Transit Gateway w/ BGP
| Goal | Utilize dynamic routing with Transit Gateway and FortiGates. |
| Task | Create attachment associations + propagations and configure FortiGate routes and firewall policies to allow secured traffic to pass. |
| Validation | Confirm outbound and east/west connectivity from EC2 Instance-A via Ping, HTTP, HTTPS. |
Introduction
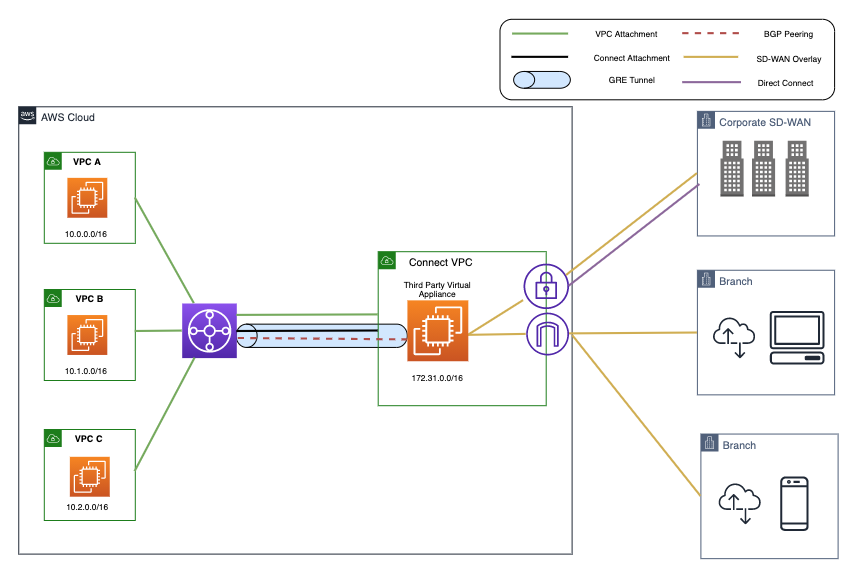
In this task, there are multiple VPCs in the same region that have one instance each. Transit Gateway is configured with multiple Transit Gateway Route Tables. You will need to create the appropriate VPC attachment associations and propagations to the correct TGW Route Tables, FW policy, and update BPG configuration on the independent FortiGates.
In this scenario the FortiGates are completely independent of each other (not clustered, nor sharing config/sessions, etc.) and are showing different connectivity options to attach remote locations to Transit Gateway. VPN attachments can be used to connect to any IPsec capable device located anywhere. TGW Connect attachments require a private path to reach a VM deployed in a VPC or HW/VM deployed on premise and must be reachable over Direct Connect (a dedicated, private circuit).
Summarized Steps (click to expand each for details)
0) Lab environment setup
Detailed Steps…
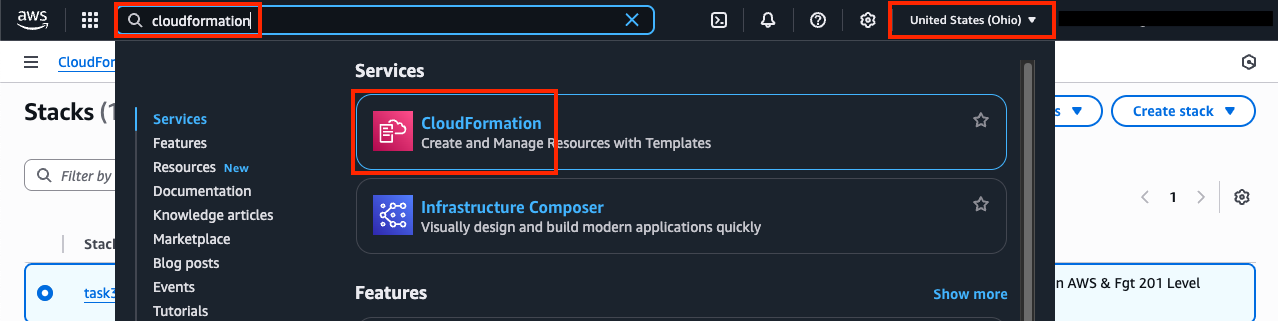
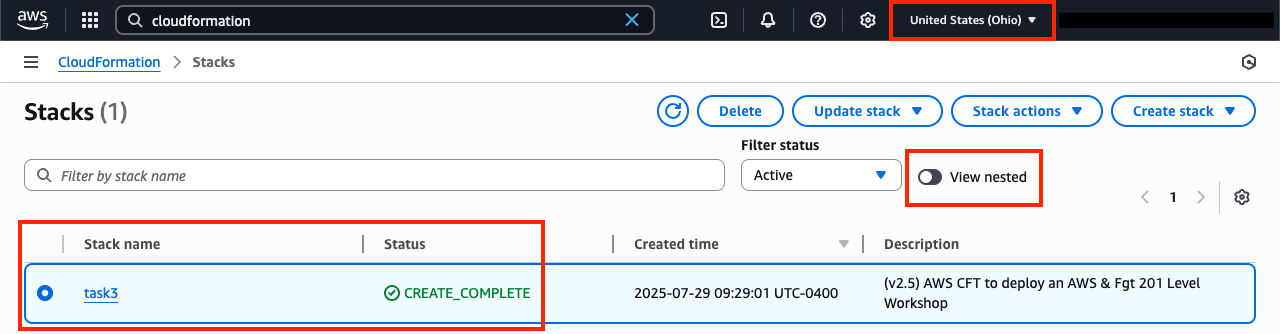
- 0.1: Login to your AWS account and navigate to the CloudFormation Console and toggle View Nested to off.
- 0.2: Make sure you are in the United States (Ohio) region as this is where the stack should be deployed.
Expand for Screenshots
Info
All AWS resources for this lab will be deployed in the United States (Ohio) region. Either switch the region for your existing browser tabs (using the region selector in the upper right corner of the AWS Console) to this region or close all other browser tabs. Otherwise, you might accidently configure the wrong AWS resources.
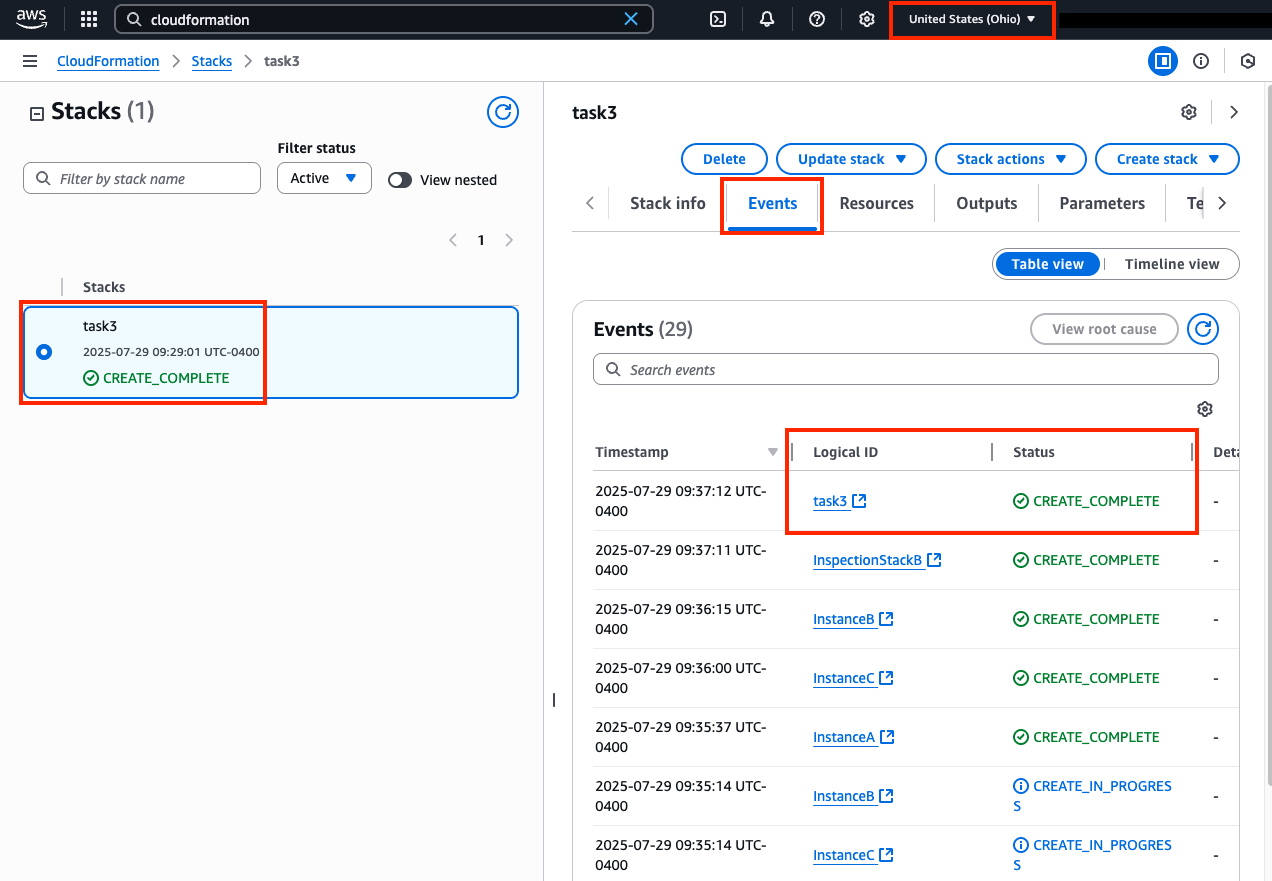
- 0.3: Select the main stack and confirm the stack has finished creating successfully by looking at the Events Tab.
Expand for Screenshot
- 0.4: You are now ready to proceed with the rest of the lab below starting in section 1. The remaining steps for this section are if the main stack failed to create successfully.
Warning
If the original stack failed to create, please notify those giving the workshop to review the root cause of the issue. Once that is done, please proceed with the remaining steps for this section.
- 0.5: Delete the previously failed main stack and wait till that has completed successfully. Please use the refresh buttons to refresh both the left and right portions of the CloudFormation Console.
- 0.6: Click the yellow Launch Stack button directly below this sentence to launch the CloudFormation Stack for Task 3

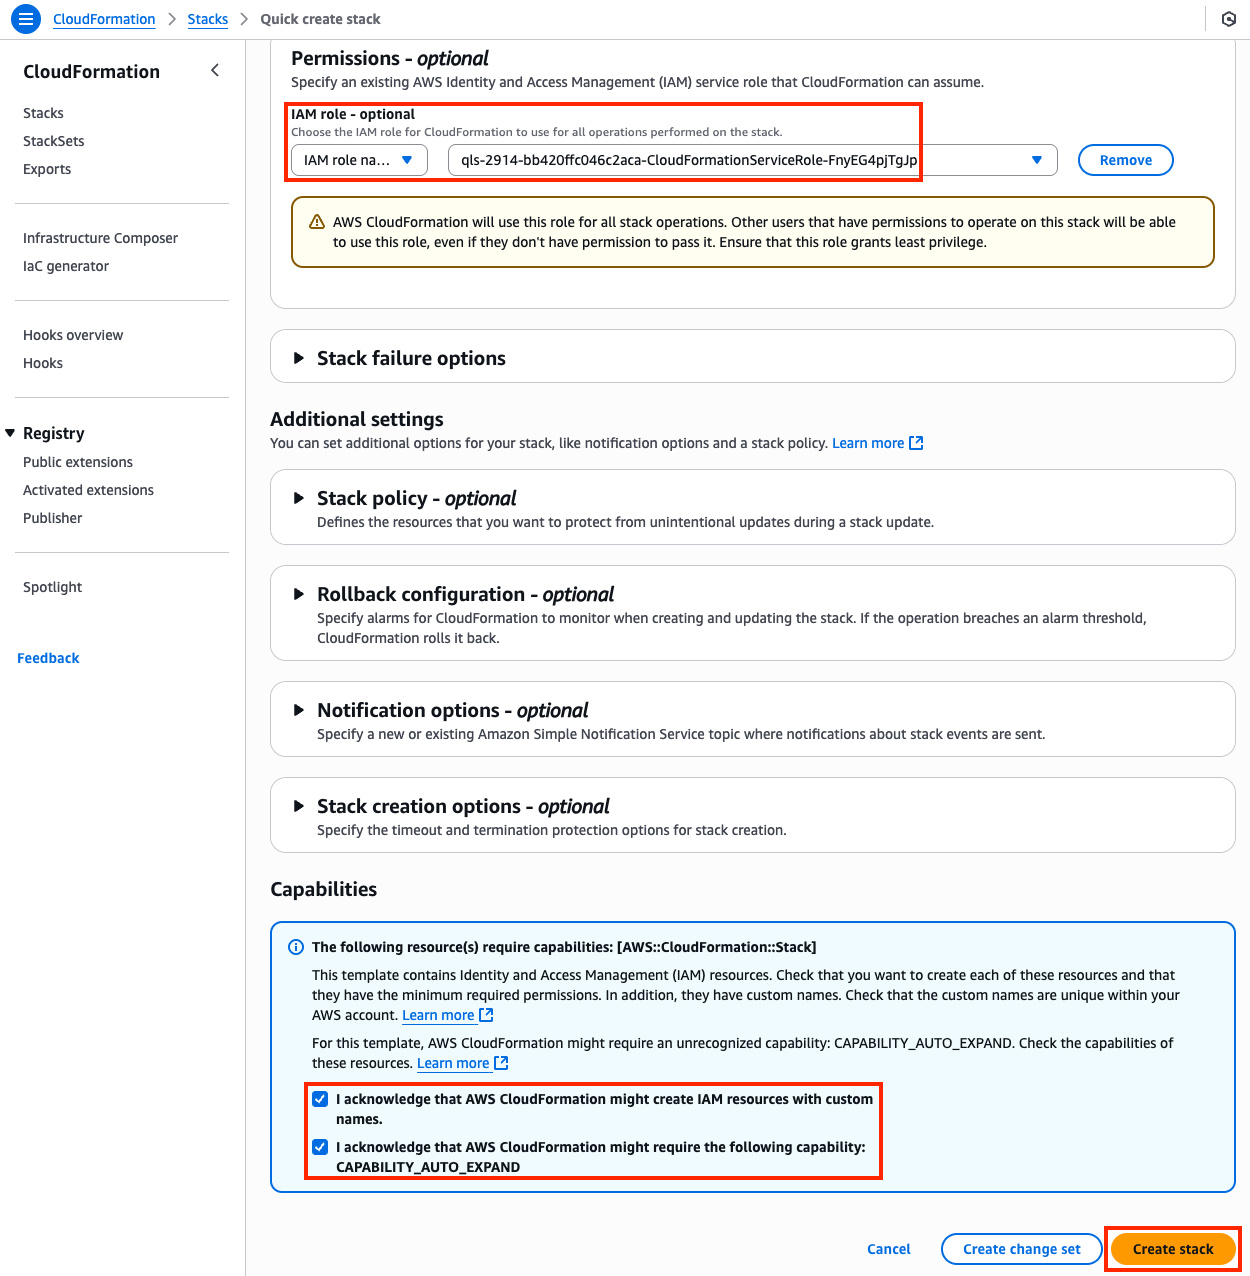
- 0.7: You must:
- select the existing IAM role
qls-...CloudFormationServiceRole...in the Permissions section - check the boxes to acknowledge the warnings in the Capabilities section
- then scroll down and click Create stack
- select the existing IAM role
Warning
If you do not select the existing IAM role and continue with the stack creation, this will fail! If this occurred, simply create another stack with a different name and follow the steps closely for this section.
- 0.8: The CloudFormation stack will take ~10 minutes to finish deploying. Once the main/root CloudFormation stack shows as Create_Complete, proceed with the steps below.
1) Check the Transit Gateway Route Tables and confirm east/west is not working
2) Review FortiGate1’s GRE + BGP config and advertise a summary route to Transit Gateway
3) Test east/west connectivity from Instance-A to Instance-B and validate there is no internet connectivity
4) Let’s dig deeper to understand how all of this works
Detailed Steps…
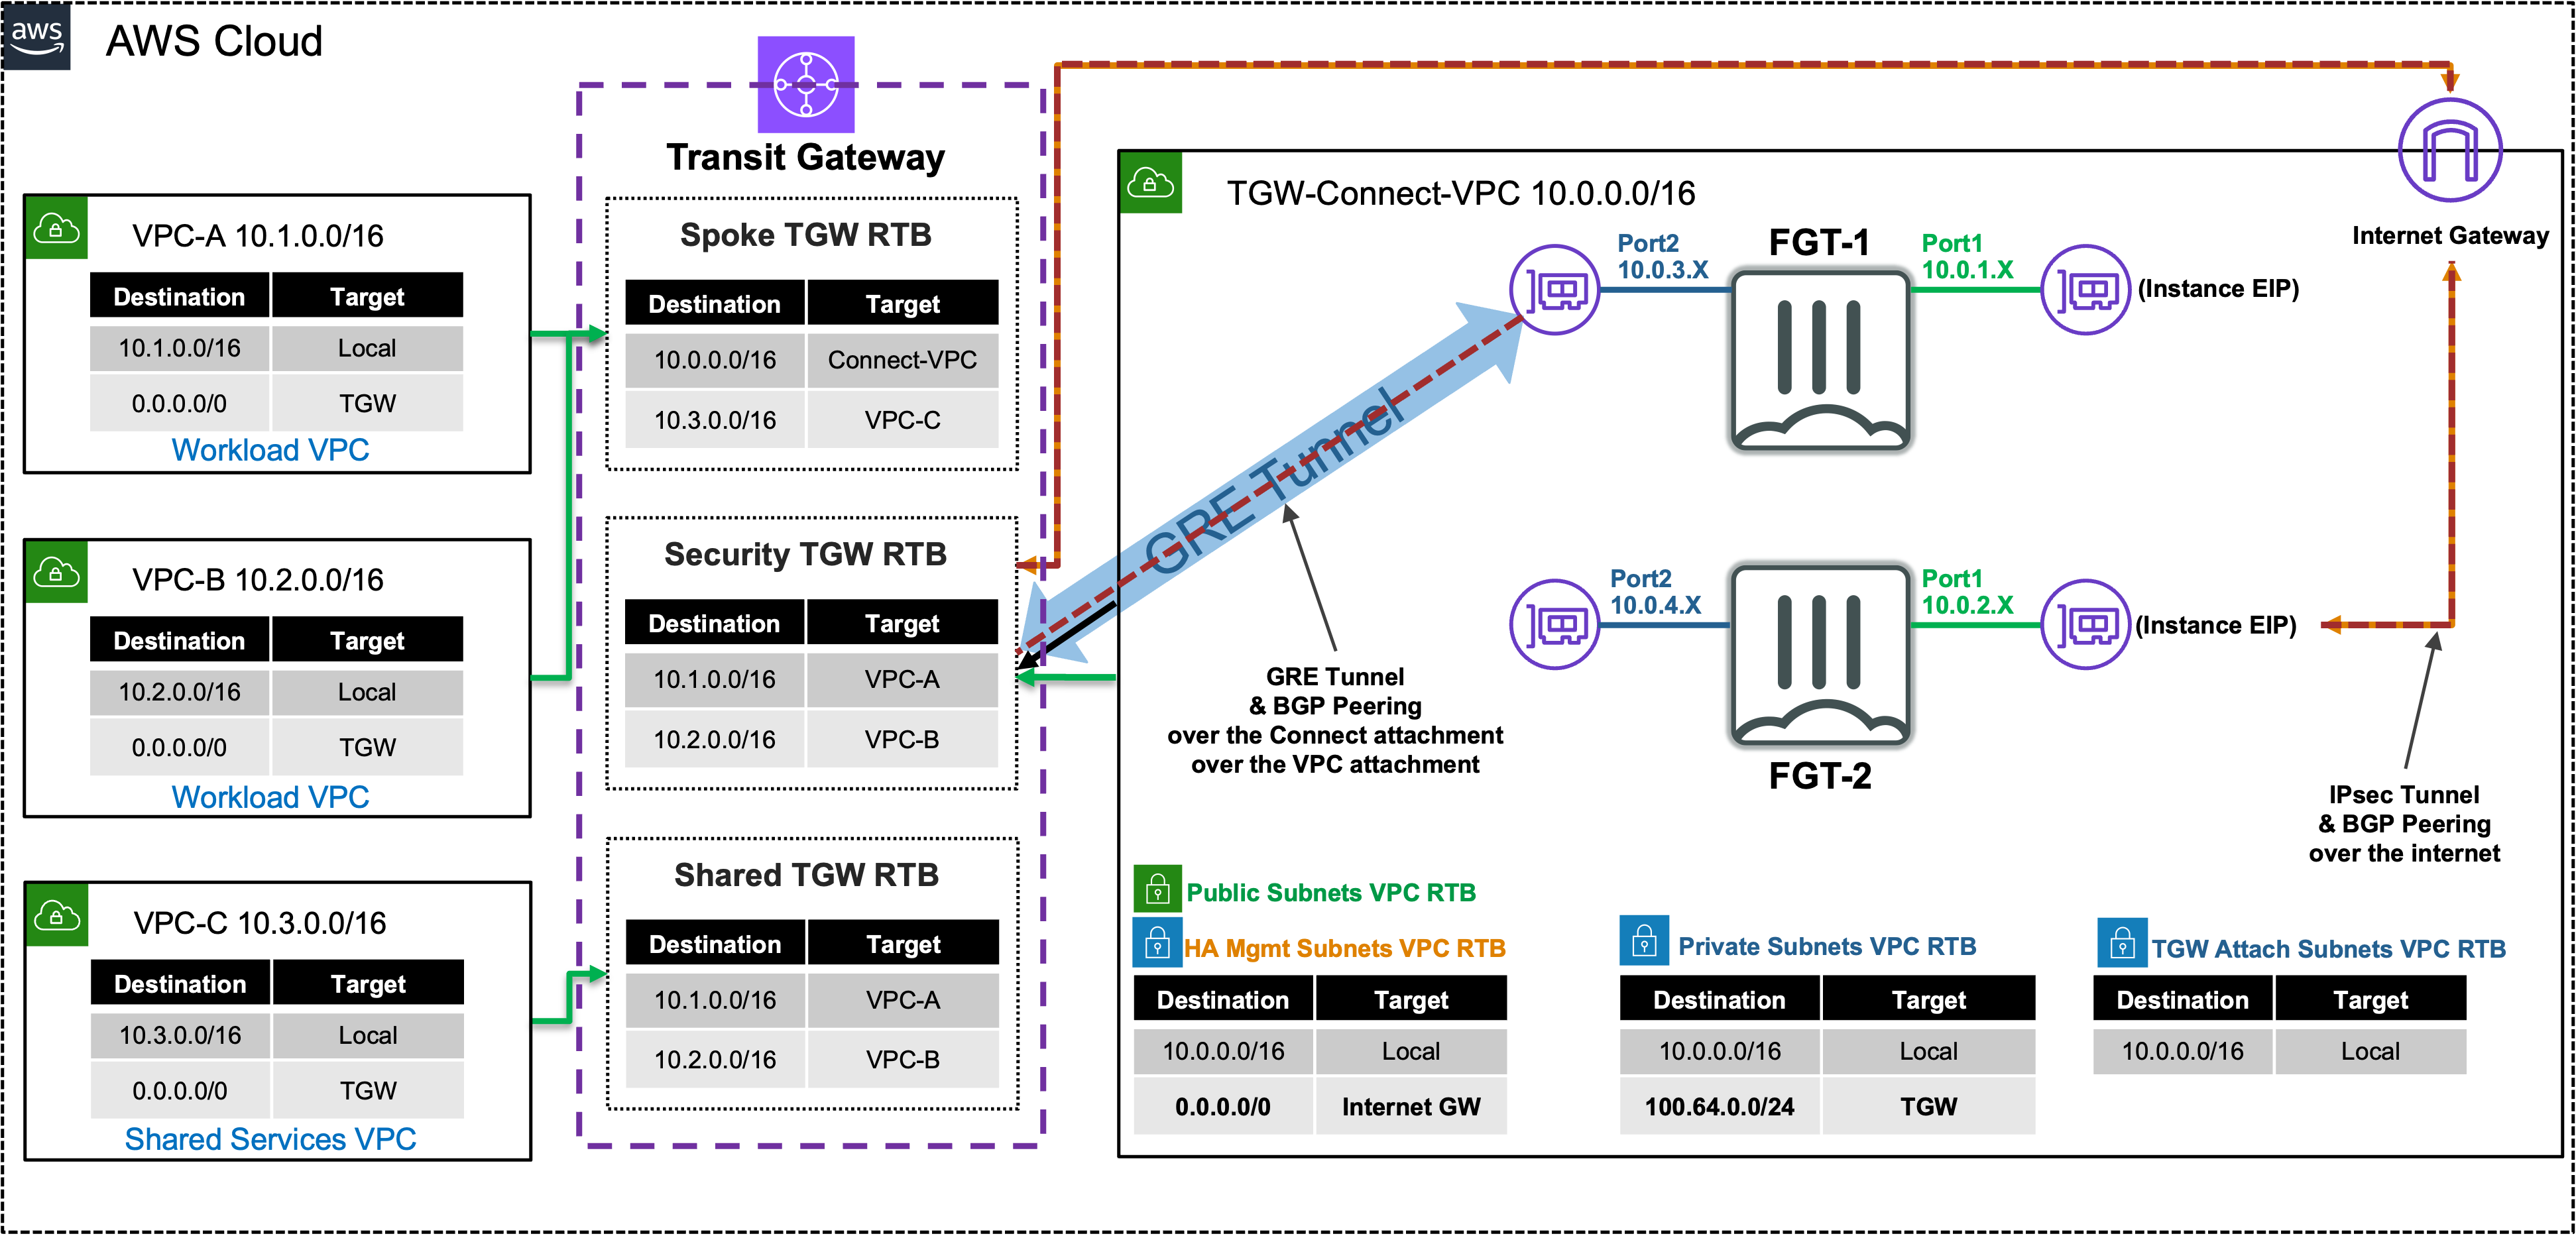
- 4.1: High level diagram showing how the Connect attachment goes over a VPC attachment which allows FortiGate1 to have a GRE tunnel over a private path which has BGP peering configured as well. This provides an overlay tunnel where dynamic routes and data-plane traffic can be routed without adding additional routes to the VPC router.
Info
FortiGate1 is getting data-plane traffic over a GRE tunnel between it’s port2 private IP (10.0.3.x/24) and an IP out of Transit Gateway CIDR block (100.64.0.x/24). This GRE tunnel is going over the TGW-Connect-security-connect-attachment, so this is all over a private path. Also Transit Gateway can support jumbo frames up to 8500 bytes for traffic between VPCs, AWS Direct Connect, Transit Gateway Connect, and peering attachments. However, traffic over VPN connections can have an MTU of 1500 bytes. Find out more in AWS Documentation.
BGP peering can be either iBGP or eBGP but the IP addressing will always use the inside tunnel IPs from a specific selection of CIDRs from 169.254.0.0/16. To find out which ones can or can’t be used, please reference AWS Documentation.
Regardless which type of BGP is used, each connect peer is only required to create one GRE tunnel to peer to the redundant BGP peers on the Transit Gateway side. For more information, reference AWS Documentation.
5) Review FortiGate2’s VPN and BGP configurations
6) Test secured egress connectivity from Instance-A through FortiGate2
7) Configure FortiGate1 with default-route-originate and a route-map as well
8) Test secured egress connectivity from Instance-A through FortiGate1
9) Lab environment teardown
Discussion Points
- TGW Connect & VPN attachments allow a simple means to connecting remote resources to TGW
- These attachment types are also helpful when dynamic routing is needed for a design
- Connect uses GRE + BGP to privately connect to an appliance reachable via Direct Connect or within a VPC
- VPN uses IPsec + BGP to publicly connect to an appliance reachable over the Internet
- TGW has a route evaluation priority to select the best path when multiple routes have the same CIDR
- TGW supports ECMP routing with routes from the same attachment type
- TGW is a stateless router which will result in asymmetric routing of traffic
- SNAT is required for flow symmetry to the correct FortiGate in Active-Active design
- Simple & scalable Active-Active for Ingress/Egress inspection
- Active-Active for East/West inspection possible with caveats
- Each TGW VPN connection (2x IPsec tunnels per connection) supports up to 2.5 Gbps
- Each TGW Connect peer supports up to 5 Gbps
- TGW supports multiple peers per TGW Connect attachment and multiple attachments to a single VPC
- TGW supports multiple VPN attachments to the same or different customer gateway (remote IPsec appliance)
- Jumbo frames (8500 bytes) are supported for all attachments except VPN (1500 bytes)
This concludes this task