Server Pools
Server Pools
A server pool is a group of servers that work together to handle incoming requests. The servers in a pool share the load, ensuring that no single server becomes overwhelmed. The Application Delivery Controller distributes traffic among the servers in the pool based on predefined criteria such as server capacity, current load, and health status. This setup enhances the availability, scalability, and reliability of the applications and services being delivered.
Real servers are physical servers that form real server pools. The Real Server configuration object specifies the status, type, and IP address or FQDN of the physical server. This Real Server configuration object can then be used as a member to form a real server pool.
When the FortiADC is deployed in L7 mode (reverse proxy), a new TCP session is established from the FortiADC to the real server. A “Real Server SSL Profile” determines how SSL is negotiated between the FortiADC and the real server.
Once a server is added to the pool we will need to define a health check so the FortiADC can determine the status or availability of a server before forwarding a request to the server.
In the next few steps we will define Real Servers and use them to create a Real Server Pool. We will start the process by defining health checks.
- Login to the FortiADC (FAD-Primary) with username
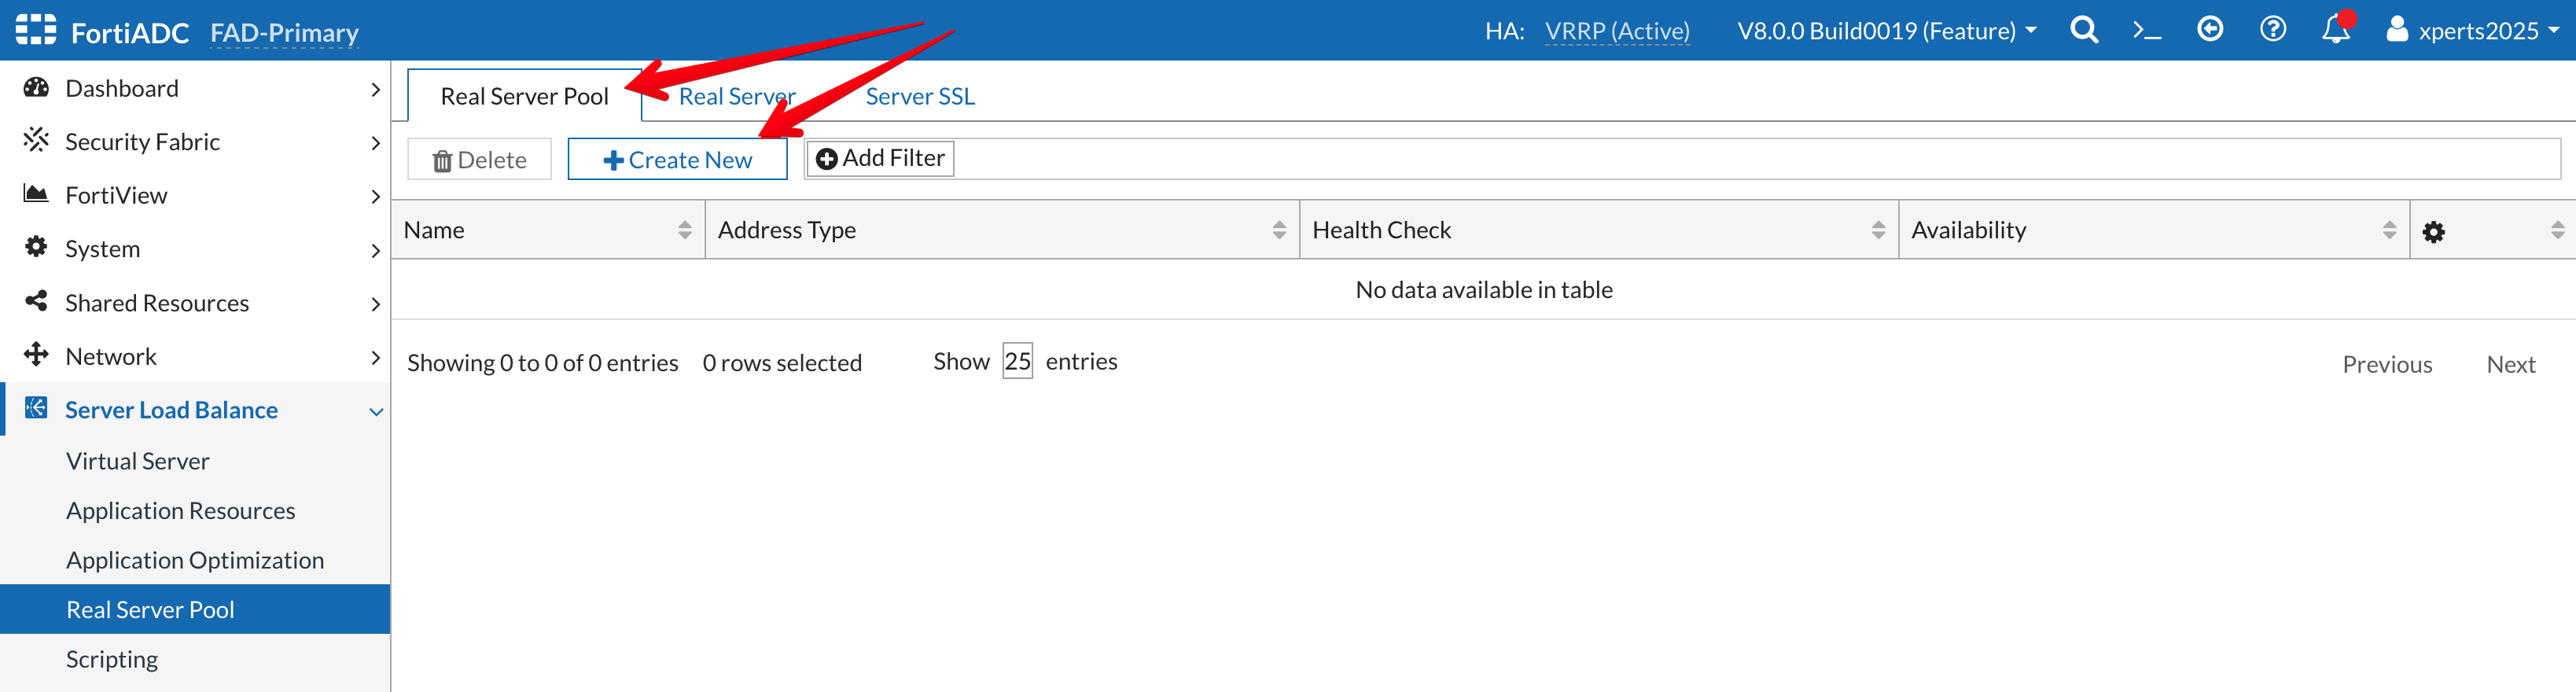
xperts2025and passwordAppSec-Xp3rts2025! - Go to Server Load Balance → Real Server Pool
- Click on the Real Server Pool Tab
- Click on +Create New
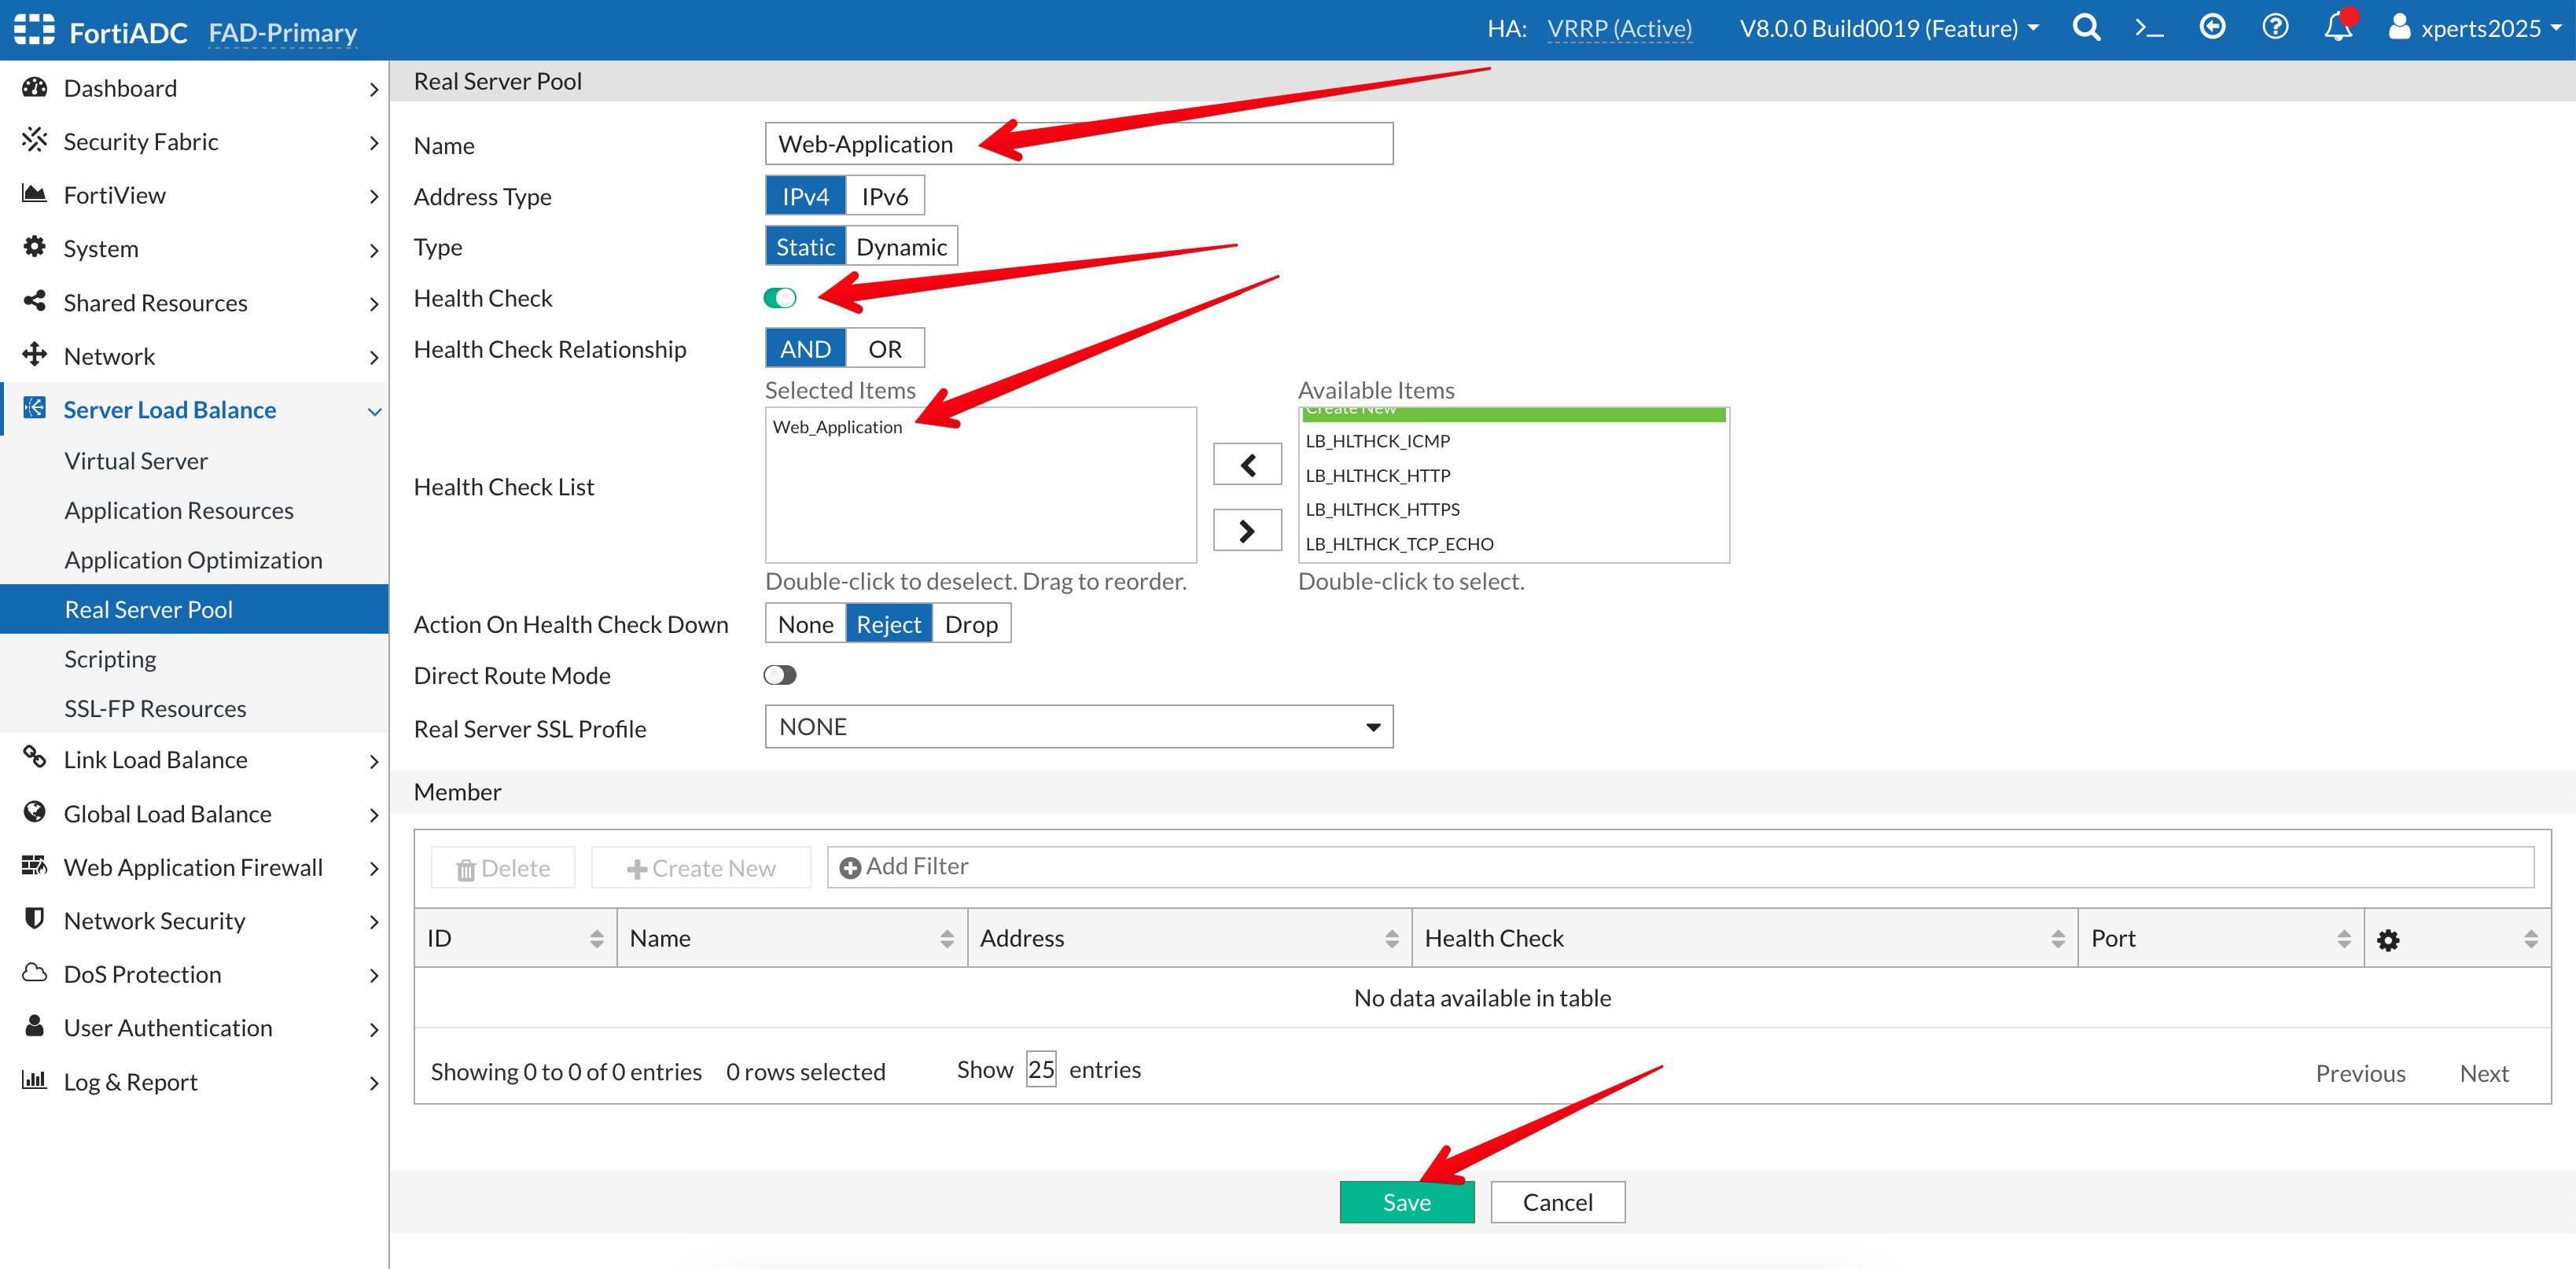
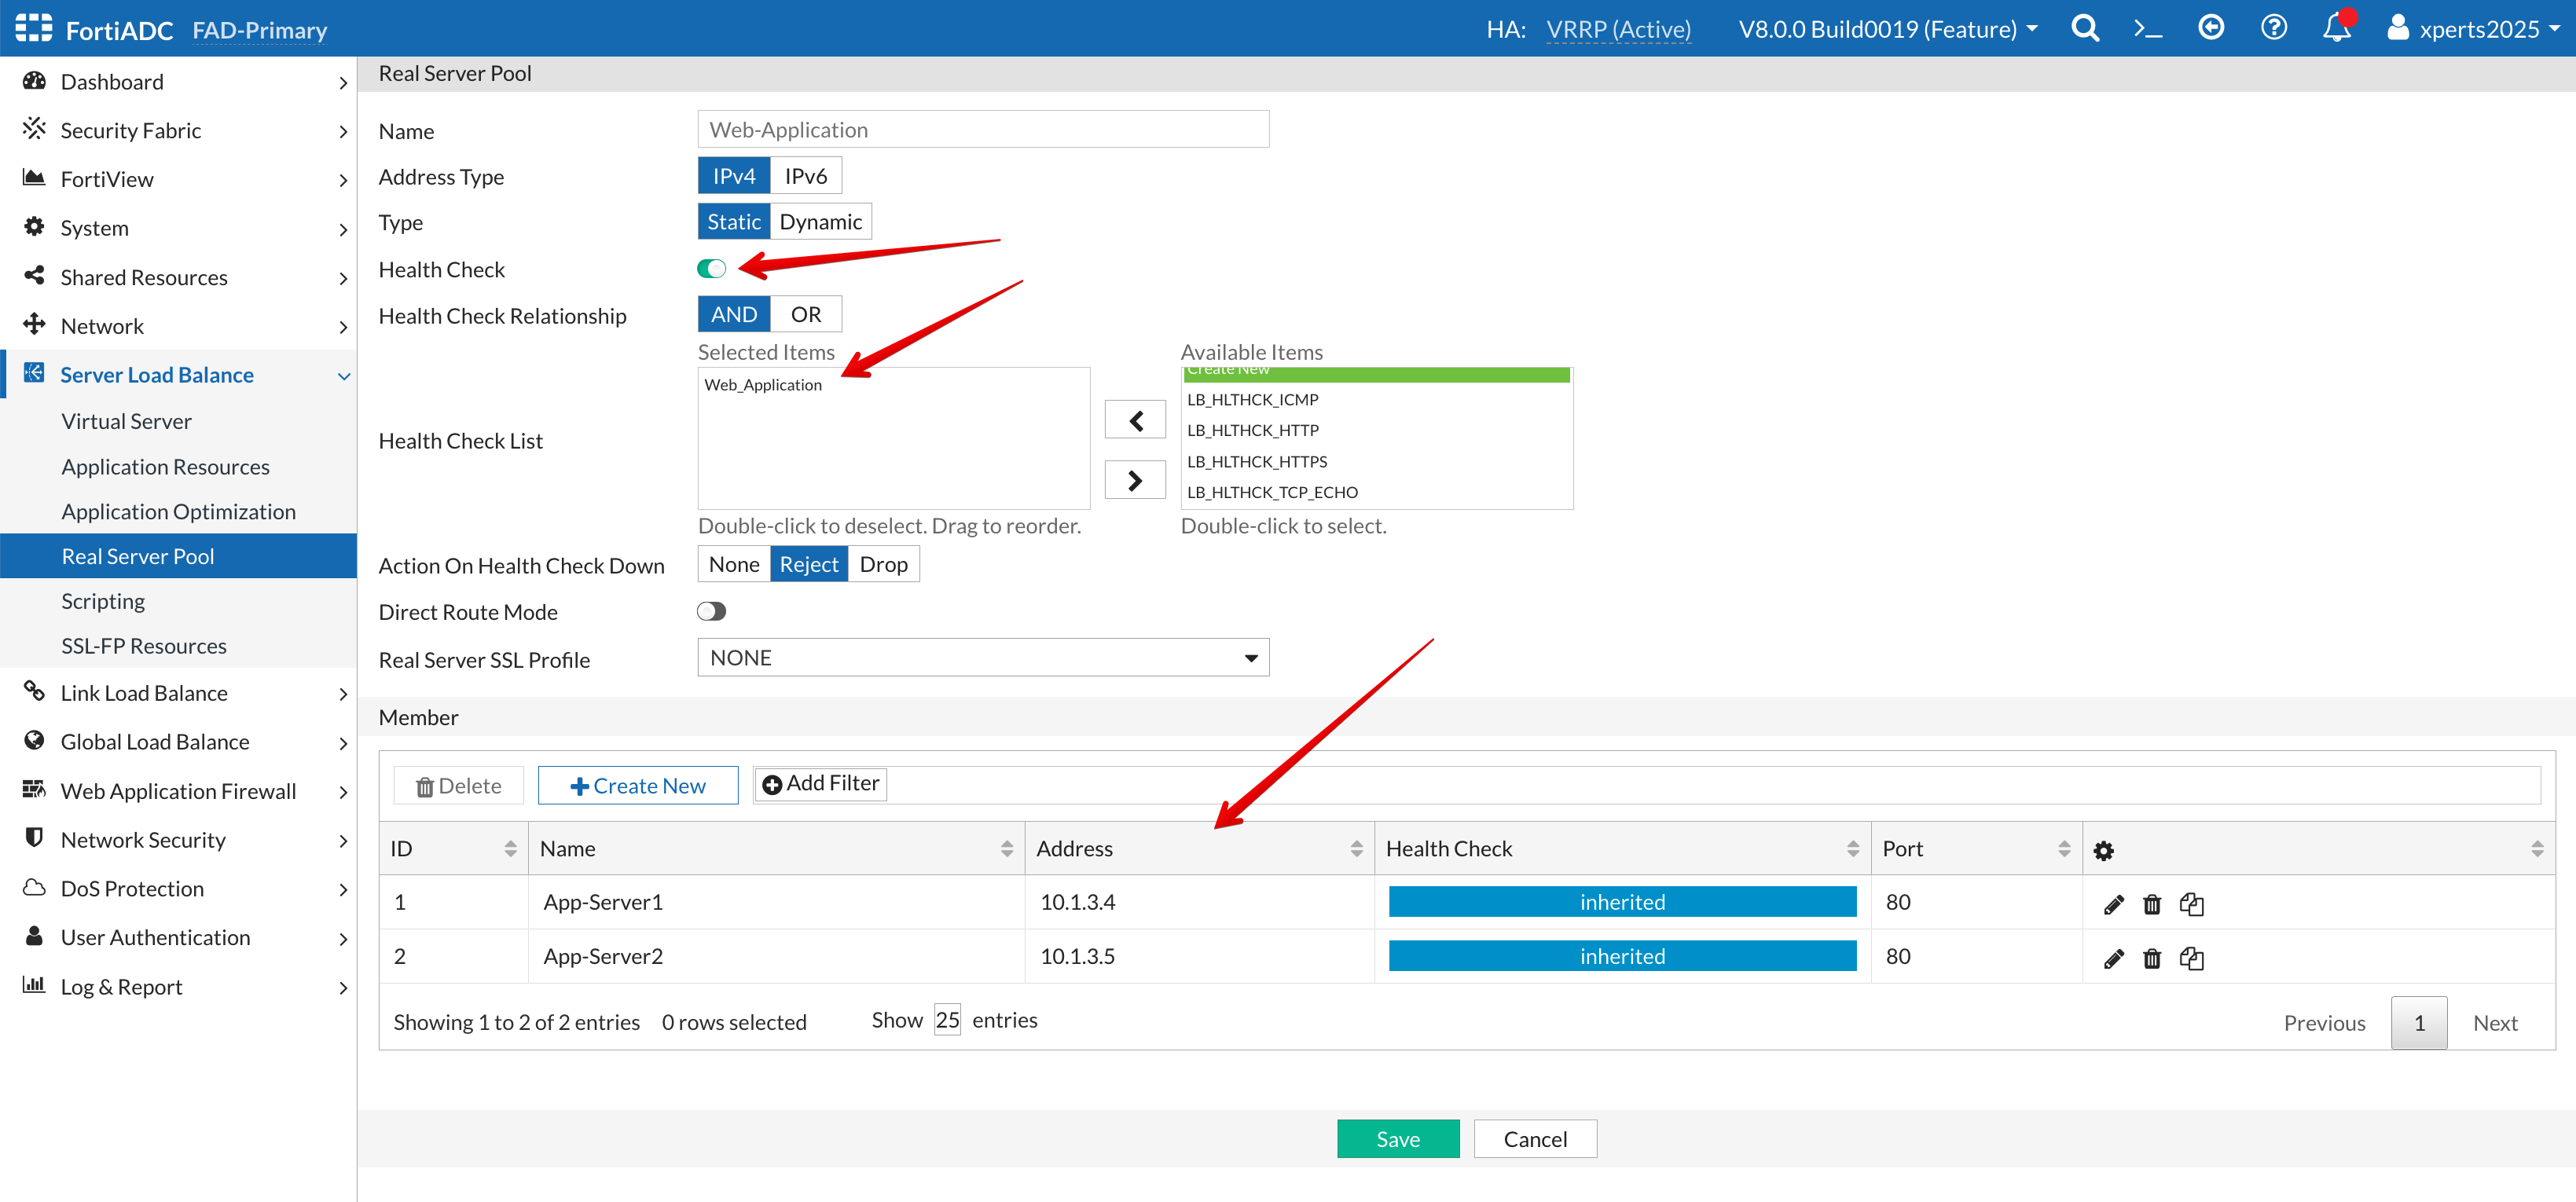
- Name: Web-Application
- Health Check: enable the toggle for Health Check and add the Web_Application Health Check we created earlier.
- Save
Info
Please note that if there is a requirement to encrypt the traffic between FortiADC and the application servers, you must configure the Real Server SSL profile and enable it within the server pool definition.
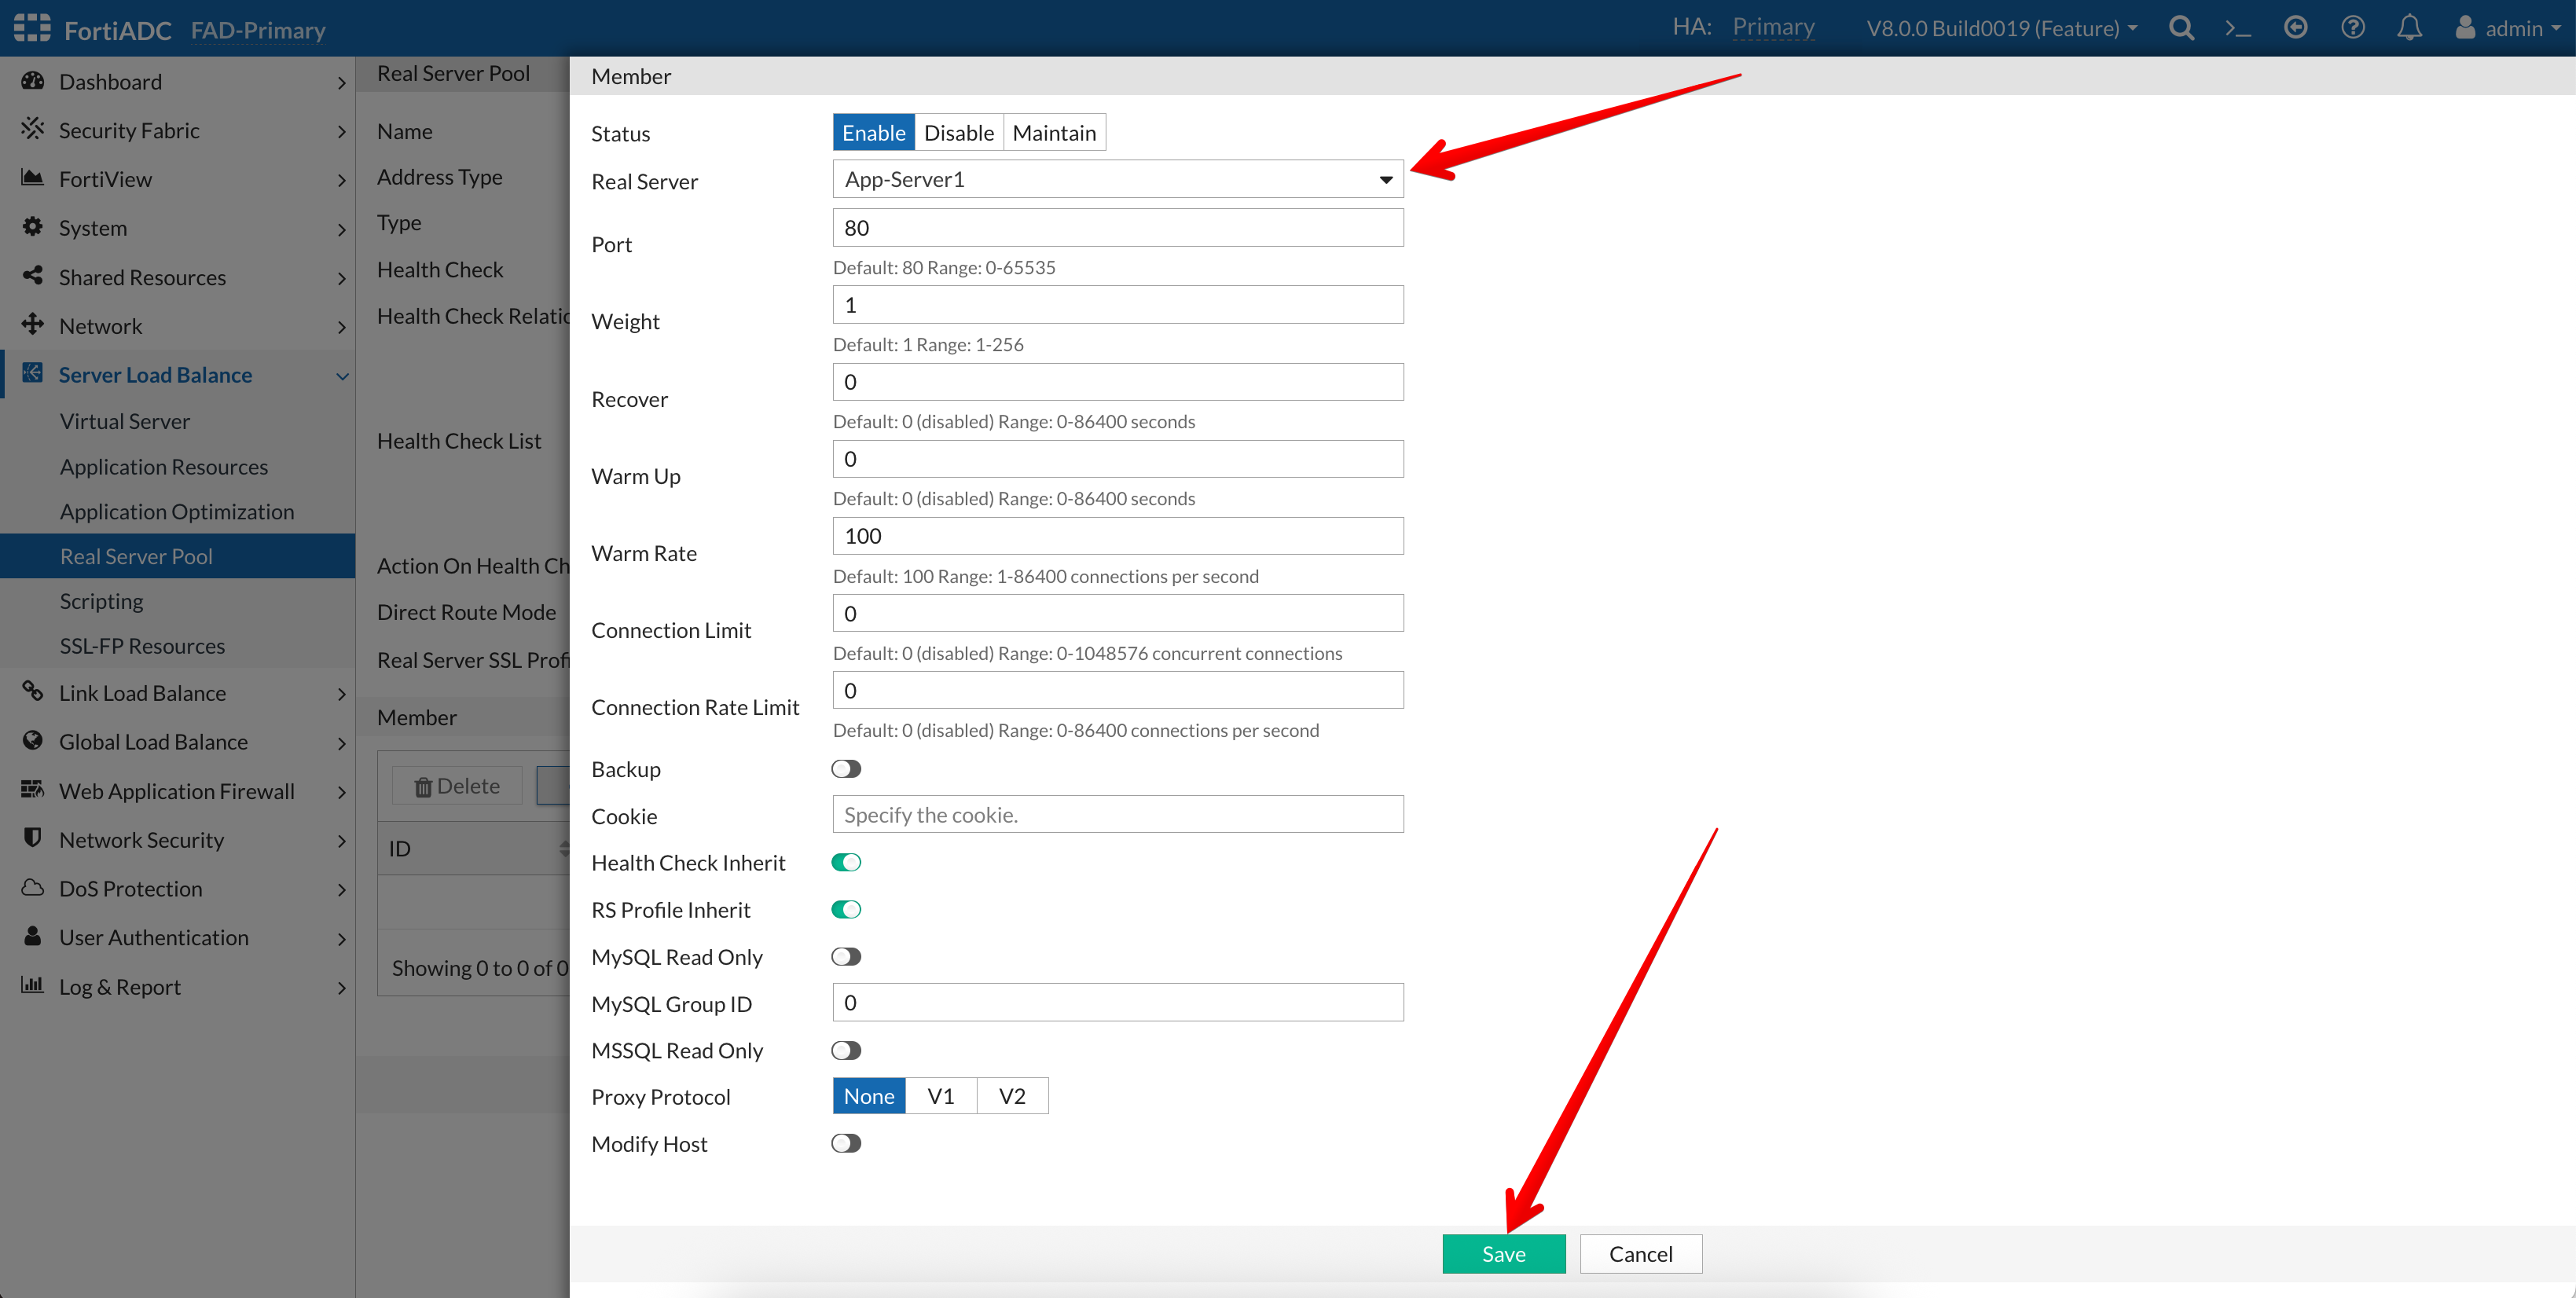
- Click on the +Create New new button under Member
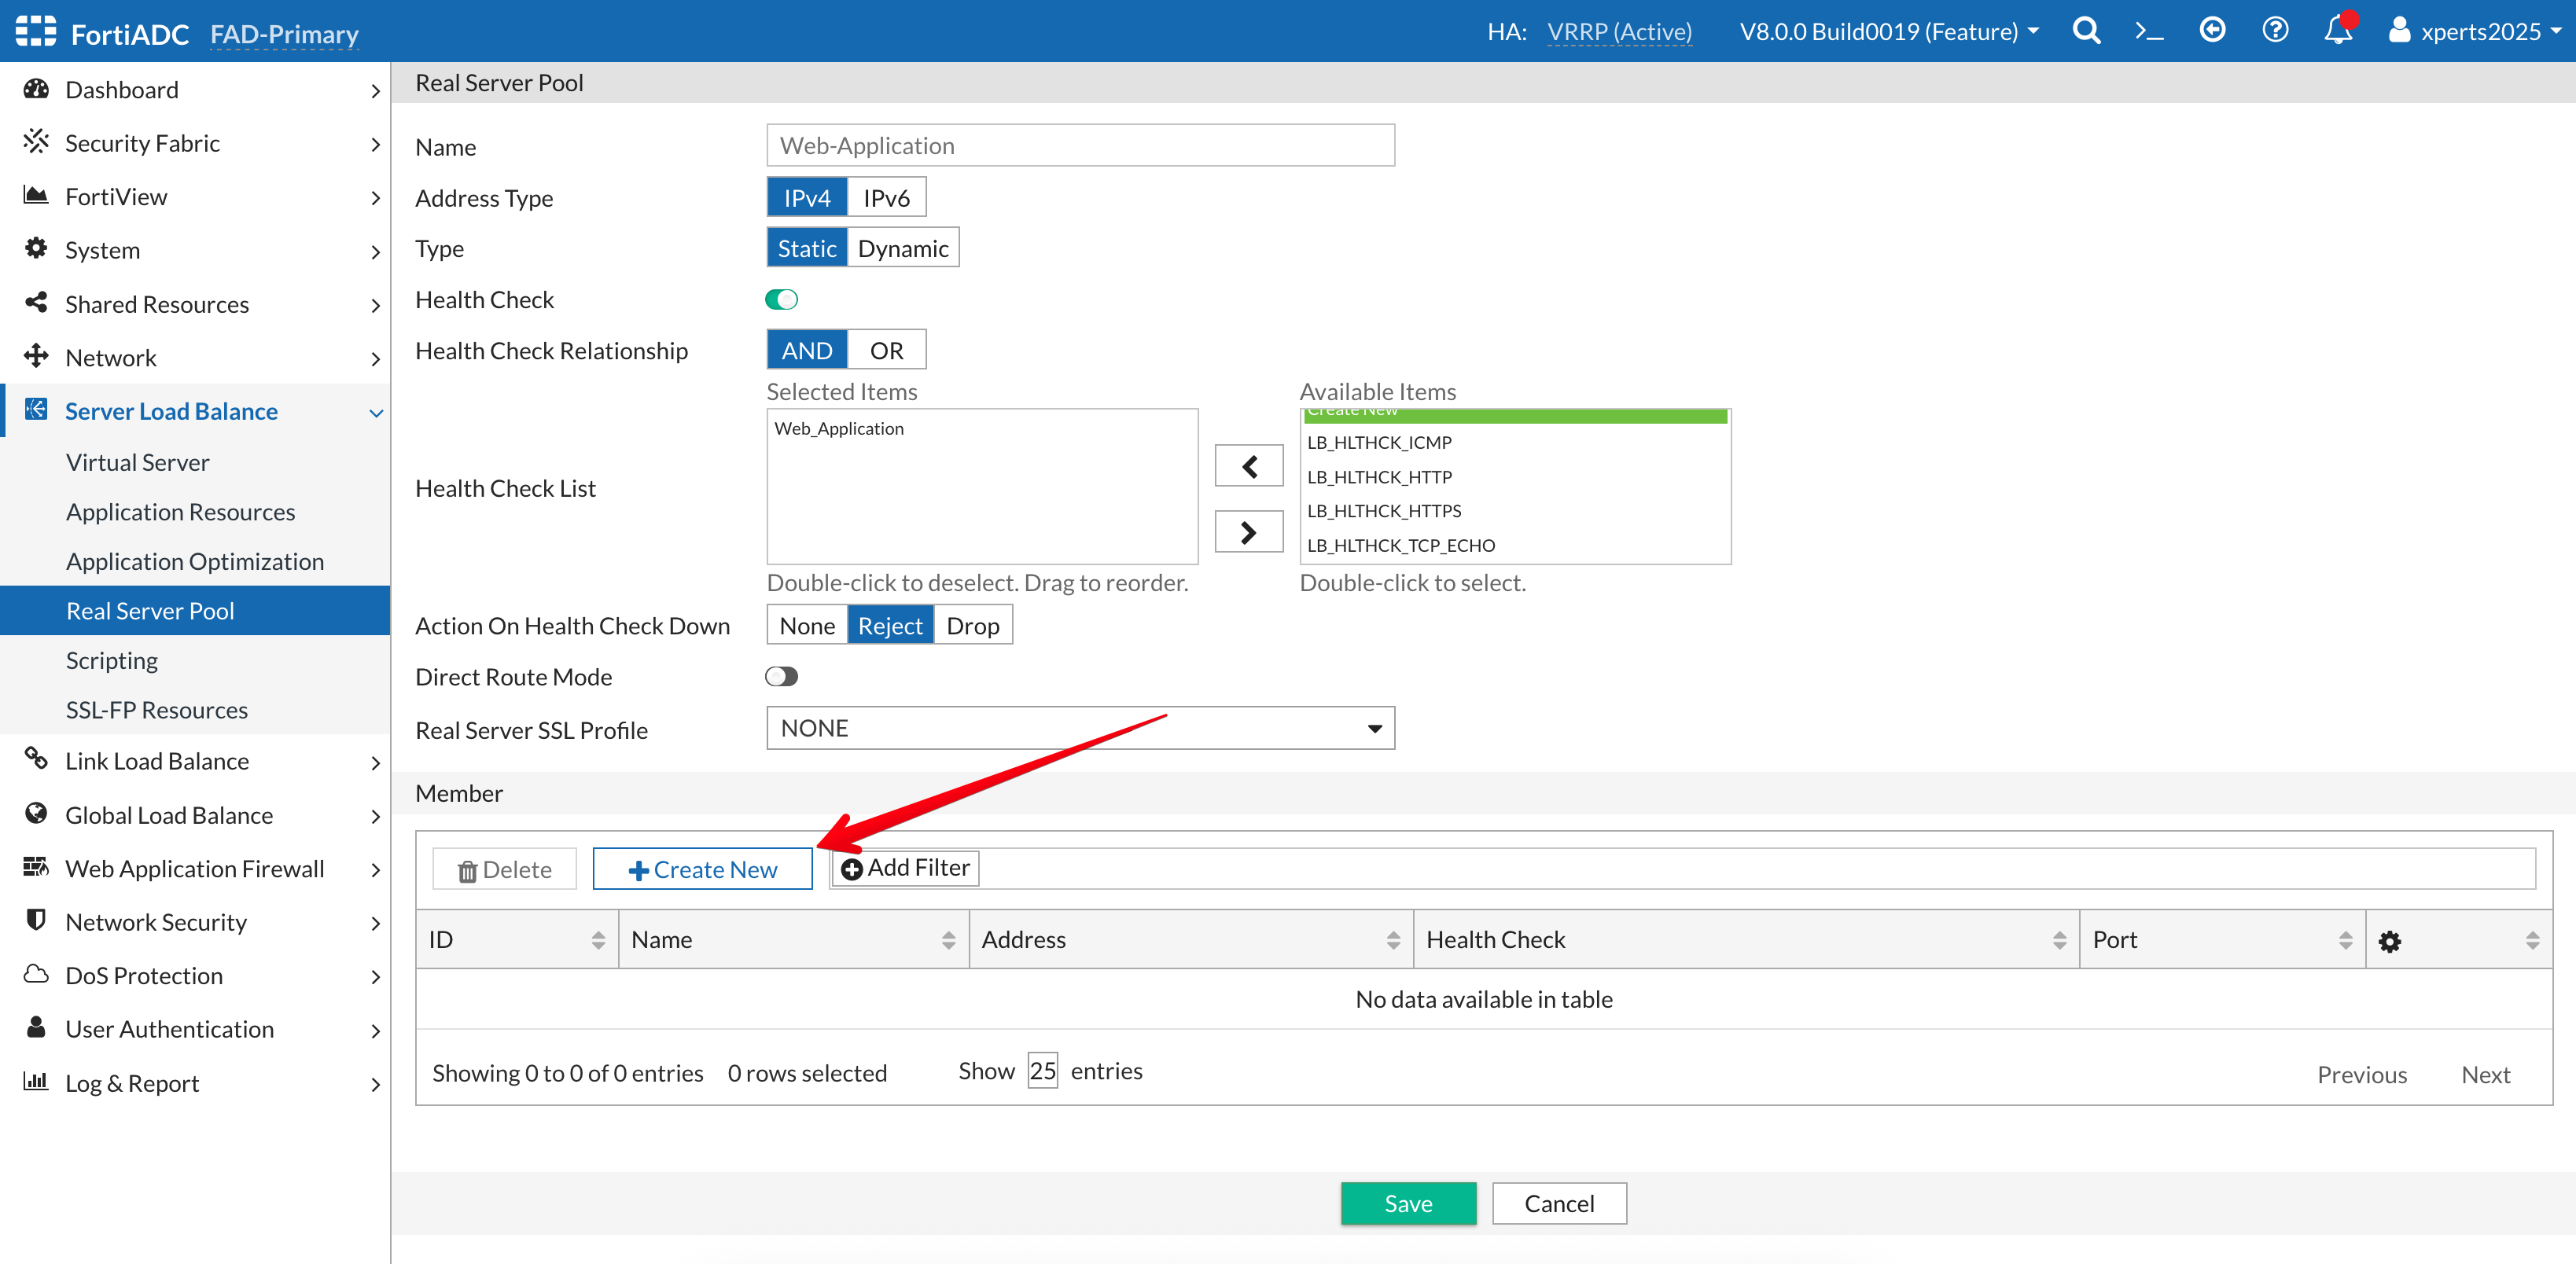
- Real Server: APP-Server1 from the drop down menu
- Accept default values for the other options
- Save
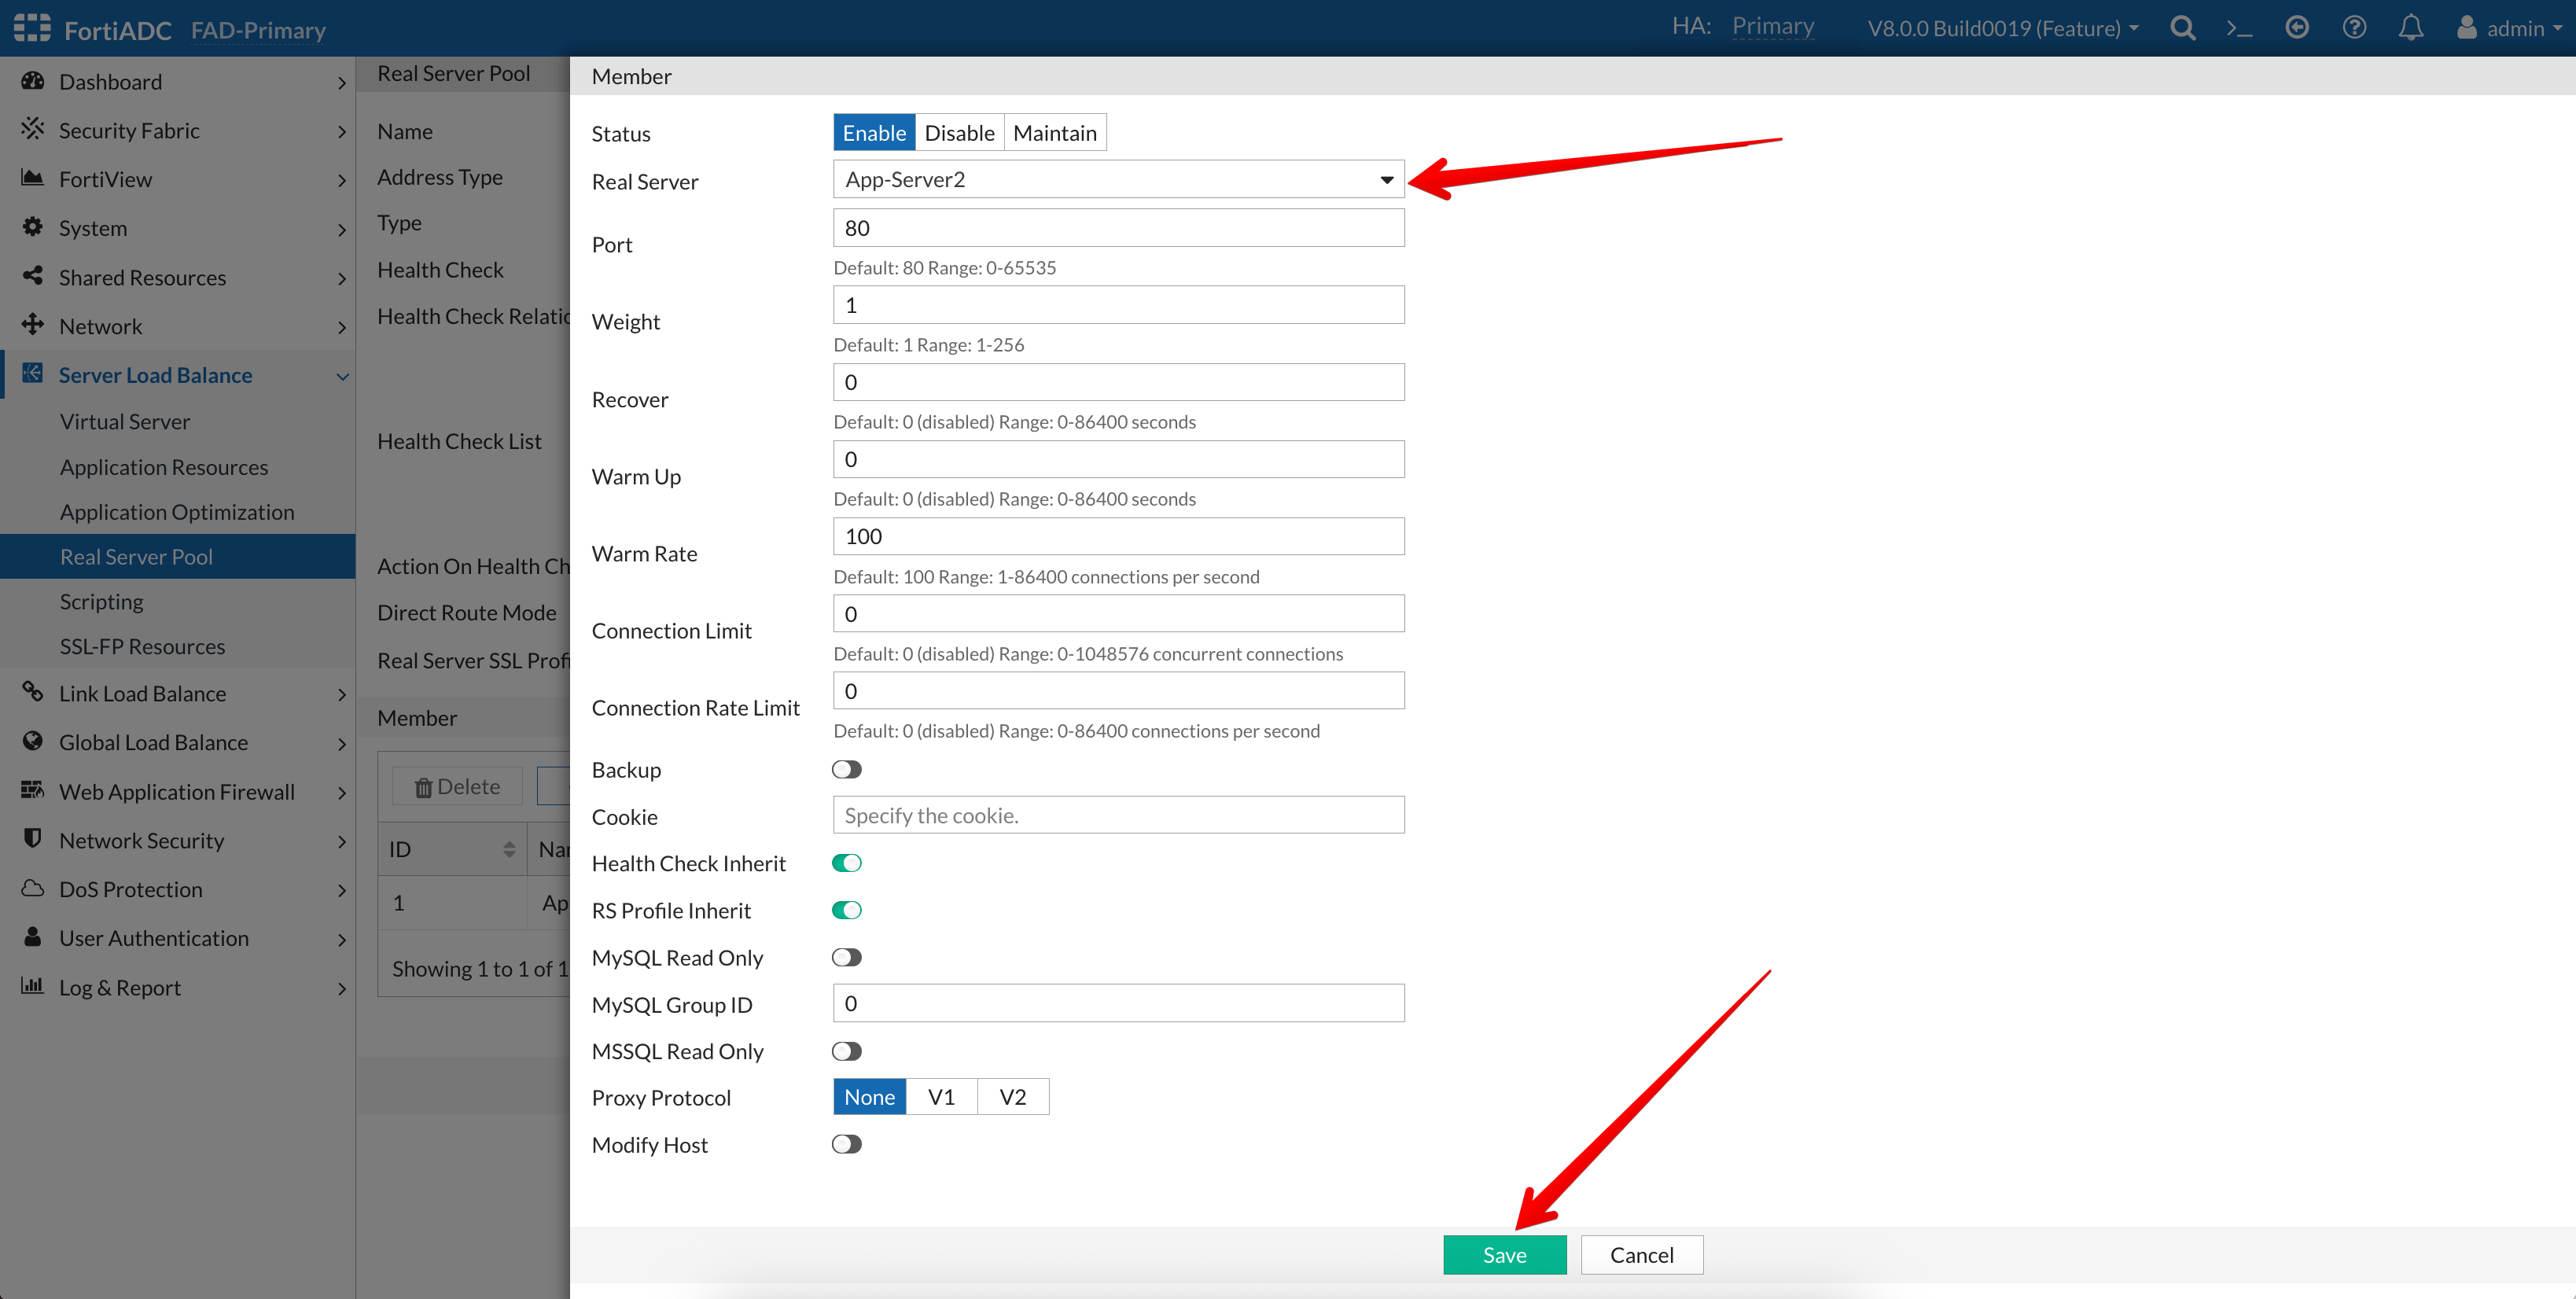
- Real Server: APP-Server2 from the drop down menu
- Accept default values for the other options
- Save
Your finished server pool should look like this.
Because we will be using two applications to run our lab, we will repeat the above steps again to define our second Real Server Pool.
Create Real Servers for the 2nd Application
In this section we will define two application servers.
- Login to the FortiADC (FAD-Primary) with username
xperts2025and passwordAppSec-Xp3rts2025! - Go to Server Load Balance → Real Server Pool
- Click on the Real Server Tab
- Click on +Create New
- Save

- Name: DVWA1
- Server Type: Static
- Status: Enable
- Type: IP
- Address: 10.1.3.4
- Save
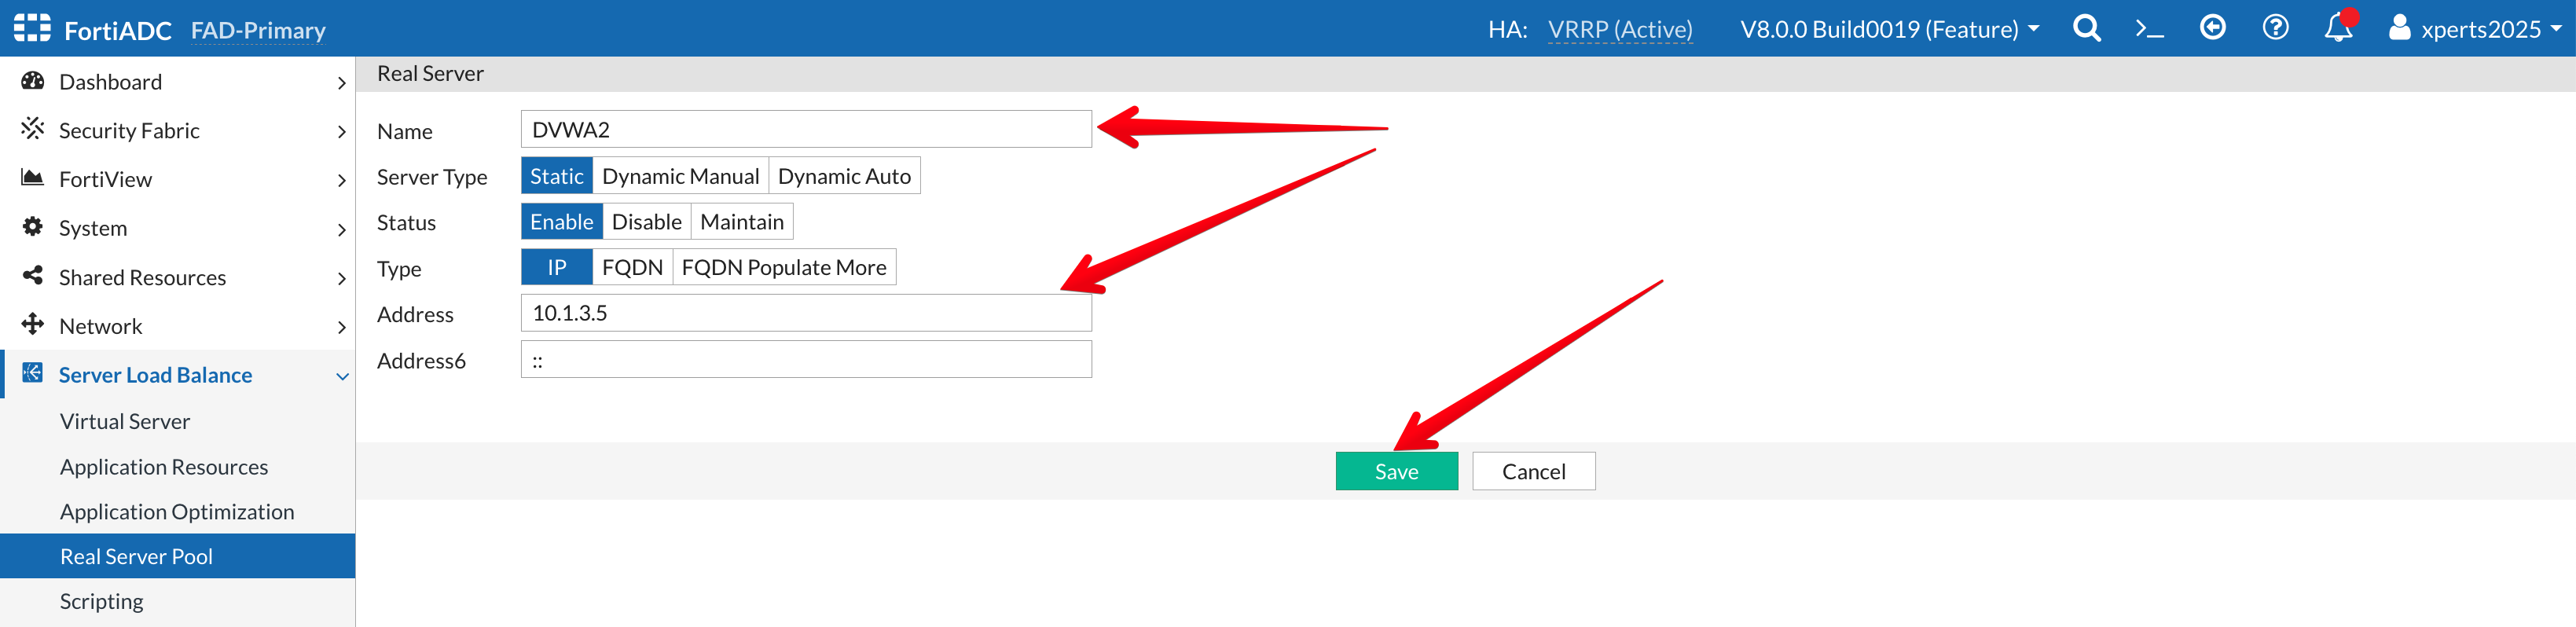
- Name: DVWA2
- Server Type: Static
- Status: Enable
- Type: IP
- Address: 10.1.3.5
- Save
Next we add the servers to a server pool.
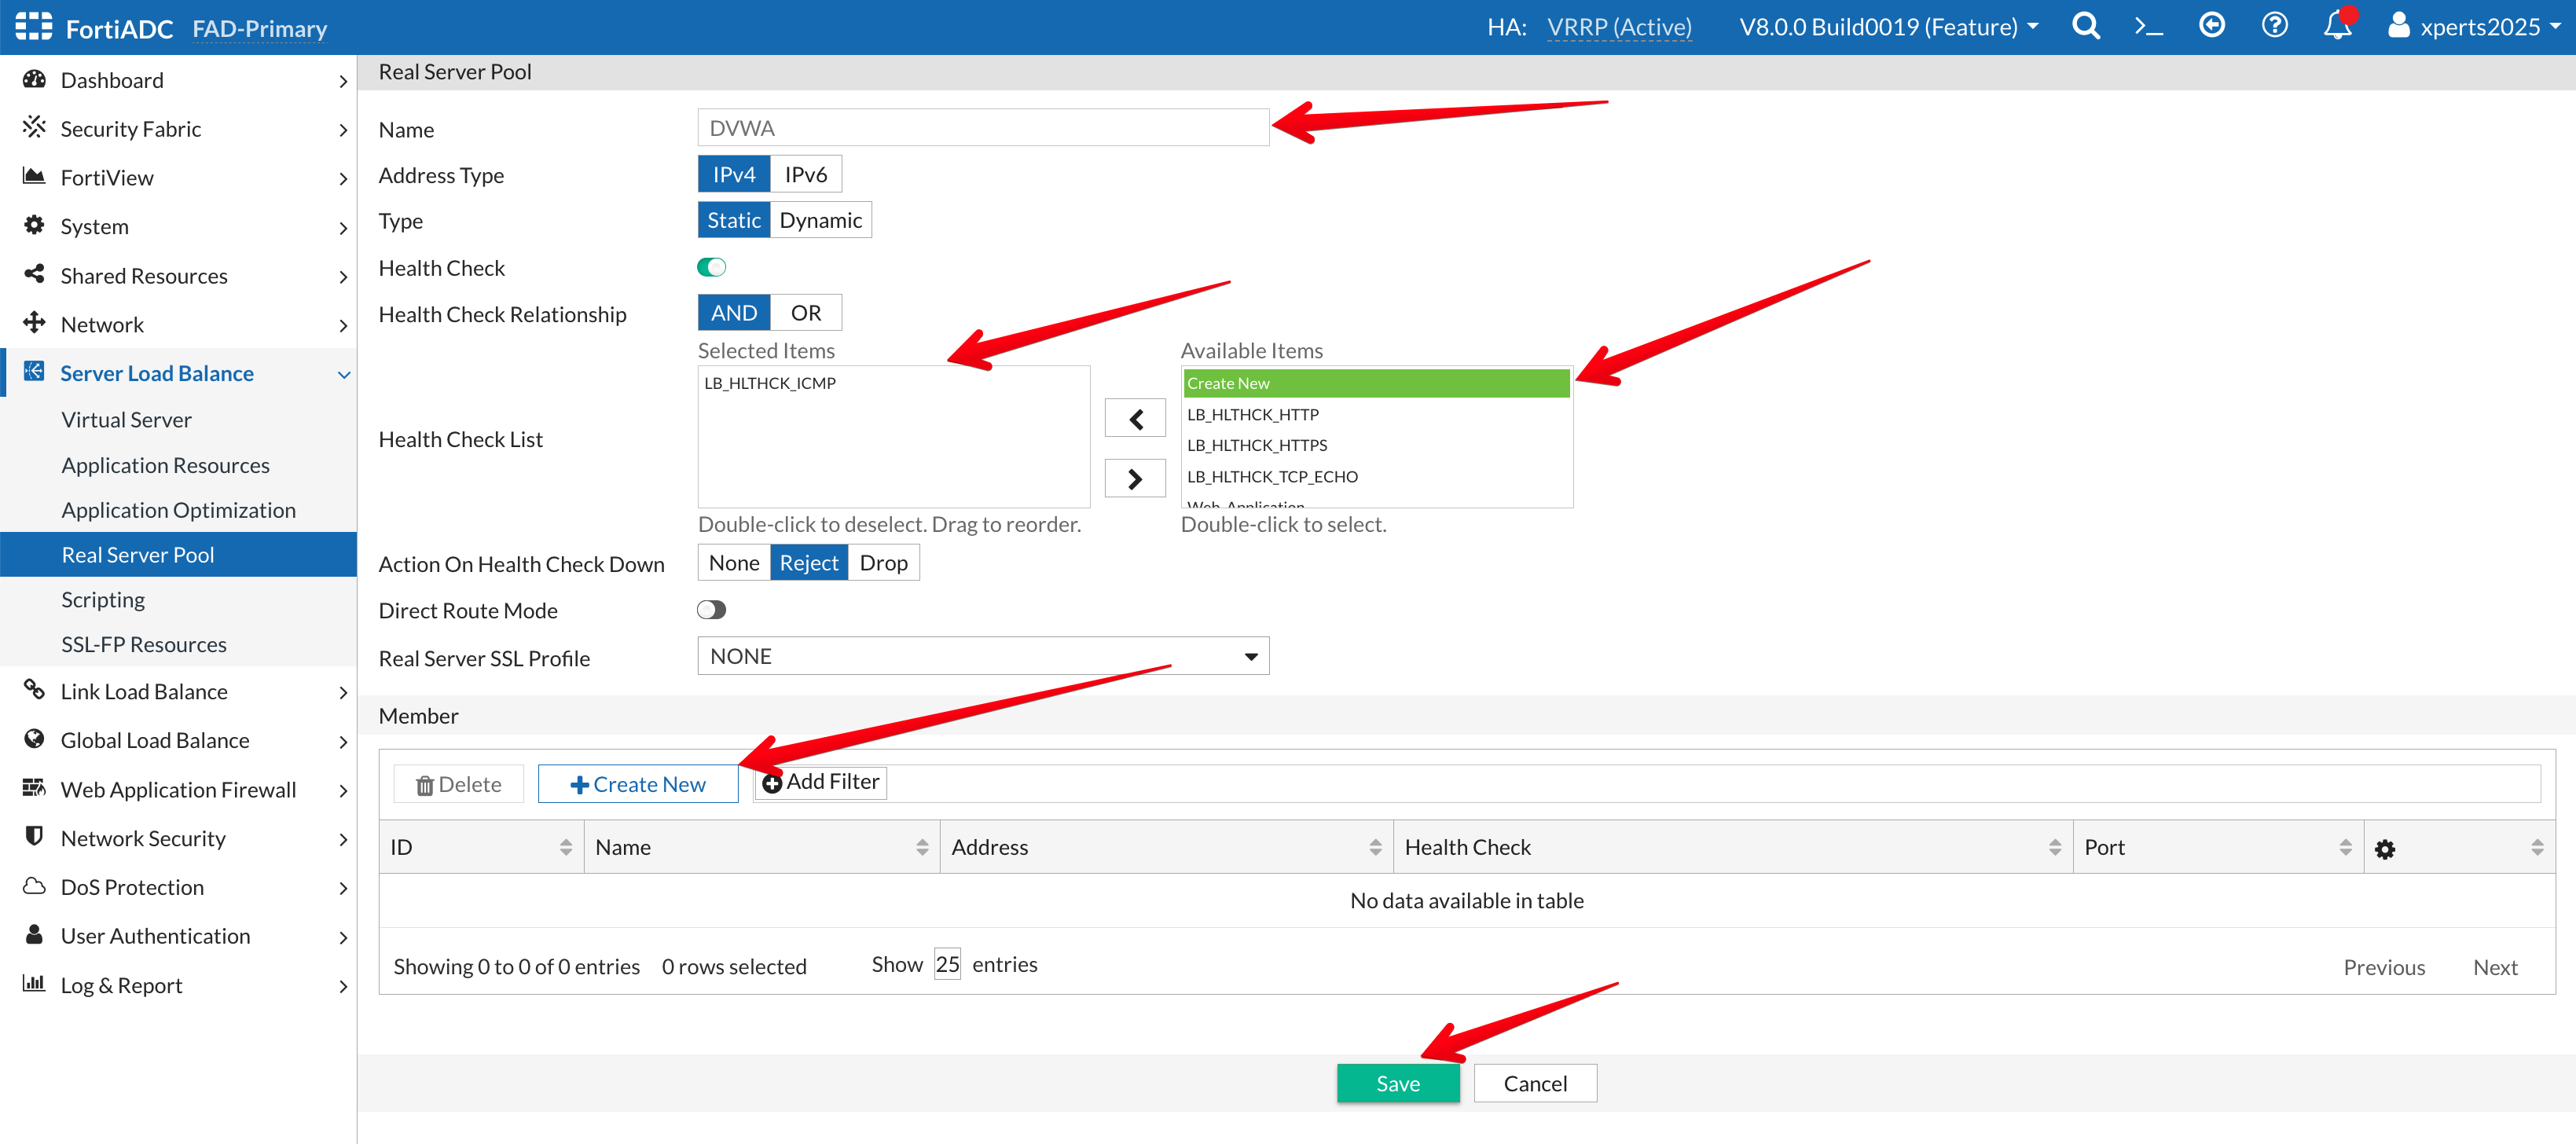
- Go to Server Load Balance → Real Server Pool
- Click on the Real Server Pool Tab
- Click on +Create New
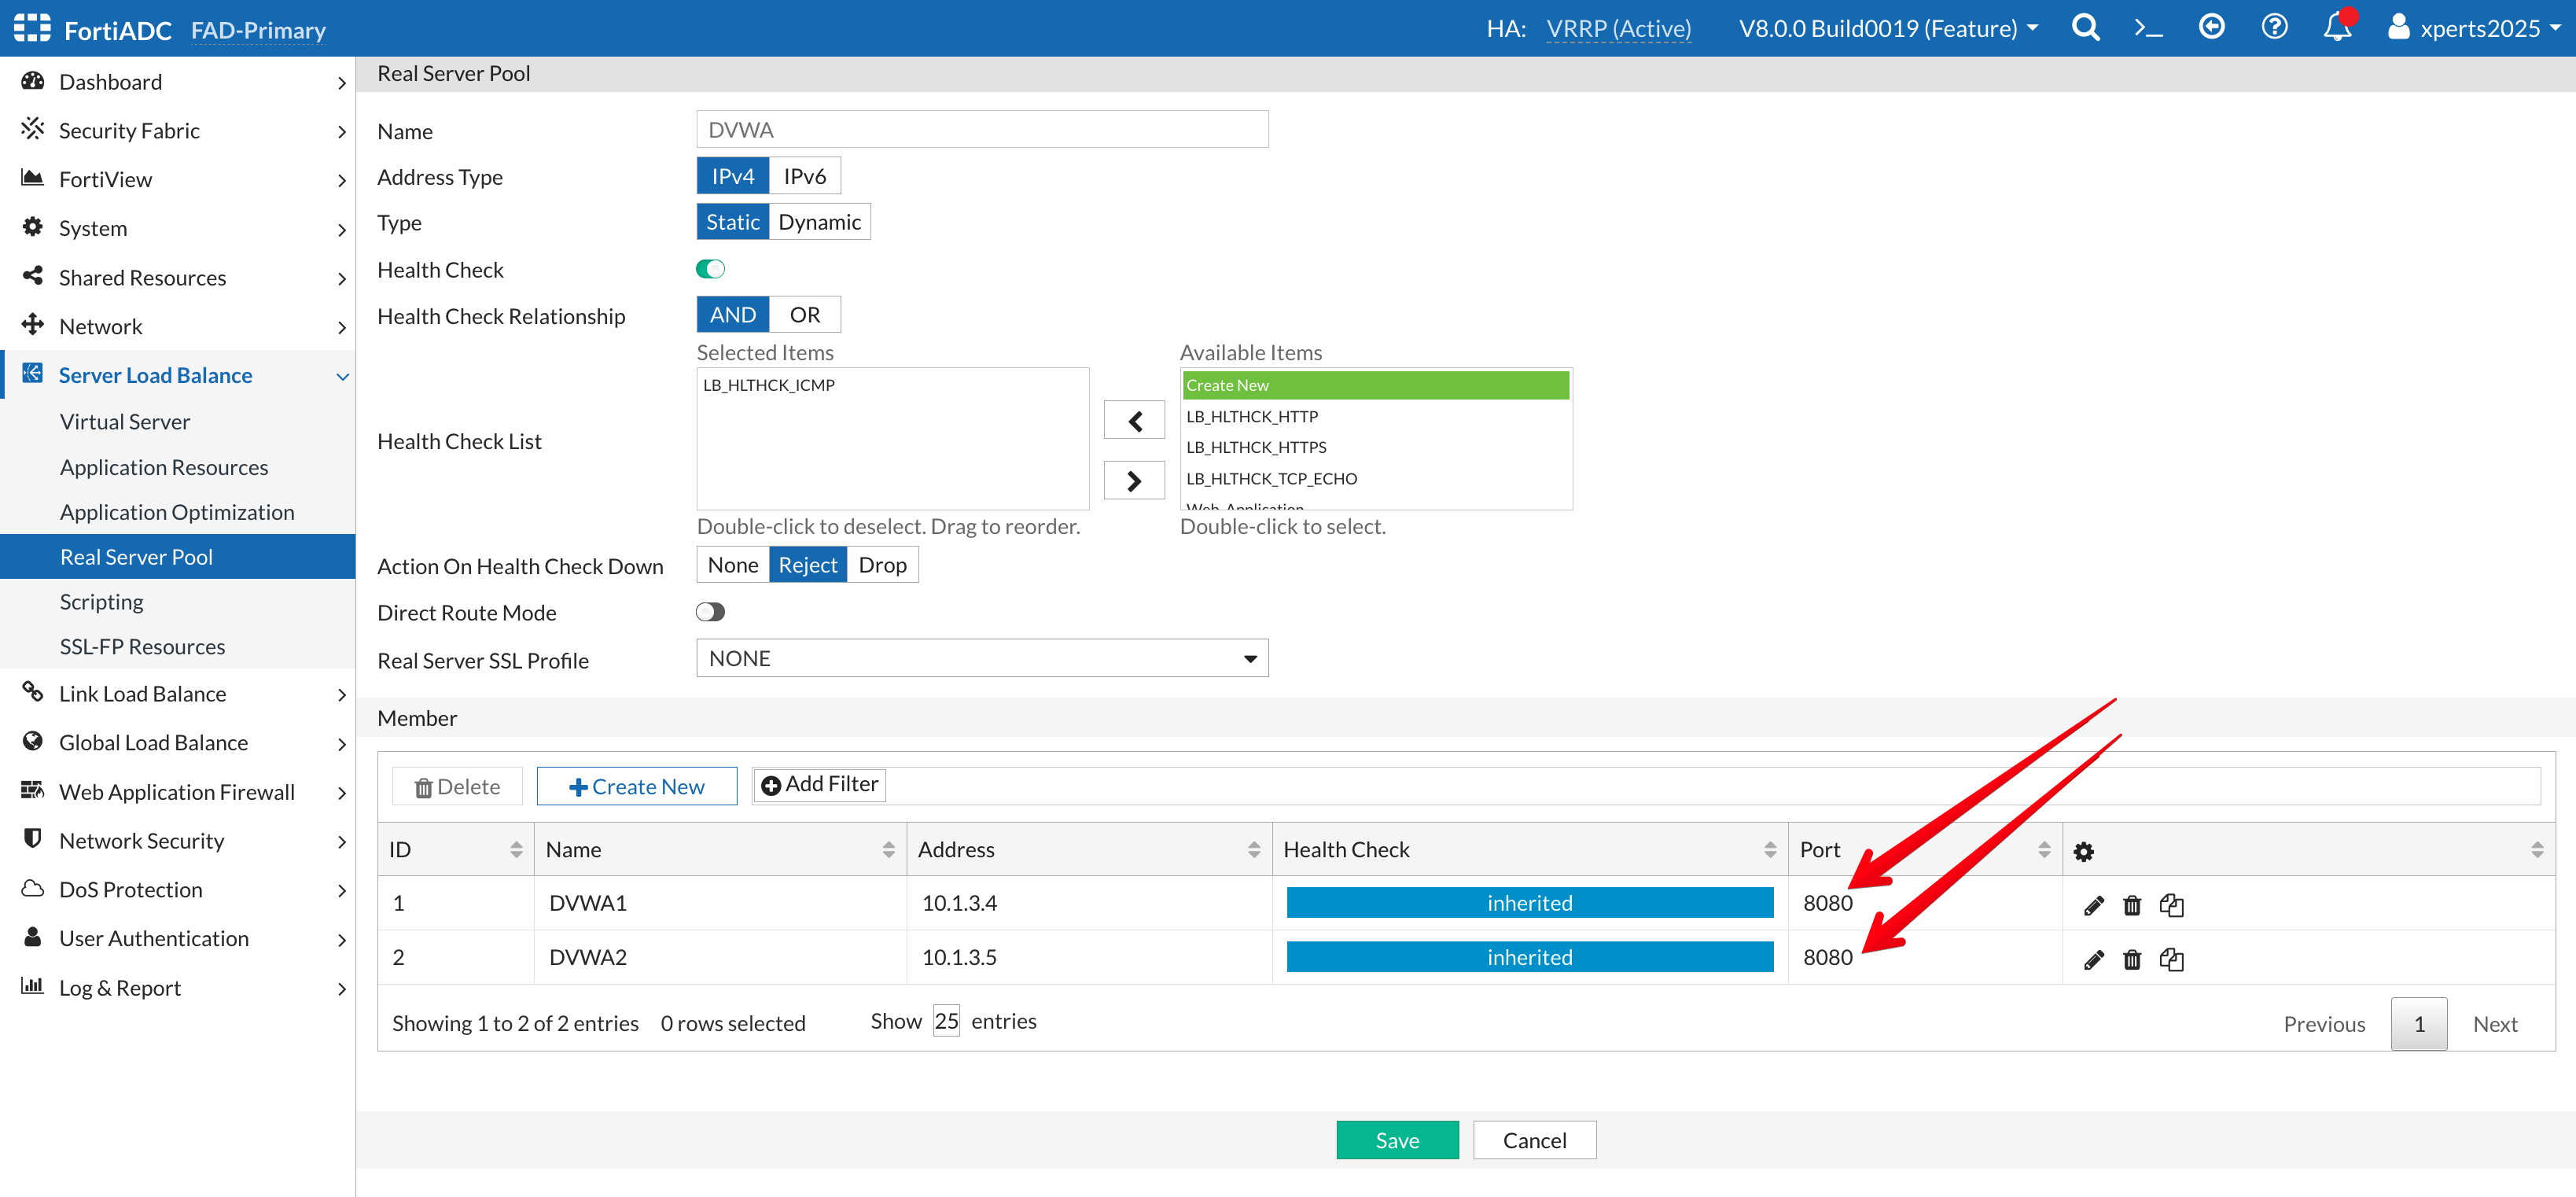
- Name: DVWA
- Health Check: enable the toggle for Health Check and add the builtin LB_HLTCHK_ICMP
- Save
- Click +Create New
- Add the Real Servers defined in the previous step to the pool
- While adding the servers, change the listening port to 8080
Your final result should look like the image below