Virtual Servers
Define Virtual Servers
The next step is to configure a virtual server, which defines the type of traffic FortiADC will manage and how it will be processed. For this exercise, we will create two virtual servers, one for each of our web applications, while using the default settings wherever possible.
- Login to the FortiADC (FAD-Primary) with username
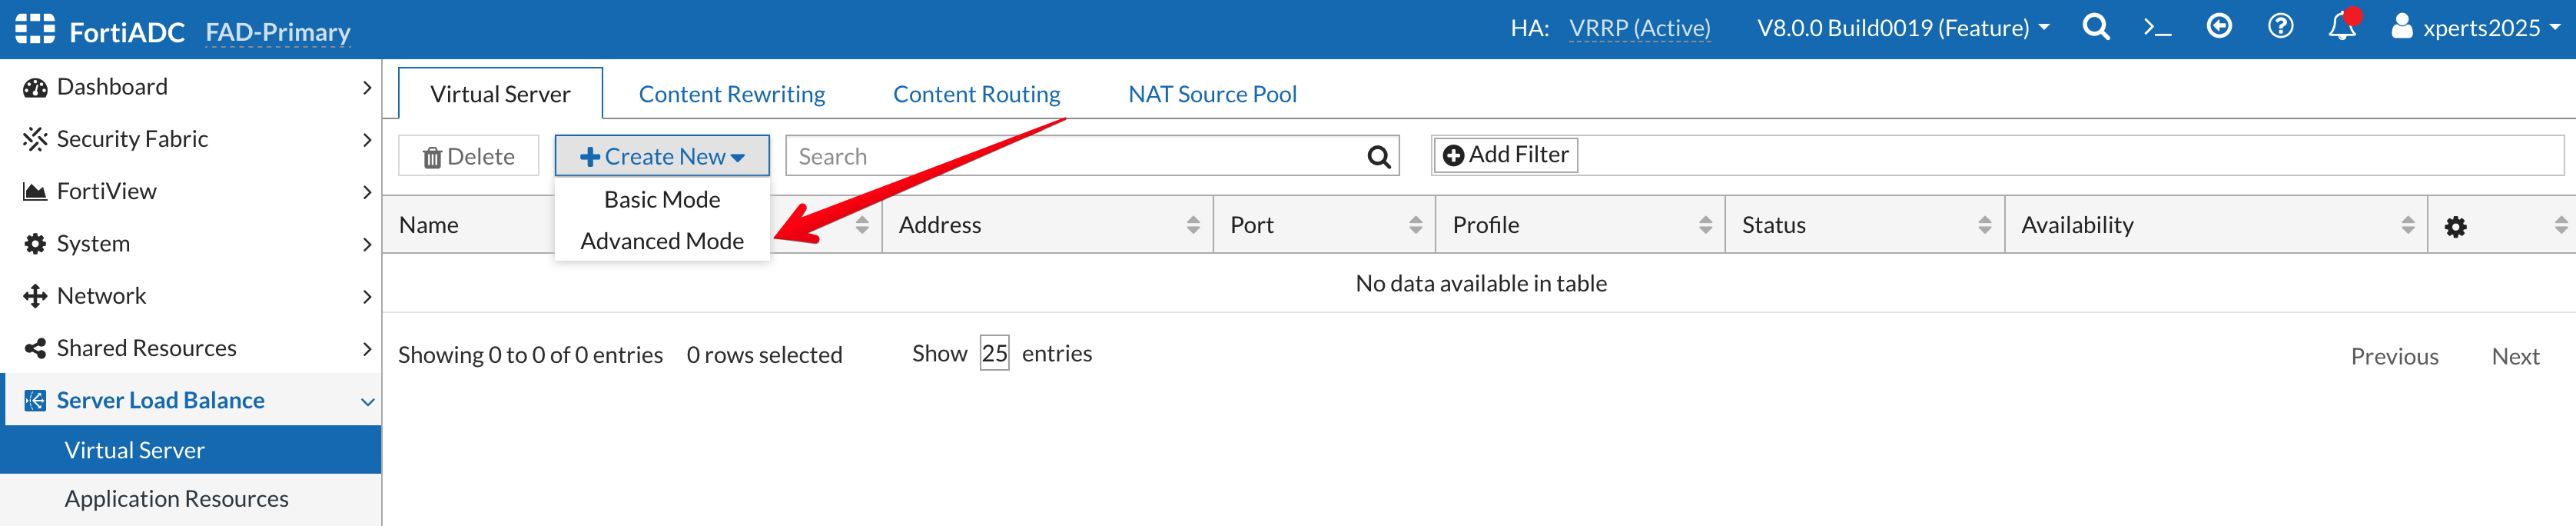
xperts2025and passwordAppSec-Xp3rts2025! - Go to Server Load Balance → Virtual Server
- Click on +Create New then Advanced Mode
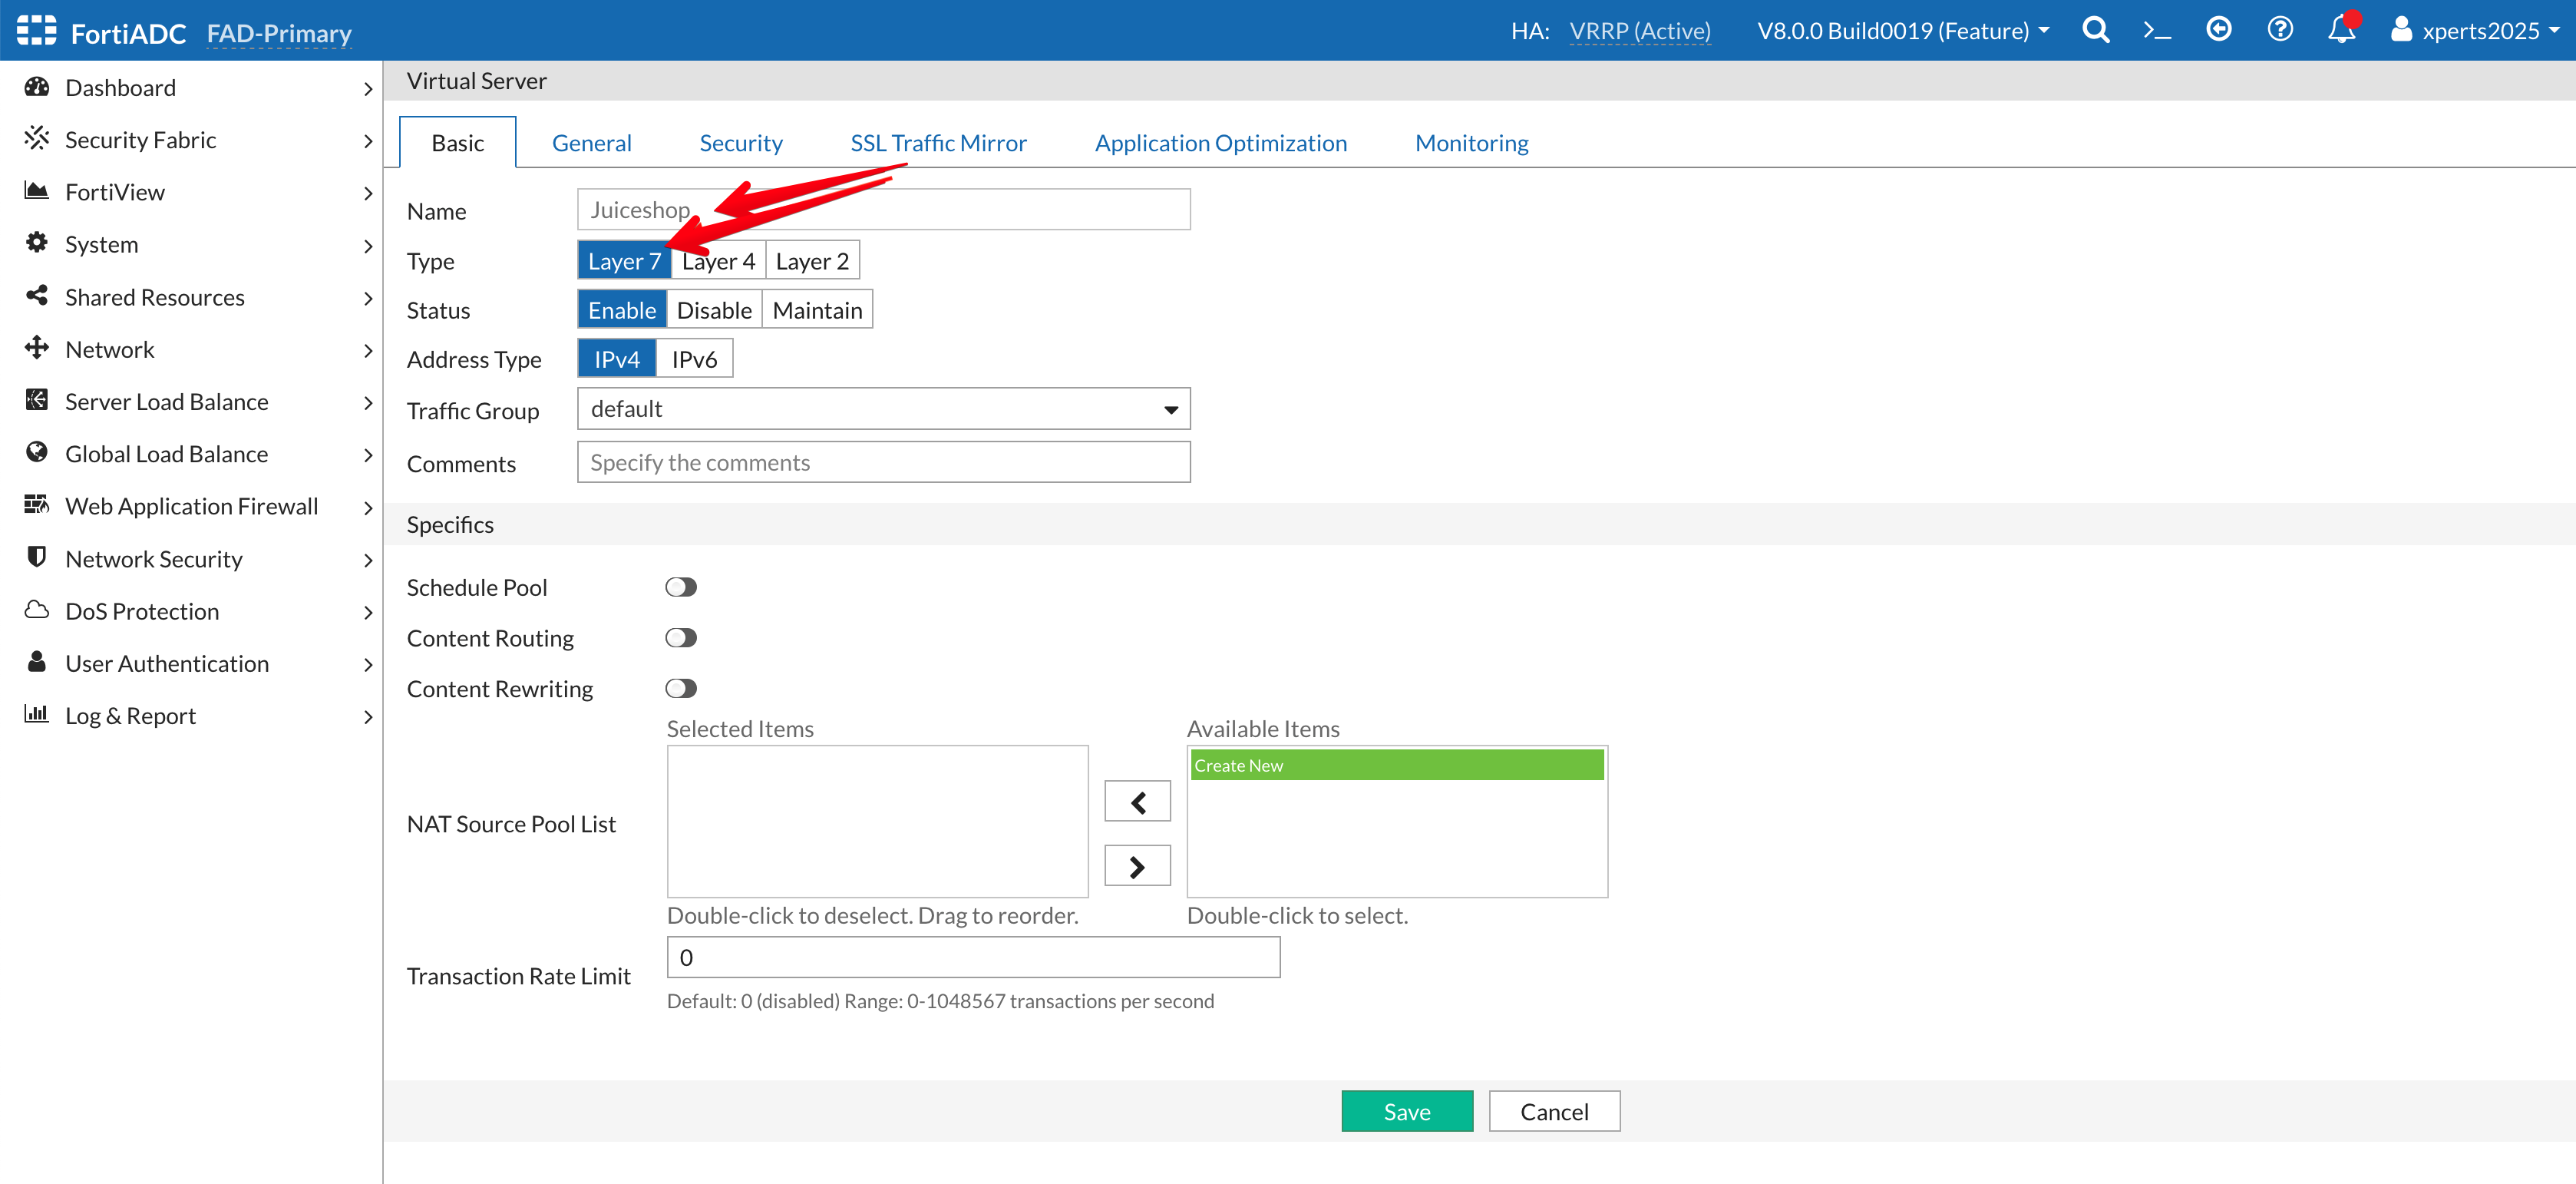
- Name: Juiceshop
- Type: Layer 7
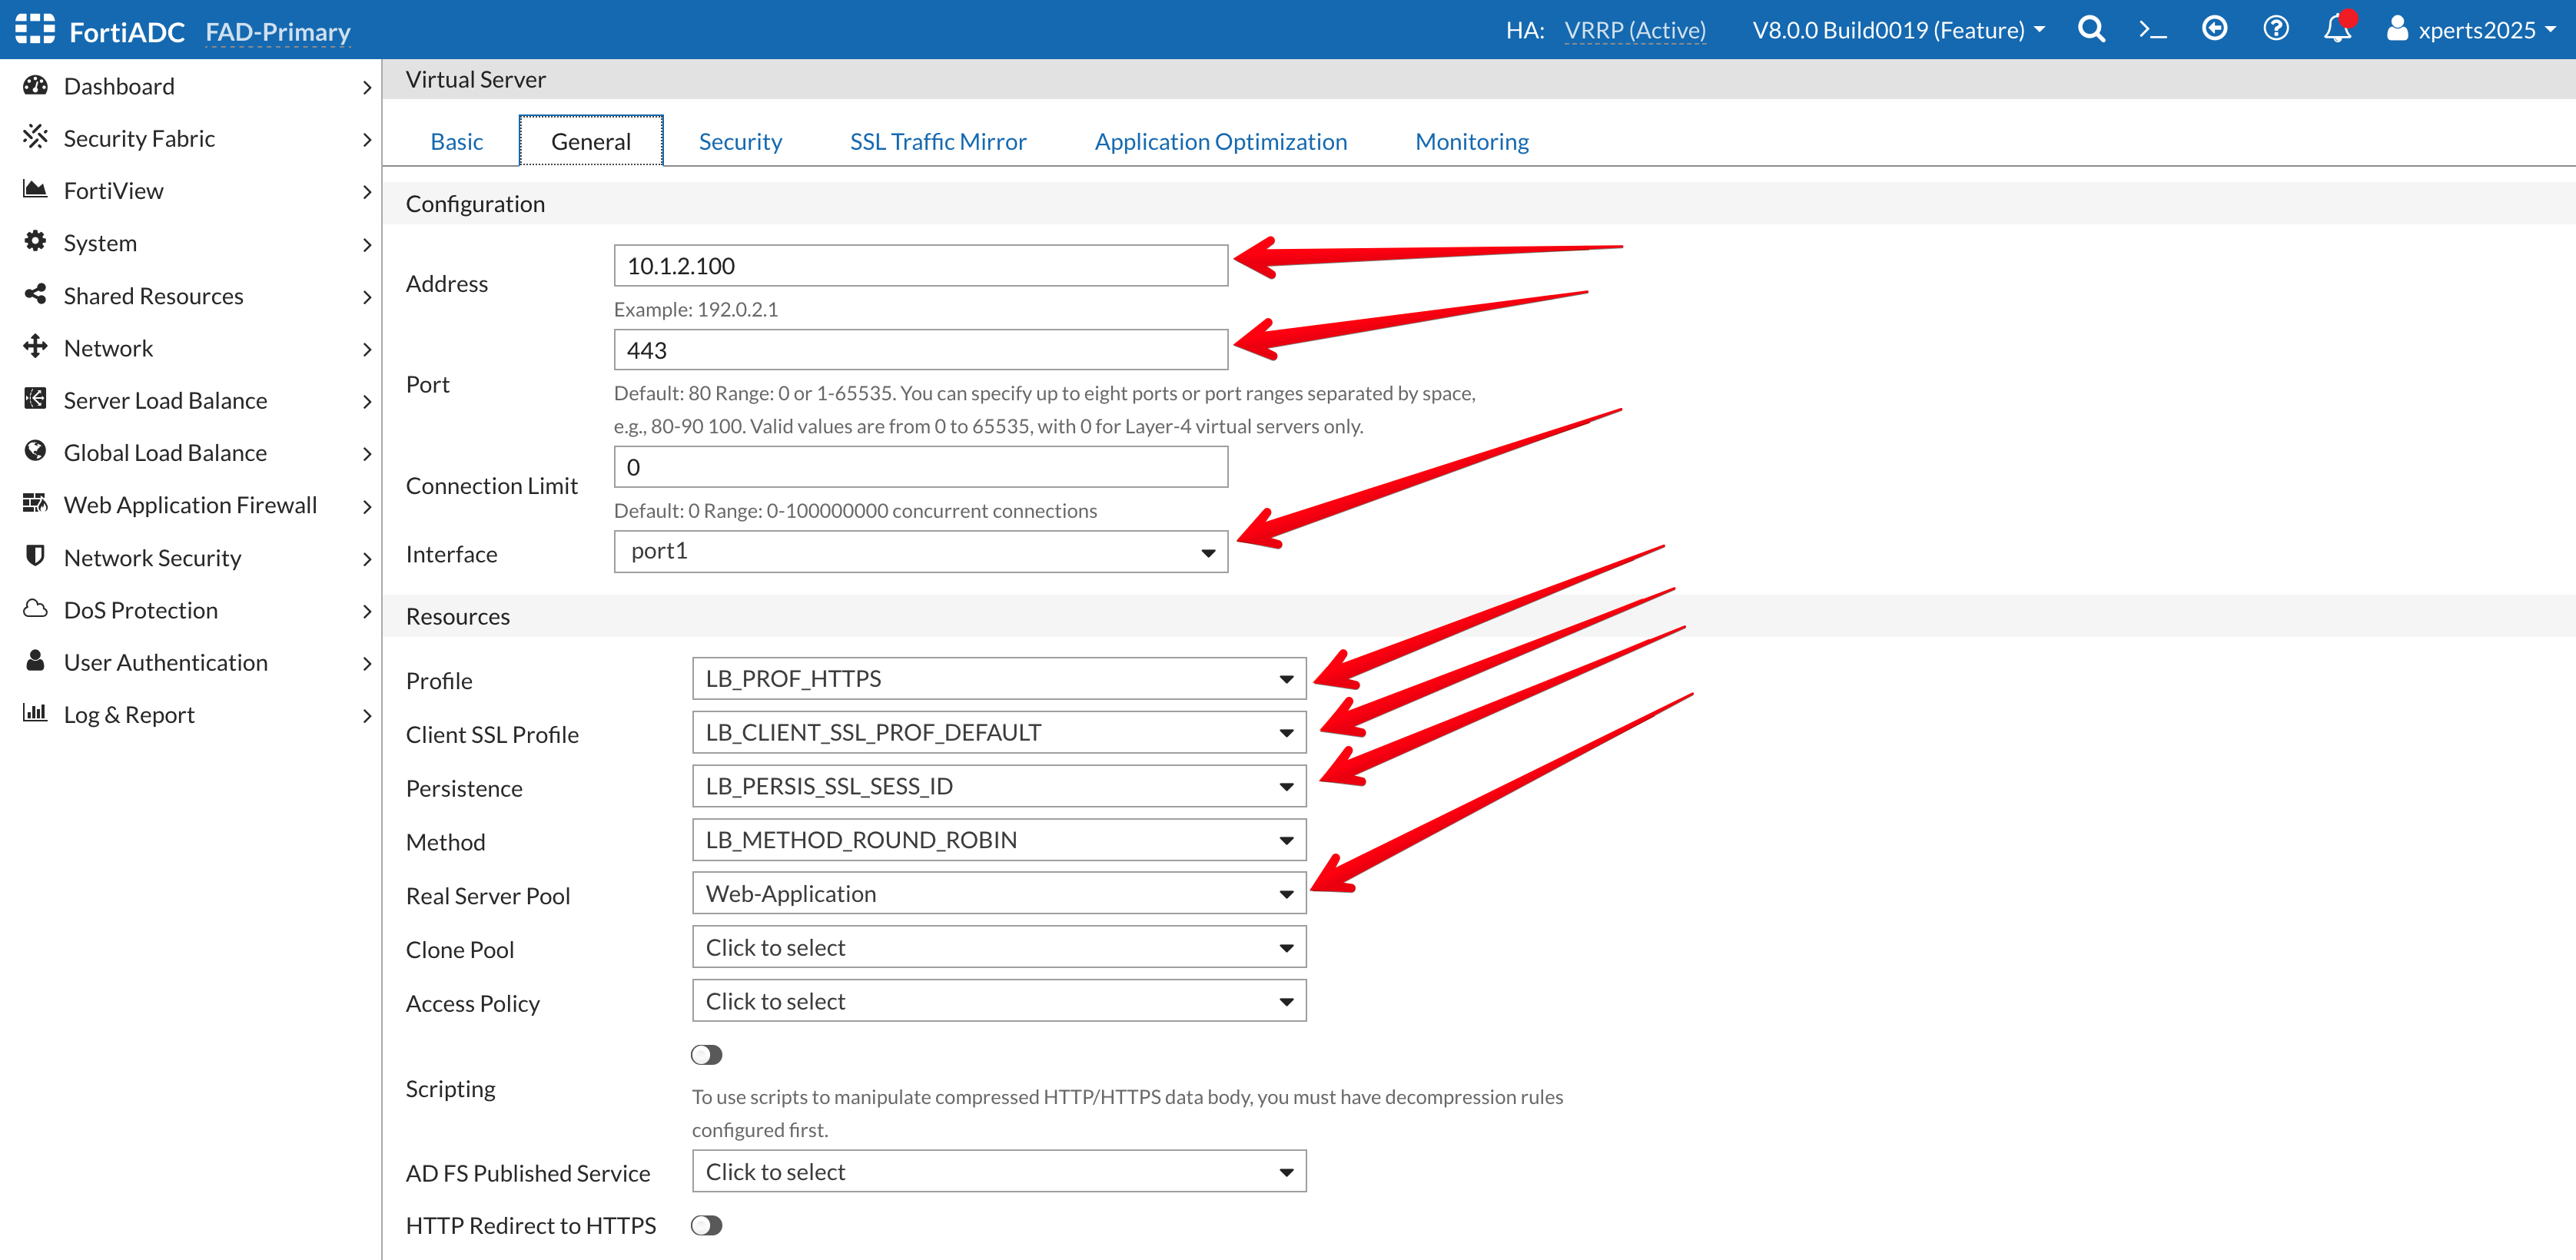
- Go to the General Tab
- Address: 10.1.2.100
- Port: 443
- Interface: Port1 ( from the dropdown Menu)
- Profile: LB_PROF_HTTPS
- Client SSL Profile: LB_CLIENT_SSL_PROF_DEFAULT
- Persistence: LB_PERSIS_SSL_SESS_ID
- Method: LB_METHOD_ROUND_ROBIN
- Real Server Pool: Web-Application
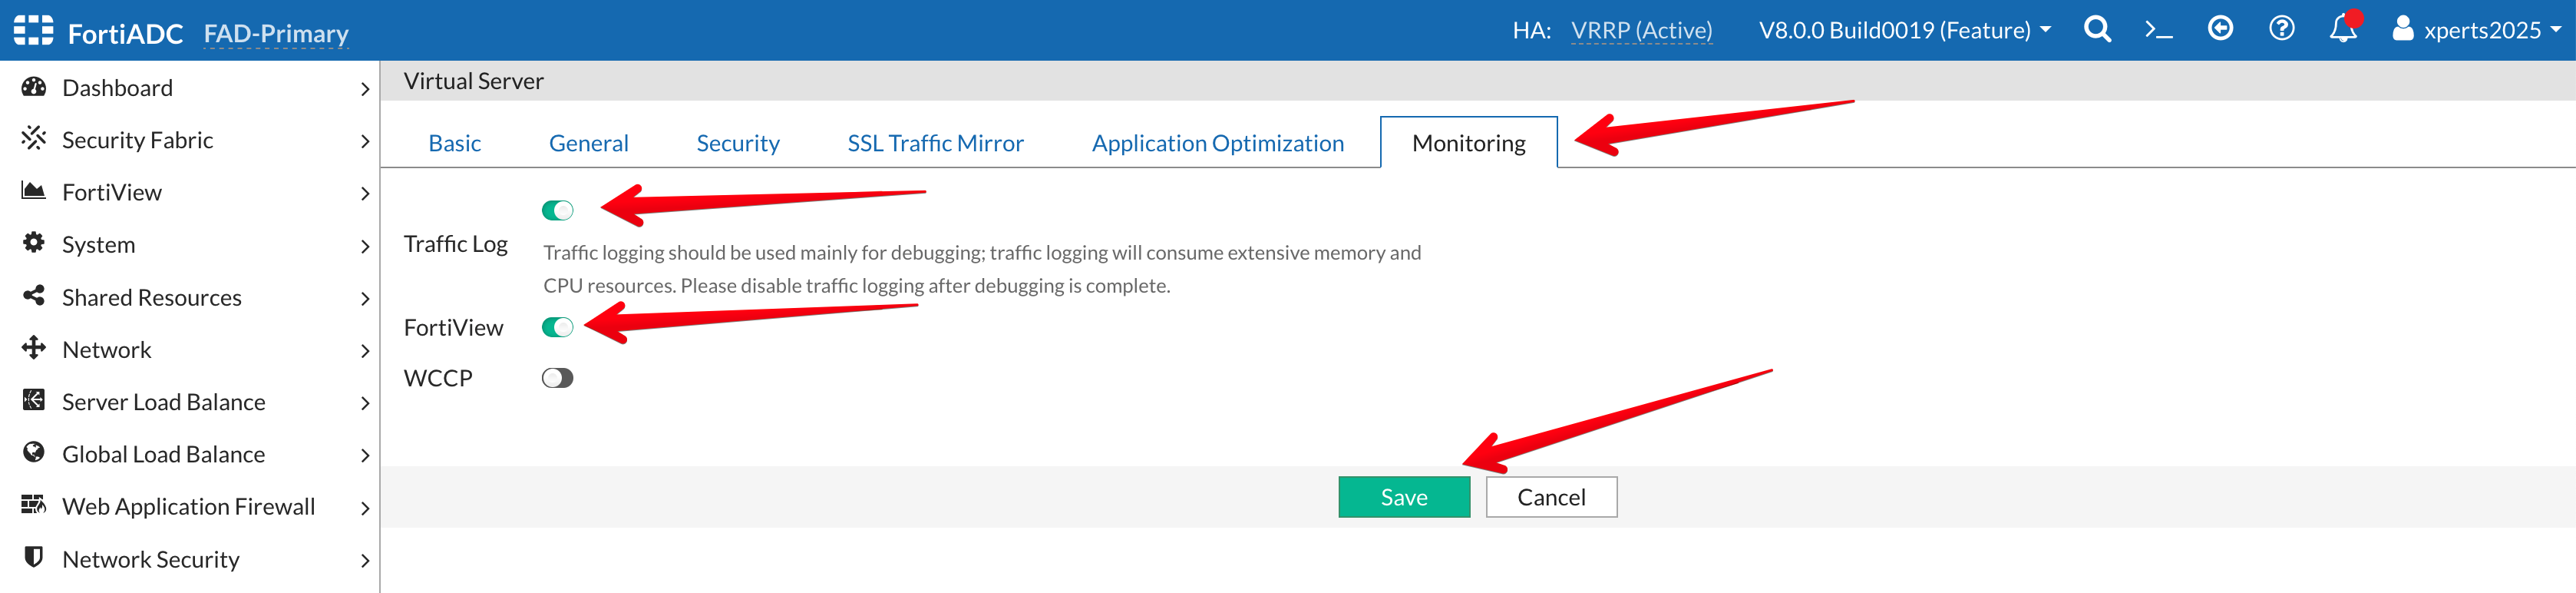
- Go to the Monitoring Tab
- Traffic Log: Enable the Toggle
- FortiView: Enable the Toggle
- Save
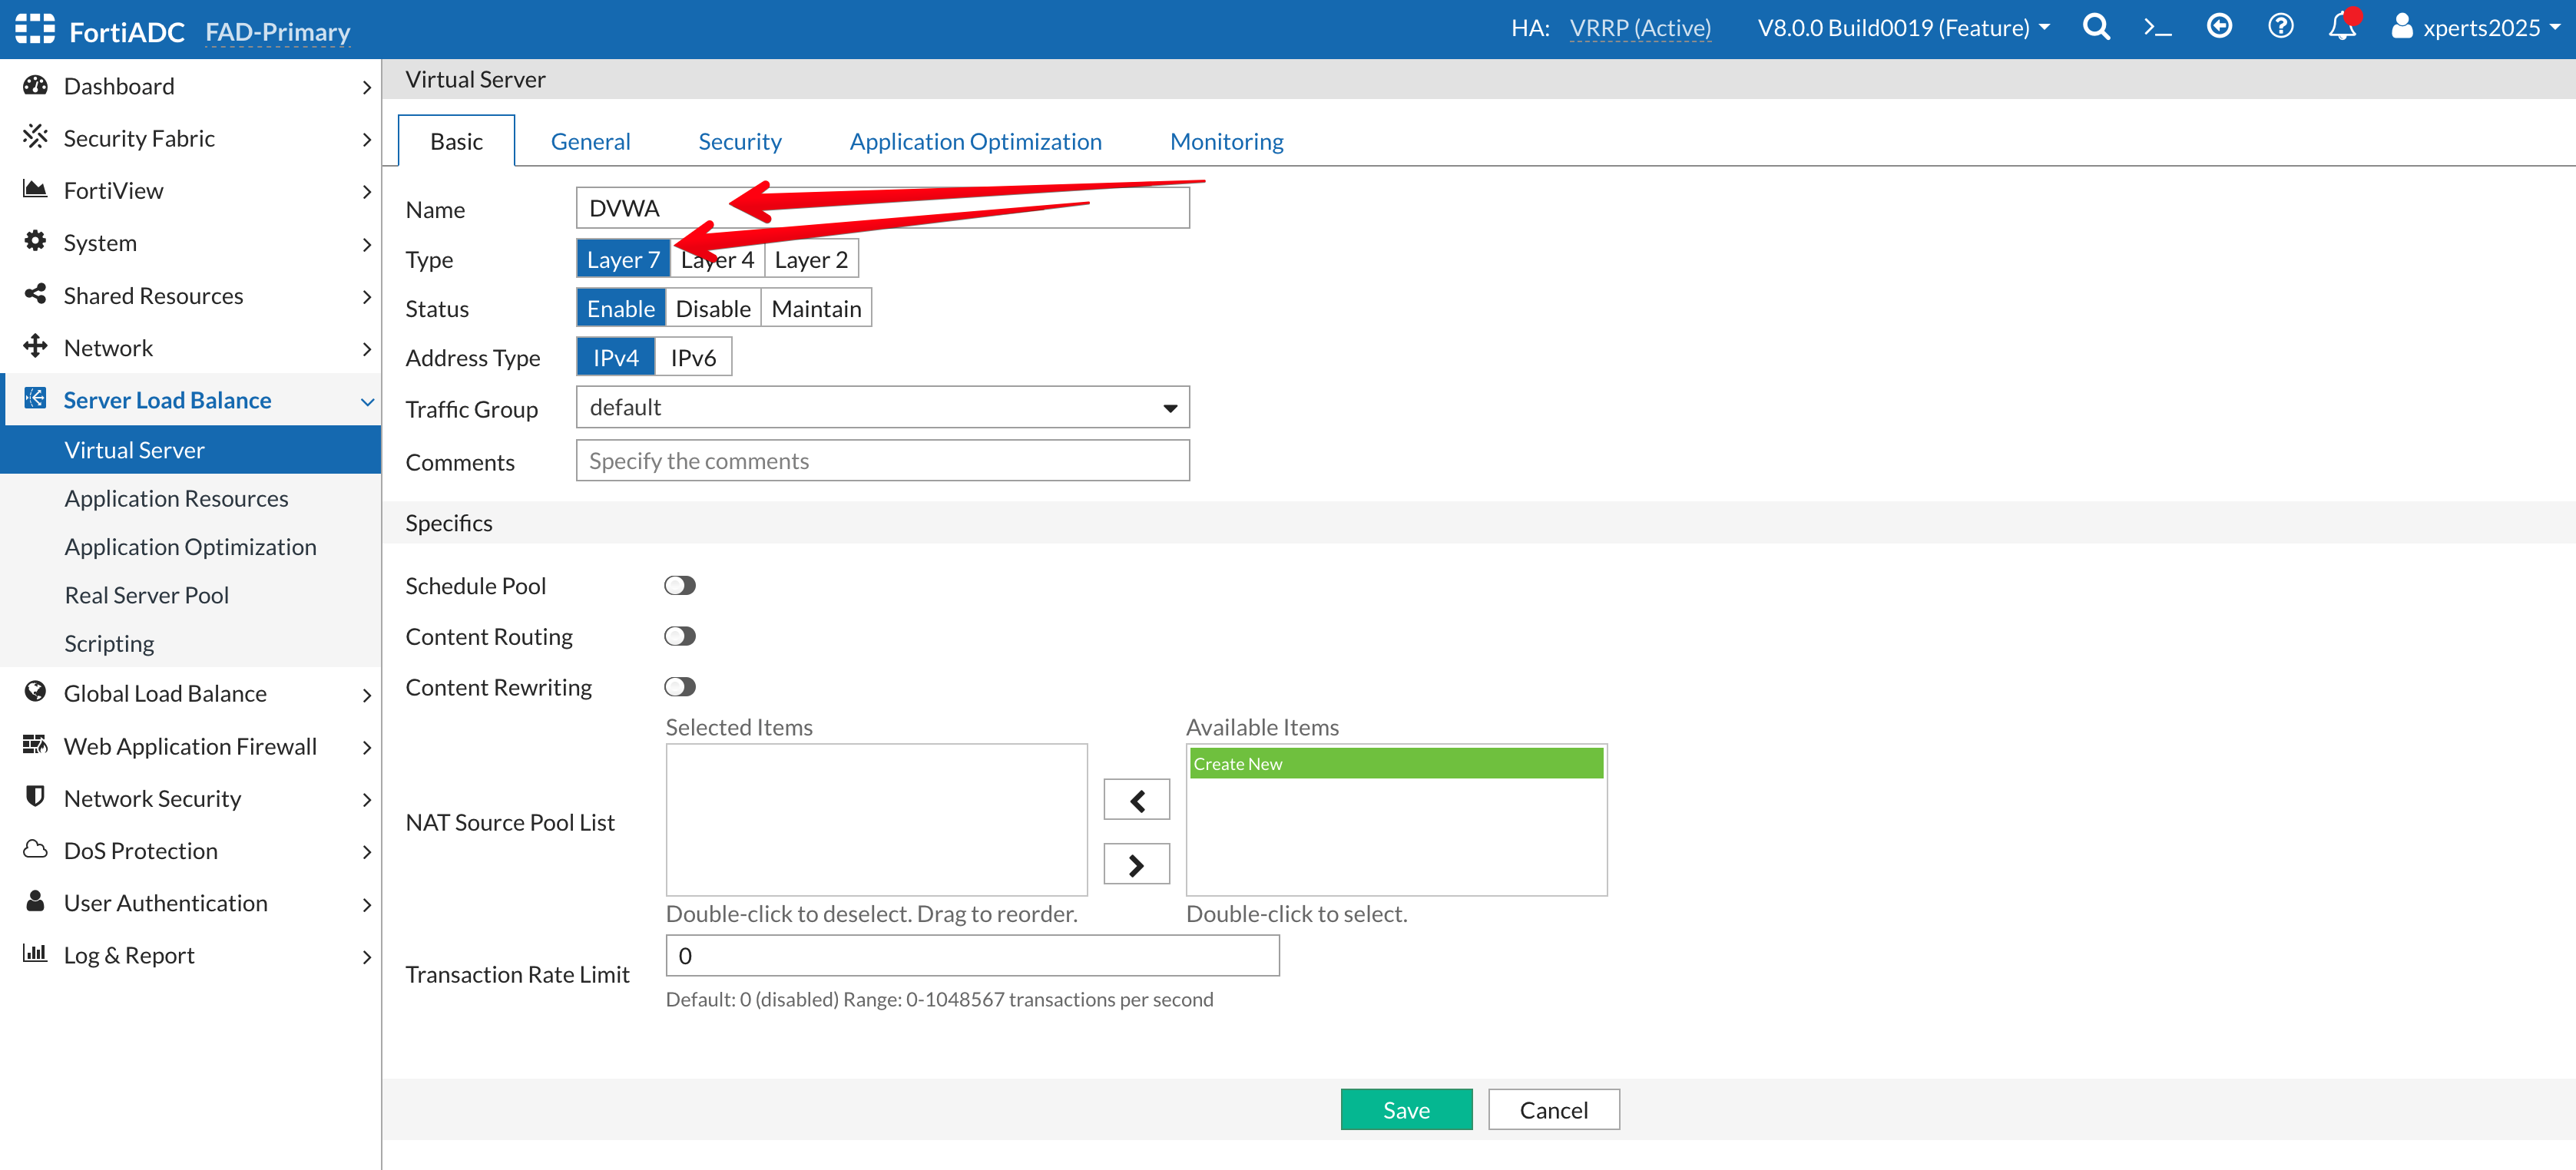
- Go to Server Load Balance → Virtual Server
- Click on +Create New then Advanced Mode
- Name: DVWA
- Type: Layer 7
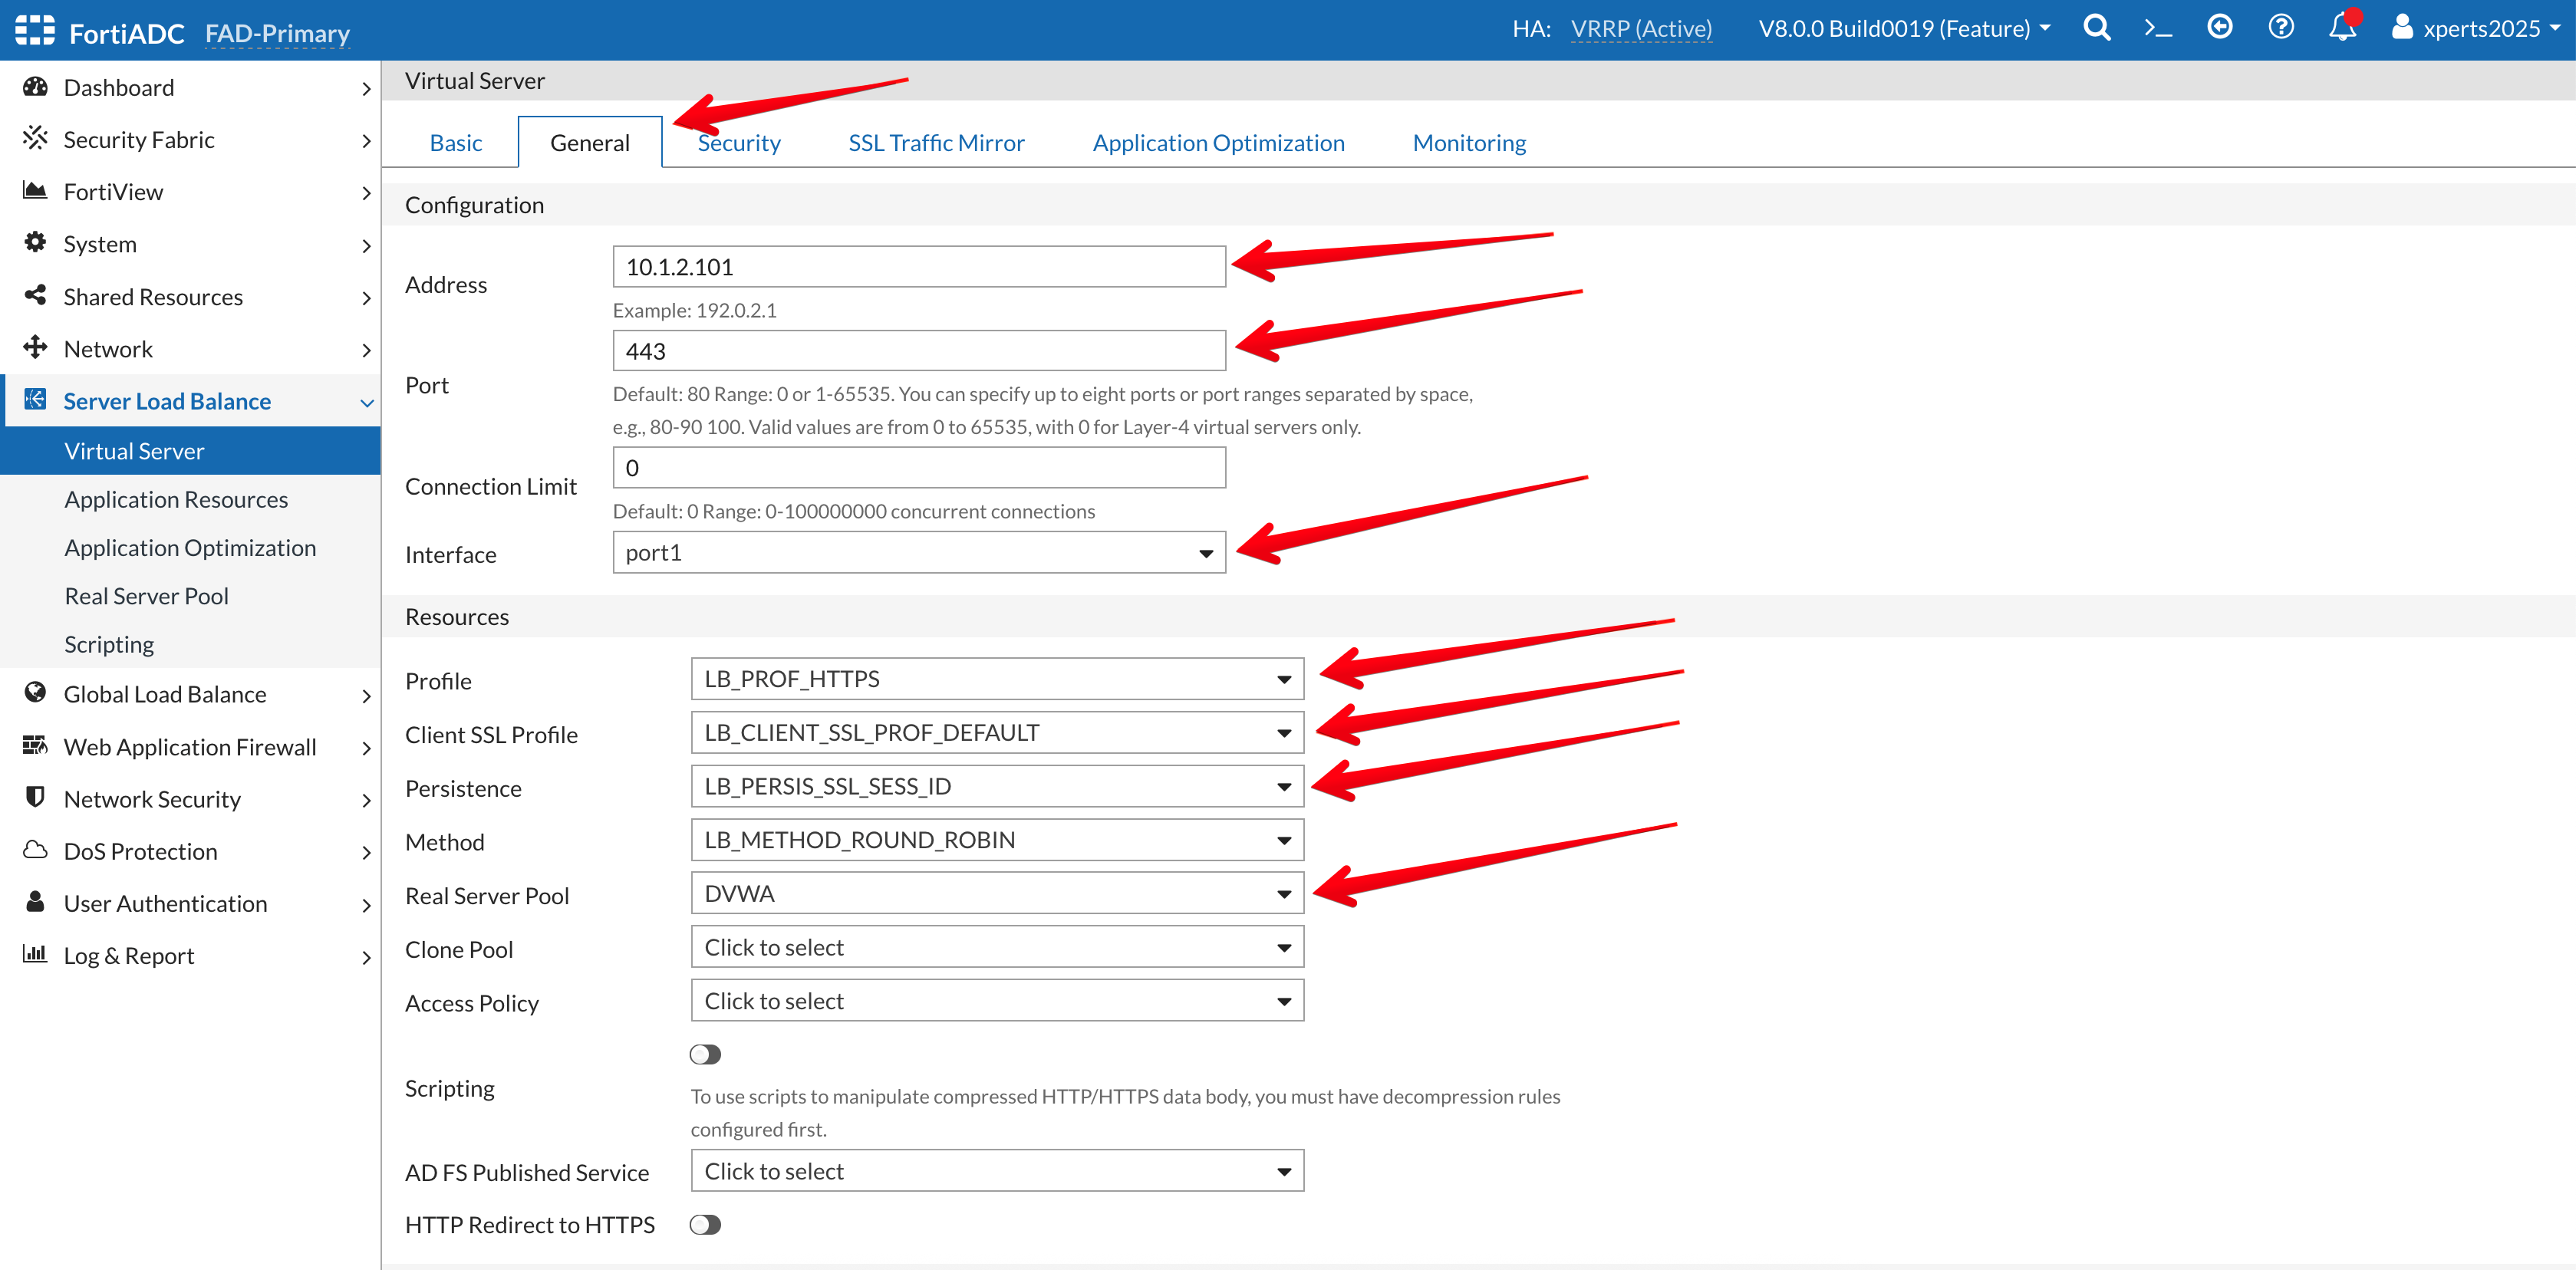
- Go to the General Tab
- Address: 10.1.2.101
- Port: 443
- Interface: Port1 (from the dropdown Menu)
- Profile: LB_PROF_HTTPS
- Client SSL Profile: LB_CLIENT_SSL_PROF_DEFAULT
- Persistence: LB_PERSIS_SSL_SESS_ID
- Method: LB_METHOD_ROUND_ROBIN
- Real Server Pool: DVWA
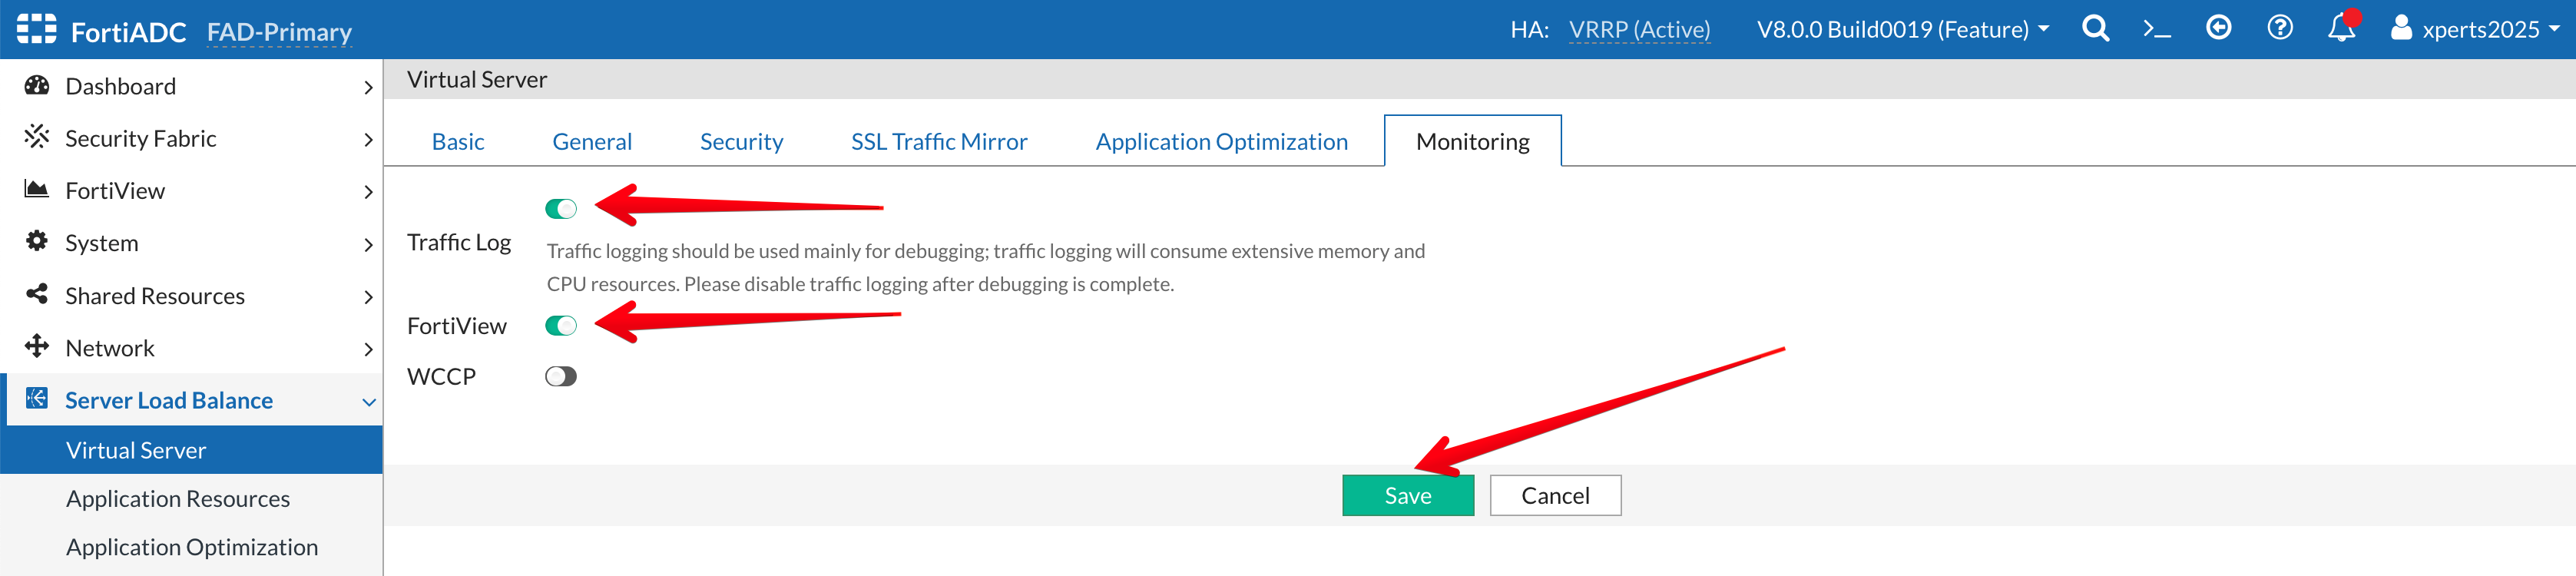
- Go to the Monitoring Tab
- Traffic Log: Enable the Toggle
- FortiView: Enable the Toggle
- Save
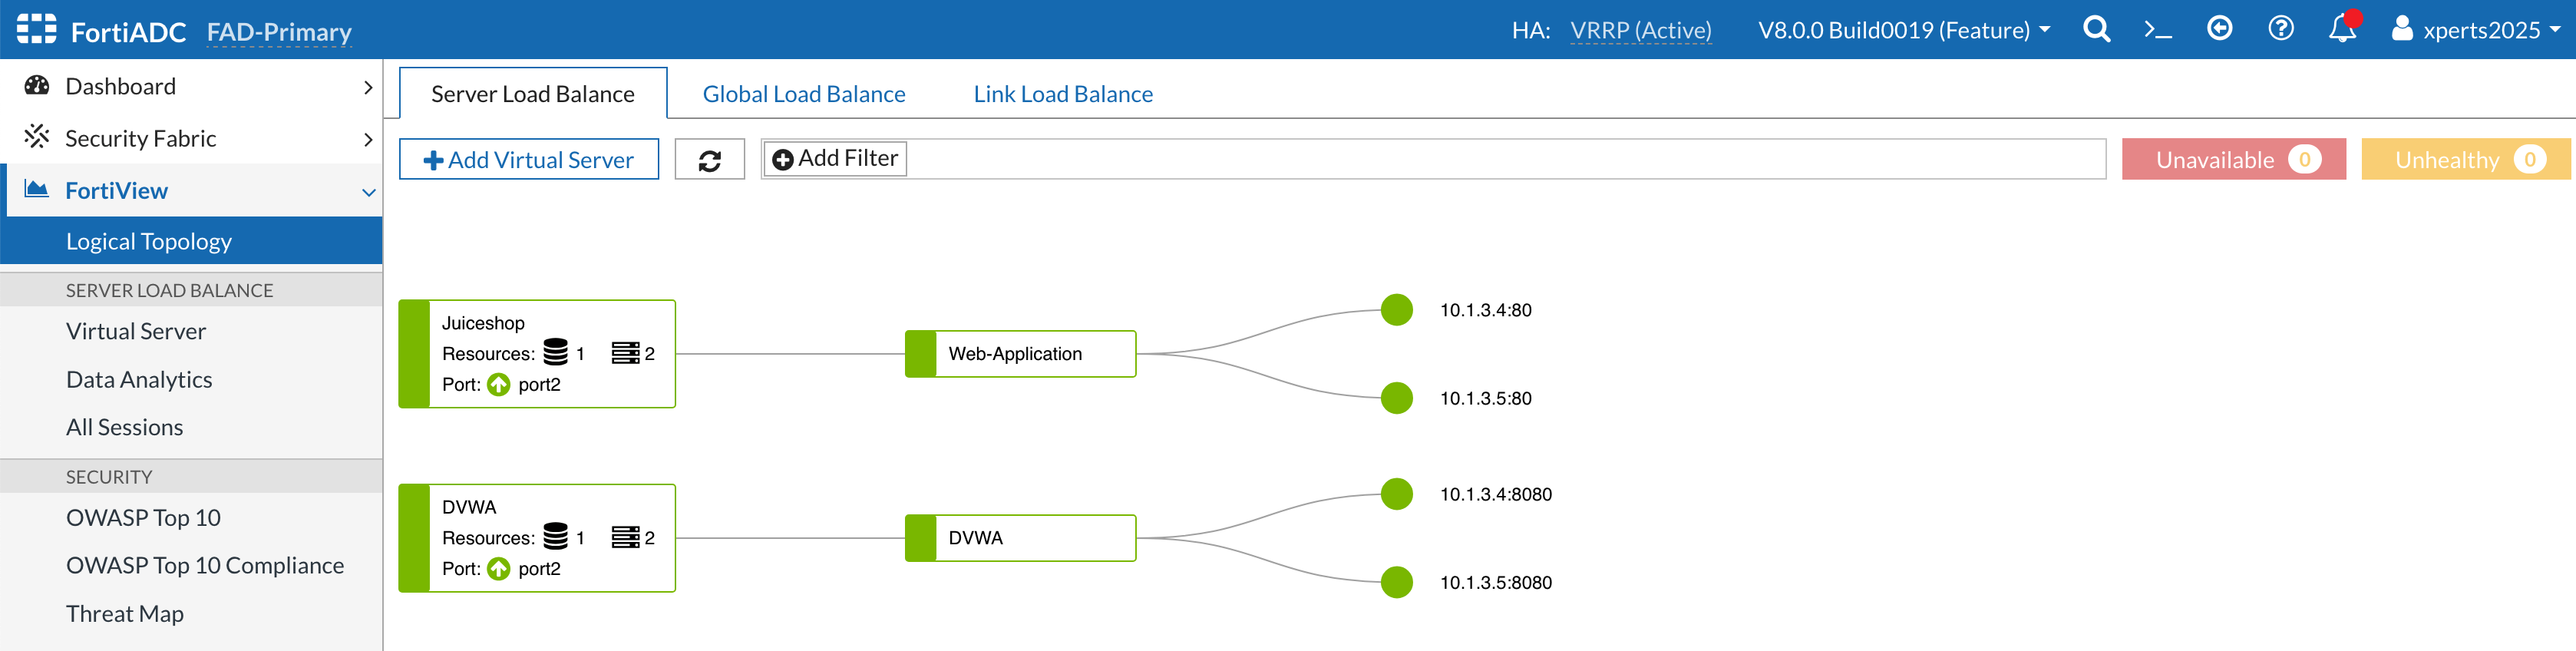
- Go to FortiView → Logical Topology
Your topology should look like the image below