Virtual Server
Step 3 - Associate the WAF profile with the Virtual Server created in Step 1
Now, we will associate the WAF profiles with a Virtual Server. Refer to the diagram in the traffic flow section to understand how traffic is processed through FortiADC for better context.
- Login to the FortiADC (FAD-Primary) with the username
xperts2025and passwordAppSec-Xp3rts2025! - Go to Server Load Balance → Virtual Server
- Double click Juiceshop or click on edit (pencil icon) on the right side of Juiceshop
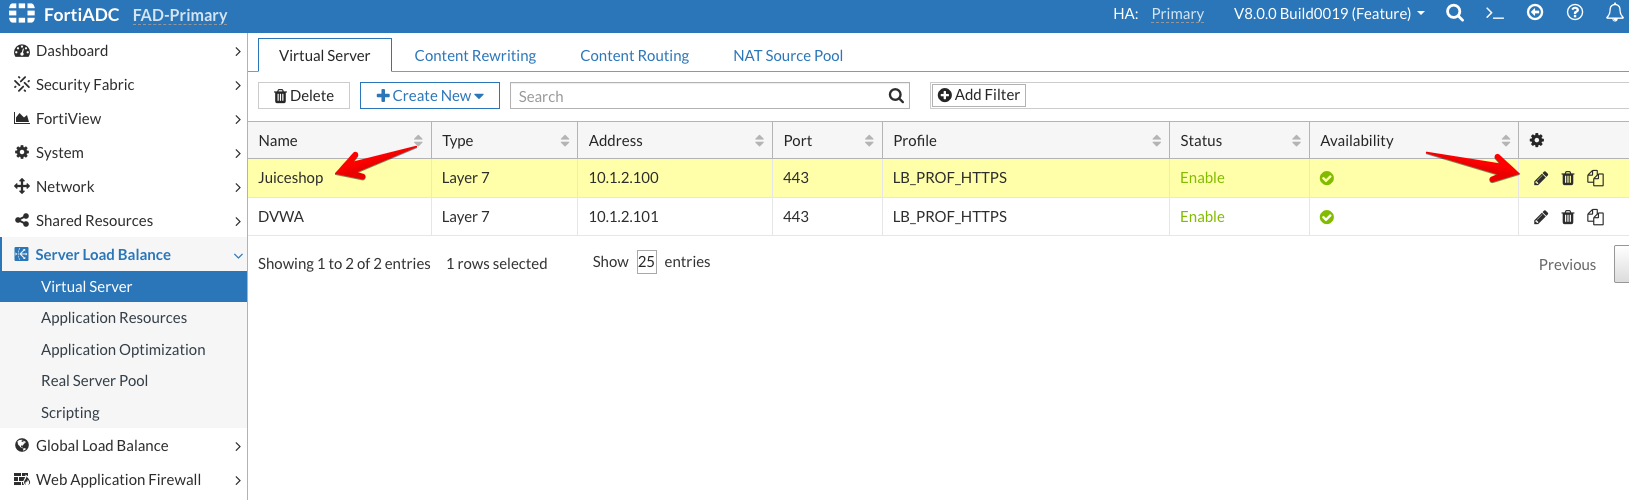
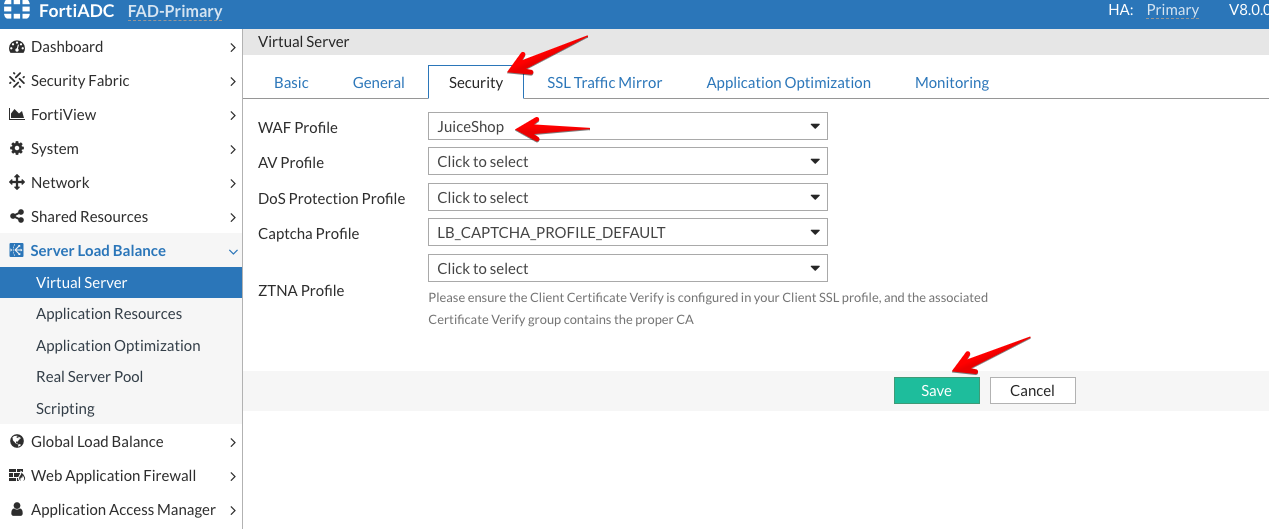
- Click on the Security tab
- Select Juiceshop from the WAF Profile dropdown menu
- Click Save
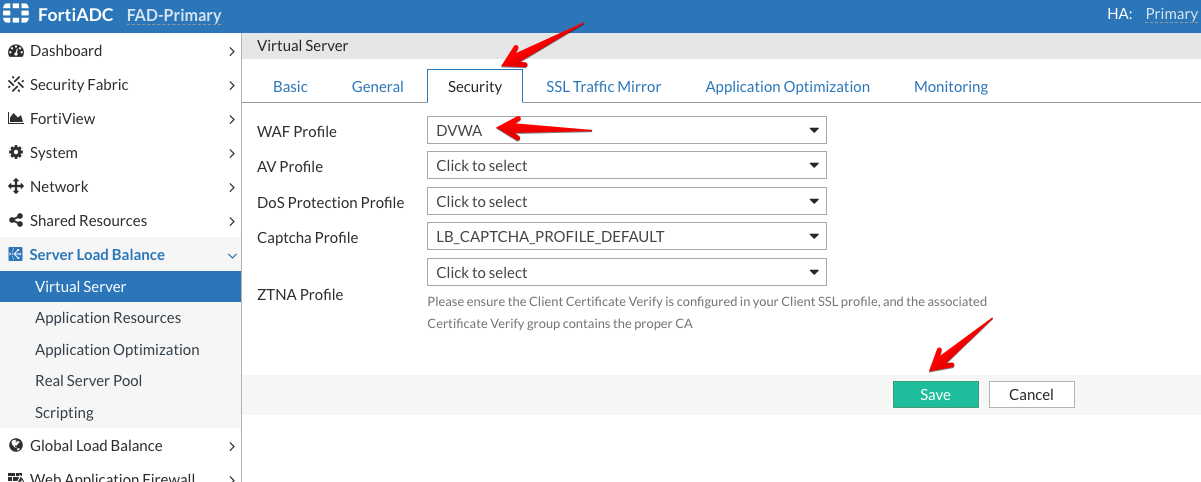
We will follow the same steps for configuring the DVWA application.
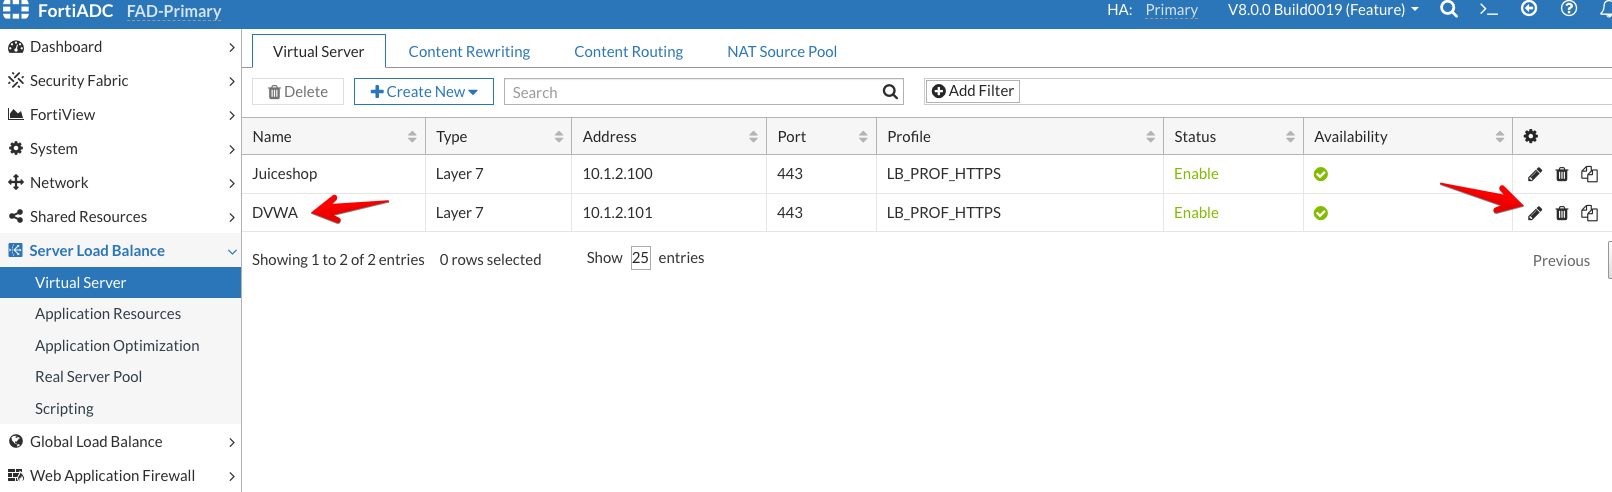
- Go to Server Load Balance → Virtual Server
- Double click DVWA or click on edit (pencil icon) on the right side of DVWA
- Click on the Security tab
- Select DVWA from the WAF Profile dropdown menu
- Click Save