autoscale_template
Overview
The autoscale_template deploys the FortiGate autoscale group into an existing Inspection VPC. It discovers VPC resources using Fortinet-Role tags created by the existing_vpc_resources template.
Warning
Prerequisites: You must run existing_vpc_resources FIRST to create the Inspection VPC with proper Fortinet-Role tags. Alternatively, you can manually apply the required tags to existing VPCs.
Info
This template is required for all deployments. It deploys the FortiGate autoscale group, Gateway Load Balancer, Lambda functions, and configures routes for traffic inspection.
What It Creates
The autoscale_template discovers the existing Inspection VPC via Fortinet-Role tags and deploys FortiGate autoscale components into it:
Resource Discovery (via Fortinet-Role Tags)
| Resource | Tag Pattern | Purpose |
|---|---|---|
| Inspection VPC | {cp}-{env}-inspection-vpc | VPC for FortiGate deployment |
| Subnets | {cp}-{env}-inspection-{type}-{az} | Public, GWLBE, Private subnets |
| Route Tables | {cp}-{env}-inspection-{type}-rt-{az} | For route modifications |
| IGW | {cp}-{env}-inspection-igw | Internet connectivity |
| NAT Gateways | {cp}-{env}-inspection-natgw-{az} | If nat_gw mode |
| TGW Attachment | {cp}-{env}-inspection-tgw-attachment | If TGW enabled |
Components Created
| Component | Purpose | Always Created |
|---|---|---|
| FortiGate Autoscale Groups | BYOL and/or on-demand instance groups | ✅ Yes |
| Gateway Load Balancer | Distributes traffic across FortiGate instances | ✅ Yes |
| GWLB Endpoints | Connection points in each AZ | ✅ Yes |
| Lambda Functions | Lifecycle management and licensing automation | ✅ Yes |
| DynamoDB Table | License tracking and state management | ✅ Yes (if BYOL) |
| S3 Bucket | License file storage and Lambda code | ✅ Yes (if BYOL) |
| IAM Roles | Permissions for Lambda and EC2 instances | ✅ Yes |
| Security Groups | Network access control | ✅ Yes |
| CloudWatch Alarms | Autoscaling triggers | ✅ Yes |
| Route Modifications | Points private subnets to GWLB endpoints | ✅ Yes (if enabled) |
Optional Components
| Component | Purpose | Enabled By |
|---|---|---|
| Transit Gateway Attachment | Connection to TGW for centralized architecture | enable_tgw_attachment |
| Dedicated Management ENI | Isolated management interface | enable_dedicated_management_eni |
| Dedicated Management VPC Connection | Management in separate VPC | enable_dedicated_management_vpc |
| FortiManager Integration | Centralized policy management | enable_fortimanager_integration |
| East-West Inspection | Inter-spoke traffic inspection | enable_east_west_inspection |
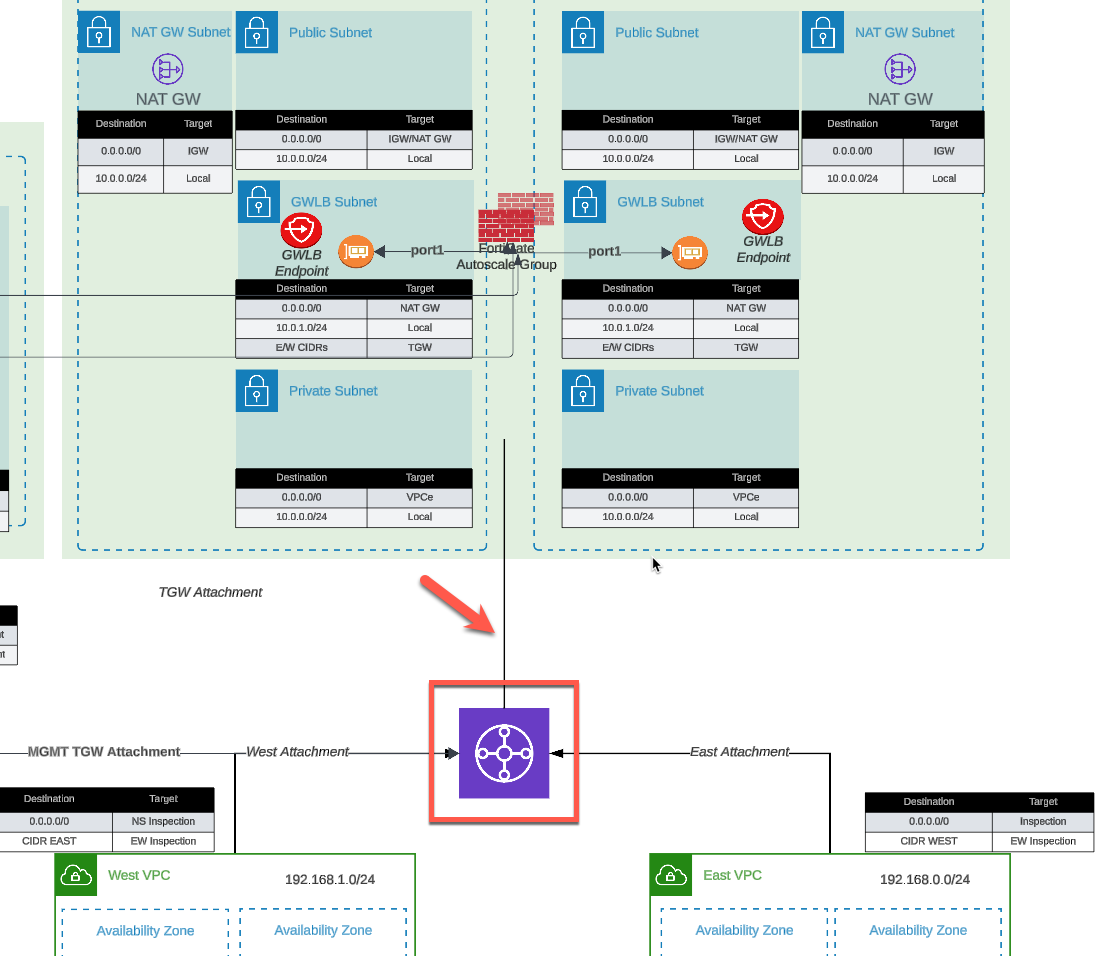
Architecture Patterns
The autoscale_template supports multiple deployment patterns:
Pattern 1: Centralized Architecture with TGW
Configuration:
enable_tgw_attachment = true
attach_to_tgw_name = "production-tgw"
Traffic flow:
Spoke VPCs → TGW → Inspection VPC → FortiGate → GWLB → InternetUse cases:
- Production centralized egress
- Multi-VPC environments
- East-west traffic inspection
Pattern 2: Distributed Architecture (No TGW)
Configuration:
enable_tgw_attachment = falseTraffic flow:
Spoke VPC → GWLB Endpoint → FortiGate → Internet GatewayUse cases:
- Distributed security architecture
- Per-VPC inspection requirements
- Bump-in-the-wire deployments
Pattern 3: Hybrid with Management VPC
Configuration:
enable_tgw_attachment = true
enable_dedicated_management_vpc = true
enable_fortimanager_integration = true
Traffic flow:
Data: Spoke VPCs → TGW → FortiGate → Internet
Management: FortiGate → Management VPC → FortiManager
Use cases:
- Enterprise deployments
- Centralized management requirements
- Compliance-driven architectures
Integration Modes
Fortinet-Role Tag Discovery
The autoscale_template discovers all Inspection VPC resources using Fortinet-Role tags. This is how it finds the VPC, subnets, route tables, and other resources created by existing_vpc_resources.
How discovery works:
# autoscale_template looks up resources like this:
data "aws_vpc" "inspection" {
  filter {
    name   = "tag:Fortinet-Role"
    values = ["${var.cp}-${var.env}-inspection-vpc"]
  }
}

data "aws_subnet" "inspection_public_az1" {
  filter {
    name   = "tag:Fortinet-Role"
    values = ["${var.cp}-${var.env}-inspection-public-az1"]
  }
}
Warning
Critical: The cp and env variables must match exactly between existing_vpc_resources and autoscale_template for tag discovery to work.
Integration with existing_vpc_resources
When deploying after existing_vpc_resources:
Required variable coordination:
# MUST MATCH existing_vpc_resources values (for Fortinet-Role tag discovery)
aws_region          = "us-west-2"
availability_zone_1 = "a"
availability_zone_2 = "c"
cp                  = "acme"      # MUST MATCH - used for tag lookup
env                 = "test"      # MUST MATCH - used for tag lookup

# Connect to created TGW (if enabled in existing_vpc_resources)
enable_tgw_attachment = true
attach_to_tgw_name    = "acme-test-tgw"  # From existing_vpc_resources output

# Connect to management VPC (if created in existing_vpc_resources)
enable_dedicated_management_vpc = true
# Management VPC also discovered via Fortinet-Role tags

# FortiManager integration (if enabled in existing_vpc_resources)
enable_fortimanager_integration = true
fortimanager_ip = "10.3.0.10"  # From existing_vpc_resources output
fortimanager_sn = "FMGVM0000000001"
Integration with Manually Tagged VPCs
If you have existing VPCs that you want to use instead of creating new ones with existing_vpc_resources, you must apply Fortinet-Role tags to all required resources:
Required tags (see Templates Overview for complete list):
- VPC:
{cp}-{env}-inspection-vpc - Subnets:
{cp}-{env}-inspection-{public|gwlbe|private}-az{1|2} - Route Tables:
{cp}-{env}-inspection-{type}-rt-az{1|2} - IGW:
{cp}-{env}-inspection-igw
Configuration:
# Match your tag prefix
cp  = "acme"
env = "prod"

# Connect to existing production TGW
enable_tgw_attachment = true
attach_to_tgw_name = "production-tgw"  # Your existing TGW

# Use existing management infrastructure
enable_fortimanager_integration = true
fortimanager_ip = "10.100.50.10"  # Your existing FortiManager
fortimanager_sn = "FMGVM1234567890"
Step-by-Step Deployment
Prerequisites
- ✅ AWS account with appropriate permissions
- ✅ Terraform 1.0 or later installed
- ✅ AWS CLI configured with credentials
- ✅ SSH keypair created in target AWS region
- ✅ FortiGate licenses (if using BYOL) or FortiFlex account (if using FortiFlex)
- ✅
existing_vpc_resourcesdeployed (creates Inspection VPC with Fortinet-Role tags) - ✅ OR existing VPCs with
Fortinet-Roletags applied manually
Warning
Required: The Inspection VPC must exist with proper Fortinet-Role tags before running this template. Run existing_vpc_resources first, or manually tag your existing VPCs.
Step 1: Navigate to Template Directory
cd Autoscale-Simplified-Template/terraform/autoscale_templateStep 2: Create terraform.tfvars
cp terraform.tfvars.example terraform.tfvarsStep 3: Configure Core Variables
Region and Availability Zones
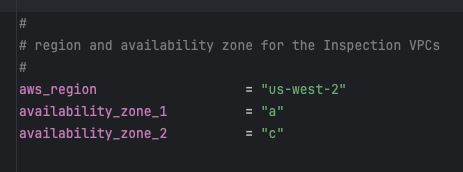
aws_region         = "us-west-2"
availability_zone_1 = "a"
availability_zone_2 = "c"
Warning
Variable Coordination
If you deployed existing_vpc_resources, these values MUST MATCH exactly:
aws_regionavailability_zone_1availability_zone_2cp(customer prefix)env(environment)
Mismatched values will cause resource discovery failures and deployment errors.
Customer Prefix and Environment
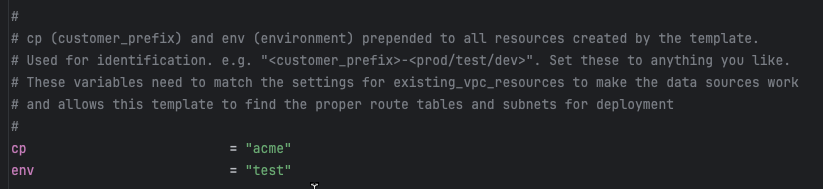
cp  = "acme"    # Customer prefix - MUST MATCH existing_vpc_resources
env = "test"    # Environment - MUST MATCH existing_vpc_resources
Warning
Critical for Tag Discovery
These values form the prefix for Fortinet-Role tags used to discover the Inspection VPC. For example, with cp="acme" and env="test", the template looks for:
- VPC with tag
Fortinet-Role = acme-test-inspection-vpc - Subnets with tags like
Fortinet-Role = acme-test-inspection-public-az1
If these don’t match the tags created by existing_vpc_resources, the template will fail with “no matching VPC found” errors.
Step 4: Configure Security Variables
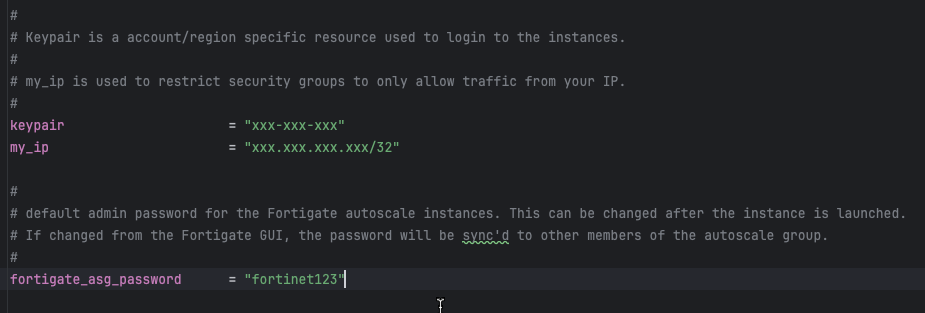
keypair                 = "my-aws-keypair"  # Must exist in target region
my_ip                   = "203.0.113.10/32" # Your public IP for management access
fortigate_asg_password  = "SecurePassword123!"  # Admin password for FortiGates
Warning
Password Requirements
The fortigate_asg_password must meet FortiOS password requirements:
- Minimum 8 characters
- At least one uppercase letter
- At least one lowercase letter
- At least one number
- No special characters that might cause shell escaping issues
Never commit passwords to version control. Consider using:
- Terraform variables marked as sensitive
- Environment variables:
TF_VAR_fortigate_asg_password - AWS Secrets Manager
- HashiCorp Vault
Step 5: Configure Transit Gateway Integration
To connect to Transit Gateway:
enable_tgw_attachment = true
Specify TGW name:
# If using existing_vpc_resources template
attach_to_tgw_name = "acme-test-tgw"  # Matches existing_vpc_resources output

# If using existing production TGW
attach_to_tgw_name = "production-tgw"  # Your production TGW name
Tip
Finding Your Transit Gateway Name
If you don’t know your TGW name:
aws ec2 describe-transit-gateways \
  --query 'TransitGateways[*].[Tags[?Key==`Name`].Value | [0], TransitGatewayId]' \
  --output table
The attach_to_tgw_name should match the Name tag of your Transit Gateway.
To skip TGW attachment (distributed architecture):
enable_tgw_attachment = falseEast-West Inspection (requires TGW attachment):
enable_east_west_inspection = true # Routes spoke-to-spoke traffic through FortiGateStep 6: Configure Architecture Options
Firewall Mode
firewall_policy_mode = "2-arm" # or "1-arm"Recommendations:
- 2-arm: Recommended for most deployments (better throughput)
- 1-arm: Use when simplified routing is required
See Firewall Architecture for detailed comparison.
Internet Egress Mode
access_internet_mode = "nat_gw" # or "eip"Recommendations:
- nat_gw: Production deployments (higher availability)
- eip: Lower cost, simpler architecture
See Internet Egress for detailed comparison.
Step 7: Configure Management Options
Dedicated Management ENI
enable_dedicated_management_eni = trueSeparates management traffic from data plane. Recommended for production.
Dedicated Management VPC
enable_dedicated_management_vpc = true

# If using existing_vpc_resources with default tags:
dedicated_management_vpc_tag = "acme-test-management-vpc"
dedicated_management_public_az1_subnet_tag = "acme-test-management-public-az1-subnet"
dedicated_management_public_az2_subnet_tag = "acme-test-management-public-az2-subnet"

# If using existing management VPC with custom tags:
dedicated_management_vpc_tag = "my-custom-mgmt-vpc-tag"
dedicated_management_public_az1_subnet_tag = "my-custom-mgmt-az1-tag"
dedicated_management_public_az2_subnet_tag = "my-custom-mgmt-az2-tag"
See Management Isolation for options and recommendations.
Info
Automatic Implication
When enable_dedicated_management_vpc = true, the template automatically sets enable_dedicated_management_eni = true. You don’t need to configure both explicitly.
Step 8: Configure Licensing
The template supports three licensing models. Choose one or combine them for hybrid licensing.
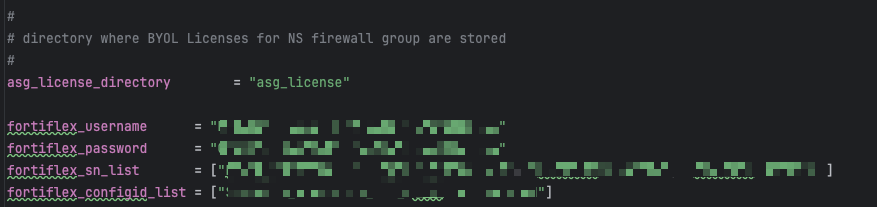
Option 1: BYOL (Bring Your Own License)
asg_license_directory = "asg_license" # Directory containing .lic filesPrerequisites:
Create the license directory:
mkdir asg_licensePlace license files in the directory:
terraform/autoscale_template/
├── terraform.tfvars
├── asg_license/
│   ├── FGVM01-001.lic
│   ├── FGVM01-002.lic
│   ├── FGVM01-003.lic
│   └── FGVM01-004.lic
Ensure you have at least as many licenses as
asg_byol_asg_max_size
Warning
License Pool Exhaustion
If you run out of BYOL licenses:
- New BYOL instances launch but remain unlicensed
- Unlicensed instances operate at 1 Mbps throughput
- FortiGuard services will not activate
- If on-demand ASG is configured, scaling continues using PAYG instances
Recommended: Provision 20% more licenses than asg_byol_asg_max_size
Option 2: FortiFlex (API-Driven)
fortiflex_username      = "xxxxxxxx-xxxx-xxxx-xxxx-xxxxxxxxxxxx"  # API username (UUID)
fortiflex_password      = "xxxxxxxxxxxxxxxxxxxxx"  # API password
fortiflex_sn_list       = ["FGVMELTMxxxxxxxx"]  # Optional: specific program serial numbers
fortiflex_configid_list = ["My_4CPU_Config"] # Configuration names (must match CPU count)Prerequisites:
- Register FortiFlex program via FortiCare
- Purchase point packs
- Create configurations matching your instance types
- Generate API credentials via IAM portal
CPU count matching:
fgt_instance_type = "c6i.xlarge"  # 4 vCPUs
fortiflex_configid_list = ["My_4CPU_Config"]  # MUST have 4 CPUs configured
Warning
Security Best Practice
Never commit FortiFlex credentials to version control. Use:
- Terraform Cloud sensitive variables
- AWS Secrets Manager
- Environment variables:
TF_VAR_fortiflex_usernameandTF_VAR_fortiflex_password - HashiCorp Vault
Example using environment variables:
export TF_VAR_fortiflex_username="xxxxxxxx-xxxx-xxxx-xxxx-xxxxxxxxxxxx"
export TF_VAR_fortiflex_password="xxxxxxxxxxxxxxxxxxxxx"
terraform apply
See FortiFlex Setup Guide for complete configuration details.
Option 3: PAYG (AWS Marketplace)
# No explicit configuration needed
# Just set on-demand ASG capacities

asg_byol_asg_min_size = 0
asg_byol_asg_max_size = 0

asg_ondemand_asg_min_size = 2
asg_ondemand_asg_max_size = 8Prerequisites:
- Accept FortiGate-VM terms in AWS Marketplace
- No license files or API credentials required
- Licensing cost included in hourly EC2 charge
Hybrid Licensing (Recommended for Production)
Combine licensing models for cost optimization:
# BYOL for baseline capacity (lowest cost)
asg_license_directory = "asg_license"
asg_byol_asg_min_size = 2
asg_byol_asg_max_size = 4

# PAYG for burst capacity (highest flexibility)
asg_ondemand_asg_min_size = 0
asg_ondemand_asg_max_size = 4
See Licensing Options for detailed comparison and cost analysis.
Step 9: Configure Autoscale Group Capacity
# BYOL ASG
asg_byol_asg_min_size     = 2
asg_byol_asg_max_size     = 4
asg_byol_asg_desired_size = 2

# On-Demand ASG
asg_ondemand_asg_min_size     = 0
asg_ondemand_asg_max_size     = 4
asg_ondemand_asg_desired_size = 0

# Primary scale-in protection
primary_scalein_protection = true
Capacity planning guidance:
| Deployment Type | Recommended Configuration |
|---|---|
| Development/Test | min=1, max=2, desired=1 |
| Small Production | min=2, max=4, desired=2 |
| Medium Production | min=2, max=8, desired=4 |
| Large Production | min=4, max=16, desired=6 |
Scaling behavior:
- BYOL instances scale first (up to
asg_byol_asg_max_size) - On-demand instances scale when BYOL capacity exhausted
- CloudWatch alarms trigger scale-out at 80% CPU (default)
- Scale-in occurs at 30% CPU (default)
See Autoscale Group Capacity for detailed planning.
Step 10: Configure FortiGate Specifications
fgt_instance_type = "c7gn.xlarge"
fortios_version   = "7.4.5"
fortigate_gui_port = 443
Instance type recommendations:
| Use Case | Recommended Type | vCPUs | Network Performance |
|---|---|---|---|
| Testing/Lab | t3.xlarge | 4 | Up to 5 Gbps |
| Small Production | c6i.xlarge | 4 | Up to 12.5 Gbps |
| Medium Production | c6i.2xlarge | 8 | Up to 12.5 Gbps |
| High Performance | c7gn.xlarge | 4 | Up to 25 Gbps |
| Very High Performance | c7gn.4xlarge | 16 | 50 Gbps |
FortiOS version selection:
- Use latest stable release for new deployments
- Test new versions in dev/test before production
- Check FortiOS Release Notes for compatibility
Step 11: Configure FortiManager Integration (Optional)
enable_fortimanager_integration = true
fortimanager_ip                 = "10.3.0.10"  # FortiManager IP
fortimanager_sn                 = "FMGVM0000000001"  # FortiManager serial number
fortimanager_vrf_select         = 1  # VRF for management routing
Warning
FortiManager 7.6.3+ Configuration Required
If using FortiManager 7.6.3 or later, you must enable VM device recognition before deploying:
On FortiManager CLI:
config system global
    set fgfm-allow-vm enable
end
Verify the setting:
show system global | grep fgfm-allow-vmWithout this configuration, FortiGate-VM instances will fail to register with FortiManager.
See FortiManager Integration for complete details.
FortiManager integration behavior:
- Lambda generates
config system central-managementon primary FortiGate only - Primary FortiGate registers with FortiManager as unauthorized device
- VDOM exception prevents sync to secondary instances
- Configuration syncs from FortiManager → Primary → Secondaries
See FortiManager Integration Configuration for advanced options including UMS mode.
Step 12: Configure Network CIDRs
vpc_cidr_inspection = "10.0.0.0/16"
vpc_cidr_management = "10.3.0.0/16"  # Must match existing_vpc_resources if used
vpc_cidr_spoke      = "192.168.0.0/16"  # Supernet for all spoke VPCs
vpc_cidr_east       = "192.168.0.0/24"
vpc_cidr_west       = "192.168.1.0/24"

subnet_bits = 8  # /16 + 8 = /24 subnets
Warning
CIDR Planning Considerations
Ensure:
- ✅ No overlap with existing networks
- ✅ Management VPC CIDR matches
existing_vpc_resourcesif used - ✅ Spoke supernet encompasses all individual spoke VPC CIDRs
- ✅ Sufficient address space for growth
- ✅ Alignment with corporate IP addressing standards
Common mistakes:
- ❌ Overlapping inspection VPC with management VPC
- ❌ Spoke CIDR too small for number of VPCs
- ❌ Mismatched CIDRs between templates
Step 13: Configure GWLB Endpoint Names
endpoint_name_az1 = "asg-gwlbe_az1"
endpoint_name_az2 = "asg-gwlbe_az2"
These names are used for route table lookups when configuring TGW routing or spoke VPC routing.
Step 14: Configure Additional Options
FortiGate System Autoscale
enable_fgt_system_autoscale = trueEnables FortiGate-native HA synchronization between instances. Recommended to leave enabled.
CloudWatch Alarms
# Scale-out threshold (default: 80% CPU)
scale_out_threshold = 80

# Scale-in threshold (default: 30% CPU)
scale_in_threshold = 30
Adjust based on your traffic patterns and capacity requirements.
Step 15: Review Complete Configuration
Review your complete terraform.tfvars file before deployment. Here’s a complete example:
Click to expand complete example terraform.tfvars
#-----------------------------------------------------------------------
# Core Configuration
#-----------------------------------------------------------------------
aws_region          = "us-west-2"
availability_zone_1 = "a"
availability_zone_2 = "c"
cp                  = "acme"
env                 = "prod"

#-----------------------------------------------------------------------
# Security
#-----------------------------------------------------------------------
keypair                = "acme-keypair"
my_ip                  = "203.0.113.10/32"
fortigate_asg_password = "SecurePassword123!"

#-----------------------------------------------------------------------
# Transit Gateway
#-----------------------------------------------------------------------
enable_tgw_attachment      = true
attach_to_tgw_name         = "acme-prod-tgw"
enable_east_west_inspection = true

#-----------------------------------------------------------------------
# Architecture Options
#-----------------------------------------------------------------------
firewall_policy_mode = "2-arm"
access_internet_mode = "nat_gw"

#-----------------------------------------------------------------------
# Management Options
#-----------------------------------------------------------------------
enable_dedicated_management_eni = true
enable_dedicated_management_vpc = true
dedicated_management_vpc_tag = "acme-prod-management-vpc"
dedicated_management_public_az1_subnet_tag = "acme-prod-management-public-az1-subnet"
dedicated_management_public_az2_subnet_tag = "acme-prod-management-public-az2-subnet"

#-----------------------------------------------------------------------
# FortiManager Integration
#-----------------------------------------------------------------------
enable_fortimanager_integration = true
fortimanager_ip                 = "10.3.0.10"
fortimanager_sn                 = "FMGVM0000000001"
fortimanager_vrf_select         = 1

#-----------------------------------------------------------------------
# Licensing - Hybrid BYOL + PAYG
#-----------------------------------------------------------------------
asg_license_directory = "asg_license"

#-----------------------------------------------------------------------
# Autoscale Group Capacity
#-----------------------------------------------------------------------
# BYOL baseline
asg_byol_asg_min_size     = 2
asg_byol_asg_max_size     = 4
asg_byol_asg_desired_size = 2

# PAYG burst
asg_ondemand_asg_min_size     = 0
asg_ondemand_asg_max_size     = 4
asg_ondemand_asg_desired_size = 0

# Scale-in protection
primary_scalein_protection = true

#-----------------------------------------------------------------------
# FortiGate Specifications
#-----------------------------------------------------------------------
fgt_instance_type       = "c6i.xlarge"
fortios_version         = "7.4.5"
fortigate_gui_port      = 443
enable_fgt_system_autoscale = true

#-----------------------------------------------------------------------
# Network CIDRs
#-----------------------------------------------------------------------
vpc_cidr_inspection = "10.0.0.0/16"
vpc_cidr_management = "10.3.0.0/16"
vpc_cidr_spoke      = "192.168.0.0/16"
vpc_cidr_east       = "192.168.0.0/24"
vpc_cidr_west       = "192.168.1.0/24"
subnet_bits         = 8

#-----------------------------------------------------------------------
# GWLB Endpoints
#-----------------------------------------------------------------------
endpoint_name_az1 = "acme-prod-gwlbe-az1"
endpoint_name_az2 = "acme-prod-gwlbe-az2"
Step 16: Deploy the Template
Initialize Terraform:
terraform initReview the execution plan:
terraform planExpected output will show ~40-60 resources to be created.
Deploy the infrastructure:
terraform applyType yes when prompted.
Expected deployment time: 15-20 minutes
Deployment progress indicators:
- VPC and networking: ~2 minutes
- Security groups and IAM: ~1 minute
- Lambda functions and DynamoDB: ~2 minutes
- GWLB and endpoints: ~5 minutes
- FortiGate instances launching: ~5-10 minutes
Step 17: Monitor Deployment
Watch CloudWatch logs for Lambda execution:
# Get Lambda function name from Terraform
terraform output lambda_function_name

# Stream logs
aws logs tail /aws/lambda/<function-name> --follow
Watch Auto Scaling Group activity:
# Get ASG name
aws autoscaling describe-auto-scaling-groups \
  --query 'AutoScalingGroups[?contains(AutoScalingGroupName, `acme-prod`)].AutoScalingGroupName'

# Watch instance launches
aws autoscaling describe-scaling-activities \
  --auto-scaling-group-name <asg-name> \
  --max-records 10
Step 18: Verify Deployment
Check FortiGate Instances
# List running FortiGate instances
aws ec2 describe-instances \
  --filters "Name=tag:cp,Values=acme" \
           "Name=tag:env,Values=prod" \
           "Name=instance-state-name,Values=running" \
  --query 'Reservations[*].Instances[*].[InstanceId,PublicIpAddress,Tags[?Key==`Name`].Value|[0]]' \
  --output table
Access FortiGate GUI
# Get FortiGate public IP
terraform output fortigate_instance_ips

# Access GUI
open https://<fortigate-public-ip>:443
Login credentials:
- Username:
admin - Password: Value from
fortigate_asg_passwordvariable
Verify License Assignment
For BYOL:
# SSH to FortiGate
ssh -i ~/.ssh/keypair.pem admin@<fortigate-ip>

# Check license status
get system status

# Look for:
# Serial-Number: FGVMxxxxxxxxxx (not FGVMEVXXXXXXXXX)
# License Status: Valid
For FortiFlex:
- Check Lambda CloudWatch logs for successful API calls
- Verify entitlements created in FortiFlex portal
- Check FortiGate shows licensed status
For PAYG:
- Instances automatically licensed via AWS
- Verify license status in FortiGate GUI
Verify Transit Gateway Attachment
aws ec2 describe-transit-gateway-attachments \
  --filters "Name=state,Values=available" \
           "Name=resource-type,Values=vpc" \
  --query 'TransitGatewayAttachments[?contains(Tags[?Key==`Name`].Value|[0], `inspection`)]'
Verify FortiManager Registration
If FortiManager integration enabled:
- Access FortiManager GUI:
https://<fortimanager-ip> - Navigate to Device Manager > Device & Groups
- Look for unauthorized device with serial number matching primary FortiGate
- Right-click device and select Authorize
Test Traffic Flow
From jump box (if using existing_vpc_resources):
# SSH to jump box
ssh -i ~/.ssh/keypair.pem ec2-user@<jump-box-ip>

# Test internet connectivity (should go through FortiGate)
curl https://www.google.com

# Test spoke VPC connectivity
curl http://<linux-instance-ip>
On FortiGate:
# SSH to FortiGate
ssh -i ~/.ssh/keypair.pem admin@<fortigate-ip>

# Monitor real-time traffic
diagnose sniffer packet any 'host 192.168.0.50' 4

# Check firewall policies
get firewall policy

# View active sessions
diagnose sys session list
Post-Deployment Configuration
Configure TGW Route Tables
If you enabled enable_tgw_attachment = true, configure Transit Gateway route tables to route traffic through inspection VPC:
For Centralized Egress
Spoke VPC route table (route internet traffic to inspection VPC):
# Get inspection VPC TGW attachment ID
INSPECT_ATTACH_ID=$(aws ec2 describe-transit-gateway-attachments \
  --filters "Name=resource-type,Values=vpc" \
           "Name=tag:Name,Values=*inspection*" \
  --query 'TransitGatewayAttachments[0].TransitGatewayAttachmentId' \
  --output text)

# Add default route to spoke route table
aws ec2 create-transit-gateway-route \
  --destination-cidr-block 0.0.0.0/0 \
  --transit-gateway-route-table-id <spoke-rt-id> \
  --transit-gateway-attachment-id $INSPECT_ATTACH_ID
Inspection VPC route table (route spoke traffic to internet):
# This is typically configured automatically by the template
# Verify it exists:
aws ec2 describe-transit-gateway-route-tables \
  --transit-gateway-route-table-ids <inspection-rt-id>
For East-West Inspection
If you enabled enable_east_west_inspection = true:
Spoke-to-spoke traffic routes through inspection VPC automatically.
Verify routing:
# From east spoke instance
ssh ec2-user@<east-linux-ip>
ping <west-linux-ip>  # Should succeed and be inspected by FortiGate

# Check FortiGate logs
diagnose debug flow trace start 10
diagnose debug enable
# Generate traffic and watch logs
Configure FortiGate Policies
Access FortiGate GUI and configure firewall policies:
Basic Internet Egress Policy
Policy & Objects > Firewall Policy > Create New

Name: Internet-Egress
Incoming Interface: port1 (or TGW interface)
Outgoing Interface: port2 (internet interface)
Source: all
Destination: all
Service: ALL
Action: ACCEPT
NAT: Enable
Logging: All Sessions
East-West Inspection Policy
Policy & Objects > Firewall Policy > Create New

Name: East-West-Inspection
Incoming Interface: port1 (TGW interface)
Outgoing Interface: port1 (TGW interface)
Source: 192.168.0.0/16
Destination: 192.168.0.0/16
Service: ALL
Action: ACCEPT
NAT: Disable
Logging: All Sessions
Security Profiles: Enable IPS, Application Control, etc.
Configure FortiManager (If Enabled)
Authorize FortiGate device:
- Device Manager > Device & Groups
- Right-click unauthorized device > Authorize
- Assign to ADOM
Create policy package:
- Policy & Objects > Policy Package
- Create new package
- Add firewall policies
Install policy:
- Select device
- Policy & Objects > Install
- Select package
- Click Install
Verify sync to secondary instances:
- Check secondary FortiGate instances
- Policies should appear automatically via HA sync
Monitoring and Operations
CloudWatch Metrics
Key metrics to monitor:
# CPU utilization (triggers autoscaling)
aws cloudwatch get-metric-statistics \
  --namespace AWS/EC2 \
  --metric-name CPUUtilization \
  --dimensions Name=AutoScalingGroupName,Value=<asg-name> \
  --start-time 2024-01-01T00:00:00Z \
  --end-time 2024-01-02T00:00:00Z \
  --period 3600 \
  --statistics Average

# Network throughput
aws cloudwatch get-metric-statistics \
  --namespace AWS/EC2 \
  --metric-name NetworkIn \
  --dimensions Name=AutoScalingGroupName,Value=<asg-name> \
  --start-time 2024-01-01T00:00:00Z \
  --end-time 2024-01-02T00:00:00Z \
  --period 3600 \
  --statistics Sum
Lambda Function Logs
Monitor license assignment and lifecycle events:
# Stream Lambda logs
aws logs tail /aws/lambda/<function-name> --follow

# Search for errors
aws logs filter-log-events \
  --log-group-name /aws/lambda/<function-name> \
  --filter-pattern "ERROR"

# Search for license assignments
aws logs filter-log-events \
  --log-group-name /aws/lambda/<function-name> \
  --filter-pattern "license"
Auto Scaling Group Activity
# View scaling activities
aws autoscaling describe-scaling-activities \
  --auto-scaling-group-name <asg-name> \
  --max-records 20

# View current capacity
aws autoscaling describe-auto-scaling-groups \
  --auto-scaling-group-names <asg-name> \
  --query 'AutoScalingGroups[0].[MinSize,DesiredCapacity,MaxSize]'
Troubleshooting
Issue: Instances Launch But Don’t Get Licensed
Symptoms:
- Instances running but showing unlicensed
- Throughput limited to 1 Mbps
- FortiGuard services not working
Causes and Solutions:
For BYOL:
Check license files exist in directory:
ls -la asg_license/Check S3 bucket has licenses uploaded:
aws s3 ls s3://<bucket-name>/licenses/Check Lambda CloudWatch logs for errors:
aws logs tail /aws/lambda/<function-name> --follow | grep -i errorVerify DynamoDB table has available licenses:
aws dynamodb scan --table-name <table-name>
For FortiFlex:
- Check Lambda CloudWatch logs for API errors
- Verify FortiFlex credentials are correct
- Check point balance in FortiFlex portal
- Verify configuration ID matches instance CPU count
- Check entitlements created in FortiFlex portal
For PAYG:
- Verify AWS Marketplace subscription is active
- Check instance profile has correct permissions
- Verify internet connectivity from FortiGate
Issue: Cannot Access FortiGate GUI
Symptoms:
- Timeout when accessing FortiGate IP
- Connection refused
Solutions:
Verify instance is running:
aws ec2 describe-instances --instance-ids <instance-id>Check security groups allow your IP:
aws ec2 describe-security-groups --group-ids <sg-id>Verify you’re using correct port (default 443):
https://<fortigate-ip>:443Try alternate access methods:
# SSH to check if instance is responsive
ssh -i ~/.ssh/keypair.pem admin@<fortigate-ip>

# Check system status
get system status
If using dedicated management VPC:
- Ensure you’re accessing via correct IP (management interface)
- Check VPC peering or TGW attachment is working
- Verify route tables allow return traffic
Issue: Traffic Not Flowing Through FortiGate
Symptoms:
- No traffic visible in FortiGate logs
- Connectivity tests bypass FortiGate
- Sessions not appearing on FortiGate
Solutions:
Verify TGW routing (if using TGW):
# Check TGW route tables
aws ec2 describe-transit-gateway-route-tables \
  --transit-gateway-id <tgw-id>

# Verify routes point to inspection VPC attachment
aws ec2 search-transit-gateway-routes \
  --transit-gateway-route-table-id <spoke-rt-id> \
  --filters "Name=state,Values=active"
Check GWLB health checks:
aws elbv2 describe-target-health \
  --target-group-arn <gwlb-target-group-arn>
Verify FortiGate firewall policies:
# SSH to FortiGate
ssh admin@<fortigate-ip>

# Check policies
get firewall policy

# Enable debug
diagnose debug flow trace start 10
diagnose debug enable
# Generate traffic and watch logs
Check spoke VPC route tables (for distributed architecture):
# Verify routes point to GWLB endpoints
aws ec2 describe-route-tables \
  --filters "Name=vpc-id,Values=<spoke-vpc-id>"
Issue: Primary Election Issues
Symptoms:
- No primary instance elected
- Multiple instances think they’re primary
- HA sync not working
Solutions:
Check Lambda logs for election logic:
aws logs tail /aws/lambda/<function-name> --follow | grep -i primaryVerify
enable_fgt_system_autoscale = true:# On FortiGate get system auto-scaleCheck for network connectivity between instances:
# From one FortiGate, ping another
execute ping <other-fortigate-private-ip>
Manually verify auto-scale configuration:
# SSH to FortiGate
ssh admin@<fortigate-ip>

# Check auto-scale config
show system auto-scale

# Should show:
# set status enable
# set role primary (or secondary)
# set sync-interface "port1"
# set psksecret "..."
Issue: FortiManager Integration Not Working
Symptoms:
- FortiGate doesn’t appear in FortiManager device list
- Device shows as unauthorized but can’t authorize
- Connection errors in FortiManager
Solutions:
Verify FortiManager 7.6.3+ VM recognition enabled:
# On FortiManager CLI
show system global | grep fgfm-allow-vm
# Should show: set fgfm-allow-vm enable
Check network connectivity:
# From FortiGate
execute ping <fortimanager-ip>

# Check FortiManager reachability
diagnose debug application fgfmd -1
diagnose debug enable
Verify central-management config:
# On FortiGate
show system central-management

# Should show:
# set type fortimanager
# set fmg <fortimanager-ip>
# set serial-number <fmgr-sn>
Check FortiManager logs:
# On FortiManager CLI
diagnose debug application fgfmd -1
diagnose debug enable
# Watch for connection attempts from FortiGate
Verify only primary instance has central-management config:
# On primary: Should have config
show system central-management

# On secondary: Should NOT have config (or be blocked by vdom-exception)
show system vdom-exception
Outputs Reference
Important outputs from the template:
terraform output| Output | Description | Use Case |
|---|---|---|
inspection_vpc_id | ID of inspection VPC | VPC peering, routing configuration |
inspection_vpc_cidr | CIDR of inspection VPC | Route table configuration |
gwlb_arn | Gateway Load Balancer ARN | GWLB endpoint creation |
gwlb_endpoint_az1_id | GWLB endpoint ID in AZ1 | Spoke VPC route tables |
gwlb_endpoint_az2_id | GWLB endpoint ID in AZ2 | Spoke VPC route tables |
fortigate_autoscale_group_name | BYOL ASG name | CloudWatch, monitoring |
fortigate_ondemand_autoscale_group_name | PAYG ASG name | CloudWatch, monitoring |
lambda_function_name | Lifecycle Lambda function name | CloudWatch logs, debugging |
dynamodb_table_name | License tracking table name | License management |
s3_bucket_name | License storage bucket name | License management |
tgw_attachment_id | TGW attachment ID | TGW routing configuration |
Best Practices
Pre-Deployment
- Plan capacity thoroughly: Use Autoscale Group Capacity guidance
- Test in dev/test first: Validate configuration before production
- Document customizations: Maintain runbook of configuration decisions
- Review security groups: Ensure least-privilege access
- Coordinate with network team: Verify CIDR allocations don’t conflict
During Deployment
- Monitor Lambda logs: Watch for errors during instance launch
- Verify license assignments: Check first instance gets licensed before scaling
- Test connectivity incrementally: Validate routing at each step
- Document public IPs: Save instance IPs for troubleshooting access
Post-Deployment
- Configure firewall policies immediately: Don’t leave FortiGates in pass-through mode
- Enable security profiles: IPS, Application Control, Web Filtering
- Set up monitoring: CloudWatch alarms, FortiGate logging
- Test failover scenarios: Verify autoscaling behavior
- Document recovery procedures: Maintain runbook for common issues
Ongoing Operations
- Monitor autoscale events: Review CloudWatch metrics weekly
- Update FortiOS regularly: Test updates in dev first
- Review firewall logs: Look for blocked traffic patterns
- Optimize scaling thresholds: Adjust based on observed traffic
- Plan capacity additions: Add licenses/entitlements before needed
Cleanup
Destroying the Deployment
To destroy the autoscale_template infrastructure:
cd terraform/autoscale_template
terraform destroy
Type yes when prompted.
Warning
Destroy Order is Critical
If you also deployed existing_vpc_resources, destroy in this order:
- First: Destroy
autoscale_template(this template) - Second: Destroy
existing_vpc_resources
Why? The inspection VPC has a Transit Gateway attachment to the TGW created by existing_vpc_resources. Destroying the TGW first will cause the attachment deletion to fail.
# Correct order:
cd terraform/autoscale_template
terraform destroy

cd ../existing_vpc_resources
terraform destroy
Selective Cleanup
To destroy only specific components:
# Destroy only BYOL ASG
terraform destroy -target=module.fortigate_byol_asg

# Destroy only on-demand ASG
terraform destroy -target=module.fortigate_ondemand_asg

# Destroy only Lambda and DynamoDB
terraform destroy -target=module.lambda_functions
terraform destroy -target=module.dynamodb_table
Verify Complete Cleanup
After destroying, verify no resources remain:
# Check VPCs
aws ec2 describe-vpcs --filters "Name=tag:cp,Values=acme" "Name=tag:env,Values=prod"

# Check running instances
aws ec2 describe-instances \
  --filters "Name=instance-state-name,Values=running" \
           "Name=tag:cp,Values=acme"

# Check GWLB
aws elbv2 describe-load-balancers \
  --query 'LoadBalancers[?contains(LoadBalancerName, `acme`)]'

# Check Lambda functions
aws lambda list-functions --query 'Functions[?contains(FunctionName, `acme`)]'
Summary
The autoscale_template deploys FortiGate autoscale into an existing Inspection VPC discovered via Fortinet-Role tags:
✅ Tag-based resource discovery: Finds Inspection VPC resources via Fortinet-Role tags
✅ Complete autoscale infrastructure: FortiGate ASG, GWLB, Lambda, IAM
✅ Flexible deployment options: Centralized, distributed, or hybrid architectures
✅ Multiple licensing models: BYOL, FortiFlex, PAYG, or hybrid
✅ Management options: Dedicated ENI, dedicated VPC, FortiManager integration
✅ Production-ready: High availability, autoscaling, lifecycle management
Key Requirements:
- Run
existing_vpc_resourcesfirst to create Inspection VPC with Fortinet-Role tags - Ensure
cpandenvvalues match between both templates for tag discovery
Next Steps:
- Review Solution Components for configuration options
- See Licensing Options for cost optimization
- Check FortiManager Integration for centralized management
Document Version: 1.0
Last Updated: November 2025
Terraform Module Version: Compatible with terraform-aws-cloud-modules v1.0+