Task 2
Task 2: FortiManager Integration
- In the AWS CloudFormation console, make sure you are in the us-west-1 (N. California) region, then toggle the view nested button to off > then select the stack name > and on the details pane select the outputs tab. You should see the output for FortiManagerLoginURL. Login to the FortiManager with the username
adminand the passwordFORTInet123!.
- In the AWS CloudFormation console, make sure you are in the us-west-1 (N. California) region, then toggle the view nested button to off > then select the stack name > and on the details pane select the outputs tab. You should see the output for FortiManagerLoginURL. Login to the FortiManager with the username

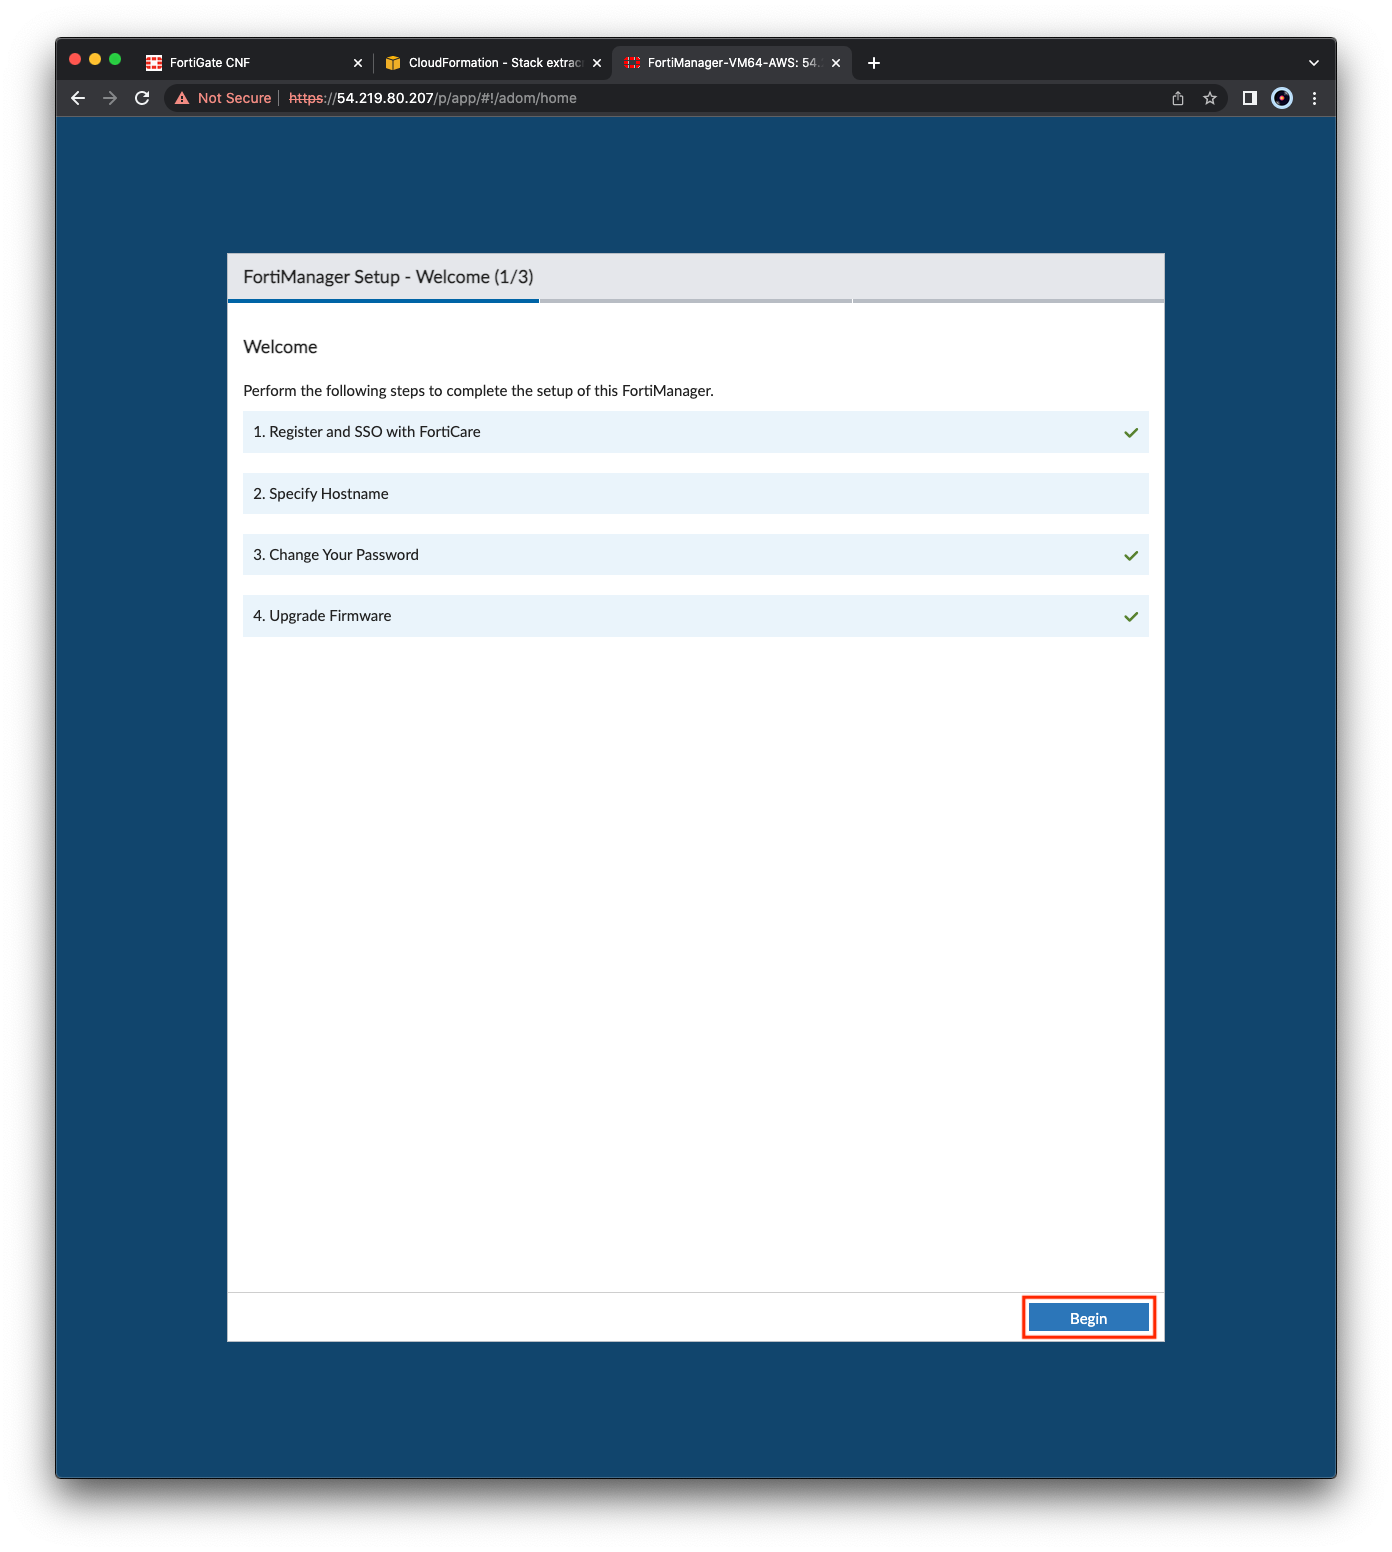
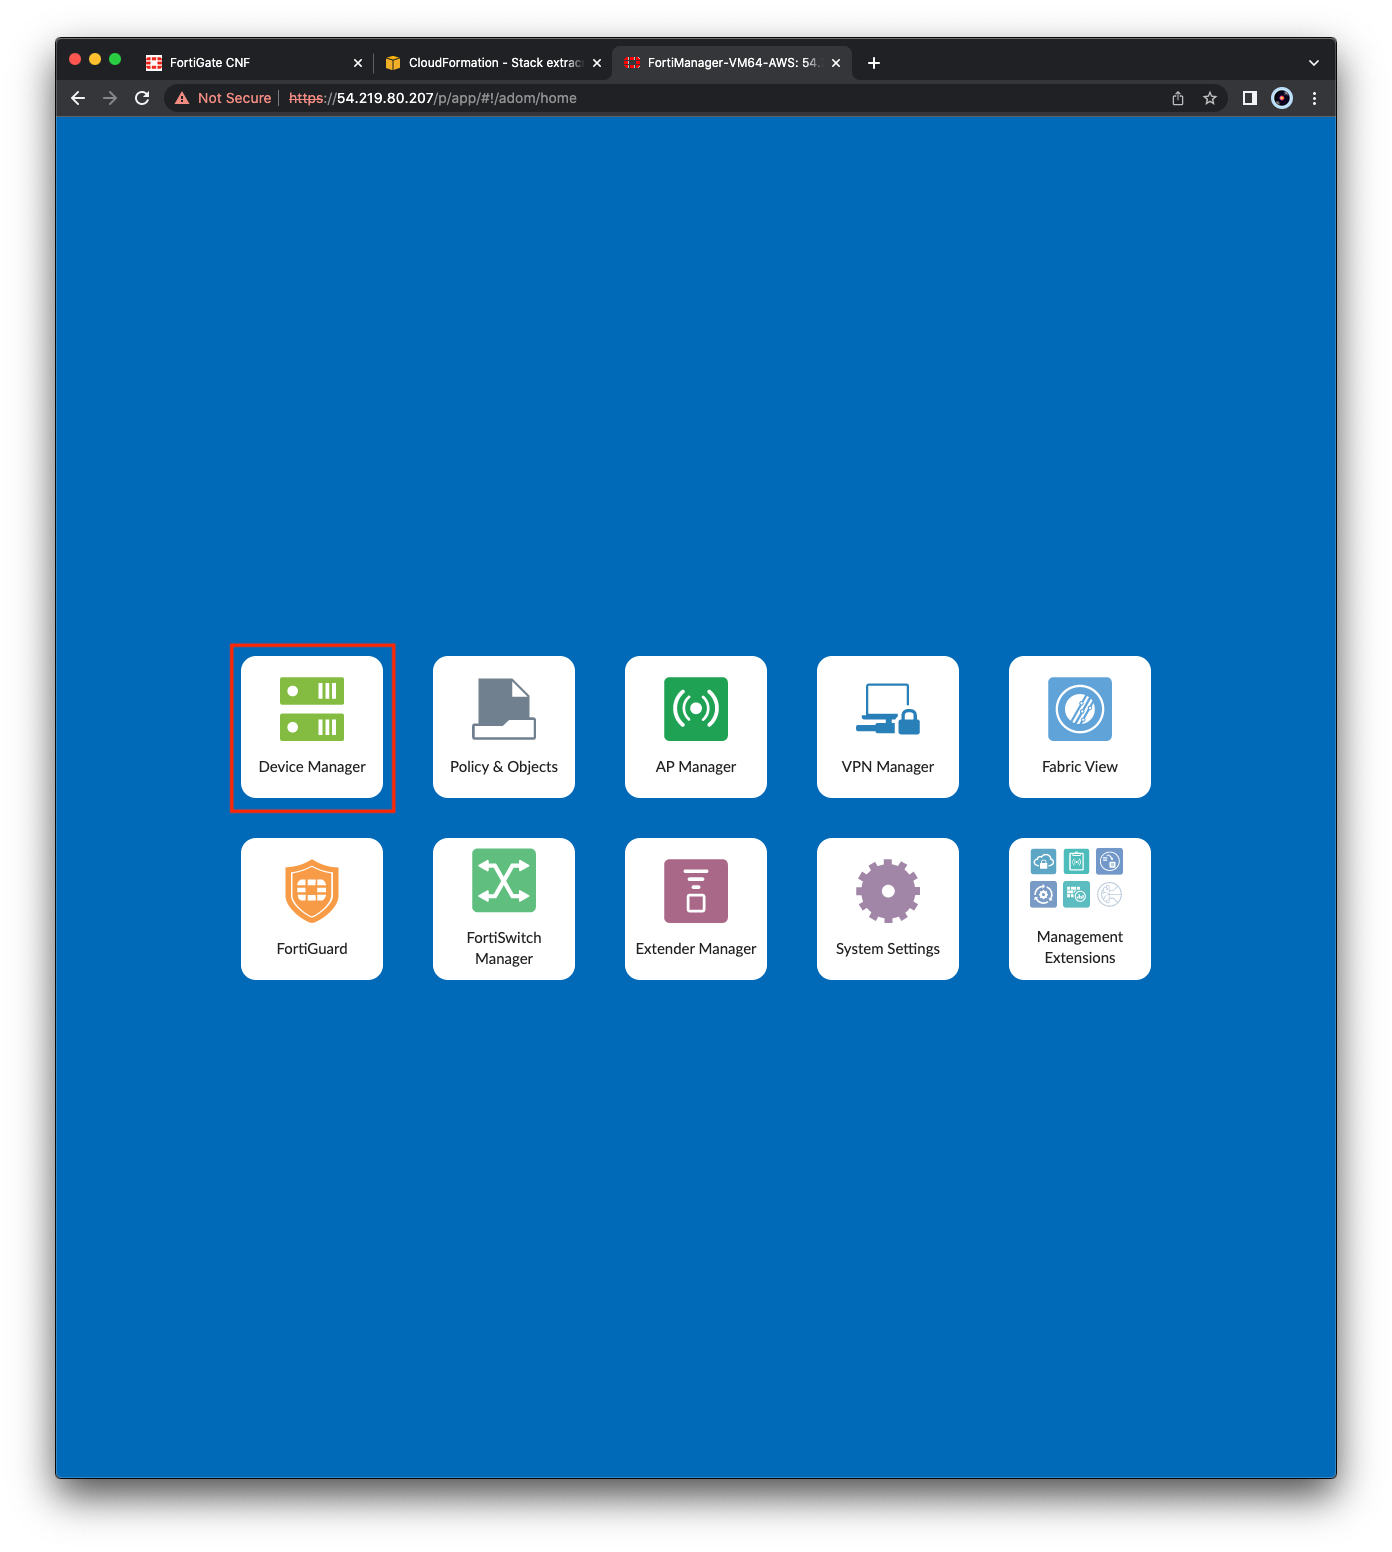
- In the FortiManager GUI for the first login, you will be prompted to complete the setup wizard. Click Begin, Next, and Finish. Then on the home page, select Device Manager.
Info
Note: By default, FortiManager will be deployed with a self-signed certificate. You will see browser warnings for this and need to accept this to login successfully.
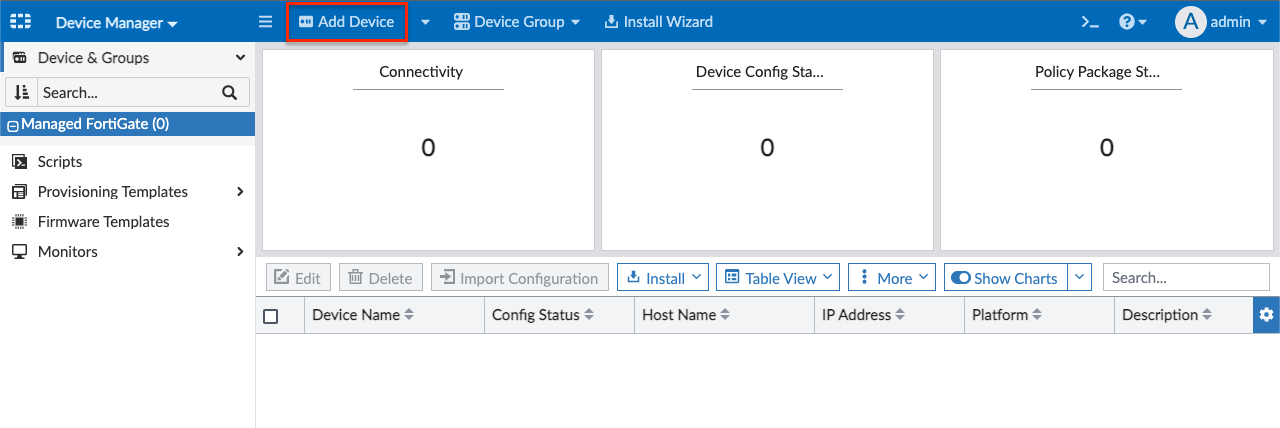
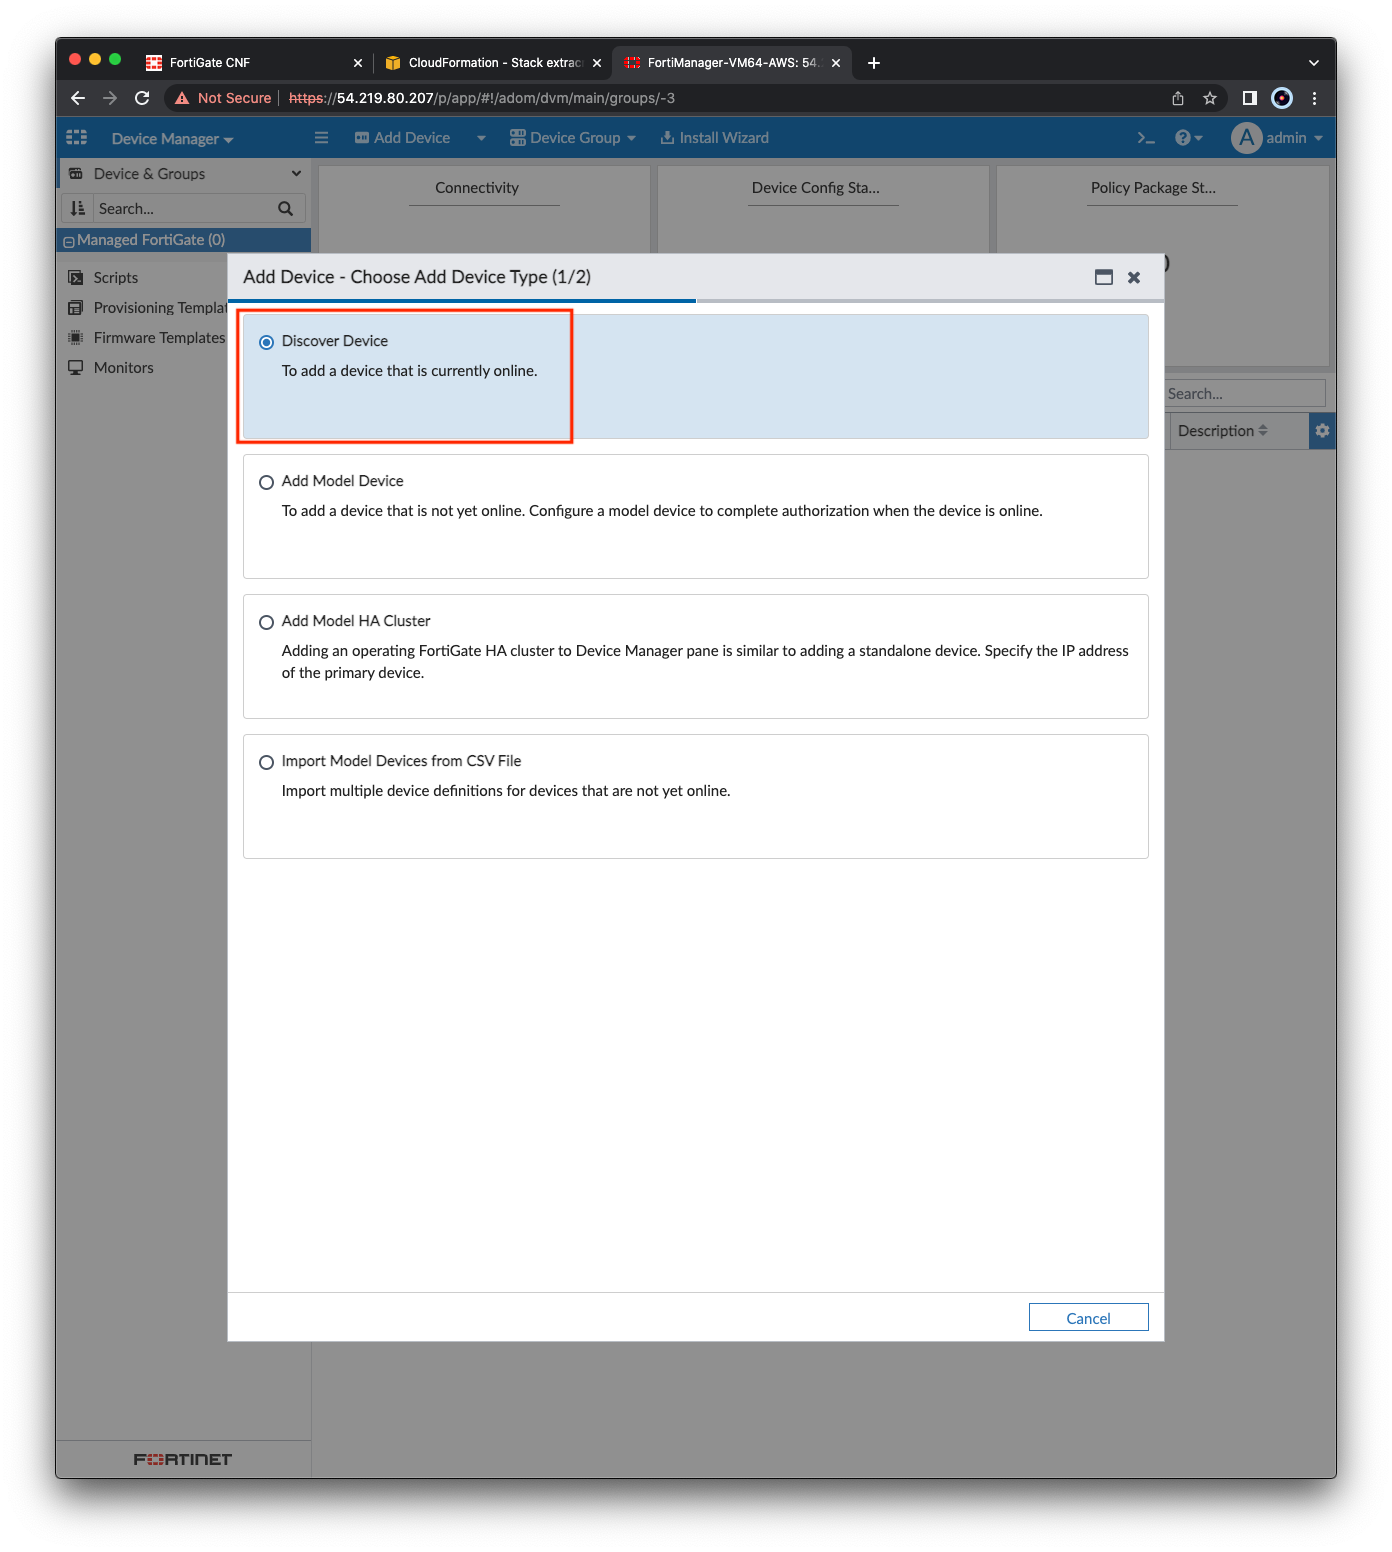
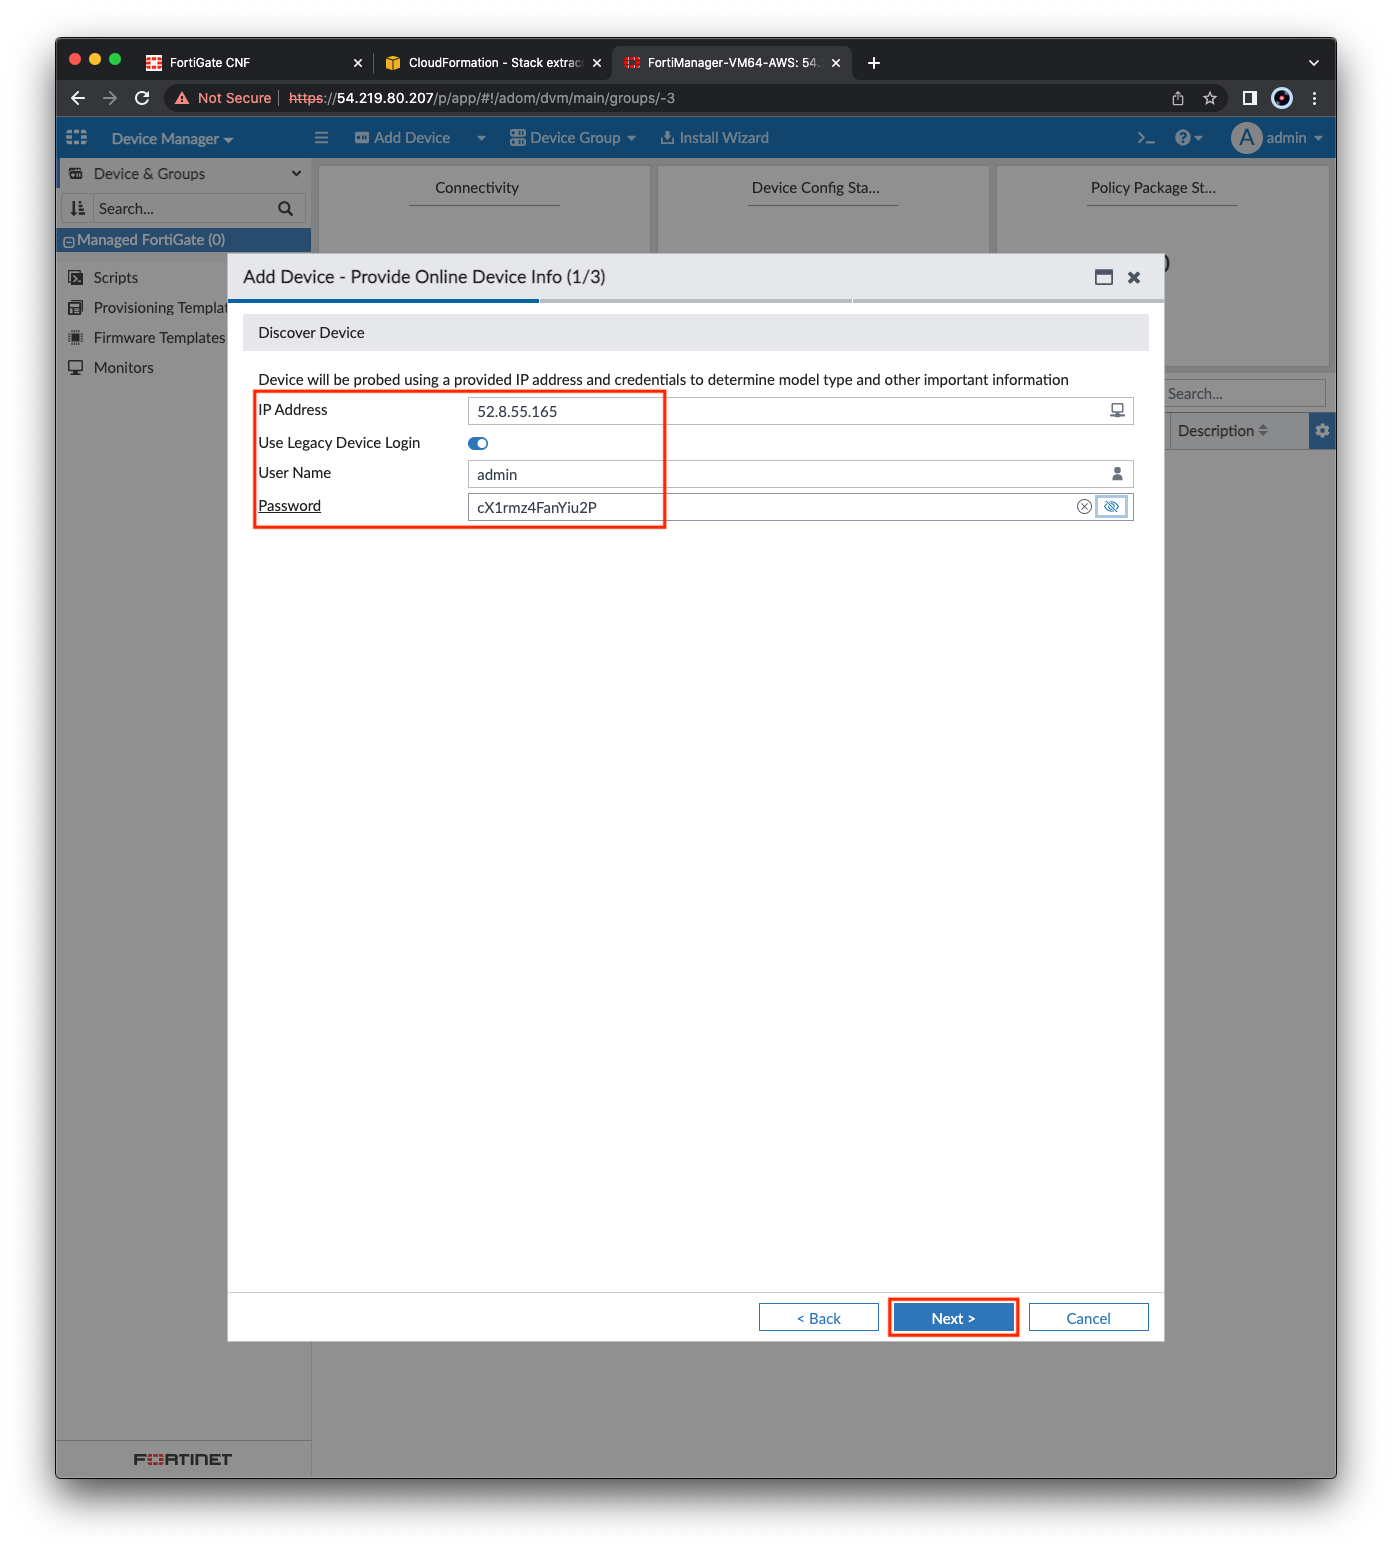
- At the top left, click Add Device and select Discover Device.
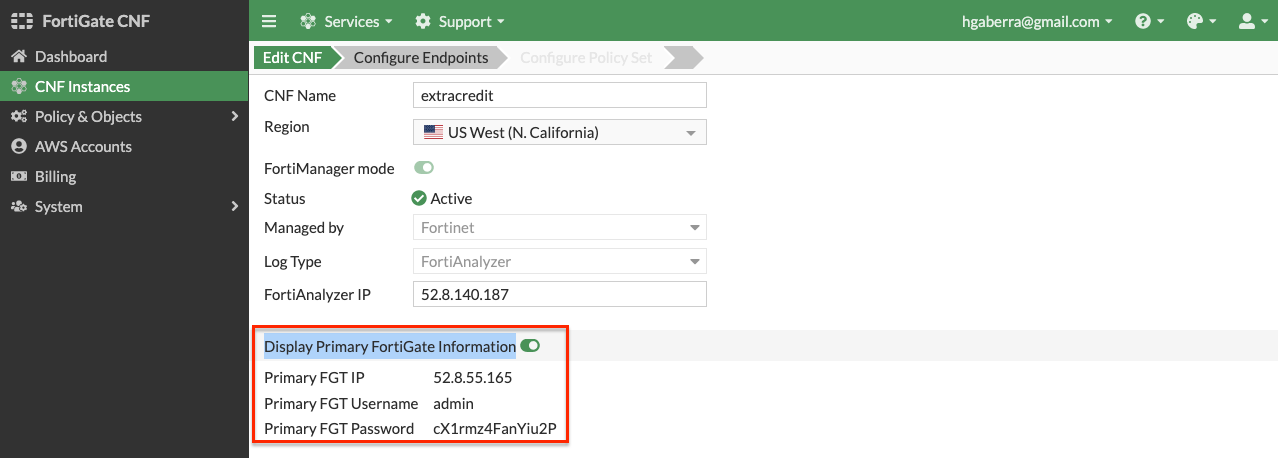
- In the FortiGate CNF console, navigate to CNF instances and select and edit the CNF instance, then toggle Display Primary FortiGate Information. Copy the Primary FGT information and click Exit.
- In the FortiManager GUI, enter in the Primary FGT IP, toggle on Use Legacy Device Login, fill out the rest and click Next.
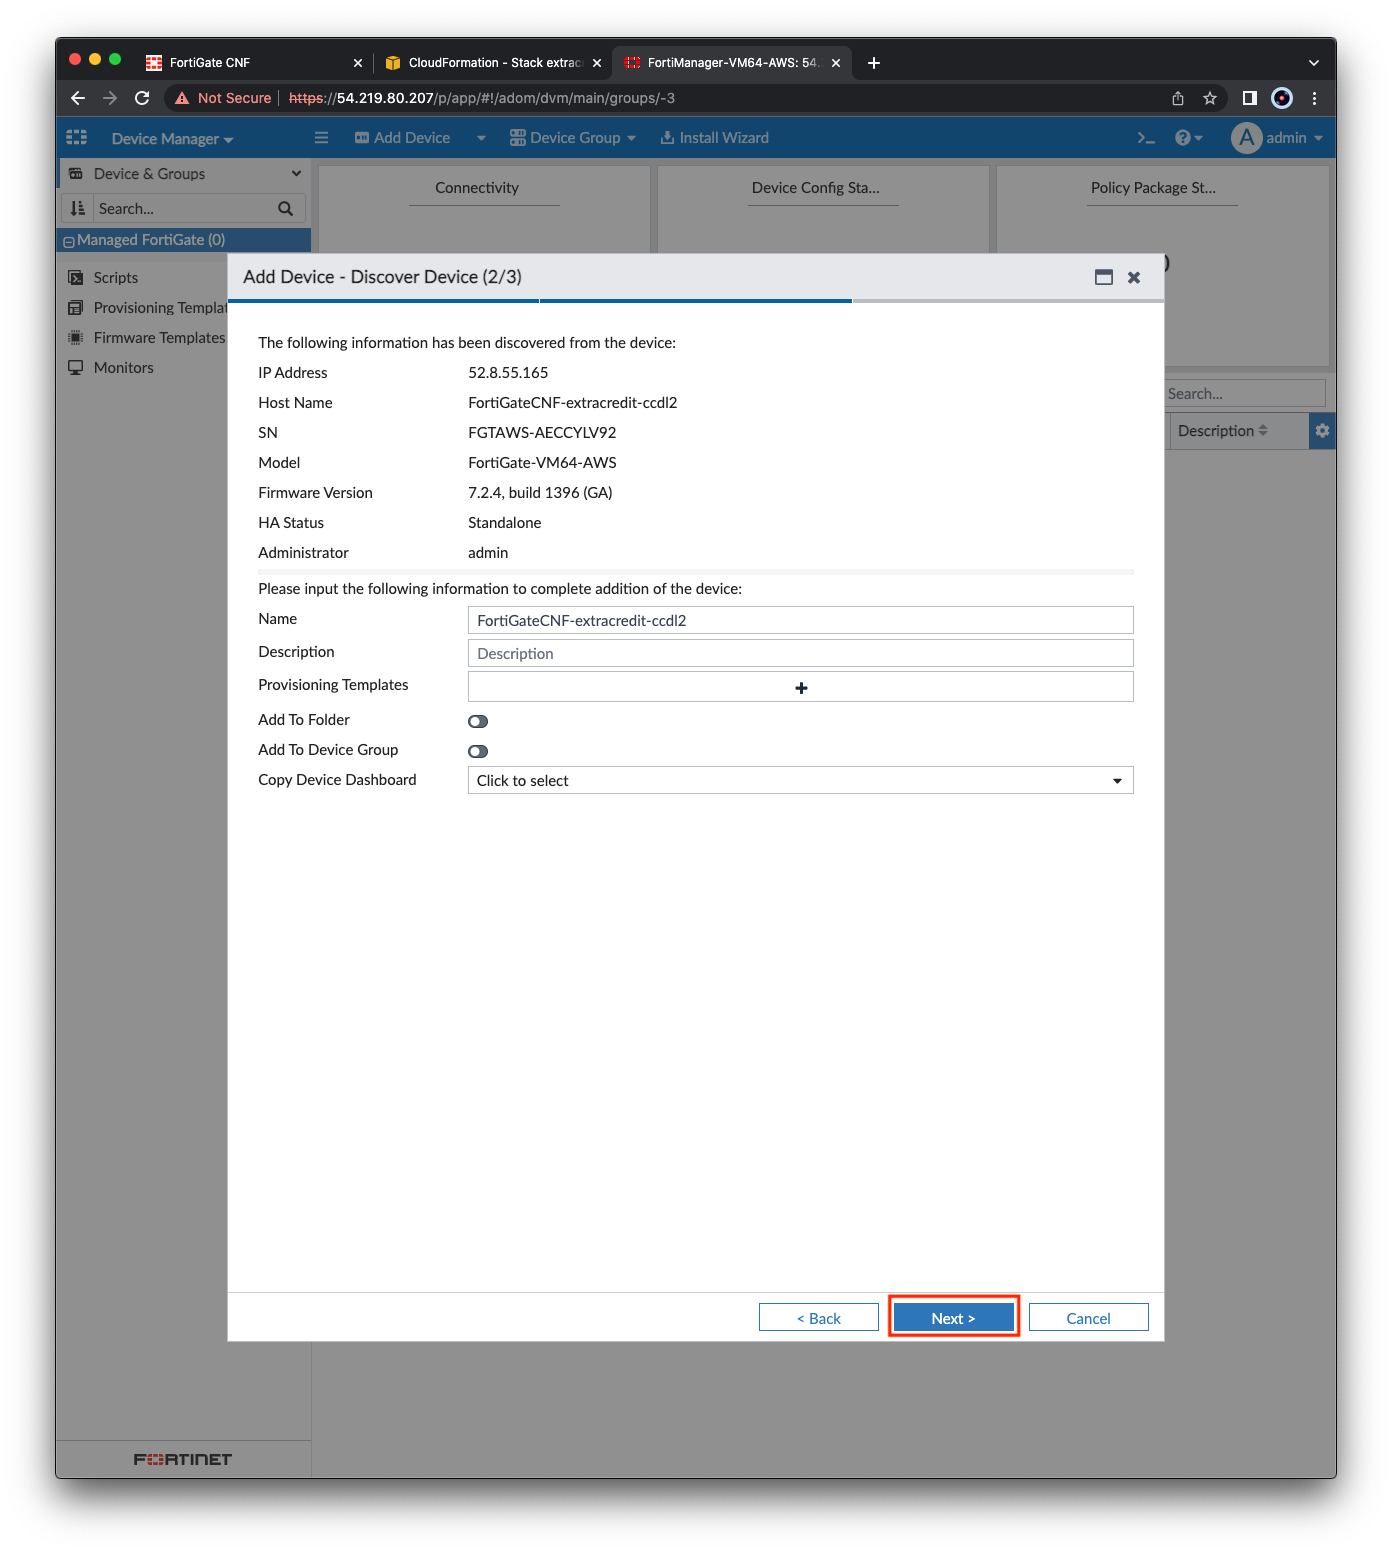
- On the next page, click Next and the FortiManager will begin discovering and adding the CNF Instance.
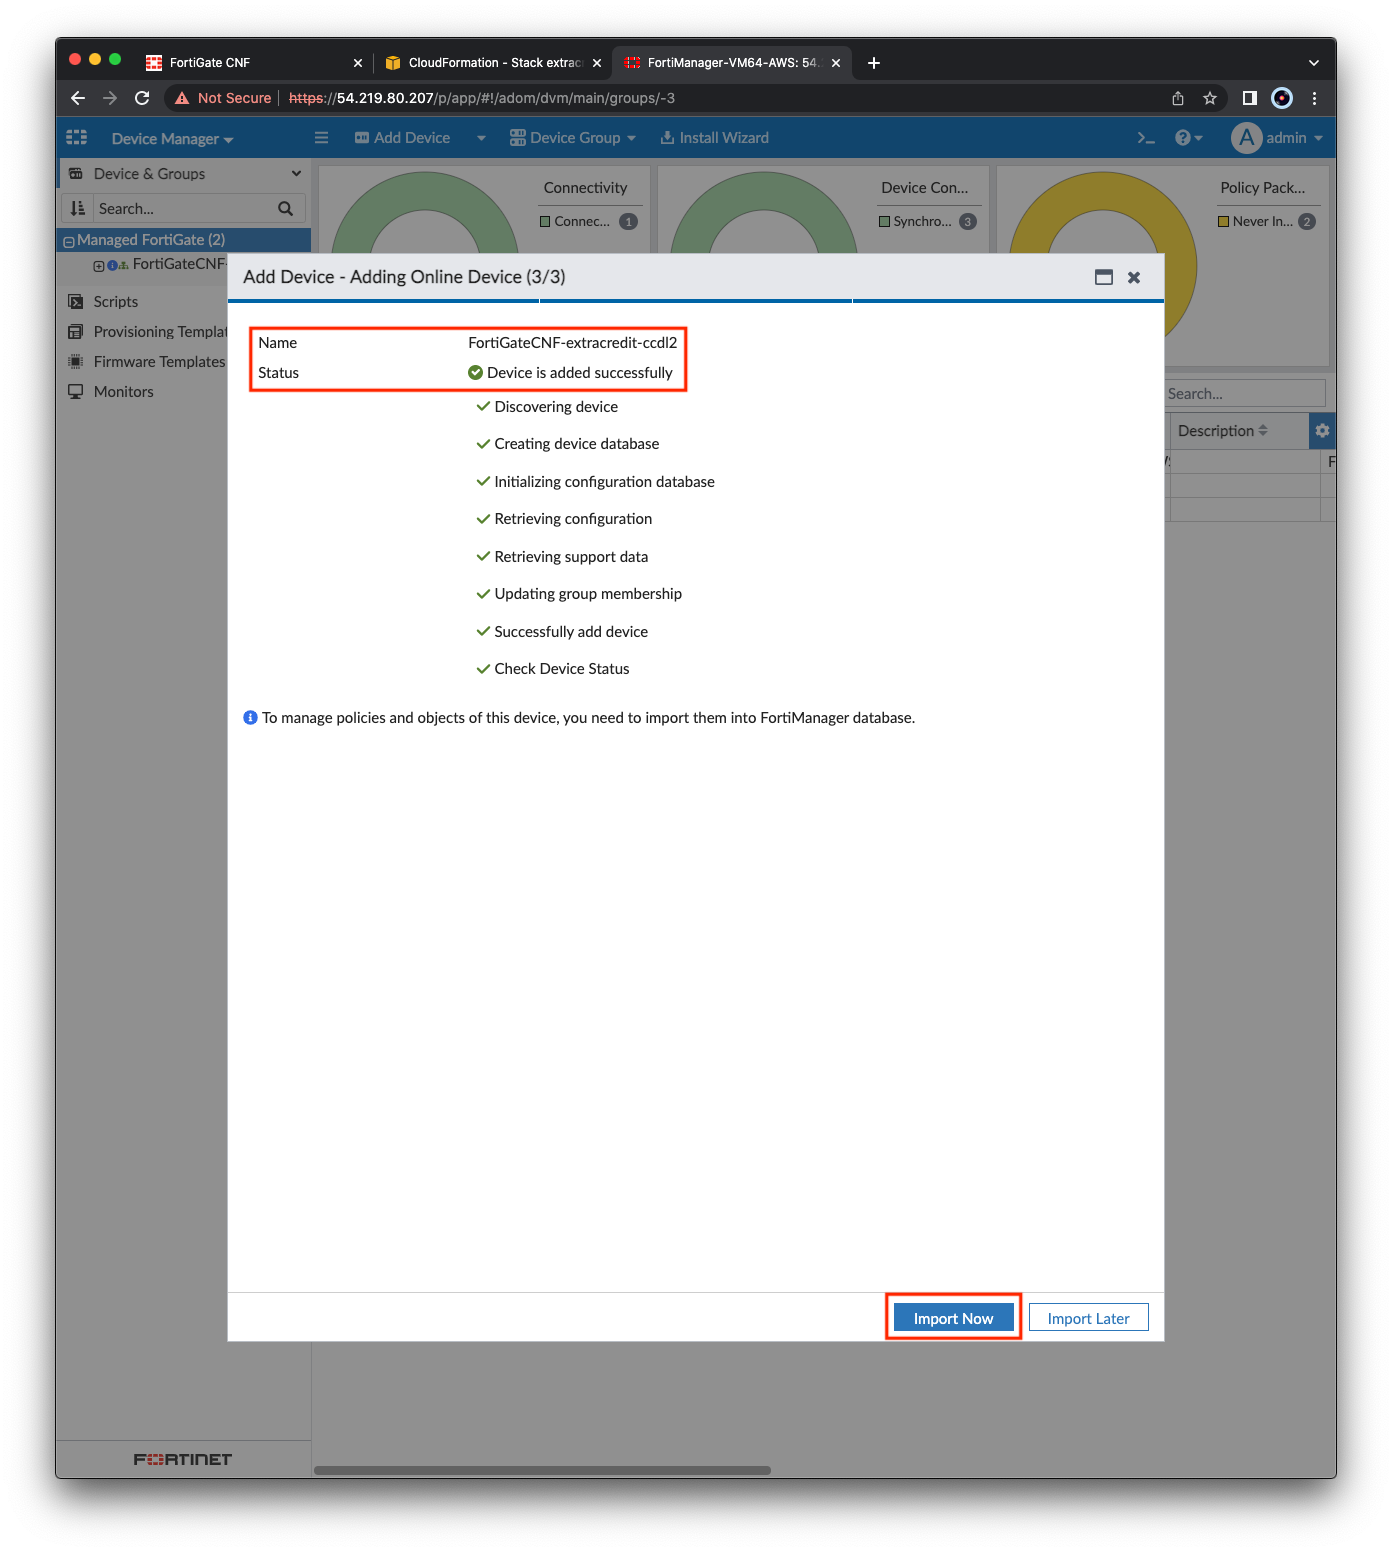
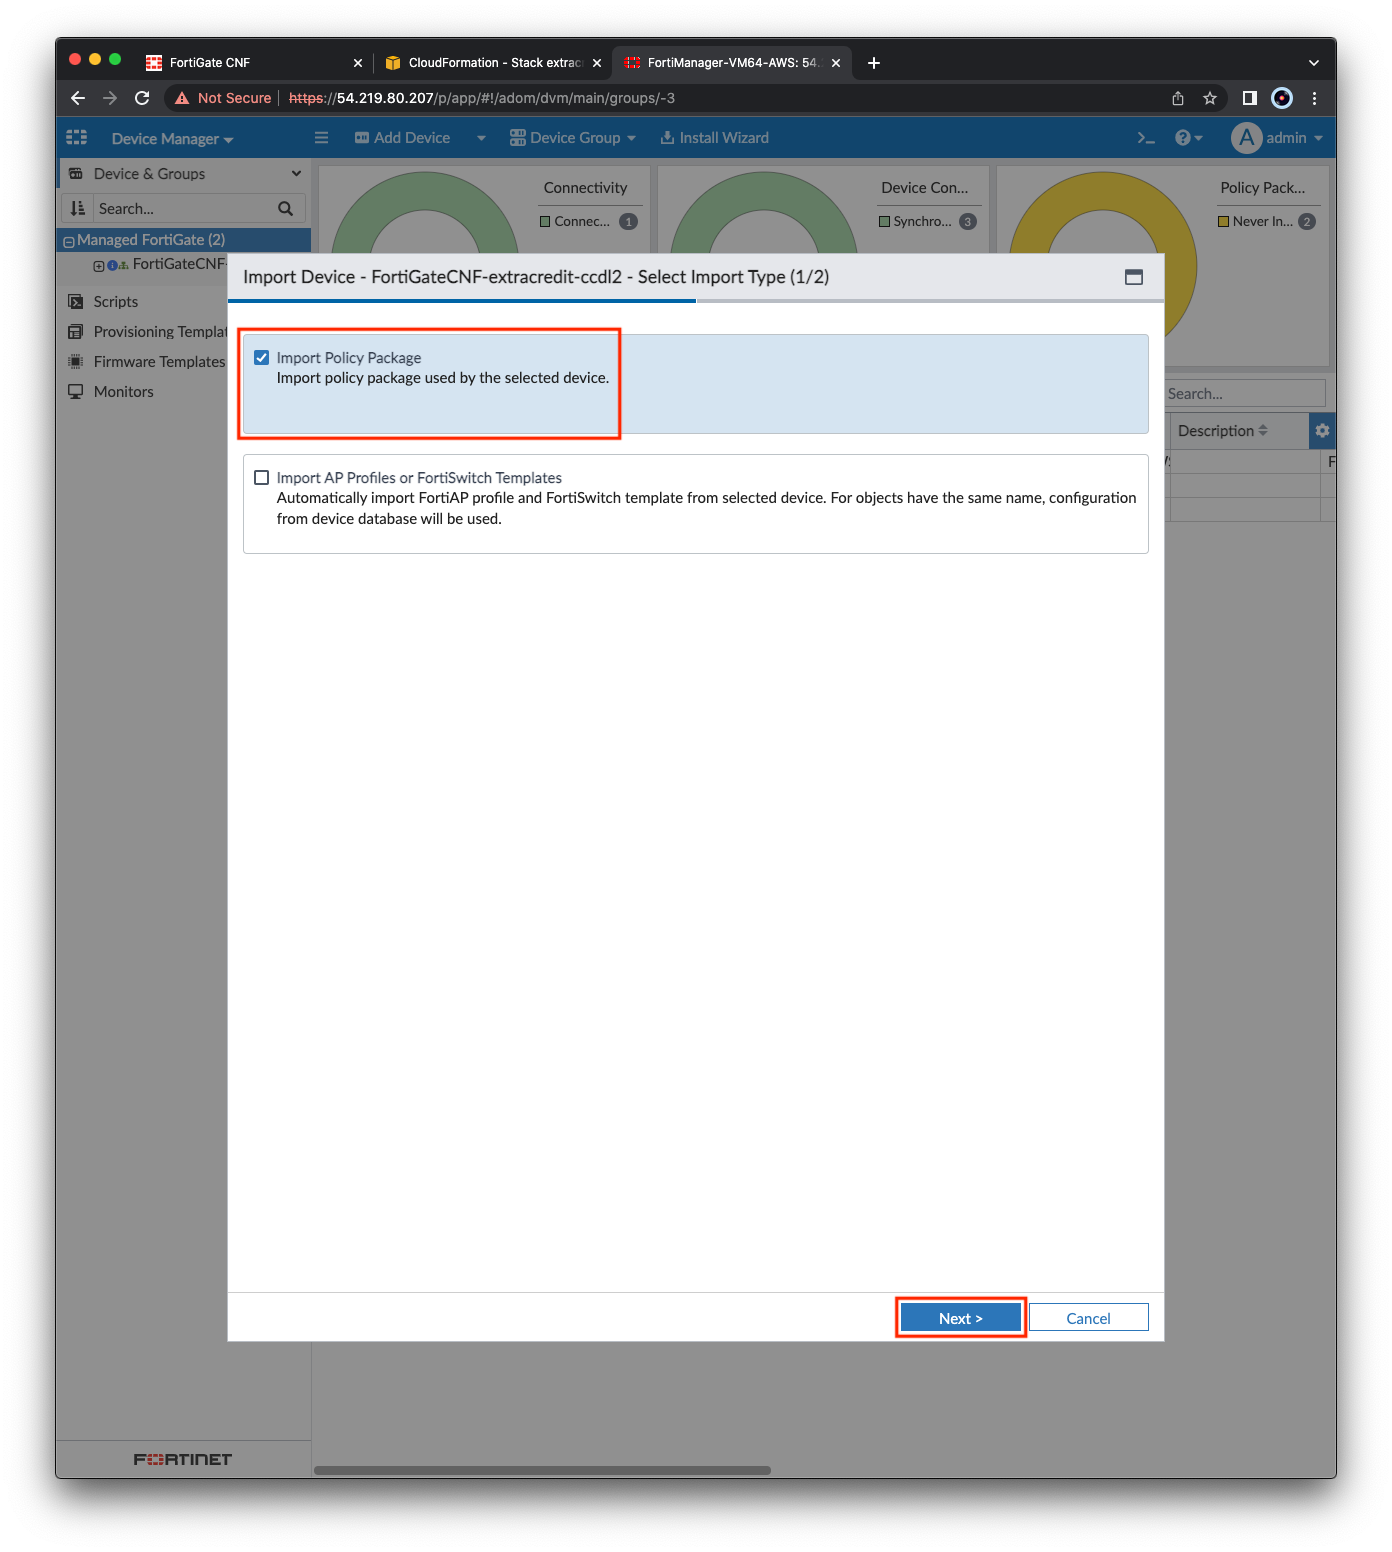
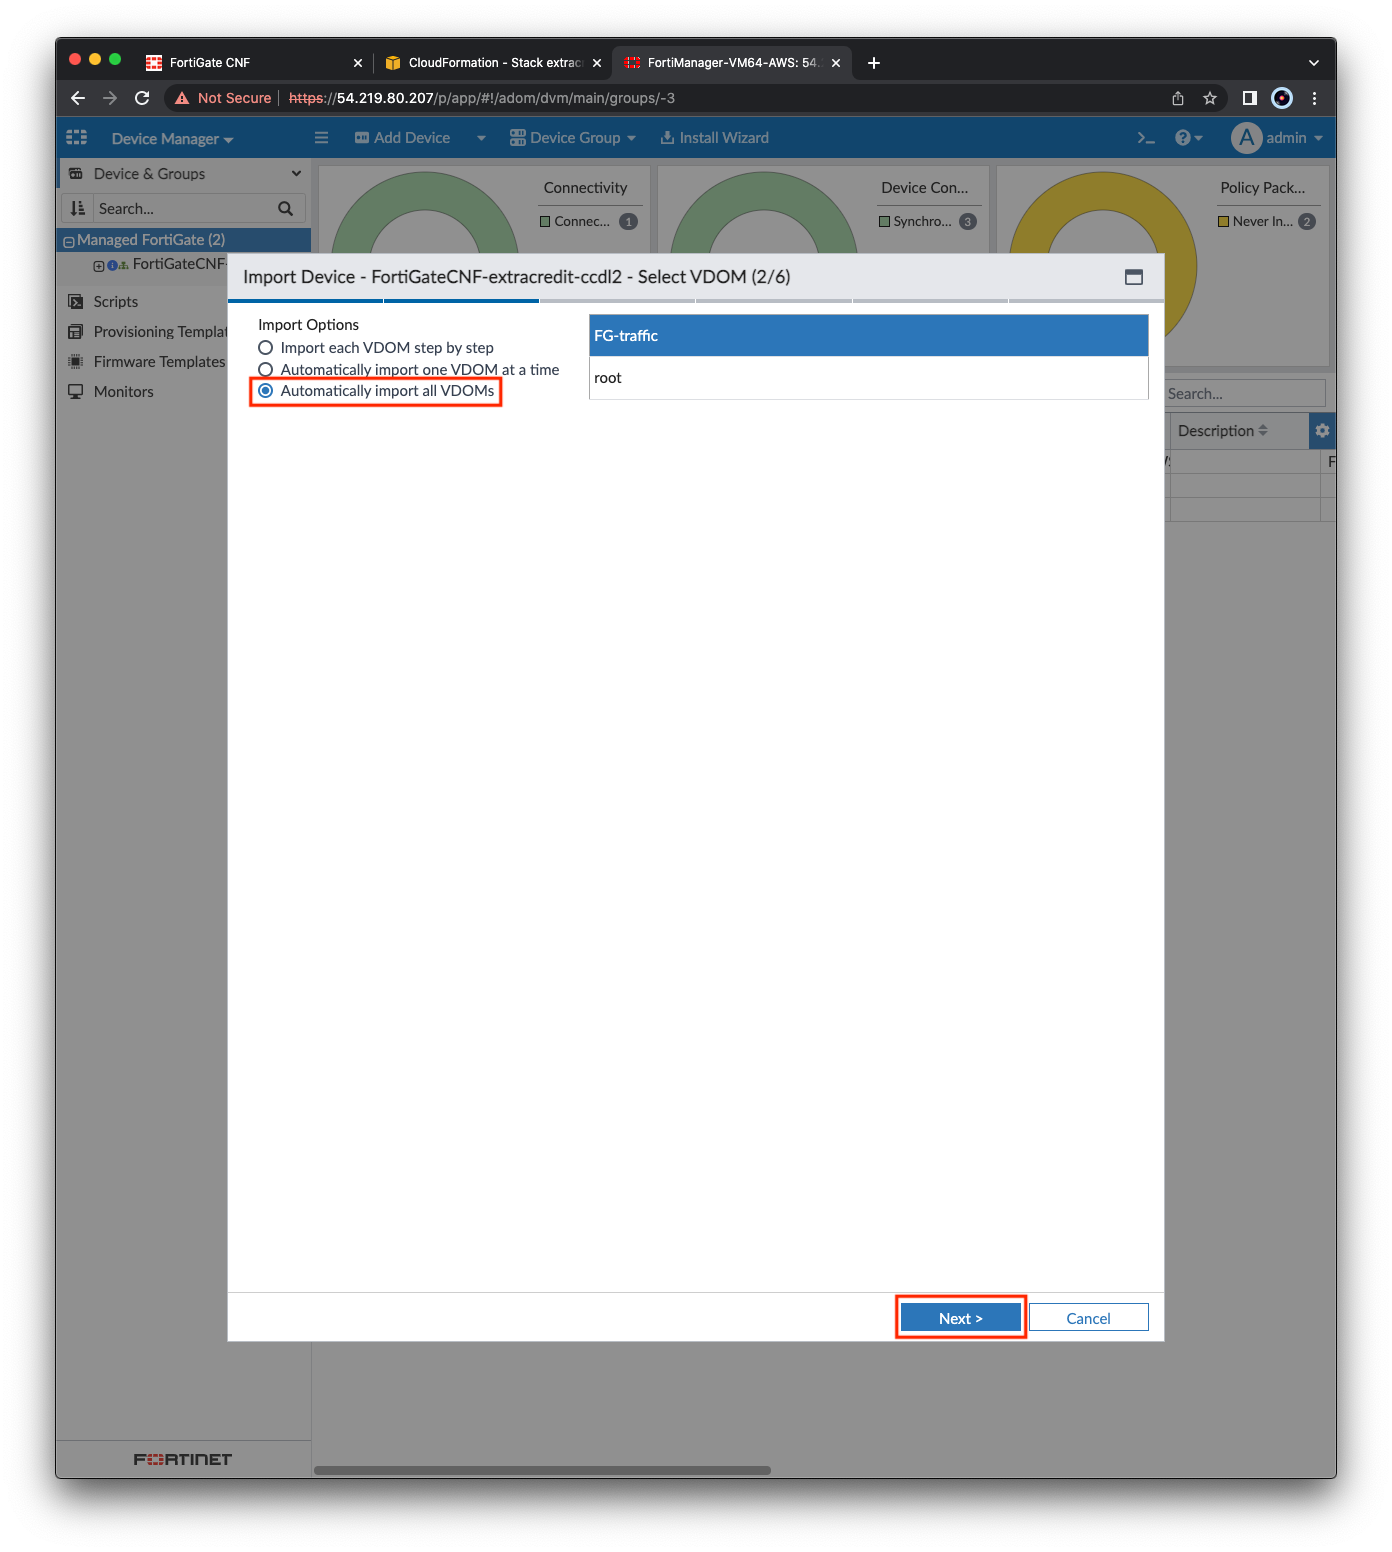
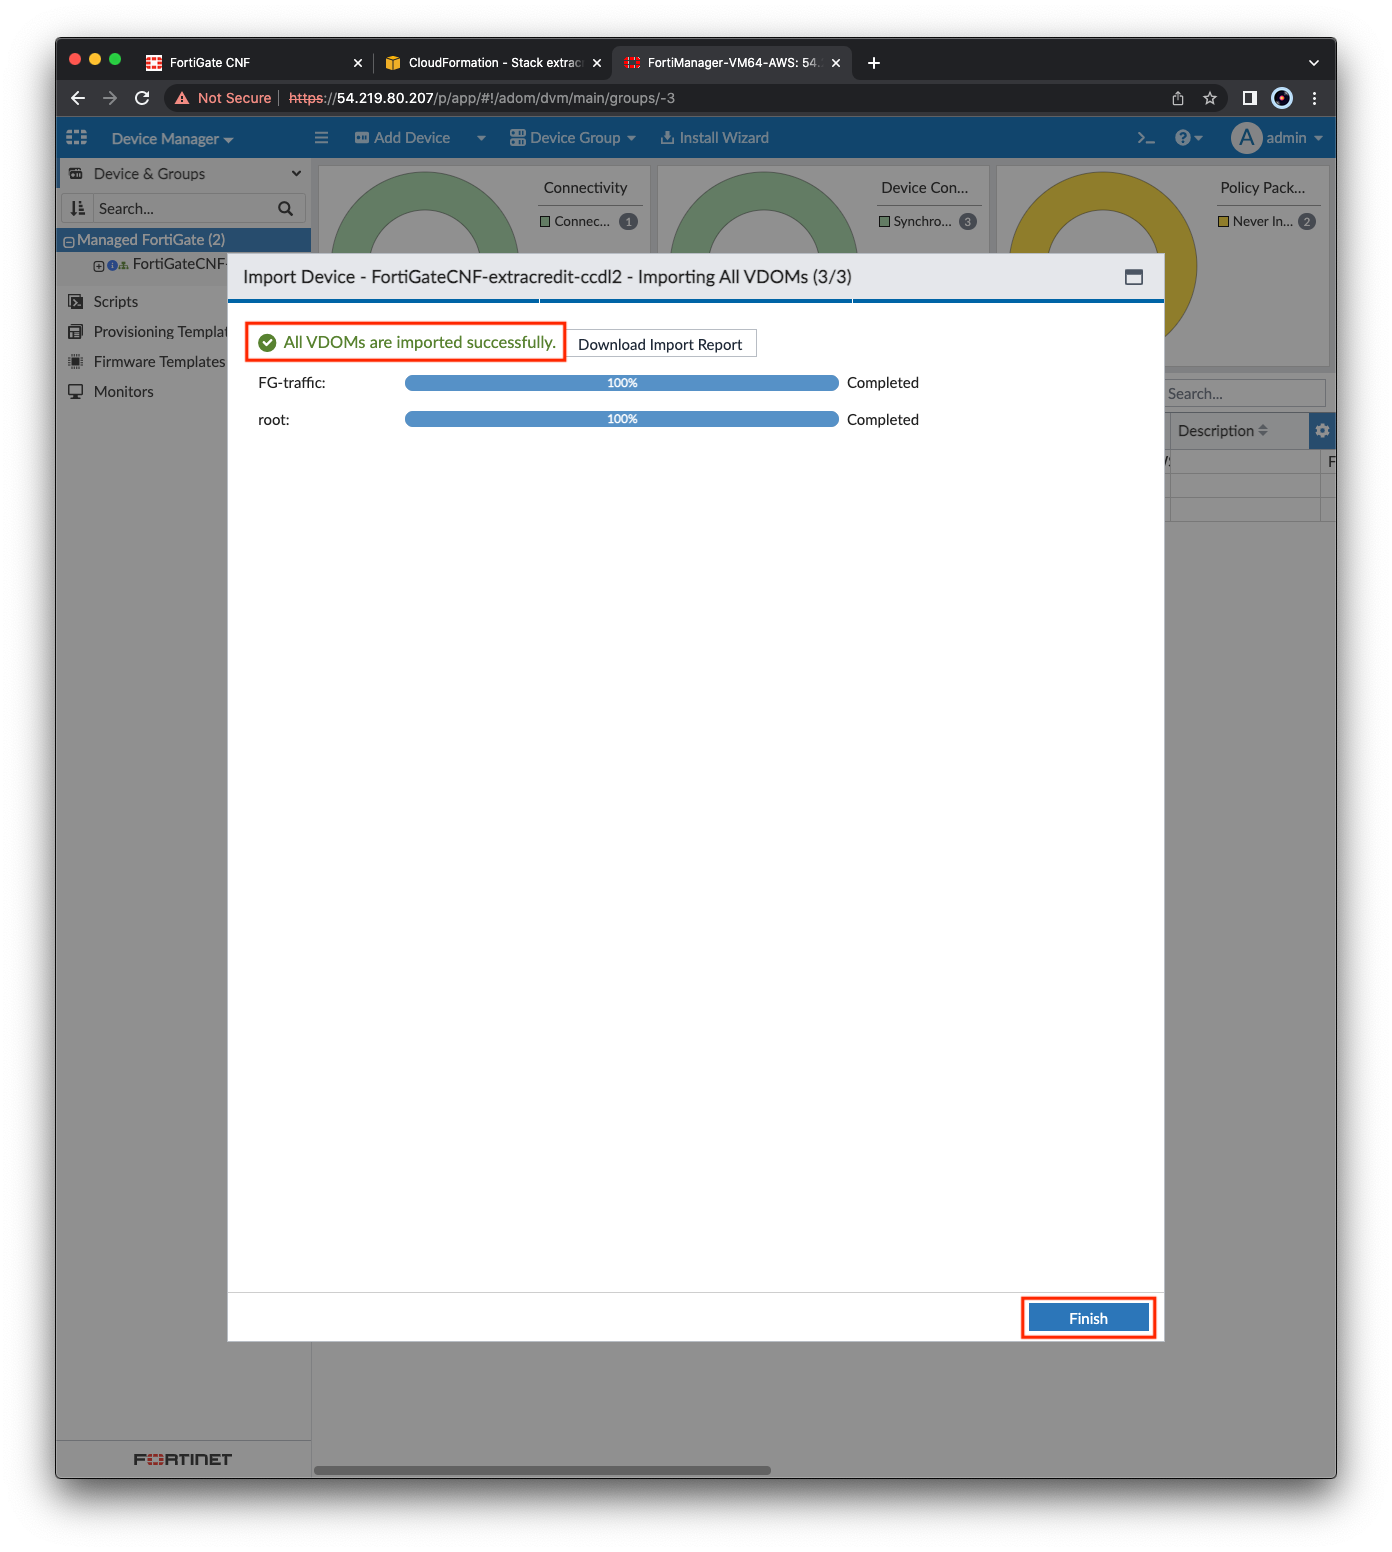
- Once this process is complete, click Import Now, then Import Policy Package and click Next. Select Automatically import all VDOMs and click Next and the FortiManager will import a policy package for each VDOM. Once complete, click Finish.
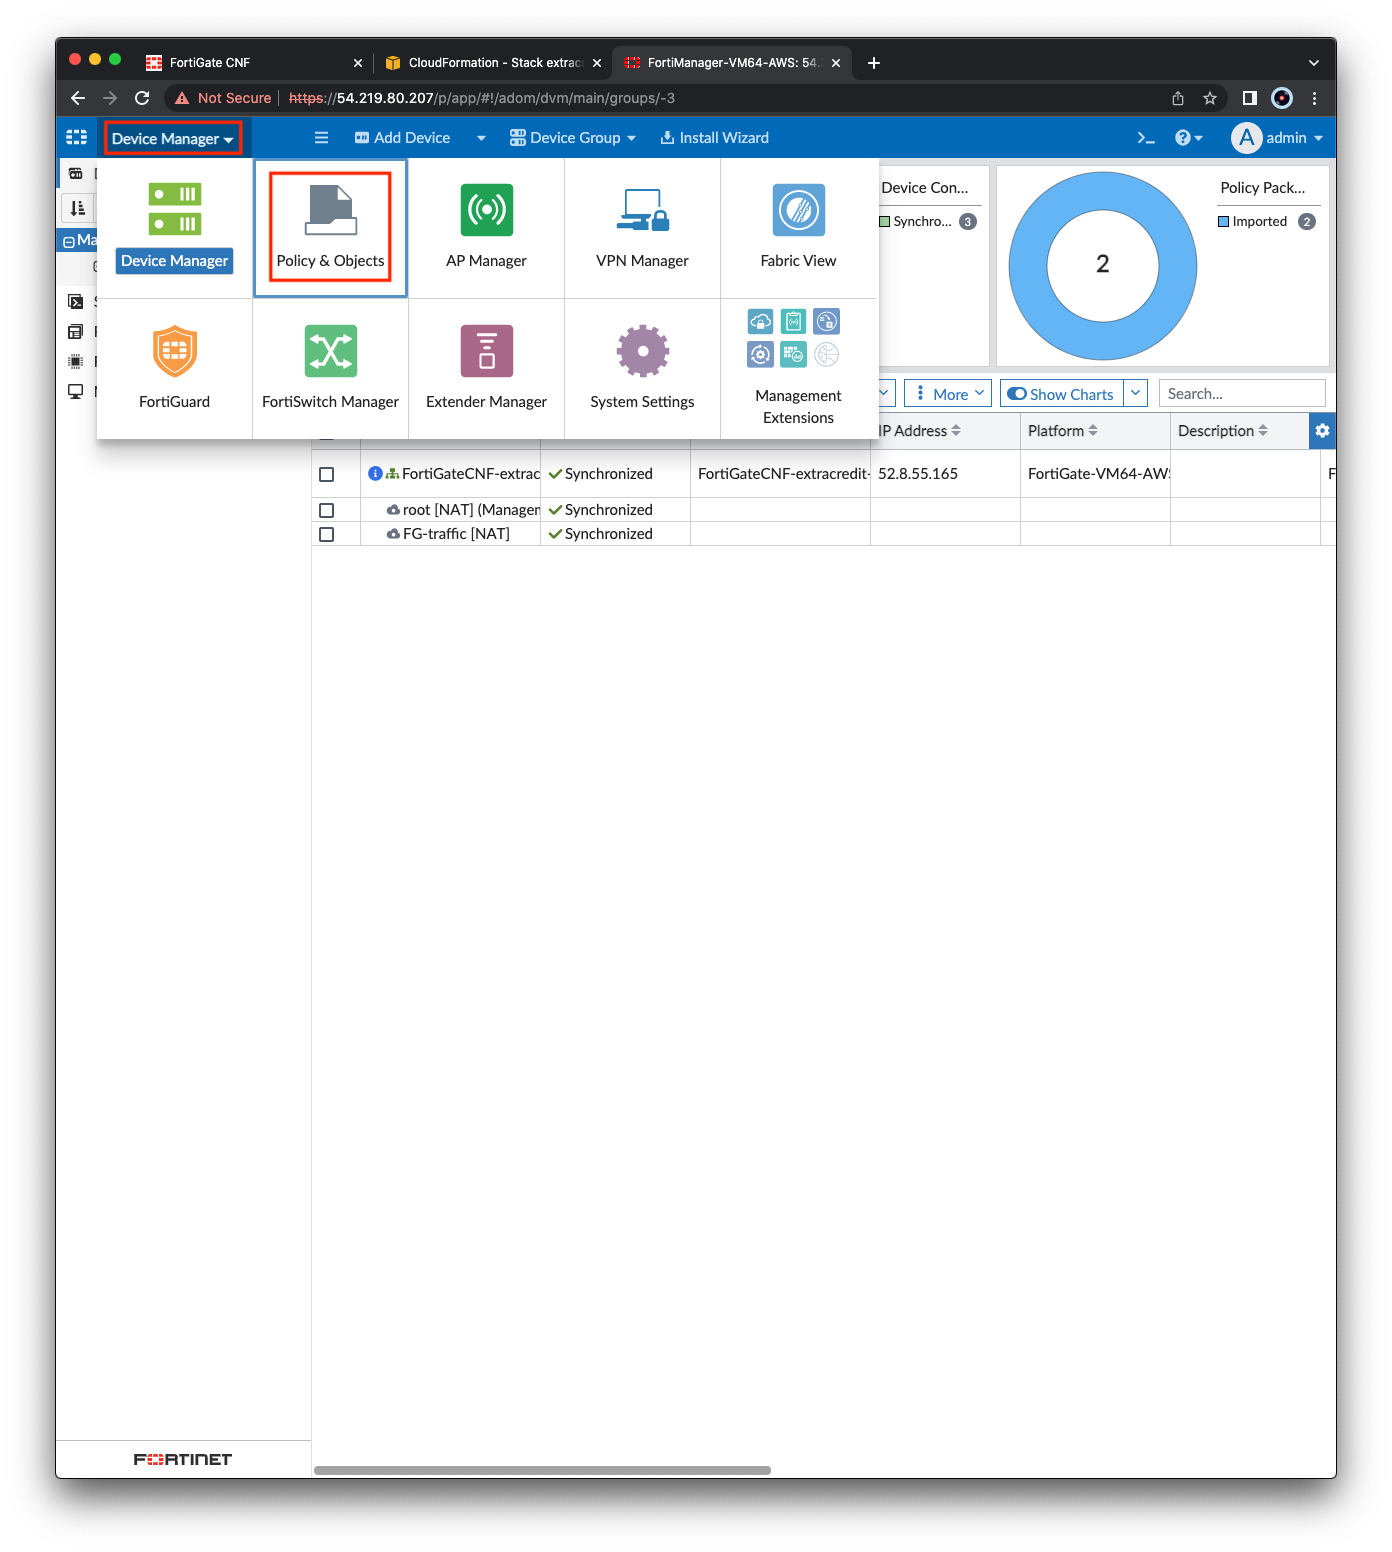
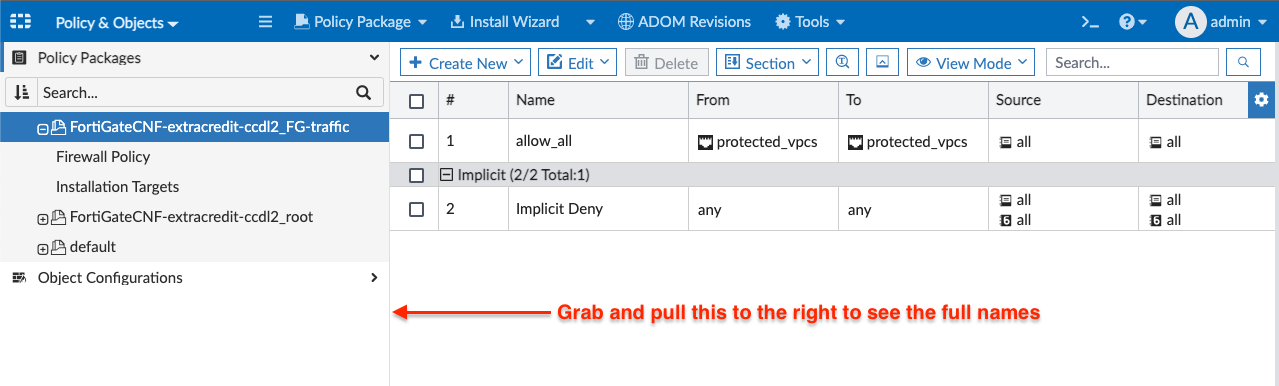
- In the top left, click Device Manager then click Policy & Object. Then grab this bar and drag it to the right to see the full names of the policy packages.
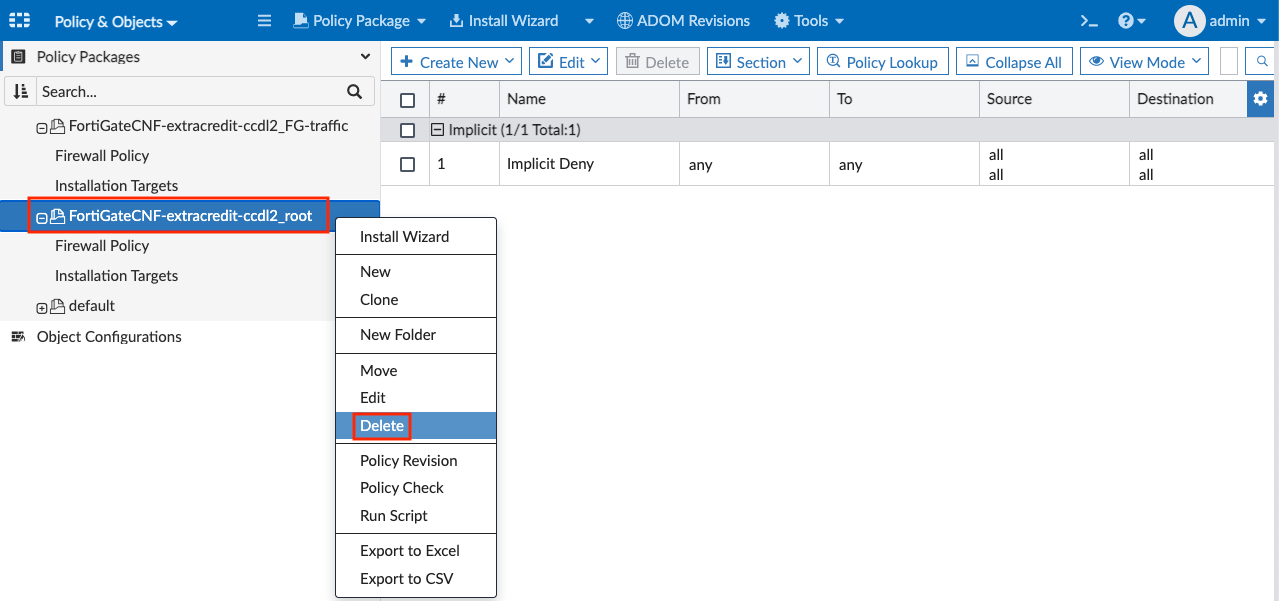
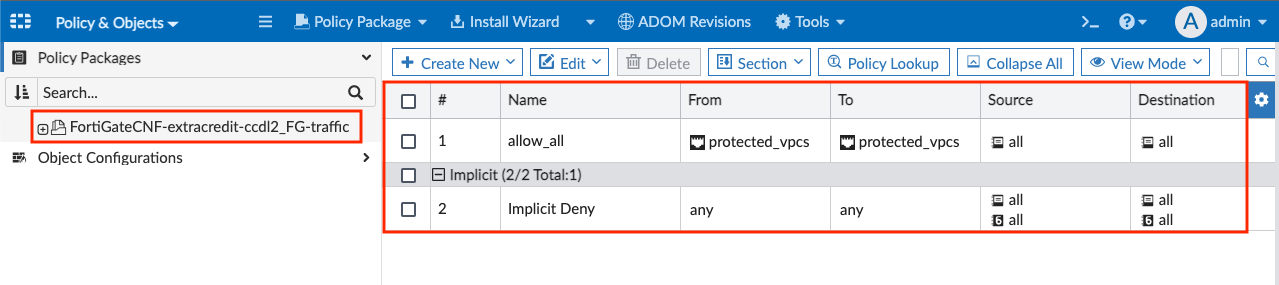
- Then right click the policy package ending in …root and click Delete. Do the same for the default policy package as well. Now you should be left with the policy package ending in …FG-Traffic.
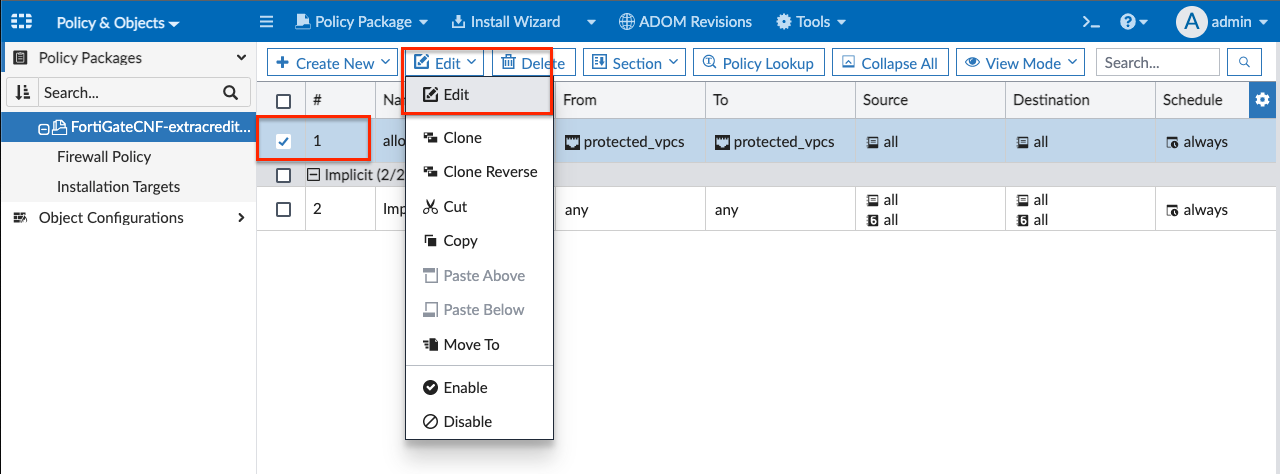
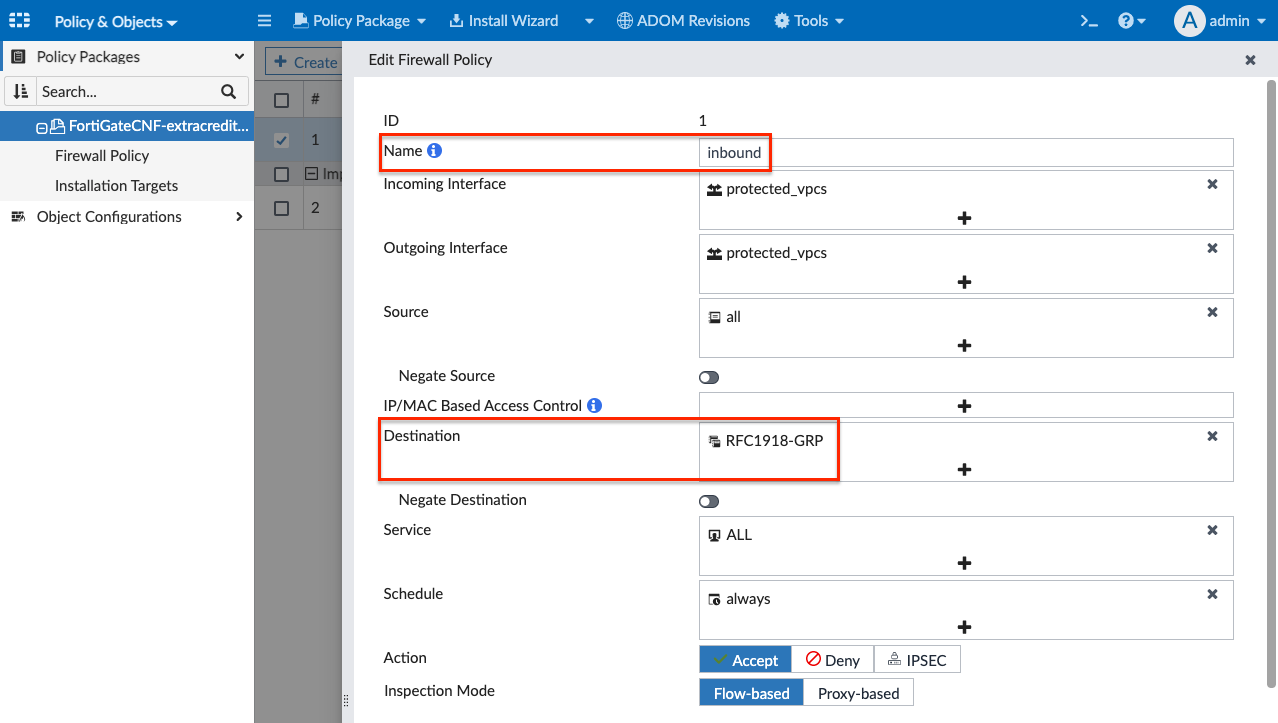
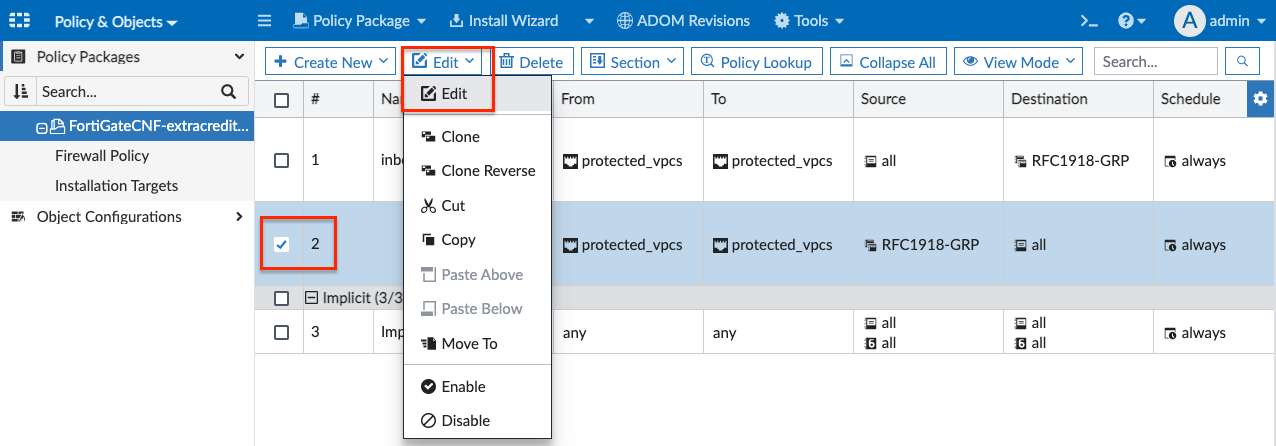
- Select policy #1, click Edit, then Edit again in the drop down menu.
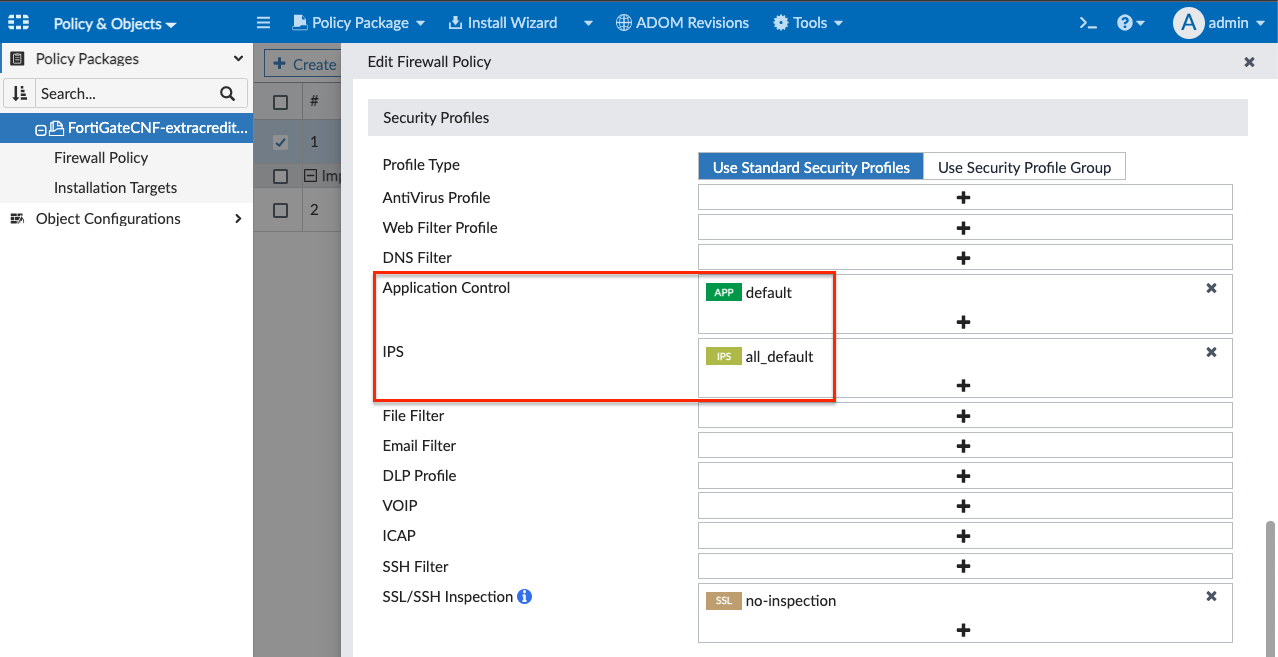
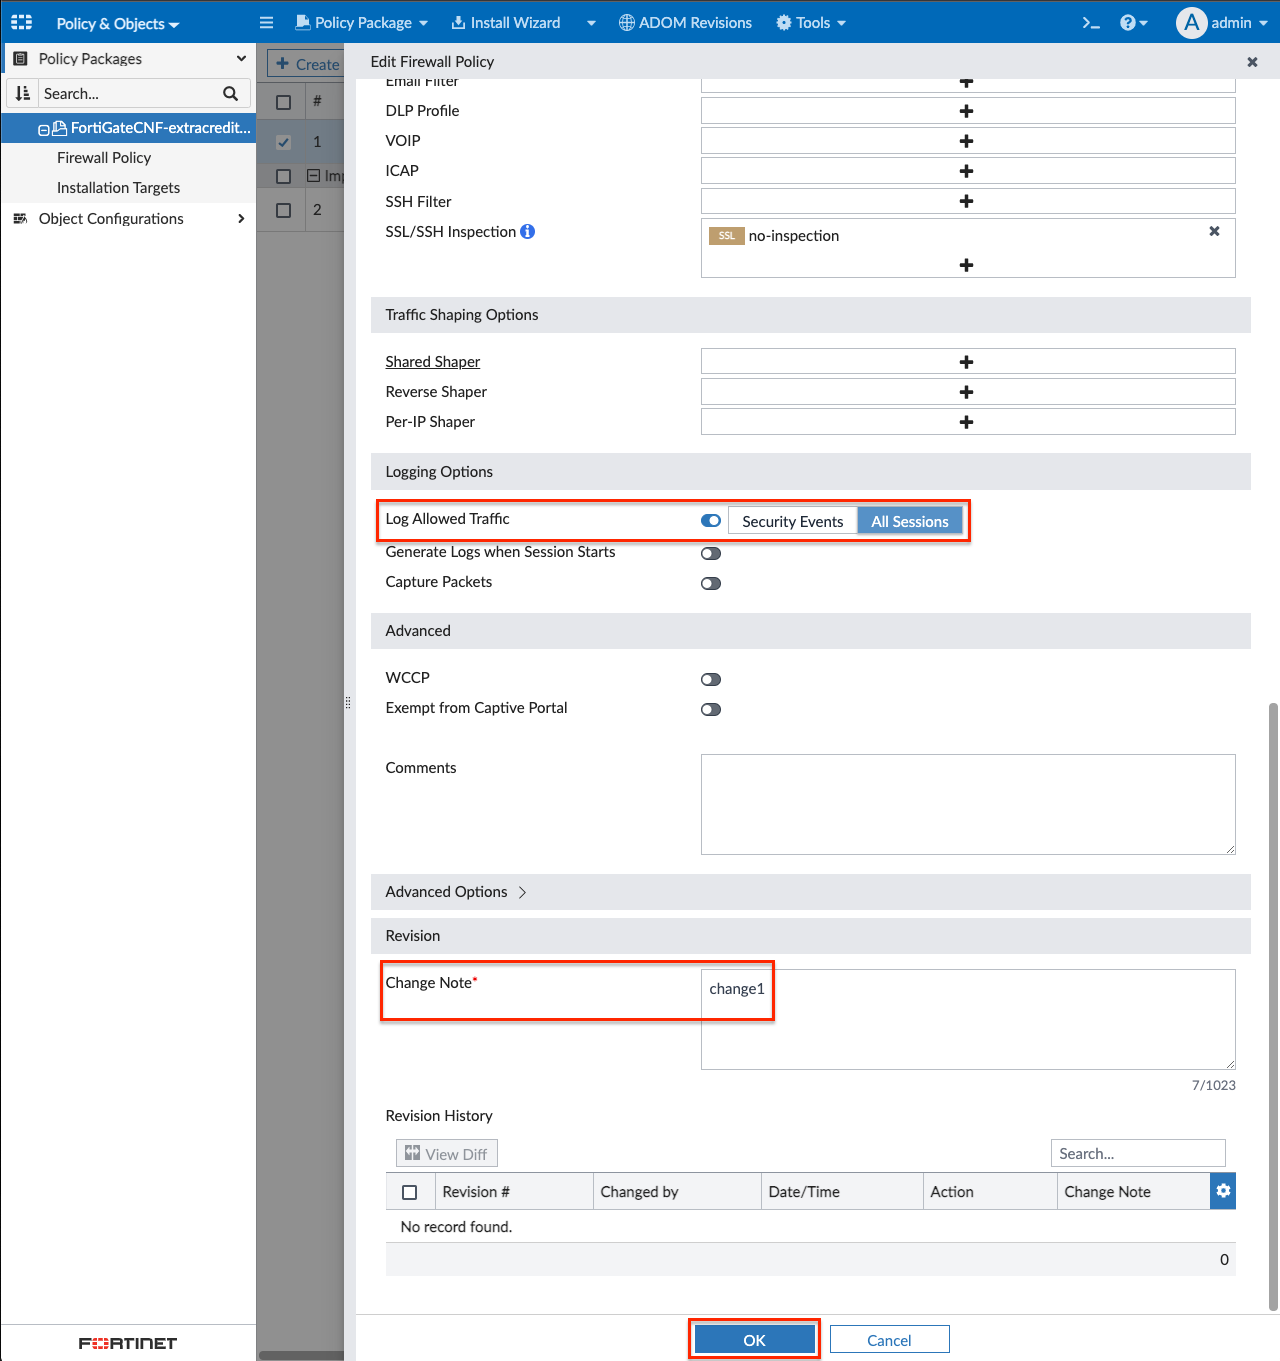
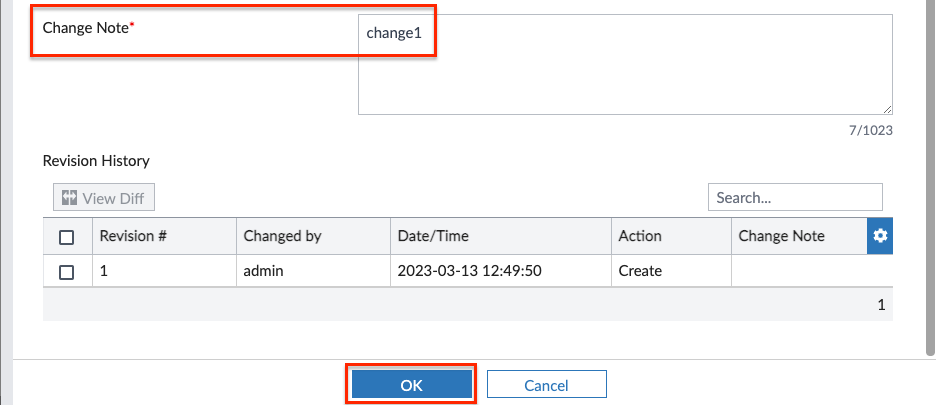
- In the edit firewall policy page, change the name to Inbound, set the Destination to be RFC1918-GRP, select default for Application Control, then all_default for IPS, toggle Log Allowed Traffic to All Sessions, finally type a note in the Change Note text box, then click OK to apply the changes.
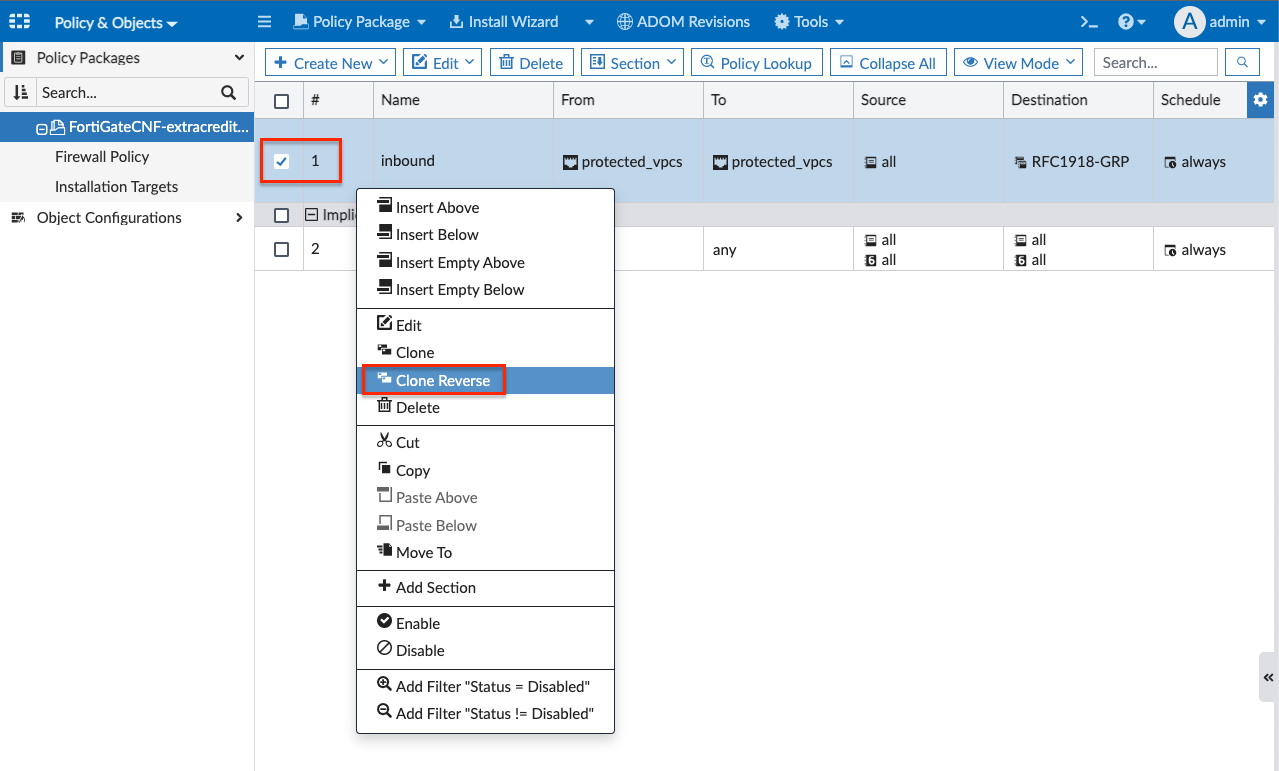
- Right click policy #1 again and click Clone Reverse to create a new policy. Then select policy #2, click Edit, then Edit again in the drop down menu.
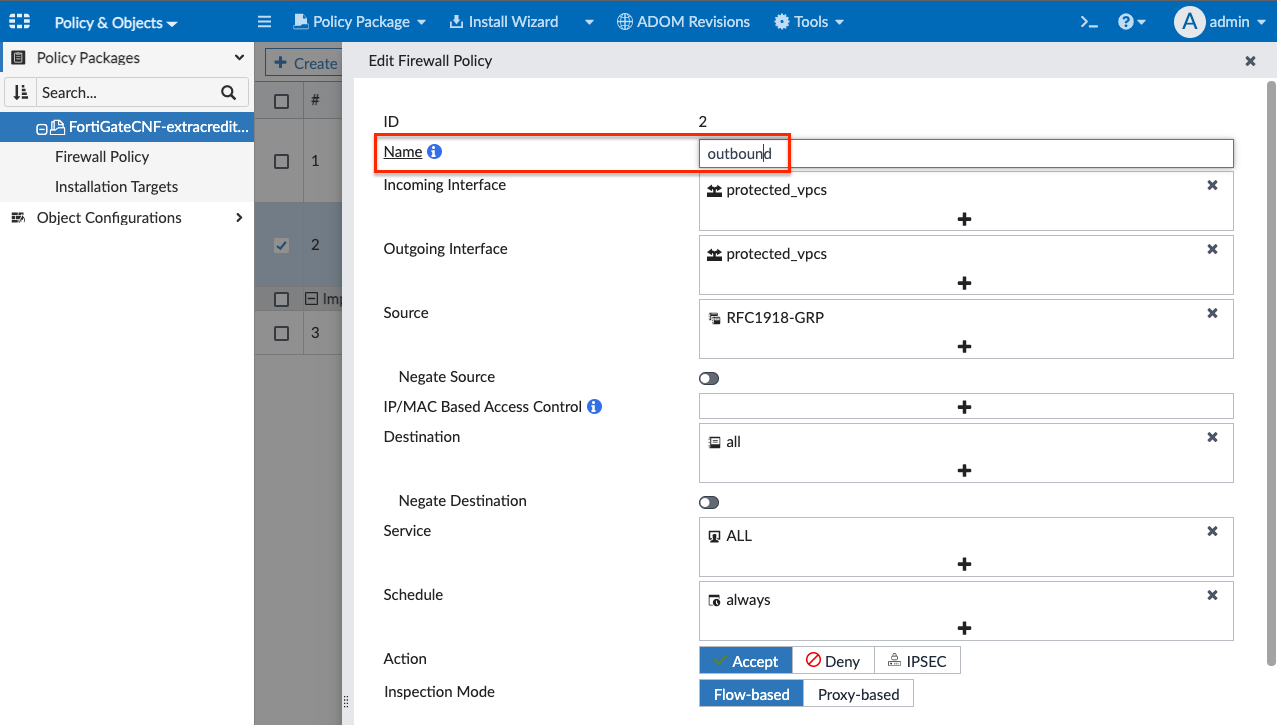
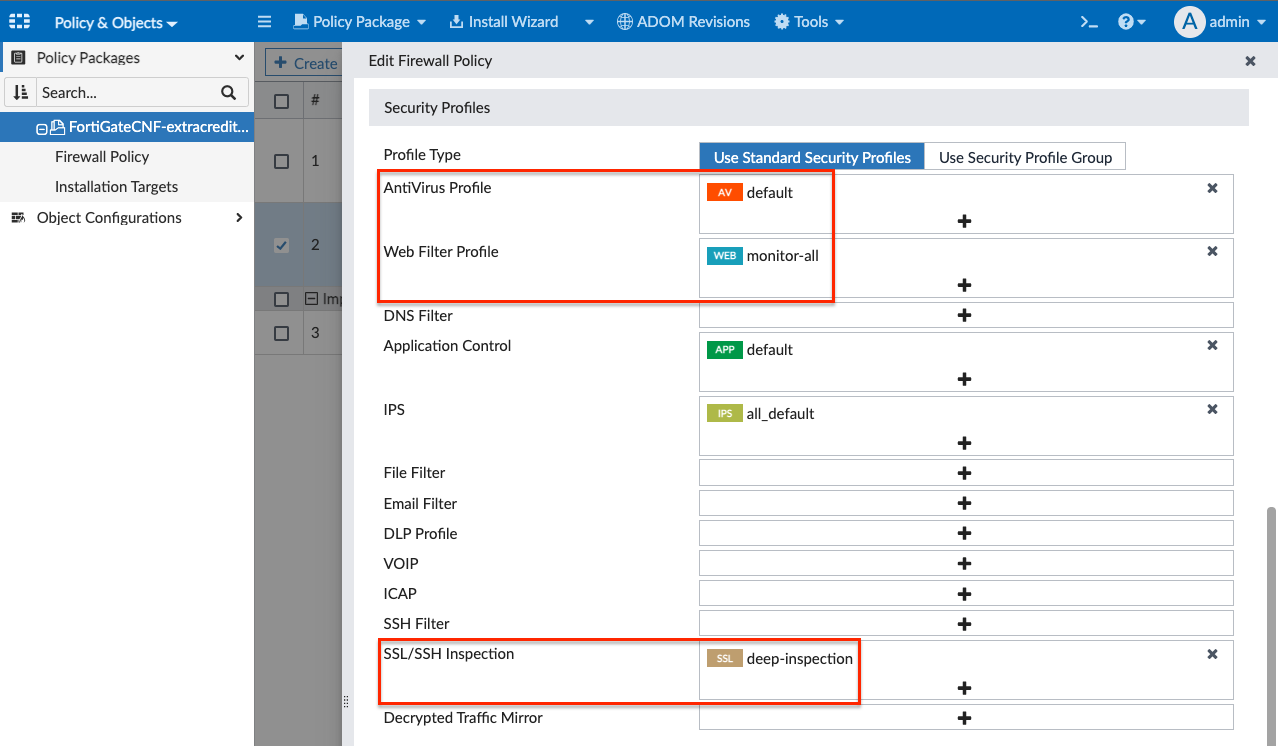
- In the edit firewall policy page, change the name to Outbound, select default for AntiVirus Profile, then monitor-all for Web Filter Profile, then deep-inspection for SSL/SSH Inspection, finally type a note in the Change Note text box, then click OK to apply the changes.
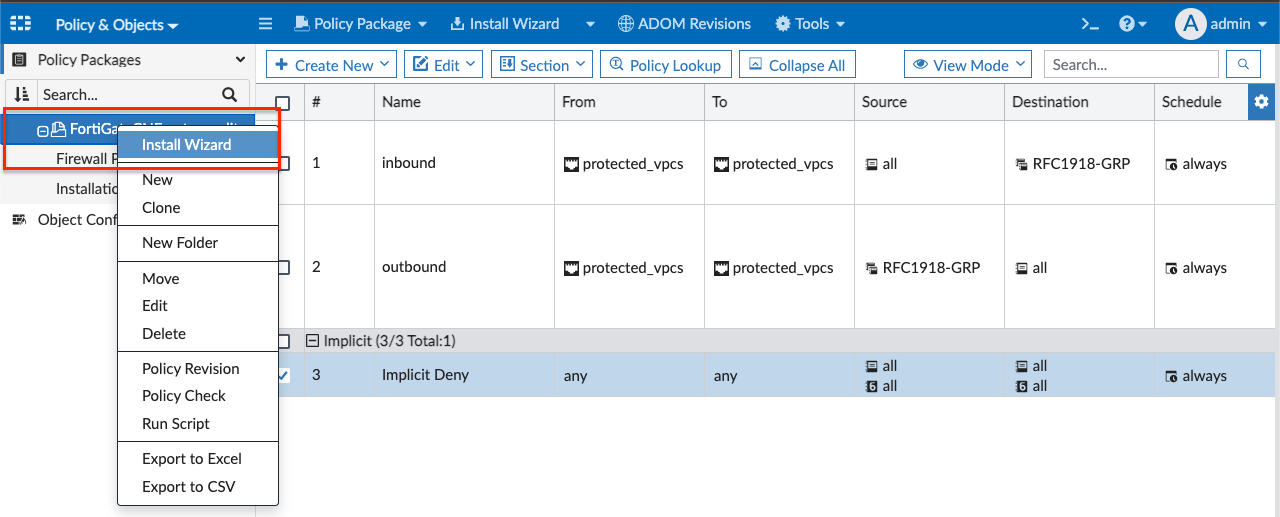
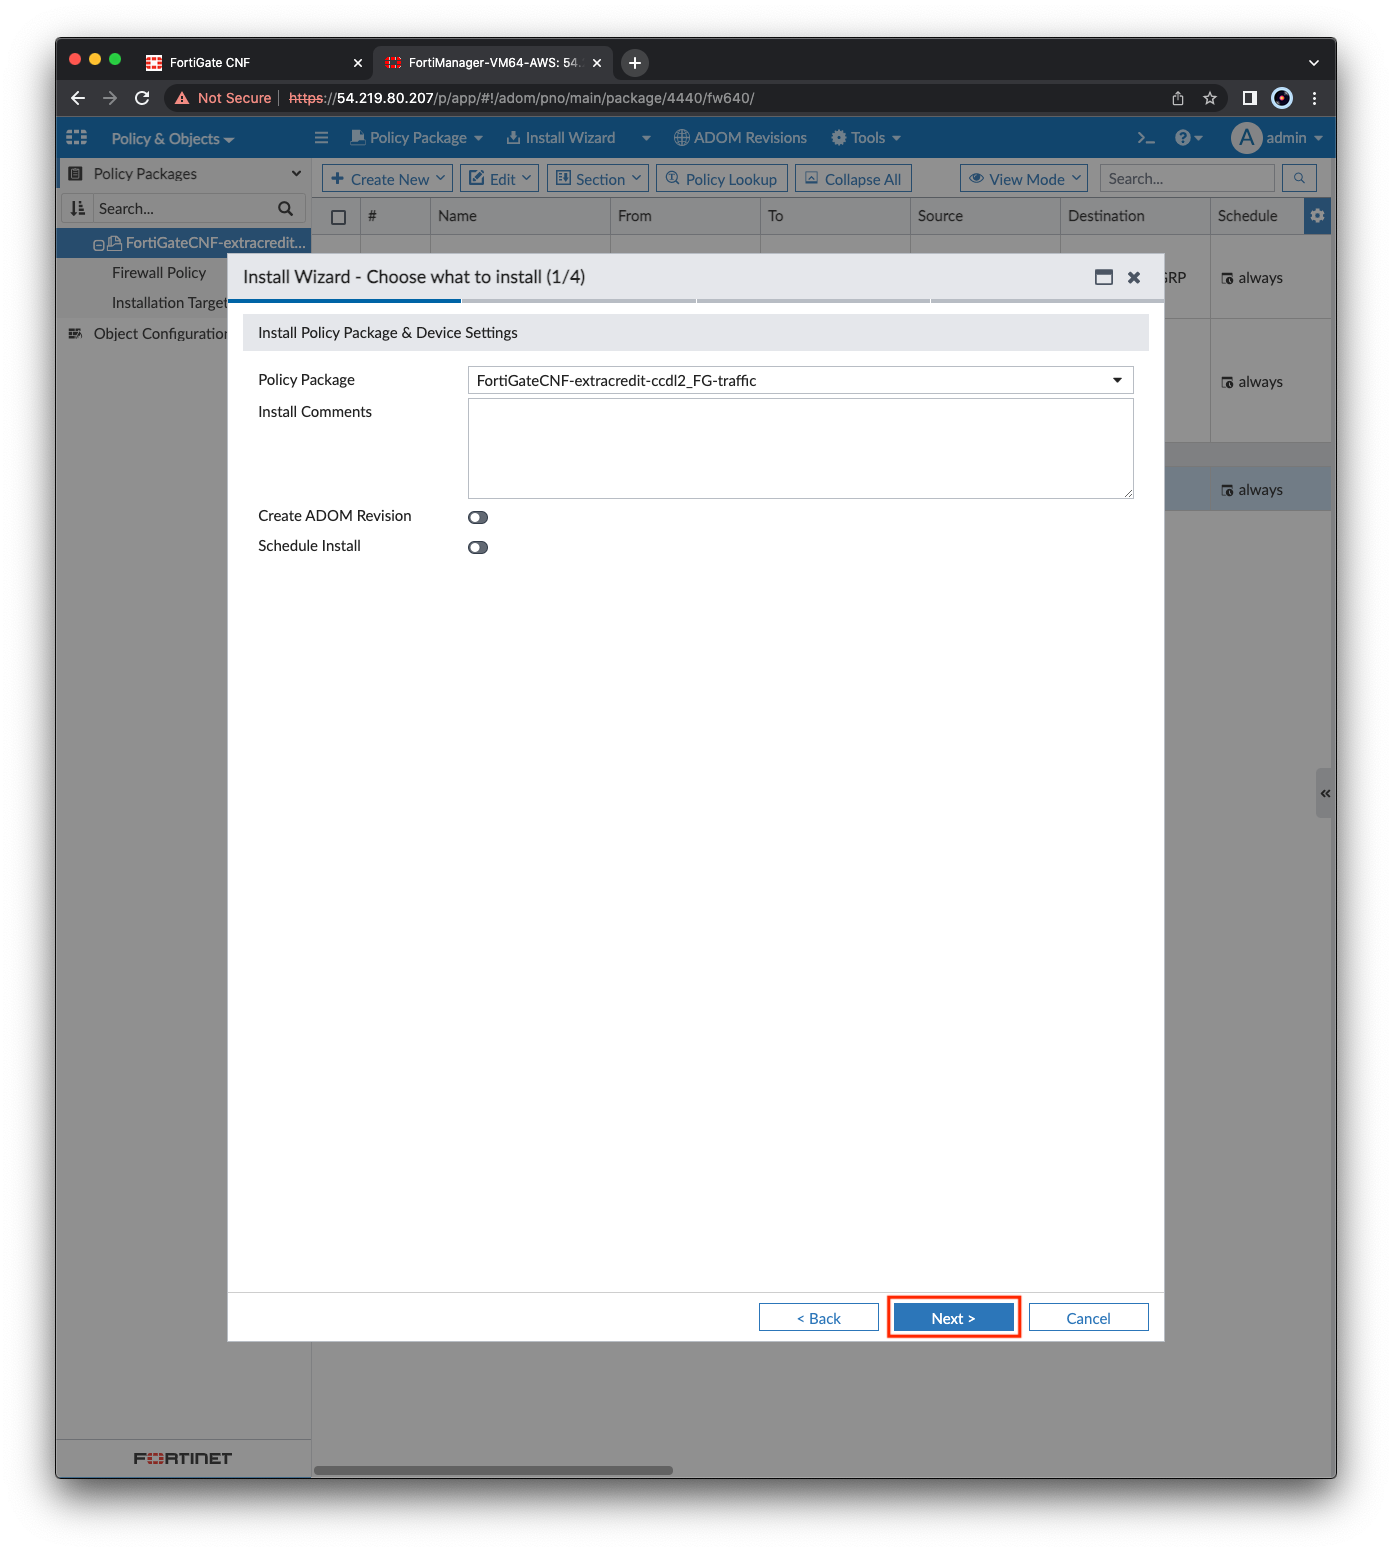
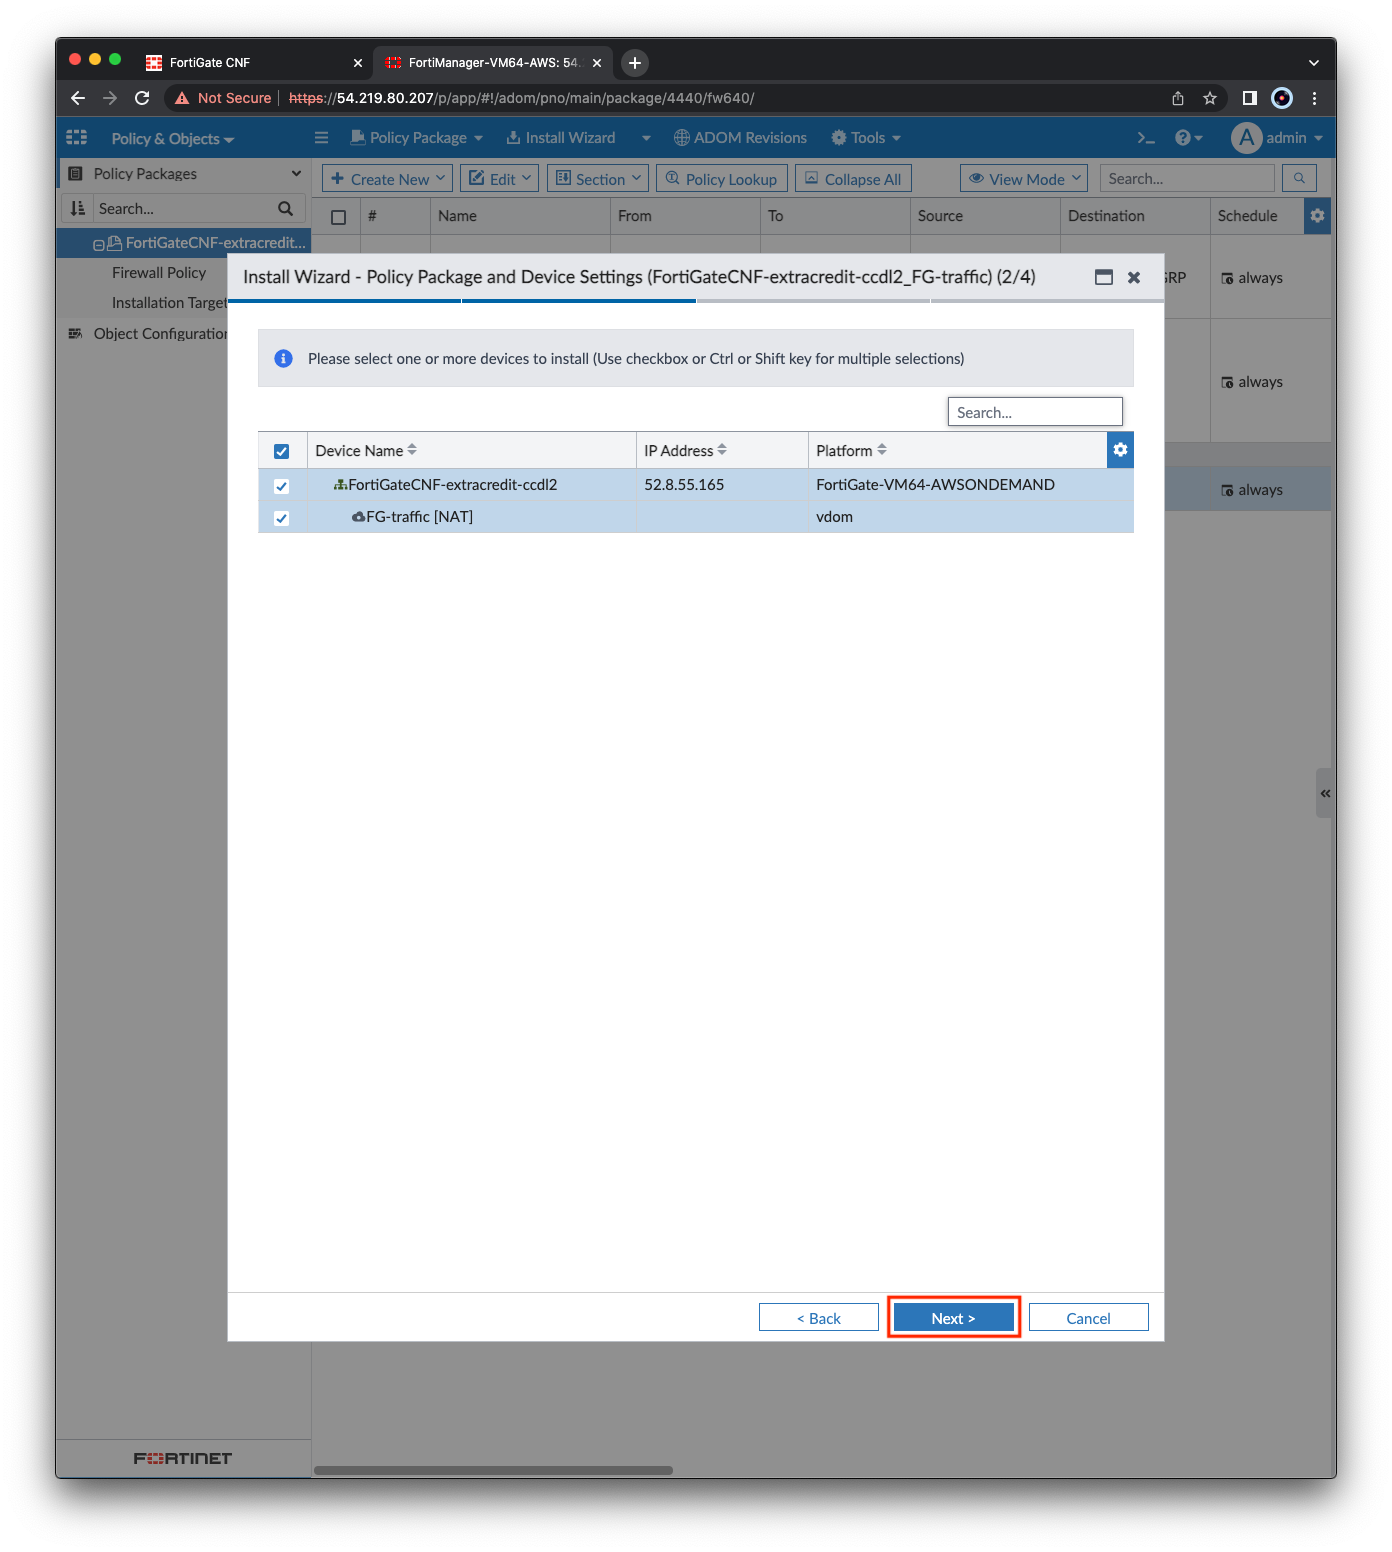
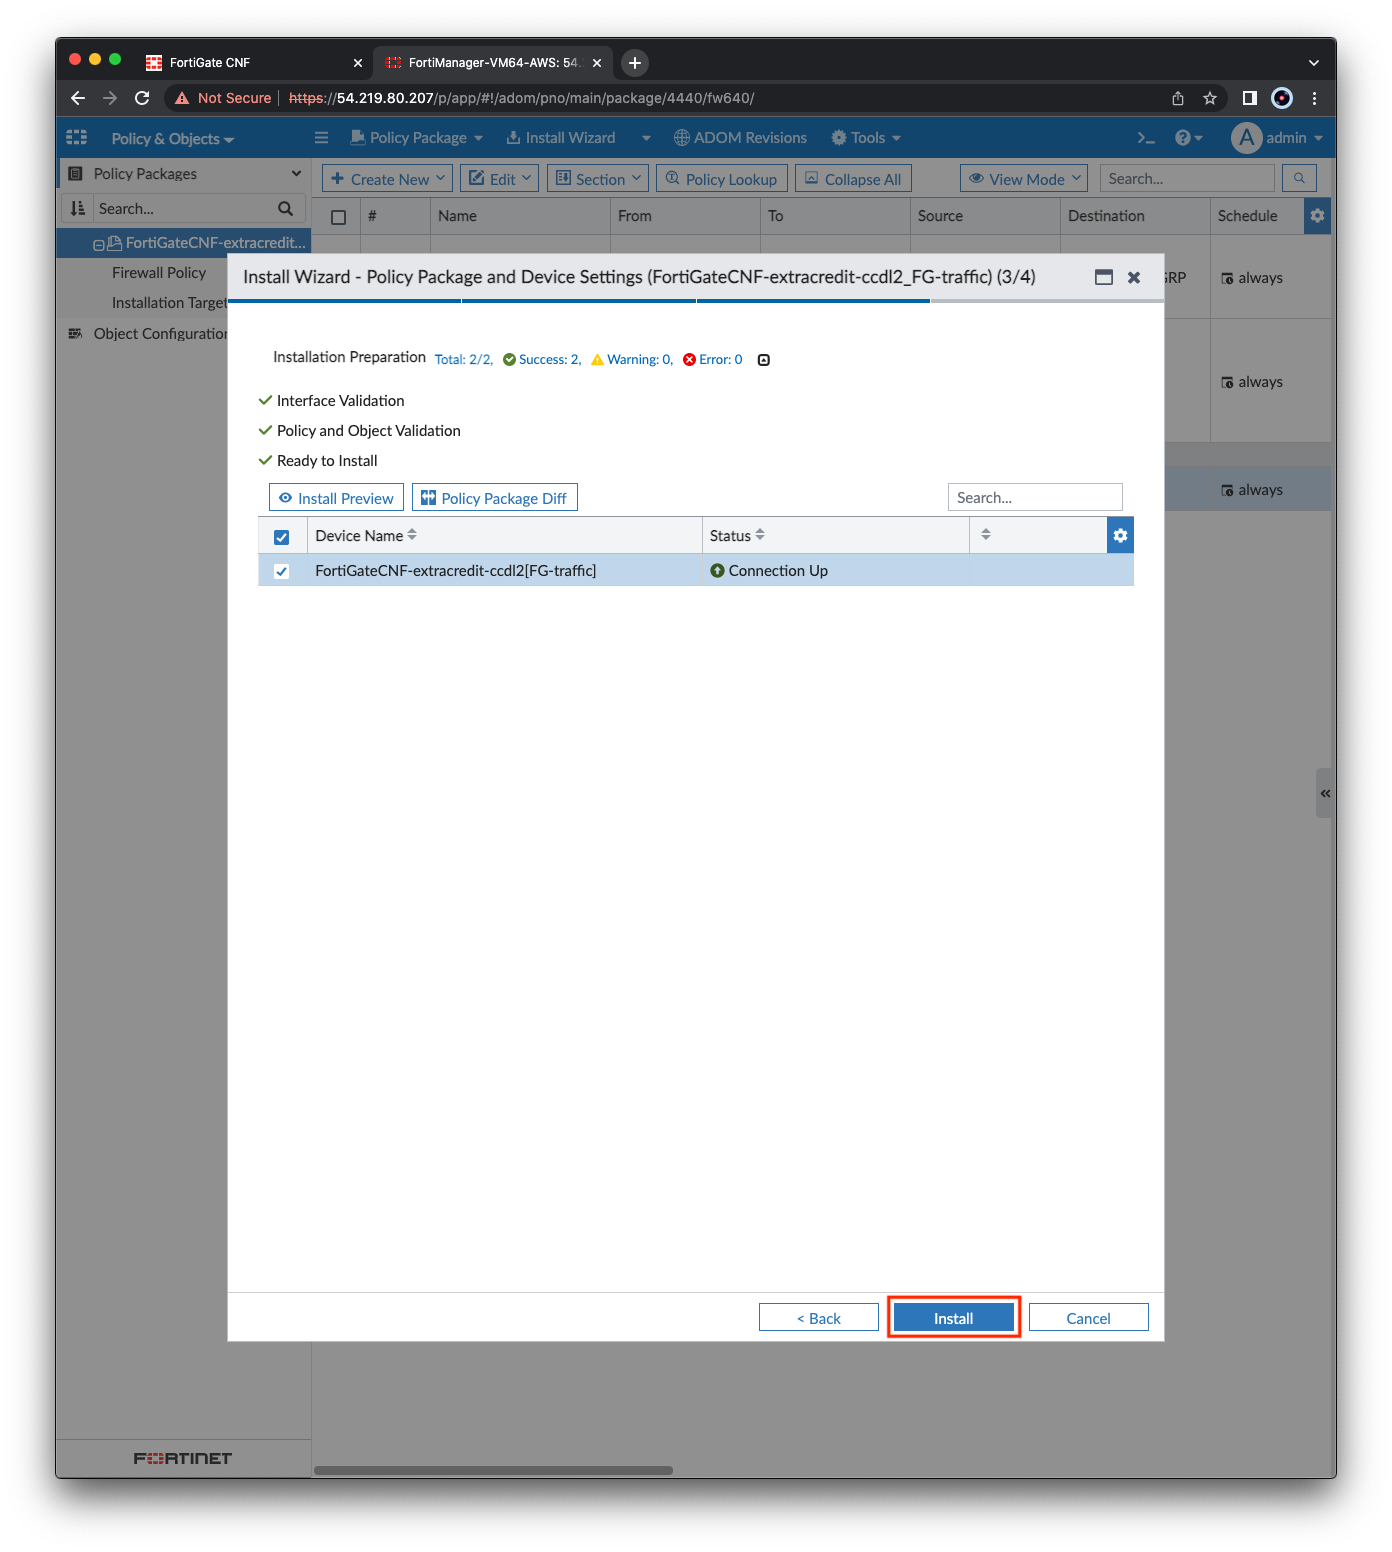
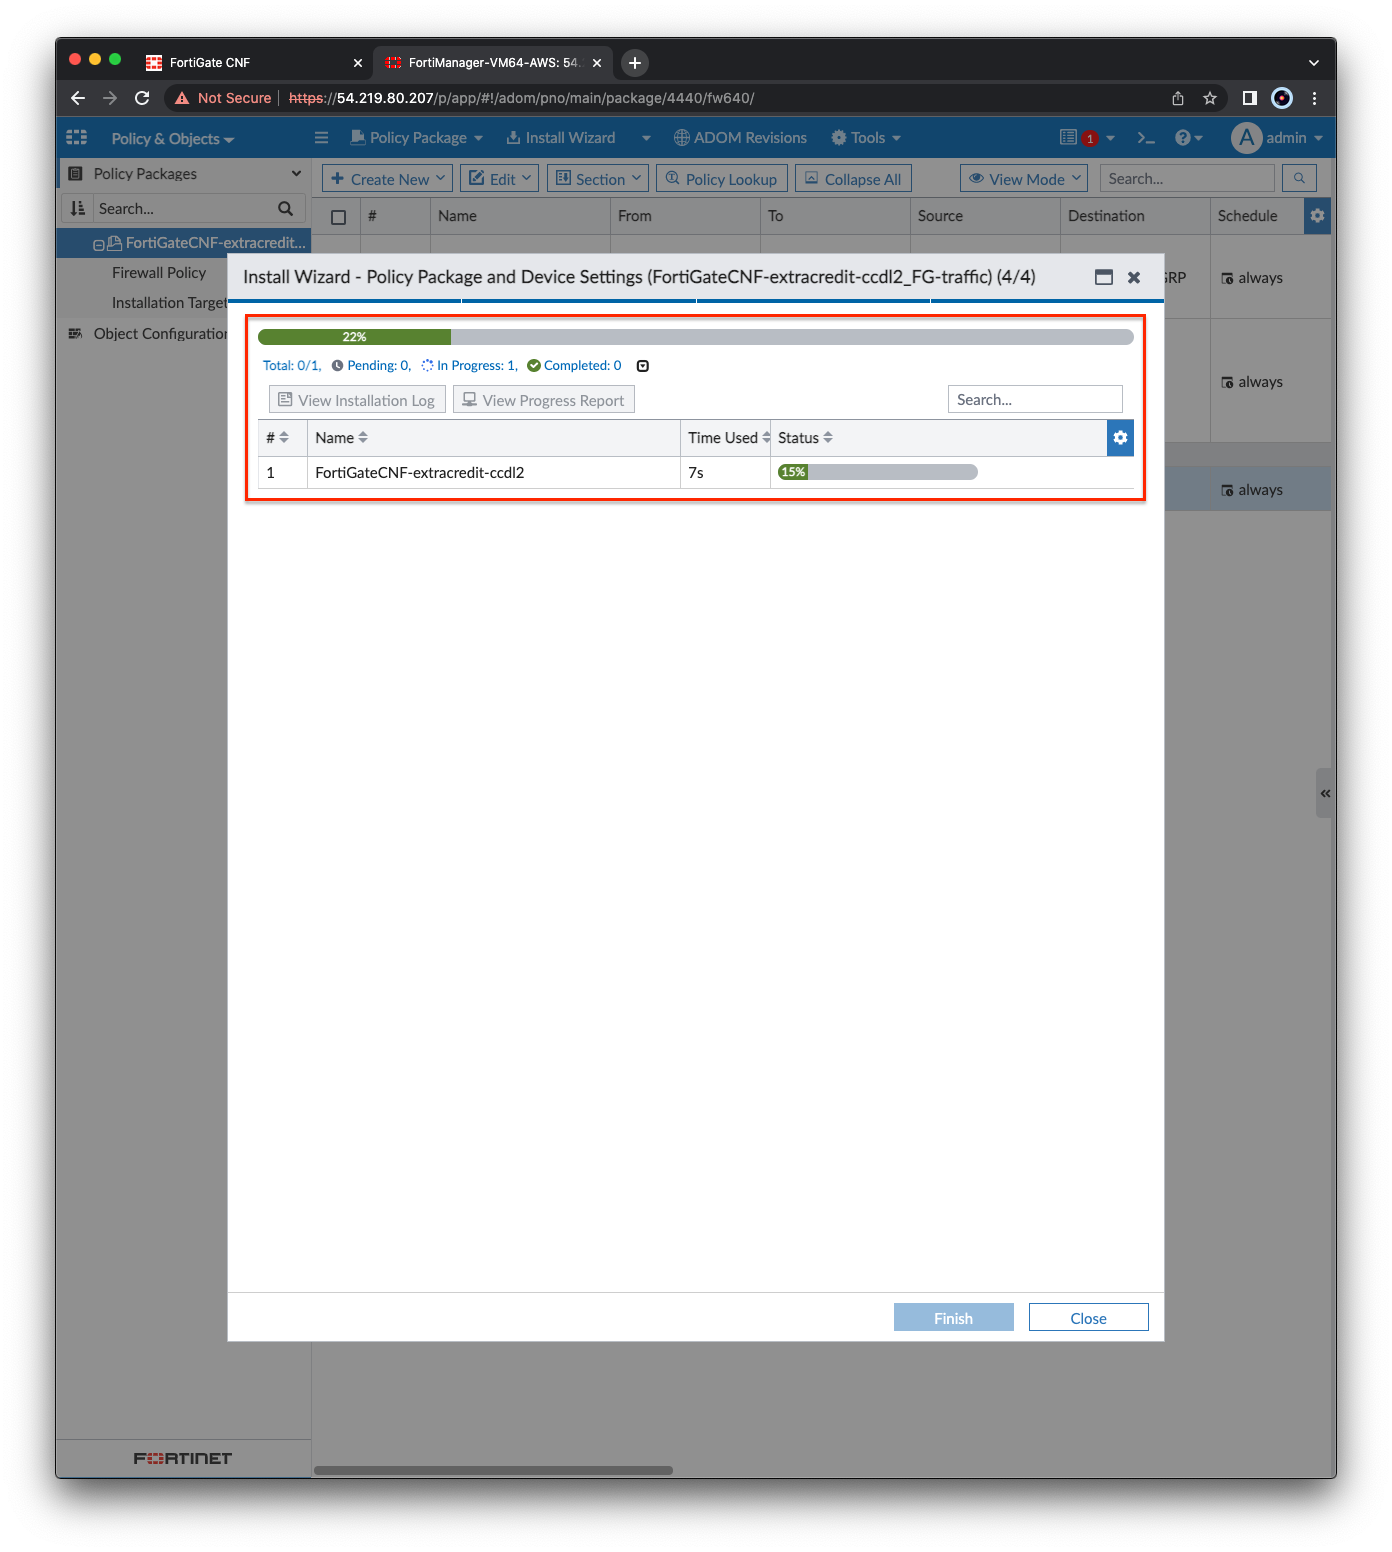
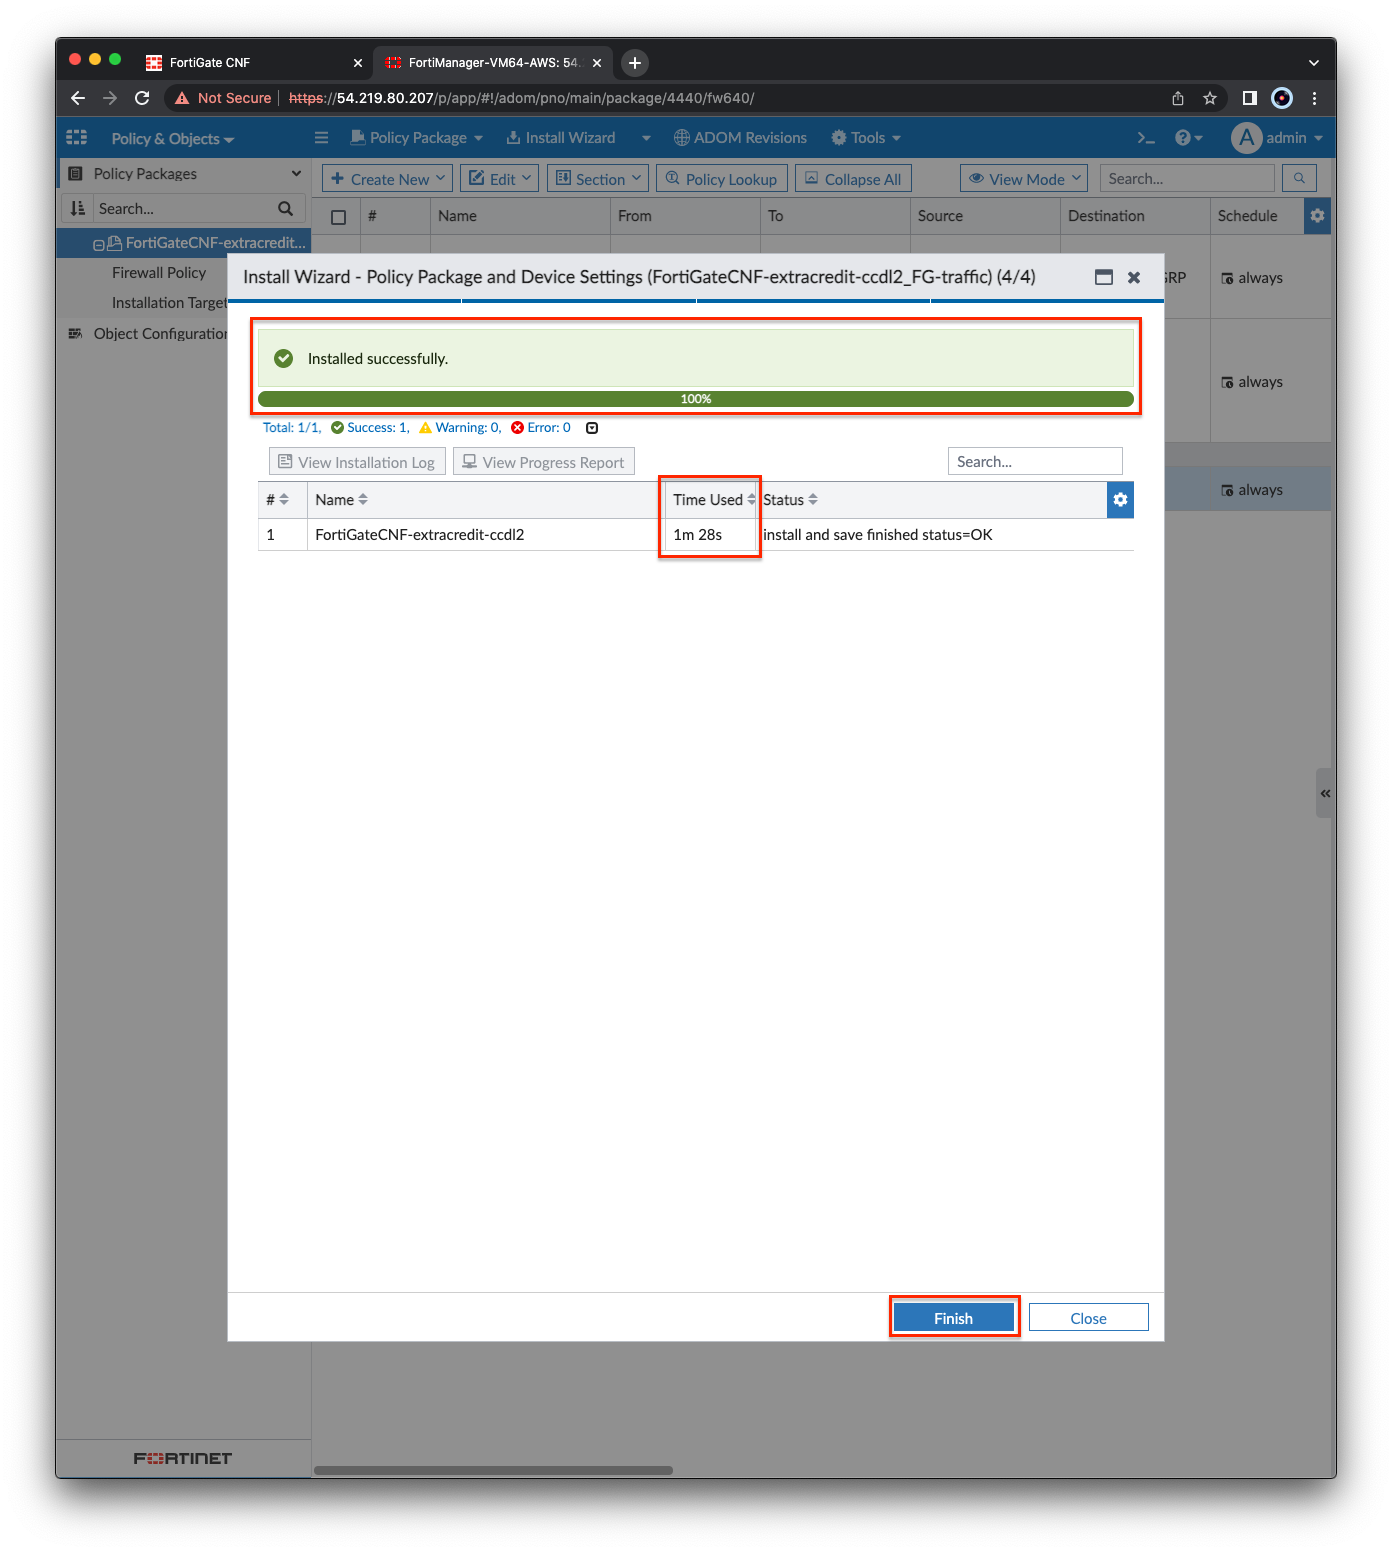
- Right click the policy package and select Install Wizard. Then click Next, Next, Install. The FortiManager will begin pushing the modified policy package to the CNF Instance. Once complete, click Finish.
- This concludes this section.