Task 1 - FortiWeb Policy setup
FortiWeb Policy setup
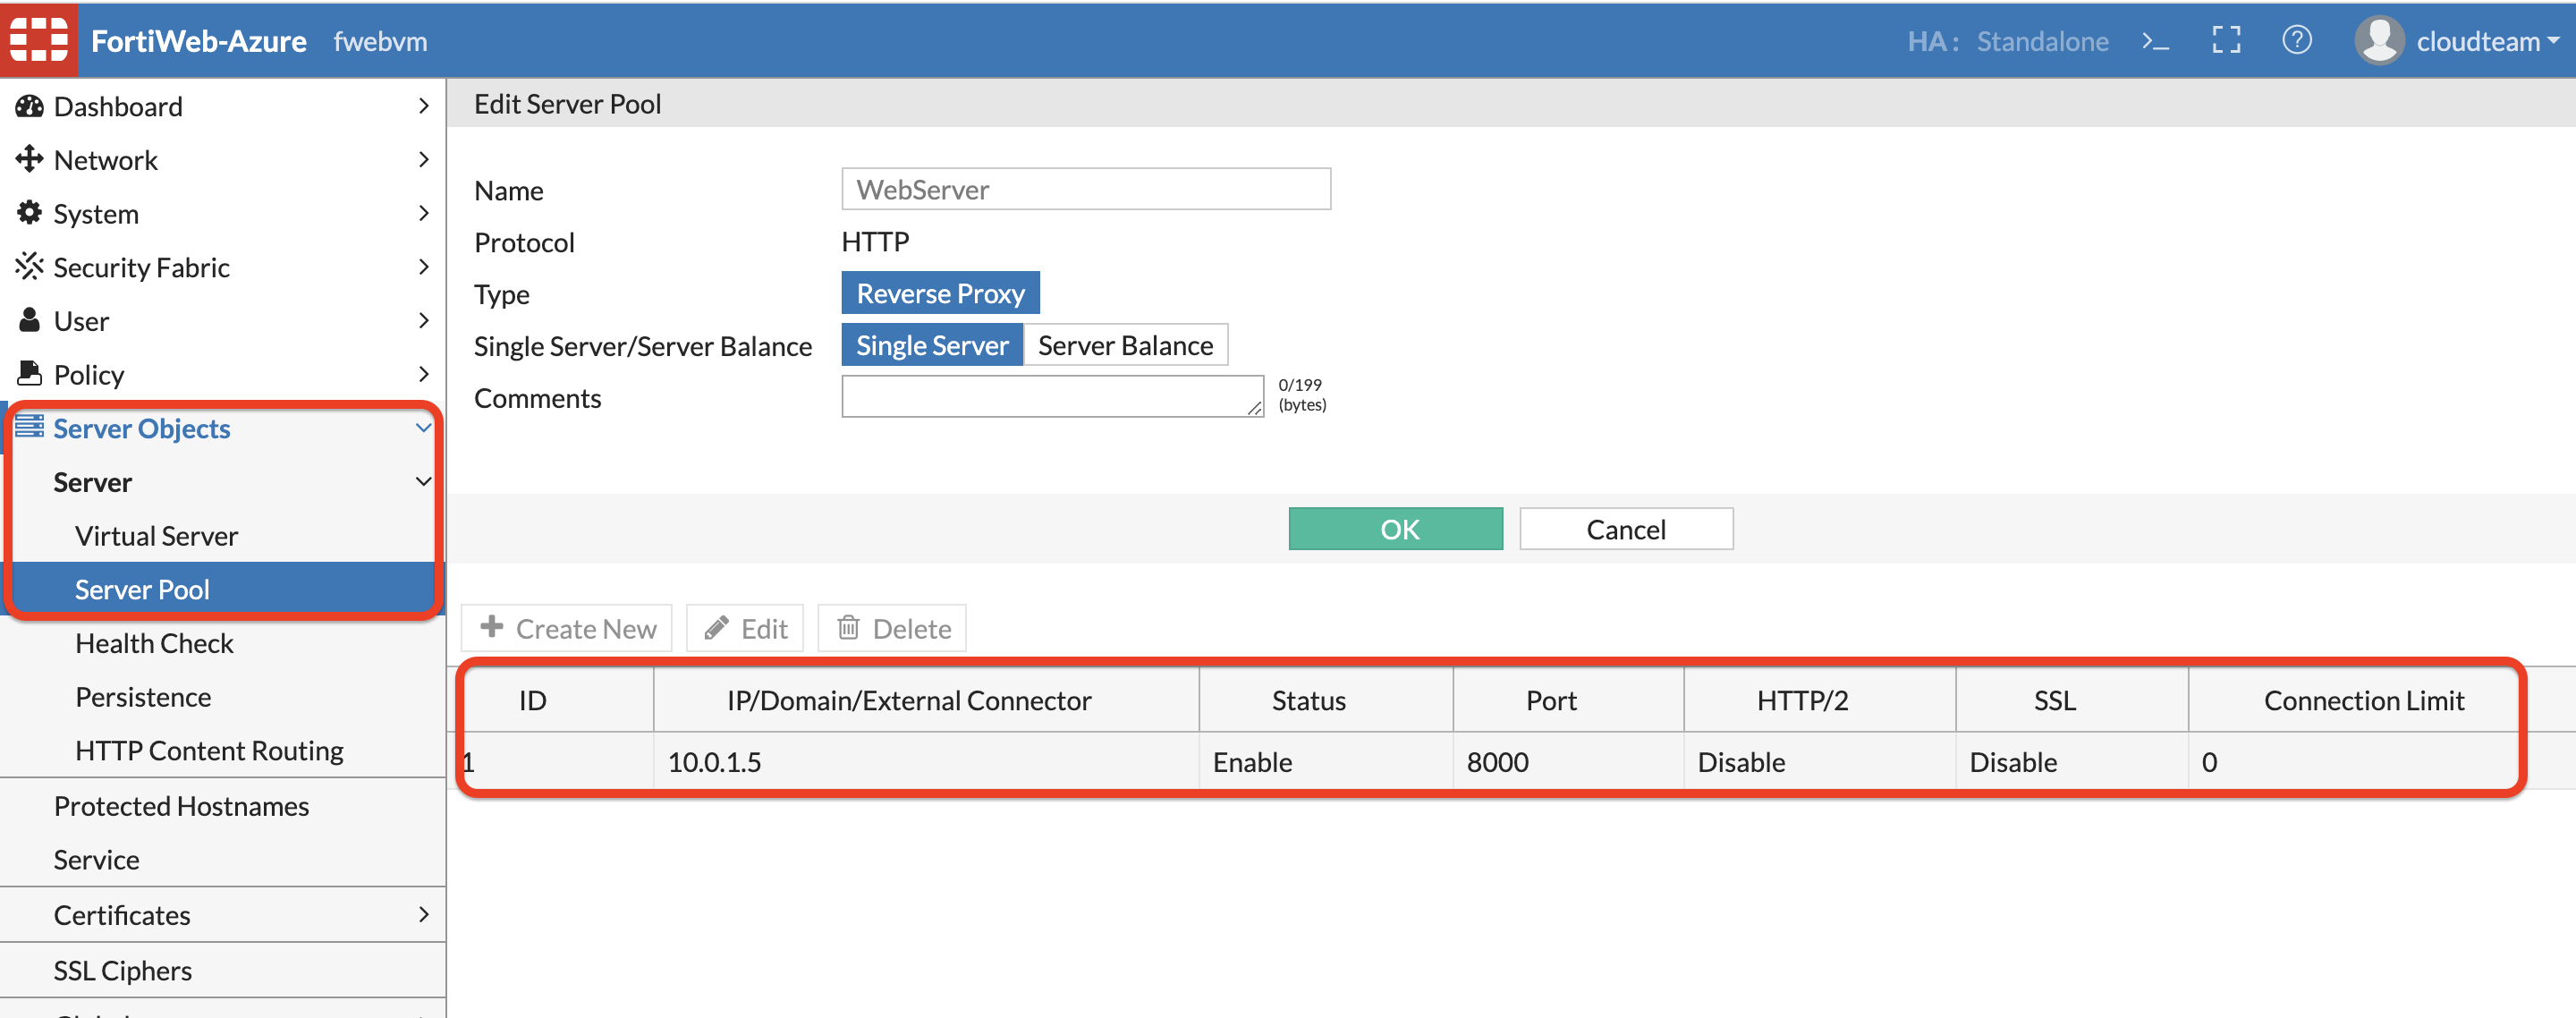
Before creating ZTNA profiles and Tags, We need to create a Server policy on FortiWeb. To create a server policy set up a server pool on FortiWeb.
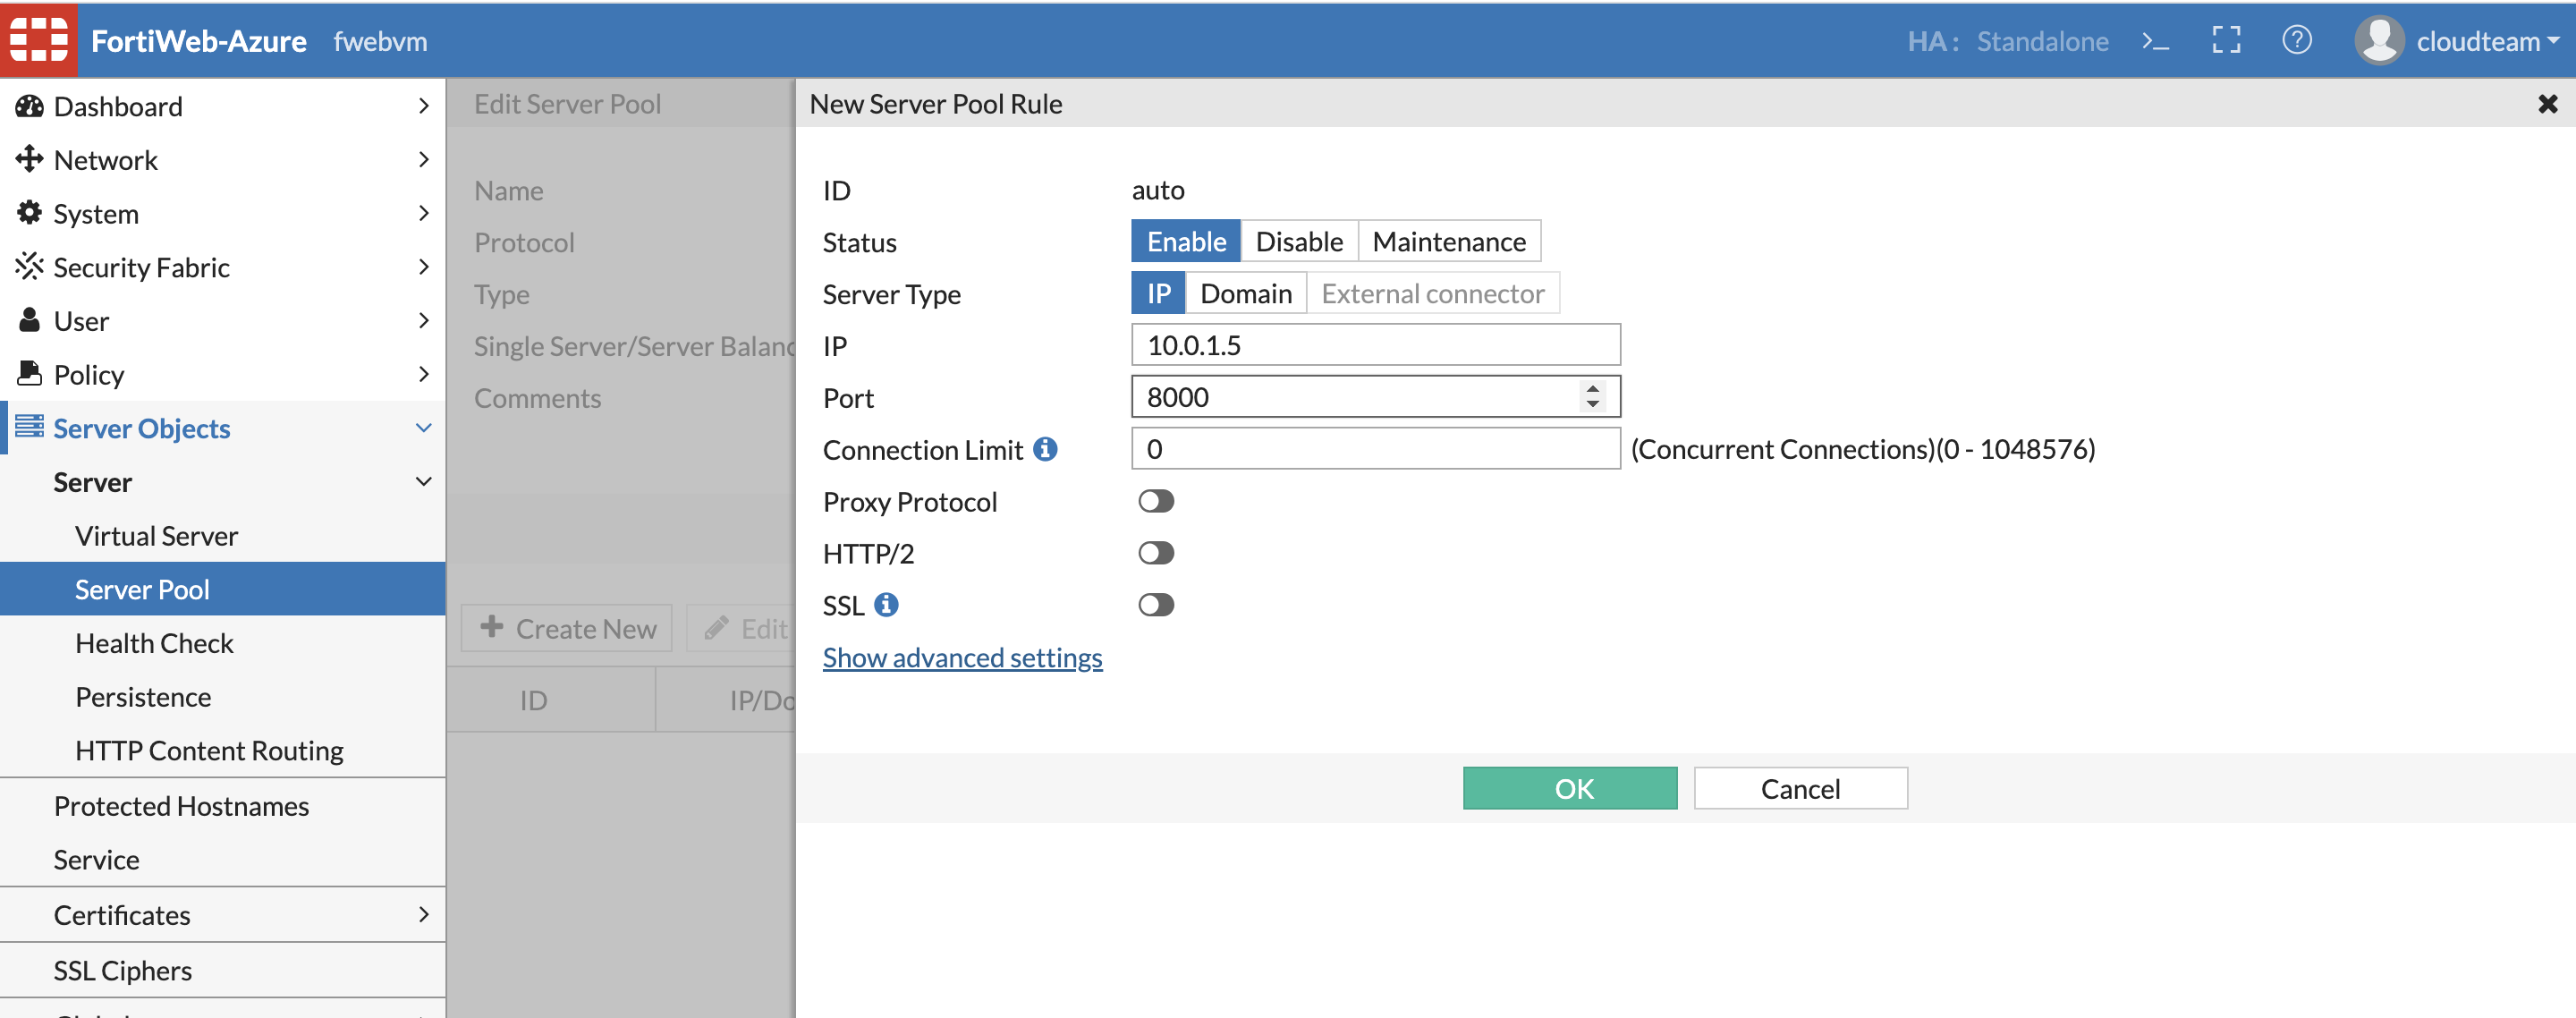
In Server Objects » Server Pool » Create new » Enter as shown below » Click OK
Click Create New to create a new server in Server pool as below.
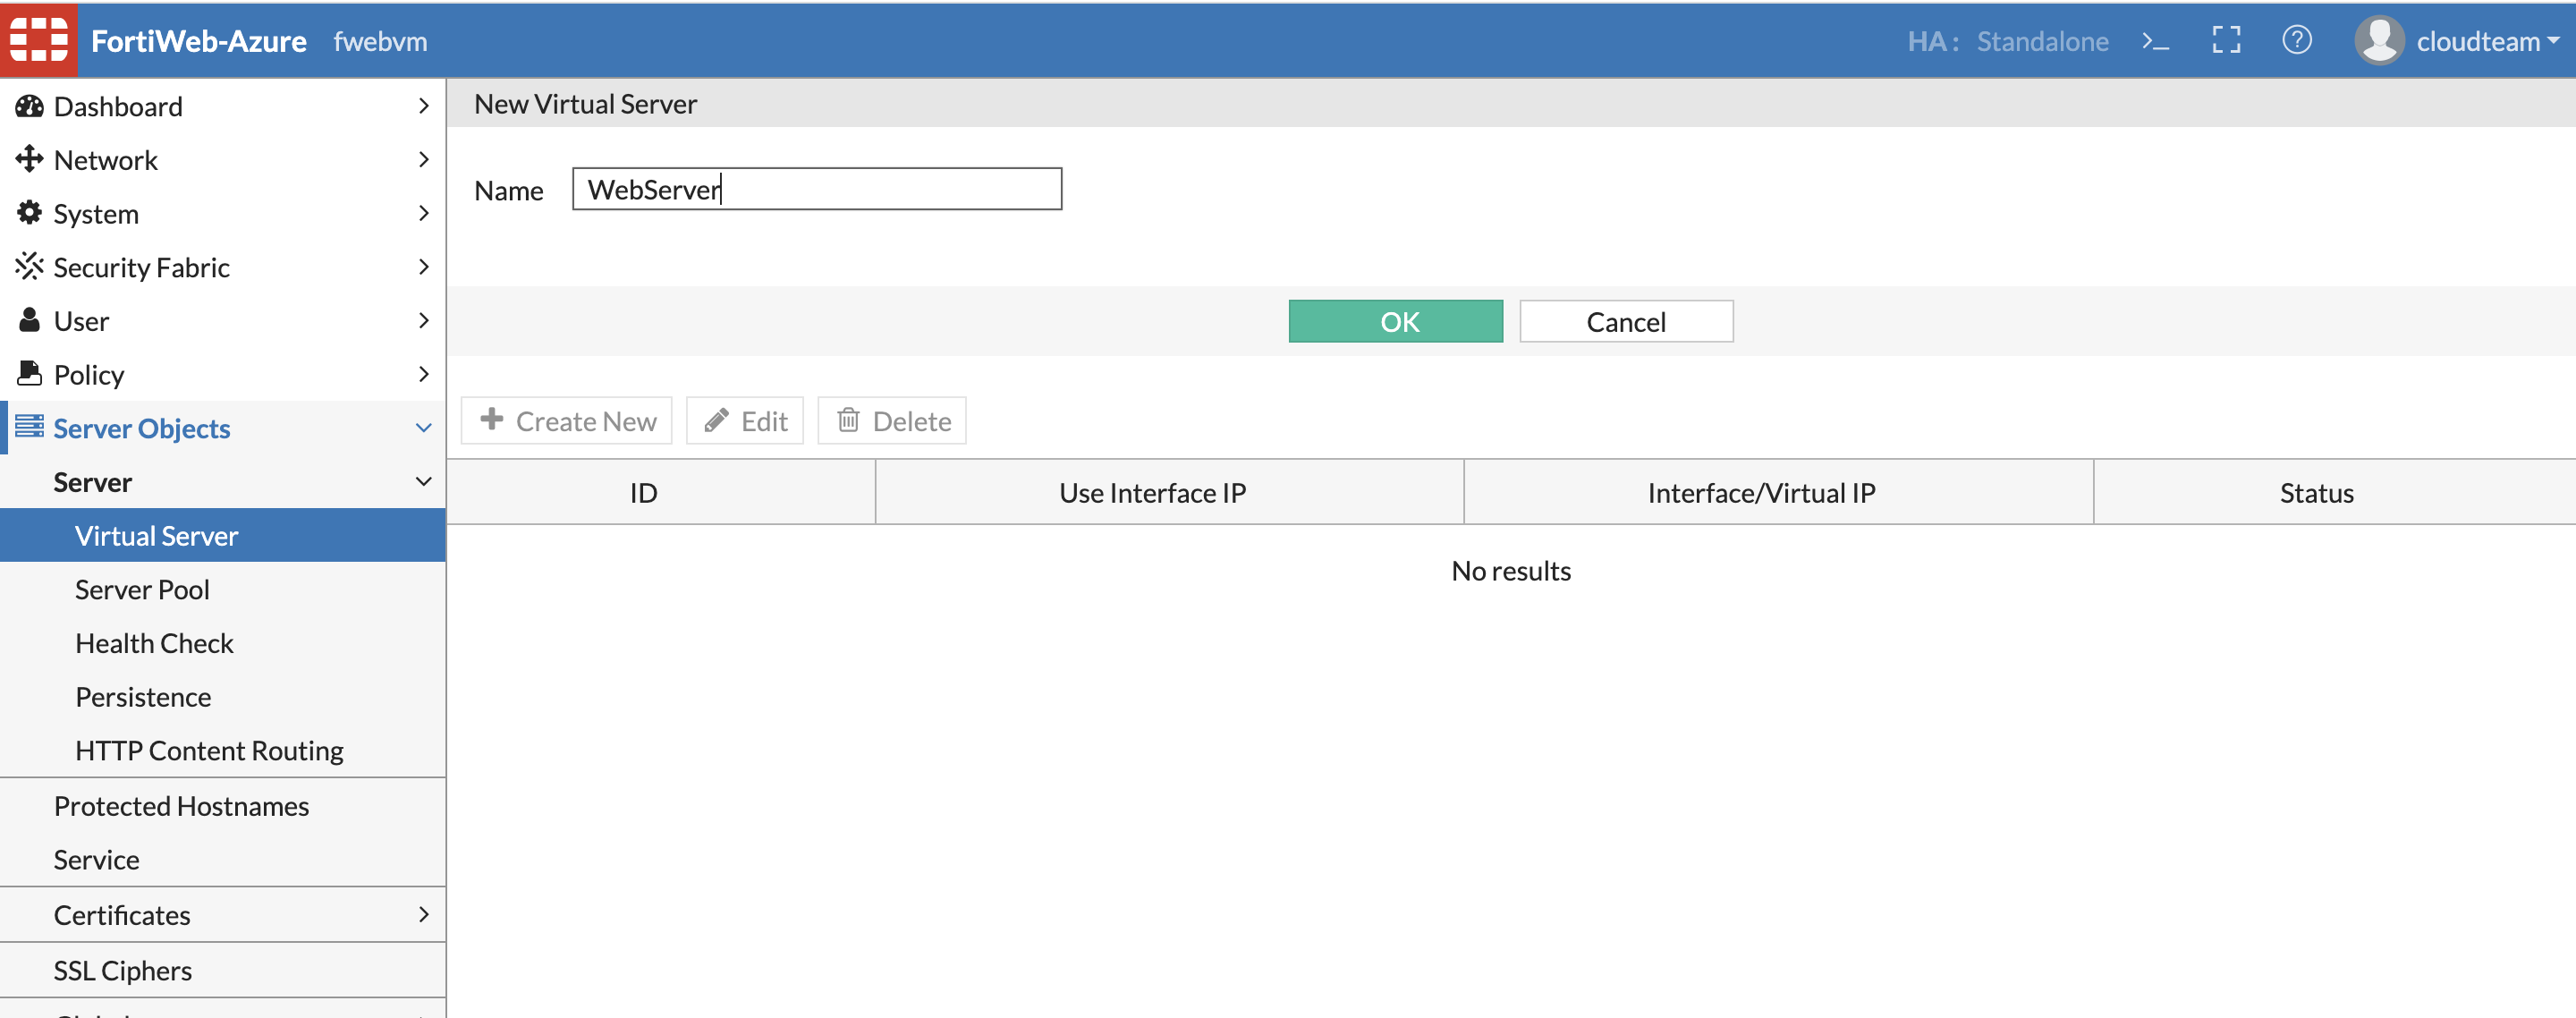
Now, Create a Virtual Server. Server Objects » Virtual Server » Create new » click OK
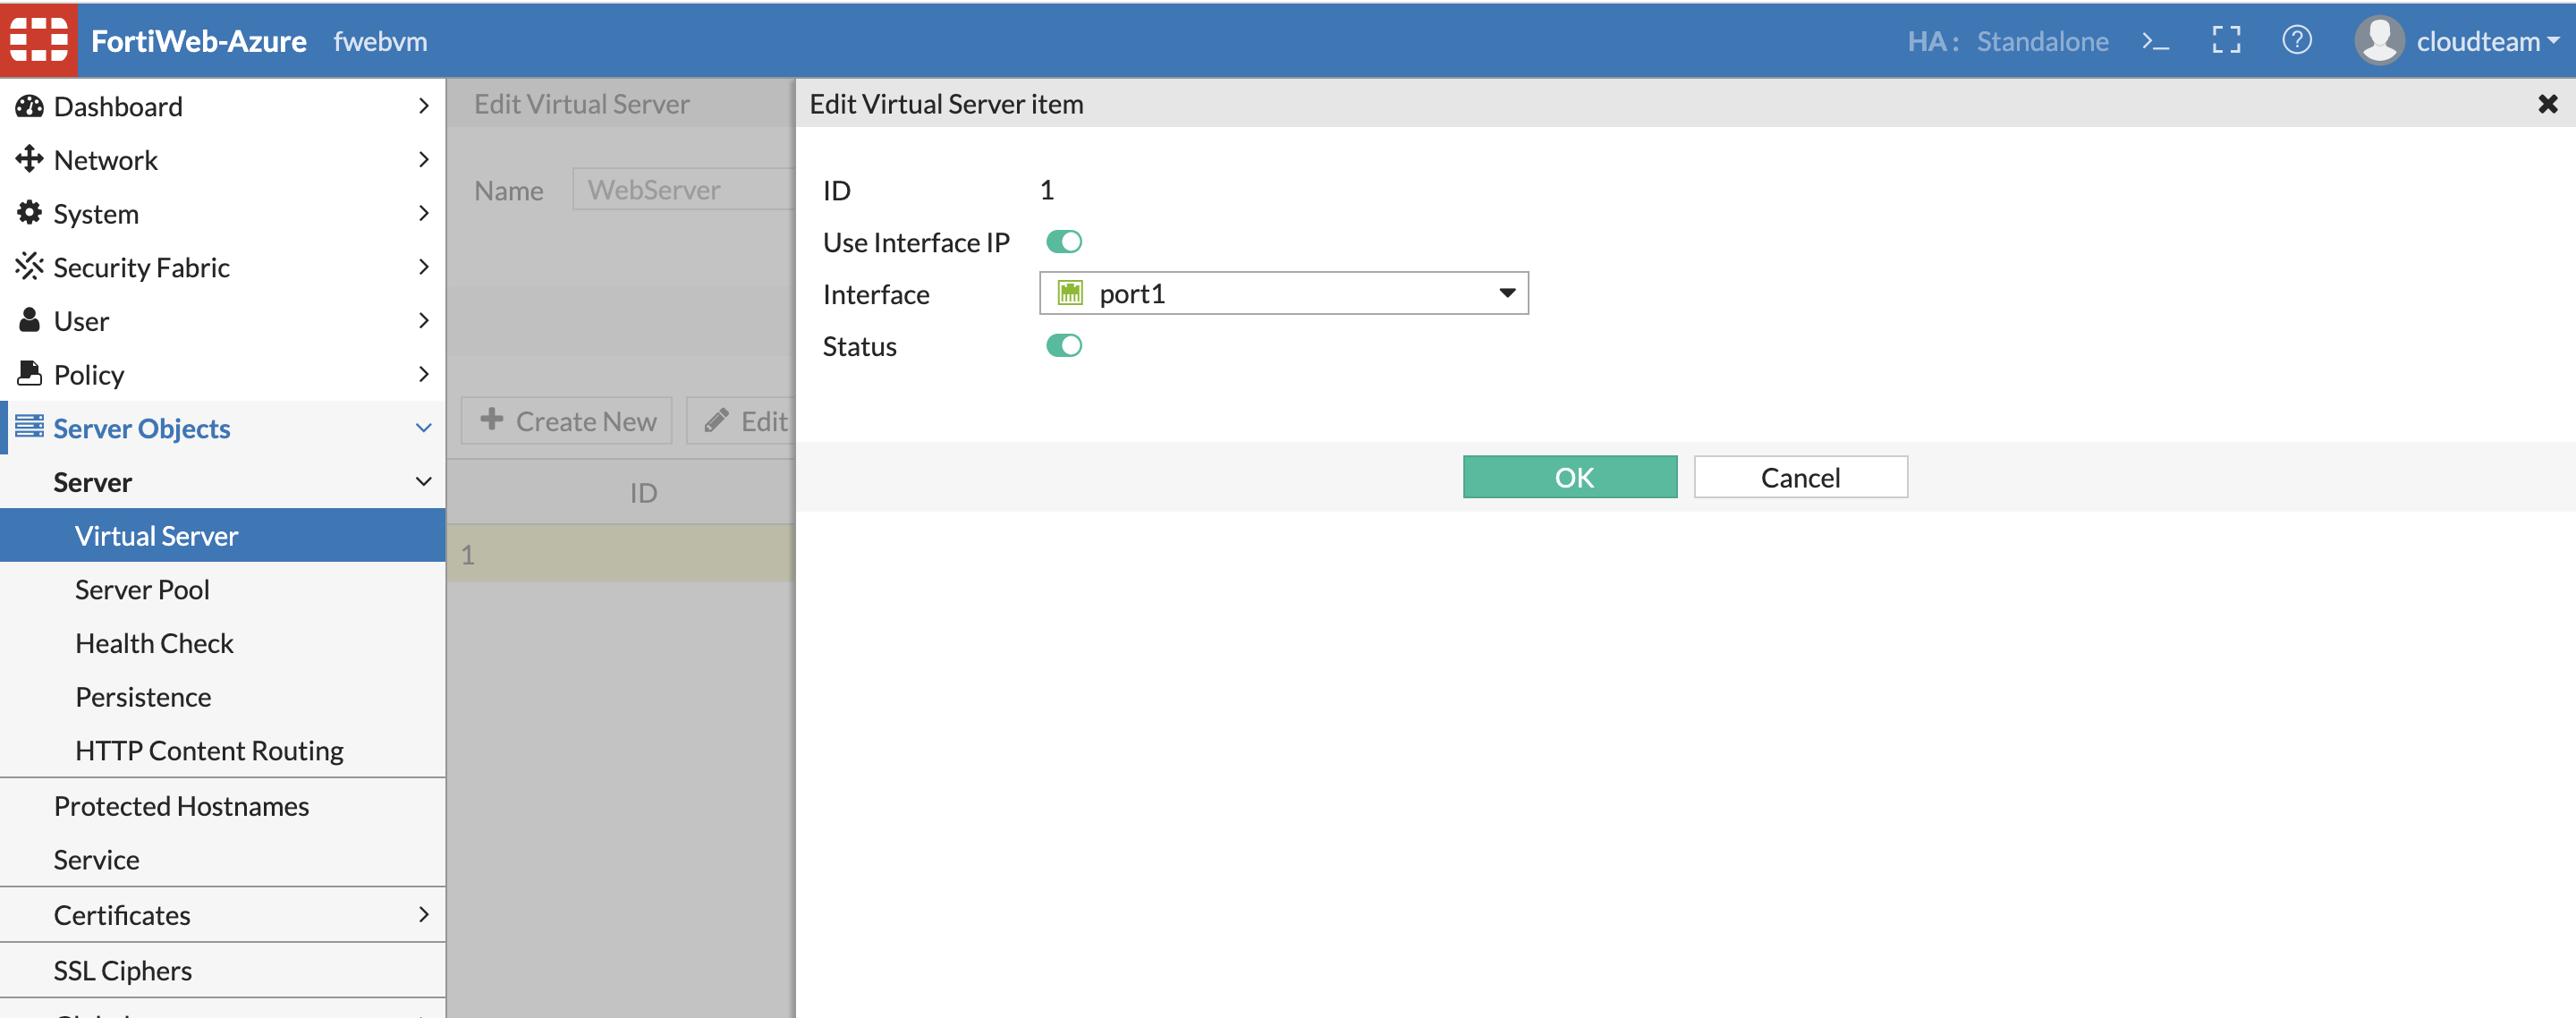
Now we will create a Virtual Server to listen on Port1 IP address
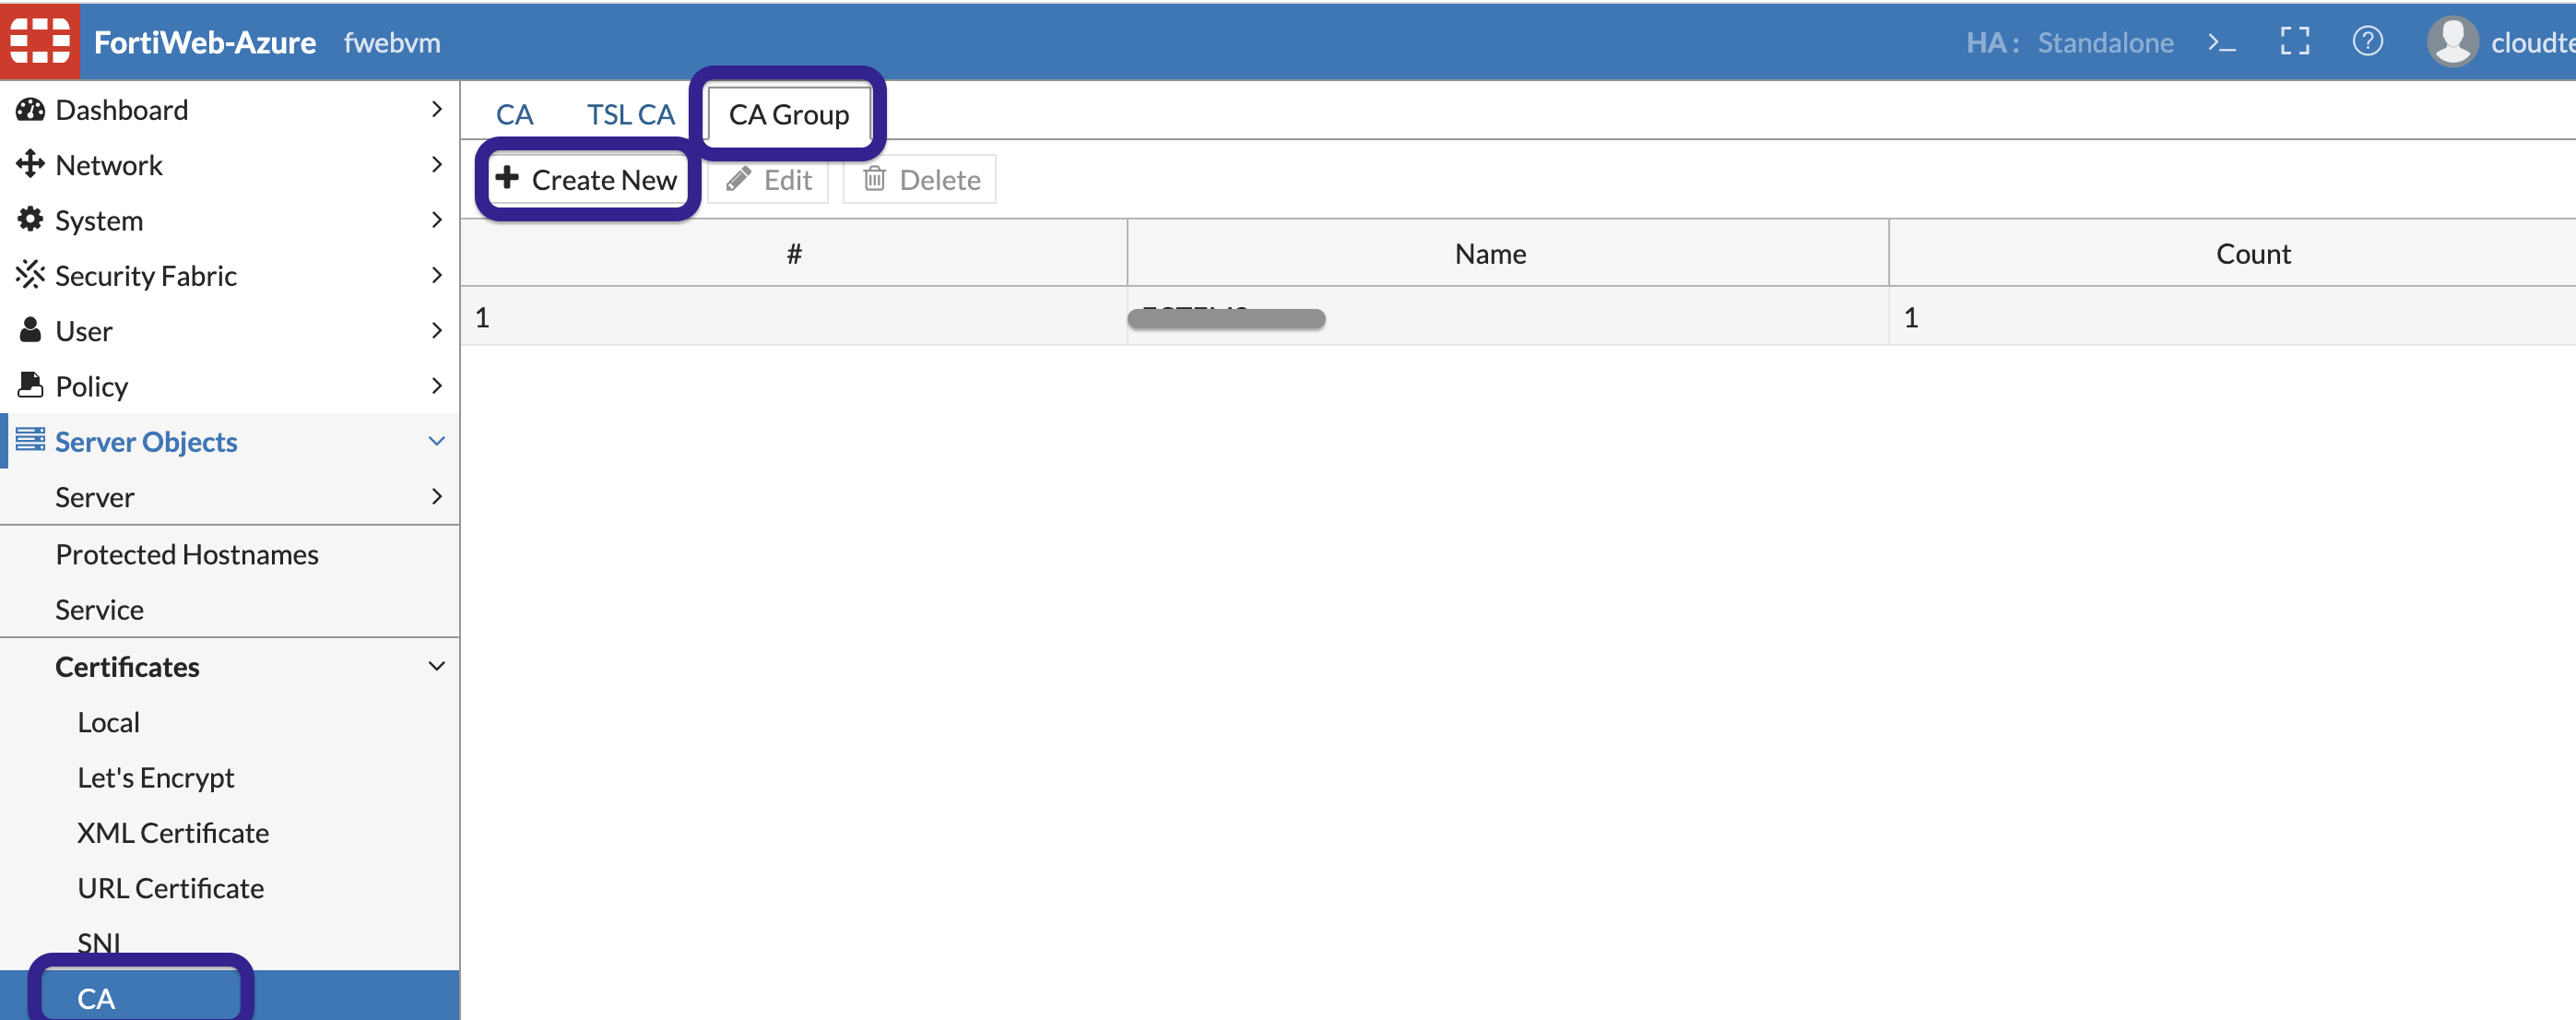
Create a certificate in Server Objects » Certificates » CA Group
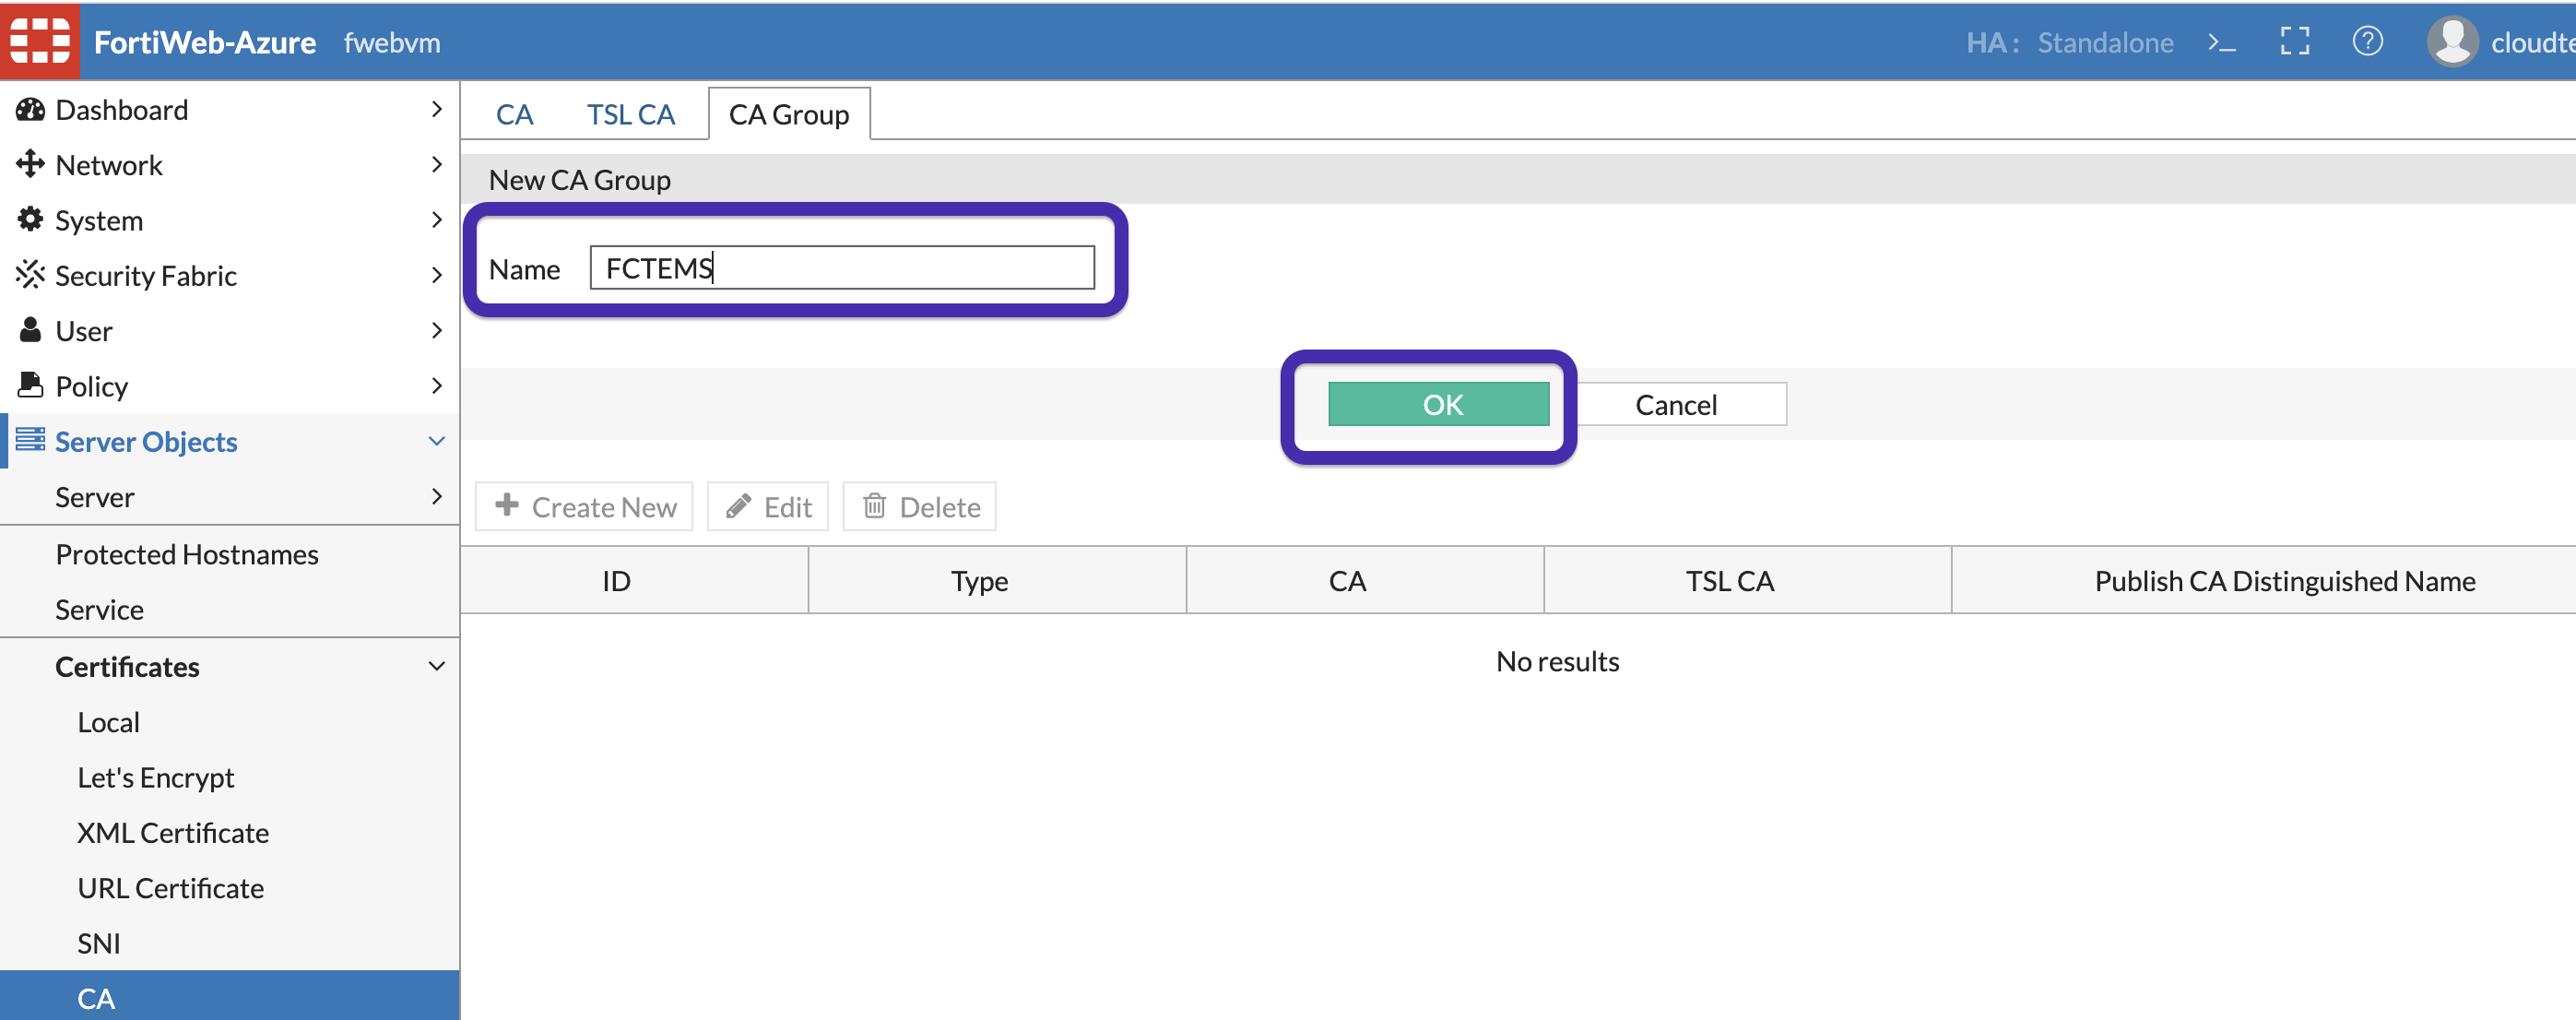
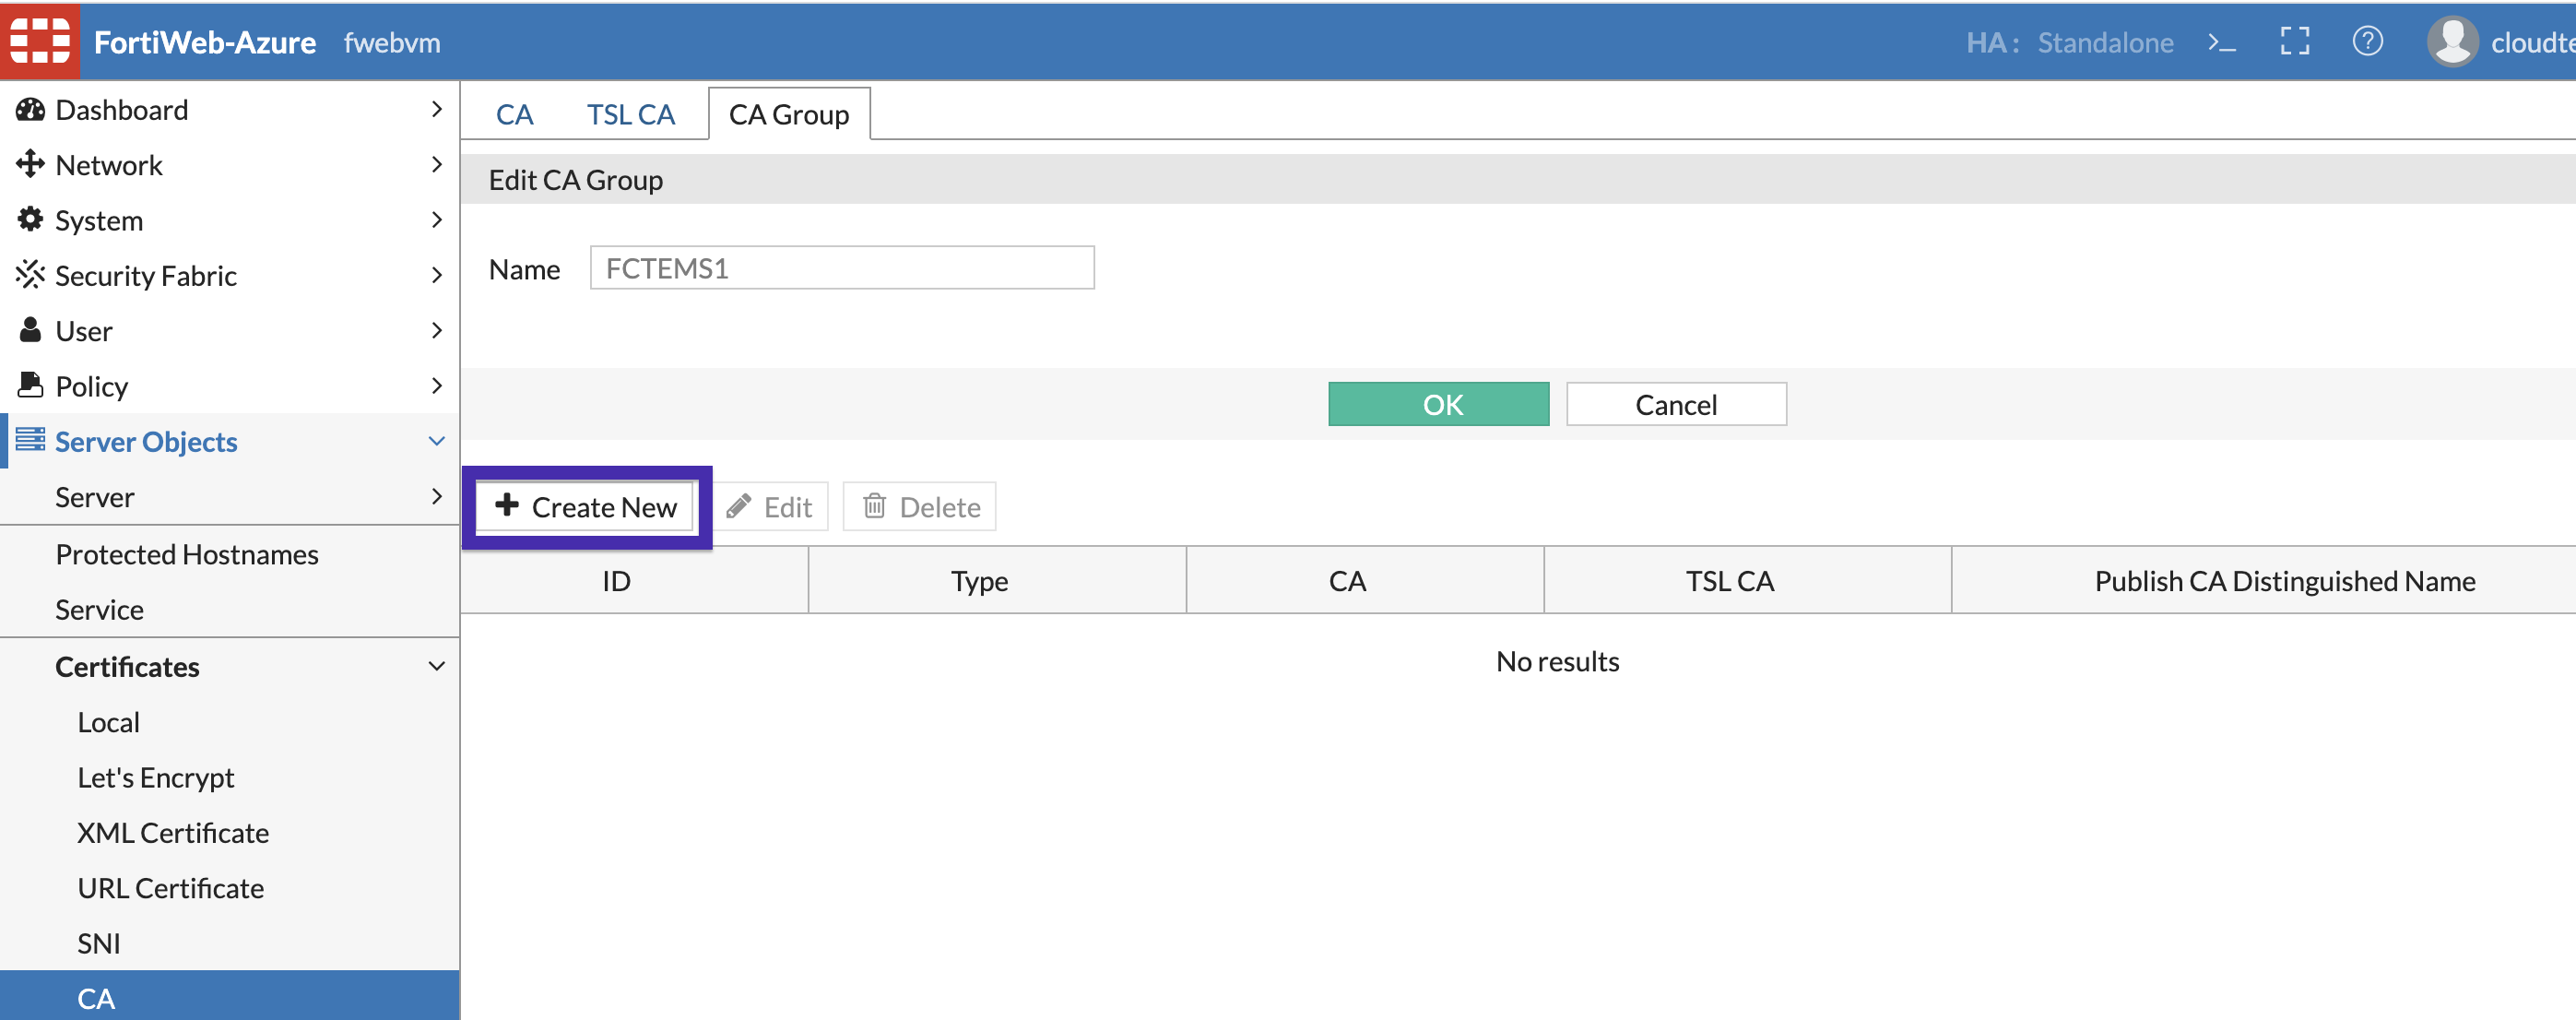
Create New CA group for FCTEMS and click OK.
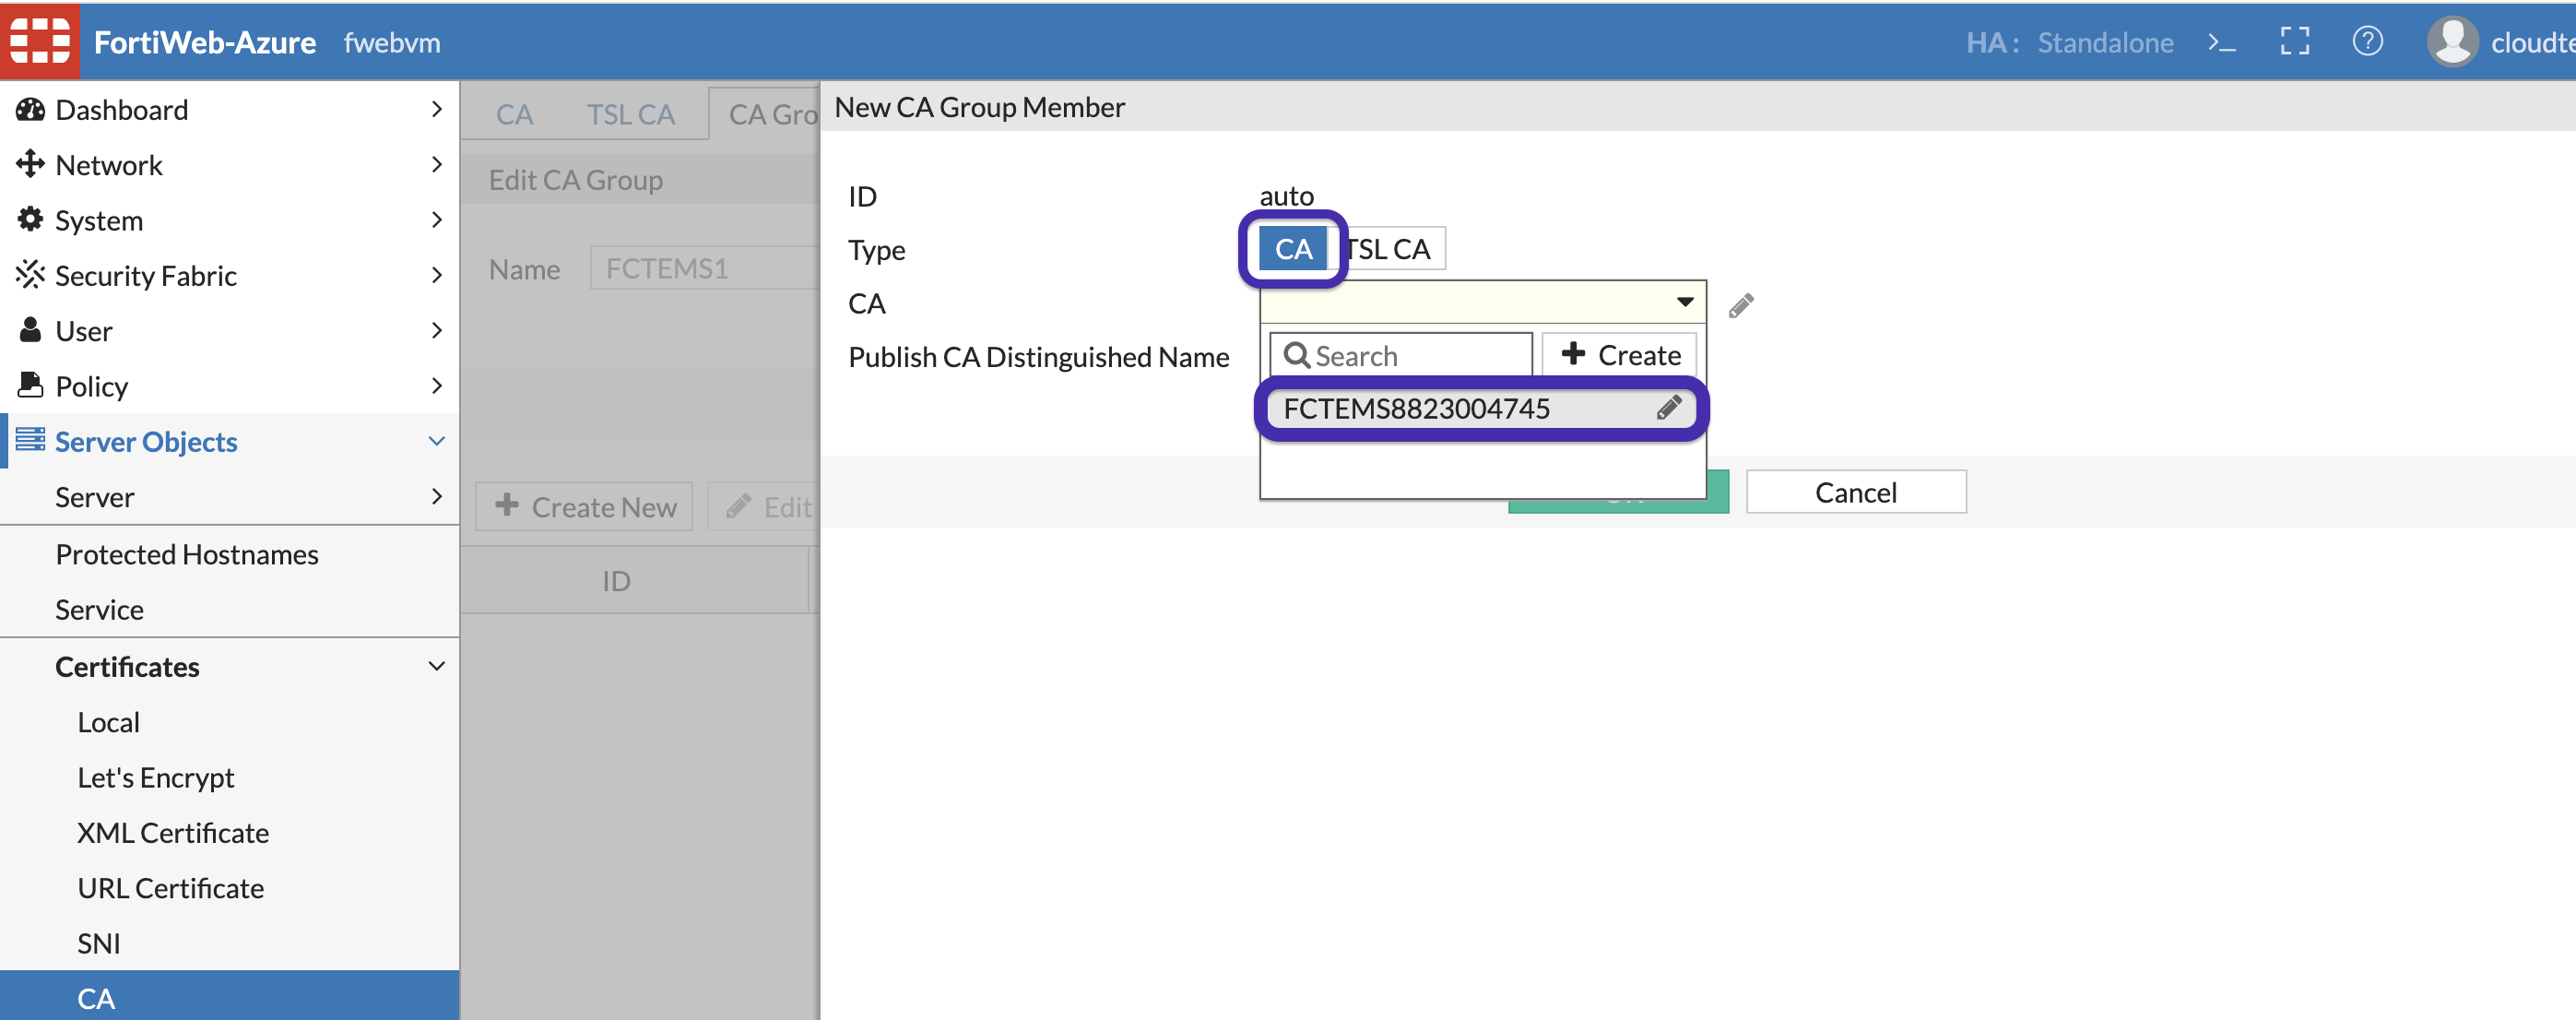
Select Type CA, Select CA for FCTEMSXXXXXXX certificate as the CA, Click OK.
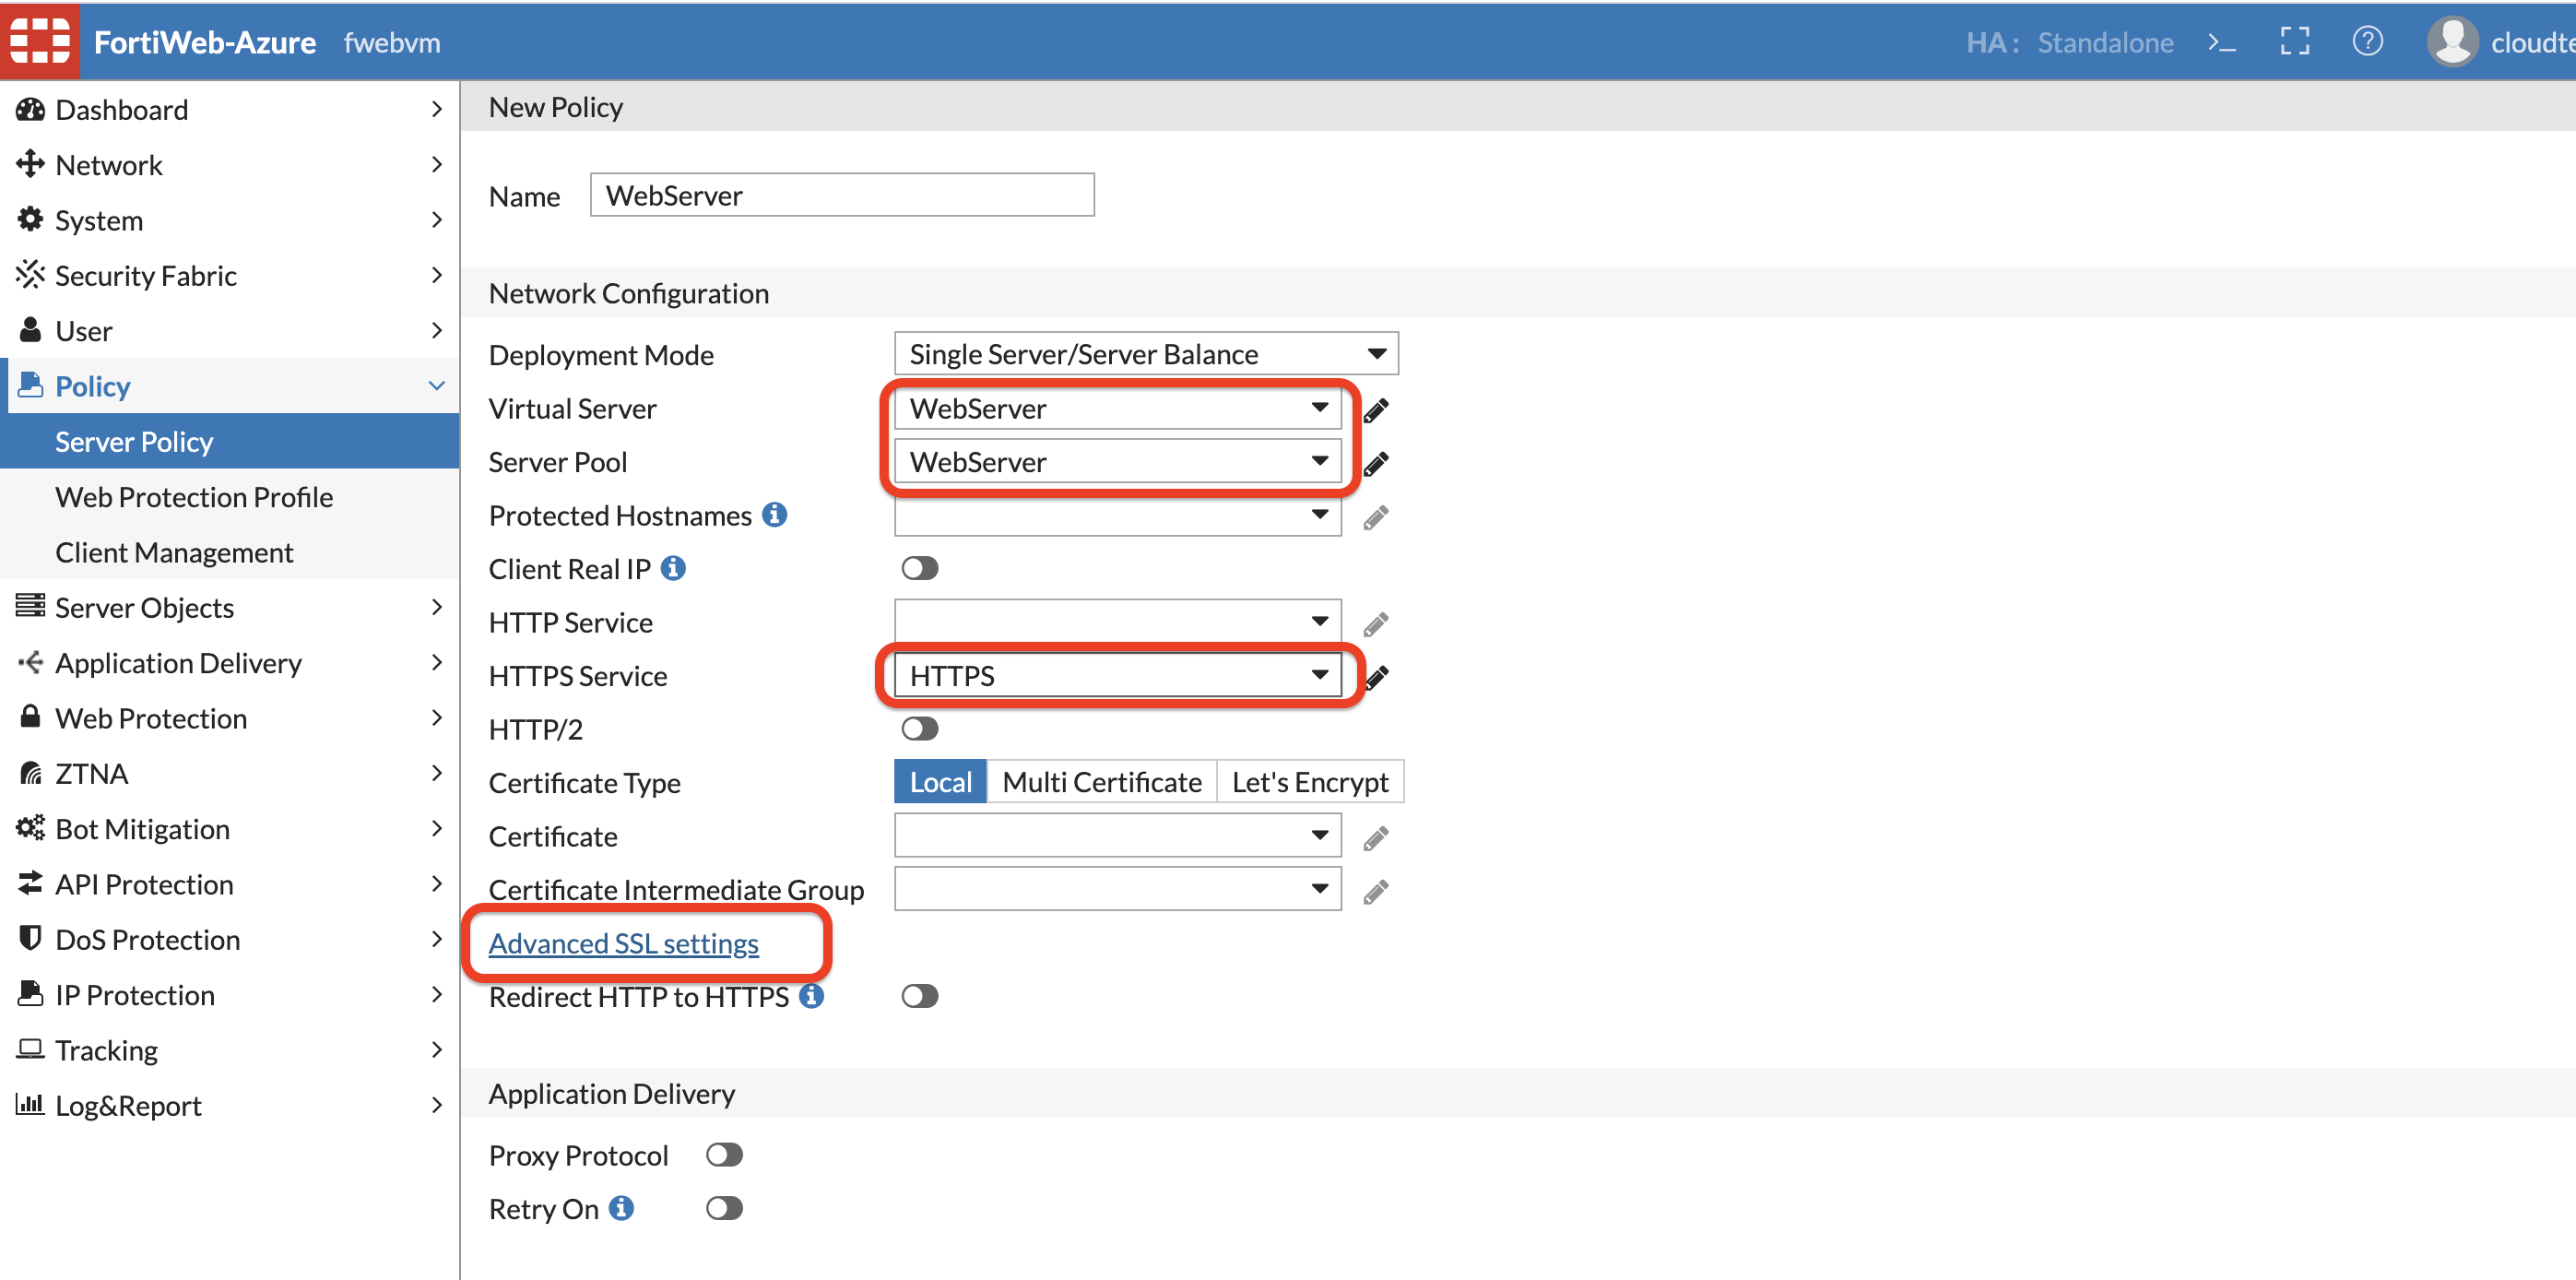
Create a Server policy , in Policy » Server Policy » Create New as shown below.
- For Server pool, Virtual Server select the objects you created in Step 2 and 3. For HTTPS service select HTTPS
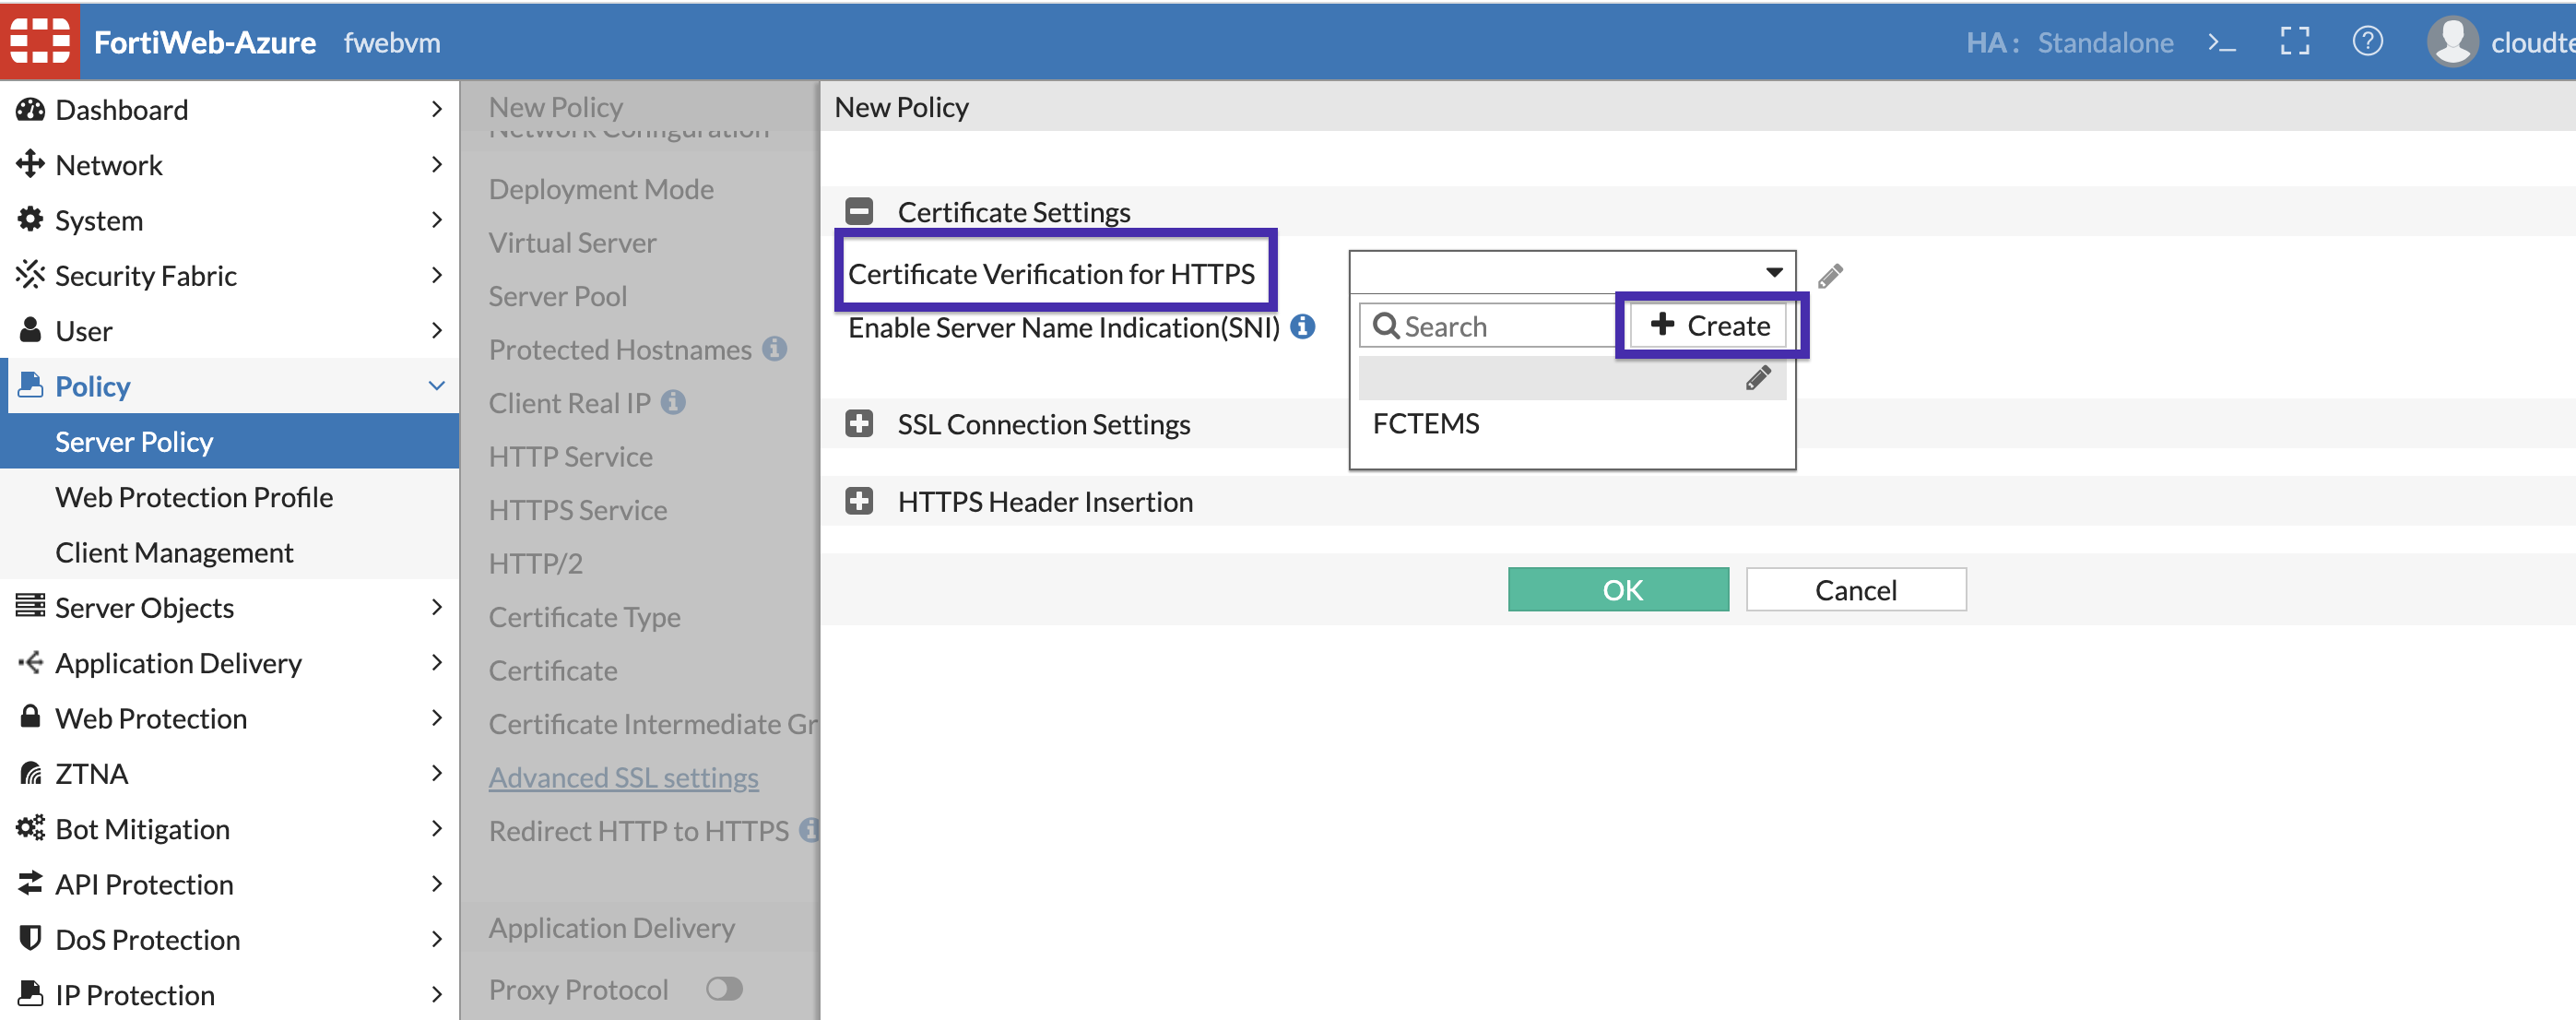
Click Advanced SSL settings, For Certification verification for HTTPS click create new:
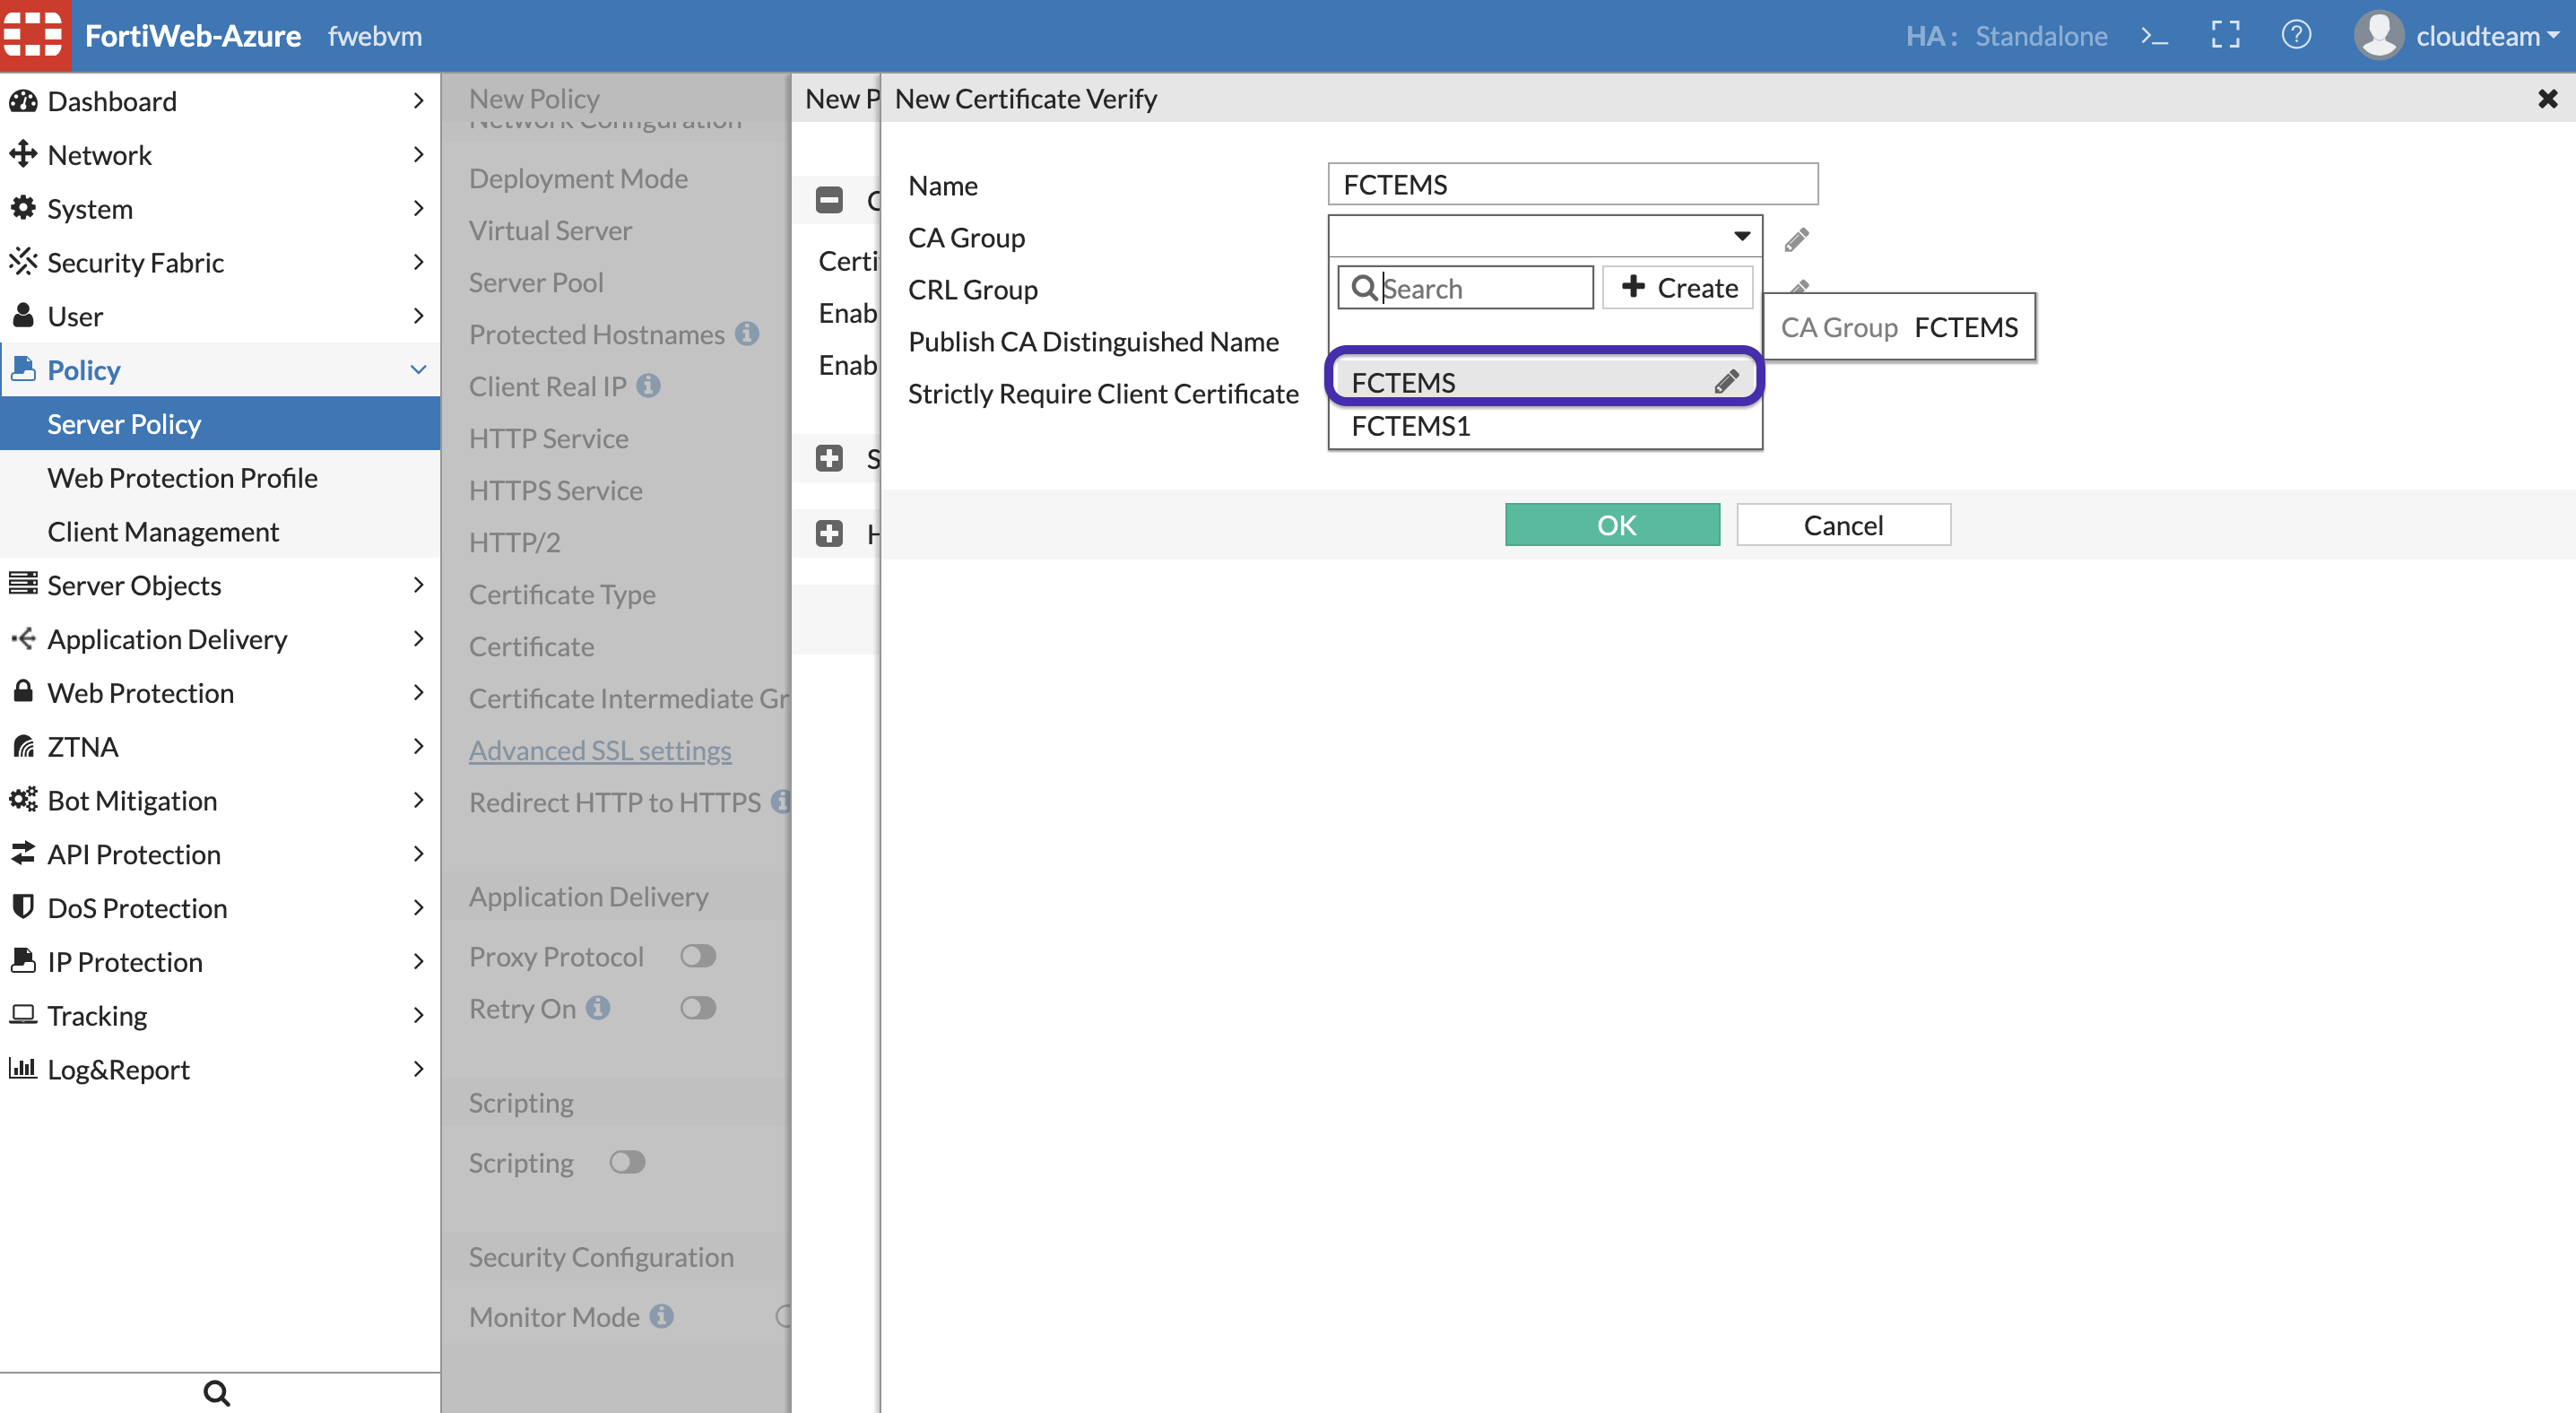
In the New Certificate Verify Tab, select the CA you have created earlier in Step 6. Finally Clik OK on the server policy.
ZTNA Policies on FortiWeb
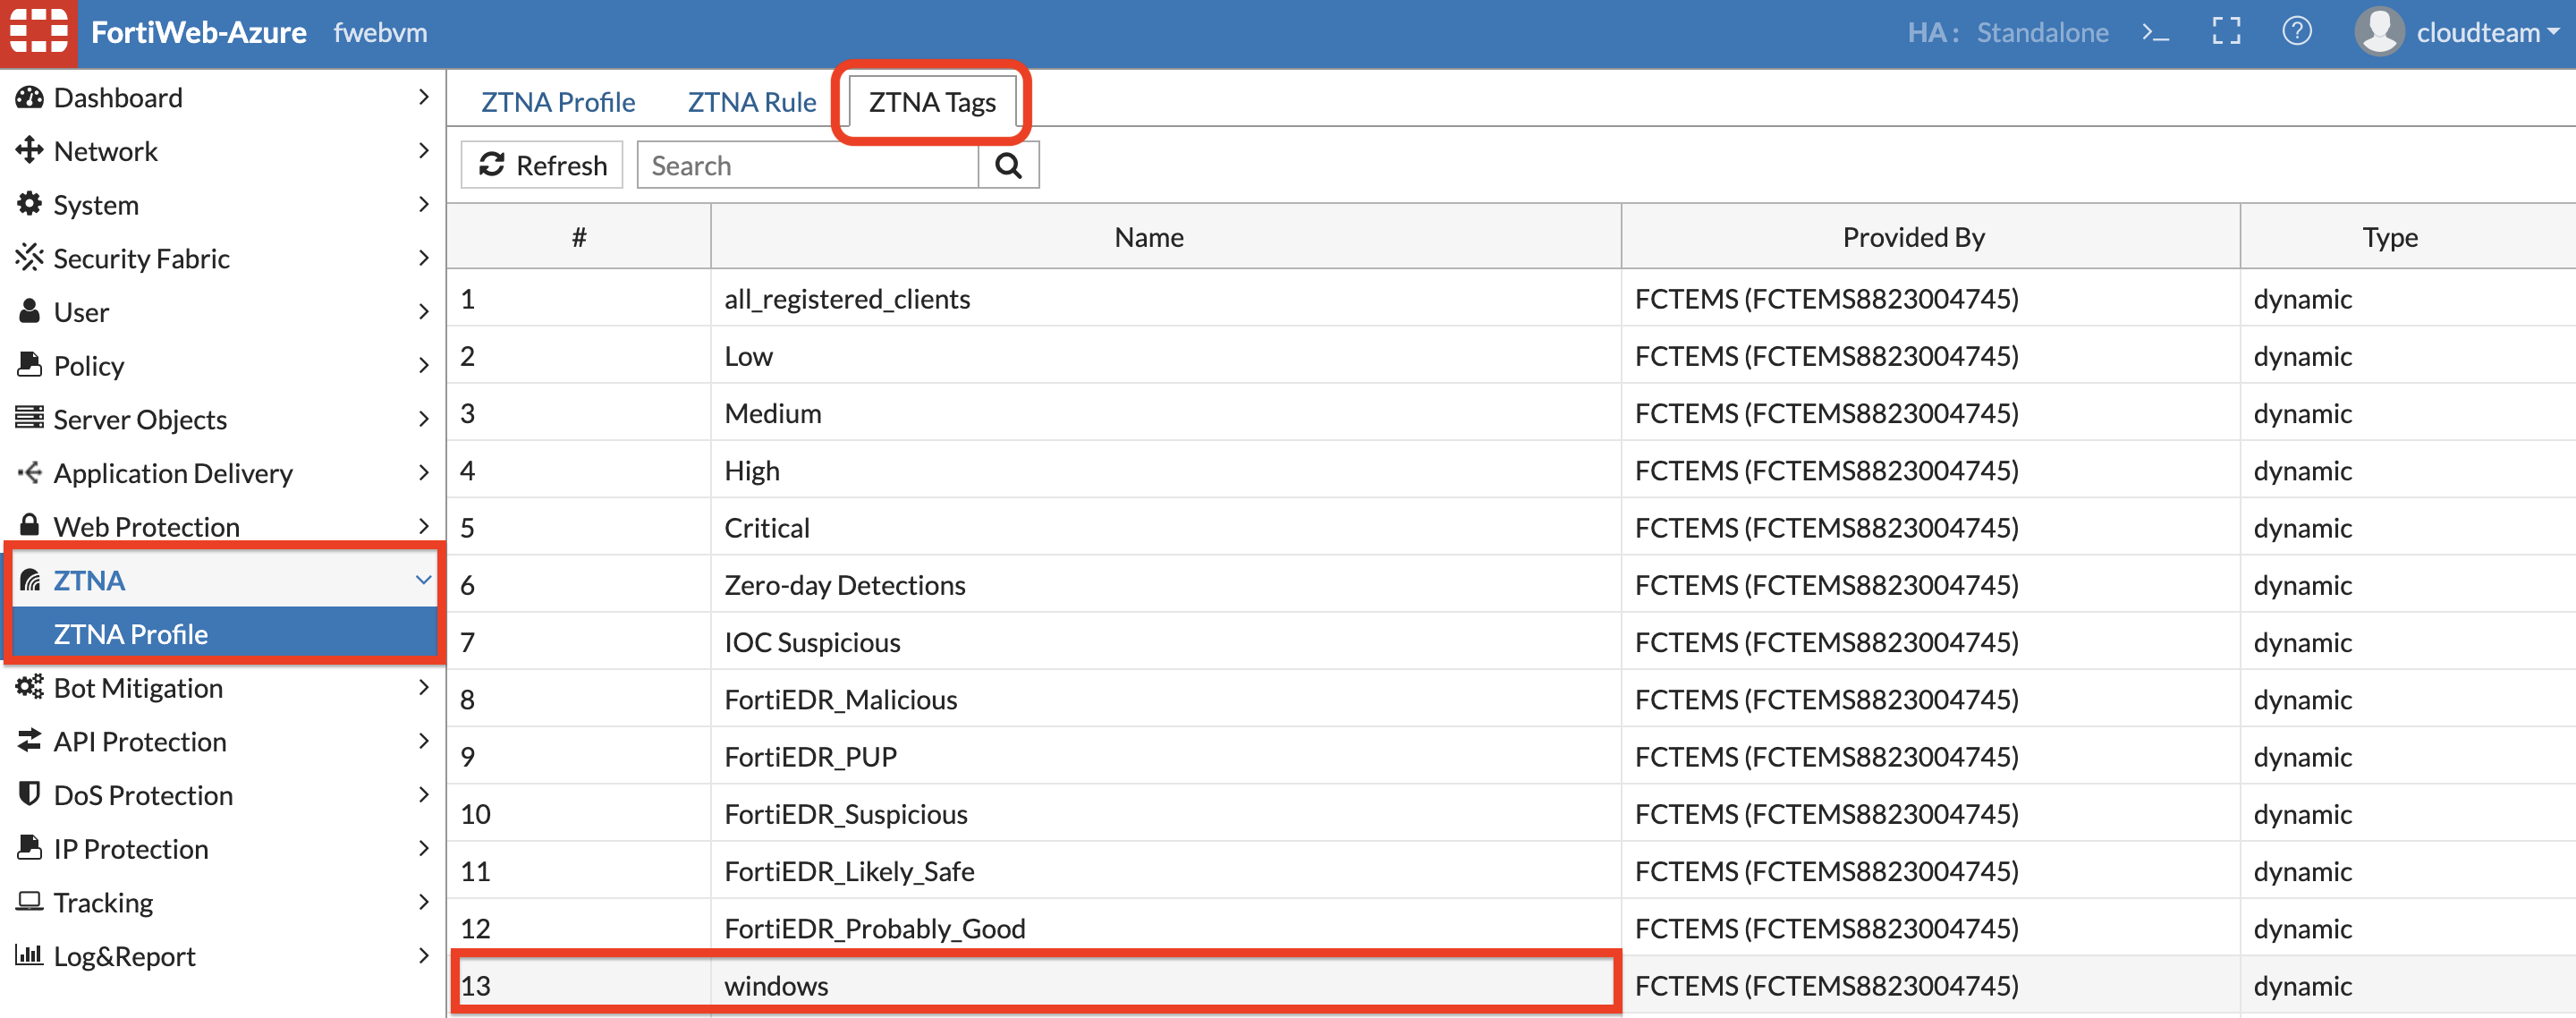
Before setting up FortiWeb ZTNA rules, check if the ZTNA tags synced from FortiClient EMS to FortiWeb. On FortiWeb navigate to ZTNA » ZTNA profile » ZTNA tags. FortiWeb Might have to scroll to the end to see the tags created in earlier step.
Create ZTNA rules to access the FortiWeb Web Server. Click OK.
Click on Add Condition, Select Type: ZTNA Tag, from Tag list Windows, Match condition: Any, click OK.
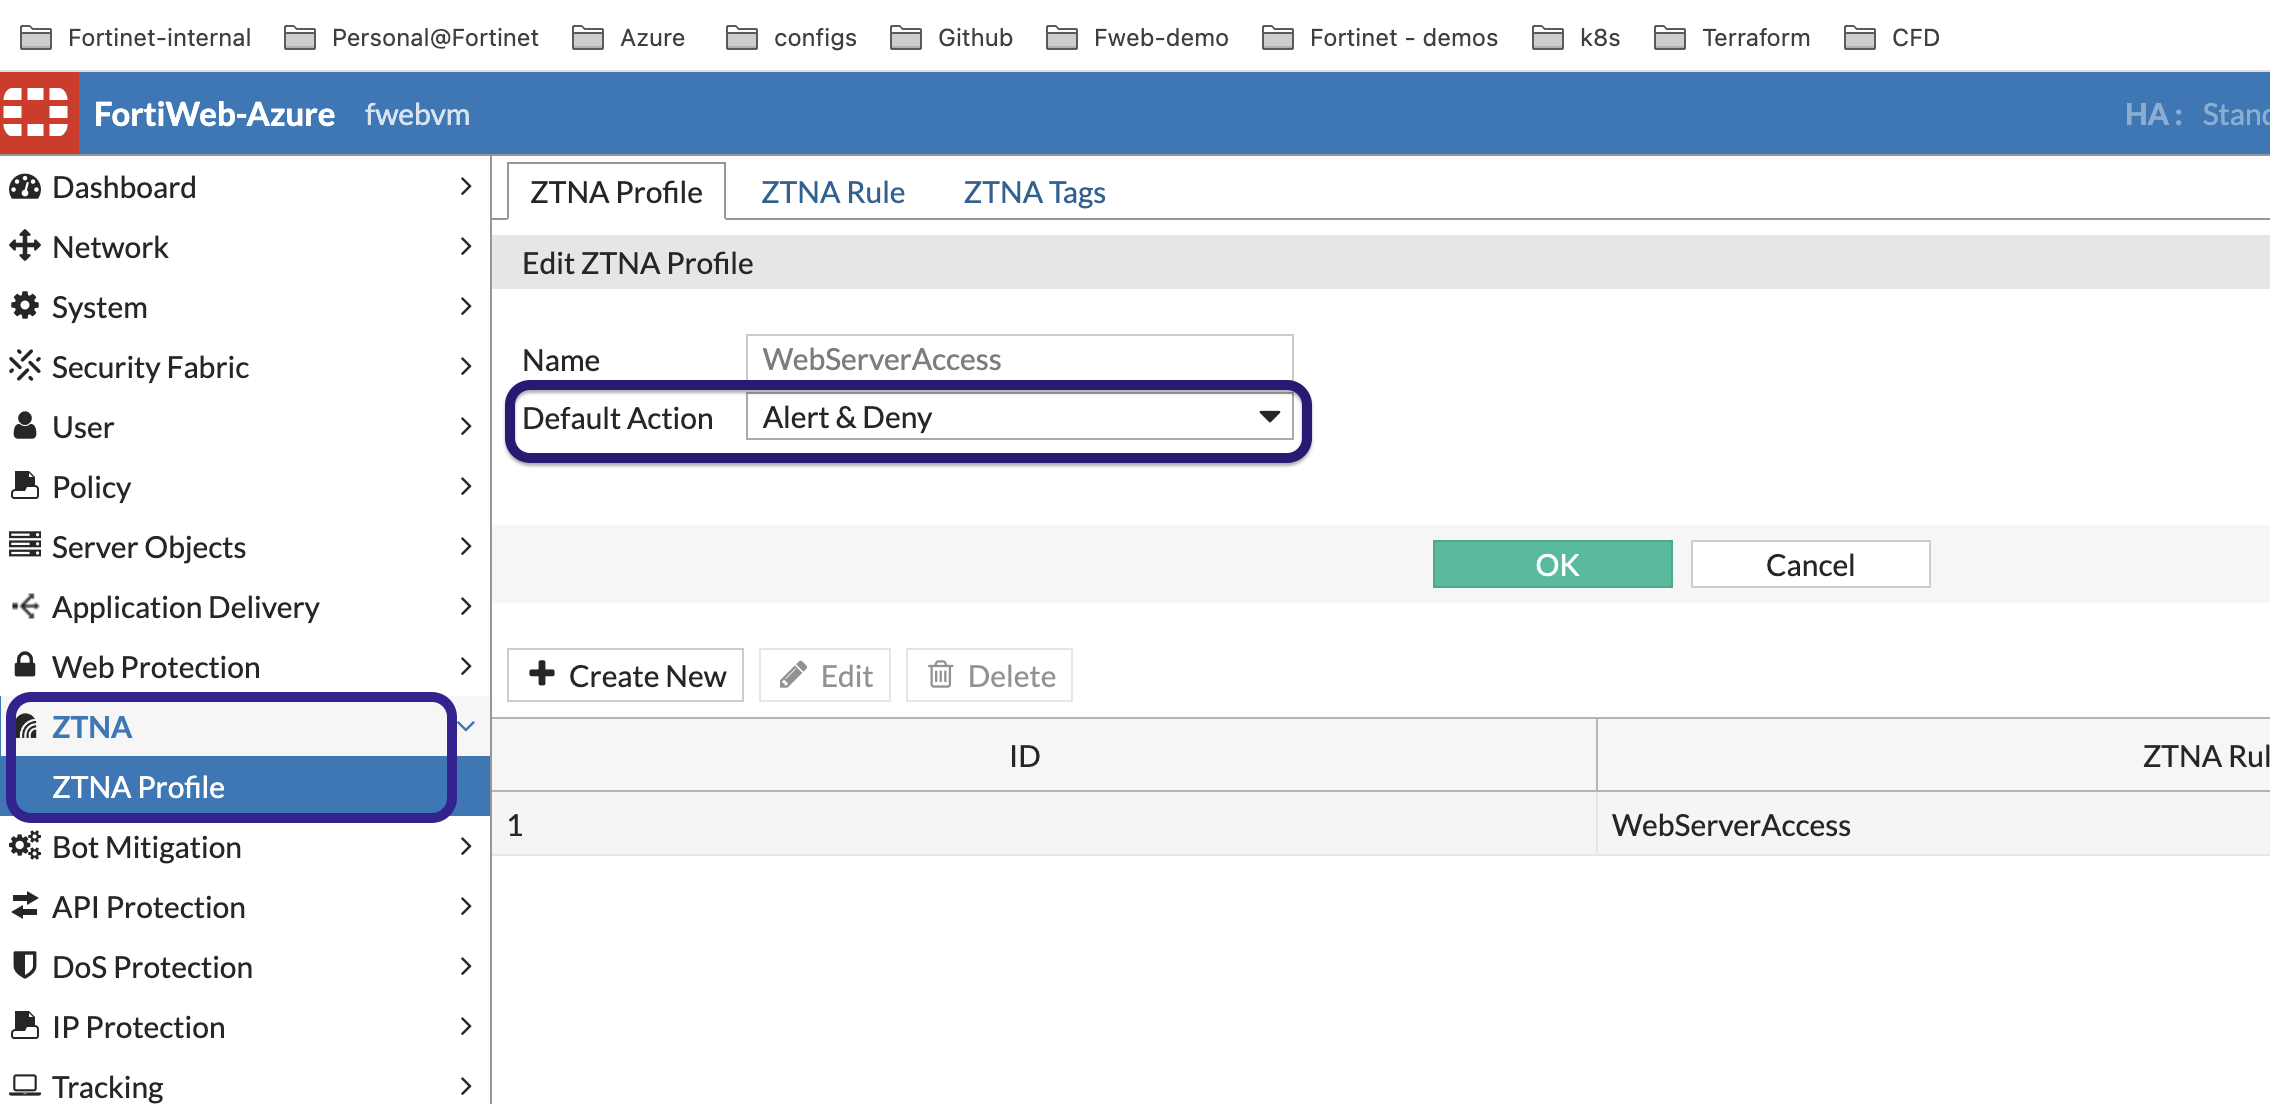
In ZTNA profile, Create ZTNA profile with name WebServerAccess, Set Default action to Alert and Deny. Click OK.
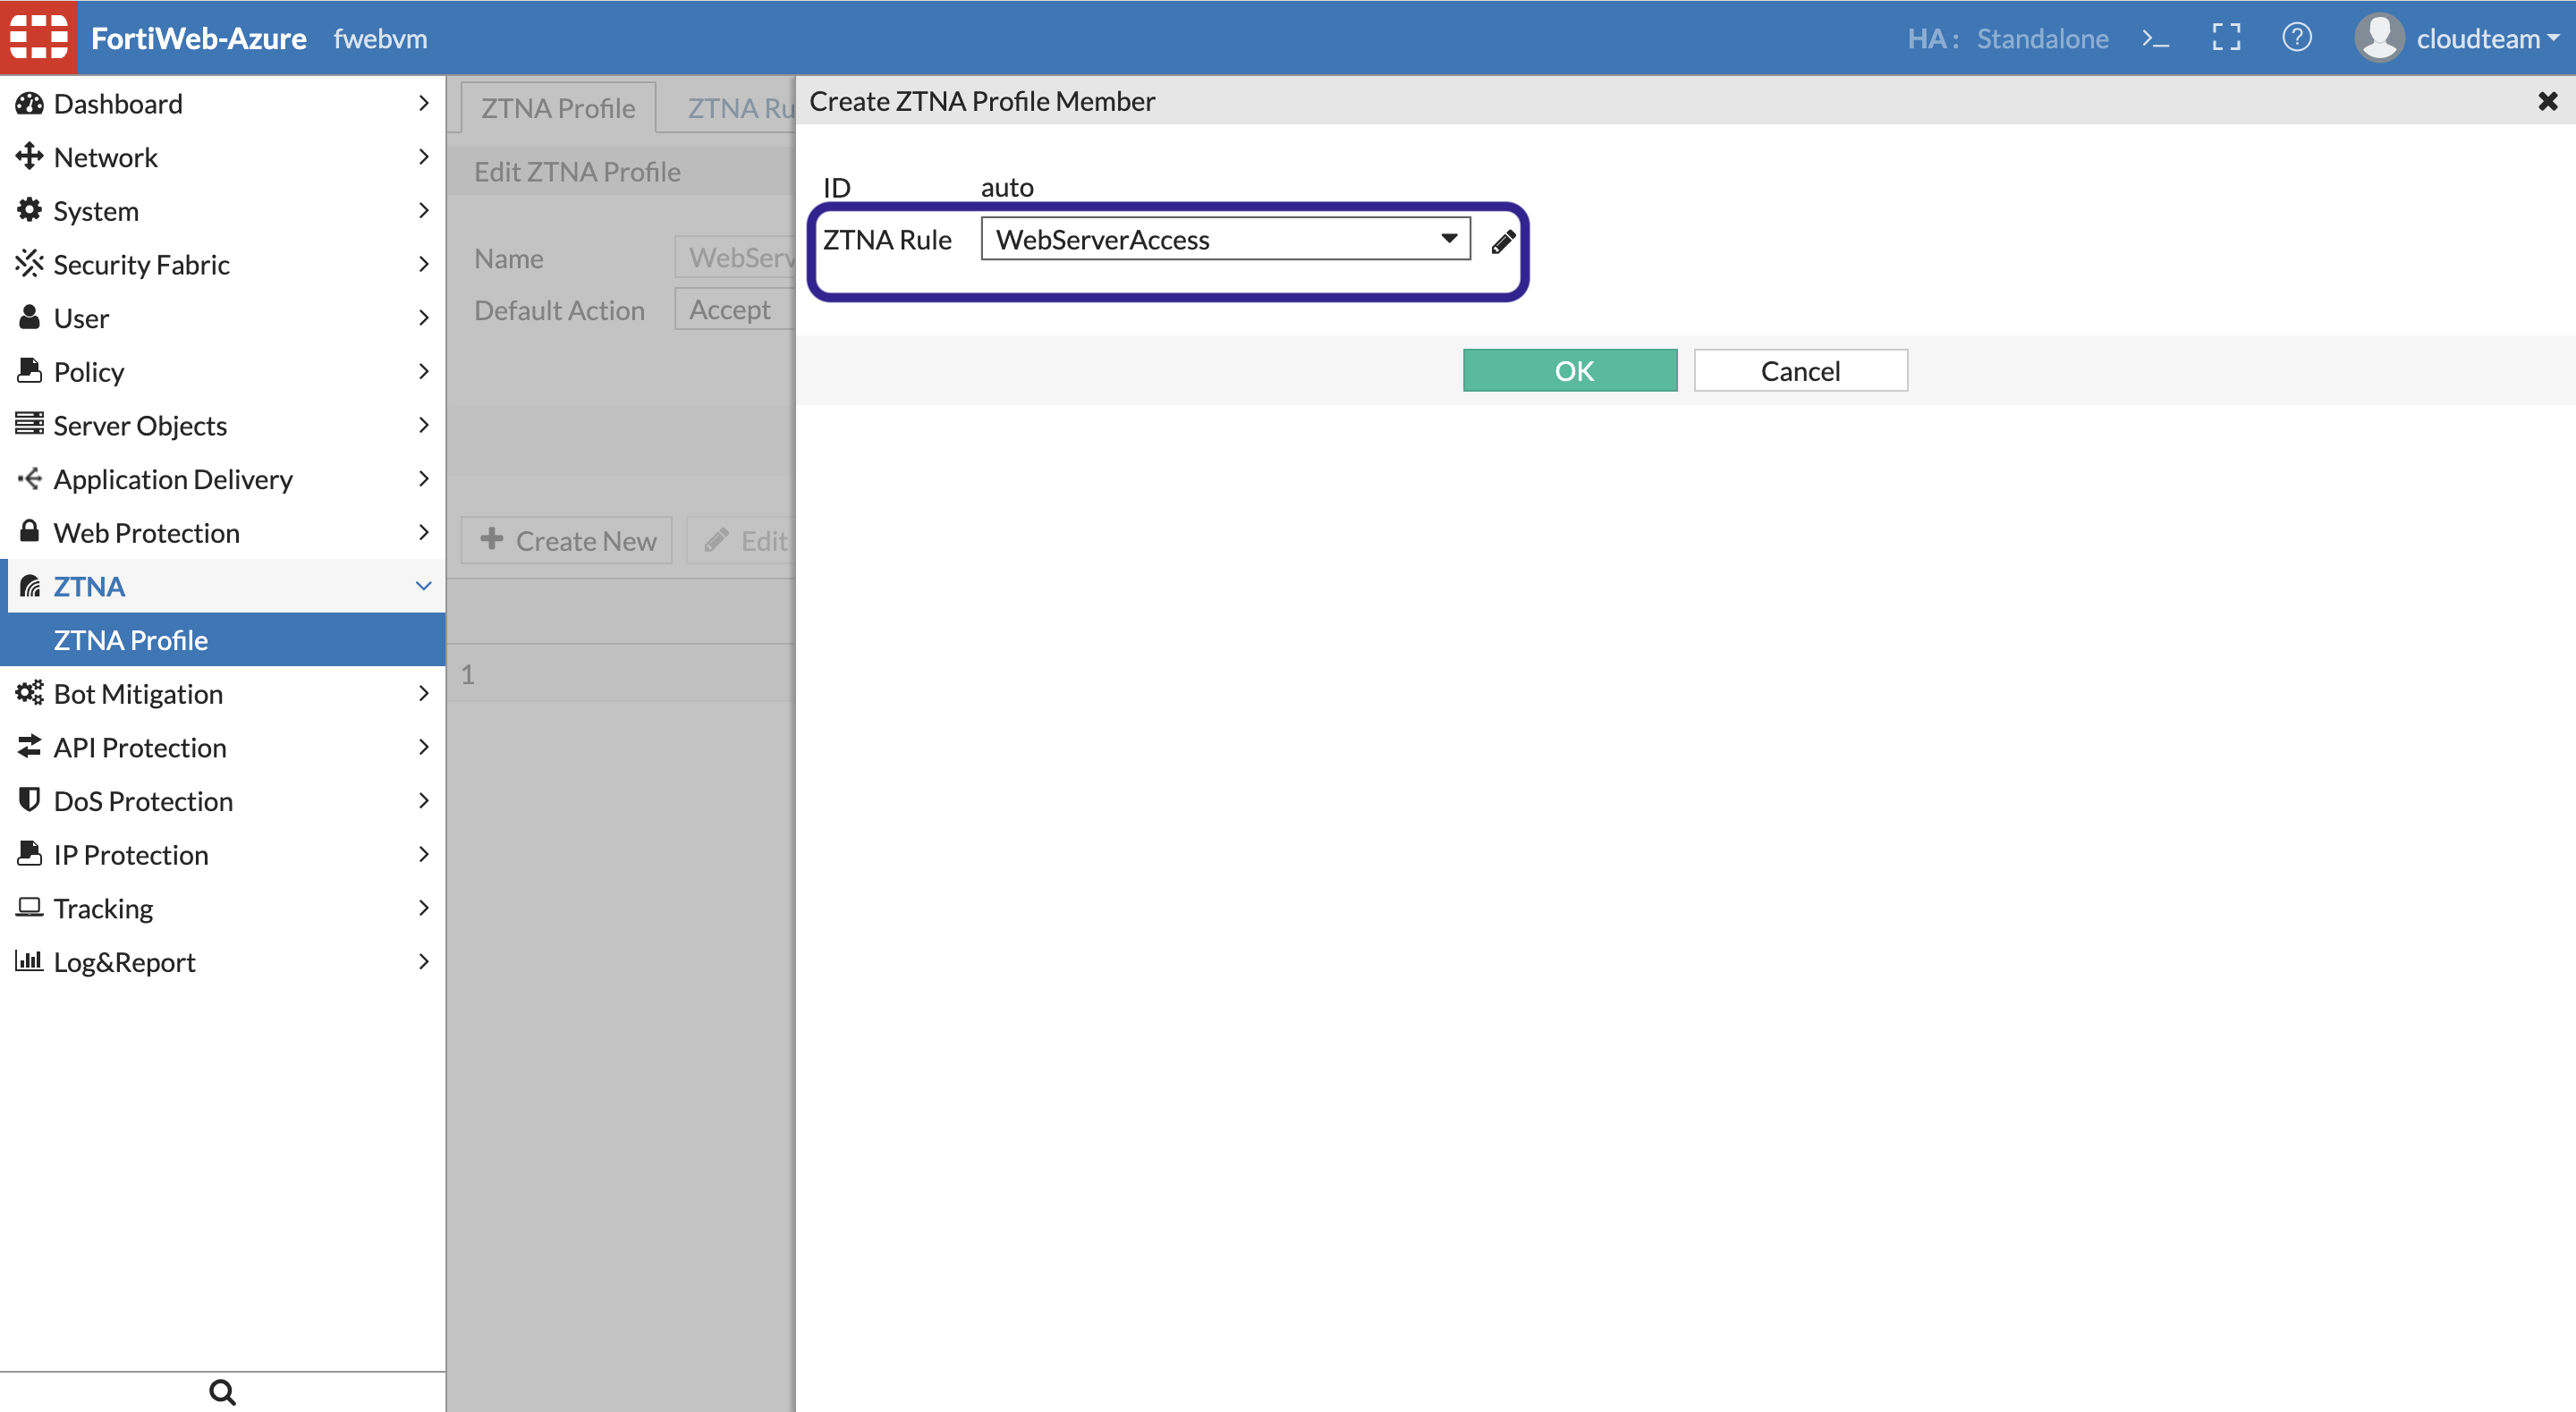
For ZTNA Profile Member » Create new » Update to Add the rule you created in Step 9.
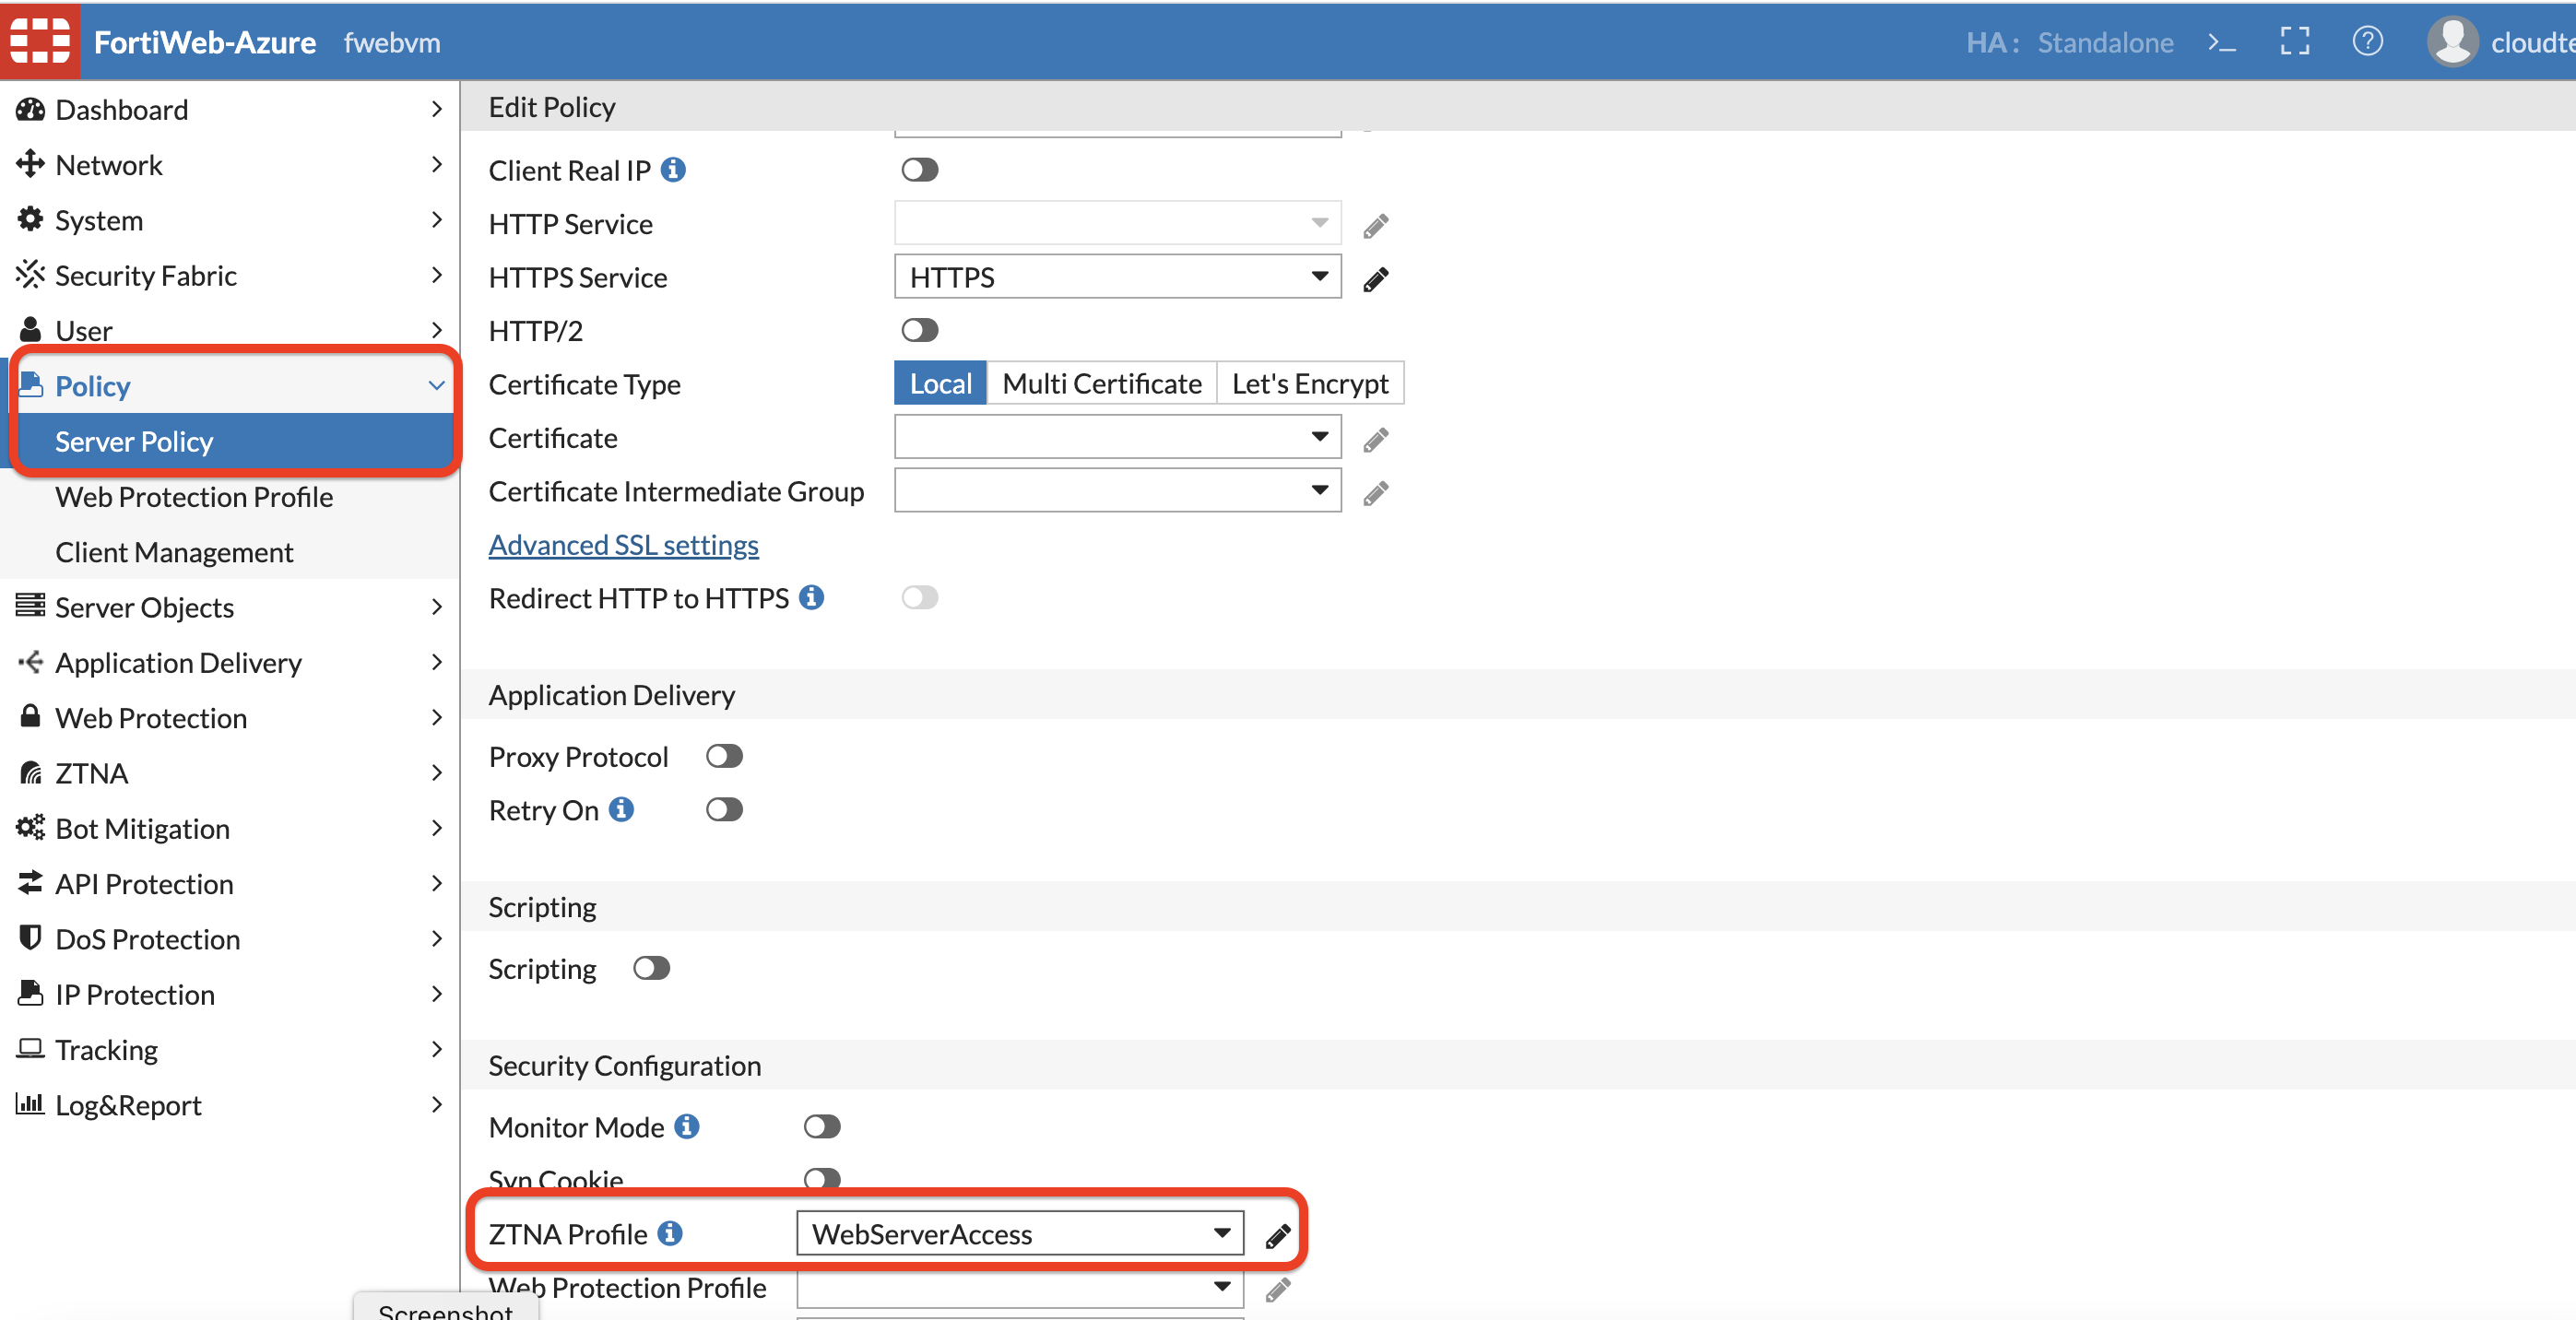
Now go back to Server Policy » Policy » Edit the existing Policy.
Scroll down to ZTNA profile and assign the profile created in previous step and click Save.

