Fortinet TECWorkshop
Welcome!
In this workshop you will learn the basics of cloud security and how a Cloud Native Application Protection Platform (CNAPP) can help gain insights and improve your security posture.
In this workshop you will learn the basics of cloud security and how a Cloud Native Application Protection Platform (CNAPP) can help gain insights and improve your security posture.
In Lab 1 you will get a web application running on a virtual server in AWS and exposed to the internet. Learn how to create a virtual server, update a security group, create IAM role and deploy a Node web application reachable from the internet.
The goal of this lab is to, as quickly as possible, get a simple web site running and exposed to the internet. This website will require some compute resources to run on, exposure to the Internet (inboud/outboud) and permissions to access a centrally managed database.
Application Diagram
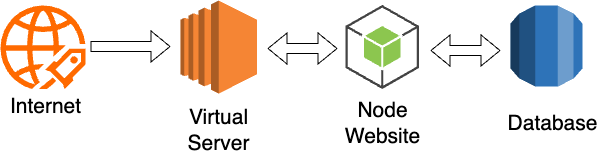
To achieve your goal you will use the public cloud to create resources, download code, grant permissions and finally expose your website to the entire world. All this will be achieved using the Amazon Web Services (AWS) web console,a web browser and a few simple commands.
Good luck!
Your first task will be to create an new AWS cloud account using Qwiklabs.
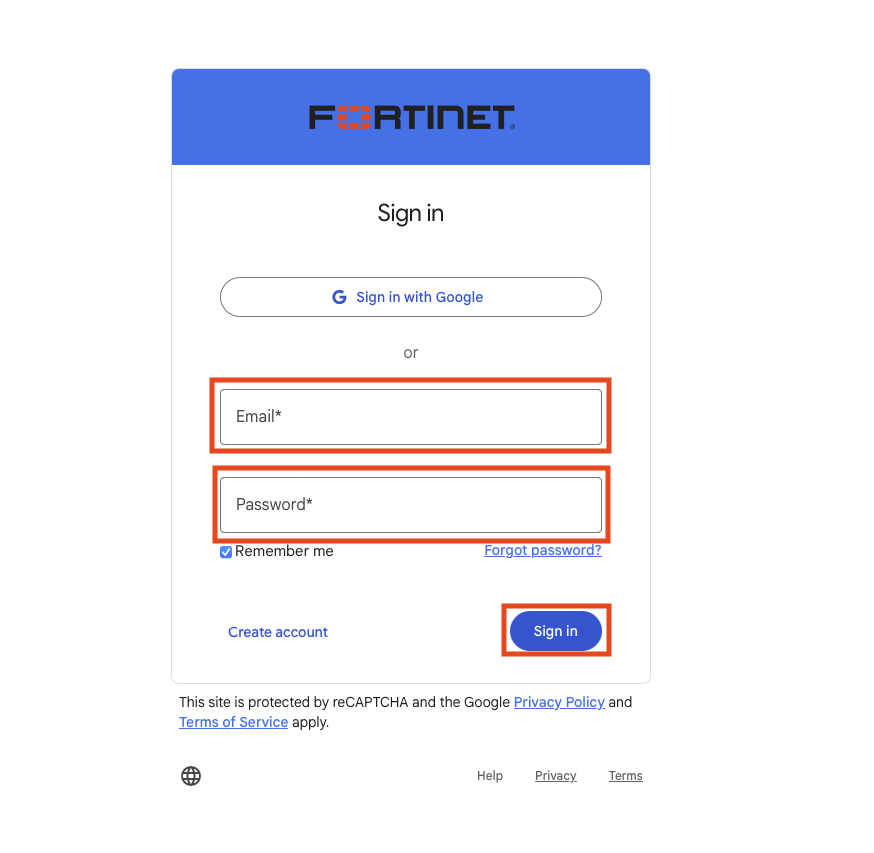
Use the email/password provided by your lab teachers to log in to Qwiklabs.
After you log into Qwiklabs select the in progress course ‘Public Cloud 104 CNAPP’.
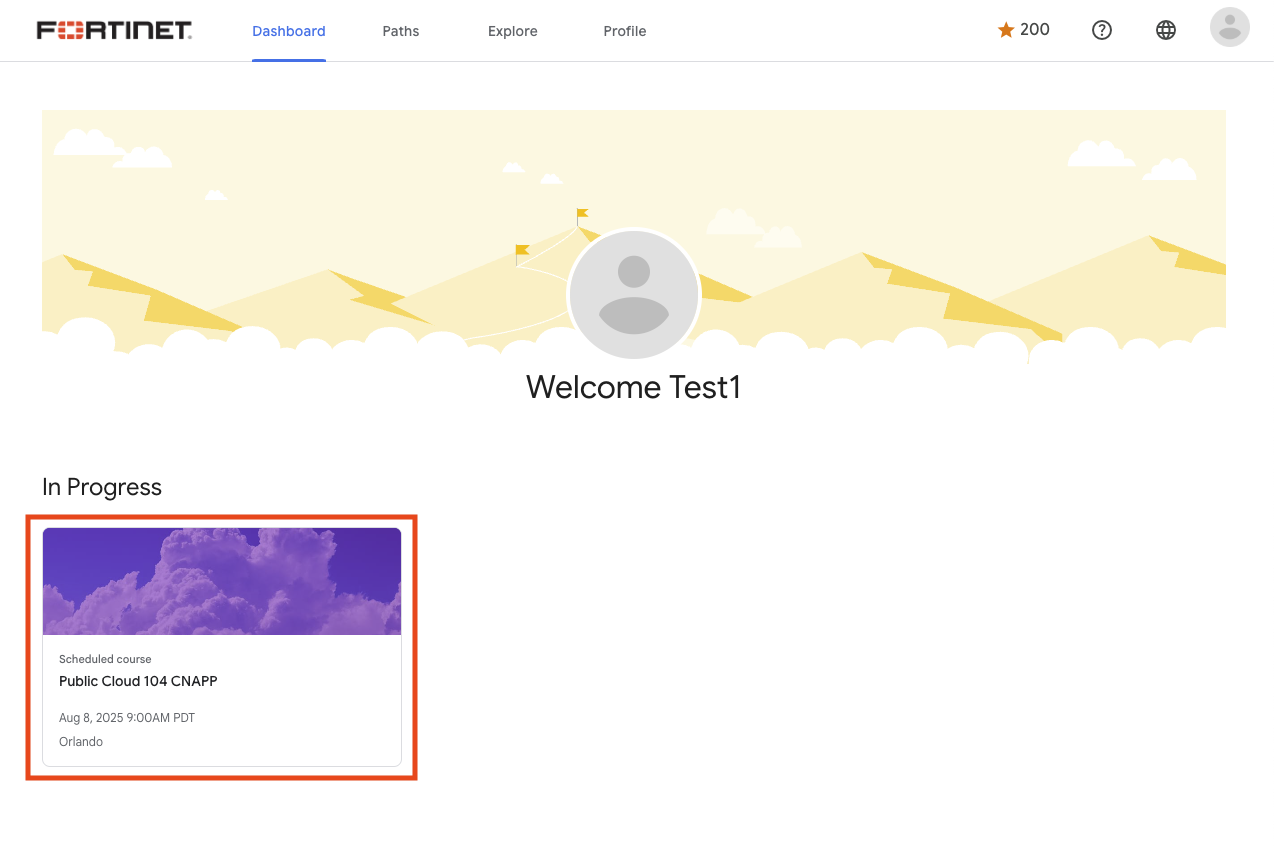
Next select the ‘Lab 1: Create AWS Cloud Account’.

Return here after you have access to your brand new AWS cloud account.
Now that you have access to the AWS Console let’s get working!
To get your website working you will need a server where you can run the code. In a traditional on premise data center you would request a server from your operations team. In the public cloud you can create your own resources, include servers, without having to ask anyone.
In AWS servers can be created using their EC2 service. Use the search box and type EC2 and click on the top returned result.
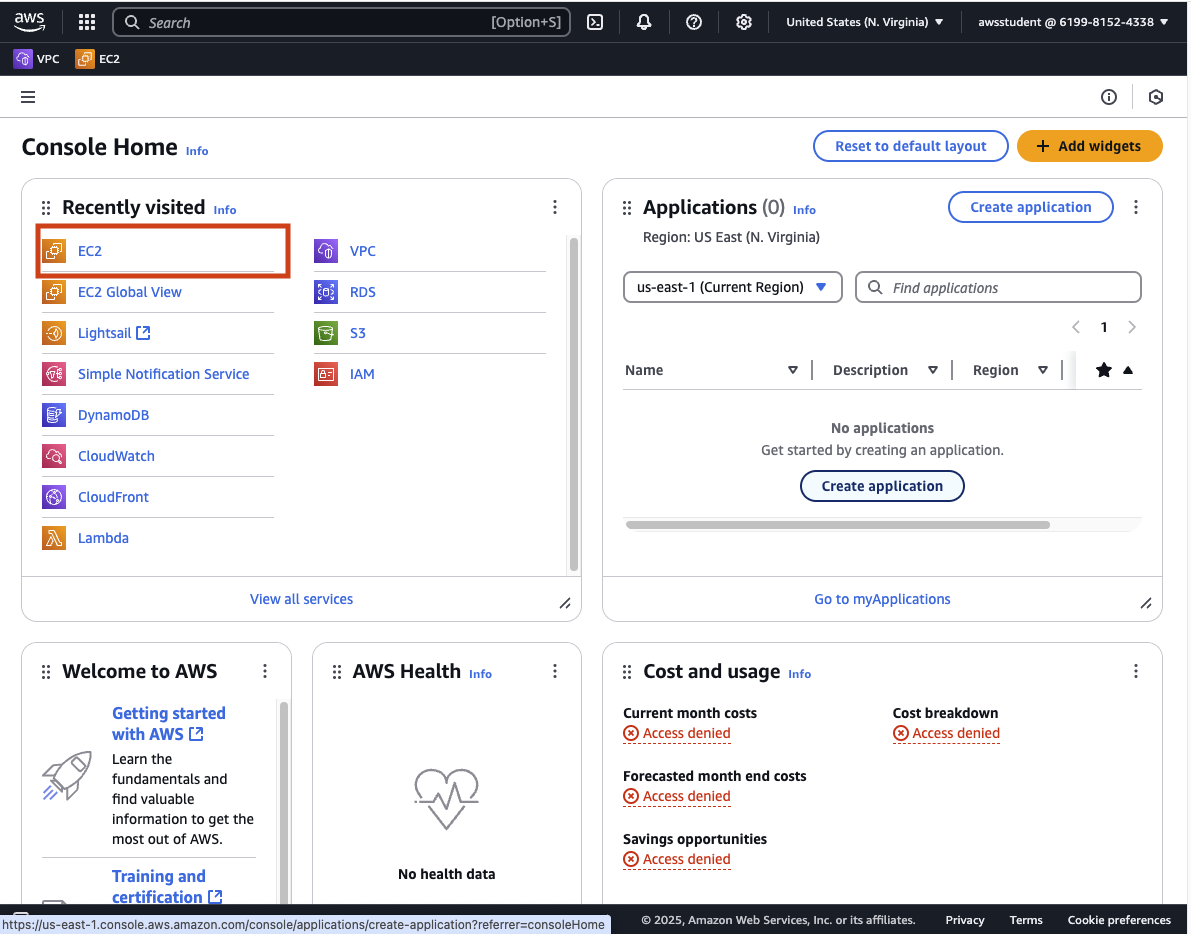
The EC2 service enables creating virtual servers in many different regions around the world. By default, you will be dropped into us-east-1 region which is located in the United States, North Virginia.
Find Instances in the left hand navigation (Below the Heading of “Instance”) and click on it to view your currently running virtual servers. At the moment you should have none running.
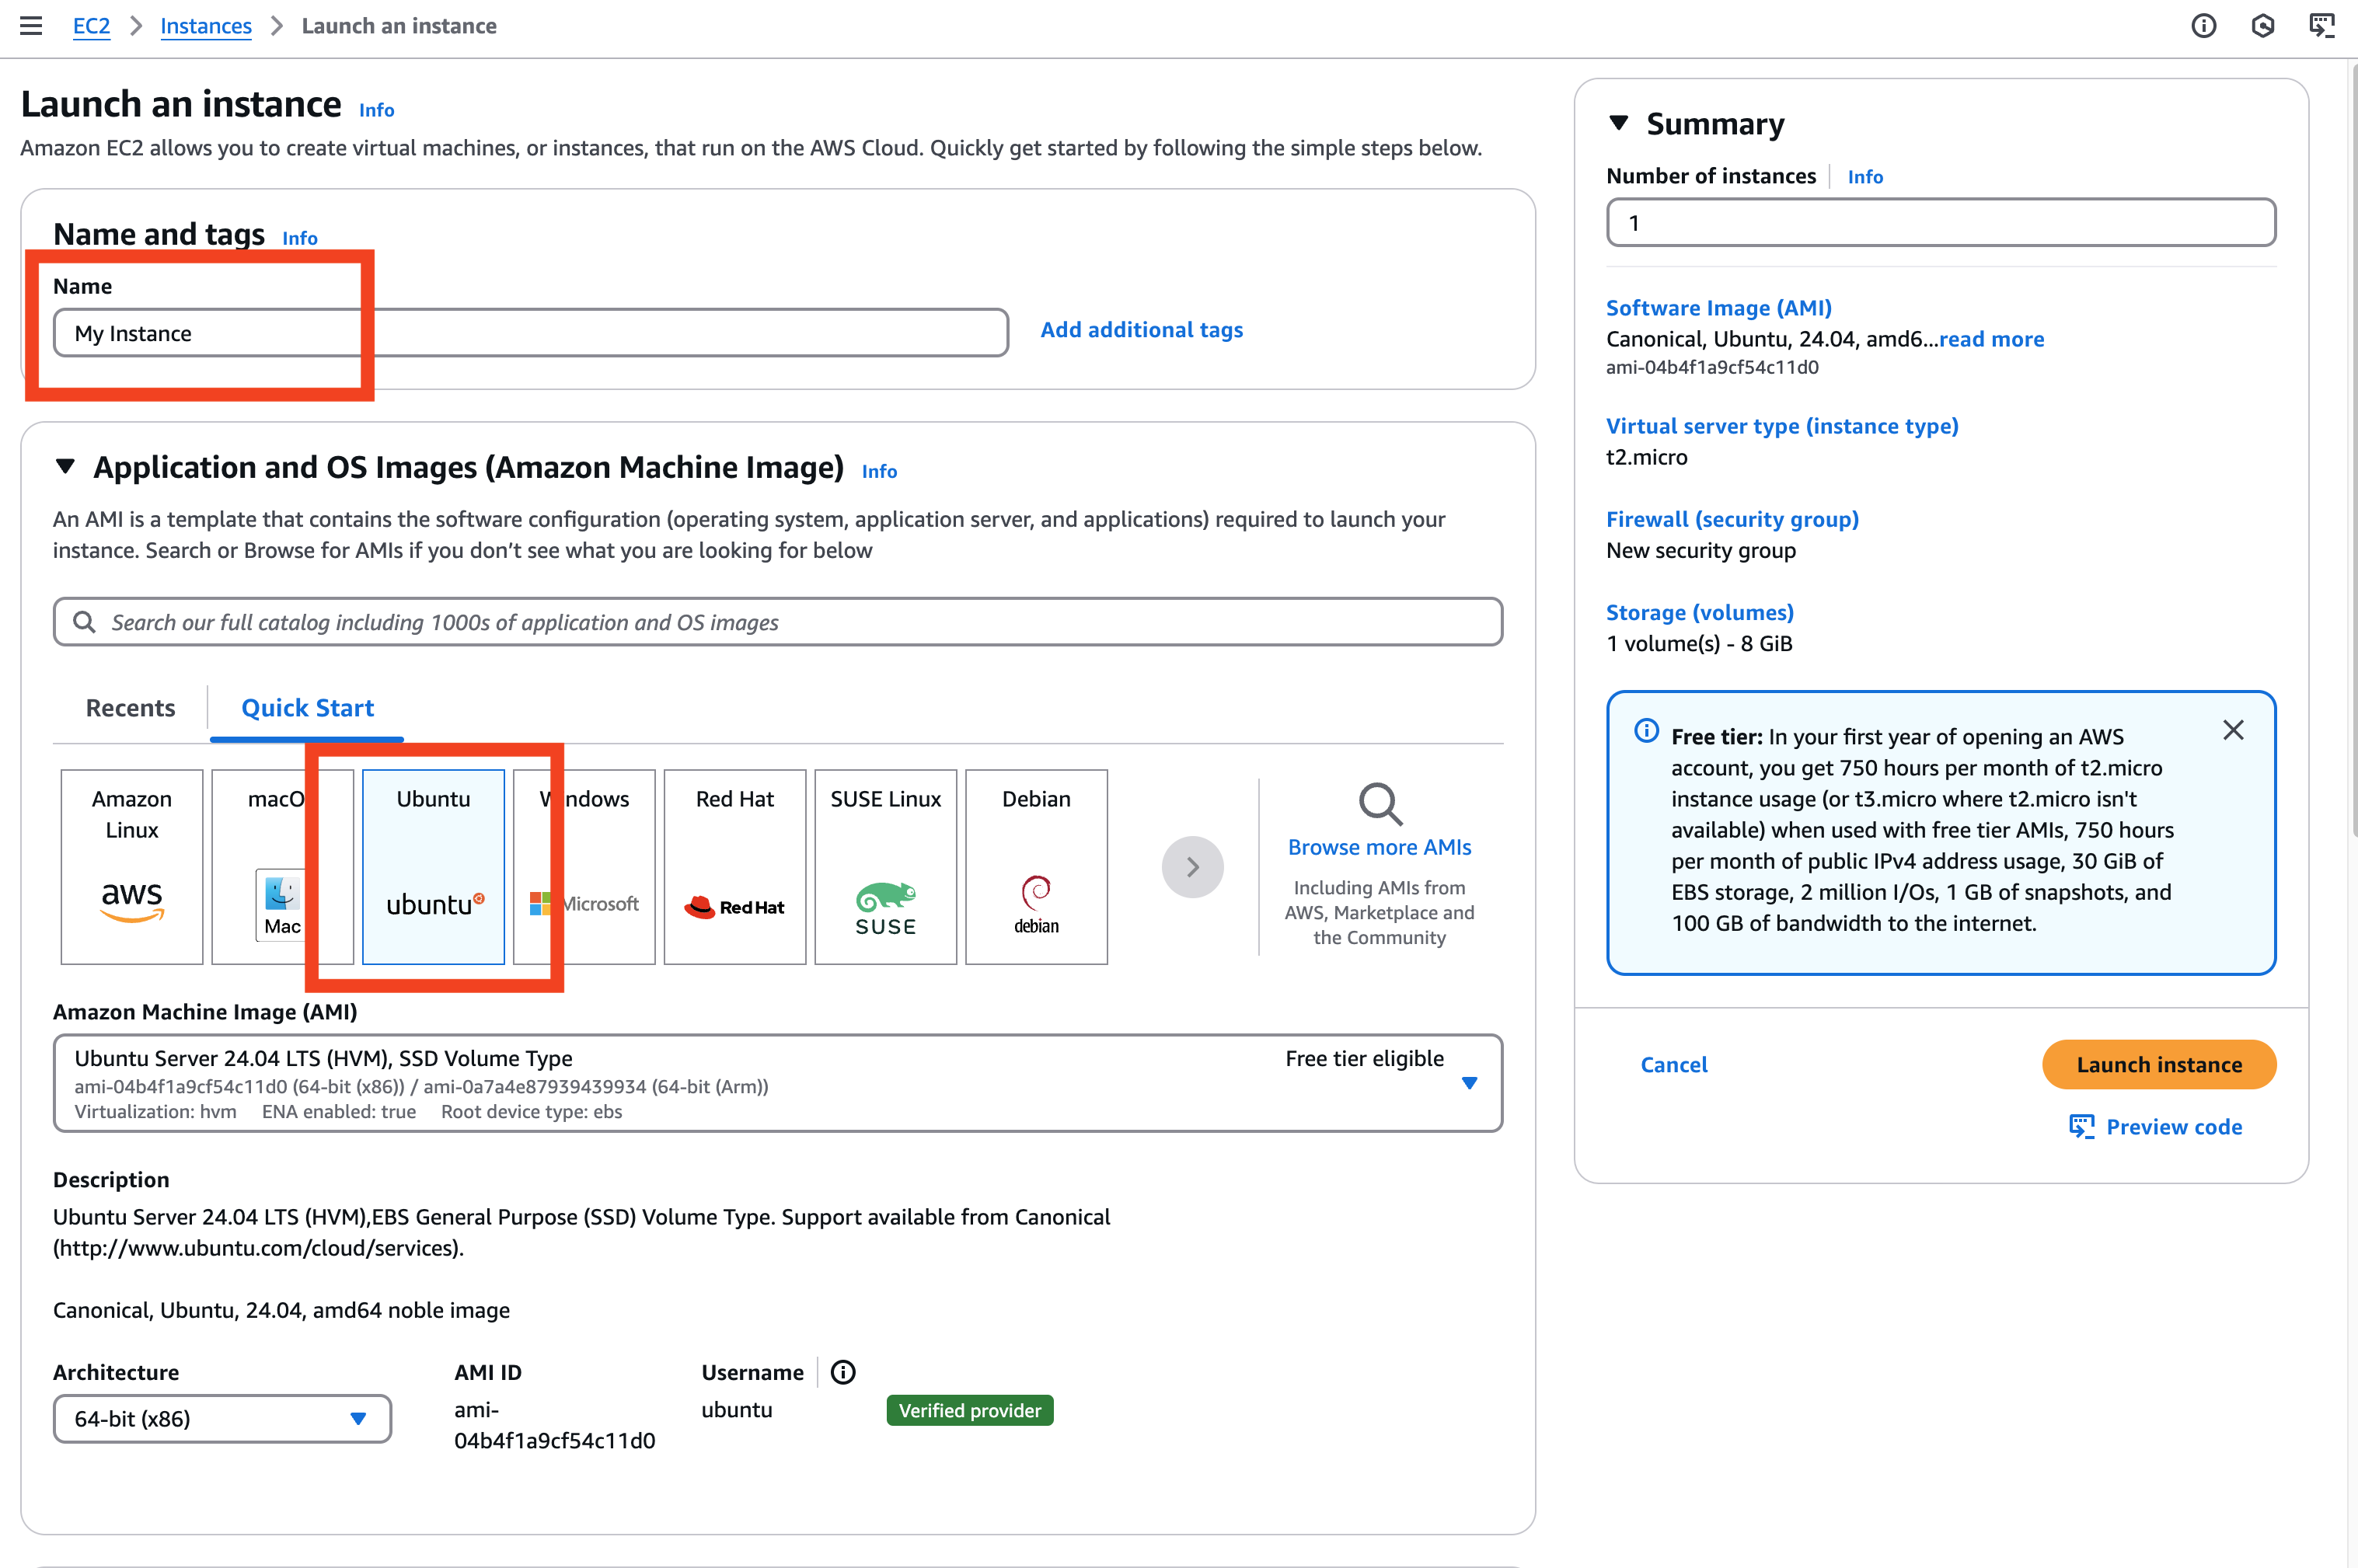
Click on Launch Instance

Give you new virtual server a name you will remember, keep it safe for work! Next choose Ubuntu as the operating system you want running in your new virtual server.
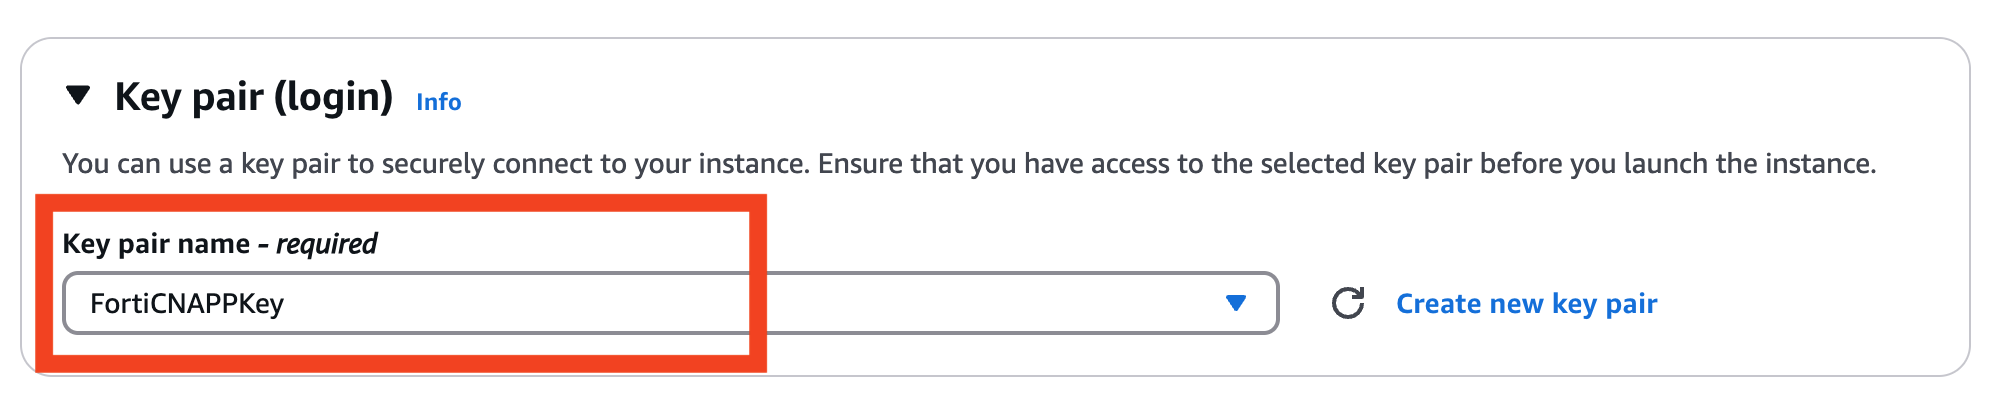
Now we need configure what credentials we will use to access this virtual server once it is up and running.
Select FortiCNAPPKey from the drop-down. This key was created by Qwkilabs and can be used within AWS or from you local machine to access your virtual server.
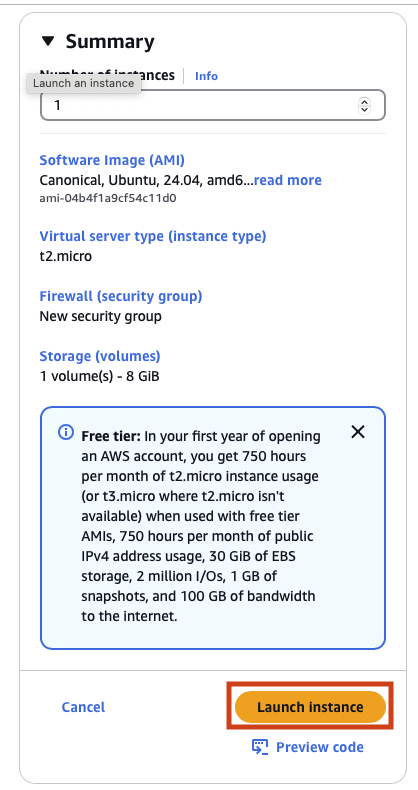
Finally click on Launch Instance to create you brand new virtual server.
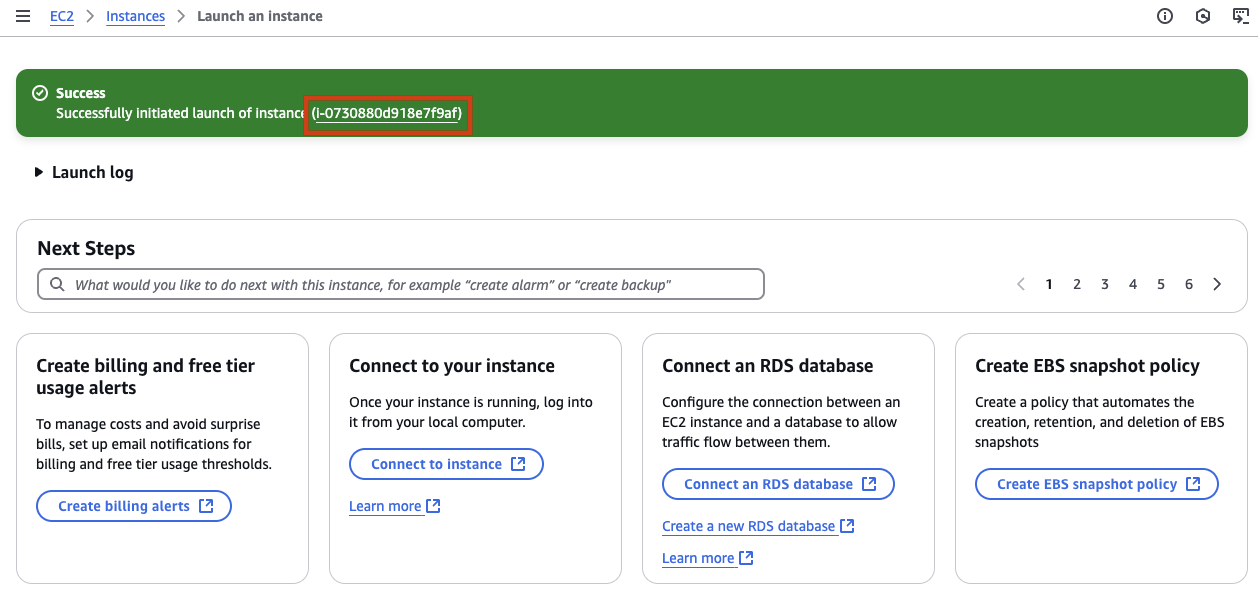
Phew! You now have a brand new virtual server up and running in EC2. Click on the ID for you new virtual server to view more details.
Next you need to gain access to your new virtual server so you can make it actually do something useful. Developers often connect to servers using a secure shell (SSH). AWS offers a simple way to do this called Instance Connect. Instance Connect will allow you to gain a connection to your new virtual server using your browser. After gaining access you will be able to run commands on the server.
Right-click on the instance name of your new instance and choose Connect.
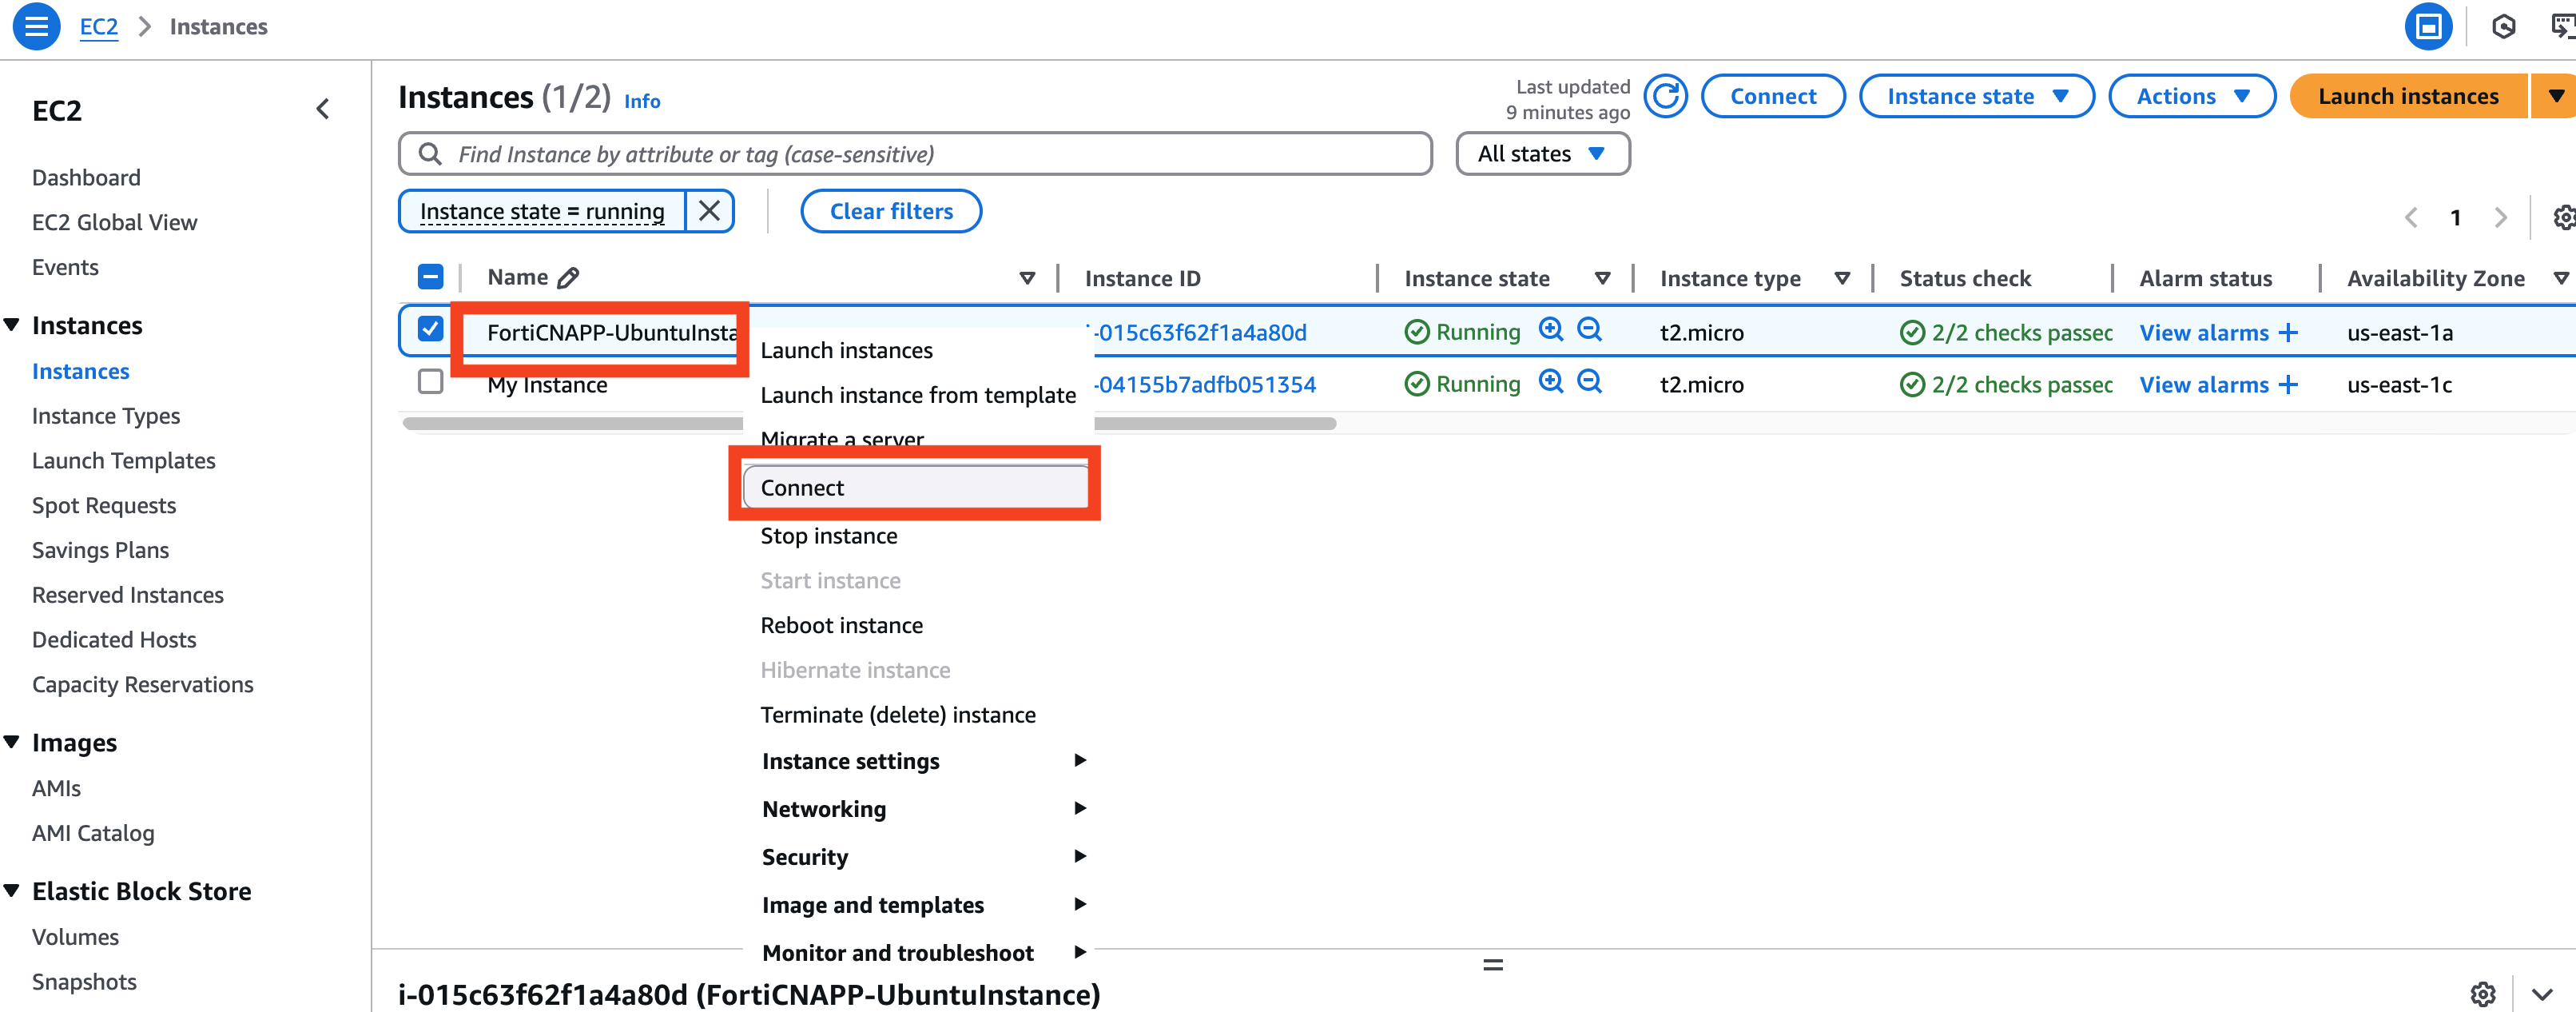
On the Connect to instance window, keep the default option of EC2 Instance Connect and click on Connect
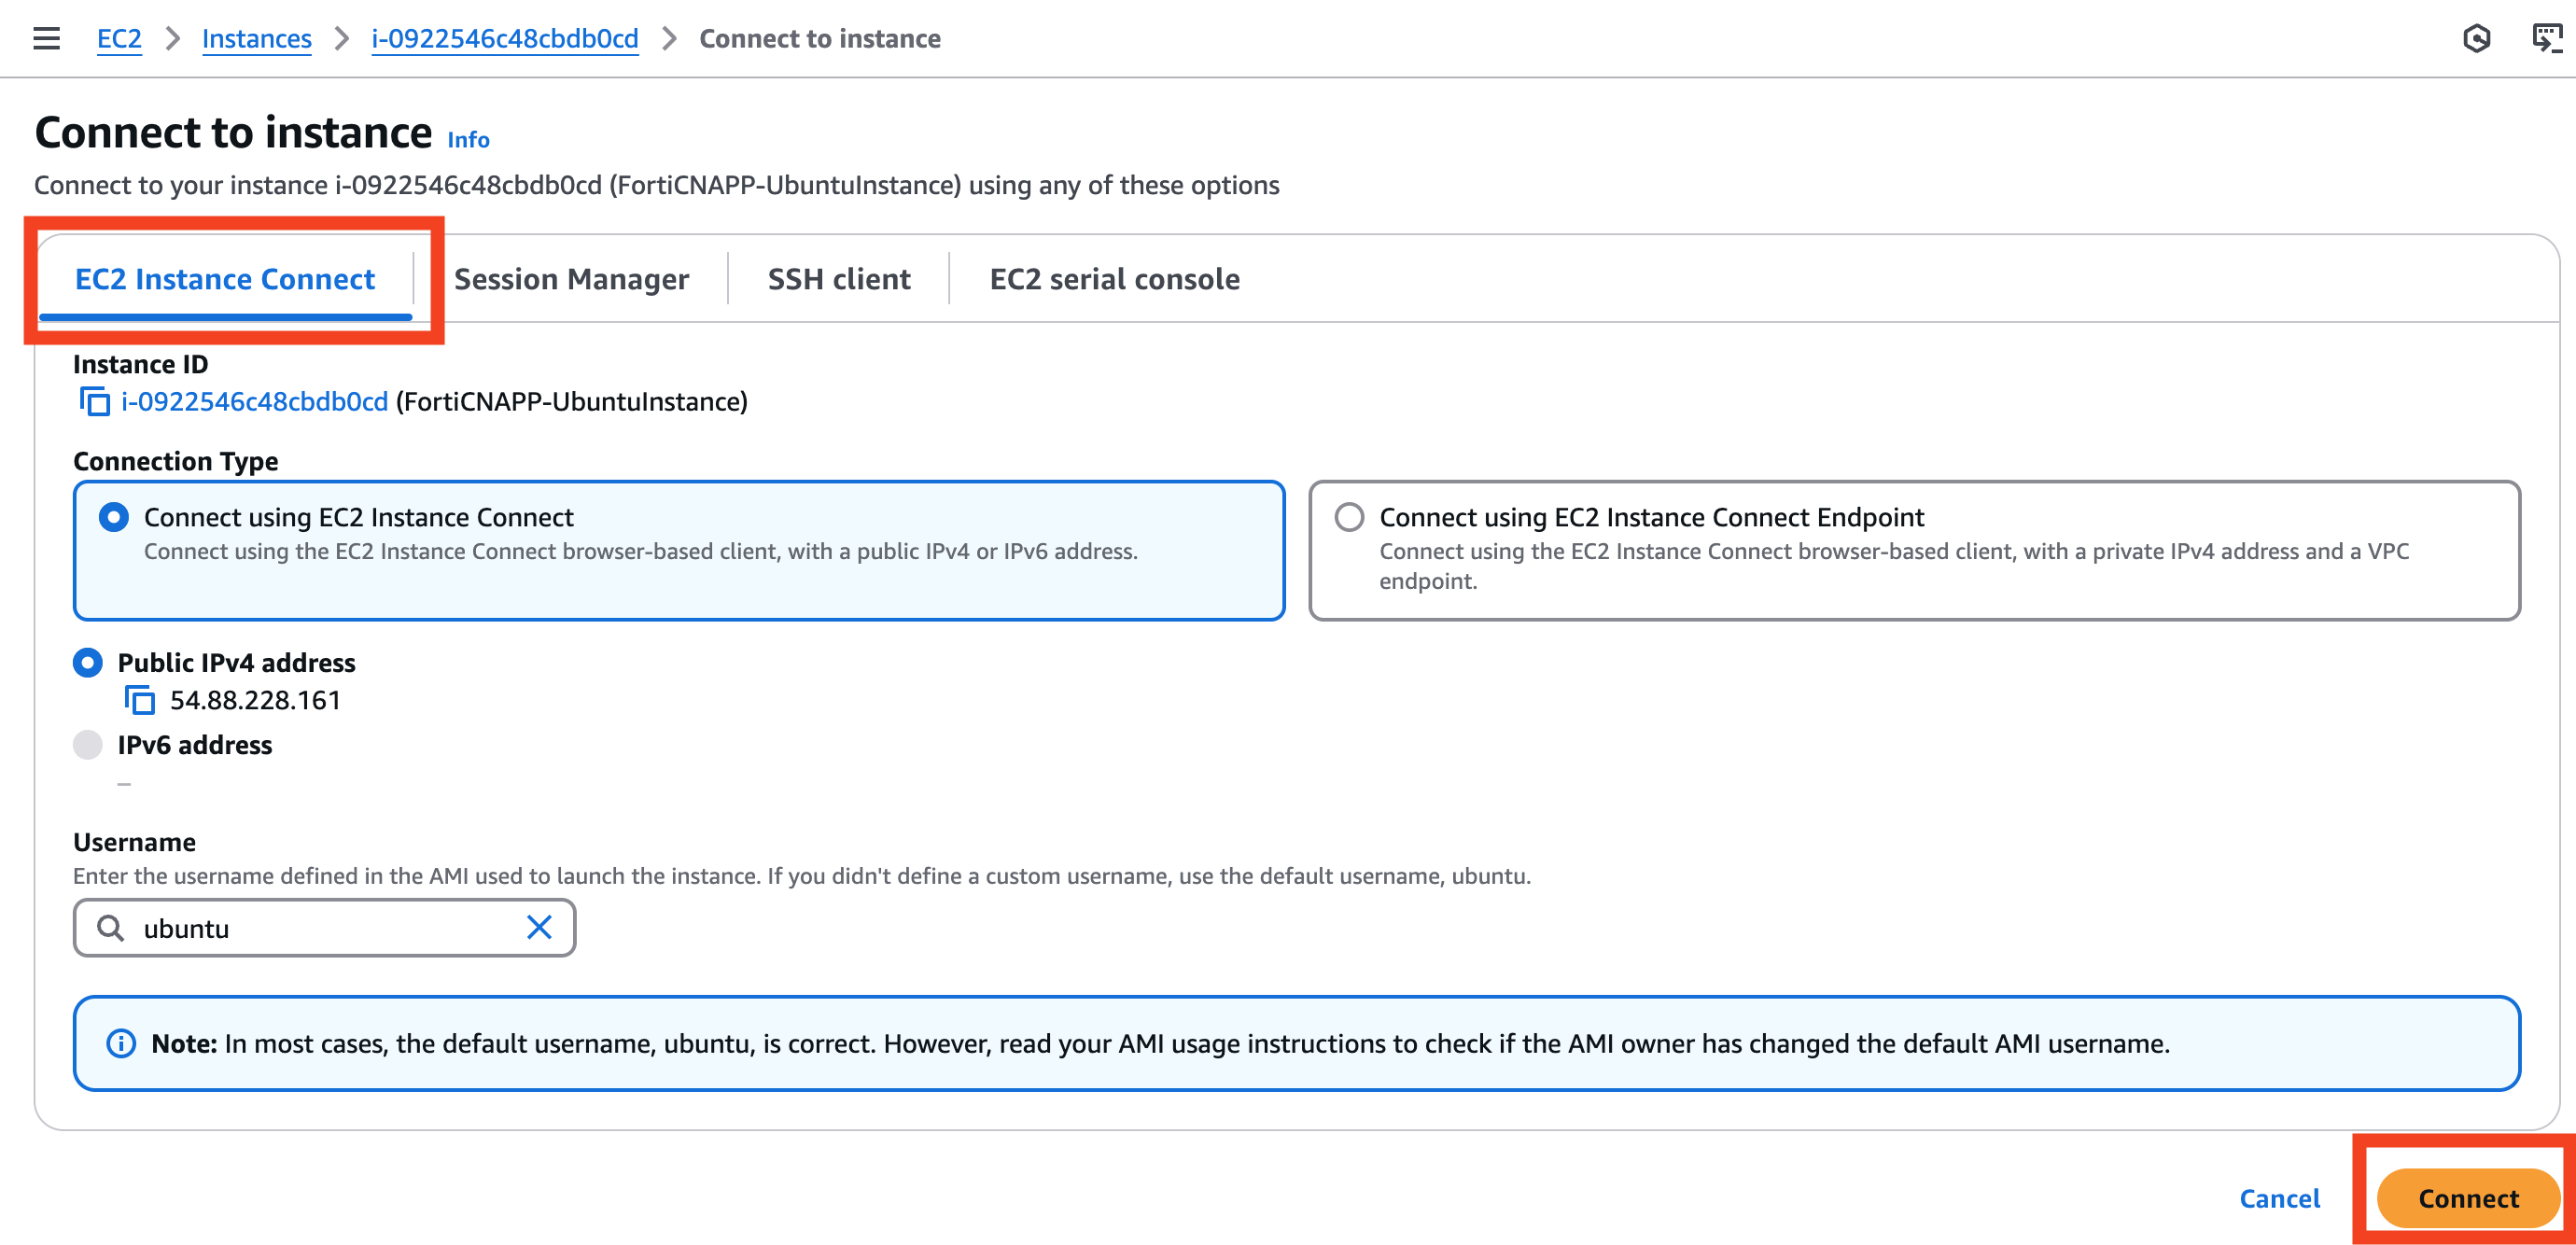
If successful, you should see a terminal like interface within your AWS Console.
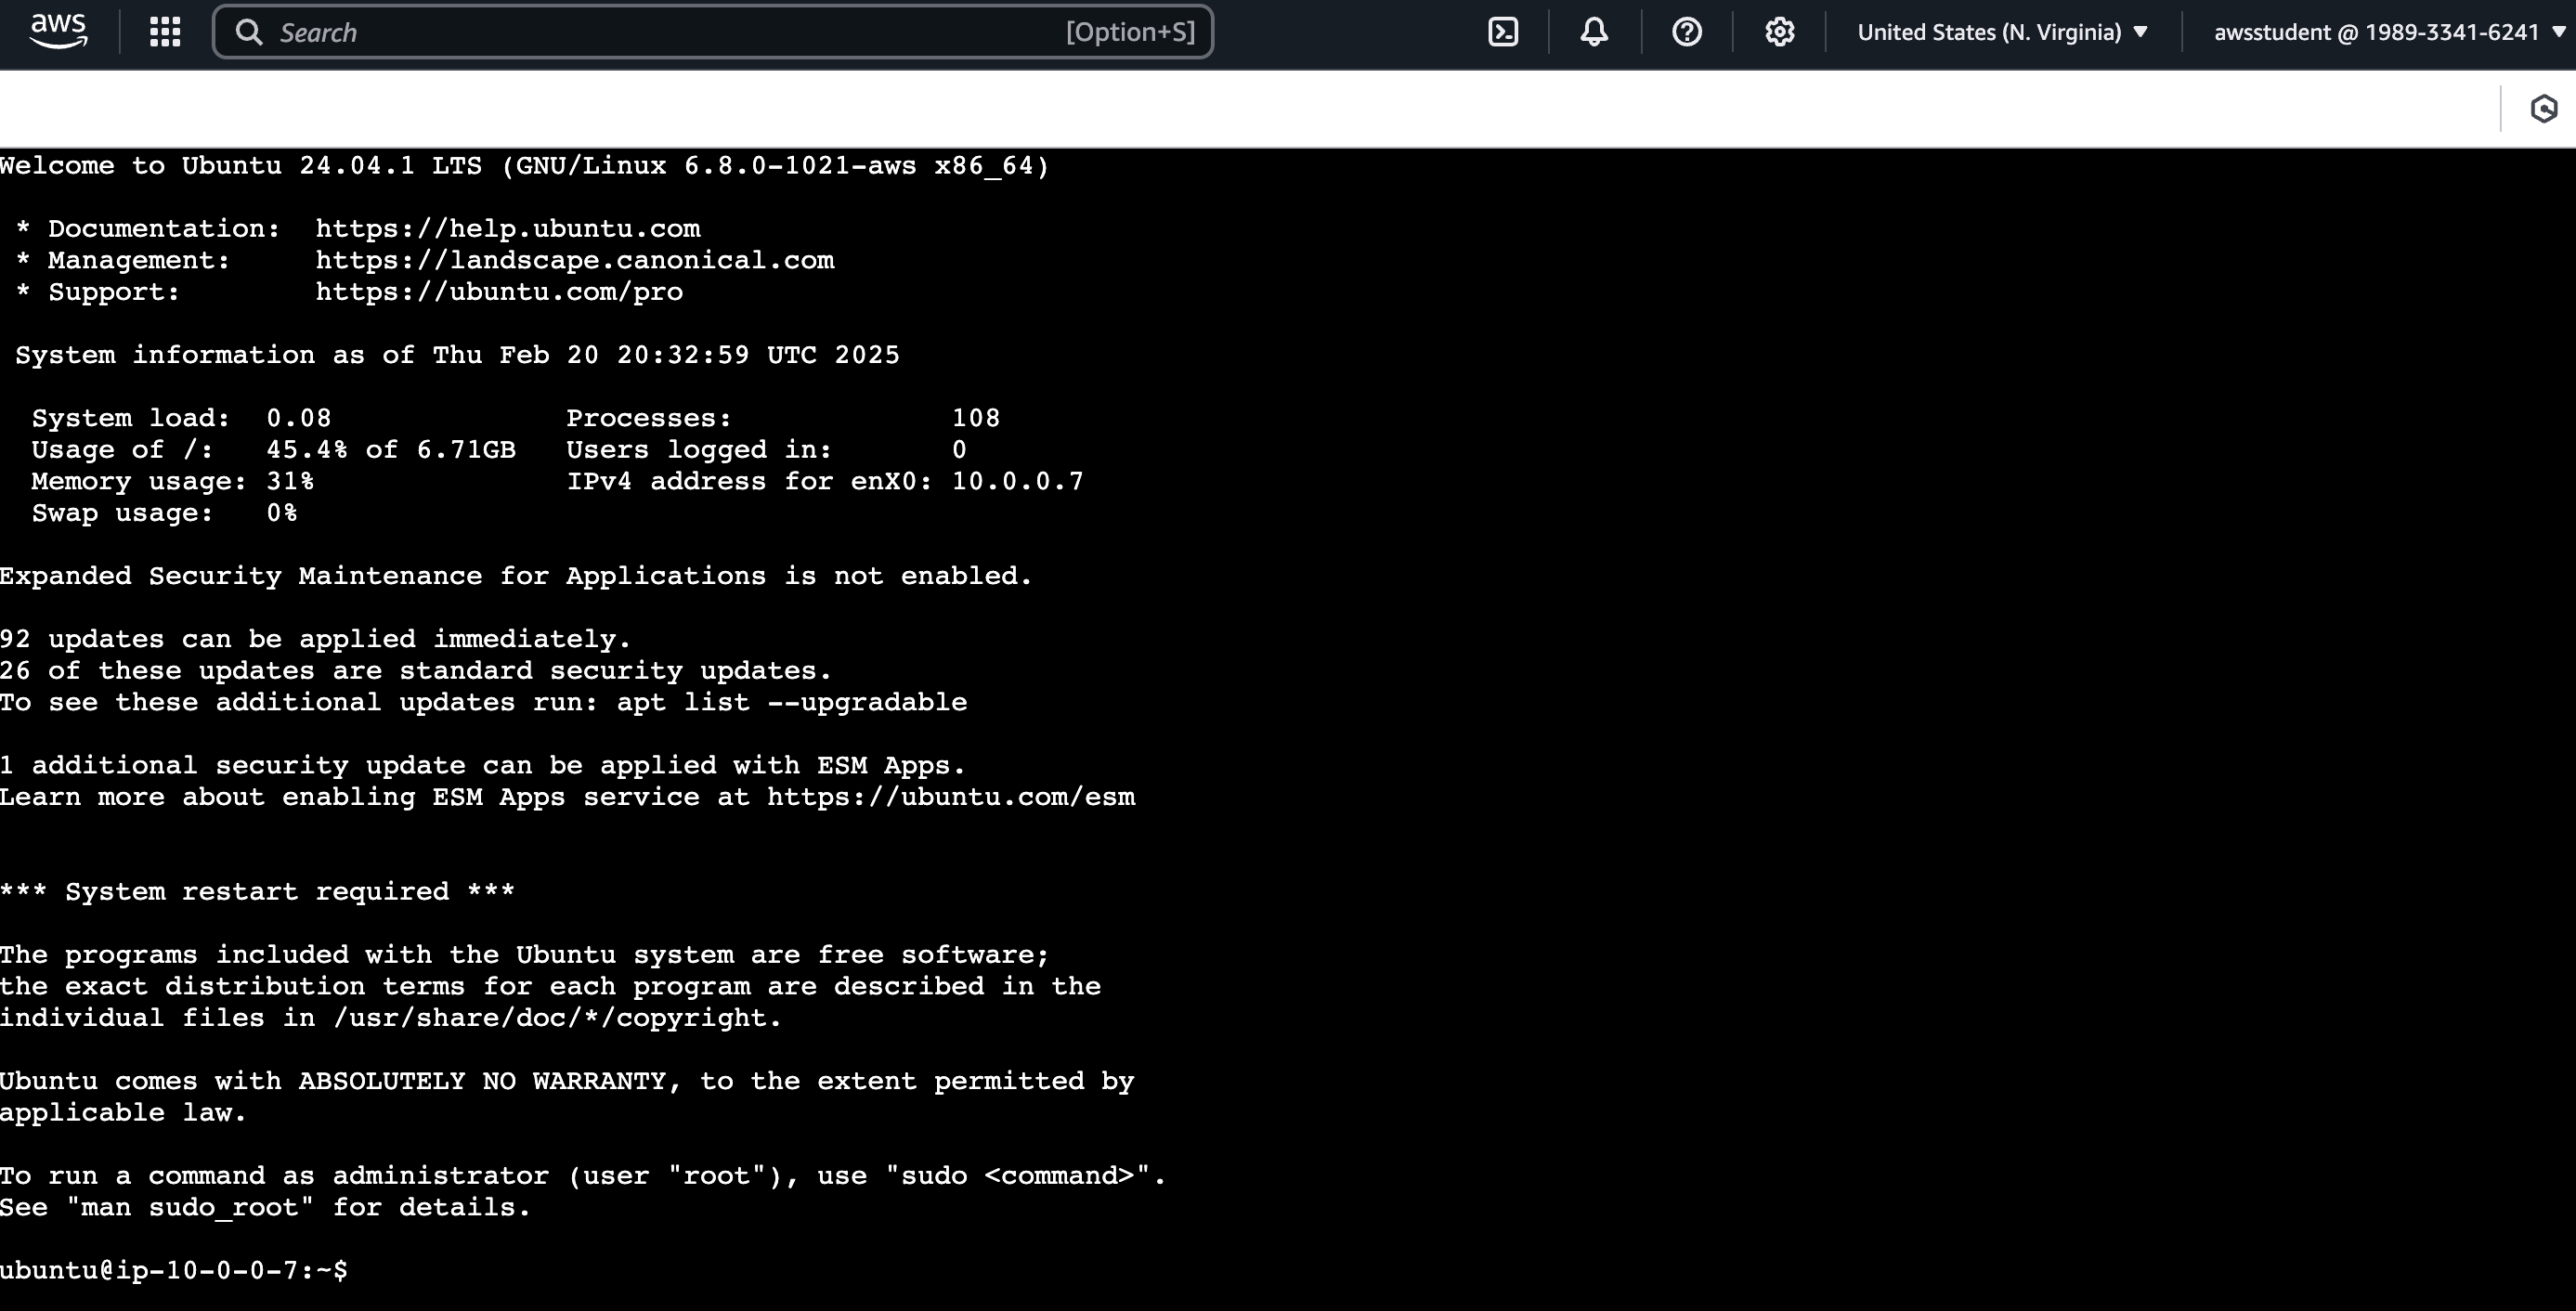
Let’s run a few simple commands to get comfortable on the terminal. Copy each command below and paste it into the terminal interface.
First let’s run the command that Prints the current Working Directory we are in: pwd
pwd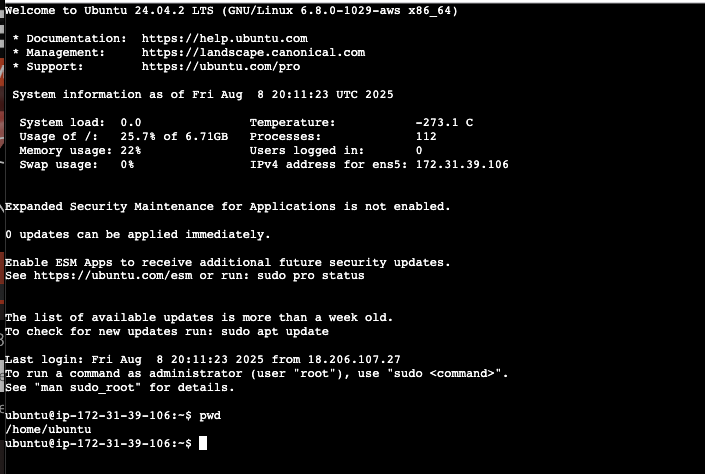
When we logged into our virtual server we were dropped into the home directory of the ubuntu user.
Next let’s list all the files or directories in the current working directory: ls -lah
ls -a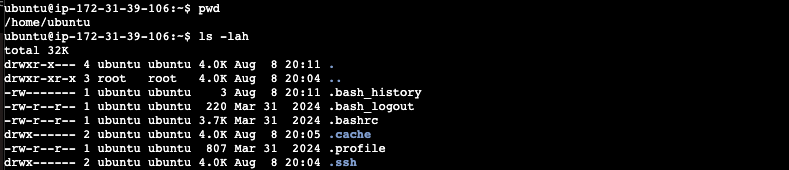
In addition to runing the ’ls’ command you passed a single argument ‘a’. The ‘a’ modifier tells the ’ls’ command to list all of the files or directories, even hidden ones.
Finally let’s see how we can learn more about any Linux command. Here we will use the ‘man’ command. The ‘man’ command will explain what a command does and what possible arguments the command will accept.
man ls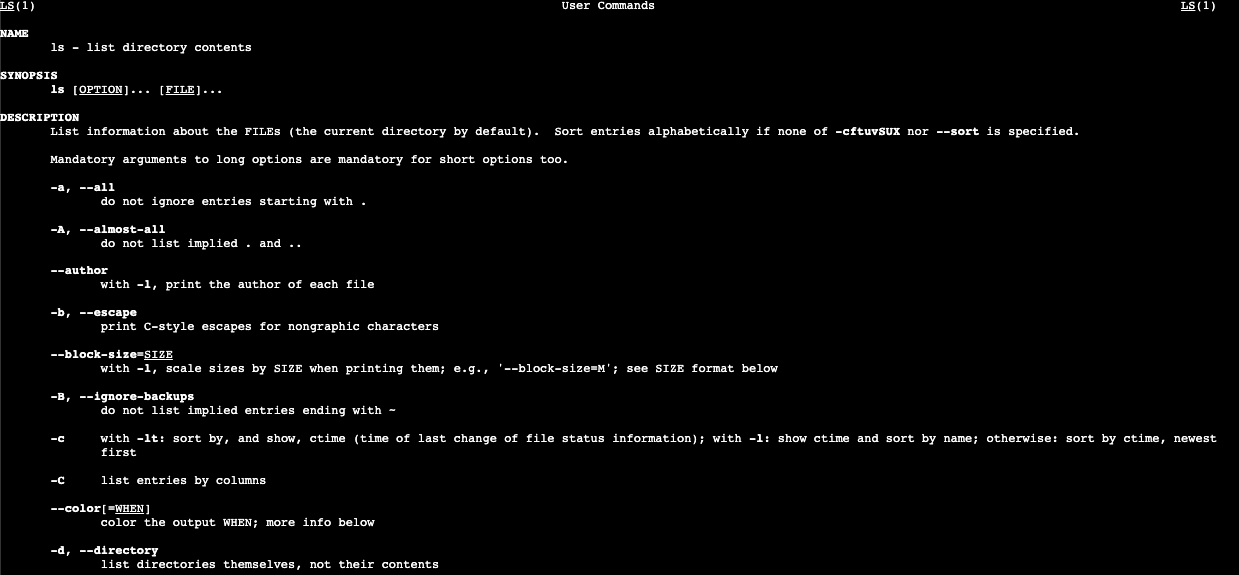
Notice that we can see the an explanation of the ‘-a’ argument we passed into ’ls’. The argument directs ’ls’ to not ignore entries starting with ‘.’. Any file or directory in Linux starting with ‘.’ is normally hidden from listing.
To exit the ‘man’ command hit the ‘q’ key.
For bonus points try running the ‘man’ command to explain the what the ‘man’ command does.
man manThe code for your new website is stored in git repository hosted on GitHub. Git/GitHub allow developers to collaborate together and share code. Almost no modern company develops all of their own code. Developers rely on using many other projects to save time and effort while delivering business value.
The command below will download the code to your virtual server
git clone https://github.com/forticnapp-cloud-lab/hello-world.gitYou can confirm that code is on your server by listing all the file us the ls command.
ls hello-worldBefore you start up your new website let’s make a few simple changes. The default message is Hello World!. The is kind of boring. Let’s update that message to something a bit more fun.
You will be using a program called nano to make this change. Below is the command to start nano opening the index.js file that runs your website.
nano ~/hello-world/index.js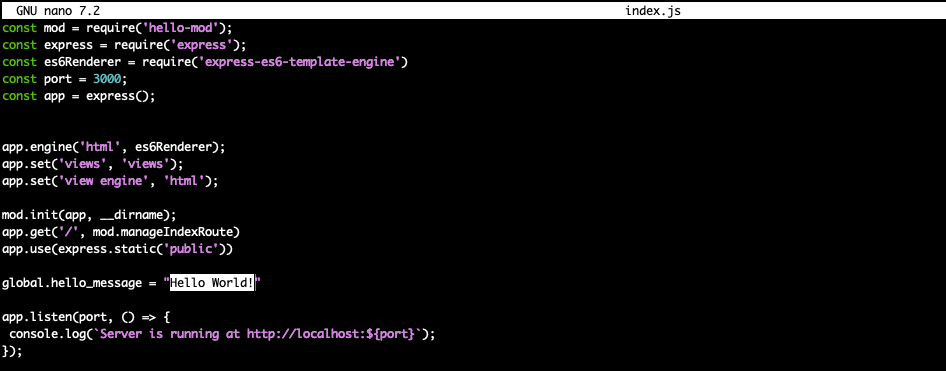
Nano tries to be as user friendly as it can be. You can use your arrow keys to move around, use delete to remove text and type to add text.
Let’s make a change to the website to make it your own. Find Hello World! and replace the text with your own message. You can customize your website even more by replacing IMAGE_URL with a URL for an work safe image you can find on the world wide web.
Once you are done making changes use the control key and o key, followed by enter to confirm the change. Finally control ‘x’ to exit nano.
Before we can even start up your website you will need to get the Node runtime setup. Node is a more modern version of the browse language JavaScript. Many modern websites and services use Node.
The command below will use the Ubuntu built in package management application (apt) to download NodeJs (the Node runtime) and npm (Node’s own package manager).
sudo apt update && sudo apt install -y nodejs npmNotice how many files are installed running just these few commands. Hopefully there aren’t any negative side effects of making all these changes.
As we mentioned all modern software is built on top of other software. Your simple website is no exception. In Node these software dependencies are listed in a file called package.json.
To see your dependencies run this command. The cat command will output the content of a file.
cat hello-world/package.json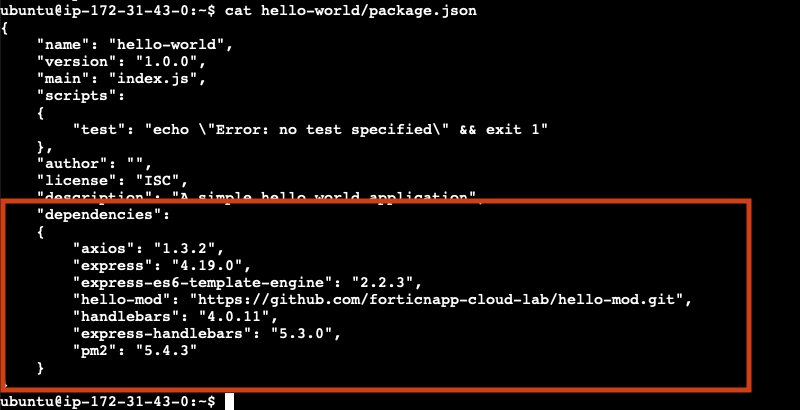
Before you can start your website you will need to install these dependencies. Luckily you already installed the Node package manager npm. Run the command below to change directory and install the needed Node packages.
cd ~/hello-world
npm install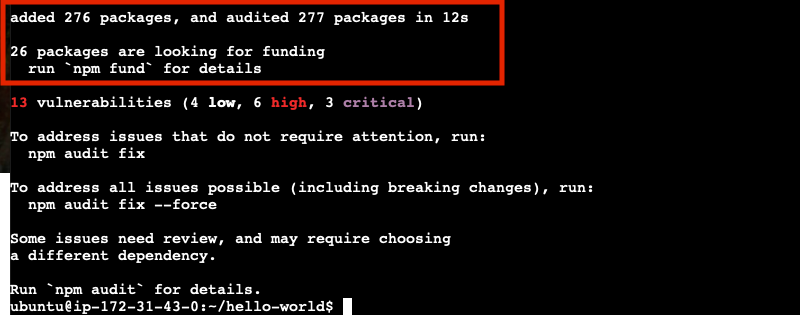
Notice that we only had 4 direct dependencies in our package.json file, but we actually added 229 packages. This is because our direct dependencies have their own dependencies, which in turn might yet more dependencies. Software is built on top of software. Turtles all the way down.
Even more concerning is the warning that there are 8 vulnerabilities found, including 5 of high severity.
Well no time to worry about all of that, you have a website to get up and running!
To keep your website up and running you will use the pm2 binary installed in the step above using npm. The job of pm2 is to ensure that your website stays up and running even if the virtual server gets restarted or your website crashes.
./node_modules/pm2/bin/pm2 start index.js
Go back to the AWS EC2 Service, click on your instance. You will find the public IP address of that instance and copy it.
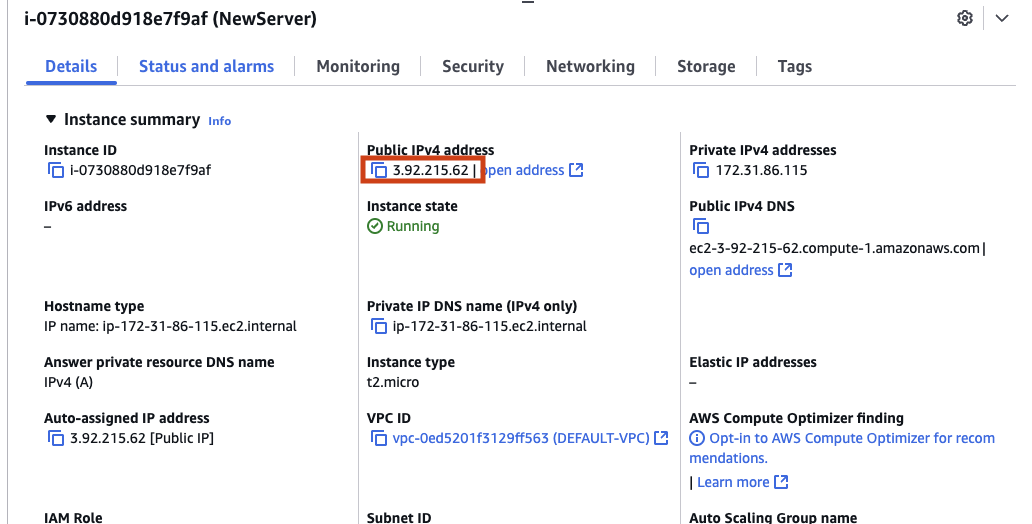
Note: use the copy link and not the ‘open address’ link
You will need to add the port the website is running on 3000. Let’s hope that port is actually open, otherwise we might not be able to access our new website.
http://<Your-IP>:3000
Ensure that you include ‘http://’ as modern browsers will try and force you onto ‘https://’, which listens on a different port (433).
You might have noticed that when you visited the URL of your newly launched website nothing happened, your browser tab just spun and spun. AWS EC2 be default only allows inbound network connections on port 22, the default port of SSH. Since your website is not running on port 22 all other inbound traffic was blocked. Next task is to open up some ports to allow inbound traffic to reach your virtual server.
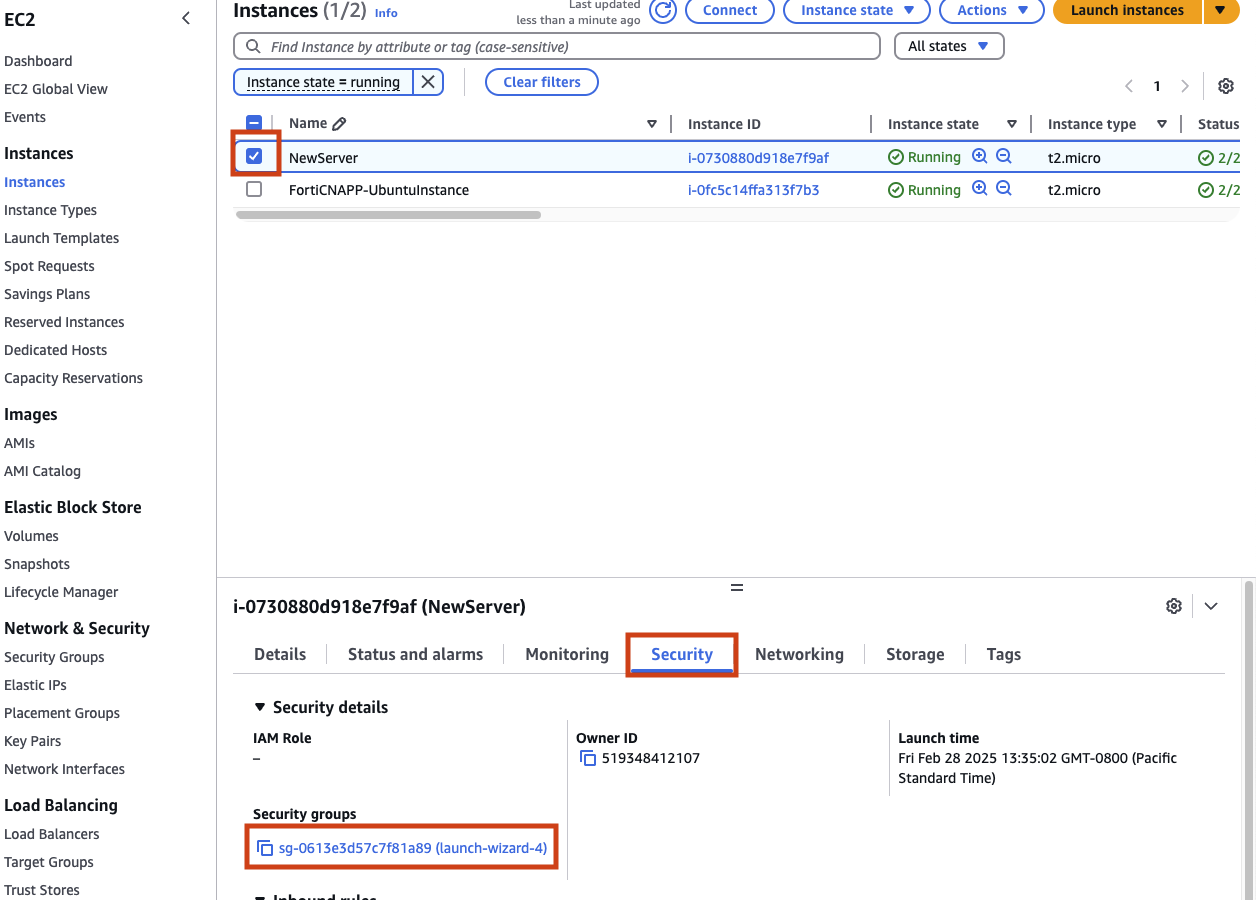
AWS EC2 manages network access via Security Groups. Return to AWS EC2, find you EC2 instance, switch to the Security tab and click on your security group name.
Ensure you are on the Inbound Rules tab and click on Edit inbound rules.
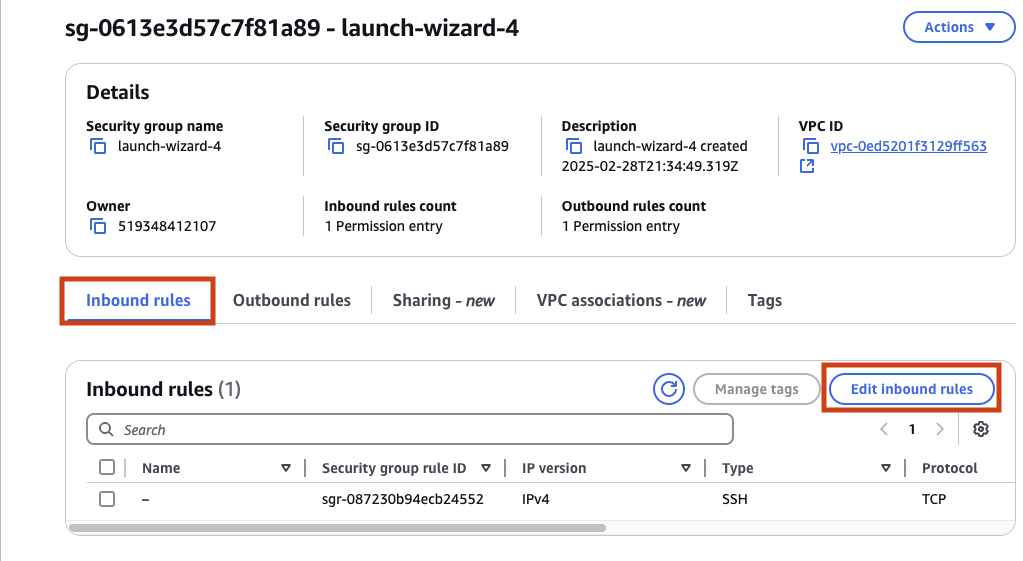
You will need click Add rule to create a new inbound rule. Then specify the Protocol as TCP, Port range of 0-65000 and ensure anyone on the internet can access by specifying a Source of 0.0.0.0/0.
Notice that we opened up way more ports than we need and AWS warns us about allowing all inbound IP addresses. These are just the type of decisions that are now entrusted to anyone with a cloud account.
Anyway… click Save rules, let’s get this web site up!

Refresh the URl of your website to see if we can get traffic flowing.
Your new website isn’t showing your fancy message. Rather it is complaining about an IAM role not being attached.
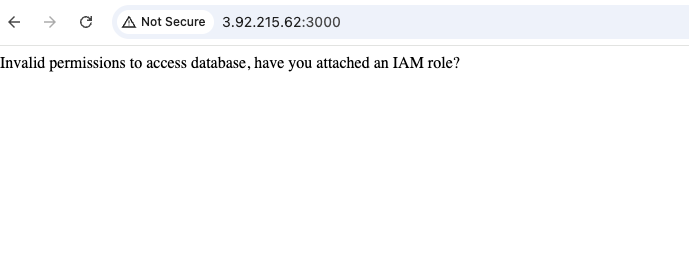
As you might recall from the very beginning we mentioned that your website would need access to a centrally managed database. Access to cloud resources, like databases, is allowed through Identity and Access Management (IAM). IAM has conecpts like roles, policies and permissions that control what can and can’t be accesssed by users and cloud resources.
By default when you create a new EC2 instance there is no IAM role attached. This means that your virtual machine can not access any other cloud resources at the moment.
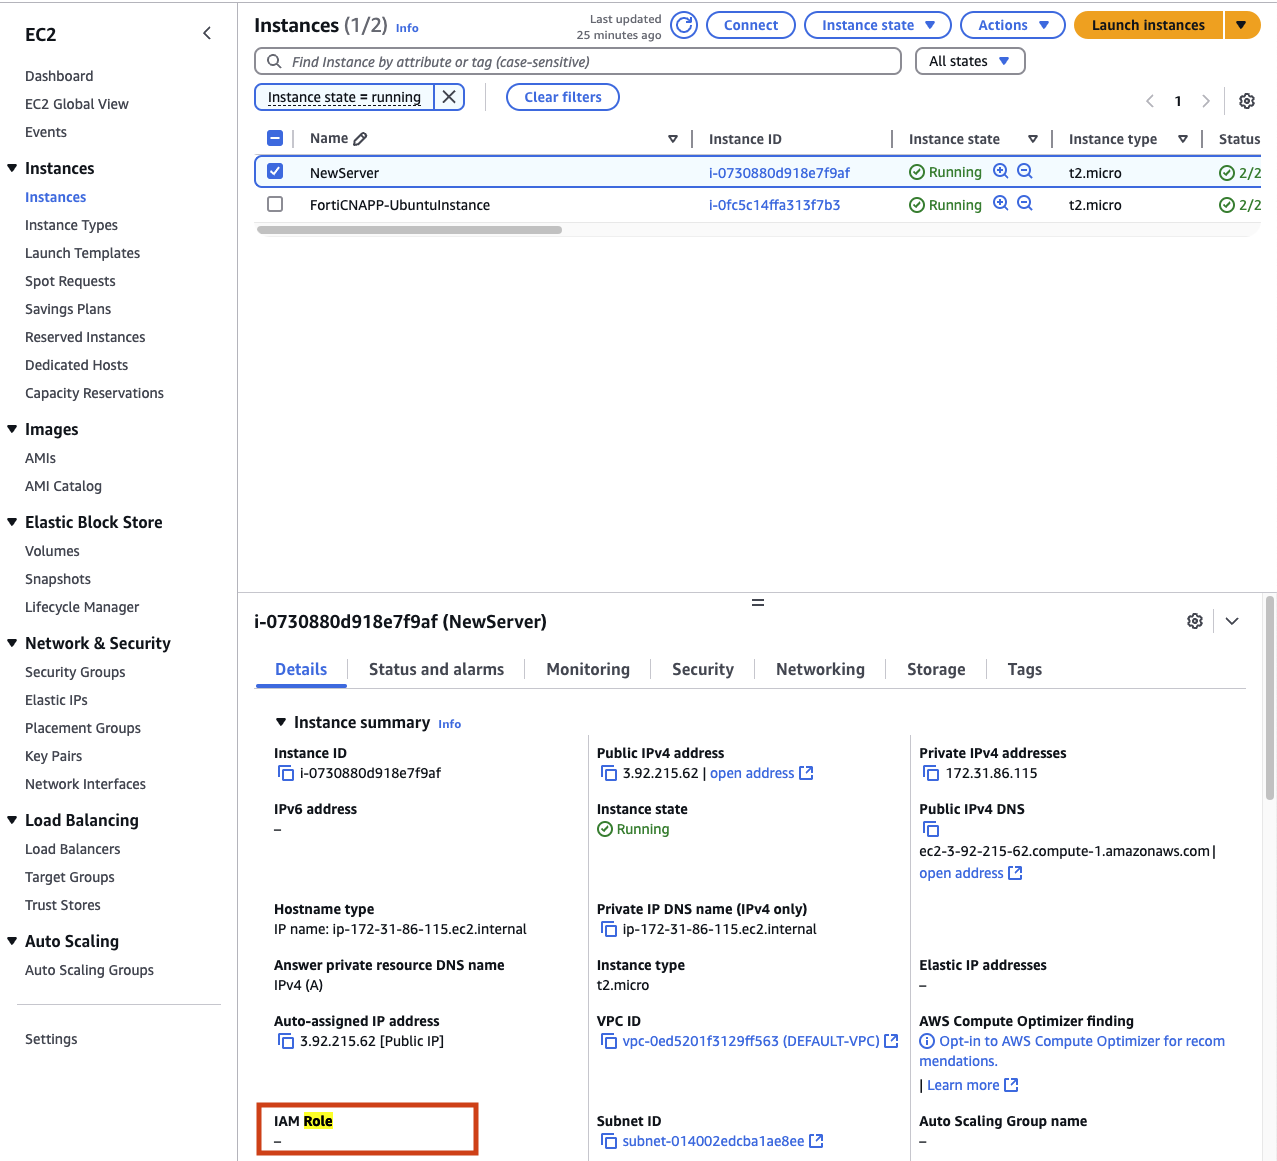
To attach a new IAM role to your virtual server click on Action, then Security and finally Modify IAM role.

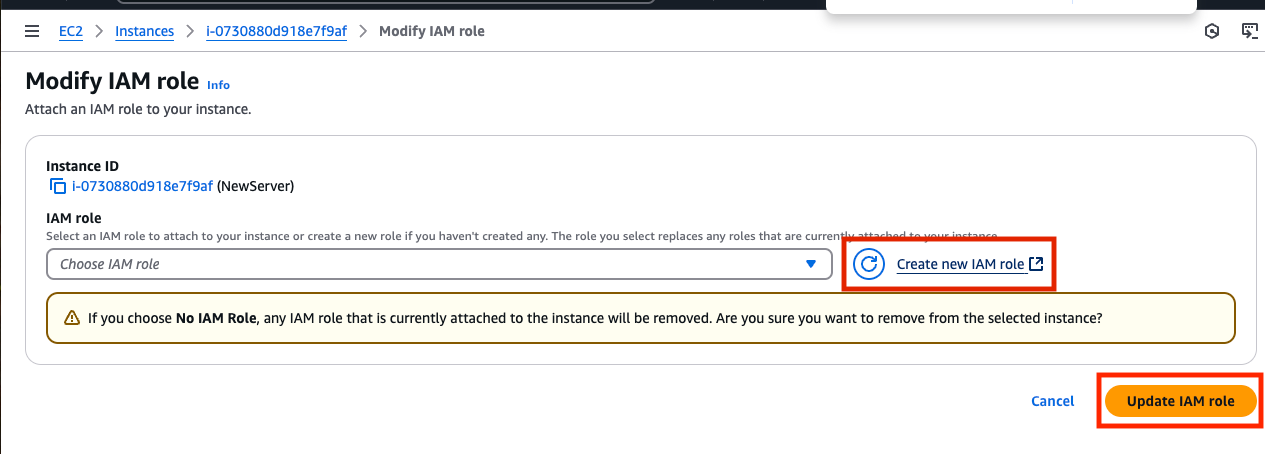
Before you can attach a role you will have to create a new on. Click on Create new IAM role to open a new window in the IAM service page.
On the IAM Role page you will find a list of all the current roles. You want a new role that can be attached to your virtual machine so click on Create role.
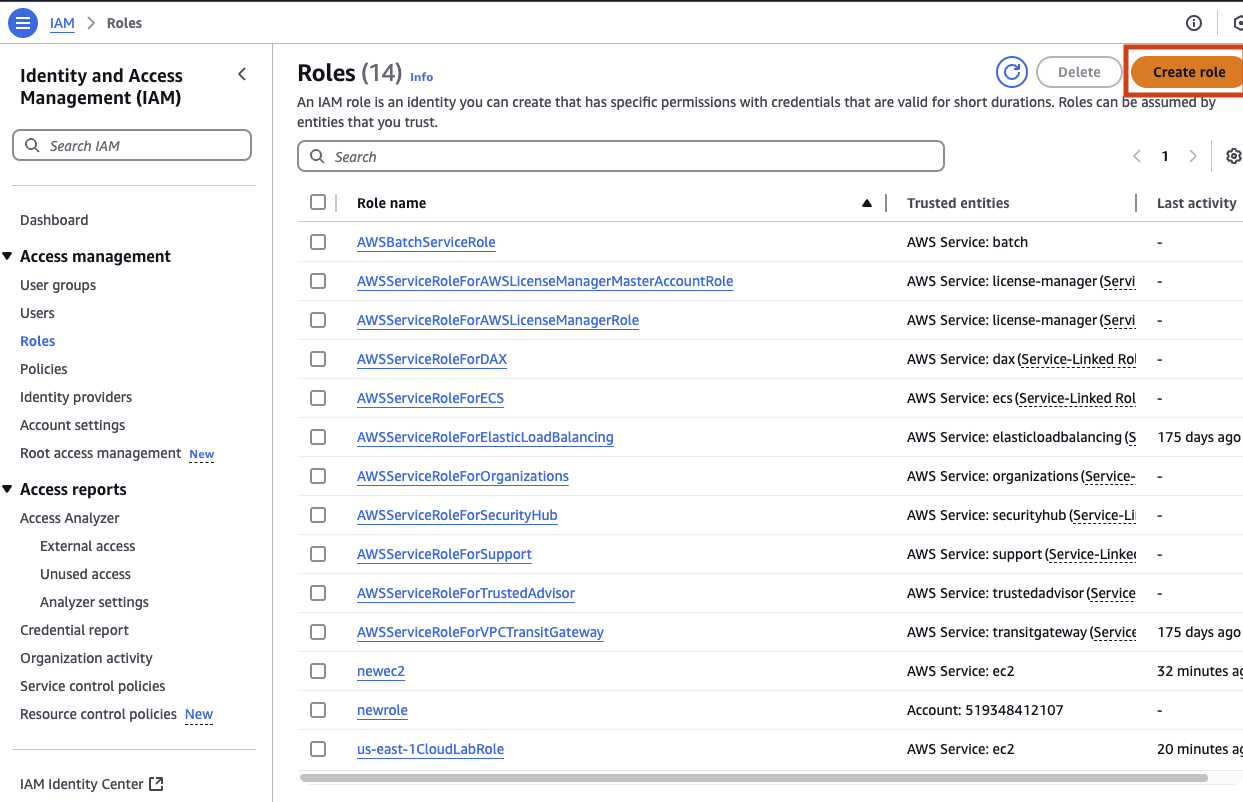
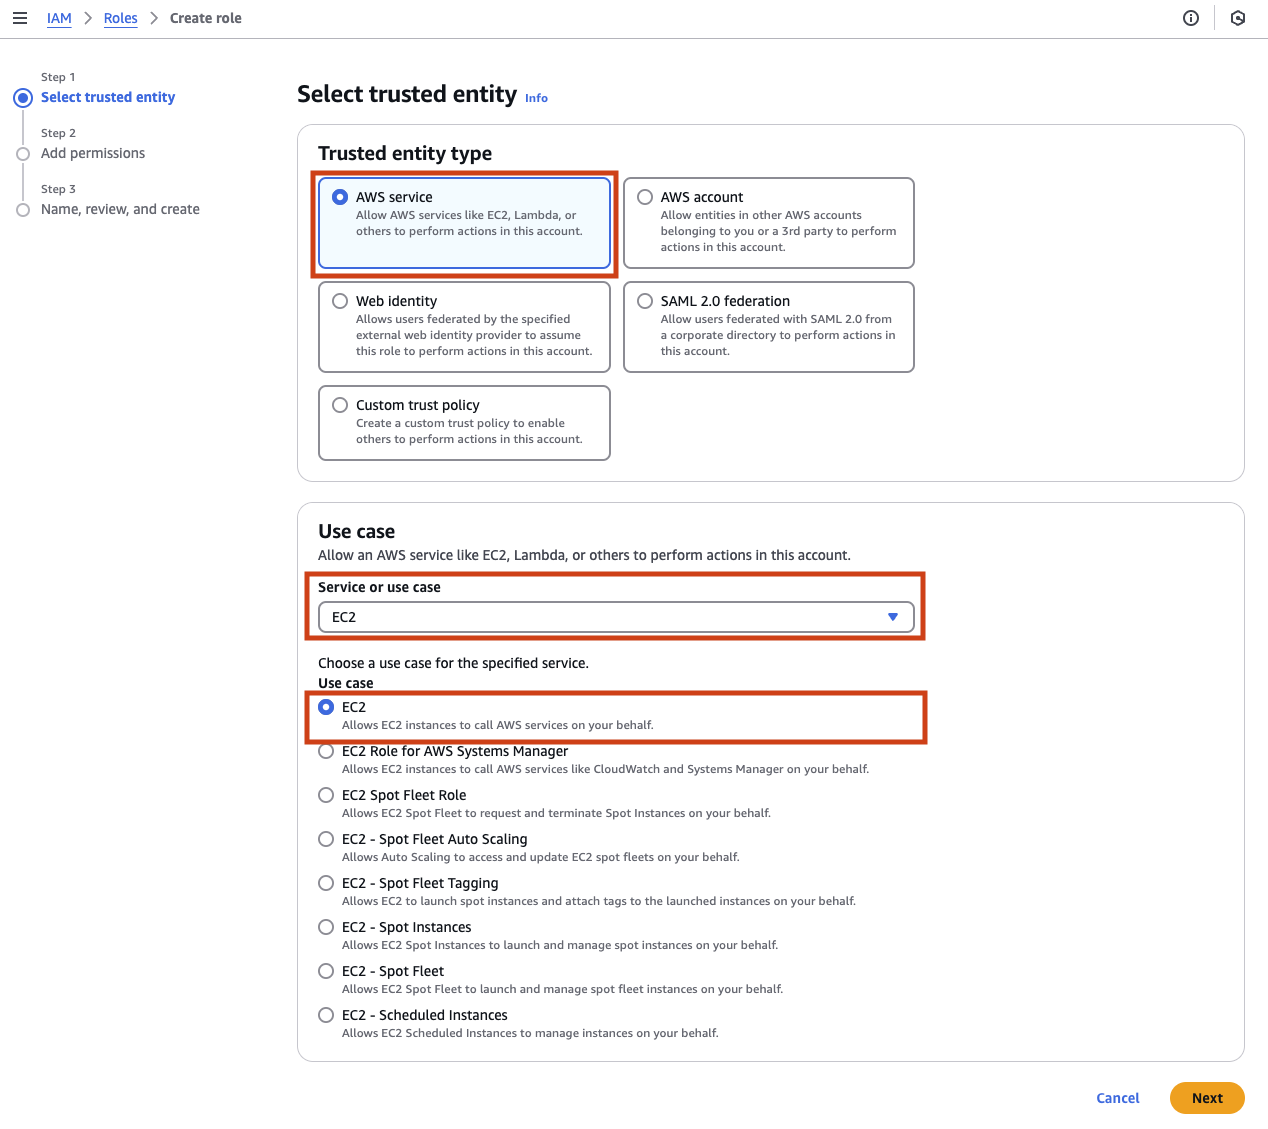
There are a few type of roles you can create select AWS service and then in the Service or use case drop down select EC2. This will allow your to attach this new role to an EC2 virtual server.
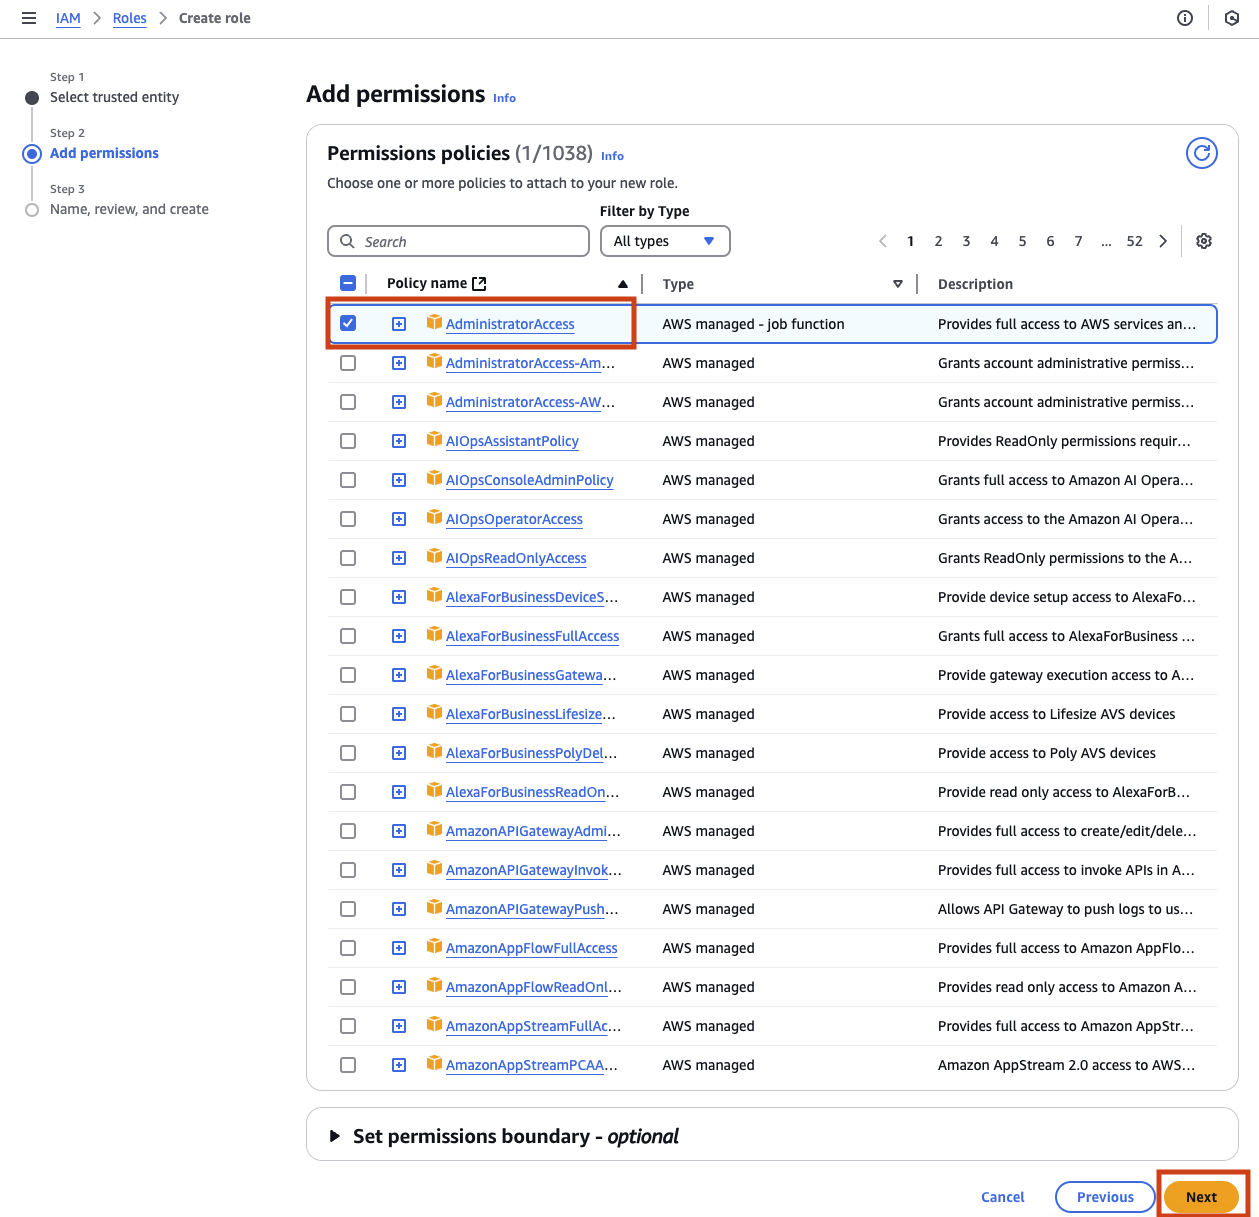
Now comes the time to choose which permissions to grant. Notice that there are over a thousand possible permissions policies you could grant. Rather than go over all of these trying to find the right one, we will take the simple path and grant AdministratorAccess. Choosing the admin role grants more permissions than you need, but ensures that the database access will work. Once again these are just the types of decisions that anyone with a cloud account face everyday.
Finally the hardest choice you have made all day. What do you name this new role? Pick something easy to remember and click Create role.
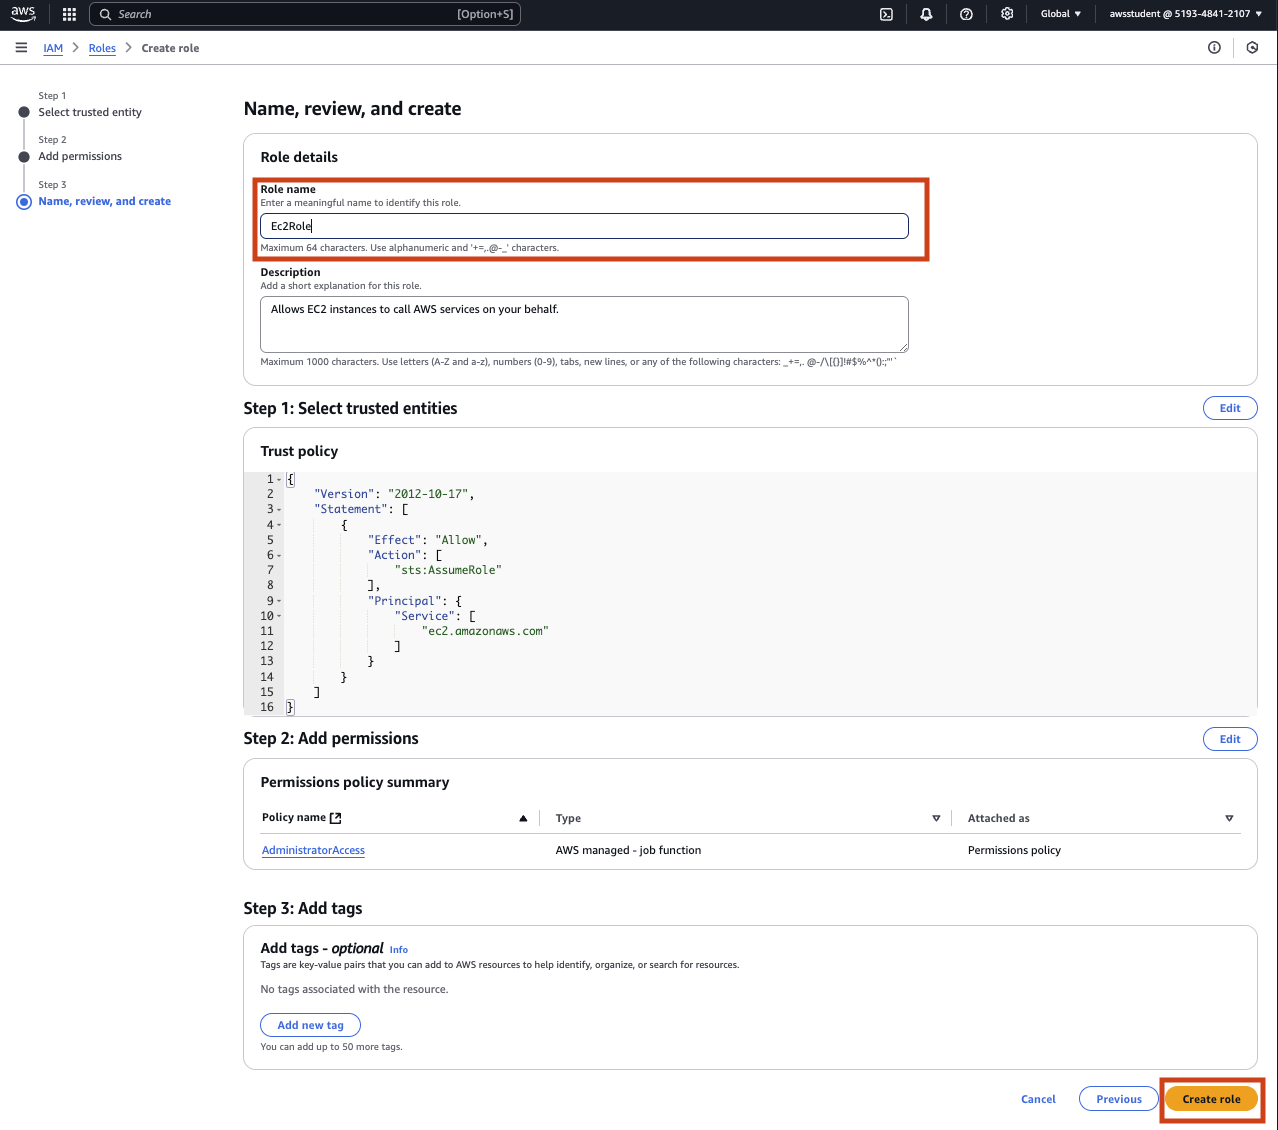
You can close the IAM role creation page, we are done here!
Return to the previous page where you where trying to attache a role. Click the circle icon, select your new role from the drop down and click Update IAM role.

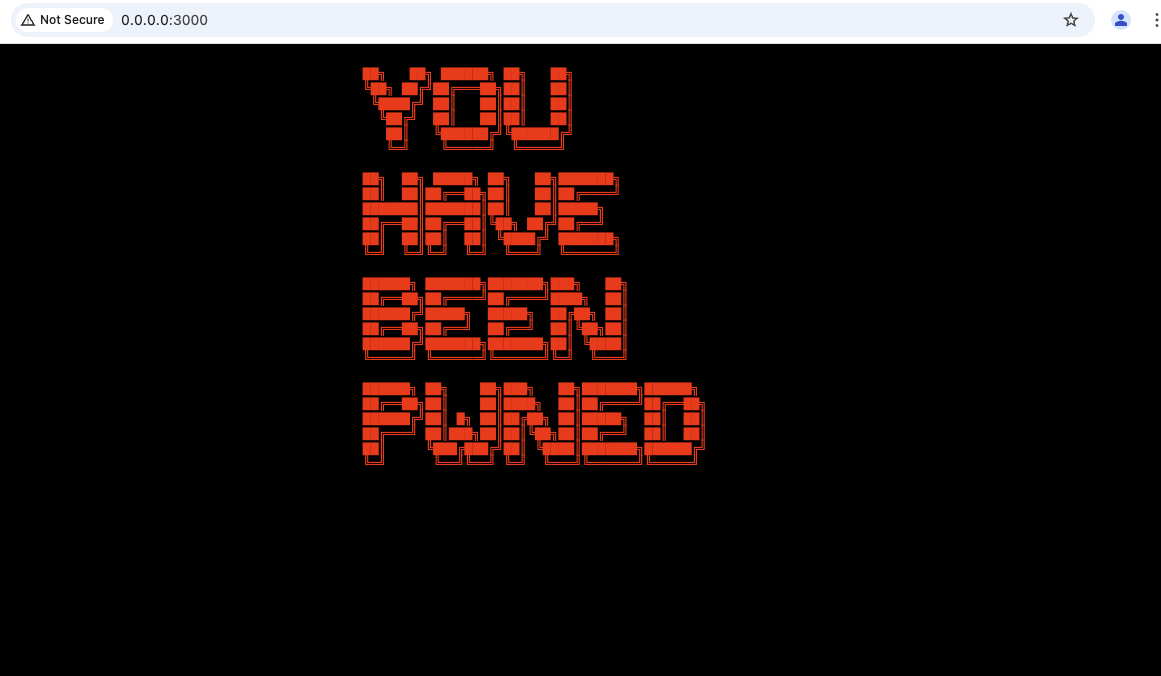
Finally check your website again. Fingers crossed it all worked.
Here are the high level steps you took:
What could go wrong?
Once you complete this section of the lab, please take a break and talk amongst your peers about what you learned, we will all come back together once everyone has finished

Check out the web application you got up and running in the last lab. A hacker was able to find a weakness in the code running on your virtual server.
Hackers have goals like all of us. Once they have found a breach they get to work on those goals. They want to create another way to access you virtual server in case you fix the current exploit. They will want to find other virtual servers or resources within your environment. Ultimately they will want to try and gain access to your cloud account itself.
In this lab you will revisit some of the decisions made while rushing to get your web application up and running. The decisions made were to remove friction and reach your goal of running your web application as quickly as possible. Keep in mind that these decisions are the exact same decisions that cloud practitioners are faced with everyday. Keeping a cloud environment secure is a constant effort and has many dimensions.
The first thing you did on your new virtual server was to install new software and code. You started with copying some code from Github. Followed by adding the NodeJS runtime and NodeJS package manager (NPM). Then using the NPM package manager you installed even more code, some of that code installed even more code.
You did get a warning from NPM about vulnerabilities with some of the code you installed. To try and reduce your risk go back to the AWS Instant Connect console where you started you web application. Use control x to exit the application and run the following command that npm suggest.
npm audit fix --force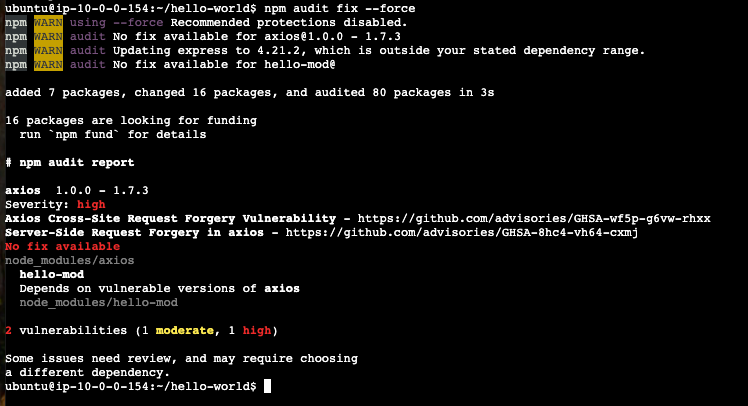
While this didn’t resolve all of the security issues, it did reduce your risk from 4 highs to 1 high (and one moderate) vulnerablity.
Take away is all your code is built on other code. All code comes with risks.
The web application you setup only needed port 3000 open to receive inbound requests. Instead of taking the time to figure out what port was needed you opened up all the ports from 1000 and 6000. This was done to save time and avoid issues. The downside of this decision is your virtual server is now listening for inbound traffic all of those ports
The hacker first step will be to a new service that would allow them to access your virtual server. If only port 22 and 3000 were open they would have to stop one of those services to use those ports. This is something you would probably notice. Having so many ports open allows the hacker to simply start up a service listing on port 5000, for example.
Run the command below in the Instance Connect console where you ran commands before. The nc command is a unix utility called netcat. Passing the -l flag to netcat makes it listen for connection over TCP or UDP on a given port.
nc -l 5000In your browser return to your web application page and replace the 3000 with 5000 and reload the page. Got back to the AWS Instant Connect console where you will find you were able to connect with netcat. Note you can see what browser used, the OS and the IP address of where the request came from.

Take away is opening too many ports is not a great idea. Be careful what you expose to the Internet!
Recall that you needed to allows your web application to access a shared database. To allow this access you granted the admin role directly to your virtual server. In AWS users and resources can have roles attached that allow them to access and manage cloud resources. Let’s explore a few of the issue with granting so many privileges.
The main goal of a hacker is to gain greater access either to other virtual server or better yet your cloud account. Getting existing user credentials would be a great. If these credentials could be used to create a new user, even better.
AWS runs an internal service call the metadata service. The metadata service is designed to allow for discovery details about virtual servers. These details include role and permission assigned to the server.
The commands below will create a token that we will use to query for information from the metadata service. Then next command will return the name of the role assigned to your virtual server.
TOKEN=`curl -X PUT "http://169.254.169.254/latest/api/token" -H "X-aws-ec2-metadata-token-ttl-seconds: 21600"`
curl -v -H "X-aws-ec2-metadata-token: $TOKEN" http://169.254.169.254/latest/meta-data/iam/security-credentials/; echo ""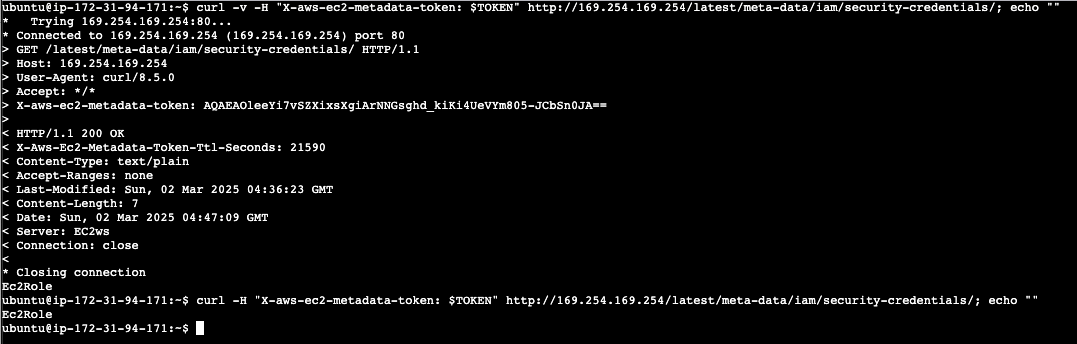
Replace the role name returned from the previous command for <ROLE_NAME> in the command below. The output of the command below will include a set of AWS security credentials (AccessKeyId, SercretKey and Token).
curl -v -H "X-aws-ec2-metadata-token: $TOKEN" http://169.254.169.254/latest/meta-data/iam/security-credentials/<ROLE_NAME>These credentials can be used by an attacker to perform any actions the role can. As you might recall we gave this role admin privileges. The goal of moving from your virtual server to the your cloud account is achieved.
Take away grant the least permissions you can to a resource of user.
The cloud has changed how teams work. The cloud has enabled engineering teams to move quickly, scale massively services and outpace other teams like operations and security. Hopefully you have seen how seemingly small decisions can have big impacts on the security posture of your cloud environment. This is where products like FortiCNAPP can help, they give teams visibility into their cloud security posture.
In Lab 1 you will get a web application running on a virtual server in AWS and exposed to the internet. Learn how to create a virtual server, update a security group, create IAM role and deploy a Node web application reachable from the internet.