FortiFlex API
| Goal | Gain Experience with the FortiFlex API |
| Task | Import FortiCloud Postman Collection, Authenticate, and explore the FortiFlex API |
| Validation | Stop and Start FortiFlex API via Postman |
Automation using FortiFlex API
In this section, you’ll learn how to automate FortiFlex operations using the REST API and Postman, then explore serverless automation with Azure Functions.
We’ll start by setting up Postman with our FortiFlex Collection, then create an API Key in FortiCloud, and finally use Postman to interact with the FortiFlex API. After that, we’ll build a serverless automation function in Azure to scale FortiGate resources based on business logic.
Step 1: Import FortiFlex Postman Collection
The following steps should remain relatively consistent regardless of how you’re using Postman, so open Postman and proceed.
- In Postman, use an existing collection, or create a new one if you’d like
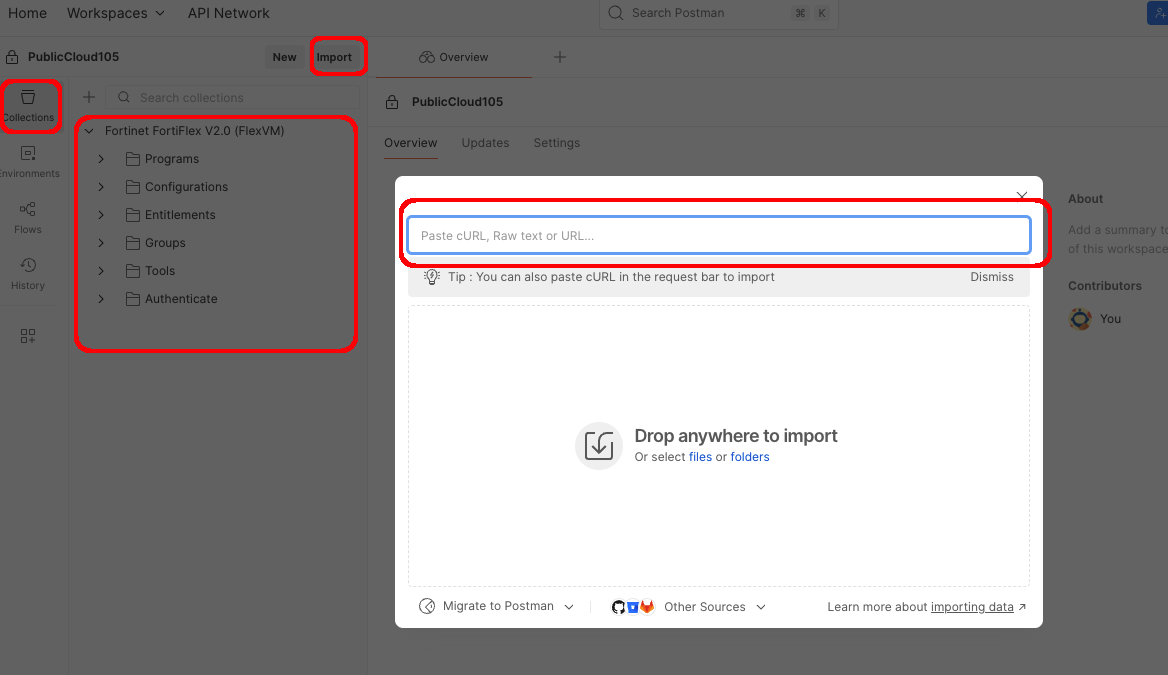
- click on File–>Import in the top left corner, or Import button in the top left of the collection
- On the import dialog, paste the following URL:
https://raw.githubusercontent.com/FortinetCloudCSE/fortiflexvm-api/refs/heads/main/api/Postman/v2/FortiCloud.postman_collection.json
- You should see the FortiCloud Collection appear in the left sidebar
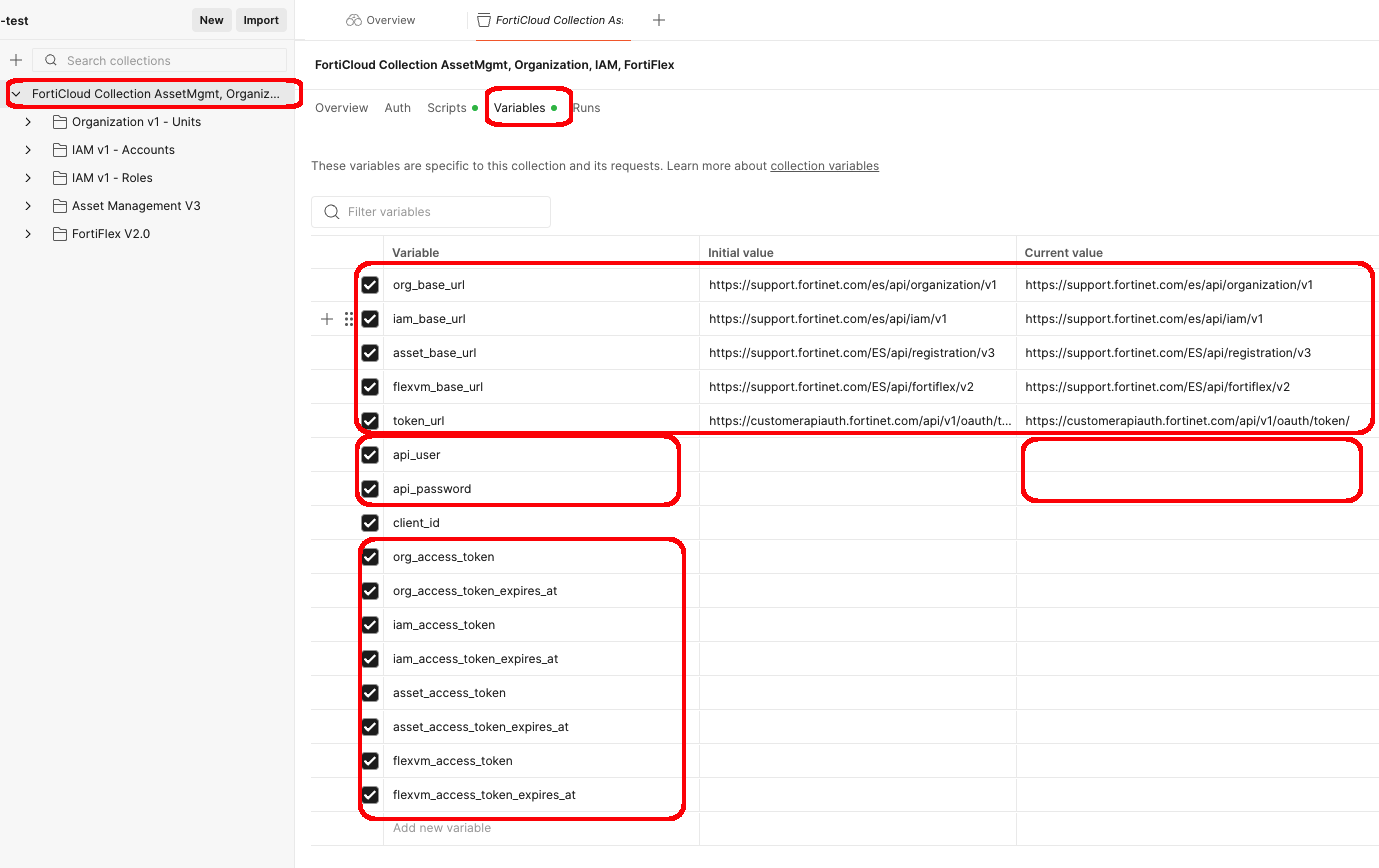
- All variables used in the collection are stored at the highest level of the Collection.
- Click on Collection Title in the left sidebar, then click on the Variables tab
- You’ll see variables for
- The API Base URLs
- api_username and api_password for authentication
- client_id for authentication (only used to override the automated client_id in the script)
- access_token, and expires_as for storing Bearer tokens returned from authentication request for each client_id/request
Tip
In most situations, the only variables you’ll need to modify are the api_user and api_password. You will notice the access_tokens populate as you launch different API requests
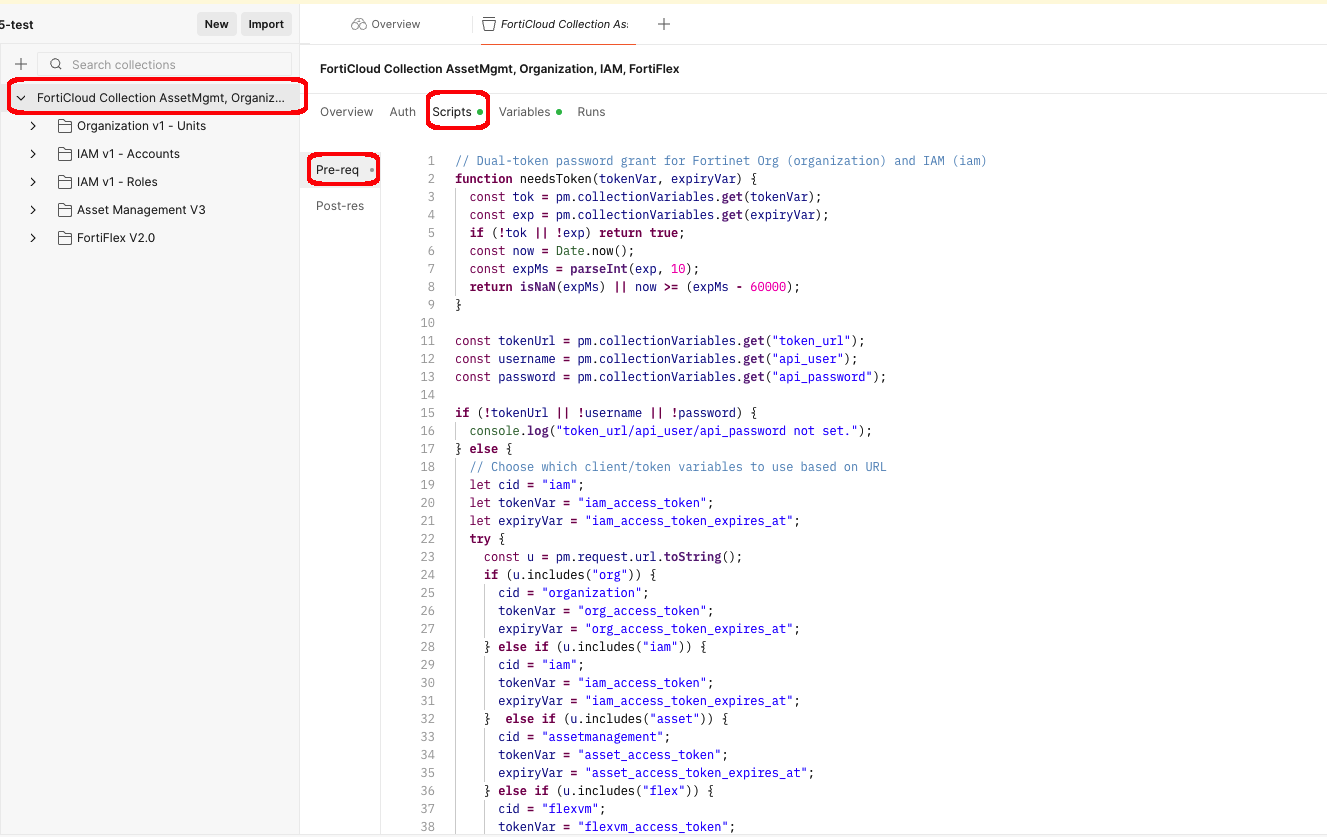
- We’ve set up the FortiCloud Postman collection to automate the authentication process and store the access token for use in subsequent requests
- You can see the scripting used to fetch Bearer tokens by clicking on the Scripts tab at the top level of the Collection, and viewing the Pre-request Script
- Pseudocode
1. Grab the URL of the request, along with the API Username and Password
2. Set the authentication client_id depending on the path in the URL
3. If (No bearer token or it's already ): get a new bearer token with api_username, api_password, and client_id
4. Set the bearer token in the request header for the given request type
Postman Collection Scripting
Step 2: API Authentication Setup
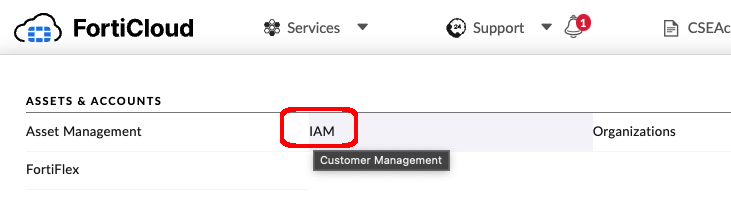
From the FortiCloud Portal, click on Services–>IAM
Click on Add New –> API User

- Enter a username for the API User such as:
flexapiuser - Choose the SysAdmin Permission Profile
- Click Next
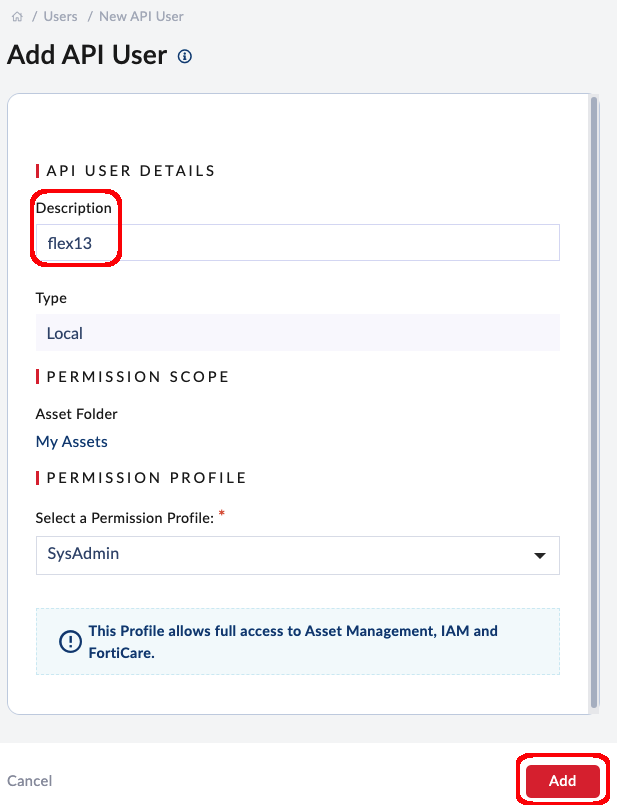
- When the API User is created, you will see a message to download the credentials.
- Click to download, and enter a password to encrypt the file, such as
FortiFlex2025!
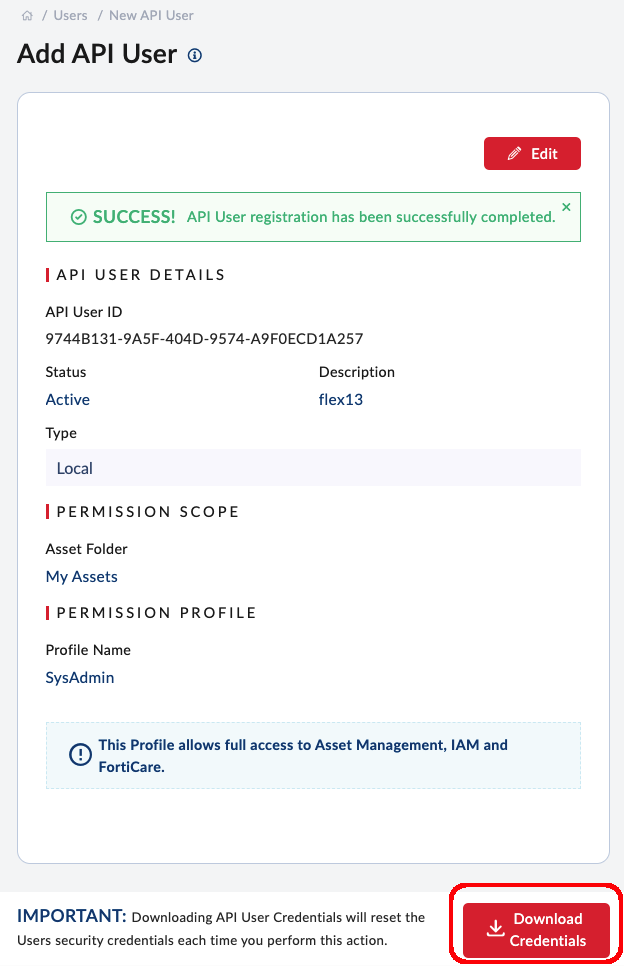
- You’ll get a password-protected zip file with the API credentials. Open it using the same password you entered when downloading the file.
- The folder will contain a single text file with the apiId and password
- You’ll enter the apiId and password into a Postman Collection Variables the next step
- Back in Postman, enter the newly created apiId and password into the Postman Collection Variables
- Copy the
apiIdfrom the credentials text file into the api_user Postman Current value variable - Copy the
passwordfrom the credentials text file into the api_password Postman Current value variable - Click Save to save the collection variables
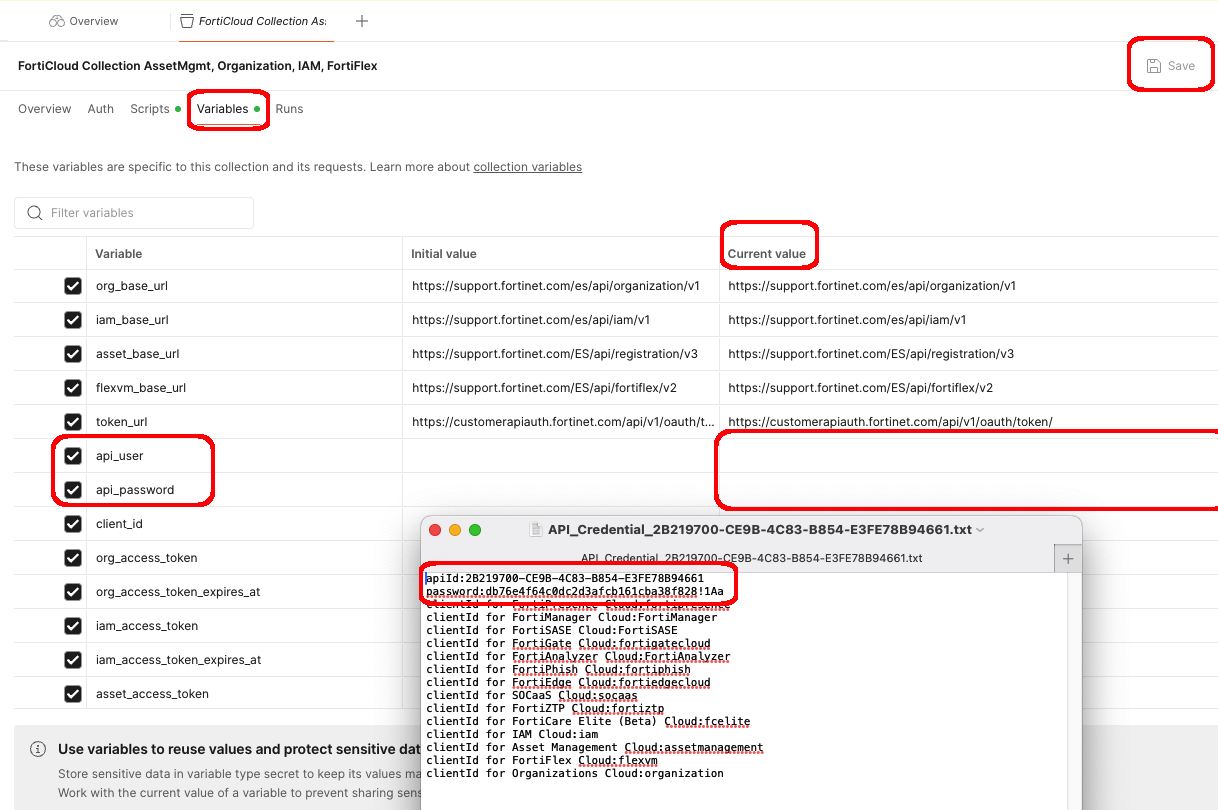
Tip
Important: Make sure to use the Current value field, not the Initial value field. The Current value is what will be used when you send requests.
- From the top level FortiCloud Collection, open folder: FortiFlex V2.0–>Programs, and then POST Request: List
- Click the Send button

- You should see a response with a 200 OK status and 2 different
serialNumberin the response body
Congratulations, you’re now authenticated with the FortiFlex API!
Warning
If you get an error at this step, please double-check everything and-or check with the Workshop Instructor
Step 3: Basic List Actions
Let’s take a moment to understand FortiFlex API list actions
To view configurations
- We can then take the Flex Program SN we got from the previous request along with our FortiCloud Account ID, and use it to retrieve a list of Configurations for that Program.
- Open the Post List request from the Configurations folder in the collection
For this Workshop, we’re focusing on FortiFlex MSSP(postpaid), and the Program SN is:
ELAVMS0000000518You can get your FortiCloud Account ID from the FortiCloud Portal top right corner
- click on the down arrow next to your account name, and look for the Member Account ID
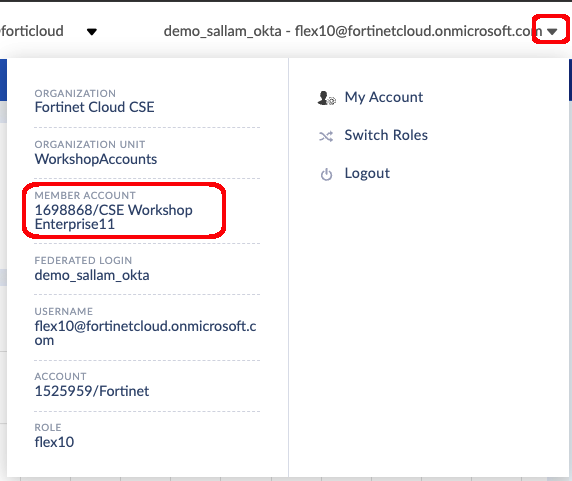
FortiCloud Account ID enter both into the Body of the Configurations/list request, and click Send
You should see a response with a 200 OK status and a list of configurations in the response body
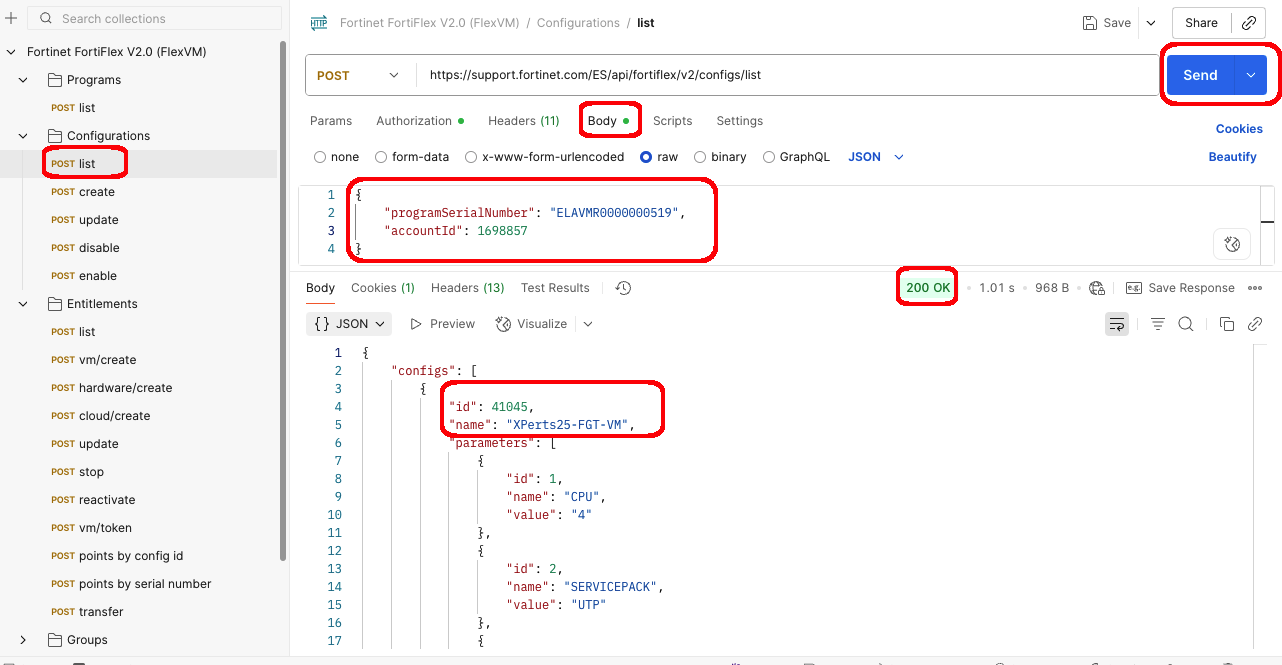
FortiFlex Configurations List Body
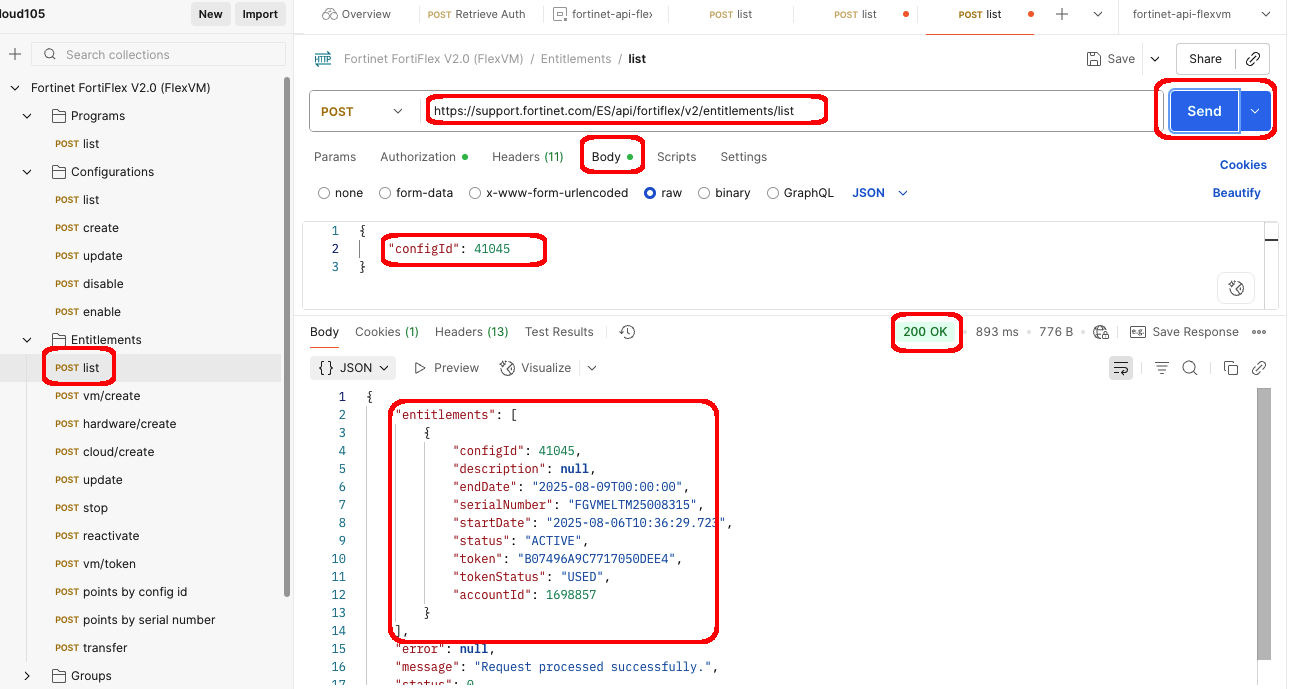
Next, we can retrieve a list of Entitlements by sending a request to the /entitlements/list endpoint.
- Open the Post List request from Entitlements folder in the collection
- enter the configId returned from the previous request into the Body of the Get Entitlements request, and click Send
Step 4: Entitlement Management via API
Let’s look at stopping and re-activating entitlements via the API
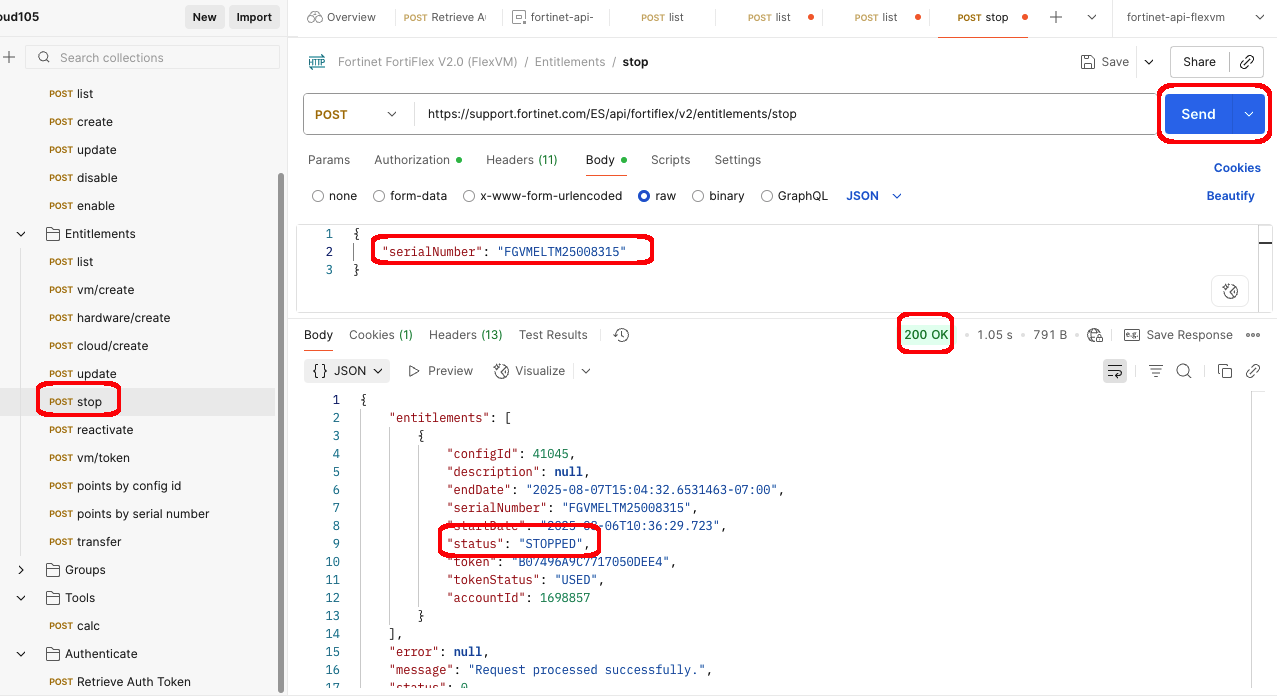
- Open the Stop request from the Entitlements folder in the collection
- Under the Body tab, enter the serialNumber you got from the previous request
- Click Send to disable the entitlement
- You should see a response with a 200 OK status and the entitlement status updated to “STOPPED”
- You can verify this by sending the list request and checking the status, or by checking the WebUI
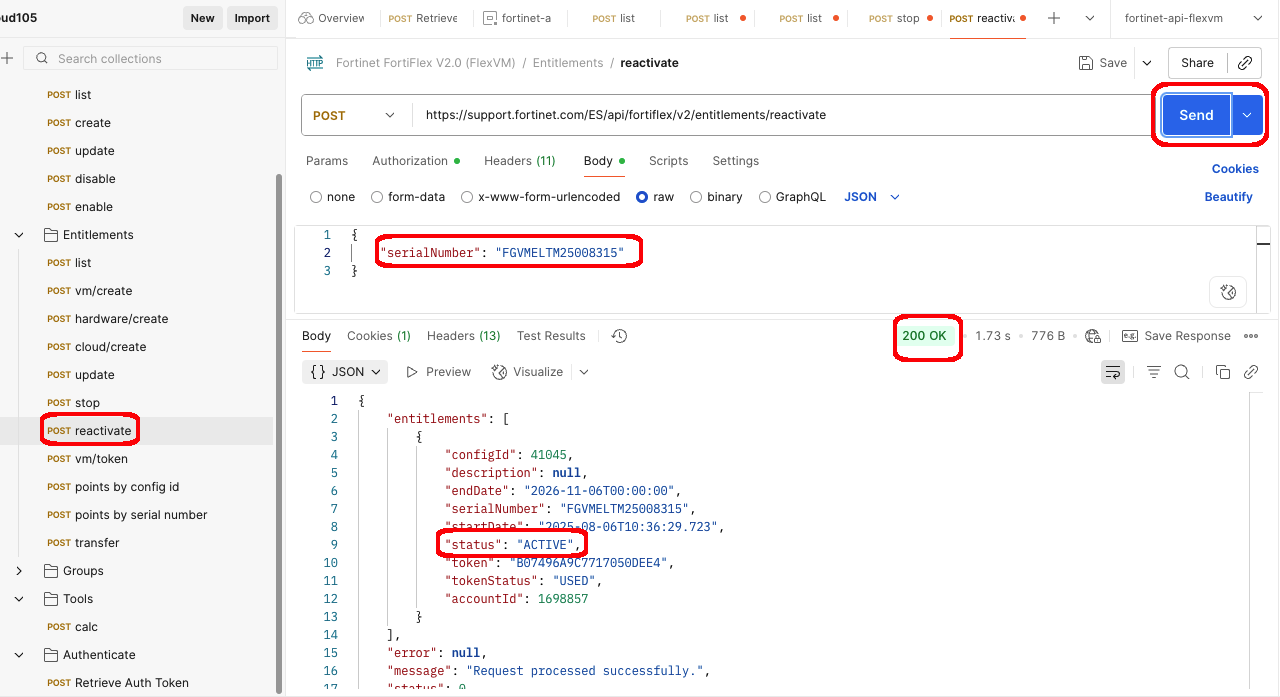
- Open the reactivate request from the Entitlements folder in the collection
- Under the Body tab, enter the serialNumber you got from the previous request
- Click Send to enable the entitlement
- You should see a response with a 200 OK status and the entitlement status updated to “ACTIVE”
- You can verify this by sending the list request and checking the status, or by checking the WebUI
Info
API Basics Complete! You’ve successfully:
- Authenticated with the FortiFlex API using Postman
- Viewed configurations and entitlements programmatically
Key Takeaways from API Basics
- Speed: API operations complete in seconds vs minutes for manual operations.
- Consistency: Automated processes eliminate human error and ensure standardization.
- Integration: APIs enable seamless integration with existing DevOps and FinOps workflows.
- Scalability: Serverless functions can handle multiple concurrent scaling requests.
- Cost Optimization: Automated scheduling can significantly reduce costs during off-hours.
- Best Practices Learned:
- Always validate API responses before proceeding to next steps
- Use Collection variables for sensitive data like API keys