FortiFlex WebUI
| Goal | Gain Experience with the FortiFlex WebUI |
| Task | Create a FortiFlex configuration and entitlement, deploy a FortiGate VM in Azure using the entitlement, and then update the configuration to increase vCPU count. |
| Validation | FortiFlex Licensed 4vCPU FortiGate VM in Azure with matching SN and License. |
In this section, you’ll learn how to manage FortiFlex entitlements through the FortiCloud web interface, providing a foundational understanding of FortFlex, If you need help accessing Azure FortiCloud/FortiFlex Portal, please refer to the Workshop Setup Guide page from QuickStart.
Note
Step 1: Create a Configuration
Every FortiFlex subscription starts with a configuration. A configuration defines the product type, form factor, and service package for your FortiFlex subscription. You can create multiple configurations to manage different products or services.
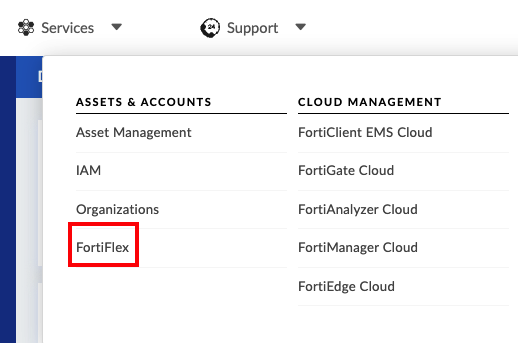
Start from the FortiCloud Dashboard
- Click on “FortiFlex” in the navigation menu
Navigate to Configurations
In the FortiFlex dashboard, click “Configurations”
You should see an empty list or existing lab configurations
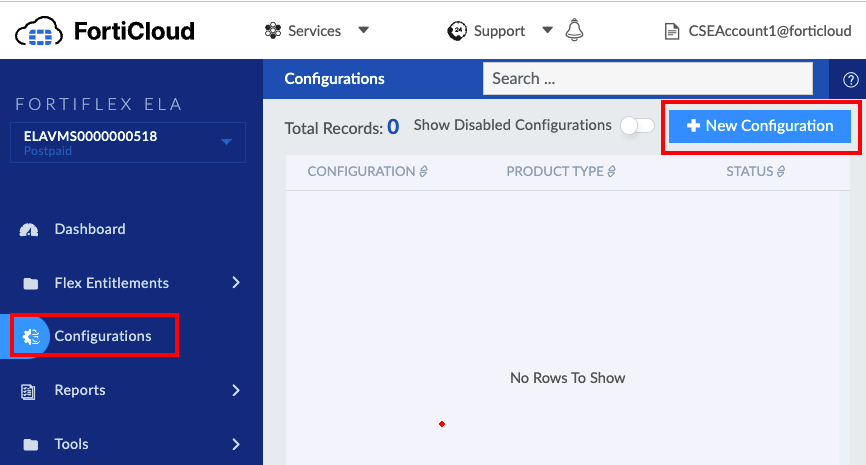
Click the + New Configuration button
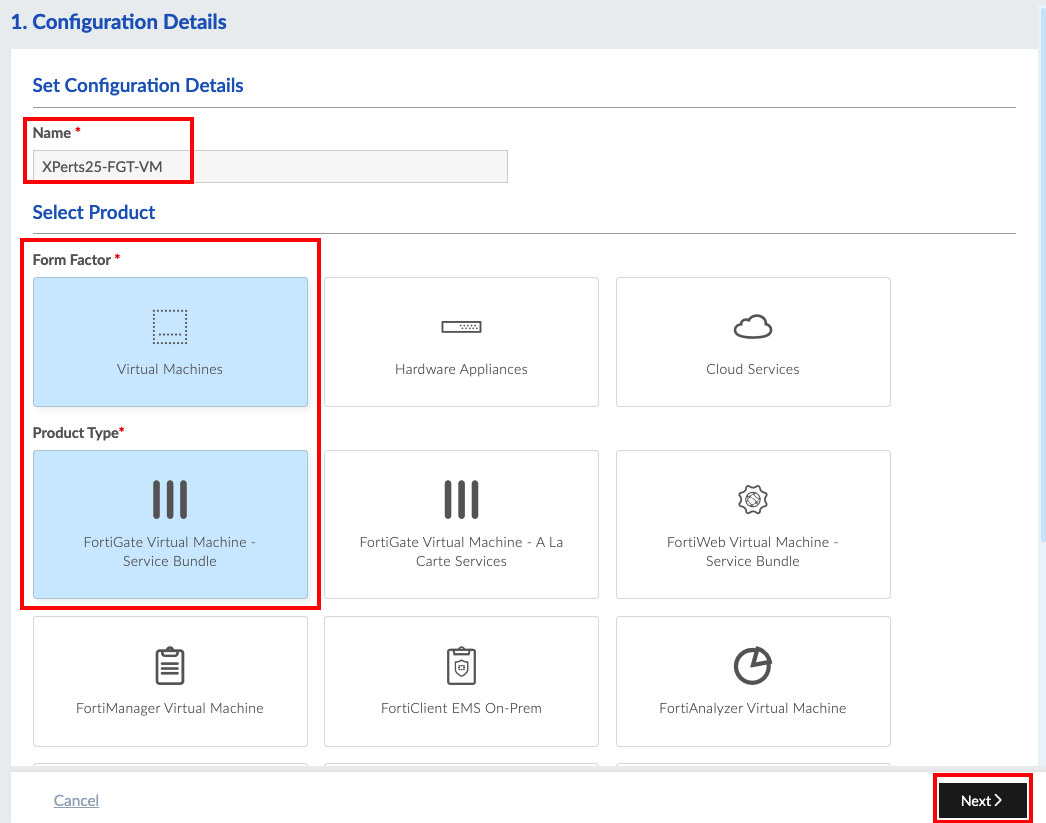
You’ll see the configuration wizard. Enter details as follows:
- Name:
XPerts25-FGT-VM(or any name you prefer) - Select Form Factor: Virtual Machines
- Product Type: FortiGate Virtual Machine - Service Bundle
- Click Next
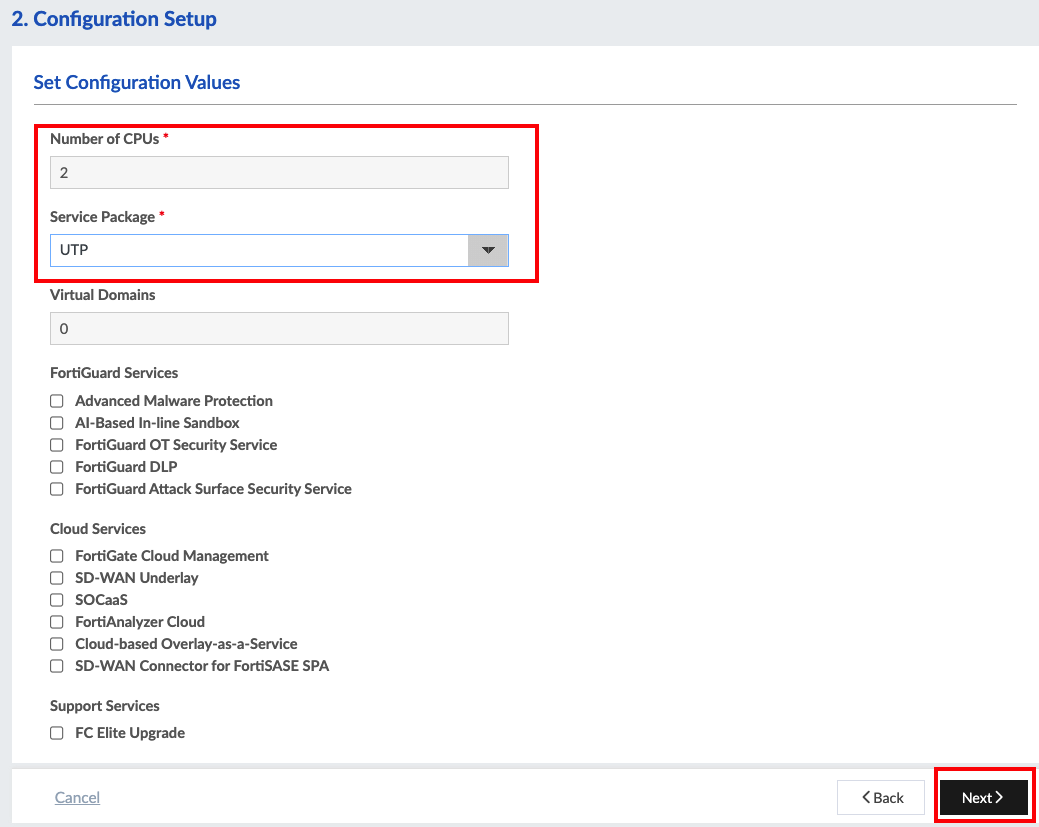
On the next screen, set the following details:
- Number of CPU’s: 2
- Service Package: UTP
- Leave Virtual domains set to 0
- Click Next
Review the details of your configuration and click Submit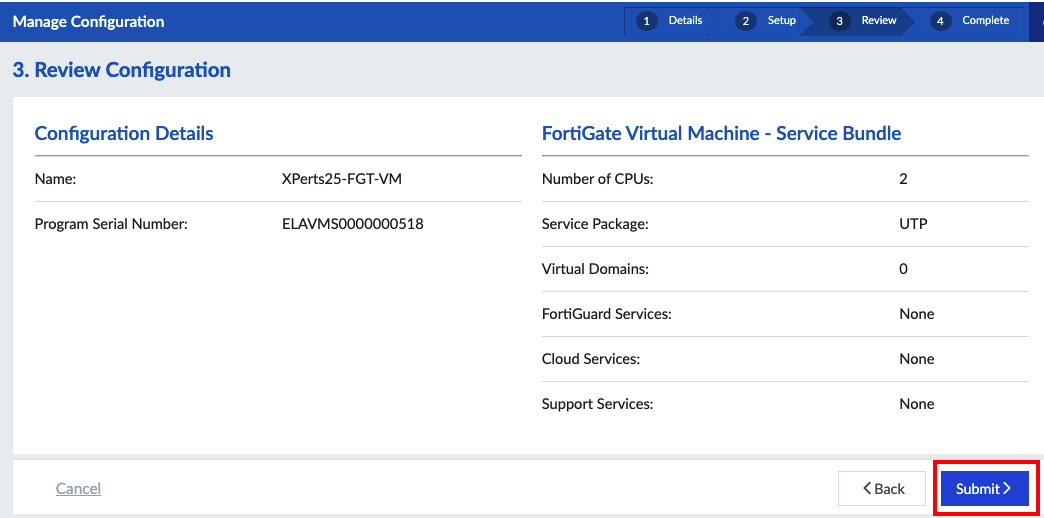
You’ll see the config successfully created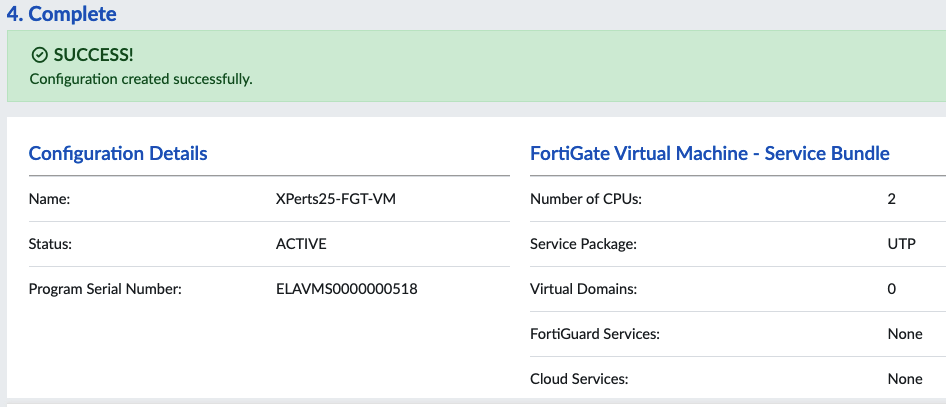
Step 2: Create an Entitlement
Once you have a configuration, you can create entitlements. An entitlement is a license that allows you to use the product defined in your configuration.
Navigate to the Flex Entitlements tab and click + New Entitlement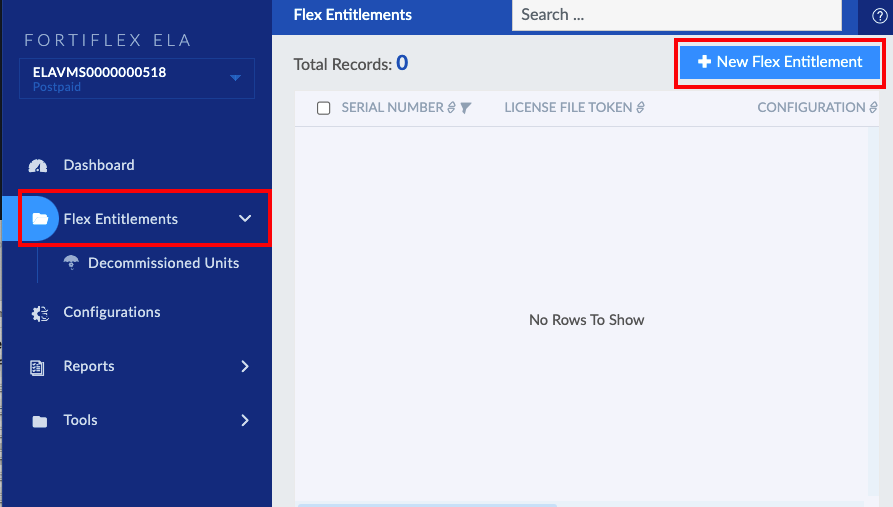
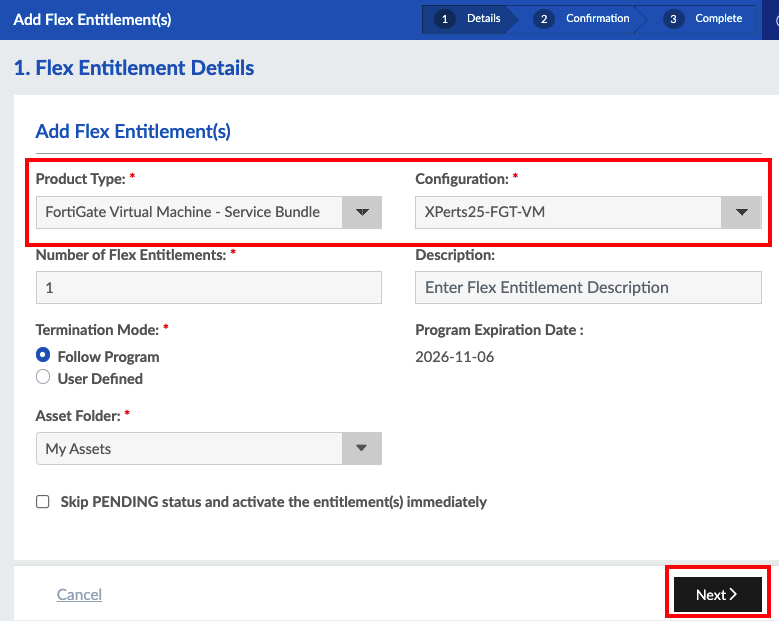
Fill in the following details in the entitlement wizard:
- Product Type: Select FortiGate Virtual Machine - Service Bundle
- Select the configuration you created above in Step 1 from the dropdown
- Click Next
Review the details of your entitlement and click Submit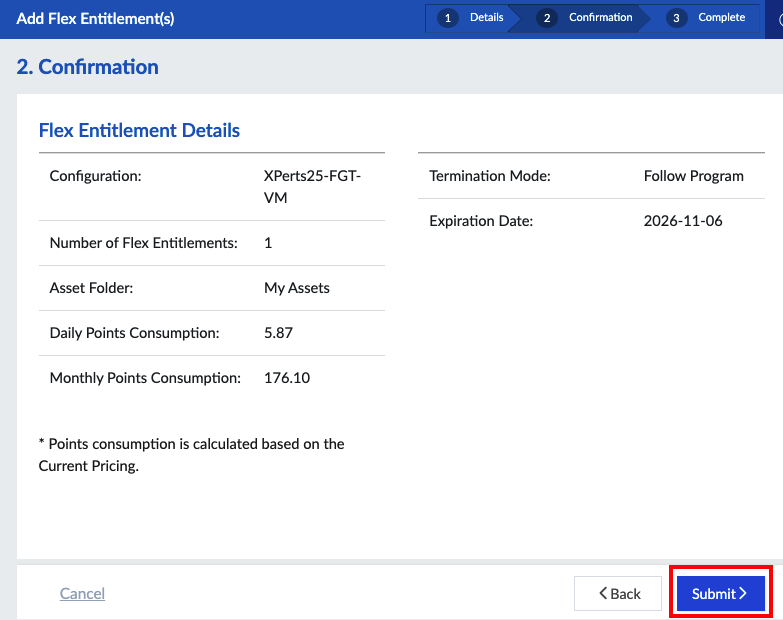
You’ll see the entitlement successfully created. Serial Number for future reference.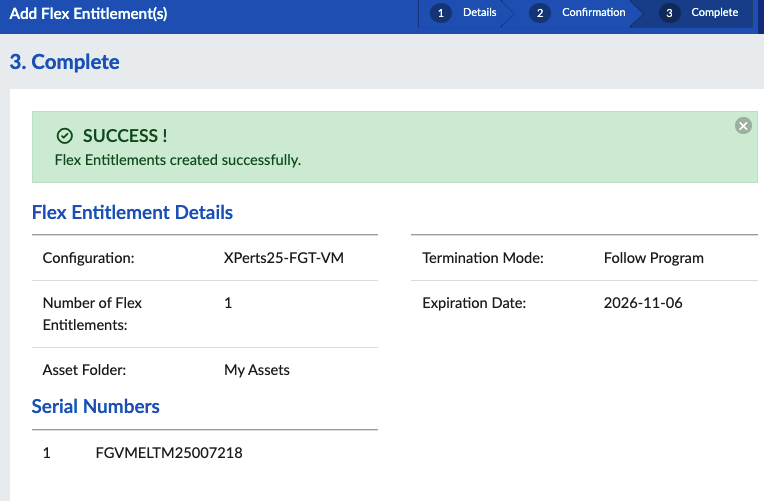
Click on List to go back to the Entitlement Listing and retrieve the Entitlement Token
From the entitlement details page, copy the License File Token. You will need this token to activate your FortiGate VM in the next step.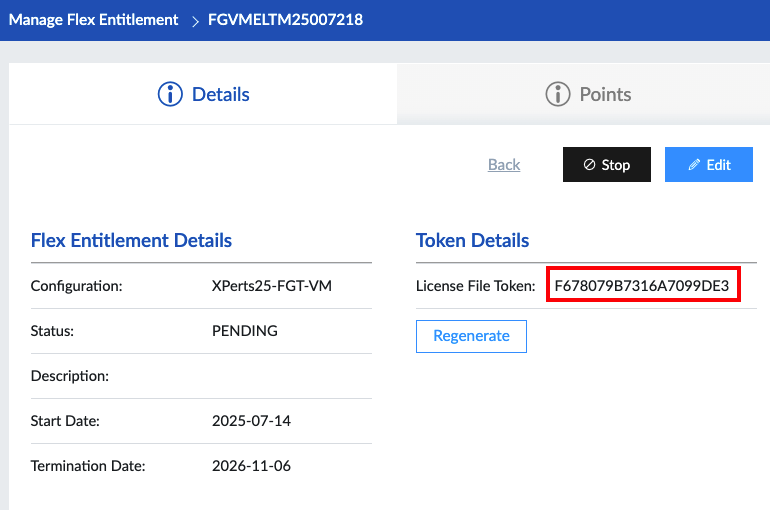
Step 3: Create a FortiGate VM in Azure & License with Flex Entitlement
Now that you have an entitlement, you can assign it to your FortiGate VM in Azure. Login to the Azure portal and follow these steps:
Navigate into your Resource Group and click on the + Create located at the top left of the tool bar. You will be redirected to the Azure Marketplace.
In the Marketplace search bar, type: Fortinet FortiGate and then enter. Navigate to the Fortinet FortiGate Next-Generation Firewall offering from Fortinet and select Create and Single VM.
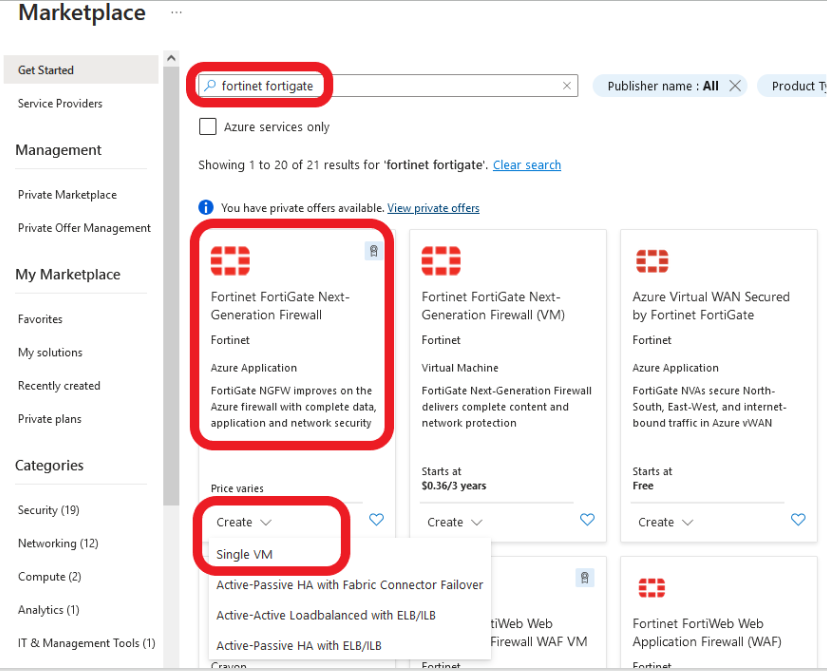
You will be redirected to the Create Single VM template.
Warning
Make sure you select the BYOL (Bring Your Own License) option. This is important as it allows you to use your FortiFlex entitlement. When you click Create on the listing, you should see options for Active-Active, Active-Passive, and Single VM.
If you see anything referencing PAYG (Pay-As-You-Go), you are viewing the wrong listing.
- Under the Basics tab, the Subscription and Resource Groups should already be filled in with your assigned info. If not, see the screen shot below for details.
Note
Use the **flexXX** username you've been assigned. Replace **[XX]** with your specific number.
- Under Instance details, select/enter the following:
- Region: East US
- FGT VM instance Architecture: ARM64
- FortiGate administrative username:
flex[XX] - FortiGate password/Confirm password:
FortinetAzure2025! - Fortigate Name Prefix:
flex[XX] - Resource Group:
flex[XX]-flex104-workshop
- Select Next.

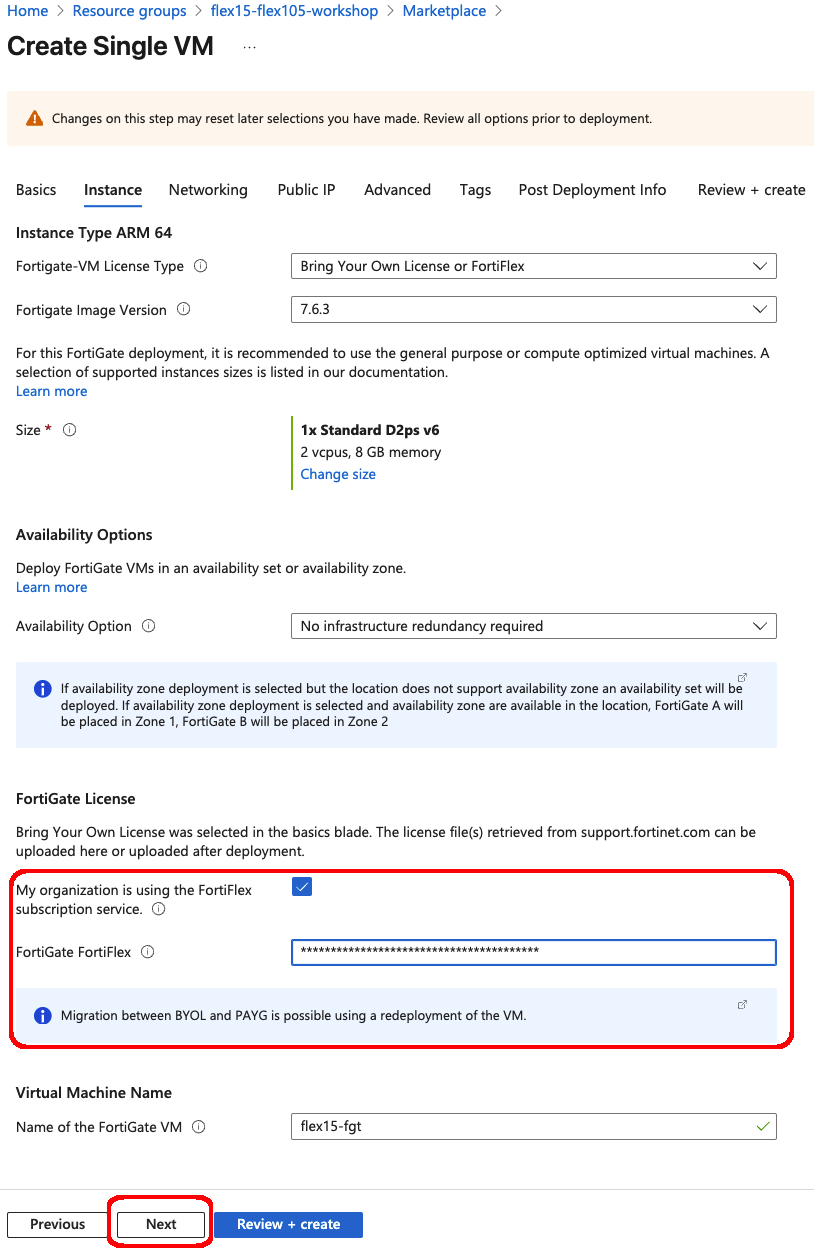
In the Instance Details tab, scroll down to the License section, and check the box for Use FortiFlex Entitlement entering the License File Token you copied earlier.
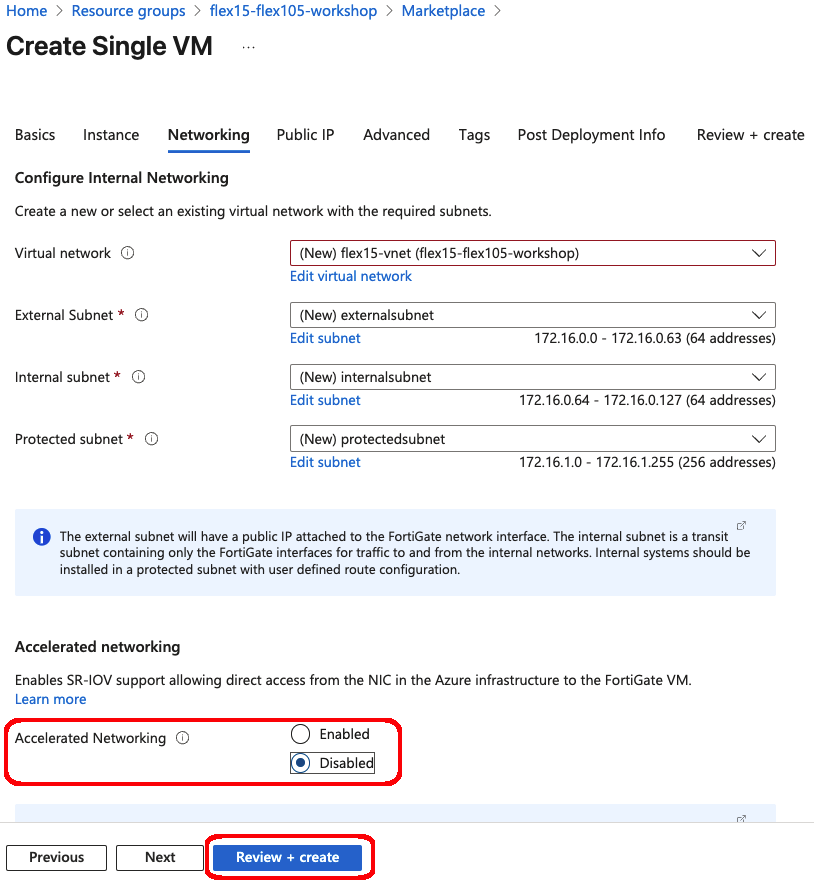
In the Networking tab, scroll down to the Accelerated Networking section and select Disabled. This feature can be enabled with specific instance types but for this example it’s not relevant.
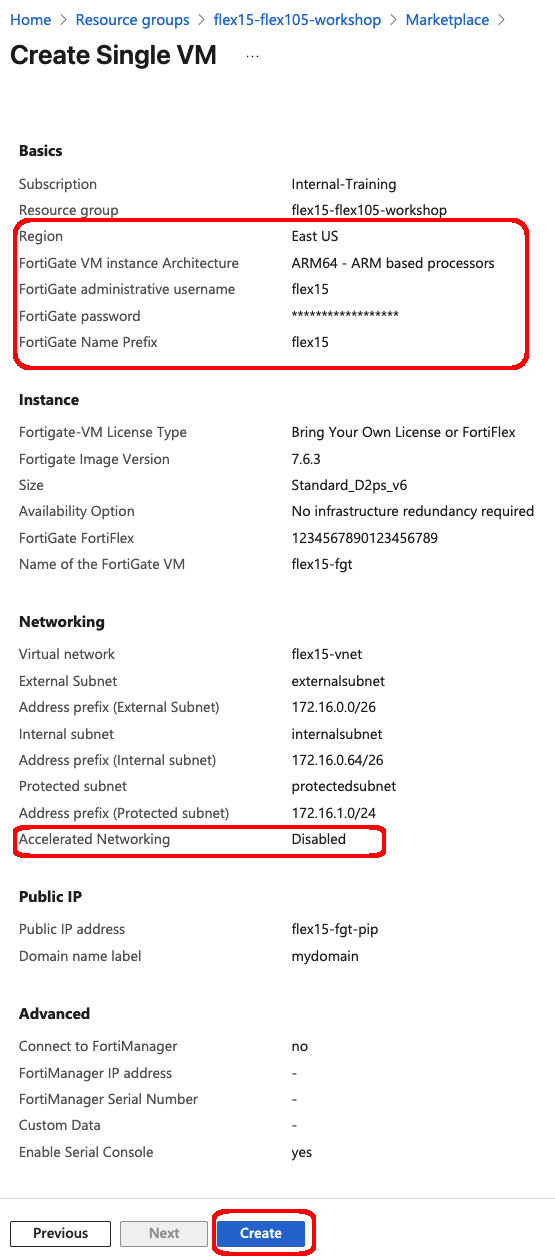
Review all the settings in the Review + create tab. Ensure that everything is correct, especially the License File Token. Click on Create to deploy the FortiGate VM.
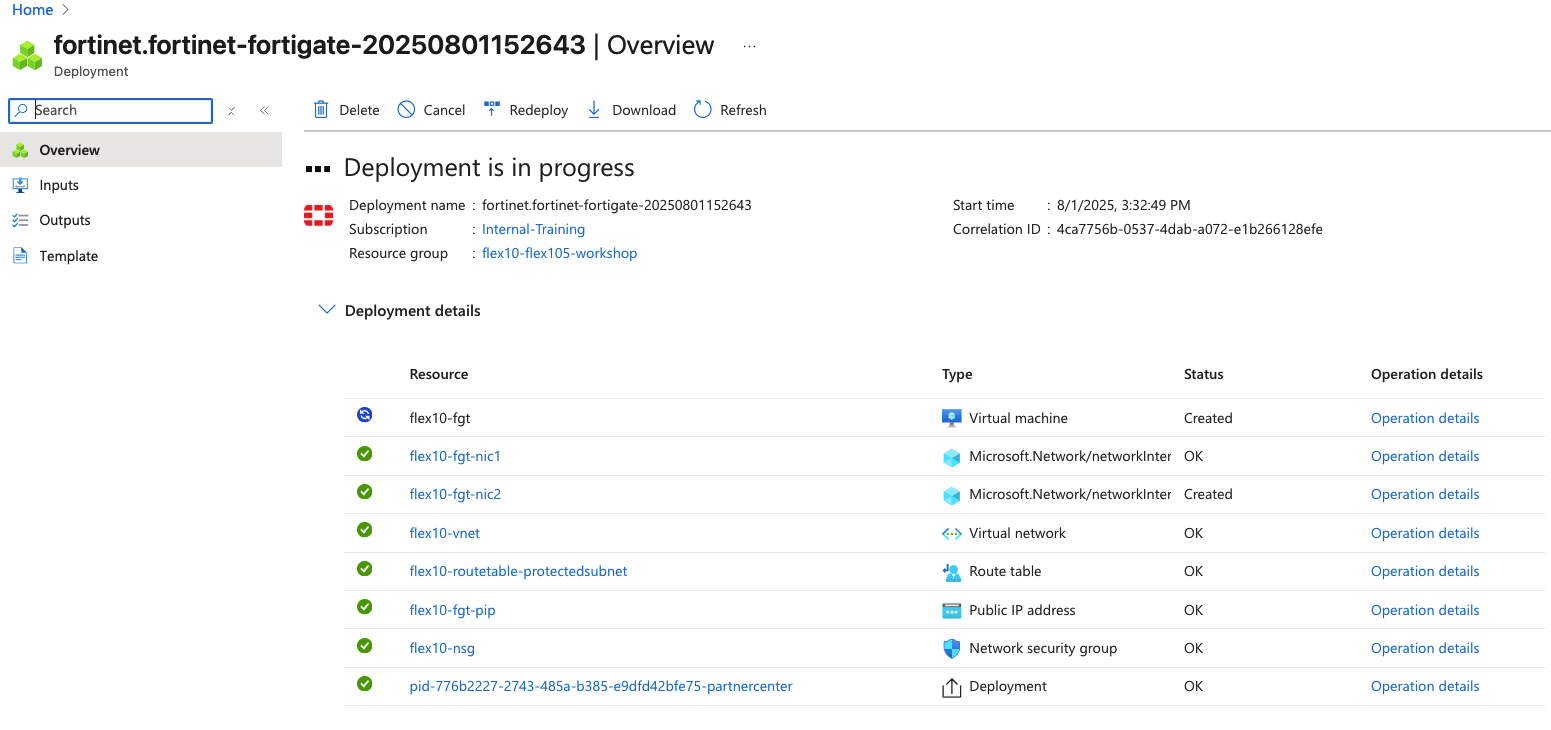
You’ll see the deployment in progress. This may take a few minutes. Once completed, you can navigate to the resource to manage your FortiGate VM.

Step 4: Verify the FortiGate VM Licensing
From the Resource Group, click on to the FortiGate VM you just created. Note the public IP address assigned to the VM. You can use this IP to access the FortiGate CLI or GUI.
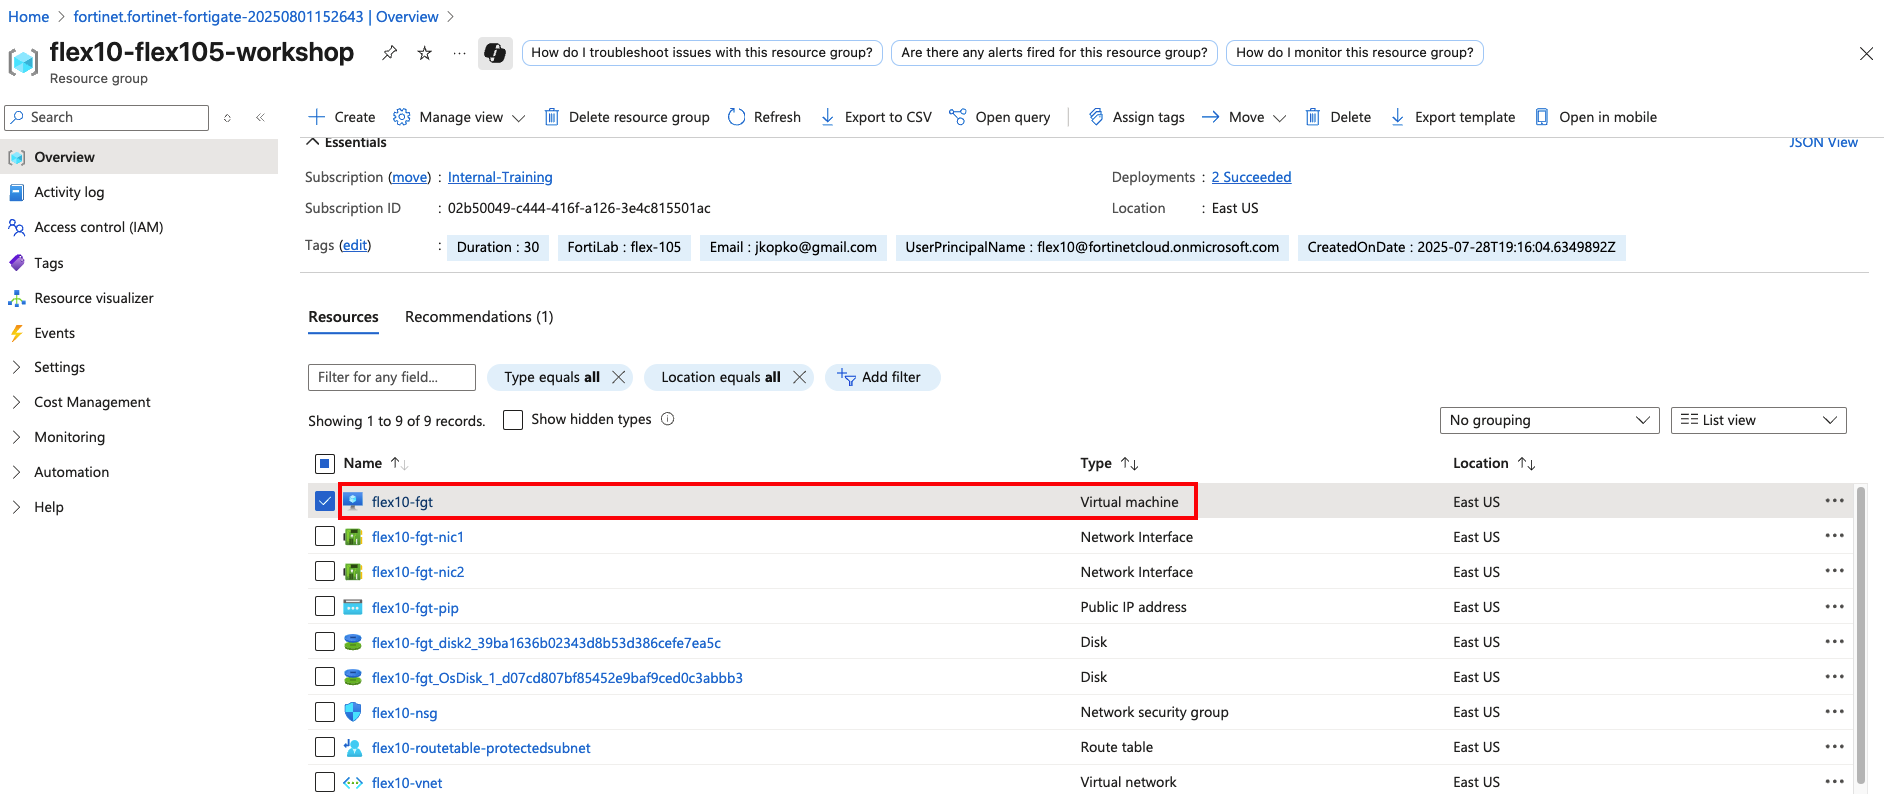
Copy the Public IP address.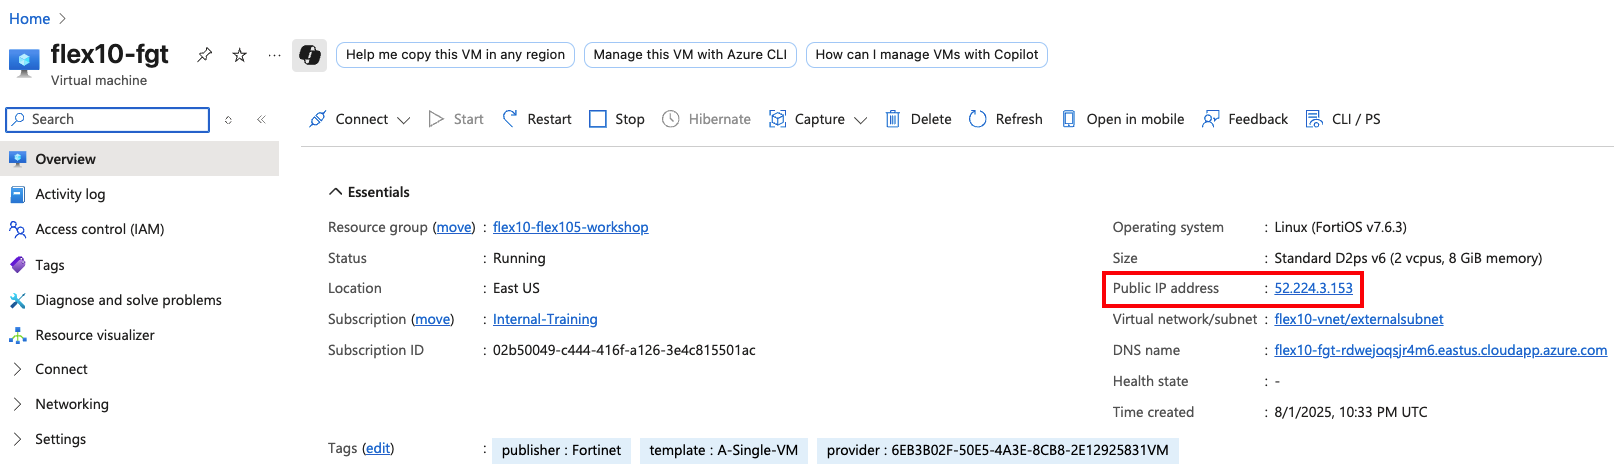
- In a new browser tab, enter the public IP address of the FortiGate VM in the address bar
- Accept the security warnings for the unsigned Cert.
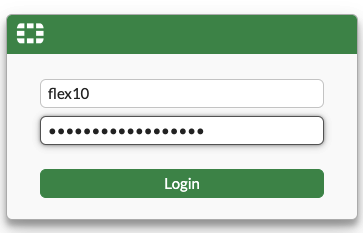
- You will be prompted to log in.
- Use the username and password you set during the VM creation (e.g.,
flexXXandFortinetAzure2025!).
You can skip the inital setup be choosing Later
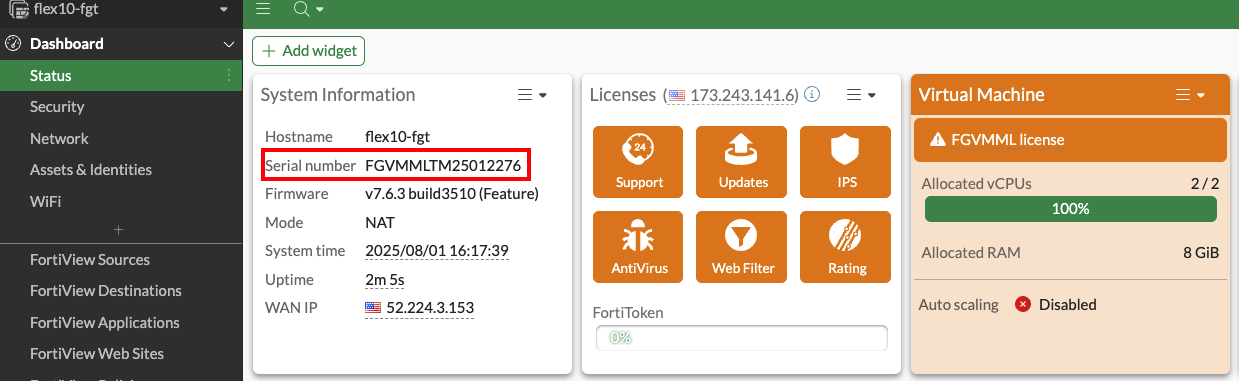
You’ll see the FortiGate Status Dashboard where the License will show 2 vCPU. The SN will match the entitlement you created in FortiFlex.

You can also verify the license via CLI.
get system status
You will see the matching SN, with Valid License, and the number of vCPU’s allowedreflecting the assigned entitlement.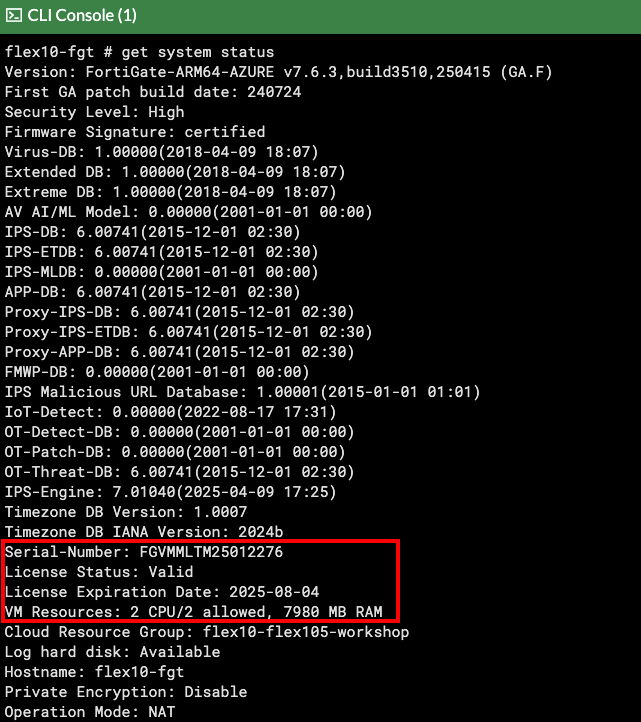
Step 5: Update the Flex Config & Entitlement to add Additional new vCPU count
Next, we’ll update the FortiFlex configuration to increase the licensed vCPU count.
In the FortiFlex dashboard, navigate to the Configurations tab. Select the configuration you created earlier and click on the edit icon.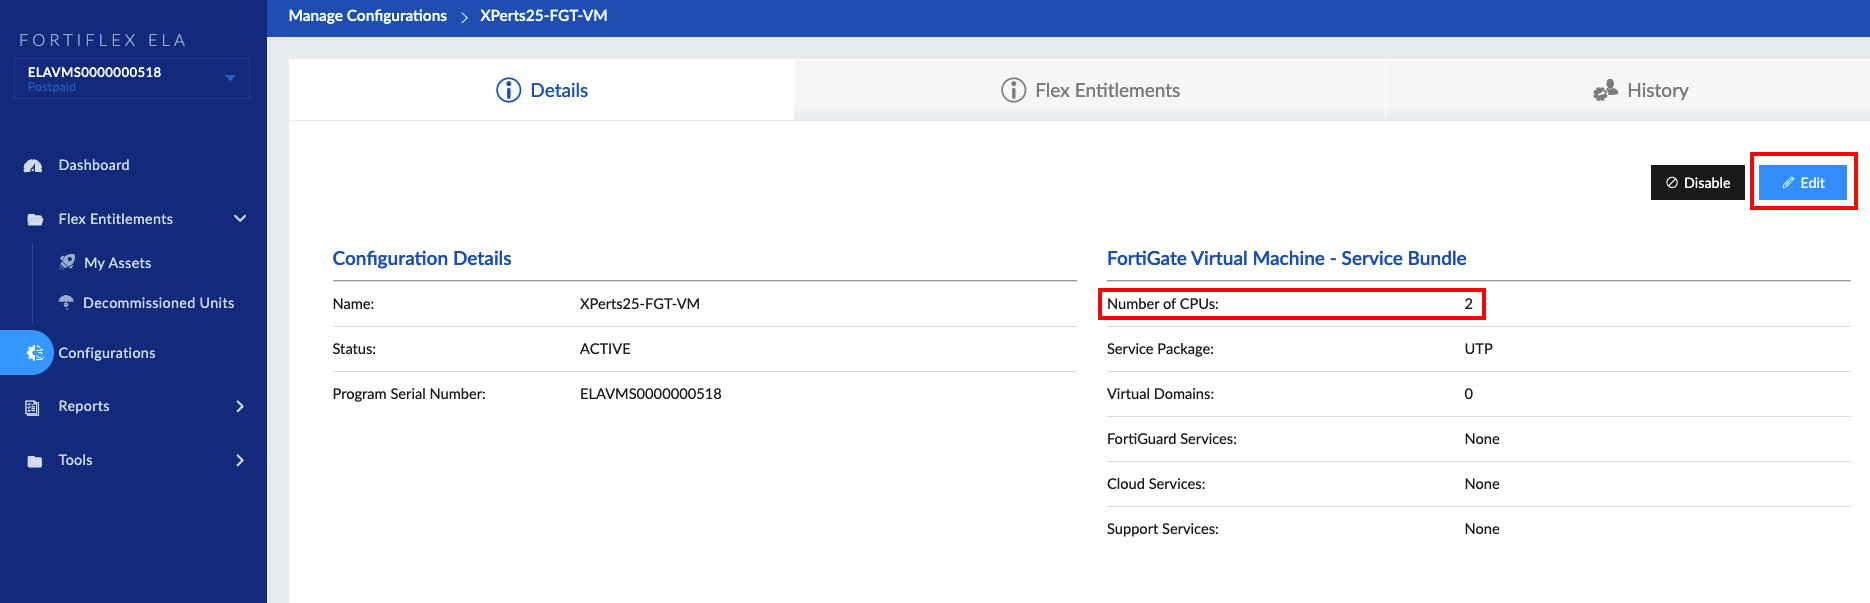
Click Next to continue past the product selection screen.
Update the number of CPU’s to 4 and click Next until you reach the review screen.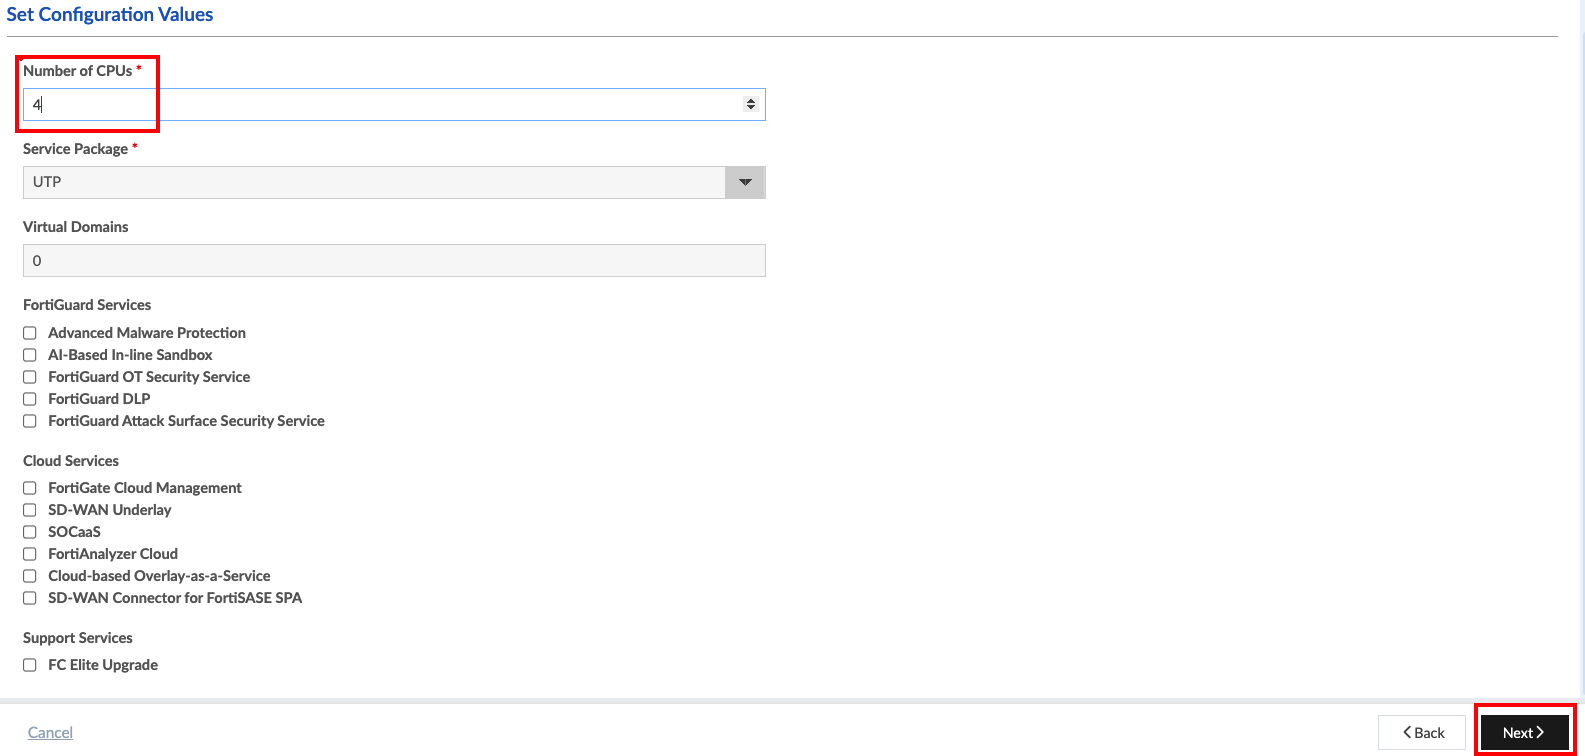
Click Submit to save the changes
You will see a warning message, and you should click to Confirm the changes.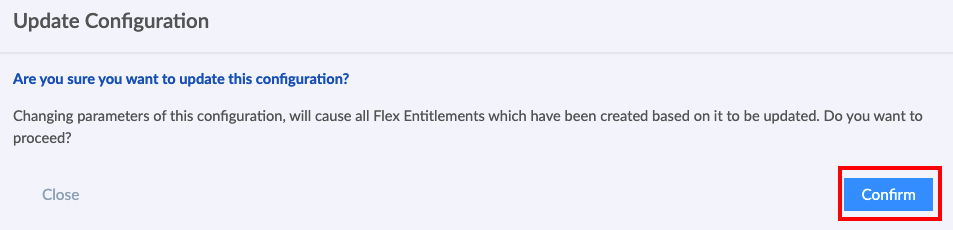
The entitlement linked this configuration will automatically reflect the vCPU change.
Step 6: Double the vCPU on the Azure FortiGate VM
Now, we’ll change the VM size in Azure to double the vCPU from 2 to 4.
Go to the VM Overview Page and then on left side click on Availability + scale and then Size. Select a size that has 4 vCPUs (e.g., Standard D4ps V6) and click “Resize”.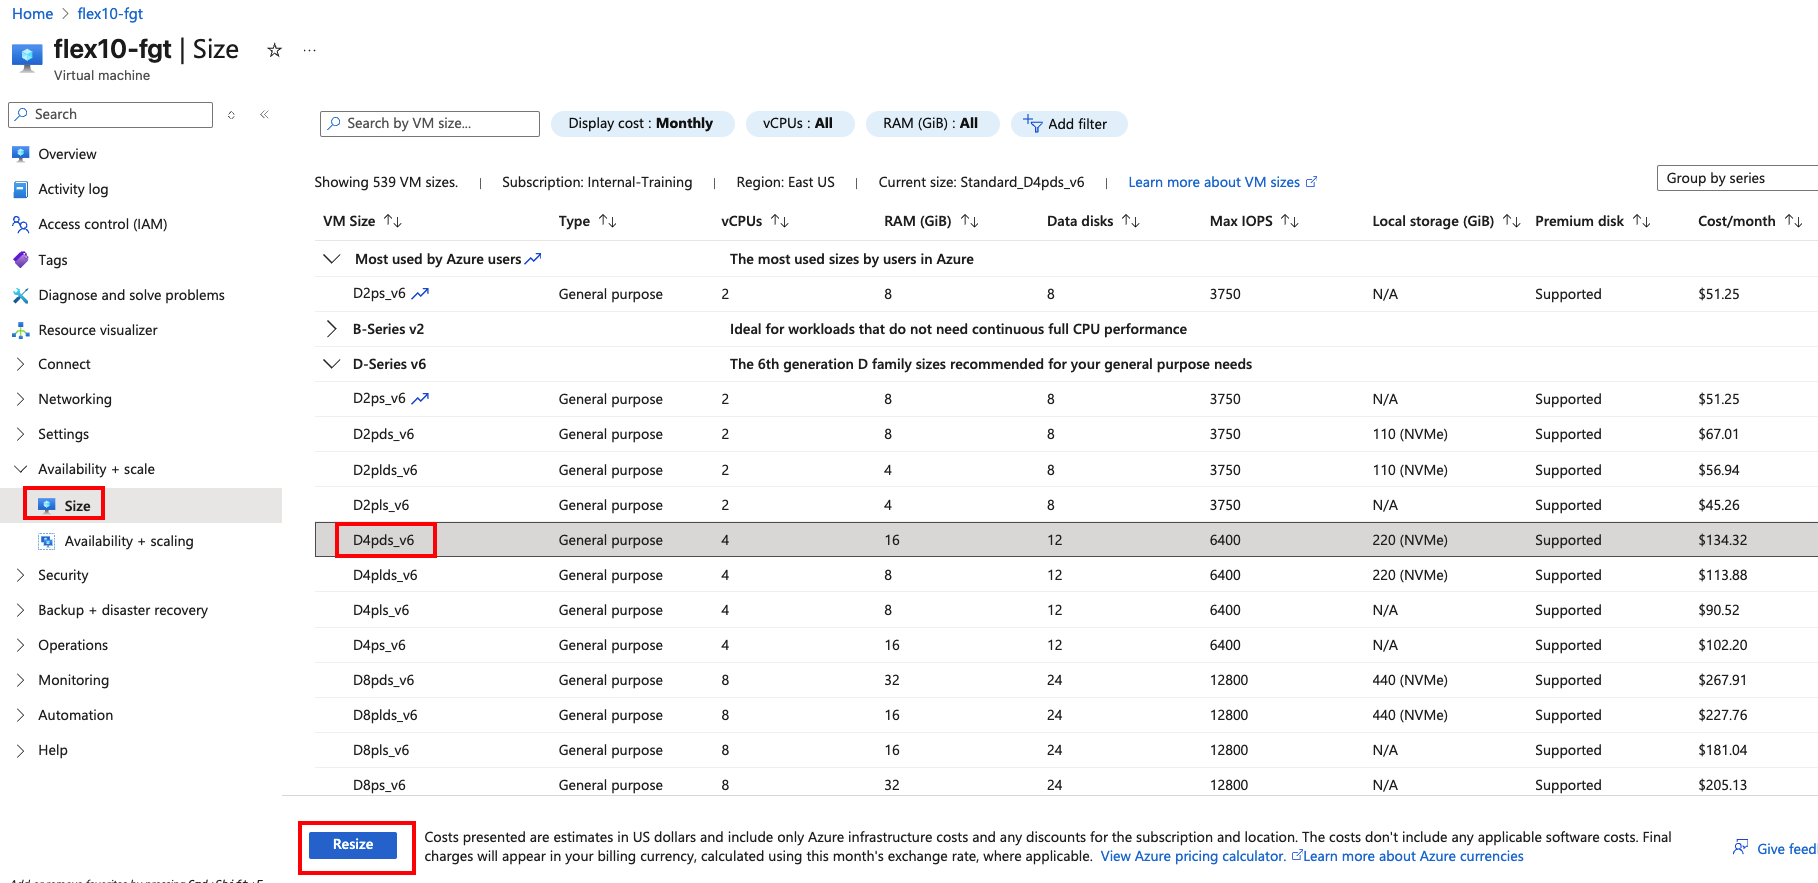
You’ll see a confirmation message that the resize is in progress. This may take a few minutes.
Proceed when you see the successful message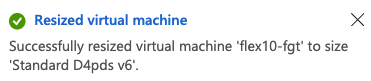
After resizing, start the FortiGate VM again from the Azure portal.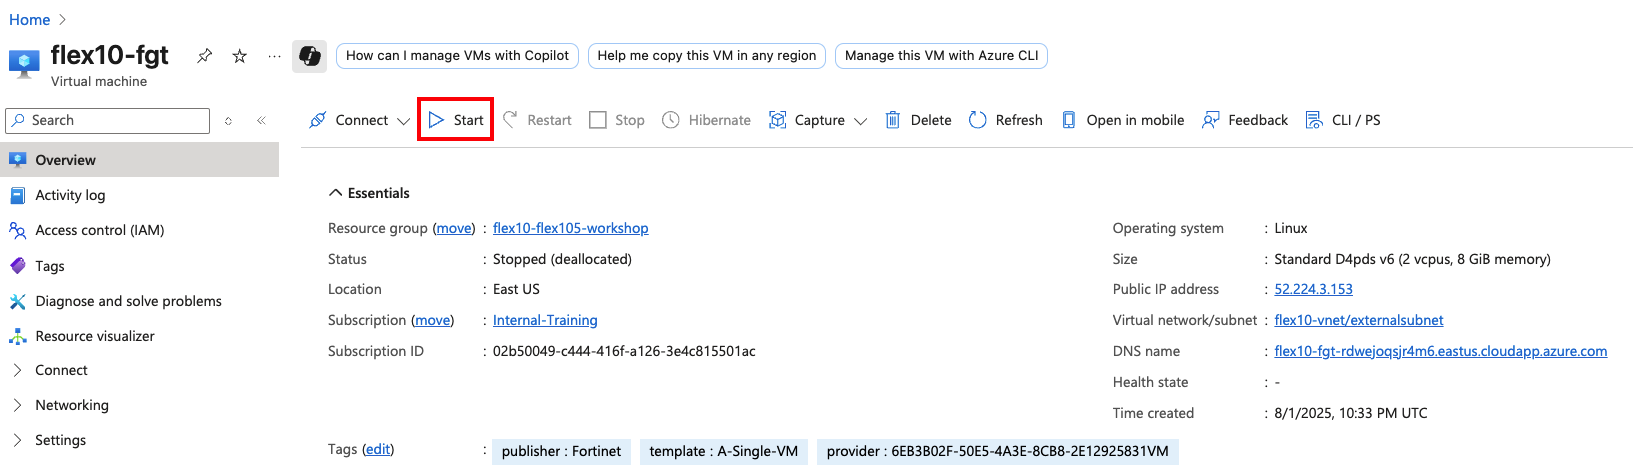
On the VM Overview Page, you can verify that the VM size has been updated to reflect the new vCPU count.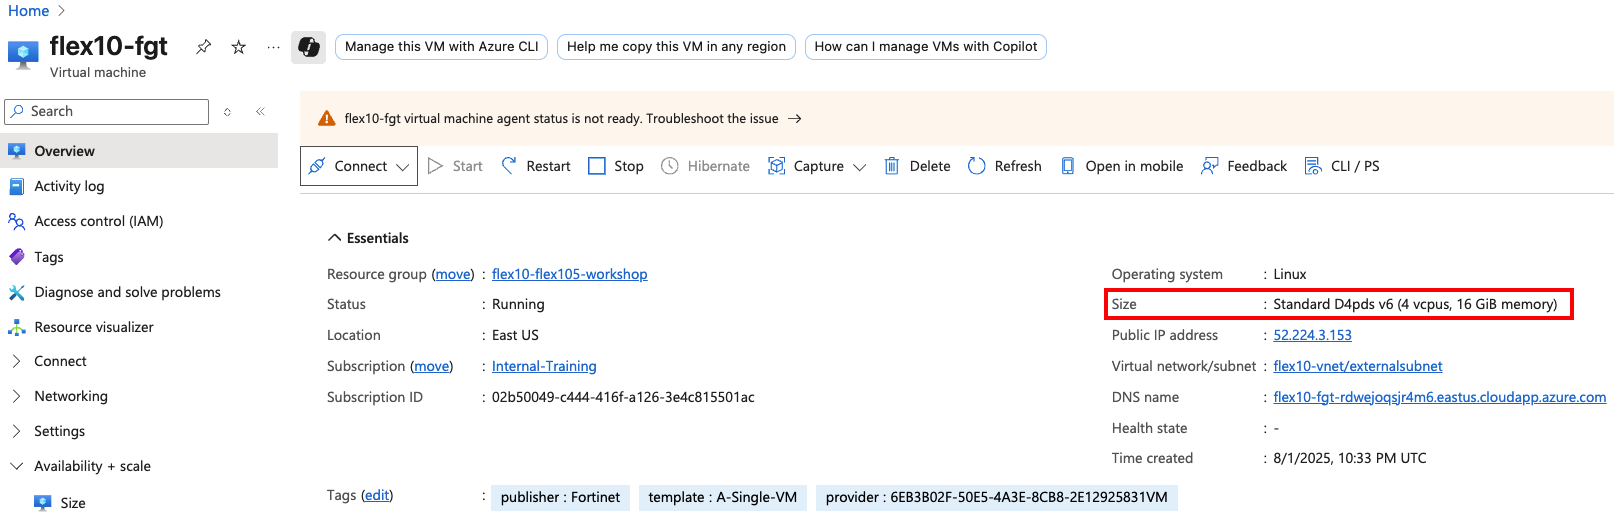
Step 7: Add the additional CPU’s to FortiGate
Finally, log back into the FortiGate VM WebUI to verify that the license now reflects the updated vCPU count, and add the additional CPU’s to the FortiGate configuration.
From the Resource Group, click on to the FortiGate VM you just created. Note the public IP address assigned to the VM. You can use this IP to access the FortiGate CLI or GUI.
Copy the Public IP address.
- In a new browser tab, enter the public IP address of the FortiGate VM in the address bar
- Accept the security warnings for the unsigned Cert.
- You will be prompted to log in.
- Use the username and password you set during the VM creation (e.g.,
flexXXandFortinetAzure2025!). - You can skip the inital setup by choosing Later
- You’ll see the FortiGate Status Dashboard where the License will show 2/4 Allocated vCPU
- You can also verify the vCPU via CLI.
get system status- You will 2/4 vCPU.

- Use the username and password you set during the VM creation (e.g.,
To add the additional CPU’s to the FortiGate configuration, open the system CLI and run the following commands:
exec cpu add 2Then verify the CPU count again:
get system statusYou should now see 4/4 vCPU allocated.