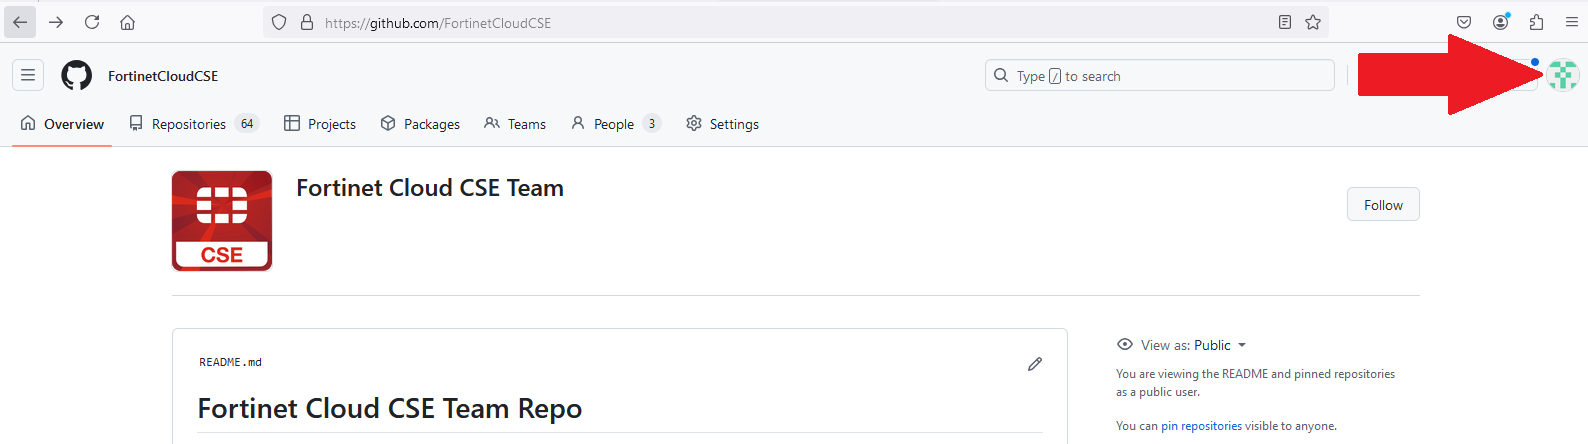
Change FYI, YOU WILL NOW NEED TO CHECKIN WITH YOUR EMAIL ADDRESS TO VIEW THIS GUIDE
This change helps with analytics and data gathering and is consistent with UserRepo guide (this repo) serving as the root of every new workshop (e.g. this guide is always on latest and greatest featureset which gets cloned into every new workshop)
This site will explain how to use the Hugo Web Framework & the “reLearn” Theme to effectively organize & deliver Fortinet TEC Workshops & Product demos in a consistent, simple, and visually appealing format.
The beauty of this framework lies in its simplicity. Within approx 30 mins, anybody can have a site up and running. Content is created via Markdown files, and the workshop guide layout is simply a directory structure.
Follow along on this simple tutorial to get up and running with a Hugo formatted site for your TEC Workshop/training/demo content today!
Learning Objectives
Setup UserRepo on your system & Build container with Hugo & CentralRepo
Learn to work in Hugo to create your content to display proper information flow for your TEC Workshop/demo/training
Publish your Hugo site to GitHub pages via a CI/CD model
Hugo and Fortinet TECWorkshops - Visually
The purpose of this workflow is to simplify creation of Fortinet TECWorkshop guides while providing an example CI/CD development environment with maximum re-usability
Subsections of TECWorkshop Template
What's New
This is a list of new features and/or changes in a given version
2025
Sept MVP 2.2CURRENT VERSION
NewAzure Lab Provisioning — launchdemoform now shows real progress, renders credentials on the page, and locks to one attempt per participant/lab/site, backed by a new Durable Function API instead of the old opaque Automation webhook.
May - MVP 2.1
ChangeFortiHugoRunner Tool will be the primary mechanism to work with our process going forward. It will continue to get iterative feature enhancements, so please update it often!
Update Hugo relearn theme update due to bug in compatability this Hugo versions 146 and later
Change Generate_toml runs on any container restart, so you never have to run it yourself and it will always update whenever you make changes
March - MVP 2.0
Change Require Checkin at each repo front page before browsing any further content.
Checkin data is used by Analytics gathering and issues a cookie valid for 5 days across our workshop estate. Collecting:
Lab provisioning shortcodes should be included on labs featuring Azure automated provisioning scripts, and REMOVED from workshops which don’t require Azure provisioning.
Added Author mode so analytics check-in NOT REQUIRED while locally authoring workshops.
Change Introduced Go Utility to simplify workshop authoring from different systems
When this Utility and documentation is polished, it will eliminate the need for docker_build/_run scripts in each repo and the tax of maintaining/updating them.
New Created utility to upgrade older repos to latest feature set including automated conversion of config.toml to repoConfig.json/hugo.toml
Update Update gitHub action to use latest API versioned commands
modify code highlighting color scheme to improve readability
NewAnalytics
Add analytics capabilities to track site activity across entire Cloud TEC workshop catalog.
2023
June - MVP 1.1
reduce container size (using Alpine to get shell. BusyBox does not have shell)
autopublish action on GitHub (run our container as GitHub action to perform Hugo build w/ CentralRepo)
eliminates need to store Hugo static HTML (autopublish action directly publishes to GH pages)
Move Shortcodes from CentralRepo to UserRepo
Add CentralRepo/scripts/local_copy.sh to copy any local shortcodes or partials into container
Modify logo.html to read Params for logoBanner & logoBannerColor
Standardize themes and colors for Workshop, UseCase, Spotlight, Demo
Modify Banner Text and Subtext to match theme and be customizable
Add ability to run container run in “build”, “server”, or “shell” mode
Added Dev container env & workflow to stage and test changes before promoting to main/Prod
May - MVP 1.0
Separated UserRepo and Central Repo to allow maximum re-usability & future-proofing for style/format changes
Standard Repo has Fortinet reLearn theme Variant & all necessary customizations
Swap in Hugo ReLearn theme (actively community supported) and eliminate Learn & Notice themes (inactive development)
Ubuntu container:
Maintain consistent Hugo version and eliminate need for local installs
allow continuous improvement to our process via container improvements without adding burden to CSE Team
Use Container for Hugo Build & GitHub action to publish/refresh GitHub Pages
Containerizing our development efforts allows for a lightweight development area while eliminating redundant componentry every time we create a new repo/workshop/demo, and allowing simple and automated updates to existing workshops when the parent template changes.
Ultimately we’d like to have scripting copy/revise parent templates periodically and/or whenever we create new Workshops
Ch 1 Getting Started with Repos, Containers, and Hugo
ChangeNew
Setting up your Hugo environment (15 min)
Prereqs
Docker - older installs won’t work, so if you need to upgrade/reinstall
You can use your docker flavor of choice. Keep in mind Docker Desktop is no longer free for enterprise use.
We’ve tested Rancher Desktop, which works well. Caveat…your locally rendered version of the site may not update in real time as you modify content, so you may need to restart the server to see new content
GitHub keys (to clone GitHub repos using SSH which will eliminate Headaches later down the line with Authentication)
Follow the instructions here to generate a new SSH key pair
Warning
DO NOT USE A PASSPHRASE when you create the keys
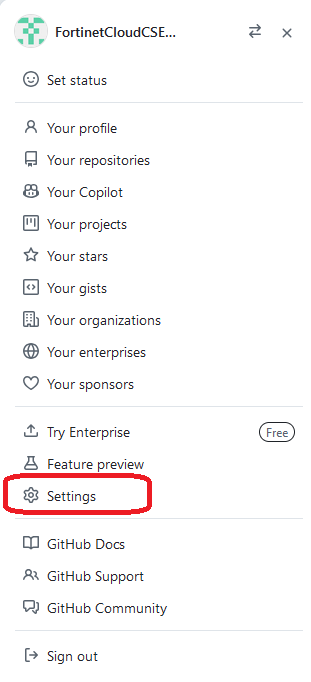
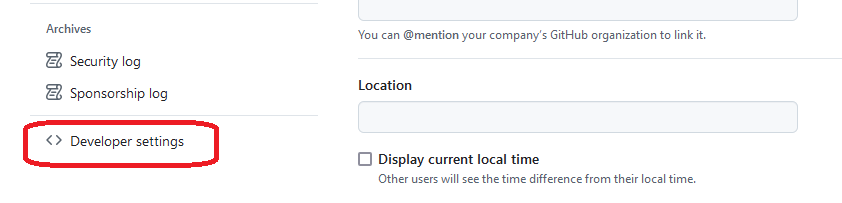
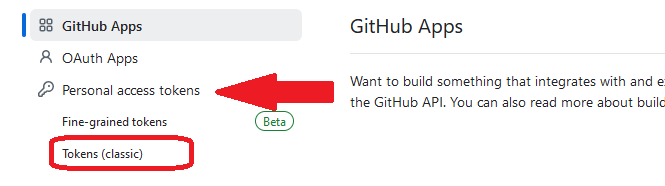
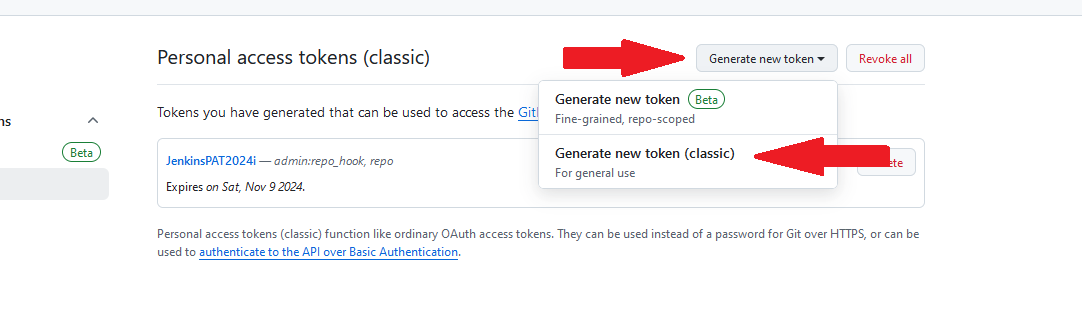
Once created follow these directions to add the newly created Key to your GitHub account.
What is Hugo and how easy can this be?
The site you are viewing right now is built with Hugo.
You can navigate to specific chapters and tasks with the Left Navbar or the top banner table of contents
For a sequential step by step flow through this workshop, use the arrows in the upper right corner to go through each step individually
you’ll create the content for your TECWorkshop guides in this repo, and ultimately publish the Hugo built website to GitHub Pages
Once you have UserRepo, you can choose how to use Hugo
NewOption 1RECOMMENDED METHOD: Use the Go Utility flavored for your OS/Architecture to build and run our container seamlessly.
Option 2: build a container with Hugo installed on it and a copy of all Fortinet specific customizations to the Hugo reLearn theme
Beyond providing an opportunity to learn the basics of container development, this option:
streamlines and simplifies the Hugo content creation process
minimizes local storage/upkeep of reusable componentry
reduces complications of version dependencies in development environment for Hugo or the reLearn theme
future-proofs the content created for any given TECWorkshop so that any Fortinet branding changes can be easily re-applied to all guides
Option 3: THIS OPTION IS INCLUDED FOR POSTERITY ONLY Install Hugo locally on your laptop/workstation and clone CentralRepo
You’ll have to
maintain CentralRepo including submodules on your local workstation
ensure your final site is published to the /docs folder in your UserRepo
Subsections of Ch 1: Setup - NEW
Task 1 - Repo Creation
Repo creation request
Request a new repo for your TECWorkshop (this will be referred to as your UserRepo)
Send an email to fortinetcloudcse@fortinet.com to request a new GitHub repo and Jenkins Pipeline. Providing the following:
Repo Name
GitHub Usernames of collaborators
Your Fortinet email address that you use to log in to FortiCloud
Behind the scenes, a script is used to create your TECWorkshop repo with appropriate protections, features, and collaborators. Additionally a Jenkins pipeline will be setup to monitor changes to the repo and run things like
publishing the website
FortiDevSec scanning. To facilitate this, administrators will send you an application id that you must paste into fdevsec.yaml in order for the scans to run and tests to pass. Jenkins tests must pass in order for your feature branch to be merged into the main branch.
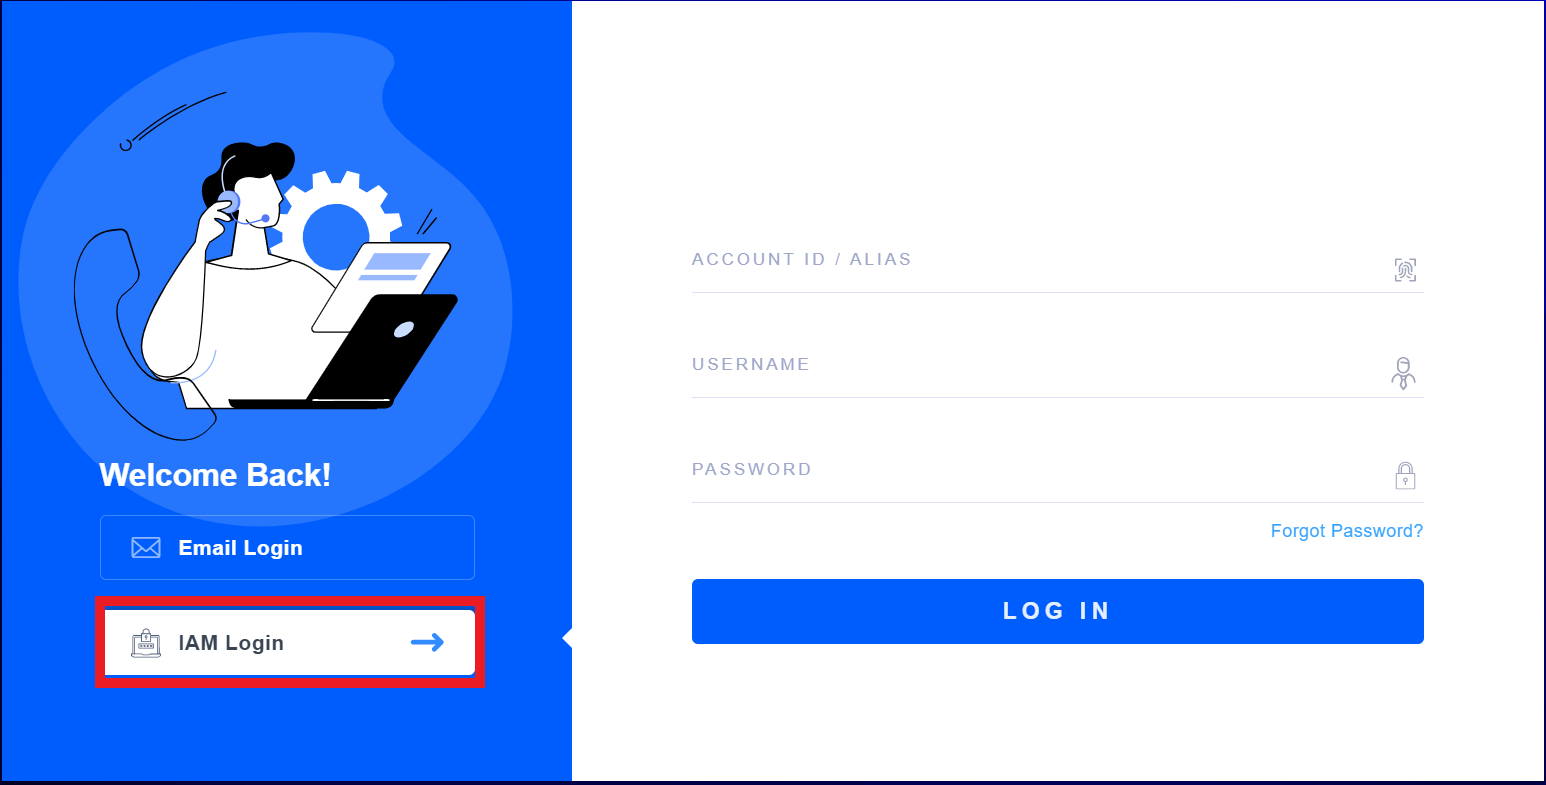
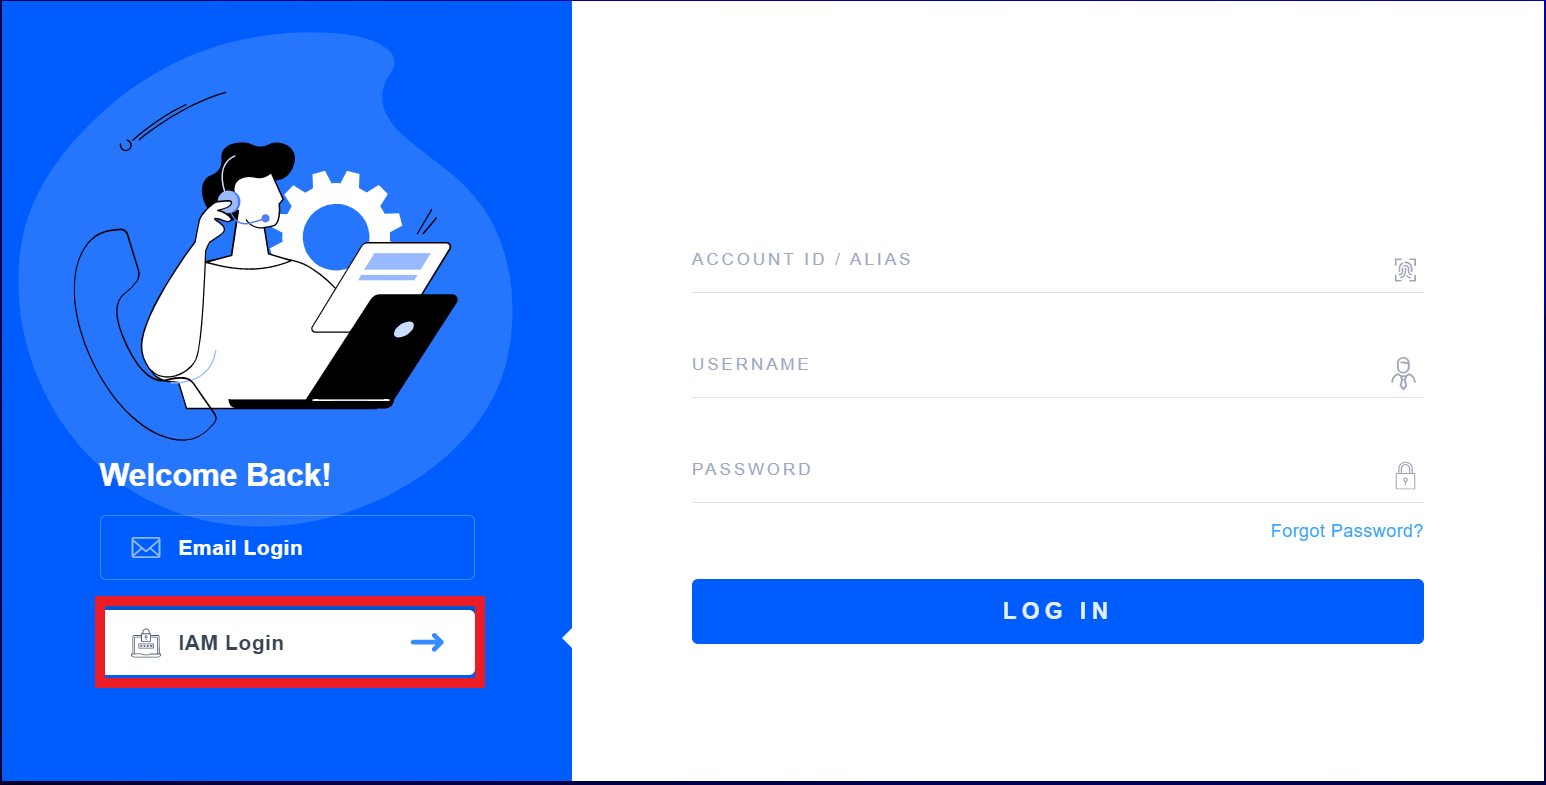
Along with the FortiDevSec application id, you will also be sent an account number which you can use to navigate to the FortiDevSec console to view the results of your scan. To do so, head to FortiCloud and click IAM Login on the left hand side of the page. Enter the provided account number along with your FortiCloud login credentials.
You will use this repo to create and modify MD chapters & tasks to create your workshop Guide in Hugo format.
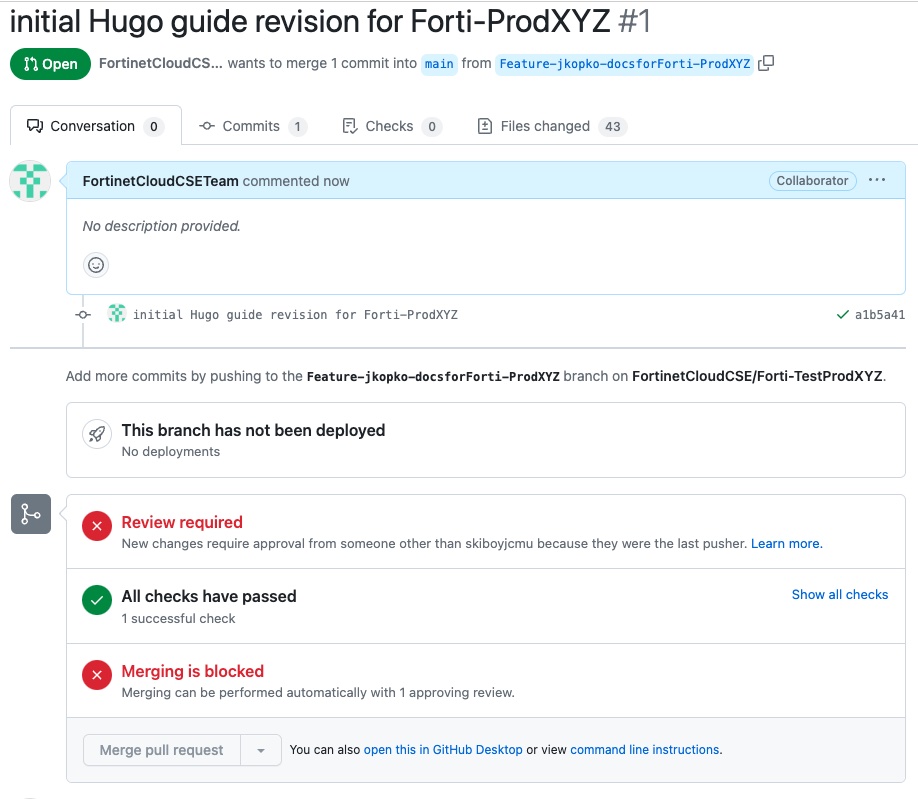
Only Authorized collaborators and admins are allowed to push to repos in FortinetCloudCSE org
We require pushes be made to a feature branch
Upon push to feature branch:
Jenkins clones the repo into its workspace on EC2 and runs FortiDevSec Scan which performs
SAST Scan
check for vulnerabilities in code, 3rd party libraries, and libraries pulled into Dockerfile
secrets scan
IaC Scan for misconfig
GitHub Pages deploys only on the main branch.
Requirements for merging feature to main branch:
FortiDevSec Tests Pass
PR request submitted and approved (automated approval)
Git repo setup
Once your TECWorkshop repo is created, clone the repo and change your working directory to the cloned repo
    git clone <provided link>
    cd <cloned repo directory>
The first thing you’ll want to do with the repo is create a Feature branch. There are branch protections in place on the repo preventing you from pushing to main, so you’ll have to follow our workflow described in Ch3
Due to the nature of Open source software, sometimes there are breaking changes. In this instance, Hugo has deprecated usage of the config.toml file in favor of a new file named Hugo.toml
Additionally, as part of the upgrade, we needed to modify some parameters in the file, so we took the opportunity to use a Jinaj2 template to generate the file for with proper parameters
This also allows us the ability to update the template in the future and re-generate hugo.toml as necessary
Rather than modify Hugo.toml directly, we will now maintain a JSON configuration file /scripts/repoConfig.json
TLDR Update scripts/repoConfig.json with parameters for your workshop
Every time the container runs it first executes a script generate_toml which will generate the hugo.toml file
Change you will no longer see config.toml or hugo.toml in your repo! It’s created automatically for you, and only exists while the container is running.
example of repoConfig.json. Replace each value with specific parameters for your repo:
logoBannerText (whatever you want in top left Menu under Fortinet Logo. Leaving this field blank will default to the themeVariant name)
logoBannerSub Text (optional sub-banner text)
marketingCode (optional marketing code to be used as default in analytics gathering and provisioning form)
bannerLine1 (optional text for XPerts Content Header banner line 1)
bannerLine2 (optional text for XPerts Content Header banner line 2)
bannerLine3 (optional text for XPerts Content Header banner line 3)
quizUrl (optional URL for quiz to be used in the quiz shortcode)
videoHeaderSrc (optional, CloudCSEMovie theme only — URL path to the MP4, e.g. "/videos/header-bg.mp4". Hugo strips the static/ prefix — do NOT include it in the path. Leave blank to disable.)
videoHeaderInterval (optional, CloudCSEMovie theme only — total seconds between the start of each video play cycle. Defaults to 60. Must be greater than the video duration.)
Shortcuts (Helpful Resources Links in the left menu
{
  "repoName":"UserRepo",
  "author":"CSE Employee",
  "workshopTitle":"Hugo for Fortinet TECWorkshops",
  "themeVariant":"CloudCSEMovie",
  "logoBannerText":"",
  "logoBannerSubText":"",
  "errorLevel":"warning",
  "googleServicesID":"G-5RZBH288ST",
  "marketingCode": "MGO12345",
  "bannerLine1":"Workshop Type ID Eg: Public Cloud 101",
  "bannerLine2":"Workshop Title Here",
  "bannerLine3":"Subtitle,Description, or 3rd line Here",
  "quizUrl": "https://forms.gle/yourformhere",
  "videoHeaderSrc": "/videos/header-bg.mp4",
  "videoHeaderInterval": "60",
  "shortcuts": [
  {
    "text": "Fortinet Cloud CSE GitHub Org",
    "URL": "https://github.com/FortinetCloudCSE",
    "icon": "fa-graduation-cap",
    "weight":10
  },
  {
    "text": "Fortinet Standard Workshop Guide",
    "URL": "https://fortinetcloudcse.github.io/UserRepo",
    "icon": "fa-tools",
    "weight":20
  },
  {
    "text": "Fortinet Standard Workshop Template Repo",
    "URL": "https://github.com/FortinetCloudCSE/UserRepo",
    "icon": "fa-tools",
    "weight":30
  },
  {
    "text": "Fortinet Hugo reLearn theme - Guide",
    "URL": "https://mcshelby.github.io/hugo-theme-relearn/index.html",
    "icon": "fa-tools",
    "weight":40
  }
  ]
}
CloudCSEMovie Theme — Video Header Background
The CloudCSEMovie theme variant replaces the static header image with a looping MP4 video in the sidebar header area (the same region used by the Xperts background image).
How it works
The video plays automatically on page load (muted, no controls)
When the video ends, it pauses and replays after a configurable interval — for example, a 6-second video with a 60-second interval plays once, waits 54 seconds, then plays again
All other header content (logo, banner text, search bar) renders on top of the video
Setup steps
1. Add your MP4 to the repo
Place the video file in your repo’s static/videos/ folder:
videoHeaderSrc — the URL path to your MP4, relative to the site root. Required for the video to appear.
videoHeaderInterval — total seconds from the start of one play to the start of the next. Optional; defaults to 60. Set this to a value greater than your video’s duration.
Tip Leave videoHeaderSrc as an empty string "" to use the CloudCSEMovie theme without a video (renders a solid color header like other themes).
Note The MP4 file is committed to your repo inside static/videos/. Keep it small — short clips under 5MB are ideal for fast page loads.
FortiHugoRunner Tool
New Go Utility for interacting with Container
The fortihugorunner CLI tool is a helper CLI tool that currently supports simplified workshop authoring on any Windows, MacOS, or Linux system with the following capabilities:
Same usage across different development platforms
Creates (builds) Fortinet Cloud CSE Docker development images
Launches local Docker container with Hugo web server and live updating view of rendered site as modifications are made and saved
You can download the binary for your OS and architecture specifications from the repo. Binaries are available for Windows, Mac, and Linux. The following sections will walk you through downloading the appropriate binary and setting up the tool in your environment.
Note
You must have Docker installed and running to use this tool. You also need to verify that the Docker API Client is reachable from the terminal environment where you’ll be running it. In Windows and Mac, Rancher Desktop is recommended for working with Docker. In Linux, installation instructions for various distributions may be found here.
Keep Docker Engine, Docker Desktop, or Rancher Desktop updated. FortiHugoRunner is a client that talks to your local Docker daemon; security fixes in FortiHugoRunner update the CLI binary and its bundled dependencies, but they do not patch the Docker daemon itself.
Some information on common issues you may run into while getting started with Docker can be found on the troubleshooting page. If you have any questions or need any help getting set up, please reach out to the FortinetCloudCSE team at fortinetcloudcse@fortinet.com.
fortihugorunner flows
Here’s a visual of what’s happening when we use this new tool:
ContainerFlow
System Architecture determination and binary download
Run this command from the Windows Command Prompt to find your OS Architecture
echo %PROCESSOR_ARCHITECTURE%
Depending on your output, download the appropriate Go Binary from the releases page:
If your command output is:
then download:
AMD64
fortihugorunner-windows-amd64.exe
x86
fortihugorunner-windows-386.exe
Run the following to get your OS Architecture:
uname -m
Depending on the output, download the appropriate Go Binary from the releases page:
If your command output is:
then download:
x86_64
fortihugorunner-<darwin/linux>-amd64.exe
arm64
fortihugorunner-<darwin/linux>-arm64.exe
Utility Setup
You should place the downloaded binary at the root of your Hugo development folder so it’s in a well-known location. This will make replacing and/or upgrading the utility easier.
For Example
If you use /home/ubuntu/pythonProjects/ for all of your Hugo development, and you clone repos into this folder structure, you should place the Go Utility here as your well-known location
Further, adding this well-known location to your system’s $PATH will enable you to run the utility on any repo you edit.
Tip
In the following examples, we’ll use C:\users\someUser\pythonProjects as our well-known-location
To show and change your system path using Windows CLI do the following:
The echo %PATH% command lists your existing $PATH variable before and after the setx change. Be careful with setx as it replaces the PATH value, not appends (though %PATH% includes the existing value).
To show and change your system path using Windows Powershell do the following:
To add your well-known-location to the system path, edit the etc/environment file and append the well-known location for the Go Utility. The following commands show you how to do this using nano editor:
Tip
In the following examples, we’ll use /home/ubuntu/pythonProjects as our well-known-location
Open the File
sudo nano etc/environment
Find the PATH line and append your well-known location where the Go Utility binary is stored, to the end of the existing line, making sure to retain the end "
append /home/ubuntu/pythonProjects/ to the end of the following line as so:
Once the binary is downloaded, you can either run it from your workshop directory, or (recommended) copy it into your system path. If you copy it into your system path, it will be available throughout your system and you won’t need to copy the binary anywhere else to run it.
You can use the following CLI arguments to modify the utility’s behavior. If you run the utility from an existing Hugo repo directory, leaving the CLI blank will run with defaults listed
The filename of the binary as downloaded will contain the OS and architecture it was compiled to, i.e. fortihugorunner-windows-amd64.exe. If you would like to trim the platform information from the binary, use the rename command:
fortihugorunner rename
# renamed fortihugo-runner-linux-amd64.exe to fortihugorunner.exe
General steps:
Run the Utility to BUILD your container. This step is only necessary when we’ve added features or capabilities within the container. Rebuilding pulls the latest/greatest into your container image
For Any repo you want to edit, run the utility with launch-server command to get a local live-updating view of your Hugo workshop site.
CLI options with defaults for Container BUILD
fortihugorunner build-image \
    --env admin-dev       # testing image, used for container/process development, named ```hugo-tester```
    --env author-dev      # daily-use image for workshop authoring, named ```fortinet-hugo```
CLI Options with defaults for Container RUN
fortihugorunner launch-server \
**OPTIONAL COMMANDS TO ALTER DEFAULT BEHAVIOR. OMIT THESE OPTIONS FOR MOST SCENARIOS**
--docker-image fortinet-hugo:latest \
--host-port 1313\
--container-port 1313\
--watch-dir .
--mount-toml
For each component (build-image, launch-server, etc.), there are help menus available which explain the various parameter flags available.
fortihugorunner -h
#Includes functions for facilitating Hugo app development with docker containers.#Usage:# fortihugorunner [flags]# fortihugorunner [command]#Available Commands:# build-image Builds a Docker image programmatically using the Docker SDK# help Help about any command# launch-server Launch the Hugo server container# version Print fortihugorunner version.#Flags:# -h, --help help for fortihugorunner# -v, --version fortihugorunner version information#Use "fortihugorunner [command] --help" for more information about a command.fortihugorunner build-image -h
fortihugorunner launch-server -h
There is also a version flag to display the current version of the tool being used. A CHANGELOG is available in the tool repository for information on version updates and features.
To update your local binary executable to the latest version, use the update command.
fortihugorunner update
# Successfully updated to version 0.5.0!
Use the update command periodically to pick up FortiHugoRunner security fixes and dependency updates. This updates the CLI binary only; keep your local Docker installation updated separately.
Navigate to your workshop repo directory and run the utility (which is 1 level up in your development root/well-known-location).
In the example below, we are working on UserRepo located at C:\users\someUser\pythonProjects\UserRepo
Build the Docker image
Launch Hugo server in Author Mode
cd C:\users\someUser\pythonProjects\UserRepo
..\fortihugorunner.exe build-image --env author-dev
..\fortihugorunner.exe launch-server
Navigate to your workshop repo directory and run the utility (which is 1 level up in your development root/well-known-location).
In the example below, we are working on UserRepo located at /home/ubuntu/pythonProjects/UserRepo
Build the Docker image
Launch Hugo server in Author Mode
cd /home/ubuntu/pythonProjects/UserRepo
../fortihugorunner build-image --env author-dev
../fortihugorunner launch-server
Important note on the Go Docker SDK
This utility leverages a Go Docker client from the Moby project, commonly referred to as the Docker SDK for Go to interact with the Docker daemon programmatically. The SDK doesn’t always initiate an implicit pull of missing base images when building from a Dockerfile as is the case when running docker build from the command line. If any base images needed or referenced in your workshop Dockerfile aren’t already present locally, the image build will fail with an error message along the lines of failed to resolve source metadata….
To resolve this, the utility explicitly checks for the presence of any base images before starting the build process and pulls them programmatically if they’re not present. At the moment, the only two required images are:
docker/dockerfile:1.5-labs
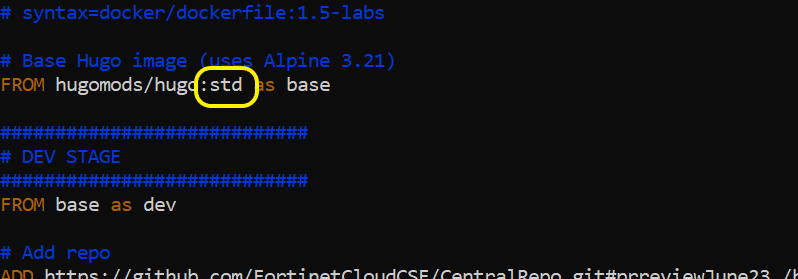
docker.io/hugomods/hugo:std
A parameter is available in the build-image component to change the tag of the hugomods image to pull if necessary. An example is shown below.
This argument is set to std by default. It is important to ensure that it matches the tag used in your workshop Dockerfile.
Docker Helpful Hints
Useful Docker Commands to Know
docker images #List all imagesdocker ps -a #List all containers, both running and stoppeddocker rmi <image-id> #Remove an imagedocker rmi $(docker images -aq)#Remove all imagesdocker rmi $(docker images --filter dangling=true -aq)#Remove all images with tag <none>docker rm <container-id> #Remove a containerdocker rm $(docker ps -aq)#Remove all containersdocker builder prune #Remove build cache
When running any of the above commands, if you get an error message indicating an image or container is being used or referenced in another image or container, you can issue the ‘-f’ flag to force remove.
Go CLI Tool -- Troubleshooting
Troubleshooting
This page outlines and attempts to offer solutions to various issues team members have run into while using the CLI tool. If you run into any issues not listed here, please email us at fortinetcloudcse@fortinet.com so we may research it and include information and solutions here.
General/Common Docker Permissions Issue in Linux
When working with Docker in Linux, you may encounter an error like the following:
docker images

# permission denied while trying to connect to the Docker daemon socket at unix:///var/run/docker.sock
This issue indicates there is a permissions issue preventing the Docker CLI (api client) from communicating with the Docker daemon. To resolve it, ensure your docker.sock permissions look like the following:
ls -la /var/run/docker.sock

#srw-rw---- 1 root docker 0 May 28 09:41 /var/run/docker.sock=
In order for the change to become effective, you will then need to log out of your terminal session and log back in. The quickest way to do this is to close your terminal window and re-open it. However, if working in a code editor such as VS Code, closing and re-opening may not be sufficient and you may need to completely log out of your Linux session and log back in (or just completely reboot).
After logging back in, check that your account has been added to the docker group:
groups
# ... group7 group8 docker
Windows Docker Issue
If you try to issue Docker commands in Windows specifically and you see this error:
...docker_engine/ping: open //./pipe/docker_engine: The system cannot find the file specified.
It means the Docker CLI is trying to connect to the daemon, but the pipe (communication channel) does not exist–usually because the Docker daemon isn’t running.
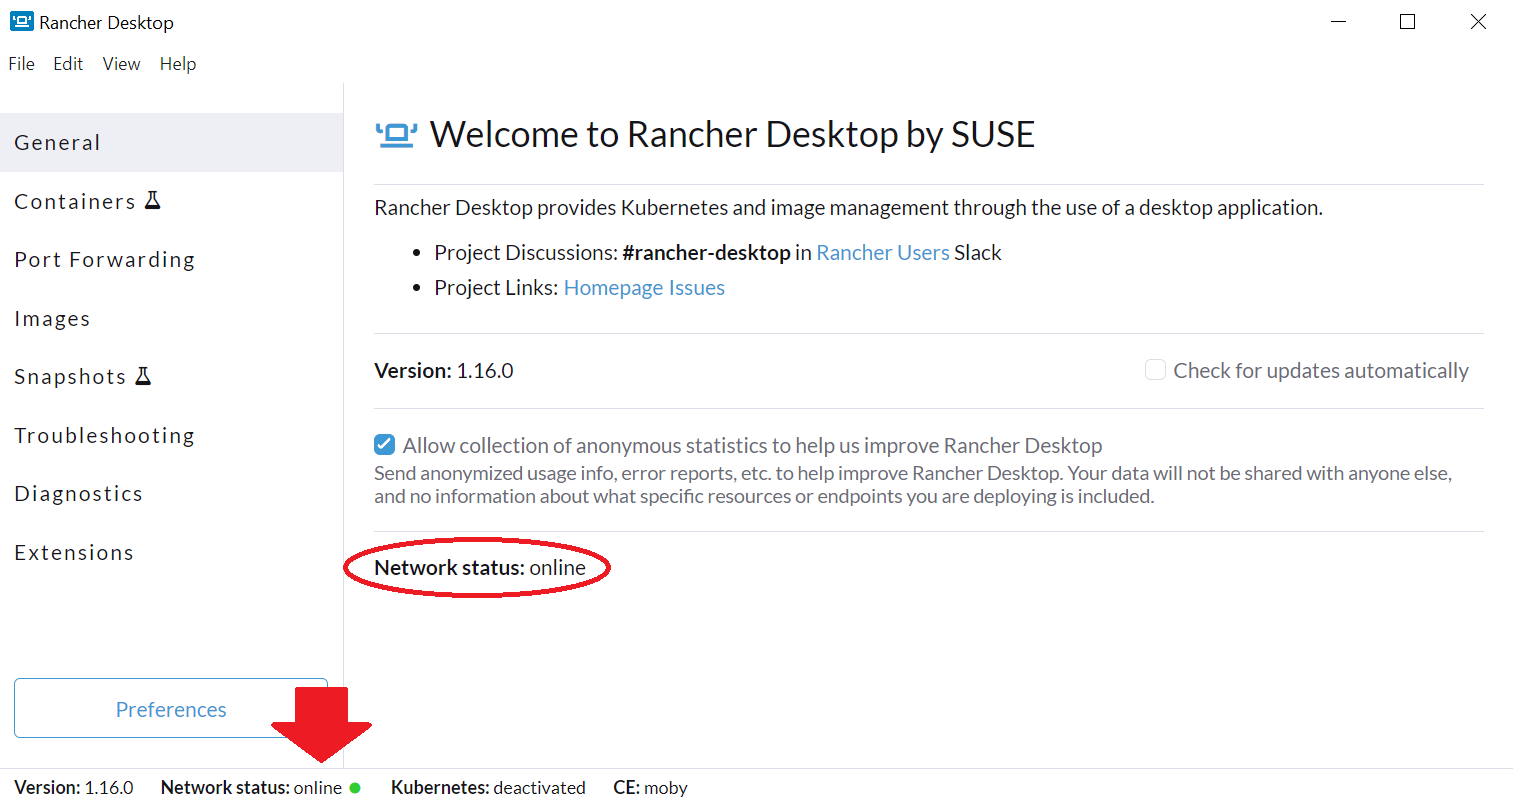
To resolve the issue, first ensure you have Docker running. If you’re using Rancher, ensure “Network Status” is online.
{{}}
You can also check that the API client is available in your terminal environment by running docker images.
docker images
#REPOSITORY TAG IMAGE ID CREATED SIZE#fortinet-hugo latest 89d81e91a4c6 3 hours ago 597MB#hugomods/hugo std 2d5893e404be 2 days ago 498MB....
If you can verify Docker is running and the API client is reachable and you’re still receiving the error message above, try the following:
Try restarting your Docker Windows application (Rancher, etc.)
Check your Docker Context:
docker context ls

docker context use rancher-desktop   # if using rancher, for example
Try rebooting the machine.
Permissions Issues
MacOS
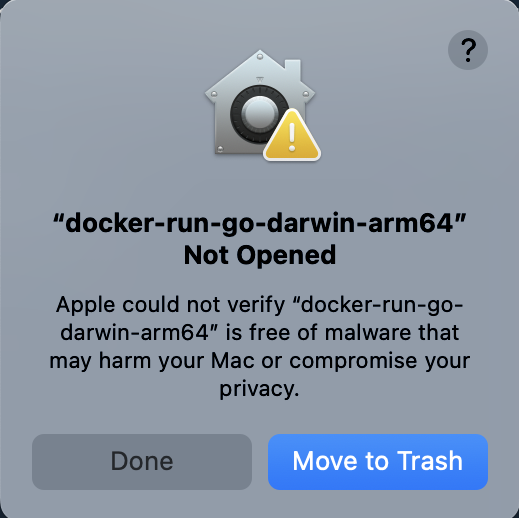
Some users have reported receiving system warnings such as the following when working with the tool in Mac:
Click Privacy & Security, scroll down and look for the CLI tool binary. Click Open Anyway next to it.
When the warning prompt reappears, click Open.
Windows
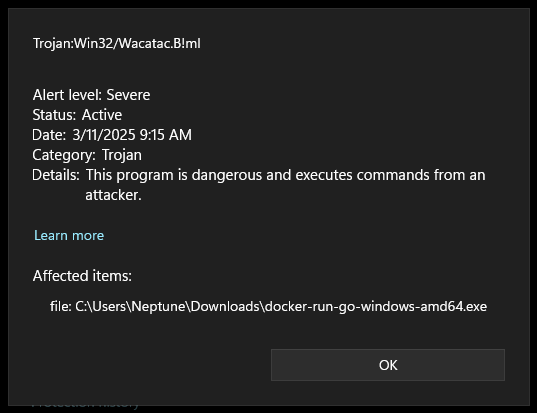
Some users have reported an issue in Windows where running the file results in the following warning from Windows Defender/AntiVirus:
{{}}
This is uncommon and typically a false positive due to Go-compiled binaries often being misidentified by heuristic antivirus engines, especially if they are not often seen in the wild. If you run into this, please email us at fortinetcloudcse@fortinet.com.
Background Procedures - CentralRepo Maintenance
CentralRepo
CentralRepo contains all of the stuff Hugo needs to build a static website, including Fortinet Customizations to themes.
How it’s used
Generally TEC Program participants creating content for Workshops, Demos, User Cases, or Spotlights don’t need to worry about Central Repo at all
When you build your container, it inherently grabs the latest copy of CentralRepo:main from github, via this command in Dockerfile:
Upon successful testing, Fortinet Cloud CSE team will merge the branch to main and close PR
    git checkout dev
    git remote add <PR label> <remote Github ssh URL>
    git pull <PR label>

    <PERFORM TESTIGN ON CONTAINER, and make any changes as necessary on this branch>

    <UPON SUCCESSFUL TESTING>
    git checkout main
    git merge dev --ff-only
    git push

    <Manually Close PR>
Relearn theme update
Whenever we need to update the ReLearn Theme, perform the following ON CentralRepo where the theme reference is stored:
    cd CentralRepo
    git submodule init
    git submodule update --remote
    cd themes/hugo_theme_relearn
    git fetch
    git checkout <latest commit>
    cd ../..
    git submodule deinit --force themes/hugo-theme-relearn
    git add themes/hugo-theme-relearn
    git commit -m "Updating relearn theme to V<x.y.z>"
    git push
Ch 2 Hugo Content Structure
Learn to organize and create content in Hugo- estimated duration 20min
You now have a container running hugo webserver and tracking changes to the /content directory in your repo.
Create your TecWorkshop Guide including Chapters and tasks. You can use your favorite editor/IDE to create the markdown pages
As you make changes to the MD files, you’ll see LIVE changes to the your local copy of the workshop guide (which depending on your ENV setup may or may not be viewable at: http://localhost:1313/<your_repo_name>
With your FortinetHugo Container running, you can proceed to creating and editing your workshop content.
Hugo is incredibly powerful and allows many customizations, and we won’t cover most of theme here as they’ve already been set for Fortinet’s standard template
Generally, you only need to do 3 things:
Set the folder structure for left hand menu bar navigation/topic structure, according to your chapters and tasks
Create Markdown files for each Chapter and discrete task therein
Adjust the site’s frontmatter settings via your_repo_name/scripts/repoConfig.json to reflect your TECWorkshop repo name, metadata, and leftnav URLs
Click the right arrow to go through each step individually
Subsections of Ch 2: Hugo Content
Task 1 - Chapter Directory Structure
Create a Folder structure correlating to the major topics/sections of the demonstration
Browse to the content directory within your TECWorkshop repo (Locally on your machine)
The Left Hand navigation menu is driven by the folder structure you create
Folder naming drives site navigation, content hierarchy, and helps organize the overall site layout. Specifically, directory naming helps to identify what’s in each Chapter & task
Within each folder there is an _index.md file (For Chapter/Section pages) or index.md (for regular/leaf pages) which will be used to hold content for that Chapter/Directory/Task
The metadata header on that page is used to set
Title of the Page
Link Title (as it appears in the leftNav bar)
Weight the order of chapters or tasks in the leftNav bar
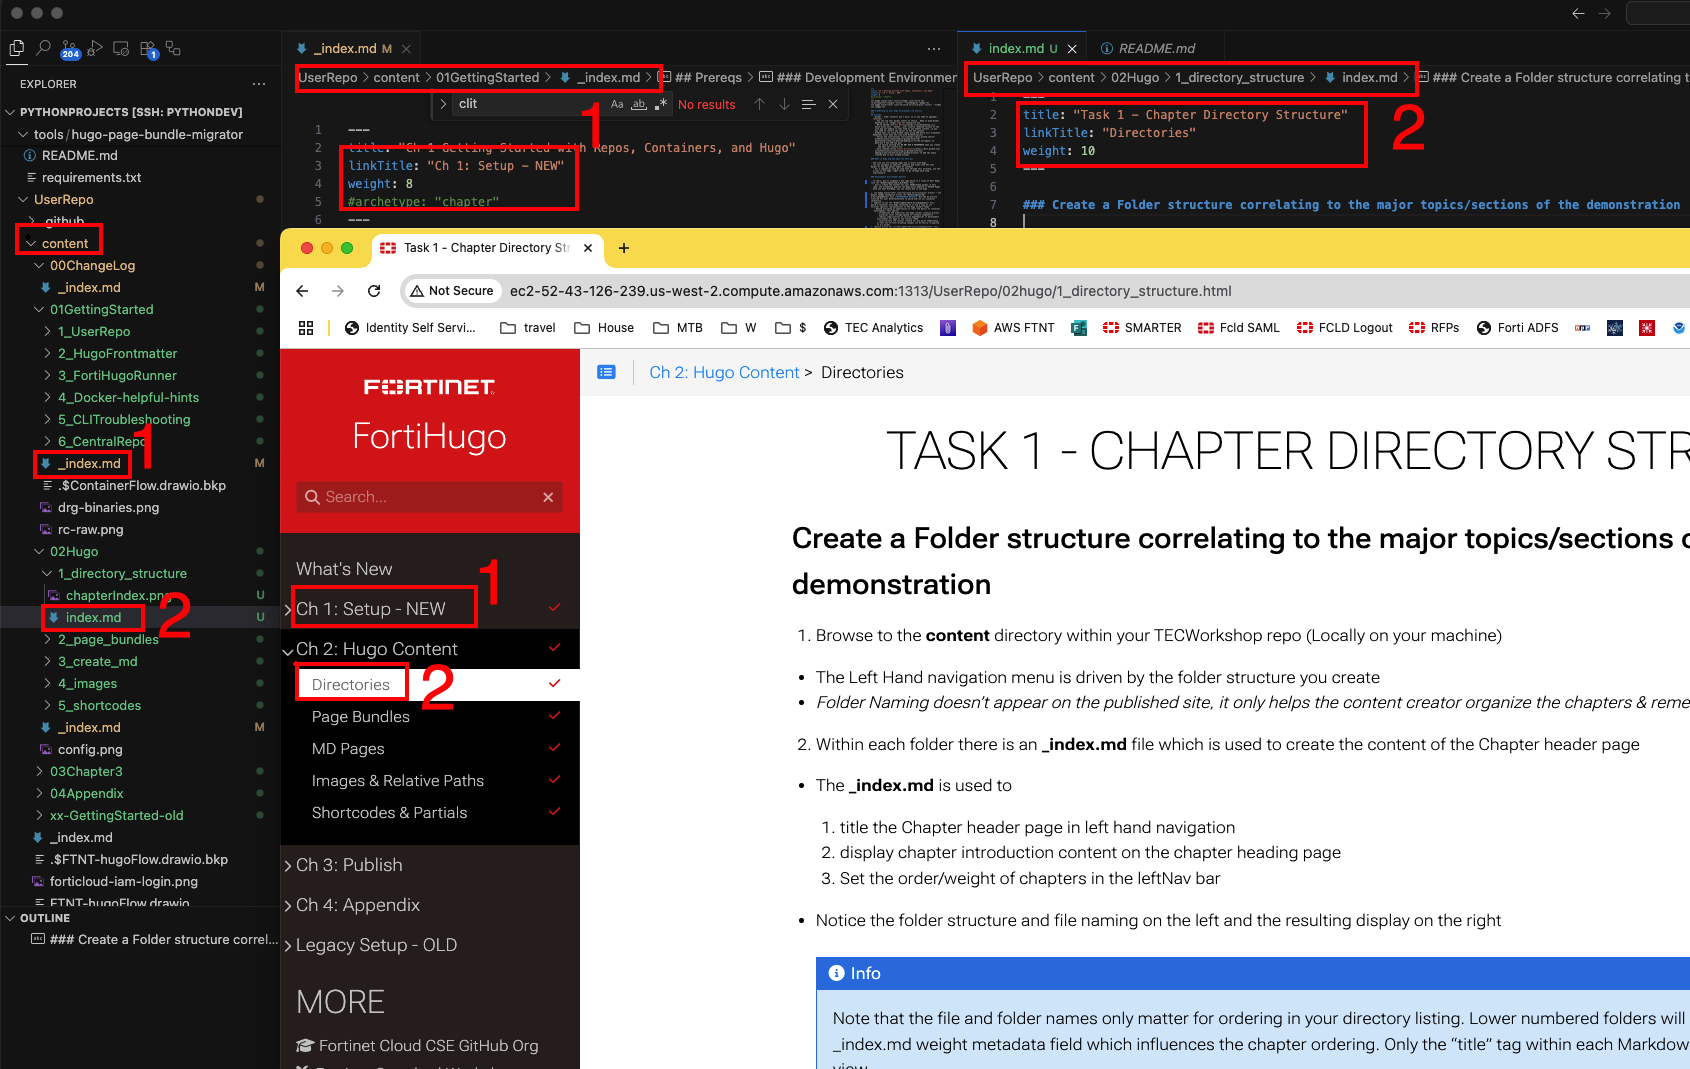
Notice the folder structure and file naming on the left and the resulting display on the right
Info
Note that the file and folder names only matter for ordering in your directory listing in your IDE. Lower numbered folders will appear first, but it’s really the _index.md weight metadata field which influences the chapter or task ordering. Only the “title” tag within each Markdown file will impact the resulting page view
image reference #
Folder/File Name
Page Type
Weight
1
content/01GettingStarted/_index.html
Chapter Heading Page
8 (Global Chapters)
2
content/02Hugo/1_directory_structure/index.html
task page (Hugo Page Bundle)
10 (within Chapter 02)
Subsequent Markdown pages under each folder are used to explain tasks/steps within each chapter
In an effort to better organize and stadardize image storage and display, and to simplify image references in Markdown, Hugo introduced Page Bundles.
A Hugo Page Bundle is a directory that contains a content file (e.g., index.md or _index.md) and its associated resources (e.g., images, videos, documents). This structure allows you to keep all related files together, making it easier to manage and reference them.
Why use Hugo Page Bundles?
Organization: Keeps related content and resources together, making it easier to manage.
Simplified References: Allows for simpler relative paths to resources, reducing the chances of broken links.
Portability: Makes it easier to move or copy content along with its resources.
Scalability: Facilitates the addition of new content and resources without cluttering the main content directory.
How to create a Hugo Page Bundle
Create a directory for your content. The directory name can be anything, but it’s often helpful to use a descriptive name.
Inside this directory, create an index.md file for regular pages or _index.md for chapter/section pages. This file will contain the content for that page or section.
Add any associated resources (e.g., images, videos) to the same directory.
Reference the resources in your Markdown file using relative paths.
For example, if you have an image named example.png in the same directory as your index.md, you can reference it like this:

Even better, use the figure shortcode to avoid unnecessary clickable images
{{< figure src="csemascot.png" >}}
Task 2 - Create/Modify MD pages
Create or copy Markdown pages for each task within the chapter
Each Chapter can have 1 or more tasks which should be completed by the participants
To comply with Page Bundle standards, generally the md page should be named index.md if it’s a task page, or _index.md for section/chapter pages,
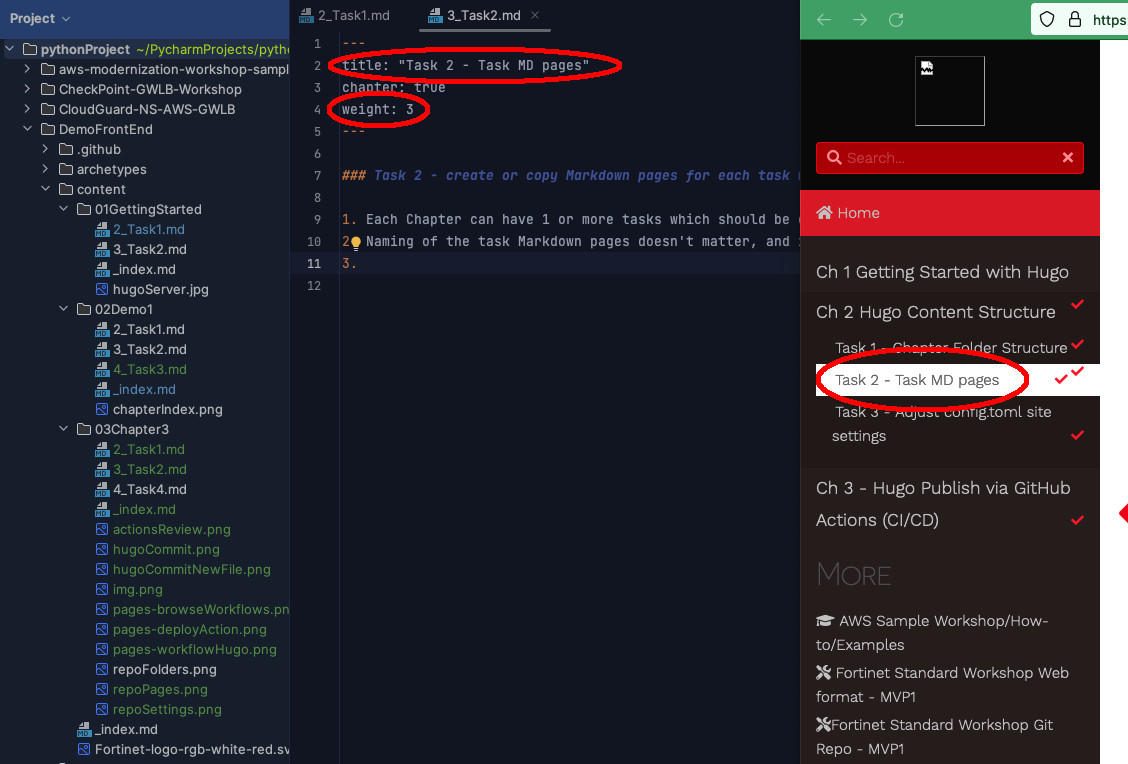
Info
The Title and Weight dictate the leftnav visual and ordering of the pages. Lower weight pages are displayed first
Warning
Because the file and folder names are very similar in our example repo, it can become confusing to know where to make edits. Make sure you’re editing the correct file in your IDE/editor
This page contains several useful markdown shortcodes you can use for visual pop-outs on the site
The examples and sample code provided in this workshop are intended to be consumed as instructional content. These will help you understand how various Fortinet and Azure services can be architected to build a solution while demonstrating best practices along the way. These examples are not intended for use in production environments without full understanding of how they operate.
%%{init:{"theme":"forest"}}%%
graph LR;
    A[Hard edge] -->|Link text| B(Round edge)
    B --> C{<strong>Decision</strong>}
    C -->|One| D[Result one]
    C -->|Two| E[Result two]
%%{init:{"fontFamily":"monospace", "sequence":{"showSequenceNumbers":true}}}%%
sequenceDiagram
    Alice->>John: Hello John, how are you?
    loop Healthcheck
        John->>John: Fight against hypochondria
    end
    Note right of John: Rational thoughts!
    John-->>Alice: Great!
    John->>Bob: How about you?
    Bob-->>John: Jolly good!
Quizes with the CTF Quiz App (quizframe shortcode)
The page param is the path to the quiz in the CTF app configured via quizUrl in repoConfig.json. The shortcode passes fortiuser, fortiemail, and workshopID cookies automatically so attendees are pre-identified.
Task 4 - Images & Relative Paths Links
Image Storage
Optimal: Use Page Bundles (see previous task)
Acceptable: Store images in a common directory and reference them with relative paths (use this if an image is used in multiple places)
Not Recommended: Store images in the “static” directory and reference them with absolute paths (e.g., /images/foo.png)
Using Images in Markdown
Optimal: Use the Hugo figure shortcode to include images with optional attributes like alt text, title, width, and height.
Acceptable: Use standard Markdown image syntax for simple images without additional attributes.

Note
Markdown Image syntax results in images that are clickable and open the image file in the browser. This is often not the desired behavior. Use the `figure` shortcode instead and include class="zoomable" if you need to zoom in on a detailed image
If you need to link to different parts of your site, you can use relative paths with Page Bundles.
Example: This page bundle is at content/02Hugo/4_images/index.md and you want to link to another page somewhere else in the site, you can reference it’s page bundle path
/layouts/partials are customizations used to tweak overall CSS parameters of the site. Generally these are reserved for use by ALL repos and can be changed by emailing Fortinet Cloud CSE team
If you absolutely must change something, use Hugo Partials as your guide
Partials are automatically included in the site’s CSS configuration
Shortcodes - custom HTML
If you need to use complex and/or custom HTML in your guide, or you have an often repeated bti of HTML you want to user across your markdown, you can use a custom shortcode.
If your workshop can be completed two ways — Docker Compose or Kubernetes, AWS or Azure, CLI or GUI — the obvious thing to do is put both on the page, side by side in tabs.
Participants then do both. Not some of them: enough of them that it is the single most common way a follow-along workshop goes wrong. Both sets of commands are visible, both look like steps, so both get run.
The deployment path feature fixes that by making the choice once, up front, and then showing that participant only their own path — in the page body, in the left-hand menu, in the next/previous buttons, and in search results.
Opt-in — nothing changes until you ask for it
A workshop that declares no deploymentPaths behaves exactly as it always has: no extra markup, no CSS, no JavaScript on any page. There is no default path vocabulary and no repo inherits another repo’s paths.
This page declares two example paths in its own front matter, so the feature is live on this page only — the controls above the title are real, and the working example further down is gated by them. Every other page of this guide is untouched.
Do you need it?
Use it when the same learning objective is reached by two or more mutually exclusive routes, and a participant only ever follows one.
Situation
Use paths?
Docker Compose vs Kubernetes/Helm deployment of the same lab
Yes
AWS vs Azure vs GCP versions of the same exercise
Yes
“Advanced participants can also try…” — extra, optional material
No — that is a notice or an expander
Two different products covered in sequence
No — those are chapters
Showing the same command’s output on Linux and macOS
No — that is a normal tabs block
The test: if a participant should run exactly one of the variants and the other is wrong for them, use paths. If they might read both, use tabs.
Step 1 — declare your paths
Declare the vocabulary in one of two places. Which one you pick decides how far the gate reaches.
The whole workshop is gated — scripts/repoConfig.json
This is the normal case. Add deploymentPaths as a site param:
The participant chooses once and every page follows it: gated blocks, the left-hand menu, the next/previous buttons, search results, and a padlock line on every page so the choice is always visible and reversible.
One page gates itself — page front matter
Put the same list in a single page’s front matter instead:
Now only that page gates anything. No menu entry is hidden, no next/previous button is filtered, search is untouched, and the padlock line appears on that page alone. Reach for this when one page forks and the rest of the workshop does not — or when a page needs a self-contained demonstration, which is exactly what the example on this page is.
Either way, each entry needs:
key — the short identifier you will write in your markdown (path="docker"). Must start with a letter and contain only letters, digits, hyphens and underscores; it is used as part of a CSS class name as well as an attribute value.
title — the label participants see on the button and in the “you are on this path” banner. Write it the way you want it read: “Kubernetes / Helm”, not k8s.
Two or more entries is the normal case. There is no limit, but every path multiplies the content you have to write and keep correct — two is almost always the right answer.
Never both at once
Declaring deploymentPaths in a page’s front matter while the site param also exists is a hard build error. There is one stored choice per participant per site, so the page would write its own key into the slot every site-wide page reads back — and those pages would then quietly show nothing at all, which is also what they correctly do before a first choice. Nothing would look broken.
deploymentPath (singular, the front-matter param that scopes a whole page to one path) is a different thing and needs the site param, because what it gates — menu, next/previous, search — is site-wide by definition.
Order and titles are both load-bearing
The first entry is the default: it is the path shown to a participant with JavaScript disabled, and it is the tab the site marks active before anyone clicks. Prefer appending a new path over reordering the list.
Renaming a title silently resets every returning participant’s choice — the stored selection is keyed on the title text, so old selections stop matching. No build error, no warning; they are simply asked to choose again.
Renaming a key is the loud kind of change: every path="…" in your markdown must be updated to match, or the build fails with a clear error. That is the safer of the two to get wrong.
Step 2 — pick the right block for the job
There are three ways to scope content to a path. Use the smallest one that fits.
pathtabs / pathtab — parallel steps in the middle of a page
For a section where each path has its own version of the same step. The outer pathtabs block wraps one pathtab per path:
{{< pathtabs title="Deploy the stack" >}}
{{% pathtab path="docker" %}}
Bring the stack up on your own machine:
```bash
docker compose up -d
```{{% /pathtab %}}
{{% pathtab path="k8s" %}}
Install the chart into your cluster:
```bash
helm upgrade --install mylab ./chart
```{{% /pathtab %}}
{{< /pathtabs >}}
title is optional (default: Your path). It labels the banner that tells the participant which path they are on.
Use {{< pathtabs >}} with angle brackets for the outer block, and {{% pathtab %}} with percent signs for each path’s body — the percent form is what renders the markdown inside.
Every path in deploymentPaths must appear exactly once in every pathtabs block. This is enforced; see what the build refuses below.
pathonly — one path, no tab UI
For prose, a warning, or a whole section that only applies to one path and has no counterpart on the other. Nothing is shown to the other path, and no tab strip is drawn:
{{% pathonly path="k8s" %}}
Your cluster needs a default StorageClass before you continue. Check with
`kubectl get storageclass`.
{{% /pathonly %}}
pathonly must use the percent form
Write {{% pathonly %}}, never {{< pathonly >}}. With angle brackets, any heading inside the block never joins the page’s list of headings, so every in-page link to it breaks — silently, with no build error.
Leave a blank line above and below the opening and closing tags. Without them the markdown inside is treated as raw HTML and never rendered.
deploymentPath front matter — a whole page for one path
When an entire page belongs to one path, scope the page instead of wrapping its body. Add one line to the front matter:
Hides the page’s entry in the left-hand menu for participants on another path.
Skips the page in the next/previous buttons, so following the arrows never walks into the other path.
Removes the page from search results for participants on another path.
If someone reaches it anyway — a bookmark, a shared link, a search from before they chose — shows a banner at the top explaining that the page belongs to the other path, with a button to switch.
Pair it with an opening notice that links to the equivalent page on the other path, so a participant who lands there has somewhere to go.
What the participant sees
Before choosing, at the very top of any page that gates content — above the page title:
Choose your deployment pathThis page’s steps are hidden until you pick one. Every other page then follows the same choice, and you can switch at any time from the header.
[ Docker Compose ] [ Kubernetes / Helm ]
The gated steps below stay hidden until they click. That is deliberate — it is the whole point — but it means anything a participant needs in order to decide must live outside a path block. Requirements, comparisons, “choose this if…” guidance: put those in plain page content, above the blocks.
After choosing, the buttons are replaced by a padlock line naming their path with a Switch to … button beside it. With a site-wide declaration that line appears on every page, so the choice is always visible and always reversible; with a page-level declaration it appears on the declaring page only, which is the only page the choice affects.
Tell them the buttons are buttons
Participants read documentation, not interfaces. Add a short notice near the top of your first page saying that the controls above the title are clickable and that the choice can be changed at any time from any page. It costs three lines and saves the “where did the Kubernetes steps go?” question.
With JavaScript disabled, every path is shown, labelled, with a note that they are alternatives rather than a sequence. Nothing is lost — the gate degrades to the old behaviour.
Try it — this page is the example
Everything below this line is a real, working gate. It is driven entirely by this page’s own front matter — nothing in scripts/repoConfig.json:
That is the only configuration involved, and it is why the rest of this guide has no padlock line, no hidden menu entries and no gate markup at all. The markdown that produces the block below is exactly the escaped pathtabs example from Step 2, with the /**/ escapes removed.
Deploy the stack: Docker Compose (example)Kubernetes / Helm (example)
Locked in — this page follows this choice.
You are reading the Docker Compose version of this step. A participant on the Kubernetes path never sees it.
docker compose up -d
You are reading the Kubernetes / Helm version of this step. A participant on the Docker Compose path never sees it.
helm upgrade --install mylab ./chart
And a pathonly block, which has no counterpart on the other path and draws no tab strip at all — on the Docker Compose path there is simply nothing here:
Kubernetes path only. Your cluster needs a default StorageClass before you continue. Check with kubectl get storageclass. Nobody on the Docker Compose path is shown this paragraph, and no empty panel is left behind where it would have been.
Three things to notice while you are here:
The chooser is above the page title, not next to the blocks. Scroll up. That is where every participant makes the choice, which is why the guidance they need to choose has to sit in plain page content.
The padlock line and its Switch to … button are on this page only. Click through to another task and look above the title: nothing. That is the page-level declaration at work — a site-wide declaration would put that line on every page, which is what a real two-path workshop wants and what a guide like this one does not.
The rest of this page never changed. Only the two blocks above are gated; ungated content is unaffected by the choice.
Starting a new workshop from this template? You inherit nothing
This repo is cloned to start every new workshop, which is the whole reason the example lives in front matter. scripts/repoConfig.json declares no paths, so a fresh clone has the feature switched off — delete this page and the example goes with it.
Had the example been a site param instead, every new workshop would have started life with two paths called (example) and a padlock line on every page.
Editing existing blocks
Add a path to a workshop that already has two
Append the new entry to deploymentPaths — append, don’t reorder.
Add a matching pathtab to everypathtabs block in the repo. The build fails, by design, listing each block that is missing the new path.
Review every pathonly block and every page with deploymentPath front matter: content that used to mean “not the other path” may now be wrong for the third one.
Check anything that hardcodes your path list — scripts, workflows, generated handouts. Derive it from repoConfig.json instead.
Remove a path
Delete its entry from deploymentPaths first, then build: every stale path="…" becomes a build error naming the file, which is your to-do list. Delete the orphaned pathtab bodies and any pages scoped to that path.
Convert an existing tabs block into a gated one
Rename the wrapper tabs → pathtabs, rename each tab → pathtab, and replace title="…" on each tab with path="<key>". The tab titles now come from deploymentPaths, so they are consistent across every block in the workshop instead of being retyped per page.
Move content out of a block
The most common edit, and the most common mistake. Anything that is true for everyone — the explanation of why a step exists, a diagram, a link to reference material — should sit outside the path blocks. Content inside a block is invisible to participants on other paths and to anyone who has not chosen yet.
Rule of thumb: inside the block, only the commands and the words that differ. Everything else moves out.
Split a long page by path
If a page’s two variants have diverged past the point where tabs read well, promote each variant to its own page with deploymentPath front matter and let the menu and next/previous gating do the work. That is usually the right move for setup and prerequisite pages, which tend to diverge most.
What the build refuses
These are hard build failures, not warnings. Each one exists because the alternative is a silent gate that shows the wrong path’s steps — which nobody notices until a participant does.
The build fails when
Why
pathtabs, pathtab or pathonly is used with no deploymentPaths in either place
There is no path vocabulary to gate against, and no default to fall back on
A page declares deploymentPaths in front matter while the site param also exists
Two vocabularies behind one stored choice: the page’s key would be written into the slot every site-wide page reads, and those pages would show nothing while looking correct
A pathtabs block is missing one of the configured paths
A participant on the missing path would silently be shown another path’s steps
A pathtabs block defines the same path twice
Ambiguous — only one of them can win
A pathtab or pathonly body is empty
Renders an empty gated panel, which reads as “this path has nothing to do” rather than as the authoring mistake it is
path="…" names a key that is not in deploymentPaths
Typo; the error lists the valid keys
A pathtab sits outside a pathtabs block
Its content would never be collected or gated
A pathonly is nested inside pathtabs/pathonly
The enclosing block already restricts the path, so it is redundant or unreachable
A page’s deploymentPath names an unknown key
The page would be hidden from every participant’s menu
A page combines deploymentPath with menuPageRef or menuUrl
Those make the menu entry a crosslink, so the menu-hiding rule would match nothing and the page would stay visible to everyone with no error
A key does not start with a letter, or contains anything but letters, digits, hyphens and underscores
It becomes part of a CSS class name, so anything else silently produces a selector that never matches
Every message names the offending file. Fix the file it names.
Gotchas worth knowing up front
Put decision-making information outside path blocks. If the prerequisites for each path live inside that path’s pathtab, a participant who has not chosen yet can see neither — the information they need to choose is hidden behind the choice.
If a page now opens with a notice, set description: in its front matter. Otherwise the site builds the page’s description, its link previews, and its search snippet out of that notice’s text.
A page scoped with deploymentPath is still reachable. Menu and next/previous gating cannot stop a bookmark or a shared link. The banner covers this — but it is another reason to keep an opening notice that points at the other path’s page.
Don’t hardcode your path list anywhere else. The deploymentPaths declaration is the single source. Scripts and workflows that need the list should read it from there, or they will quietly keep working with a stale list after you add a path. Printable handouts is a worked example of exactly this — its generator derives everything from this same declaration.
With a site-wide declaration the switch control is site-wide, not per page. A participant who picks wrongly on page one can fix it from any page — you do not need to repeat a chooser.
deploymentPath (singular) needs the site param. Scoping a whole page to one path gates the menu, the next/previous walk and search, all of which are site-wide; a page-level deploymentPaths declaration deliberately touches none of them.
A live workshop using all three mechanisms: ai-101 — see its 01Intro chapter for the chooser, the comparison written outside the blocks, and two path-scoped prerequisite pages
Deployment paths show each participant only their own path in the browser: pathtabs renders one tab active, one hidden, and JavaScript swaps them on click. That is exactly what makes it useless on paper.
theme.css sets .tab-content { display: none } with .tab-content.active { display: block }. That is not a print-only rule — the print stylesheet only recolours tabs for the page, it does not un-hide anything. So a two-path page, printed or exported to PDF exactly as it renders, contains one path’s steps and zero indication the other path’s steps ever existed. No error, no missing-content notice — the page just looks complete. A participant who prints the Kubernetes path for offline reference silently gets a document with no helm commands, or vice versa.
The fix is not a print stylesheet — the tab that isn’t active isn’t in the printed DOM at all, so no @media print rule can recover it. The fix is a separate, generated page per path, flattened ahead of time so nothing needs to be hidden. That is what this tooling does.
Opt-in — nothing changes until you ask for it
The same rule as deployment paths itself: a workshop that declares no deploymentPaths gets no generated handouts, no extra CI time, and no content/09Reference/handouts/ directory. All four files below already sit in this repo, inert, as of this change — see How to opt in.
The four files
File
Job
scripts/gen_handouts.py
Walks content/ in site order and, per deployment path, writes one linear page to content/09Reference/handouts/ with every pathtabs/pathonly/tabs block flattened to that path’s body and the other path’s content dropped entirely — not collapsed, dropped, because collapsed is exactly the failure mode above. --check exits 1 if regenerating would change anything; --list-slugs prints the handout slugs and nothing else.
scripts/lint_paths.py
Guards the invariant the generator depends on: every path-specific instruction has to actually live inside a pathtabs/pathonly block (or a page-level deploymentPath) or the generator has no way to flatten it correctly. It imports its marker grammar and path vocabulary from gen_handouts.py rather than keeping a second copy. Its final check delegates to gen_handouts.py --check — a lint pass and a stale-handout are the same failure, reported together.
.github/workflows/path-lint.yml
Runs on every PR touching content: regenerates the handouts and fails loud if that produces a diff, then runs lint_paths.py — see the CI gate below. On a push to main (never on a PR — see below), the auto-fix commits and pushes the regenerated handouts instead of just failing.
.github/workflows/handout-pdf.yml
Runs a full Hugo build, serves it, and renders each handout to PDF with headless Chrome. PR-triggered so a real build failure (the actual incident this hardening was built after — a bad pathtabs block that passed lint but broke the Hugo build) is visible before merge, reusing the build step this workflow already ran, rather than adding a third copy of build-and-fail-on-error.
How to opt in
Declare deploymentPaths — site-wide in scripts/repoConfig.json, or page-scoped in a single page’s front matter — exactly as described in Step 1 of the deployment-paths guide. The moment a real path vocabulary exists:
gen_handouts.py starts producing pages under content/09Reference/handouts/, one per path.
lint_paths.py starts enforcing that every path-specific instruction sits inside a path block.
Both workflows above stop short-circuiting and start doing real work on every PR.
Nothing else changes. scripts/lint_paths.py’s own PATH_TITLE_RE, PATH_TOKENS and ALLOWLIST are empty in this repo’s copy — they carried ai-101’s docker/kubectl/helm vocabulary, which is that workshop’s content, not a generic default — so a repo that writes real path-specific lab content should repopulate them the way ai-101 did (see the comments at the top of scripts/lint_paths.py for the reuse recipe).
The CI gate
“Stale” means the committed pages under content/09Reference/handouts/ do not match what gen_handouts.py would write today — a source page changed and nobody re-ran the generator. --check (used by both lint_paths.py and handout-pdf.yml) catches this and fails loud, naming every changed and orphaned file.
path-lint.yml goes one step further, but only on a push to main, never on a pull request — before linting, it runs gen_handouts.py for real (not --check), and if that produces a diff, it commits and pushes the fix using a repo secret named HANDOUT_AUTOFIX_PAT — a fine-grained PAT (contents: write, scoped to that one repo), not the workflow’s own GITHUB_TOKEN. That distinction matters: a push made with GITHUB_TOKEN deliberately does not re-trigger other workflow runs, so a re-run against the corrected head wouldn’t happen automatically. The push is deliberately restricted to the push trigger: a pull_request run has just executed the PR head’s own (potentially untrusted) gen_handouts.py in the same job, and GitHub Actions runner state persists across steps in one job — combining that with a secret capable of pushing to the repo is a real credential-exfiltration risk, not a theoretical one. So a PR that needs its handouts regenerated has to be fixed locally (python3 scripts/gen_handouts.py + commit) or merged and left to self-heal on main afterward — it is never auto-fixed during review.
A repo without its own HANDOUT_AUTOFIX_PAT still gets the full safety guarantee — just not the auto-fix. The push step checks the secret is present (and that the trigger is push) before attempting anything; if either isn’t true, it reverts its own regeneration and leaves the stale files in place, and lint_paths.py fails with the same clear “handouts are stale, re-run gen_handouts.py” message it always has. Nothing pushes with an empty credential, nothing produces an opaque git-auth error — the mechanism degrades from self-healing to fail-loud-and-tell-you-how-to-fix-it, never to silently-wrong. This repo (UserRepo) does not provision the secret — there is nothing here to print — so this is the path every clone of this template actually exercises.
To get the auto-fix instead of just the fail-loud check, mint a fine-grained PAT the same way ai-101 did — contents: write, scoped to that one repo only — and store it as a repository secret named HANDOUT_AUTOFIX_PAT.
Live example
ai-101 is the one workshop currently using this end to end: deploymentPaths declared site-wide, real pathtabs content throughout, HANDOUT_AUTOFIX_PAT provisioned, and its own PATH_TITLE_RE/PATH_TOKENS/ALLOWLIST populated with its docker/kubectl/helm vocabulary. Its published handouts are the generator’s real output.
Reference
Deployment paths (the vocabulary this tooling reads): Task 6
Workshops that need per-participant Azure accounts (a resource group, a portal sign-in, sometimes a VM) use the launchdemoform shortcode (CentralRepo) to trigger provisioning. Until now, that button POSTed to an Azure Automation webhook using mode:'no-cors' — the request went out, but the response was opaque by design, so the page could never show real status. Credentials arrived by a single Gmail-SMTP email, which routinely didn’t land in time for a live workshop.
launchdemoform now calls a real HTTP API (an Azure Durable Function, in fortinet-on-demand-labs-provisioning-and-tracking) that returns a real, readable response and a status endpoint the page polls. Participants see a progress bar and step name while provisioning runs, and credentials render directly on the page the moment they’re ready — email is now a secondary/audit channel, not the only delivery path.
Only add this shortcode where Azure provisioning is actually required
launchdemoform should appear on labs that use this repo’s Azure automation, and be removed from workshops that don’t need it — it has no effect and shows nothing useful otherwise. It requires a participant to have already checked in (the fortiuser/fortiemail cookies come from the site’s analytics check-in flow, unchanged by this feature).
Params
Shortcode params (unchanged by this rework):
Param
Required
Meaning
lab (or labdefinition)
Yes
The lab definition to provision — matches a file name (minus .json) under lab-definitions/ in the backend repo, e.g. azure-102-odl.
debug
No, default false
true logs request/response/state-transition detail to the browser console.
customer
No
Optional customer identifier passed through to the backend.
smartticket
No
Optional SmartTicket reference passed through to the backend.
One new site param, in this repo’s scripts/repoConfig.json:
Point it at the deployed Function App from the backend repo. Leave it unset until that Function is actually deployed and reachable — with no value, the shortcode renders normally (the button is still gated on check-in as before) but a click shows a clear “Provisioning is not configured for this workshop yet” message instead of failing against a URL that doesn’t exist.
Usage
{{< launchdemoform lab="azure-102-odl" >}}
Live example
What you’ll see here depends on your check-in/config state
This repo’s own scripts/repoConfig.json intentionally has no provisionApiBaseUrl set — the example below is live, but clicking it (once you’ve checked in) demonstrates the “not configured” state rather than a real provisioning run. A workshop with the site param set and a real backend behaves as described in What the participant sees below.
Provision your Portal Accounts
Required for hands-on portion of this workshop
What the participant sees
Before checking in: the button is disabled with a message to check in first (unchanged behavior).
Idle, checked in, no attempt yet, no reusable credential found: button reads “Provision Accounts” and is clickable.
Idle, checked in, and a valid credential from an earlier workshop exists — either the same lab-definition, or a different one tagged into the same series (see Gotchas below) — the plain button is replaced by a choice: “We found existing credentials from {workshop}, issued {date}” with two buttons:
Reuse These Credentials — renders that credential immediately (username, TAP, resource group, a “Reused from” line naming the original workshop) with no new provisioning call at all.
Provision New For This Workshop — proceeds with the normal flow below as if no prior credential existed. This choice is remembered only for this page’s site+lab, not the whole series — a different workshop page later in the same series still offers the reuse choice fresh.
In flight: the button disables (permanently, for this lab, until a terminal state), a progress bar fills, and a step label updates every few seconds — e.g. “Creating AD user — 20%”, “Assigning role — 60%”.
On success: a credential card renders in place — username, sign-in info, resource group, expiry, and an “Open Azure Portal” link — and the button reads “Already Provisioned” and stays disabled.
On failure: the button re-enables as “Retry Provisioning” and the status line shows the participant-safe failure reason from the backend.
Reload, close the tab, or restart the browser — the page always reads its stored state first: it resumes polling an in-flight attempt, or renders the stored credential card directly, before ever showing the plain “Provision Accounts” button. State is localStorage, not session-only — it survives tab/browser closure by design, since a provisioned credential is only valid for the lab’s own duration regardless of how long a browser stays open. Once that duration has passed, the credential card still renders (as a record of what was issued) but shows an inline “access window has ended” warning instead of presenting a dead credential as still good.
Gotchas
Attempt state is scoped per Hugo site and per lab, not just per site. Two launchdemoform shortcodes with different lab values on the same or different pages of the same workshop track independent attempts; the same lab value anywhere on the site shares one lock. Scoping is keyed on the browser’s localStorage, prefixed with the site’s own base URL — a participant working two different workshop sites in the same browser never sees one site’s credentials or lock state on another.
The client-side single-attempt lock is a UX convenience, not the source of truth. The backend’s own idempotency (a deterministic key over participant email + lab definition + source site) is what actually prevents double-provisioning, and it has no expiry of its own — this matters if you’re debugging what looks like a stuck lock, or wondering why a participant can’t start a genuinely new attempt after their lab access has ended: clearing localStorage only resets what this browser remembers, not what the backend already did. Getting a real new attempt for the same email+lab+site is a backend-side question, out of scope for anything client-side.
Retry only appears after a hard Failed status from the backend, never just because a poll is slow or a tab was closed mid-provisioning. If a participant reports “it’s been stuck at X% forever,” that’s a backend-side question (check the Function’s Application Insights traces via the token), not a reason to expect a retry button to appear.
A missing or unreachable provisionApiBaseUrl fails safely. No value configured → the shortcode never attempts a network call and shows the “not configured” message on click. A value that’s set but wrong (typo, backend down) surfaces as a normal Failed attempt with a generic network-error reason, and the retry button appears once the URL is fixed.
Linking two workshops into a reusable credential “series” is a lab-definition change, not a shortcode param. A participant who already completed one workshop can be offered their existing credential on a later one (see What the participant sees, step 3) when either (a) both workshops’ launchdemoform calls use the literal samelab value (nothing to configure — this is how the K8s 101/201/202 trio works today), or (b) their lab-definitions are genuinely different but both set the same series string in the lab-definition JSON (in lab-definitions/ in the backend repo — not this repo). There’s no shortcode-side setup: once the backend lab-definitions share a series (or are the same lab), the reuse choice appears automatically. Only identity (the AD user/TAP) is reused across a series — a linked workshop’s own resource groups/storage/VM still provision fresh if it needs them.
This shortcode has no default backend URL any more. The previous version silently posted to a hardcoded Azure Automation webhook if site.Params.webhookUrl wasn’t set — and due to a separate bug, that site param was never actually wired into hugo.toml by generate_toml.py/hugo.jinja, so every real build used the hardcoded default regardless of what a repo configured. provisionApiBaseUrl is wired through the schema, the Jinja template, and hugo.toml generation, and has no hardcoded fallback — an unset value is a deliberate, visible “not configured” state instead of a silent default.
Admin: logs, credential recovery, and troubleshooting
Azure Portal access required
Everything below is in the Internal-Training subscription, resource group CloudCSE-WorkshopAccountProvisioning. You need at least Reader on that resource group to follow along.
The backend: Function App func-cse-lab-provisioning (Python, Durable Functions, EP1 plan). Search for that exact name in the Azure Portal to get to everything else — its Function App blade links to its Application Insights resource and its own Durable Functions instance list.
Every request is logged and correlatable by the orchestration instance ID — which is also the token the shortcode polls GET /api/provision/status/{token} with, so it’s visible in the participant’s browser dev tools (Network tab) or console (debug=true shortcode param logs it directly). All logs land in Application Insights appi-cse-lab-provisioning (backed by Log Analytics workspace appi-cse-lab-provisioning-law, 30-day retention). From the Function App blade → Application Insights → Logs, run:
traces
| where customDimensions.instance_id == "<token>"
| order by timestamp asc
This reconstructs the entire run for one participant — every step name, percent, and (on failure) the real exception with a stack trace, not just the generic participant-safe failure message the page shows. log_failure writes failures to traces/exceptions at error level; a stuck or failed provisioning is almost always diagnosable from this one query.
Finding a participant’s instance ID when you don’t have it (they lost the tab, the email never arrived, and they can’t give you the token): the orchestration’s stored input includes their email, but email is never logged into customDimensions directly, so traces can’t be full-text-searched by email. Instead use the Durable Functions instance list — either the Function App’s own Durable Functions instances view in the Portal, or the management REST API (.../runtime/webhooks/durabletask/instances?showInput=true&showOutput=true, auth code from the Function App’s host keys) — and filter the results for input.email. This lists every orchestration regardless of terminal state, which is also the fastest way to answer “is this participant’s attempt actually stuck, or did it fail/succeed and they just didn’t see it.”
Fastest path: check the Training Credentials channel in the Cloud Architects Team first. Every successful provisioning posts a formatted card — workshop name, participant email, username, password/TAP — to that Teams channel via a Power Automate webhook, at the same moment the participant’s credential email goes out. This is the intended first stop for “a participant says they never got their credentials” — faster than any of the lookups below, since it needs no instance ID and no Portal access.
The webhook posts through a Power Automate flow (fd0bf968c0df4299aa09ab673de41b04, same Power Platform environment as ManageTrainingUser.ps1’s original webhook) — open it in Power Automate if the destination ever needs to change.
This only covers labs that reach the send_email step successfully — a Failed attempt never posts (use the instance-ID/Application Insights lookups below for those), and the notification itself is best-effort: a webhook failure is logged (step: teams_webhook) but never blocks credential delivery or rolls back provisioning, so occasionally you’ll need to fall back to the lookups below even for a Completed attempt.
Recovering an already-issued credential depends on which lab path ran:
Bastion + VM labs (10 of 11 lab definitions): the VM’s local-admin password is a durable Key Vault secret, vm-password-<resource-group-name>, in the dedicated vault kv-cse-wksp-provision. Look up the resource group name from the orchestration’s output (same instance lookup as above), then read that secret directly — no time limit, it doesn’t expire or get purged.
AD user / Temporary Access Pass labs (azure-102-odl and similar): the TAP is not stored anywhere durable on purpose — it’s a Microsoft Entra credential, emailed once and returned once in the orchestration’s output. The orchestration’s output (via the same instance-ID lookup, show_output=true) still has the original TAP value as long as the Durable Task history hasn’t been purged — nothing currently purges it (no retention policy configured on the ProvisioningTaskHub storage), so in practice this works well past the 30-day Application Insights window. If the TAP has since expired (they’re short-lived) or truly can’t be found, don’t try to reuse it — issue a fresh one for that user directly in Entra ID (Users → the participant’s AD user → Authentication methods → Temporary Access Pass). The AD user itself persists across labs; only the TAP is single-use/time-boxed.
Checking whether a participant is rate-limited or “stuck” on a stale lock: the dedup/rate-limit state lives in a Durable Entity (ProvisionEntity), one instance per email:<lowercased-email> and one per dedup_key (email + lab + source site). Query entity state the same way as orchestration status (Durable Functions instance/entity list, entity ID @ProvisionEntity@email:<email> or @ProvisionEntity@<dedup_key>) if a participant reports the button won’t let them retry — this tells you whether the backend genuinely still considers them in-flight/already-completed, independent of whatever the browser’s localStorage shows.
Client-side state is not authoritative
Clearing a participant’s browser localStorage (or having them use a different browser) never unblocks a real backend-side lock or rate limit — it only resets what their browser remembers. Always confirm against the Durable Entity state above before telling a participant to “just try a different browser.”
Tracing a reused credential (a participant says “it gave me someone else’s/an old workshop’s credentials”): verify via the backend, never by guessing from what the page shows.
Fastest check — the orchestration’s own output. Find the participant’s instance ID the same way as above (Durable Functions instance list filtered on input.email), then read that instance’s output. If the credential was reused, the output has a reusedFrom field naming the lab-definition the identity/TAP originally came from. No reusedFrom field means that specific attempt provisioned fresh — the participant’s complaint is about a different attempt, or a client-side display bug, not the reuse mechanism.
Full per-participant history — every lab that email has ever completed, reused or not — lives in a separate Durable Entity, one instance per email, entity ID history:<sha256 of the lowercased, trimmed email> (hashed rather than the raw email — a read_entity_state HTTP lookup on a key containing @ doesn’t resolve; see this repo’s backend CLAUDE.md if you’re touching this code). Compute the key with:
Then look that entity up the same way as ProvisionEntity above (Durable Functions instance/entity list, @ProvisionEntity@history:<hash>). Its state is a list of every completion for that email — lab_definition_name, series, user_principal_name, completed_at, lab_duration_days — the authoritative record of what that participant actually has and where each credential came from.
“It gave me an old workshop’s credentials” almost always means the reuse was correct and expected — the participant is confusing “the same account, still valid, from an earlier session today” with “wrong account.” Confirm by checking completed_at + lab_duration_days on the matching history entry actually covers now (an expired-but-still-Completed entry is never offered for reuse server-side — see the backend README’s “Credential reuse” section — so if they’re seeing stale credentials from outside that window, that’s a genuine bug, not the intended behavior, and worth escalating with the instance ID from step 1).
Use plain markdown code fences — no shortcode nesting. Follow this style for every
command/output pair:
No $ prompt in the command.
One command per block, preceded by a sentence that says what it does.
Introduce the output with “The output is similar to:”.
Use [...] for elided lines in long output.
Reserve tabs for genuine alternatives (e.g. bash vs PowerShell) — not for hiding output.
run= targets
Add {run="<target>"} to a bash, sh, shell or text fence to get a coloured
header badge. Five targets get a fixed colour and label — bastion, local, pod,
browser (each reads “Run on: <Target>”) and chatbot (reads “Ask the chatbot”,
see below); anything else gets a neutral badge.
Check the pods on the cluster:
Run on: Bastion
kubectl get pods
The output is similar to:
Expected output
NAME                     READY   STATUS    RESTARTS   AGE
ollama-7d4f9c6b78-abcde  1/1     Running   0          4m
agent-6b8d5f9c7d-fghij   1/1     Running   0          4m
An unrecognised target still renders, with a neutral badge:
Run on: Jumphost
whoami
chatbot blocks — for chat-UI prompts
run= also works on text fences, for prompts typed into a workshop’s chat UI rather than
run in a shell. chatbot is a fifth standard target: header reads “Ask the chatbot” (not
“Run on: …”), orange badge, FortiAI-Assist icon.
Enter this in the chat box:
Ask the chatbot
Who is in the Engineering department?
Custom label, icon and color
Every block’s header text, icon and colour are author-editable, on any target, with the
label, icon and color attributes — for a one-off badge that isn’t one of the five
standard targets:
Ask FortiAI-Assist
Summarize this alert and recommend a remediation.
label — replaces the header text entirely.
icon — terminal (default for most targets), fortiai (the mark chatbot uses by
default), or any Font Awesome class string, e.g. fas fa-robot.
color — any CSS colour (hex, named, rgb()) for the header background.
output fences
Plain output, no syntax colouring, no copy button:
Expected output
qwen2.5:3b
Optional lang="json" highlights inside the panel:
Expected output
{
  "models": ["qwen2.5:3b"]
}
Optional collapse="true" wraps long output in the theme’s expand widget (the value must be
quoted — Hugo’s fence-attribute parser does not accept a bare collapse=true):
If the run=/output render hooks aren’t in the image you’re building against yet,
this renders a titled block today with zero CentralRepo changes:
kubectl get pods
NAME READY STATUS
Ch 3 - Hugo Publish
Publish your content to GitHub pages via a GitHub action
Now that you have your content first draft, push your repo to gitHub, there’s already a GitHub action to automatically publish your content anytime you upload to the repo
Click the right arrow to go through each step individually
Subsections of Ch 3: Publish
Task 1 - Push content to your repo
Push your content to GitHubo repo
When you’re satisfied with the look and feel of your workshop guide locally, from your local workstation CLI, push the newly created Hugo site up to GitHub to automatically publish your Hugo Site
Remember we’re always working in a Git Branch, so you should get in the habit of issuing a Pull request and merge using our GitFlow procedure
Info
This is mostly applicable when working in a collaborative environment where multiple people may be pushing to the repo with different branches/PR to main. Strictly speaking, if you’re the only person working on this repo and/or it’s your first push, this step isn’t 100% necessary
          # locally checkout the main branch
      git checkout main
          # pull the latest version of main from GitHub to your local repo
      git pull
          # locally checkout your feature branch
      git checkout <branch>
          # locally perform an interactive rebase which locally pull commits from main into my branch
      git rebase main -i
          # push my local branch (which now includes the latest changes from GH main) up to GitHub remote
      git push --force

      ########### WAIT FOR PR APPROVAL
Create a PR on GitHub, being sure to select your branch to merge with main. Wait for approval
{{}}
{{}}
Once your PR is approved, checkout the main branch and perform a fast-forward merge and force push to complete the workflow.
      # locally checkout the main branch
  git checkout main
      # locally merge myFeatureBranch into main with a fast-forward merge scheme
  git merge <feature branch name> --ff-only
      # push local main (which now has myFeatureBranch merged into it) up to GitHub remote
      # because this push includes the merge it will auto close the PullRequest
  git push
After you push to main, the PR auto closes and the change to main triggers GitHub actions which automatically build and publish your workshop to GitHub Pages
GitHub Action to Auto Publish
The file workflows/static.yaml is already included in your repo and triggers a GitHub Action to build and publish your Hugo site every time you push content to GitHub.
Action:
Build a Hugo container with all of our customizations
Issue a Hugo Build command to create static HTML site
Publish resulting HTML to GitHub Pages for your repo
You can see action progress and errors in the Actions Tab on your repo
Git Flow
GitHub Repo Getting Started (General Workflow for GitHub Repos)
Once your repo and pipeline have been created, you will be provided with the GitHub repo link which you can use to clone and begin content creation. First, navigate to a desired local directory and clone the repo with the provided link:
  cd <desired parent directory>
  git clone <provided link>
  cd <cloned repo directory>
Create a feature branch to begin working on your desired changes.
git checkout -b <FEATURE-username-ShortDescr>
Check the repo status to verify the changes to be staged.
git status
When you have changes, Stage the desired files (or issue -A (or .) for all), commit, and push.
  git add -A {or} git add .
  git commit -m "<add a commit message here>"
  git push
If this is your first push to the branch, GitHub upstream doesn’t know about it. Just go ahead and use the provided command in this case to perform the push, which will create the upstream branch
To auto create new branches when you first push, update Git global config
Tip: If you have a number of small commits and don’t want them and their associated commit messages polluting the git log, you can squash your commits by performing a soft reset:
   git reset --soft <hash of the last commit you want to keep as is>
   git add -A
   git commit -m "<new commit message>"
   git log
You will see the new commit on top of the one you referenced in the git reset command.
When you have completed your work and are ready to merge your changes into the main branch, ensure your branch is up-to-date with the main branch.
    # locally checkout the main branch
  git checkout main
    # pull the latest version of main from GitHub to your local repo
  git pull
    # locally checkout your feature branch
  git checkout <branch>
    # locally perform an interactive rebase which locally pulls commits from main into my branch
  git rebase main -i
    # push my local branch (which now includes the latest changes from GH main) up to GitHub remote
  git push --force
Create a PR on GitHub, being sure to select your branch to merge with main. Wait for approval
You will not be able to merge the PR until receiving approval from Jeff or Rob
Once your PR is approved, checkout the main branch and perform a fast-forward merge and force push to complete the workflow.
  # locally checkout the main branch
  git checkout main
  # locally merge myFeatureBranch into main with a fast-forward merge scheme
  git merge <feature branch name> --ff-only
  # push local main (which now has myFeatureBranch merged into it) up to GitHub remote
  # because this push includes the merge it will auto close the PullRequest
  git push
Branch cleanup - generally you can reuse your branch while actively developing. If you want to close your branch, use the following commands
When you’re satisfied with Hugo view of your content in Hugo virtual server, issue a Hugo ‘build’ in the container CLI
hugo --minify --cleanDestinationDir
This command “builds” your Hugo site into the container’s /public folder. We used a docker disk mount to map this folder back to your local /docs folder, so the Hugo website will automatically be copied back into your local repo
flag ‘–cleanDestinationDir’ tells hugo to re-write the entire output directory with its build, so it will clear out template files/anything else that may be in there
You can now exit the container with ctrl + cd, or command: ’exit’
When you exit the container, any files stored or changes you made to the container will be lost and cannot be recovered
Remember we edited the /content folder on our local OS, so those changes were not made to the container and will not be lost
Further, the disk mount from local’s /docs to Container’s public AUTOMATICALLY writes the hugo build to your local OS, so those changes will not be lost
If you need to continue editing, just run a new container from your built image, and run hugo’s webserver. Everything is linked properly so it should just work
Ch 4 - Appendix
This section contains miscellaneous content related to our workshop CI/CD pipeline and infrastructure.
Subsections of Ch 4: Appendix
Updating the Jenkins Personal Access Token
The Jenkins PAT
The Jenkins personal access token is used by Jenkins to retrieve Git repo information and send status checks during pipeline runs.
To generate a new token, navigate a web browser to the team Github, and click the {{}} at the top right of the screen.
{{}}
Click ‘Settings’ in the dropdown.
{{}}
At the bottom left of the Settings page, click ‘Developer Settings.’
{{}}
Click the ‘Personal access tokens’ dropdown, and click ‘Tokens (classic)’.
{{}}
Generating a New Token
To generate a new token, follow these steps. If you just need to regenerate an existing token, skip down to the following section.
To generate a new token, click the ‘Generate new token’ dropdown near the top right of the Personal access tokens (classic) screen. In the dropdown, click ‘Generate new token (classic).’
{{}}
You will be prompted to enter your FortiAuthenticator TOTP code. Enter it, and on the New personal access token (classic) page, ensure the following permissions are checked:
repo and all of its sub-options:
{{}}
admin:repo_hook and all of its sub-options:
{{}}
Choose an expiration date, optionally add a note, and click {{}} at the bottom of the screen.
Note: When the token appears on the next screen, ensure you copy and paste it somewhere where you can retrieve it before navigating away from the screen or closing the tab. Once you do, you will not be able to retrieve the token again and will need to generate another.
Regenerating an Existing Token
To regenerate an existing token, from the Personal access tokens (classic) screen, click the name of the token. For example:
{{}}
On the following screen, ensure the requisite permissions are selected, and click ‘Regenerate token’, and copy the token someplace handy where you can retrieve it later.
{{}}
Updating Jenkins
Navigate to the FortinetCloudCSE Jenkins server, and login with your credentials. To update a token, you’ll need admin permissions.
{{}}
After logging in, click ‘Manage Jenkins’ on the left hand side of the screen.
{{}}
On the Manage Jenkins screen, under the Security heading, click ‘Credentials’.
{{}}
On the Credentials page, click the name of the token you want to update. Then, click ‘Update’ on the left menu.
{{}}
Click ‘Change Password’, paste in the new token, and click {{}}.
Confirm the token works
Click the ‘Manage Jenkins’ breadcrumb at the top of the screen.
{{}}
Click ‘System’ under the System Configuration heading on the Manage Jenkins page.
{{}}
Scroll down to the Github section towards the center of the page.
{{}}
Select the credential that references the token you just updated, and click {{}}.
If the token is valid and working, you should see a message appear such as Credentials verified for user… as in the image below.
{{}}
Ch 1 Getting Started with Repos, Containers, Go Utility, and Hugo
Setting up your Hugo environment (15 min)
Pre-requisites
Docker - older installs won’t work, so if you need to upgrade/reinstall
You can use your docker flavor of choice. Keep in mind Docker Desktop is no longer free for enterprise use.
We’ve tested Rancher Desktop, which works well. Caveat…your locally rendered version of the site may not update in real time as you modify content, so you may need to restart the server to see new content
GitHub keys
Follow the instructions here to generate a new SSH key pair
Warning
DO NOT USE A PASSPHRASE when you create the keys
Once created follow these directions to add the newly created Key to your GitHub account.
What is Hugo and how easy can this be?
The site you are viewing right now is built with Hugo.
You can navigate to specific chapters and tasks with the Left Navbar or the top banner table of contents
For a sequential step by step flow through this workshop, use the arrows in the upper right corner to go through each step individually
you’ll create the content for your TECWorkshop guides in this repo, and ultimately publish the Hugo built website to GitHub Pages
Once you have UserRepo, you can choose how to use Hugo
Option 1: build a container with Hugo installed on it and a copy of all Fortinet specific customizations to the Hugo reLearn theme
Beyond providing an opportunity to learn the basics of container development, this option:
streamlines and simplifies the Hugo content creation process
minimizes local storage/upkeep of reusable componentry
reduces complications of version dependencies in development environment for Hugo or the reLearn theme
future-proofs the content created for any given TECWorkshop so that any Fortinet branding changes can be easily re-applied to all guides
Option 2: Install Hugo locally on your laptop/workstation and clone CentralRepo
You’ll have to
maintain CentralRepo including submodules on your local workstation
ensure your final site is published to the /docs folder in your UserRepo
Subsections of Legacy Setup - OLD
Task 1 - Repo Creation
Repo creation request
Request a new repo for your TECWorkshop (this will be referred to as your UserRepo)
Send an email to fortinetcloudcse@fortinet.com to request a new GitHub repo and Jenkins Pipeline. Providing the following:
Repo Name
GitHub Usernames of collaborators
Your Fortinet email address that you use to log in to FortiCloud
Behind the scenes, a script is used to create your TECWorkshop repo with appropriate protections, features, and collaborators. Additionally a Jenkins pipeline will be setup to monitor changes to the repo and run things like
publishing the website
FortiDevSec scanning. To facilitate this, administrators will send you an application id that you must paste into fdevsec.yaml in order for the scans to run and tests to pass. Jenkins tests must pass in order for your feature branch to be merged into the main branch.
Along with the FortiDevSec application id, you will also be sent an account number which you can use to navigate to the FortiDevSec console to view the results of your scan. To do so, head to FortiCloud and click IAM Login on the left hand side of the page. Enter the provided account number along with your FortiCloud login credentials.
{{}}
You will use this repo to create and modify MD chapters & tasks to create your workshop Guide in Hugo format.
Only Authorized collaborators and admins are allowed to push to repos in FortinetCloudCSE org
We require pushes be made to a feature branch
Upon push to feature branch:
Jenkins clones the repo into its workspace on EC2 and runs FortiDevSec Scan which performs
SAST Scan
check for vulnerabilities in code, 3rd party libraries, and libraries pulled into Dockerfile
secrets scan
IaC Scan for misconfig
GitHub Pages deploys only on the main branch.
Requirements for merging feature to main branch:
FortiDevSec Tests Pass
PR request submitted and approved by FortiCloudCSE admins (manual intervention)
Git repo setup
Once your TECWorkshop repo is created, clone the repo and change your working directory to the cloned repo
    git clone <provided link>
    cd <cloned repo directory>
The first thing you’ll want to do with the repo is create a Feature branch. There are branch protections in place on the repo preventing you from pushing to main, so you’ll have to follow our workflow described in Ch3
You only need to build the container when you’re starting development
Container rebuild is necessary when:
CentralRepo has changed
You removed/deleted the previously built container
Once Built, you can re-run the container whenever you wish to keep creating content and reviewing your Hugo site
Warning
You can choose your own container name and it MUST be lowercase only . Our example uses fortinet-hugo
Tip
The Full commands and explanation for building and running docker are listed below. We’ve also included a shell script in this repo to perform the build
./scripts/docker_build.sh [prod | dev]
use prod (Production) Container for everyday usage
use dev (Development) Container for testing changes to CentralRepo or other background items
docker build -t fortinet-hugo . --target=prod
Info
If you get build errors, check you’re on a recent version of docker and upgrade if necessary
The container image is a point-in-time Ubuntu OS including a Hugo installation and a copy of CentralRepo so your Hugo formatting/themes/branding will always be up-to-date
CentralRepo contains necessary files, directories, and Fortinet-specific customizations to configure Hugo, it won’t change often
‘–target=prod’: Prod is for general usage. We’re using a single Dockerfile for both dev and prod container images. Dev is used for testing changes to CentralRepo.
no need to clone/maintain Hugo “supporting files/directories”….your repo will be much larger and will get out-of-date quickly
same container can be used to preview and build EVERY TECWorkshop, and you could build/move it anywhere
no need to rename/modify Hugo’s public folder after builds
Task 3 - Run Container
Task 3: Run FortinetHugo container
Run the container with local disk mounts so you can review your markdown TECWorkshop Guide as you’re creating the content (repeat this procedure for any TECWorkshop you’re creating)
Tip: Simple container run
We’ve included a super simple shell script to run your container image with arguments
./scripts/docker_run.sh server [prod | dev]
Choose your CLI argument depending on what you want Hugo to do:
server argument to run Hugo’s interactive web server
shell to access the container CLI
build to perform a Hugo build
generate_toml to generate hugo.toml from parameters in scripts/repoConfig.json
update_scripts to update scripts to latest features
prod to use the Production container (for everyday usage with latest released container)
dev to use the Development container (for testing changes to Central Repo or other background items)
Full Container run command
  docker run --rm -it \
  -v $(pwd):/home/UserRepo \
  --mount type=bind,source=$(pwd)/hugo.toml,target=/home/CentralRepo/hugo.toml \
  -p 1313:1313 fortinet-hugo:latest server
‘-rm’ flag removes the container after it exits…freeing up resources
‘-it’ flag runs the container interactively providing prompt into the Container
‘-v’ flag creates a disk mount to the local file system available within the container OS
‘-p’ publishes container ports to the local OS (used to view the local Hugo Webserver)
CLI Options:
‘shell’ subcommand for Hugo container to access the shell directly
‘server’ subcommand for Hugo container to run the local/test webserver
‘build’ subcommand for Hugo container to build the static website, this is the default
the ‘shell argument runs the container and logs you into the container Alpine Linux OS CLI (general Linux commands will work, but this is a lean image so doesn’t include everything)
Note the $(pwd) in Container OS, and list files. You’ll see you have everything needed to create your Hugo site!
pwdls -la
Note
Notice the folders from your local repo are available in the container, from the disk mounts
/content
/layouts
hugo.toml
These disk mounts allow bidirectional read/write between container and local file system, and these disk mounts are the only directories that will be maintained when the container shuts down
Within the container shell, you can Run Hugo virtual server to get a live view of Hugo’s output
hugo server --contentDir /home/UserRepo/content --bind=0.0.0.0
In your local machine, browse to http://localhost:1313/UserRepo
You’ll see a template hugo site served by Hugo’s local webserver. Now you’re ready to proceed building your TECWorkshop content in the next chapter!
To exit out of the Container OS: use ’exit’ or CTRL+d
exit
Tip
We’re including some helpful docker commands here for reference. Use these if you’ve built LOTS of images and you need to get rid of the mess
Notes:
Inside the container, Central Repo (which is where we’ll make any template changes) is cloned and integrated with your repo.
Container (ideally) displays local version of Hugo site updating near real time as you create content
To run a container interactively (for troubleshooting or to see how they function)
Comment out any offending lines in the dockerfile
Build again using commands above.
to run the container interactively use the ‘-it’ flag:
docker run --rm -it fortinet-hugo:latest
Container outputs /public folder which is the result from “Hugo build”
This /public(/docs) folder can be hosted anywhere. We’ll still use GH Pages to host the actual page.
Useful Docker Commands to Know
docker images #List all imagesdocker ps -a #List all containers, both running and stoppeddocker rmi <image-id> #Remove an imagedocker rmi $(docker images -aq)#Remove all imagesdocker rmi $(docker images --filter dangling=true -aq)#Remove all images with tag <none>docker rm <container-id> #Remove a containerdocker rm $(docker ps -aq)#Remove all containersdocker builder prune #Remove build cache
When running any of the above commands, if you get an error message indicating an image or container is being used or referenced in another image or container, you can issue the ‘-f’ flag to force remove.
Upgrade Hugo - container and scripts Update
FYI - Upgrading Hugo and the container image
As a reminder, all the software we’re using in this CI/CD process is Open source, and there are active updates to Hugo and the reLearn theme periodically. As such, we may introduce new features and/or change how we work within this process.
To simplify the update process and not force you into the sausage making process, we have devised a scheme to update the container and scripts in each repo with minimal manual intervention.
This process is detailed below. Follow the tabs in order complete the upgrade (ON AN EXISTING REPO ONLY….this new process is built into any newly created repos)
Once you’ve done this conversion on an existing repo, you should periodically rebuild the container and run it with update_scripts to get any latest features
Rebuild Old Container
Start in the root of your repo directory
Rebuild your hugo container with the command below.
This pulls the latest versions if our customized scripts into the existing/“older” container image (running older Hugo version), allowing us to copy some of them back to your repo directory.
./scripts/docker_build.sh
Manually update Docker_run
Grab a copy of the latest docker run command scripts, located here
There are countless methods for getting this file, so choose your favorite. (e.g. download from gitHub, wget, copy/paste text)
Once you have the latest file, overwrite the docker_run.sh script in your repo with the latest version
scripts/docker_run.sh
Note
This is a chicken-and-egg problem. We have everything we need in the refreshed container, but we can’t run any of the new features bc our docker_run script is limited to whatever was available when your repo was cloned.
The new run command maps additional local directories to the container allowing us to make updates from the container in the future
Use container script to update the rest of your local scripts
Use the newly updated docker_run.sh script with update_scripts option to copy the latest scripts into your local environment/repo directory
./scripts/docker_run.sh update_scripts
This command performs the following:
From the Container OS/file system, copy the following files into your local environment
update the docker_tester_run script with latest command line options. The tester script is used for testing changes to CentralRepo and UserRepo before merging to main
docker_run.sh –> scripts/docker_run.sh
update the docker_run script with latest command line options
update GitHub action to reflect latest docker run commands
Dockerfile –> Dockerfile
update Dockerfile to use latest container image and any installed packages
IF THERE IS NO repoConfig.json file in scripts/
repoConfig.json –> scripts/repoConfig.json
We don’t overwrite this file if it’s already there :)
Echo ‘venv/’ to .gitignore
ignore Python virtual envs created during generate_toml
Tip
The most important update is to Dockerfile, which now uses a new base container image featuring rolling upgrades to Hugo. Our old container image was no longer actively supported, so it wasn’t getting the latest Hugo updates.
All the rest of the updates are supporting cast to streamline our scripts, and to simplify future modifications as necessary.
Build New Container
Now that you have the latest Dockerfile (which directs your docker build command to use a new Container image with updated Hugo), we need to re-build the container again:
./scripts/docker_build.sh
The previous container image we were using which included Hugo was no longer maintained, so we had to switch to a new one. We also install python on the container for use in the next step!
Generate hugo.toml file
Due to the nature of Open source software, sometimes there are breaking changes. In this instance, Hugo is deprecating usage of the config.toml file in favor of a new file named Hugo.toml
Additionally, as part of the upgrade, we needed to modify some parameters in the file, so we took the opportunity to use a Jinaj2 template to generate the file for with proper parameters
This also allows us the ability to update the template in the future and re-generate hugo.toml as necessary
Rather than modify Hugo.toml directly, we will now maintain a JSON configuration file /scripts/repoConfig.json
Update scripts/repoConfig.json with parameters for your workshop
Run the container with generate_toml option
every time you run this command, a new hugo.toml file will be generated
./scripts/docker_run.sh generate_toml
example of repoConfig.toml. Replace each value with specific parameters for your repo prior to using the generate_toml script:
Congratulations! You’ve updated everything required to use the latest Hugo version. Now all you need to do is run the container with server command like normal:
./scripts/docker_run.sh server
Container Flow Visual
ContainerFlow.html
Optional - Install Hugo
Tip
Hugo is installed on the container so it’s best to use it there. These instructions are included for legacy learning purposes
Hugo Local install
If you’re using a Mac, run the following brew install from your terminal
brew install hugo
If you’re using Windows, install chocolatey for windows (follow directions here). Once installed run the following
choco install hugo -confirm
Run Hugo webserver locally to see a local version of the rendered website
From within the root of the repo you copied onto your system
hugo server
Click on the URL presented after the above command finishes to view a local version of your first Hugo formatted website
{{}}
Clone Central Repo if not using a container
Because you’re not using a container, you need to clone and maintain fresh copy of CentralRepo
When you’re ready to perform a final ‘hugo build’ on your site, be sure to use the ‘-d’ flag to write files back into your UserRepo
hugo --minify -d $(PWD)/../UserRepo/docs --contentDir $(PWD)/../UserRepo/content --config $(PWD)/../UserRepo/hugo.toml --cleanDestinationDir
Warning
The examples and sample code provided in this workshop are intended to be consumed as instructional content. These will help you understand how various Fortinet services can be architected to build a solution while demonstrating best practices along the way. These examples are not intended for use in production environments without full understanding of how they operate.
Background Procedures - CentralRepo Maintenance
CentralRepo
CentralRepo contains all of the stuff Hugo needs to build a static website, including Fortinet Customizations to themes.
How it’s used
Generally TEC Program participants creating content for Workshops, Demos, User Cases, or Spotlights don’t need to worry about Central Repo at all
When you build your container, it inherently grabs the latest copy of CentralRepo:main from github, via this command in Dockerfile:
Upon successful testing, Fortinet Cloud CSE team will merge the branch to main and close PR
    git checkout prreviewJune23
    git remote add <PR label> <remote Github ssh URL>
    git pull <PR label>

    <PERFORM TESTIGN ON CONTAINER, and make any changes as necessary on this branch>

    <UPON SUCCESSFUL TESTING>
    git checkout main
    git merge prreviewJune23 --ff-only
    git push

    <Manually Close PR>