Task 2 - Use Netcat to interact with Application
| Goal | Learn how to use netcat to craft http requests |
| Task | Use netcat to interact with our simple application by using form data and json. We will monitor network behavior using Wireshark. |
| Verify task completion | If entered properly, the flask application will return data, as highlighted below |
According to the “manpage”: netcat is a simple unix utility which reads and writes data across network connections, using TCP or UDP protocol. It is designed to be a reliable “back-end” tool that can be used directly or easily driven by other programs and scripts. At the same time, it is a feature-rich network debugging and exploration tool, since it can create almost any kind of connection you would need and has several interesting built-in capabilities. Netcat, or “nc” as the actual program is named, should have been supplied long ago as another one of those cryptic but standard Unix tools.
We will be using Netcat to craft a series of HTTP calls to our flask application and observing the resulting actions. We are using “localhost” as our destination because we are executing NC from the same Kali Linux instance that’s hosting the Flask Web App, but it could just as easily use a public URL.
Make your first web call
For this first example, we want to use Wireshark to watch the interaction between netcat and the Flask web server.
In wireshark, select Loopback:lo as the interface and enter
host 127.0.0.1 and port 8000into the capture filter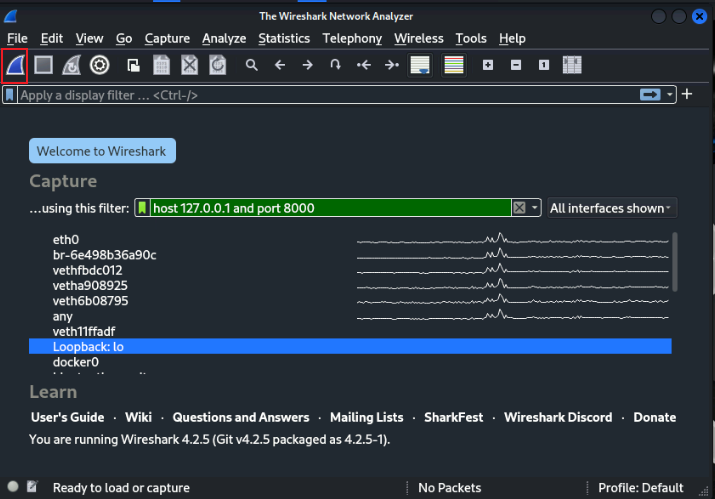
Warning
Please take care when entering the commands below. Please enter the commands one line at a time, and be sure to hit enter twice after each web command.
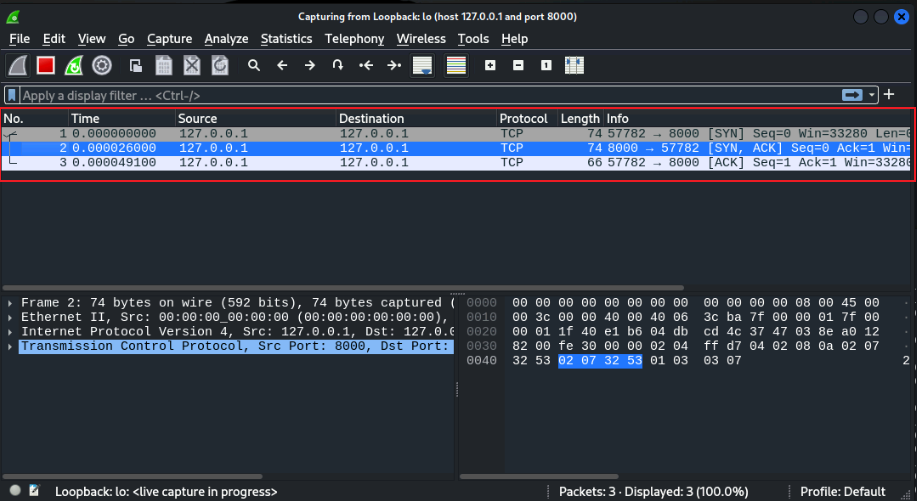
For Example:

1. Open the TCP 3-way handshake and wait for the return

```
nc localhost 8000 -vvv
```

2. Enter the HTTP request

```
GET /hello HTTP/1.1
```

3. _**Hit enter 2 times**_
From the 2nd ssh session terminal to Kali Linux, let’s start the tcp connection
nc localhost 8000 -vvvThe resulting Wireshark capture should show us the TCP three-way handshake
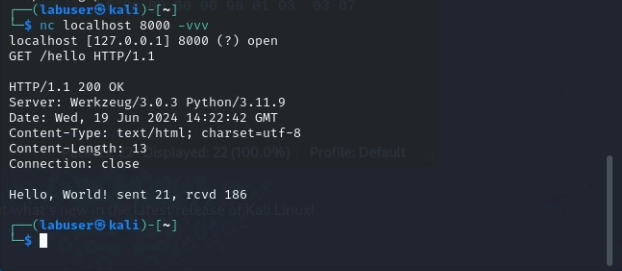
Now let’s finish the call by adding L7 components
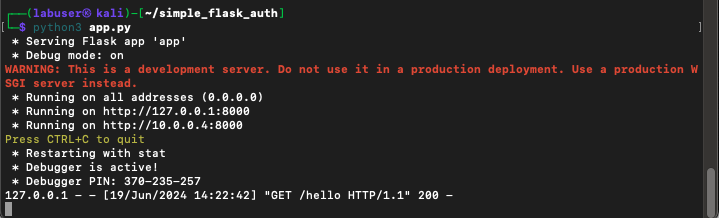
GET /hello HTTP/1.1
<hit enter again>
You should see some response headers returned as well as the programmed response from the app. We can see the 200 OK status, meaning that our application is actually working, and we requested a valid resource.
Now we can look back at Wireshark and see the rest of the traffic associated with this call.

Info
We can see the underlying HTTP in this Wireshark capture because we are not using Secure HTTP (TLS or Quic) If this traffic were encrypted using TLS, we would only see TCP and TLS
Tip
We also get some other useful information about the application, including the Application server software as well as the python version used. Generally speaking the less information potential attackers have about your application, the better. If this information is exposed, it is imperative to ensure that servers are appropriately patched.
Take a look back at the terminal where you originally started the Flask application. You should see your first debug message.
Method Not Allowed
In our first call above, we used the GET method against http://localhost:8000/hello. Let’s try the same thing against a different resource
nc localhost 8000 -vvvGET /login HTTP/1.1 <hit enter again>- Click here for example
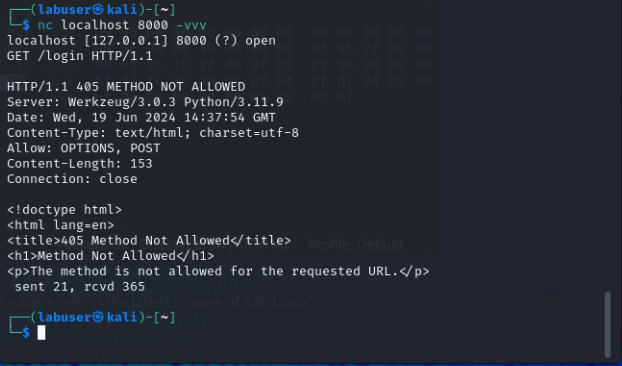
As you can see, we got the Method Not Allowed (405) error. In the example output, you can see that we only allow POST and OPTIONS methods for the /login resource.
Form Data
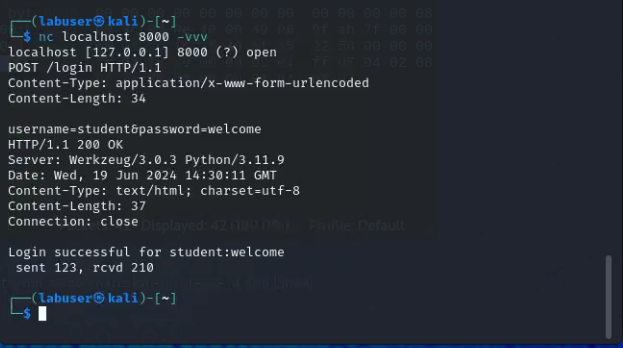
The FormData interface provides a way to construct a set of key/value pairs representing form fields and their values. Formdata is useful if the client does not support Javascript, or in a situation where it is desirable to send binary data without text encoding. For This step, we are going to set the “Content-Type” to x-www-form-urlencoded and then add key/values for username and password.
nc localhost 8000 -vvvPOST /login HTTP/1.1
Content-Type: application/x-www-form-urlencoded
Content-Length: 34
username=student&password=welcomeClick here for example
JSON
JavaScript Object Notation (JSON) is a text-based format for representing and exchanging data that is both human and machine-readable. It is often used in web applications, but can be used independently from JavaScript and in any programming language. JSON is popular with developers because it is lightweight, easy to parse and generate, and requires less coding. For This step, we are going to set the “Content-Type” to json and then add key/values for username and password in a simple JSON string.
For more information about JSON, click on this link.
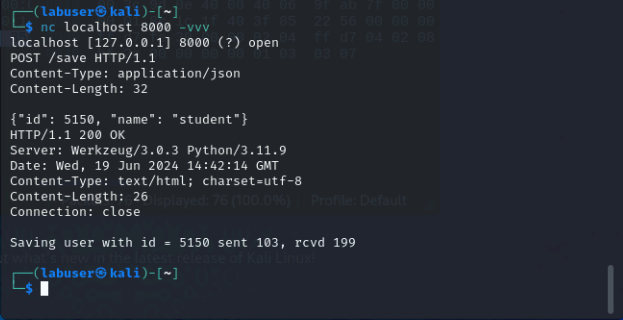
nc localhost 8000 -vvvPOST /save HTTP/1.1
Content-Type: application/json
Content-Length: 32
{"id": 5150, "name": "student"}Click here for example