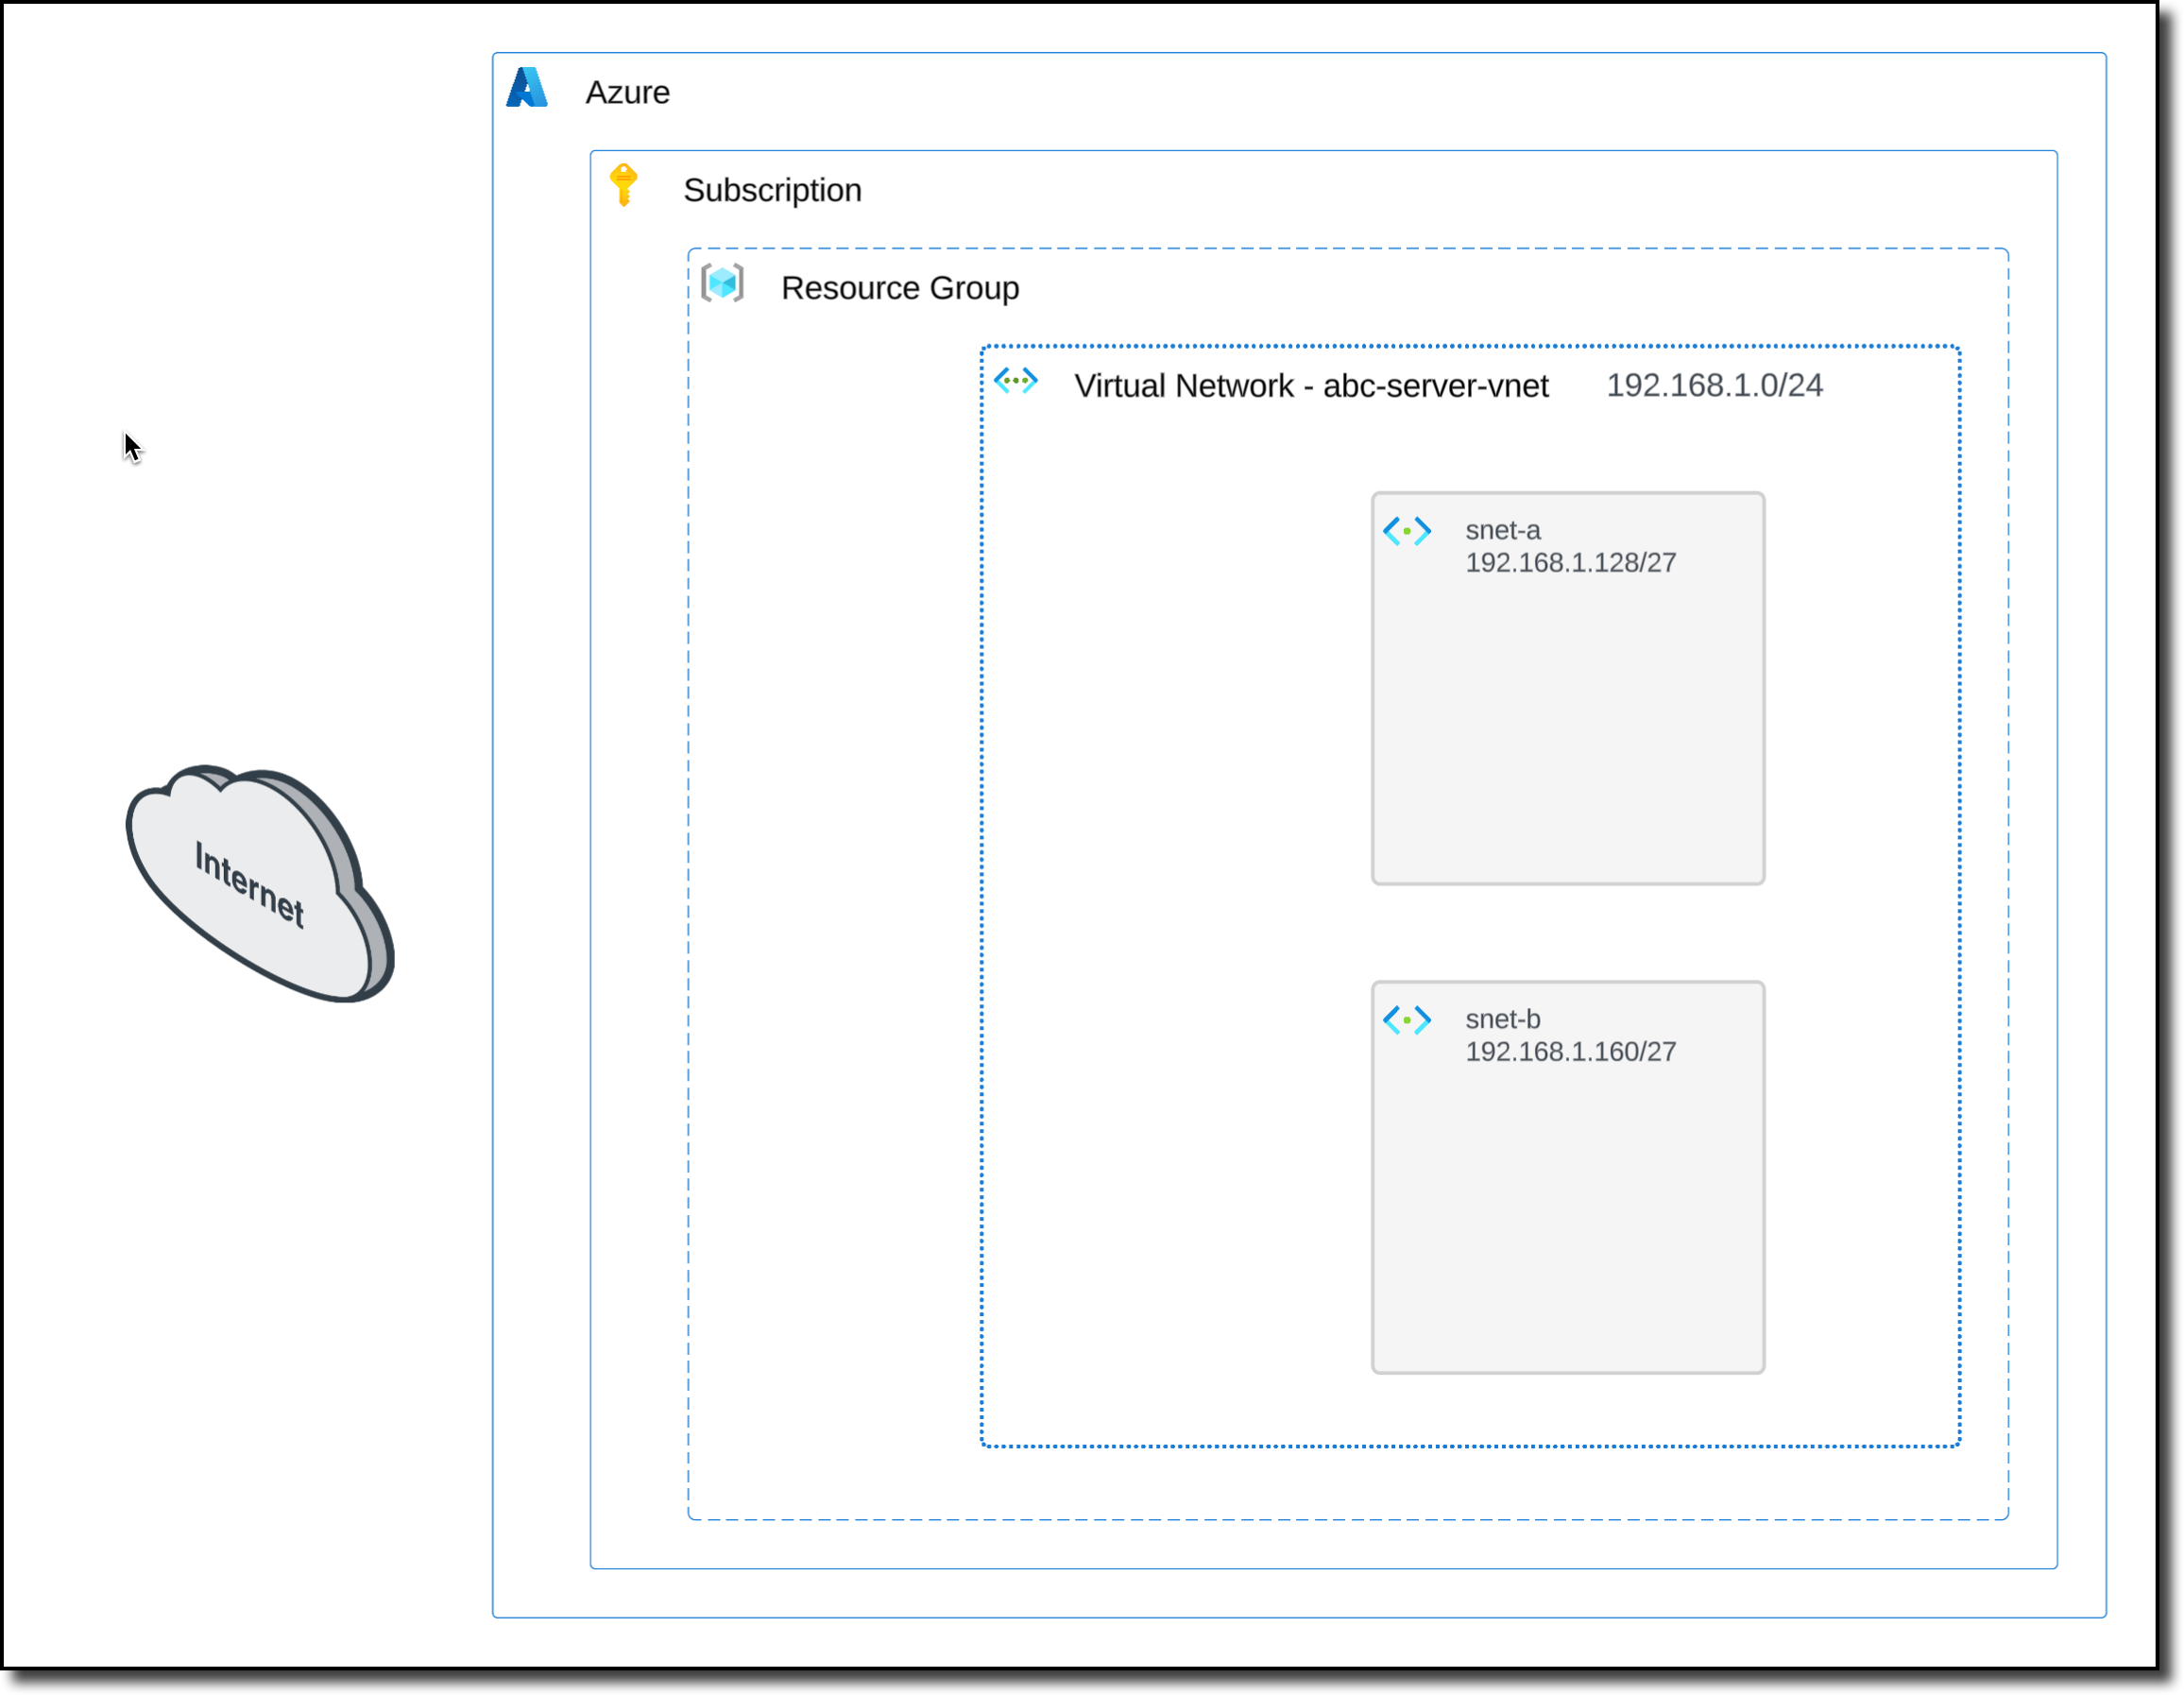
Task 1: Deploy an Azure Virtual Network (VNET)
Deploy a VNET (Virtual Network) in the assigned workshop Resource Group.
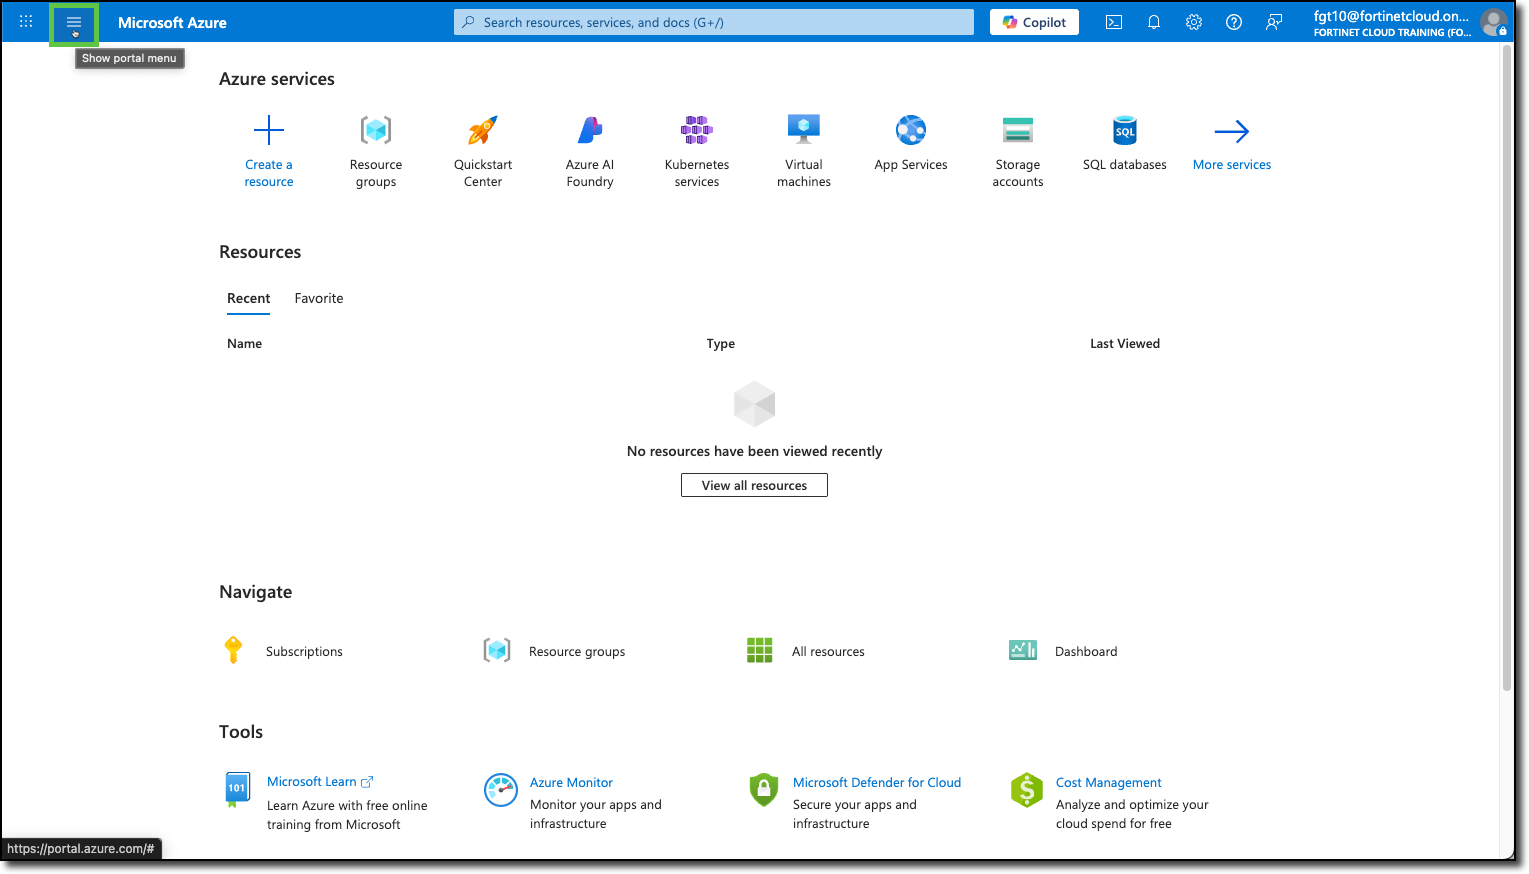
Click the Hamburger menu in the upper-left corner of the Azure Portal to show the “Portal Menu”
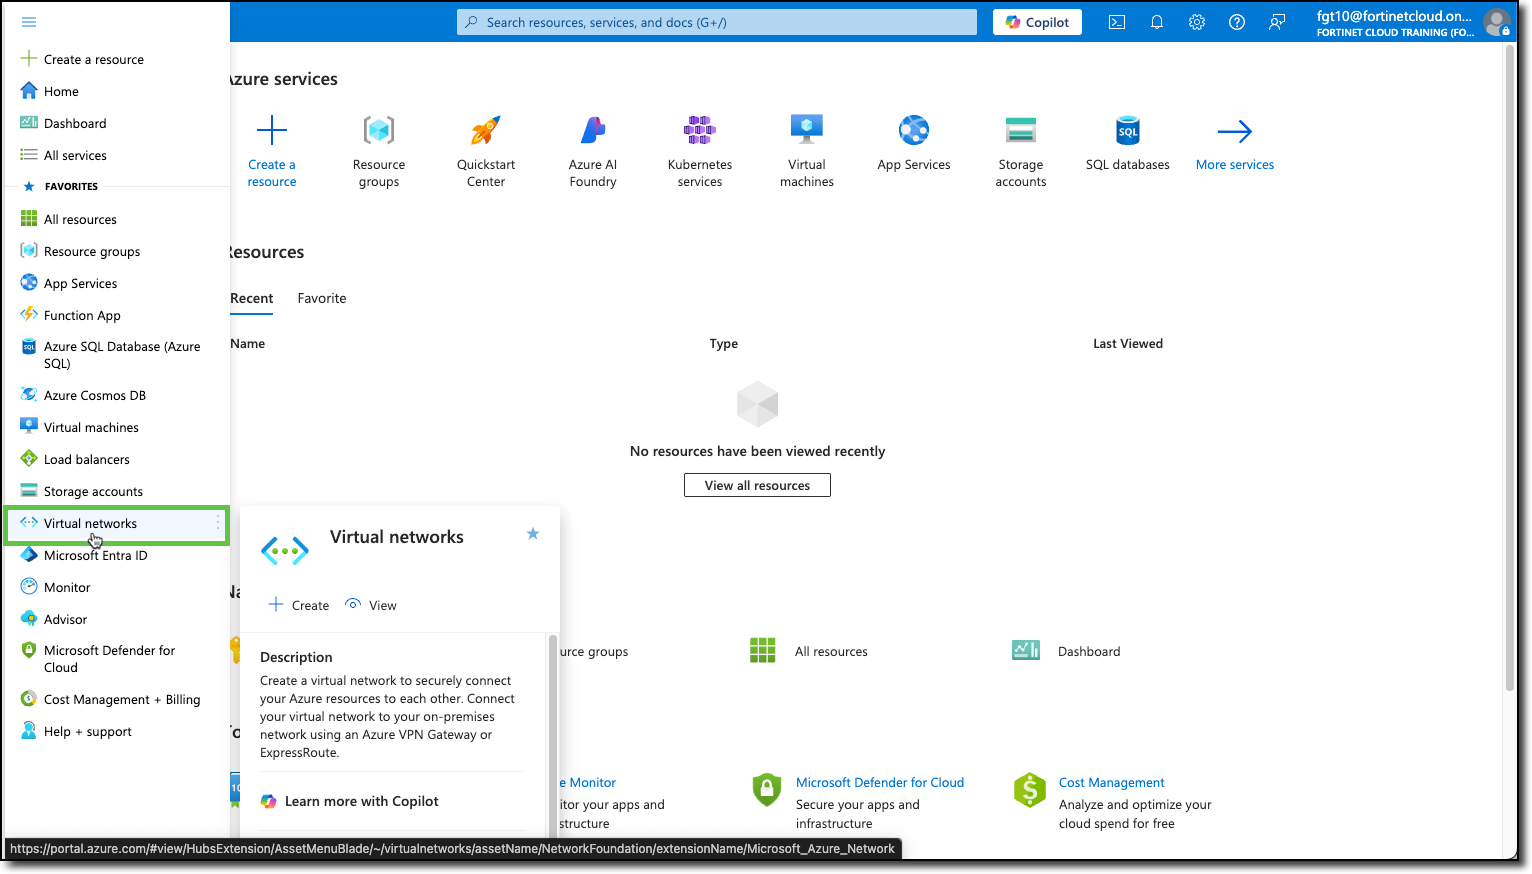
Click “Virtual networks”
Click “+ Create”
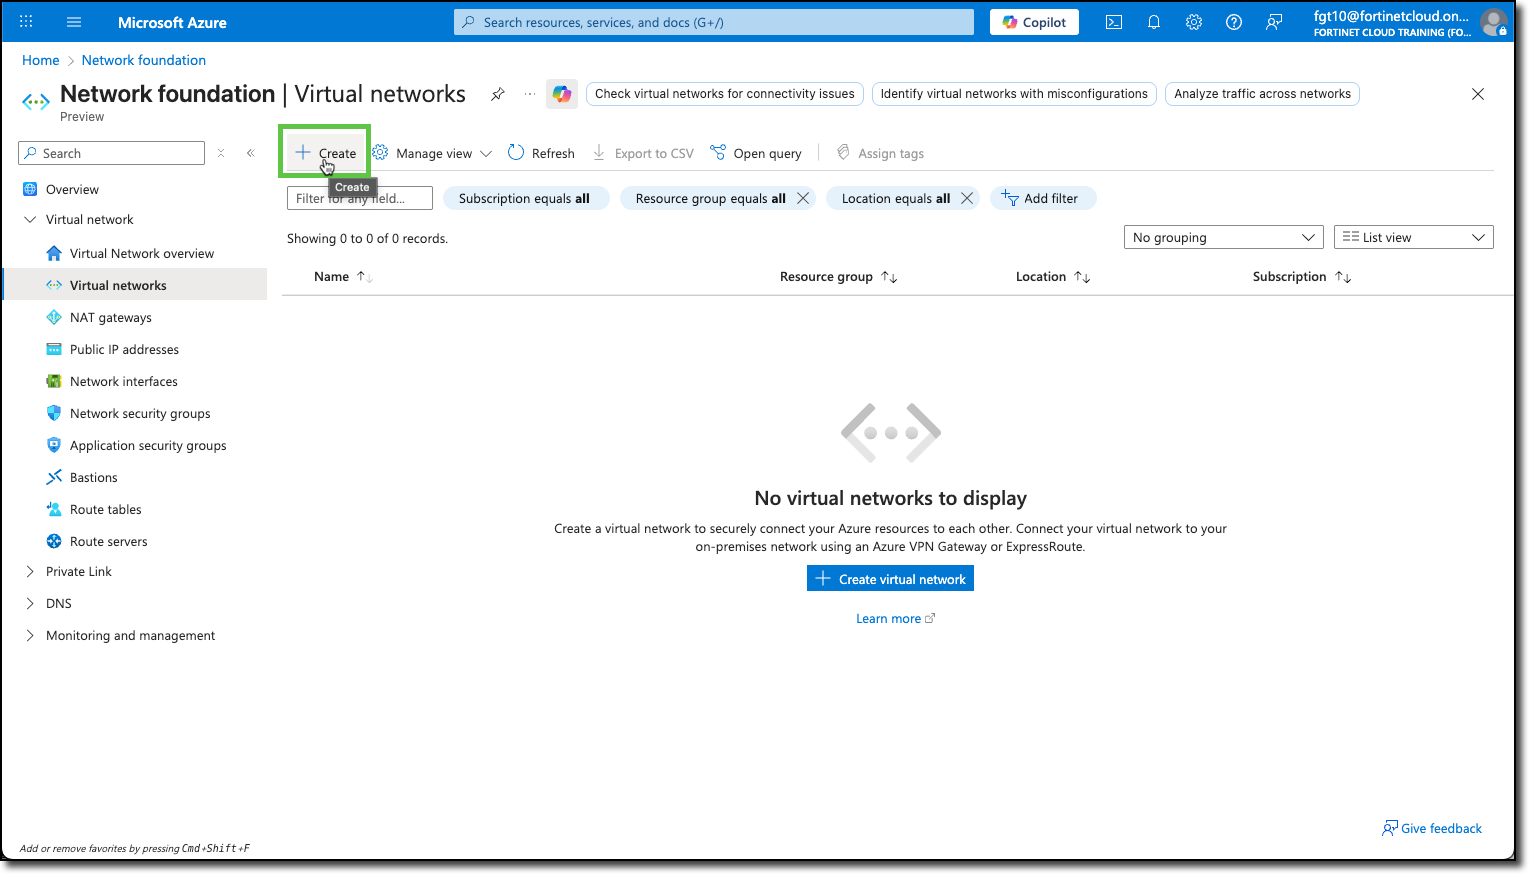
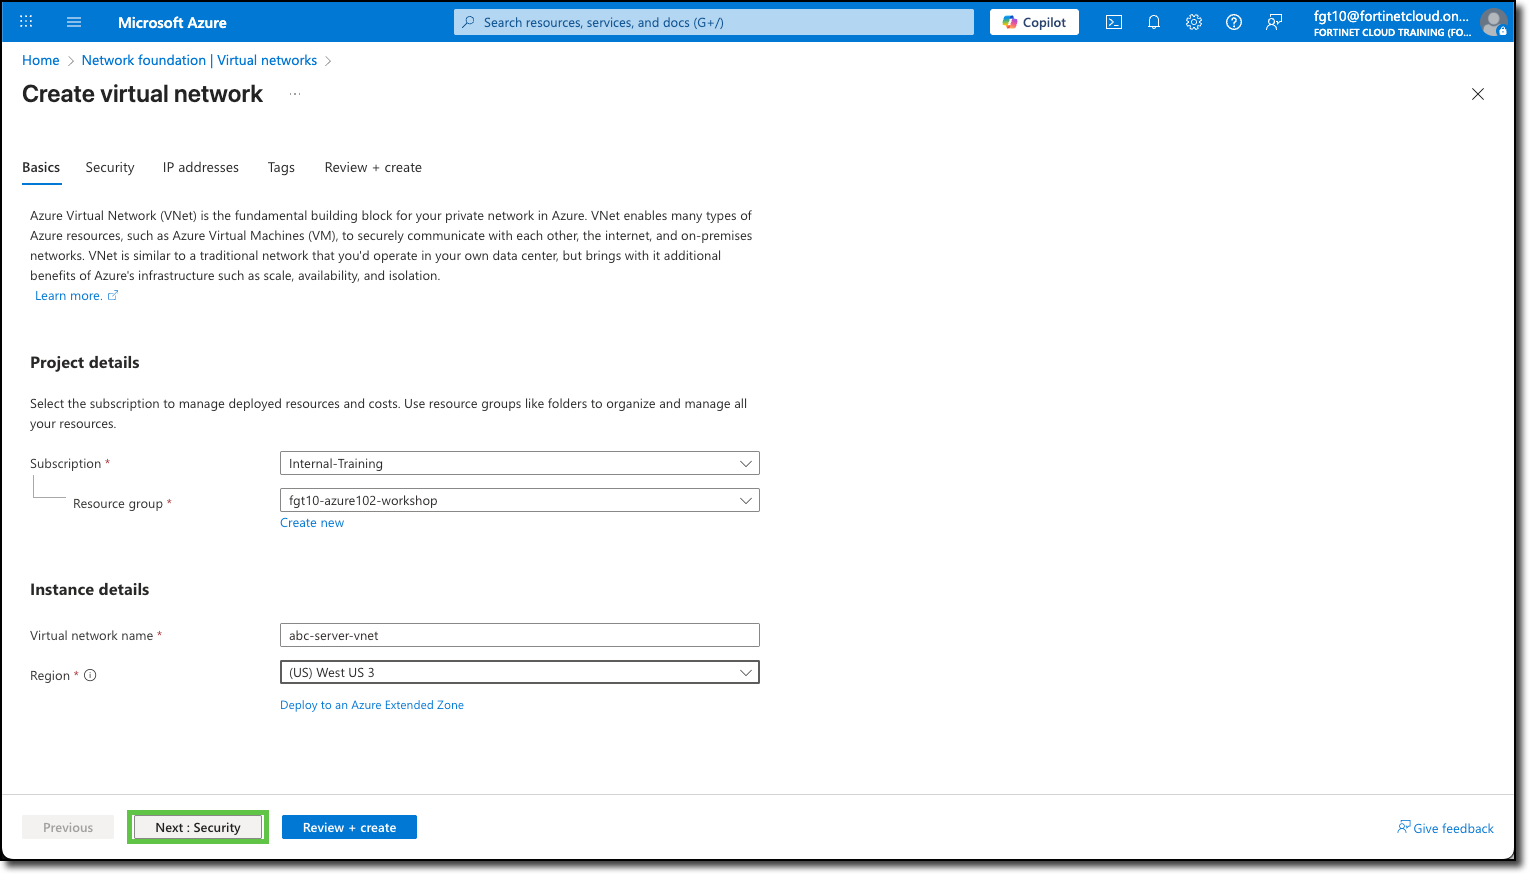
You will be redirected to the Create virtual network template.
Under the Basics tab, the Subscription and Resource Groups may already be filled in with your assigned info. If not, see the screenshot below for details.
In the Instance details section, enter the following:
- Virtual network name:
abc-server-vnet - Region: (US) West US 3
- Virtual network name:
Click “Next : Security”
On the Security tab, ensure none of the services are selected - Feel free to read through the available services that can be enabled.
Click “Next : IP addresses”
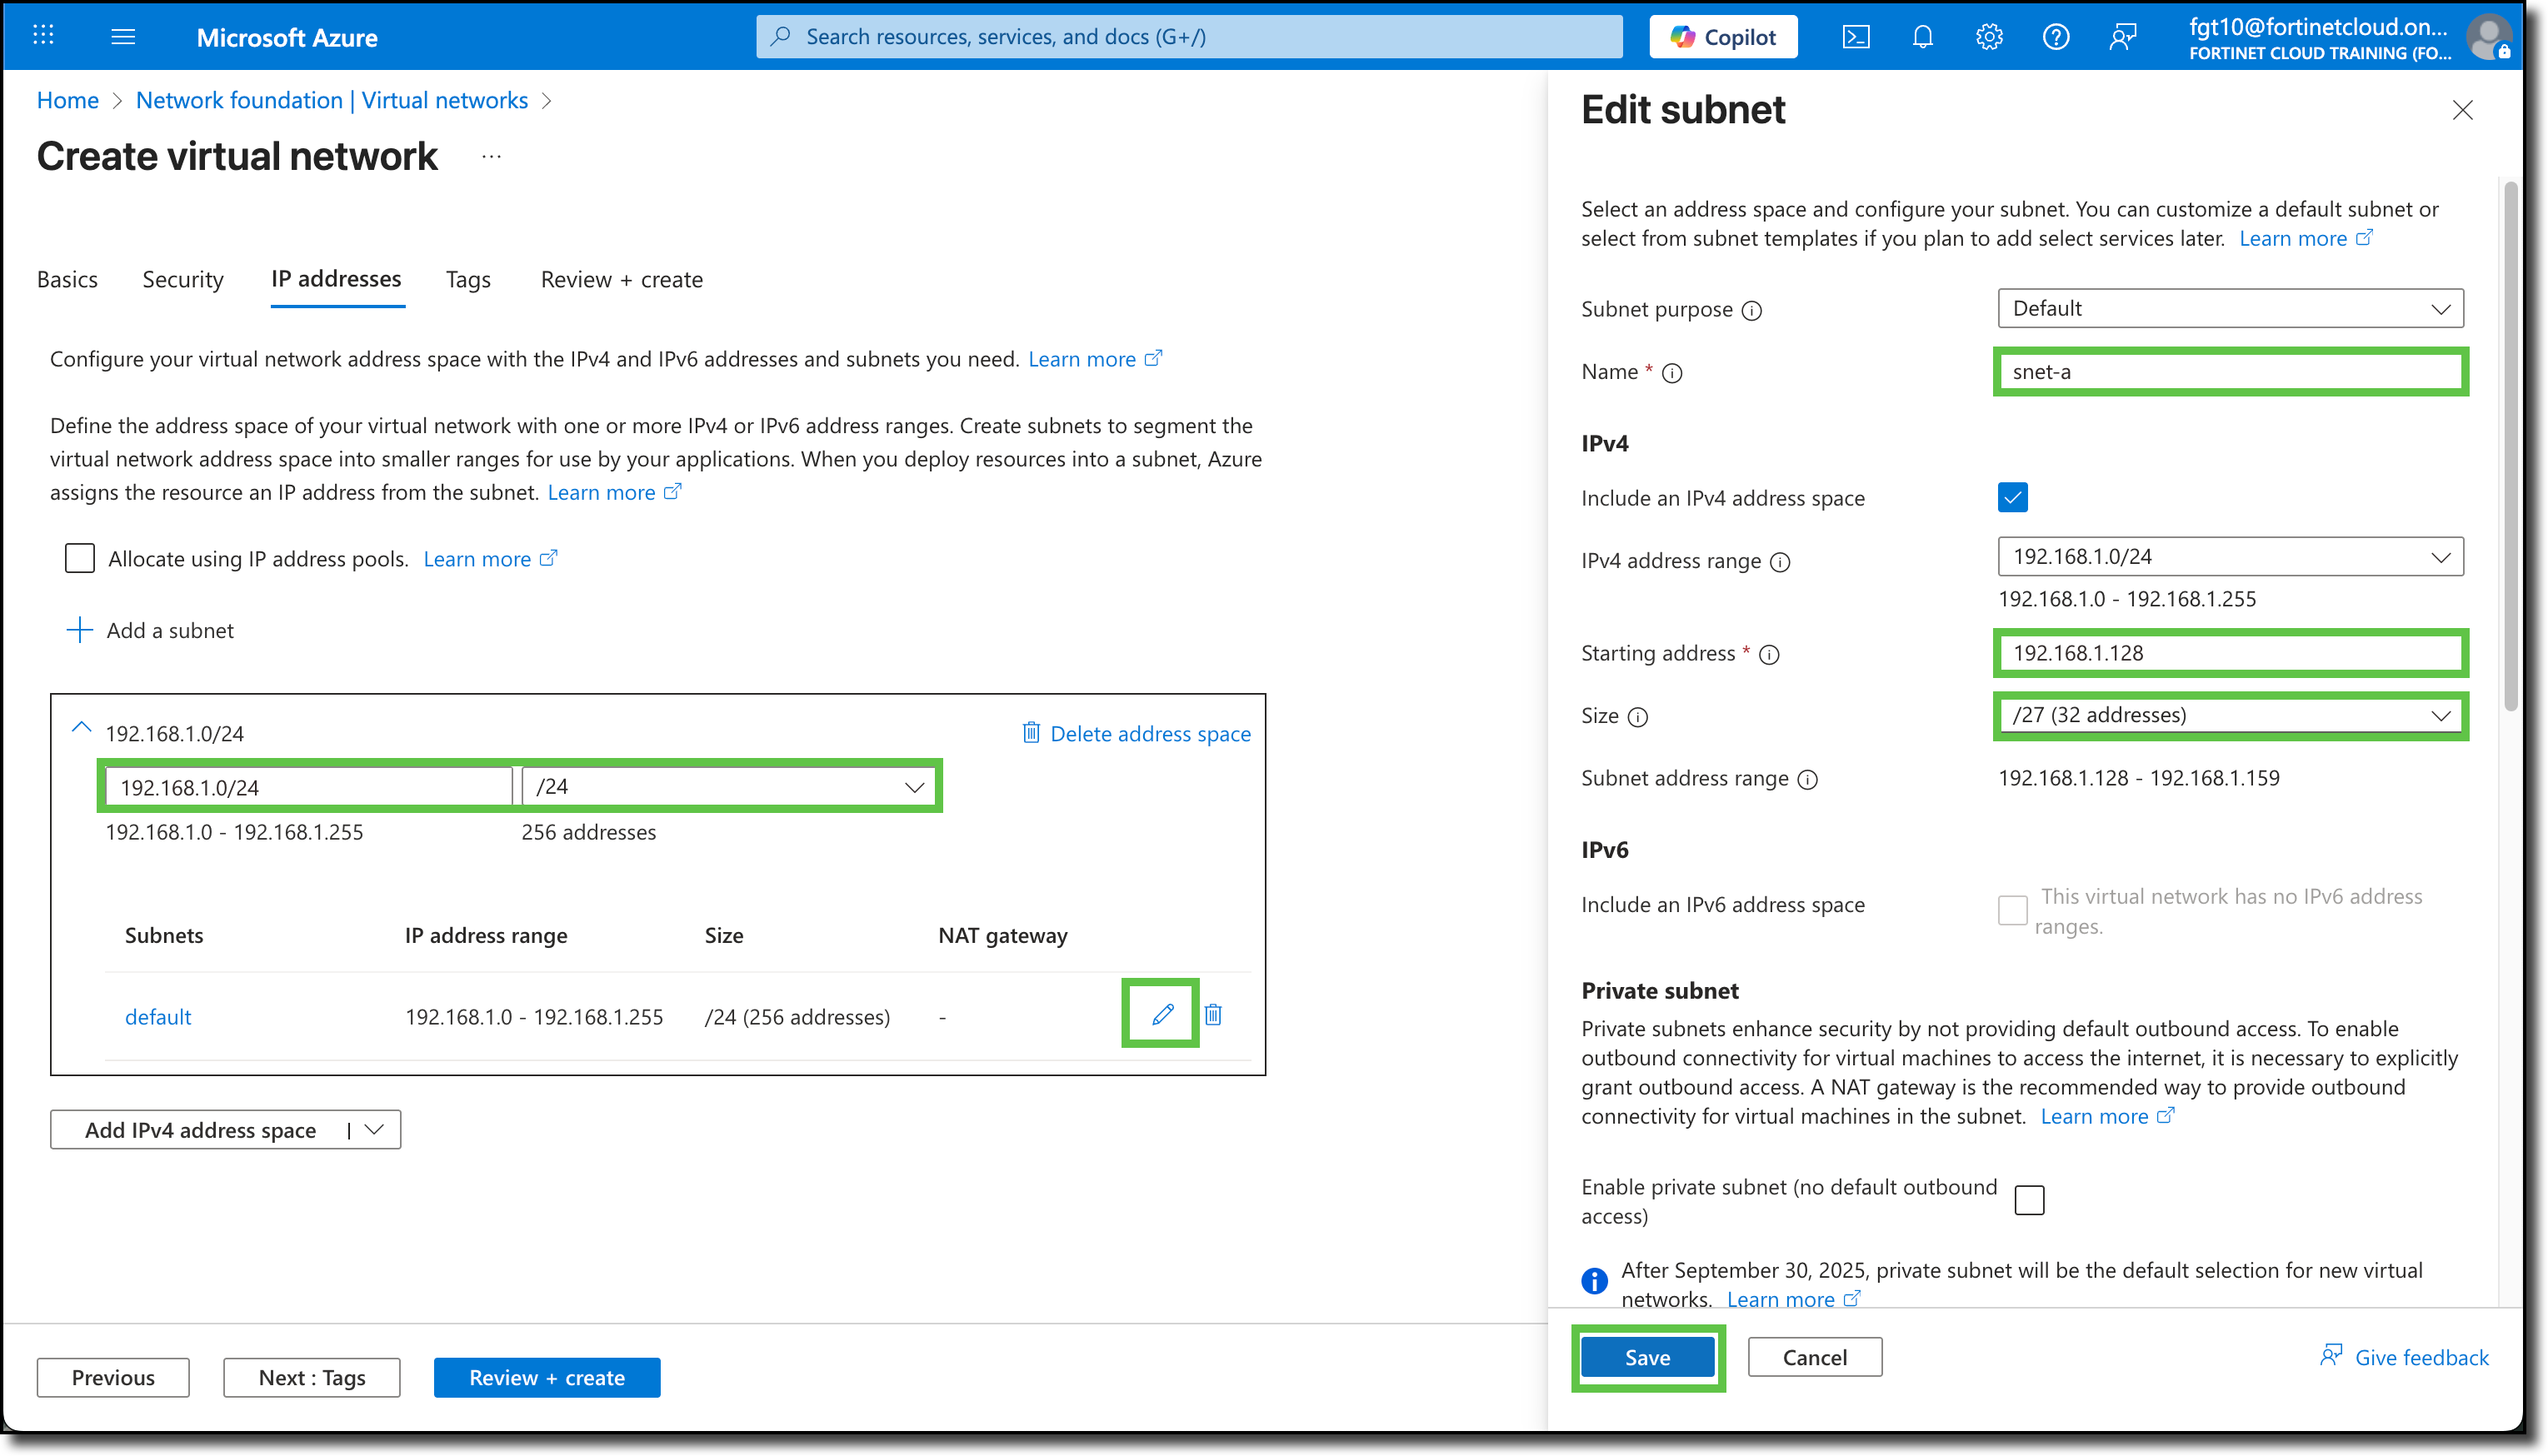
Edit the default address space, change to
192.168.1.0/24Click The pencil icon to the right of the “default” subnet, in the new window to the right, update the following settings:
- Name:
snet-a - Starting address:
192.168.1.128 - Size: /27
- Click Save
- Name:
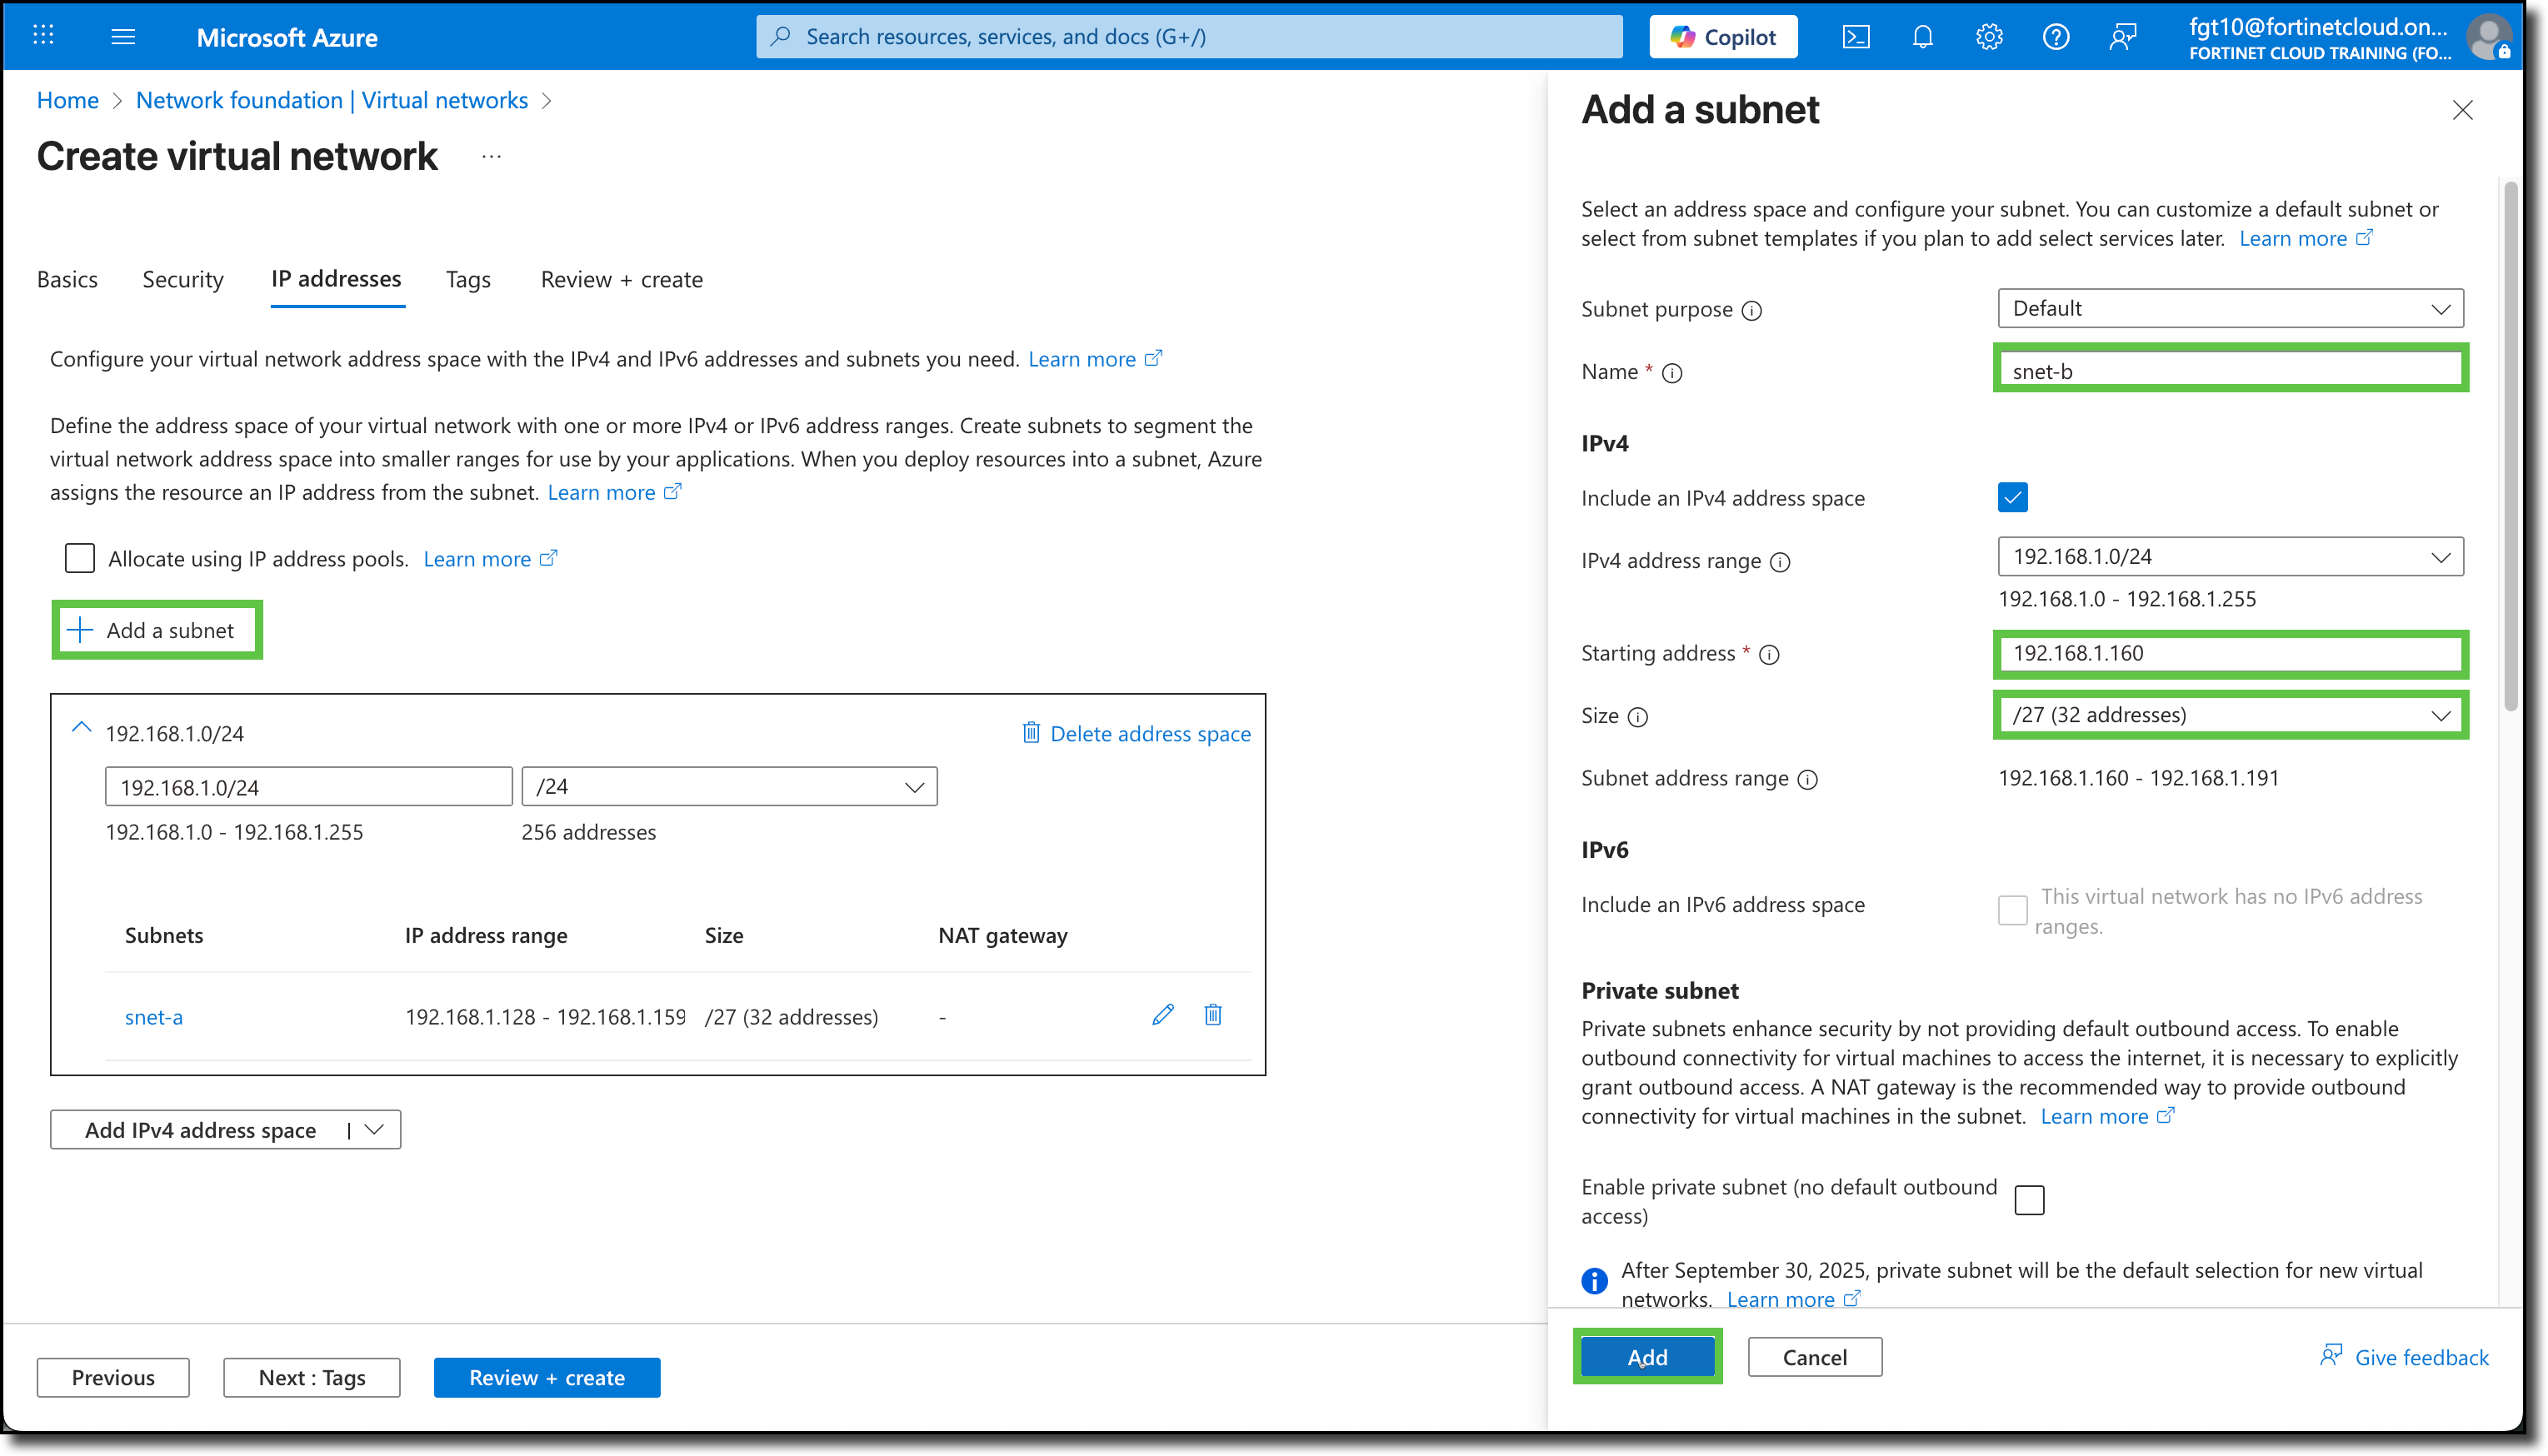
Click “+ Add a subnet” add the following subnet:
- Name:
snet-b - Starting address:
192.168.1.160 - Size: /27
- Click Add
- Name:
Click “Review + create”
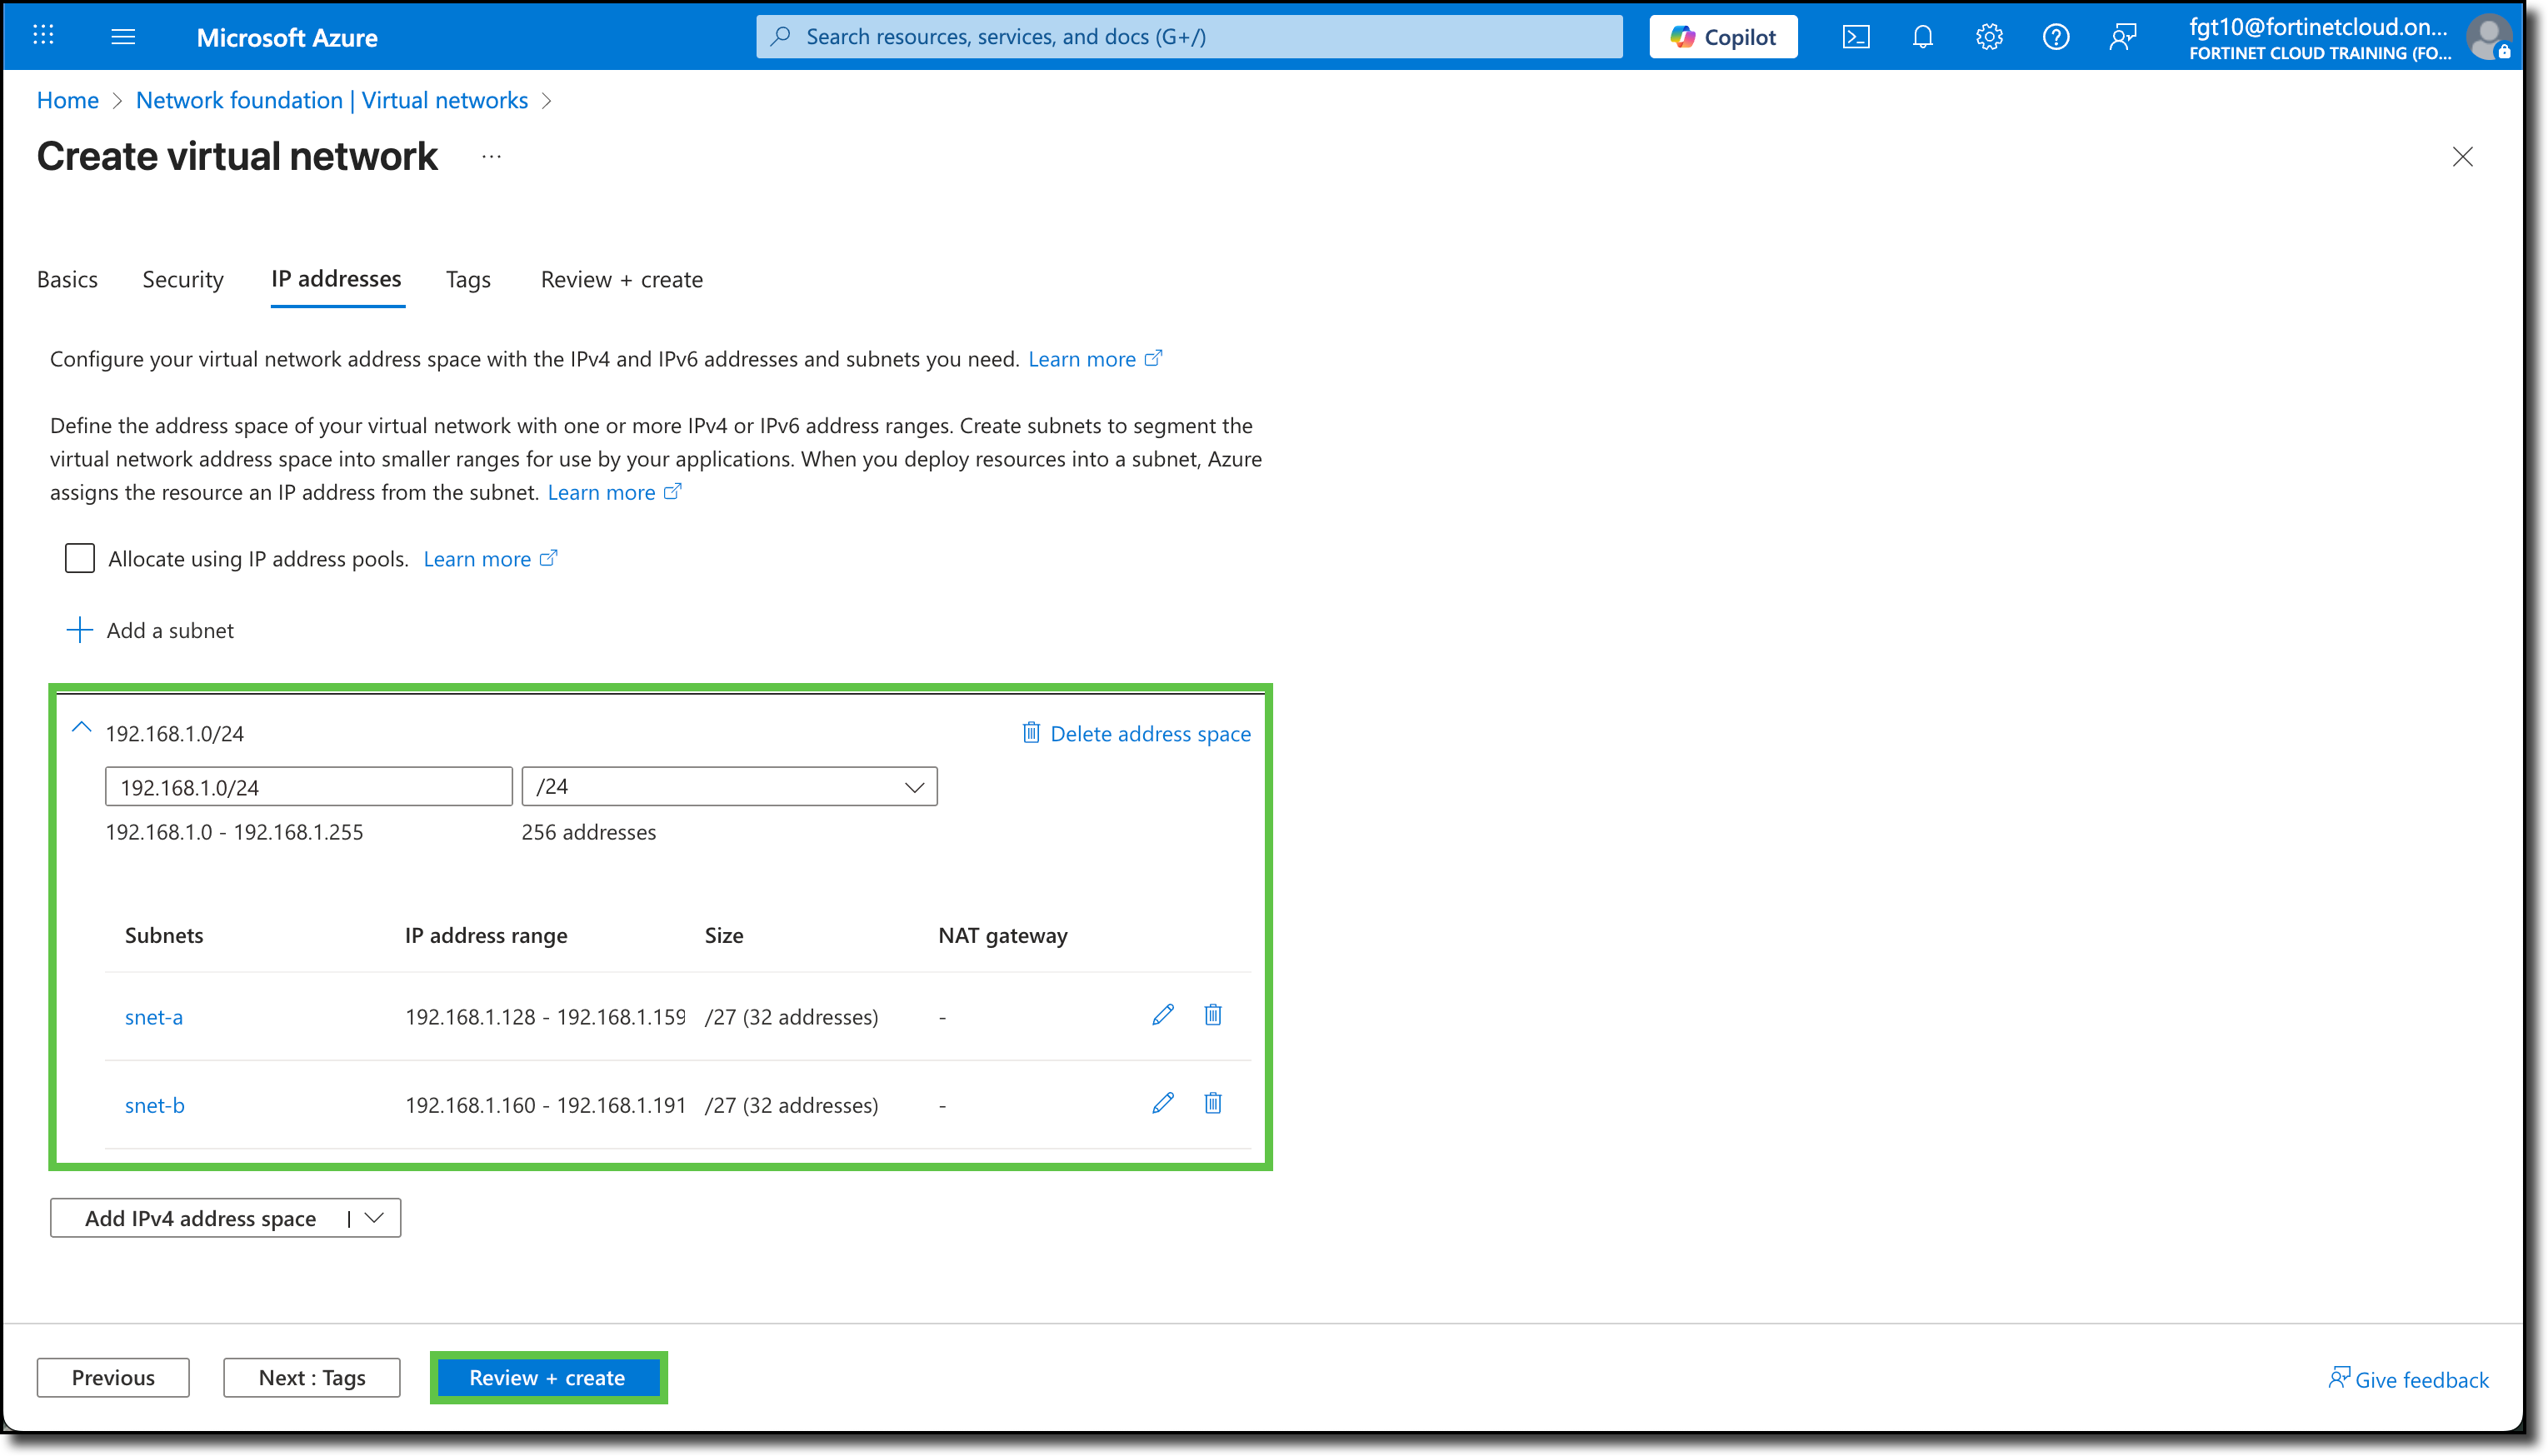
Confirm the settings
Click “Create”

Click your Resource Group link, When the deployment is complete
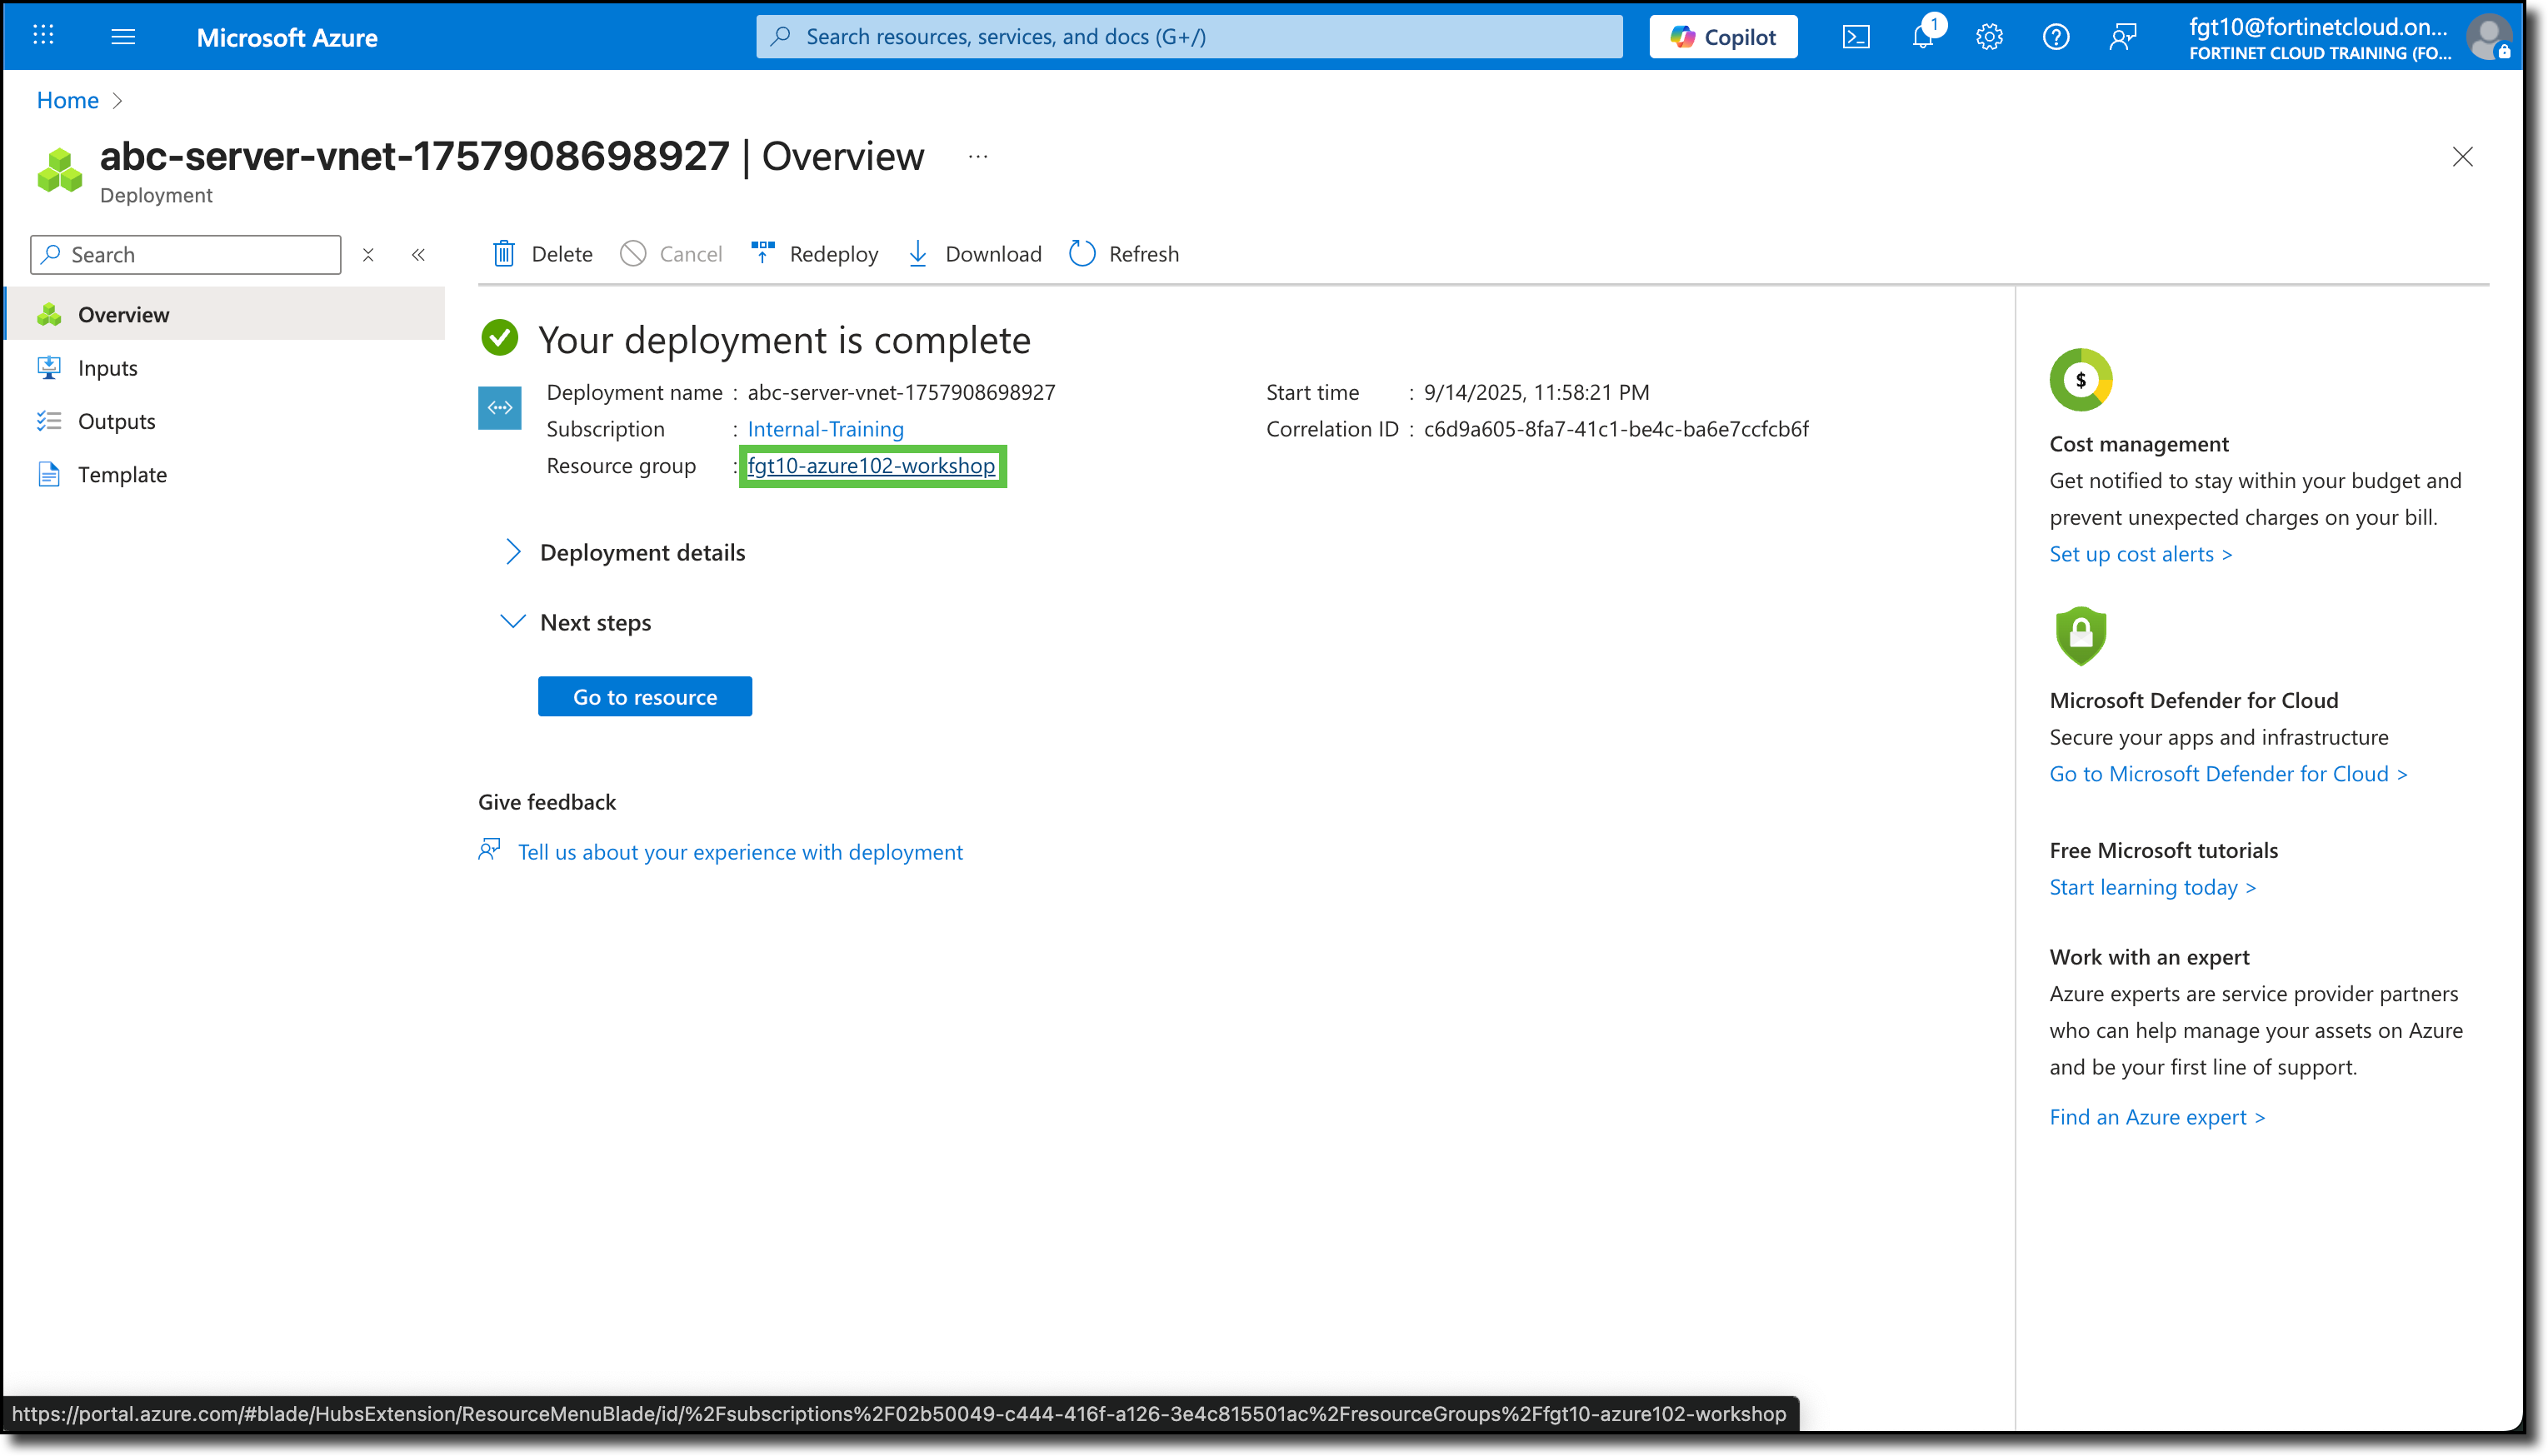
Your Resource Group should now have a VNET named abc-server-vnet
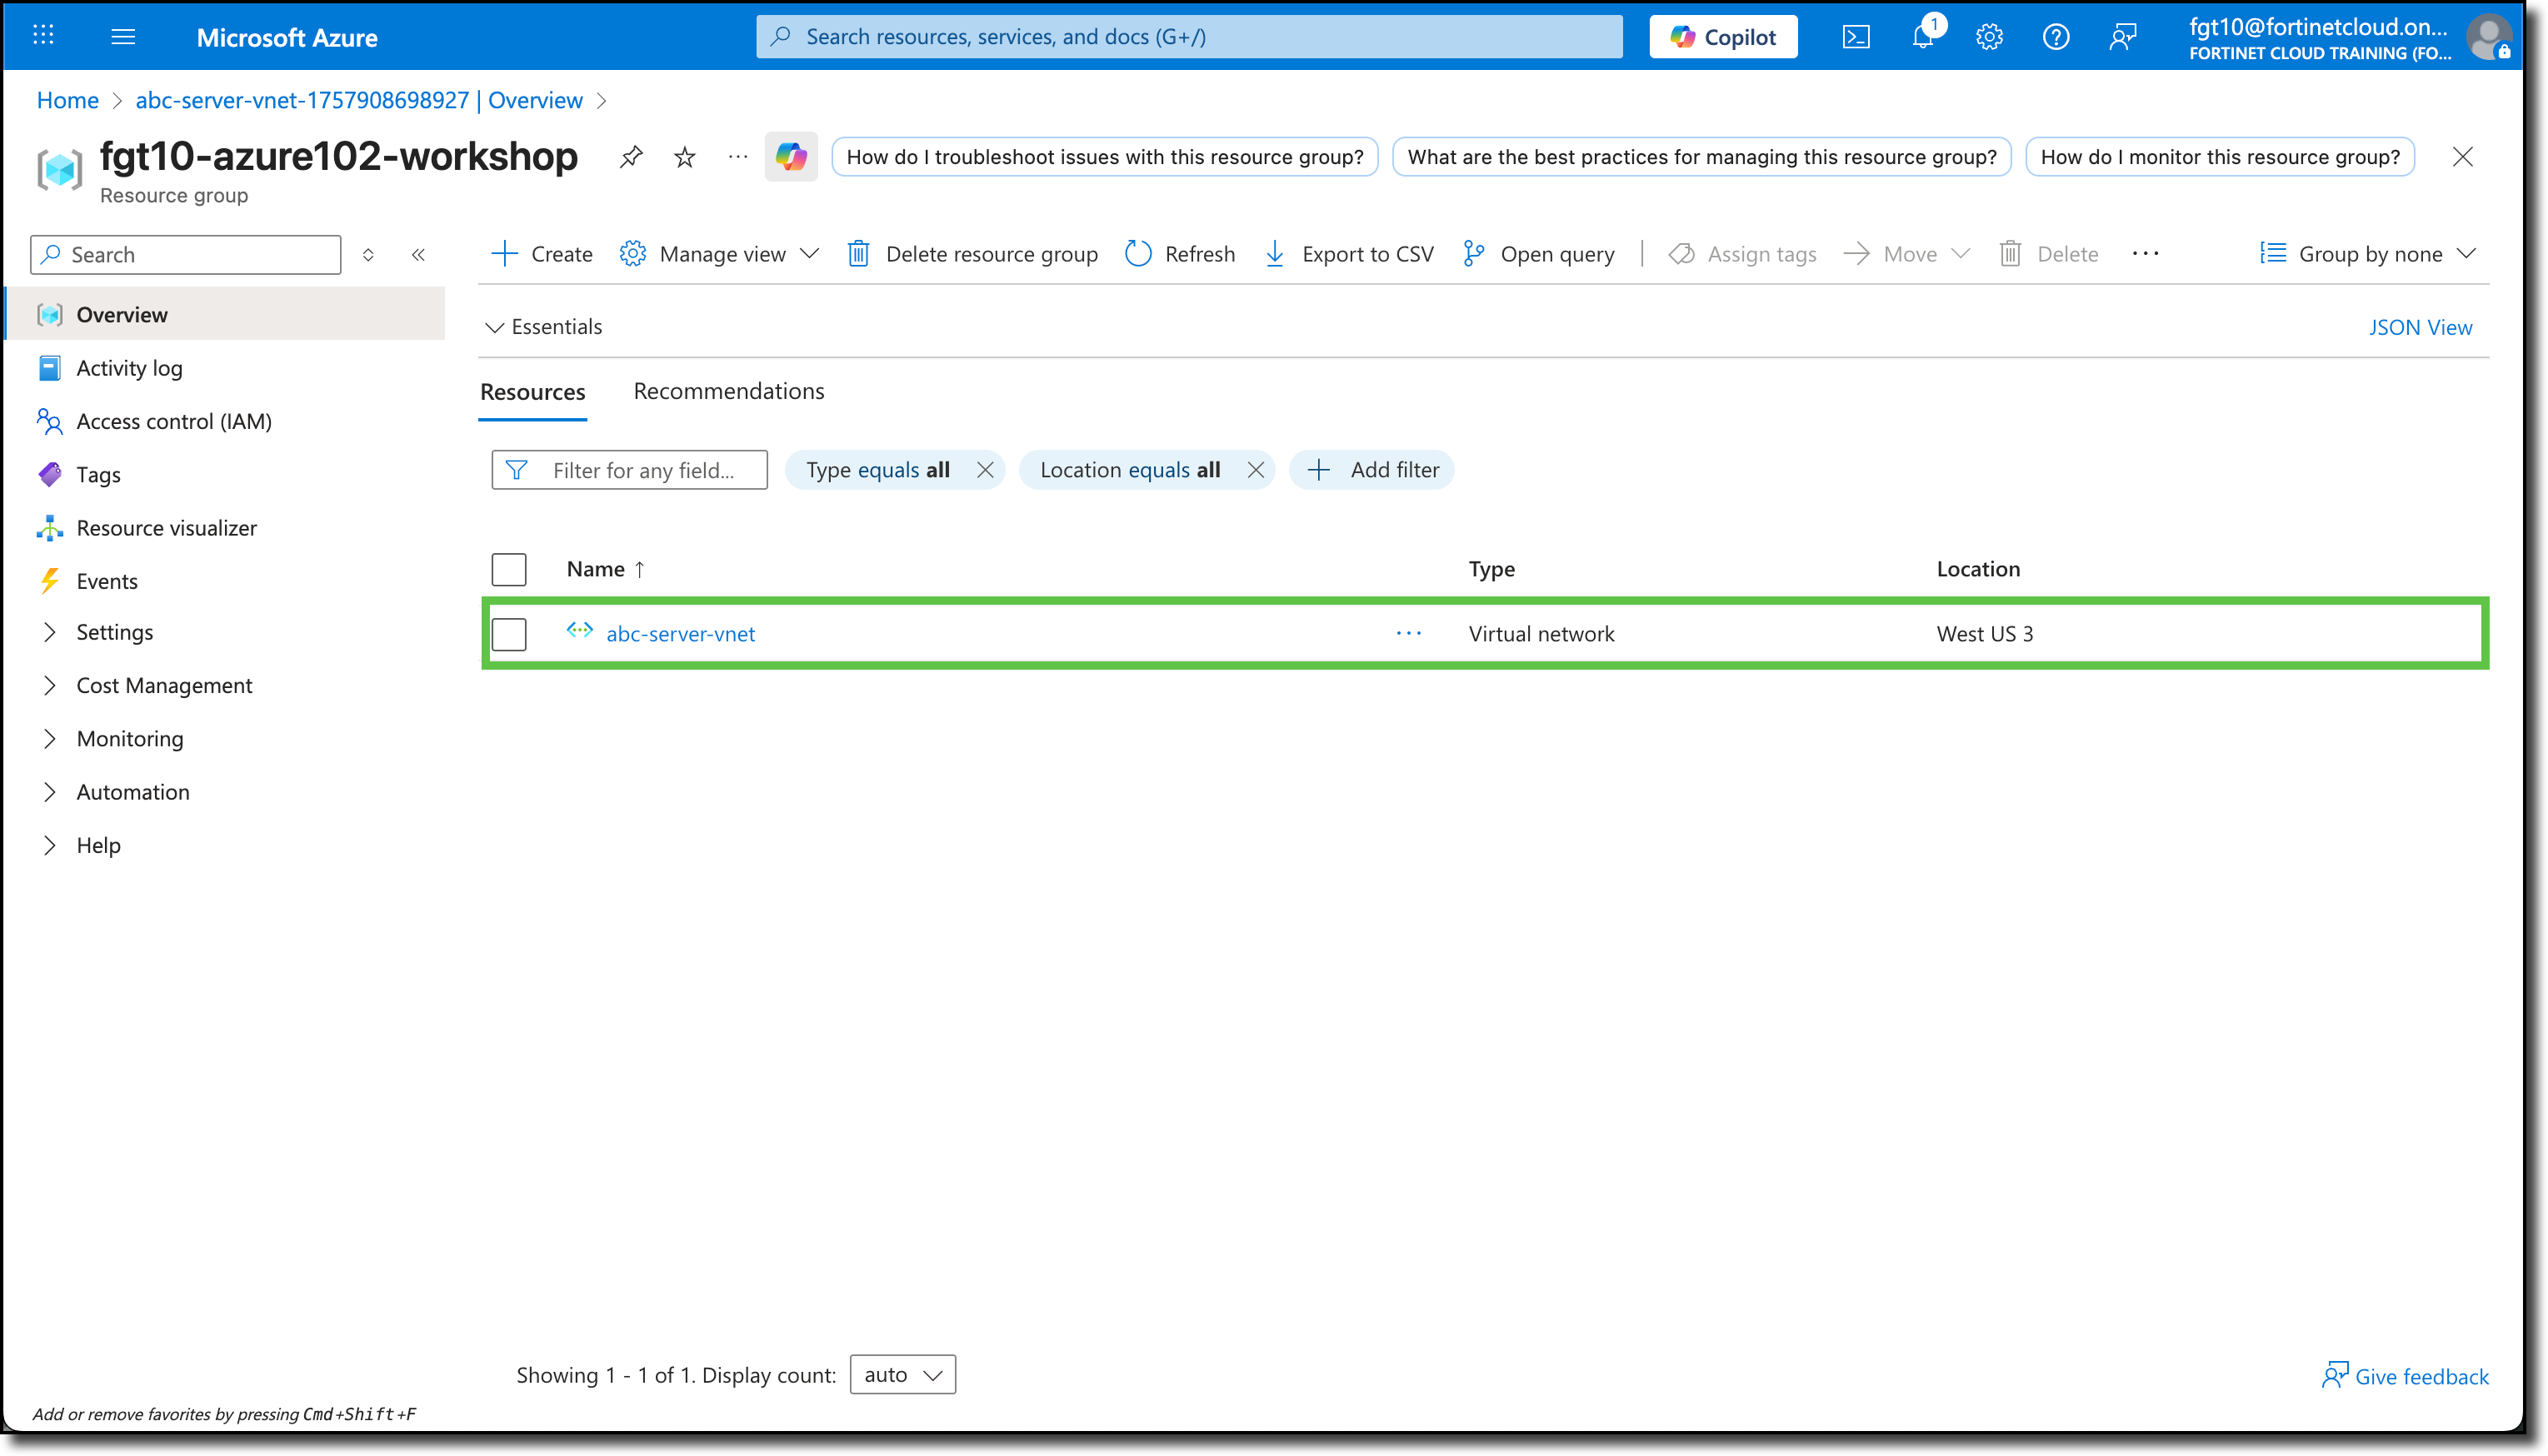
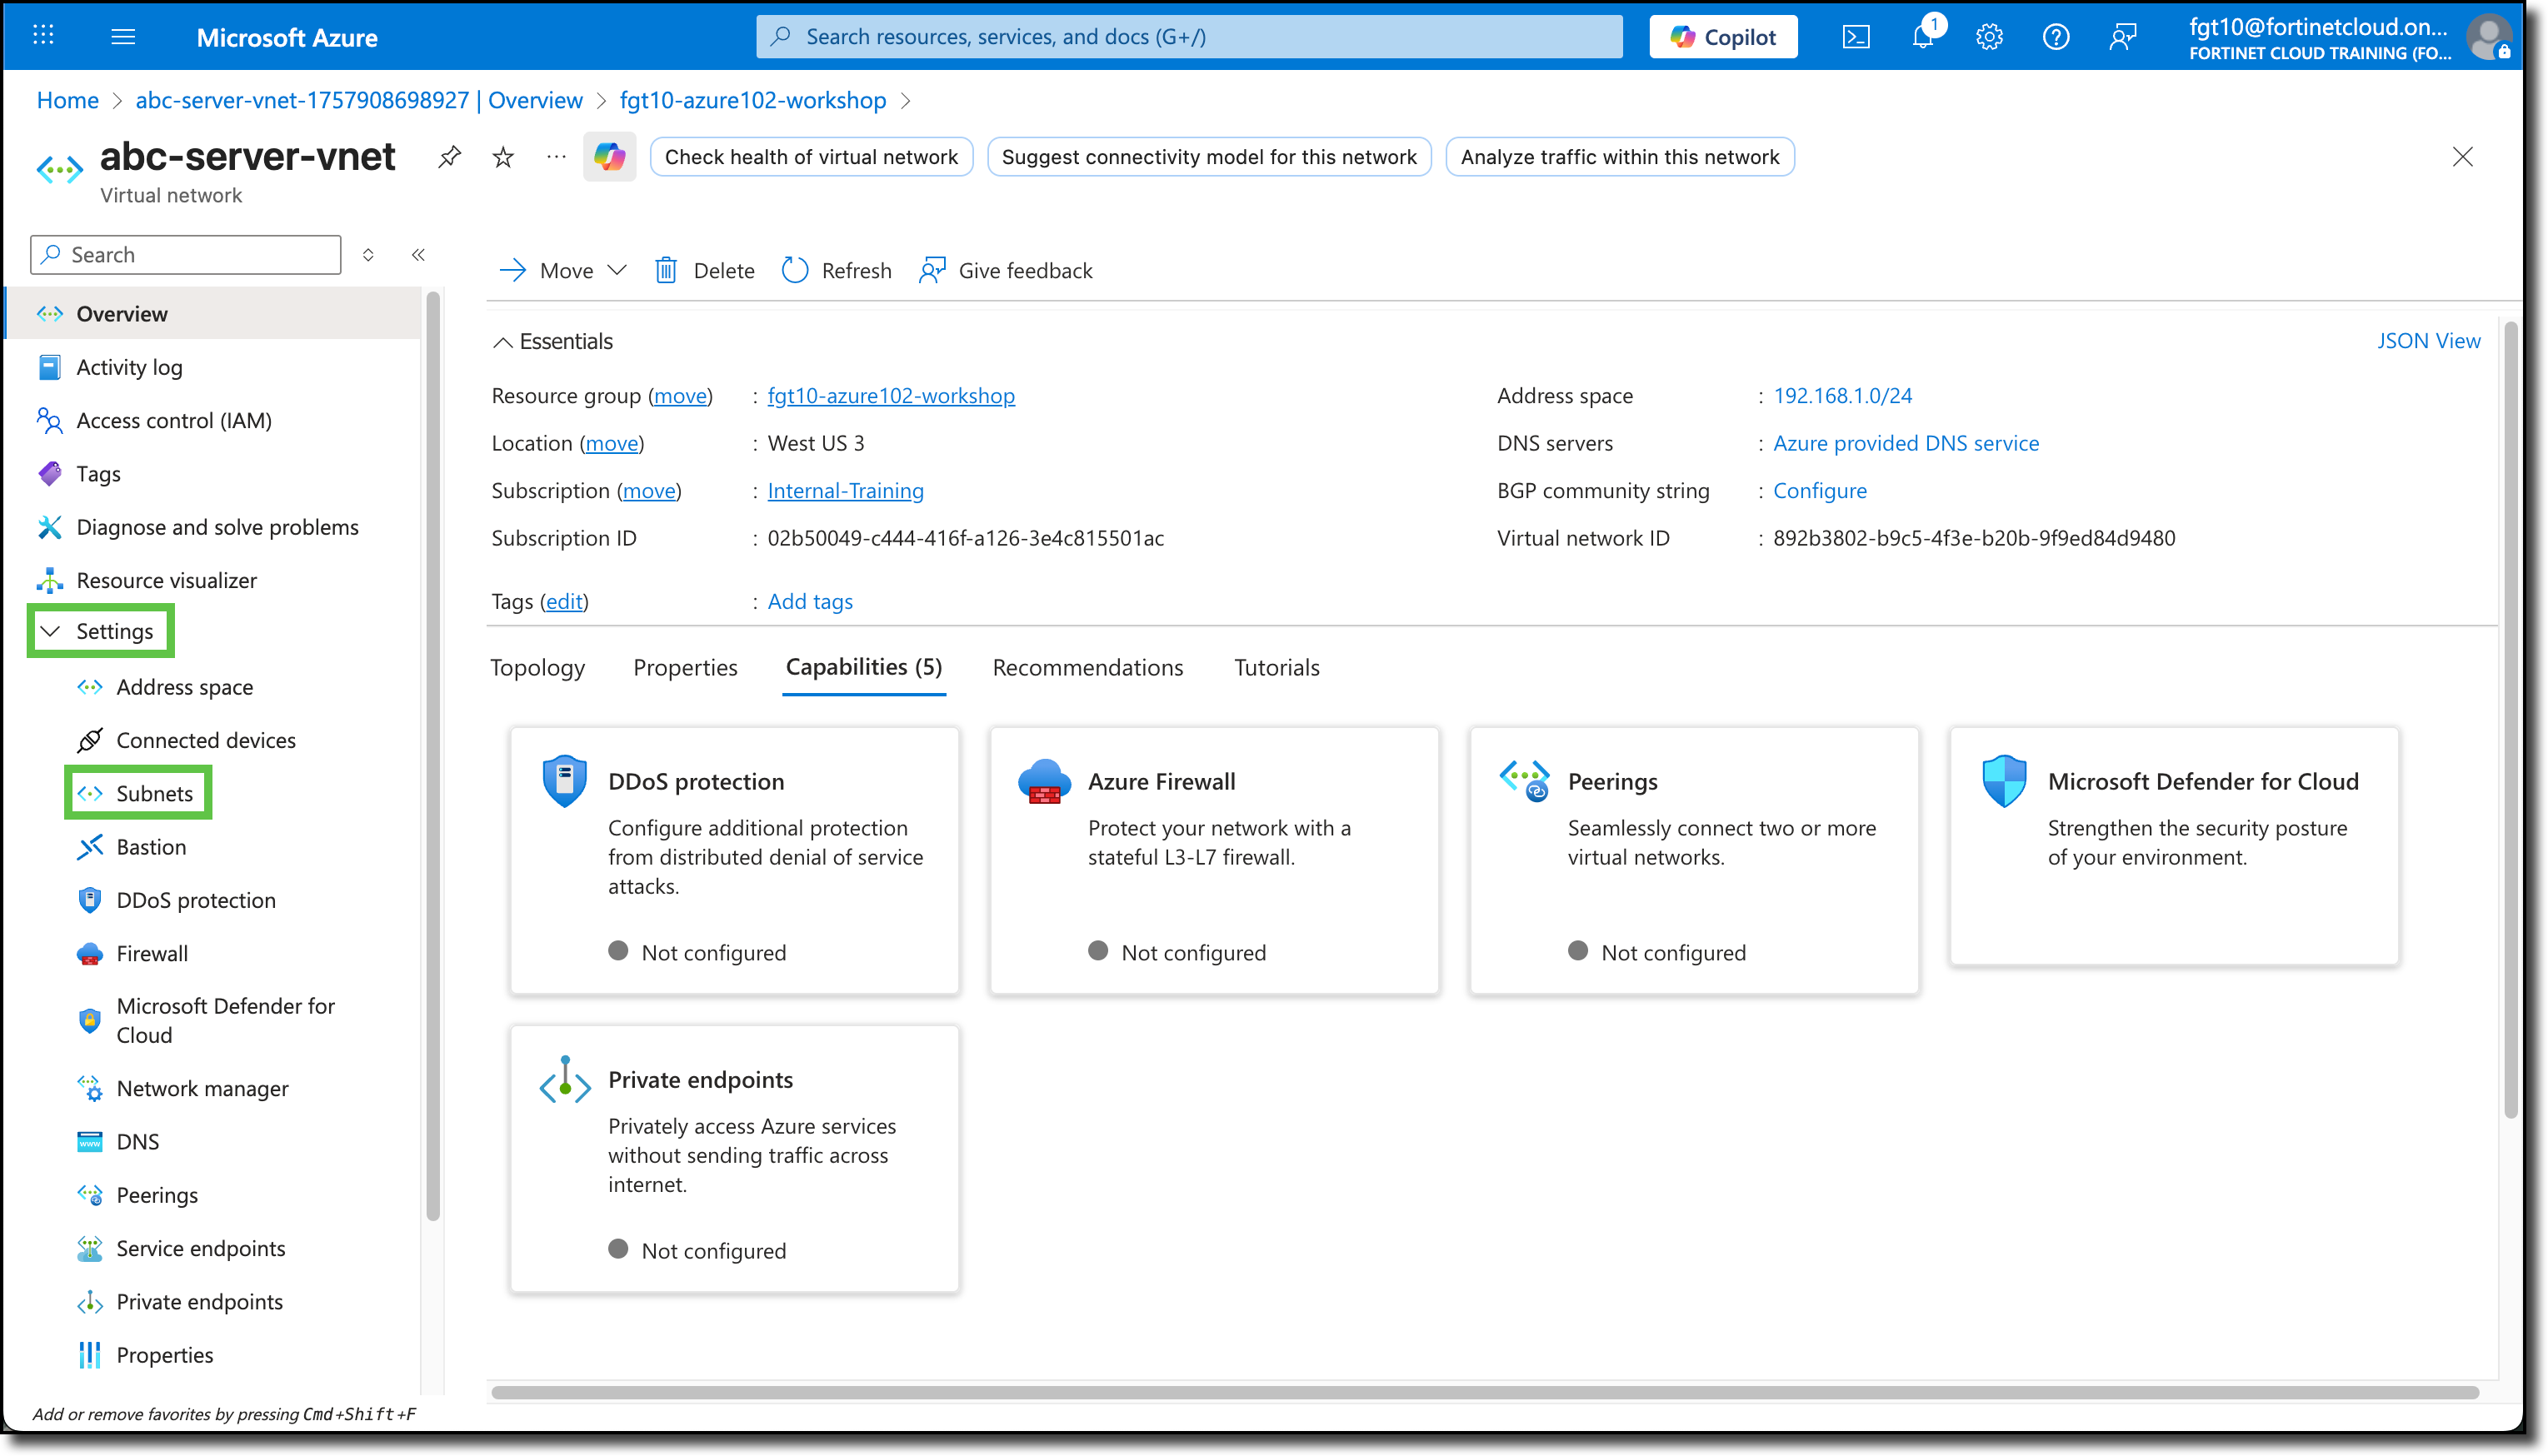
Click on the VNET name and explore the various settings that can be applied to or utilized with an Azure Virtual Network.
Click on “Subnets” under “Settings” to view the subnets that were just created.
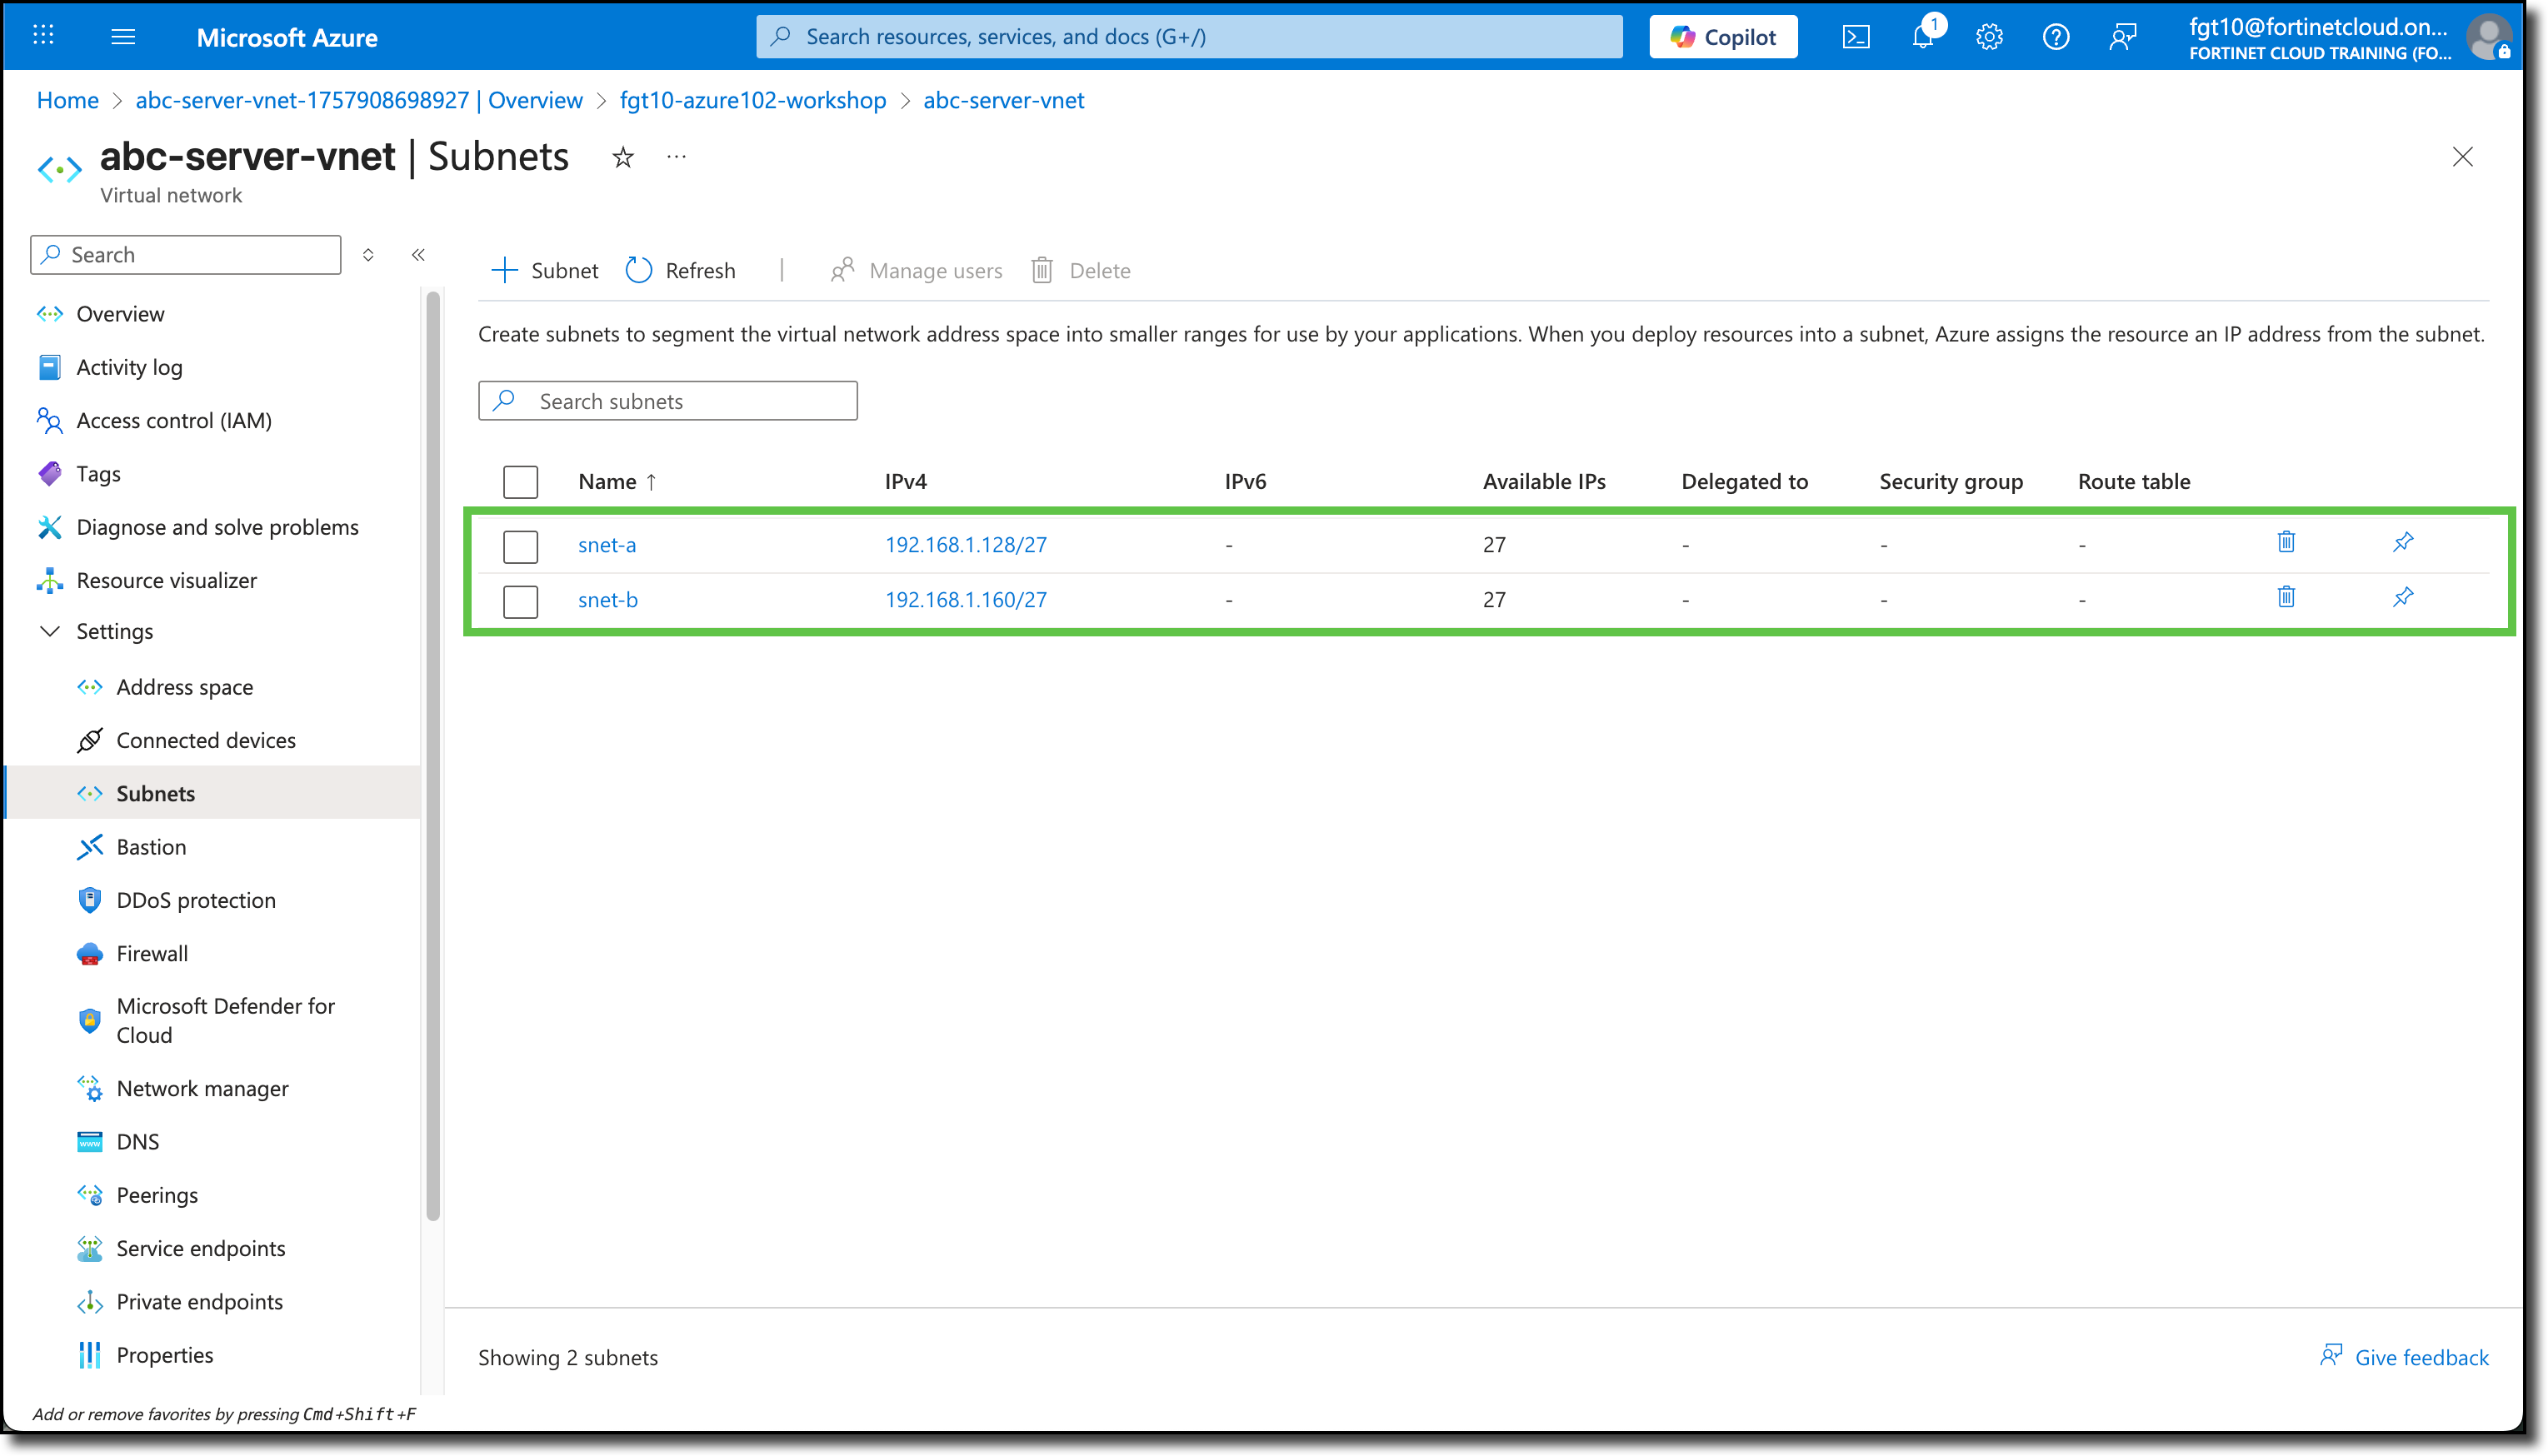
At this point these are your Azure Resources