Task 1: Deploy a FortiGate NVA
In Task 1, you will deploy a FortiGate network virtual appliance (NVA) in your Resource Group. After deployment, you will login to the FortiGate and verify settings.
FortiGate Deployment - Prerequisite
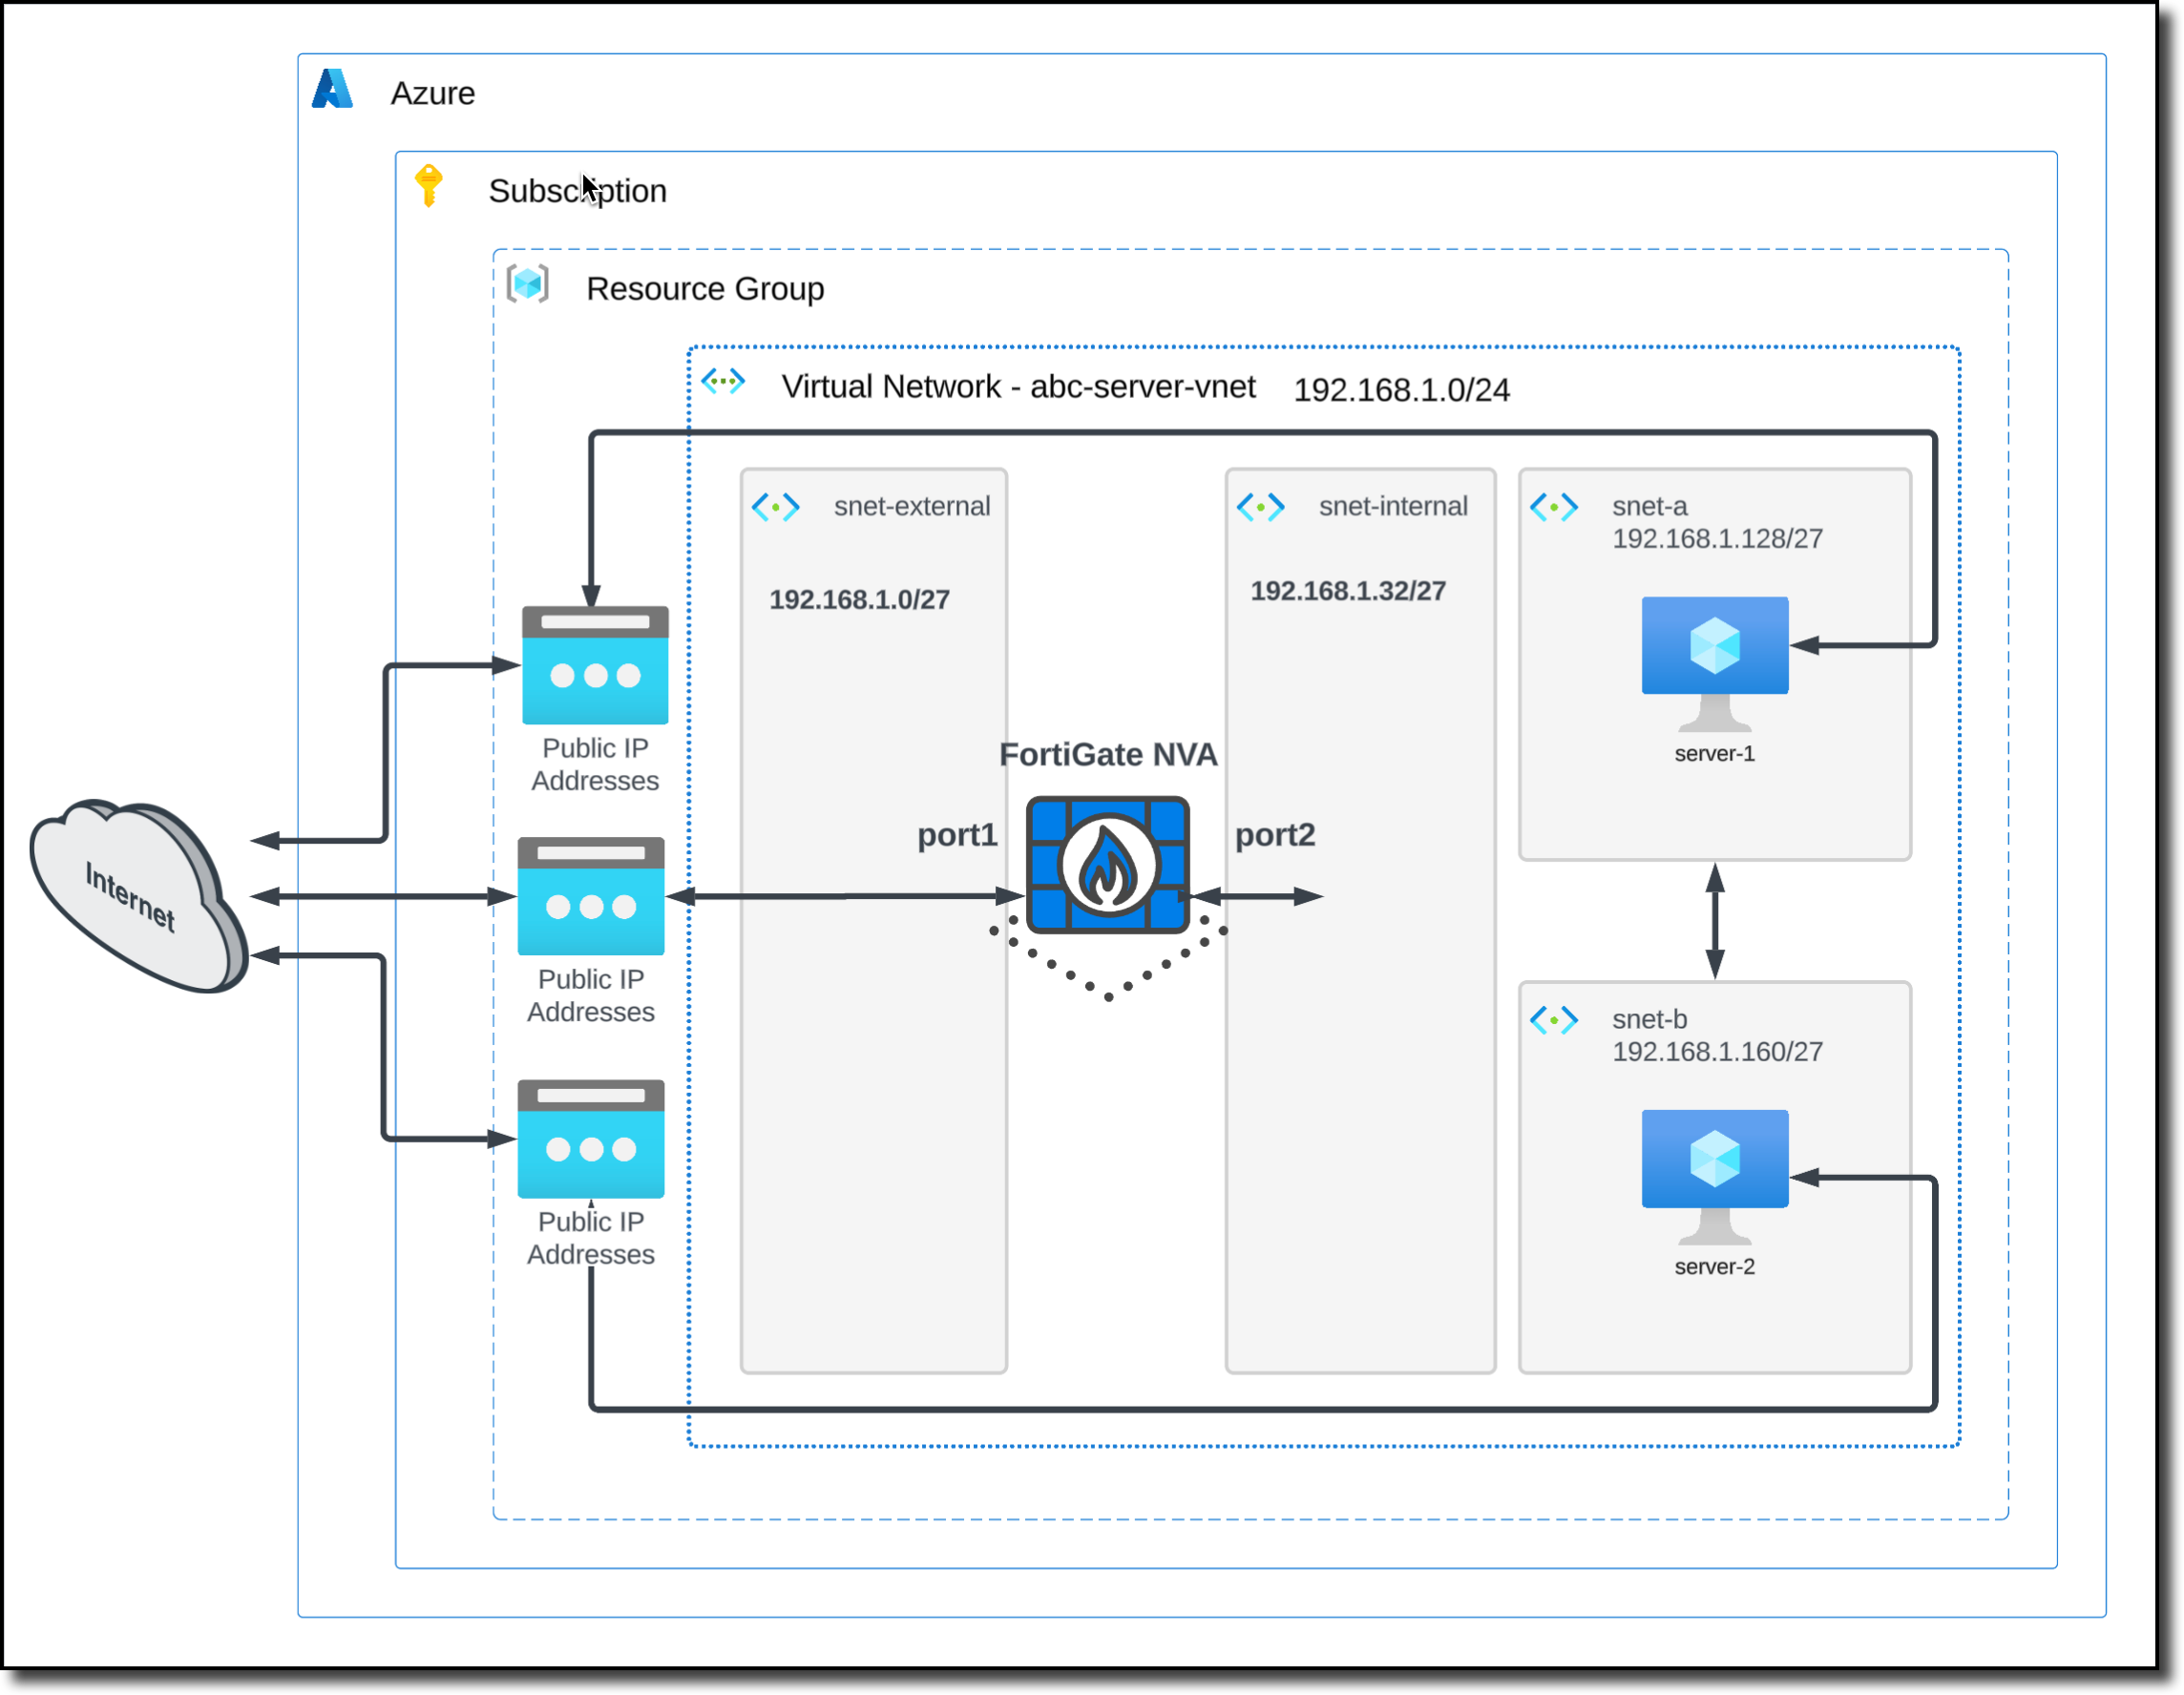
The Single Fortinet FortiGate requires two interfaces
- external (port1) untrusted interface
- internal (port2) trusted interface
These interfaces require two additional subnets be added to VNET acb-server-vnet
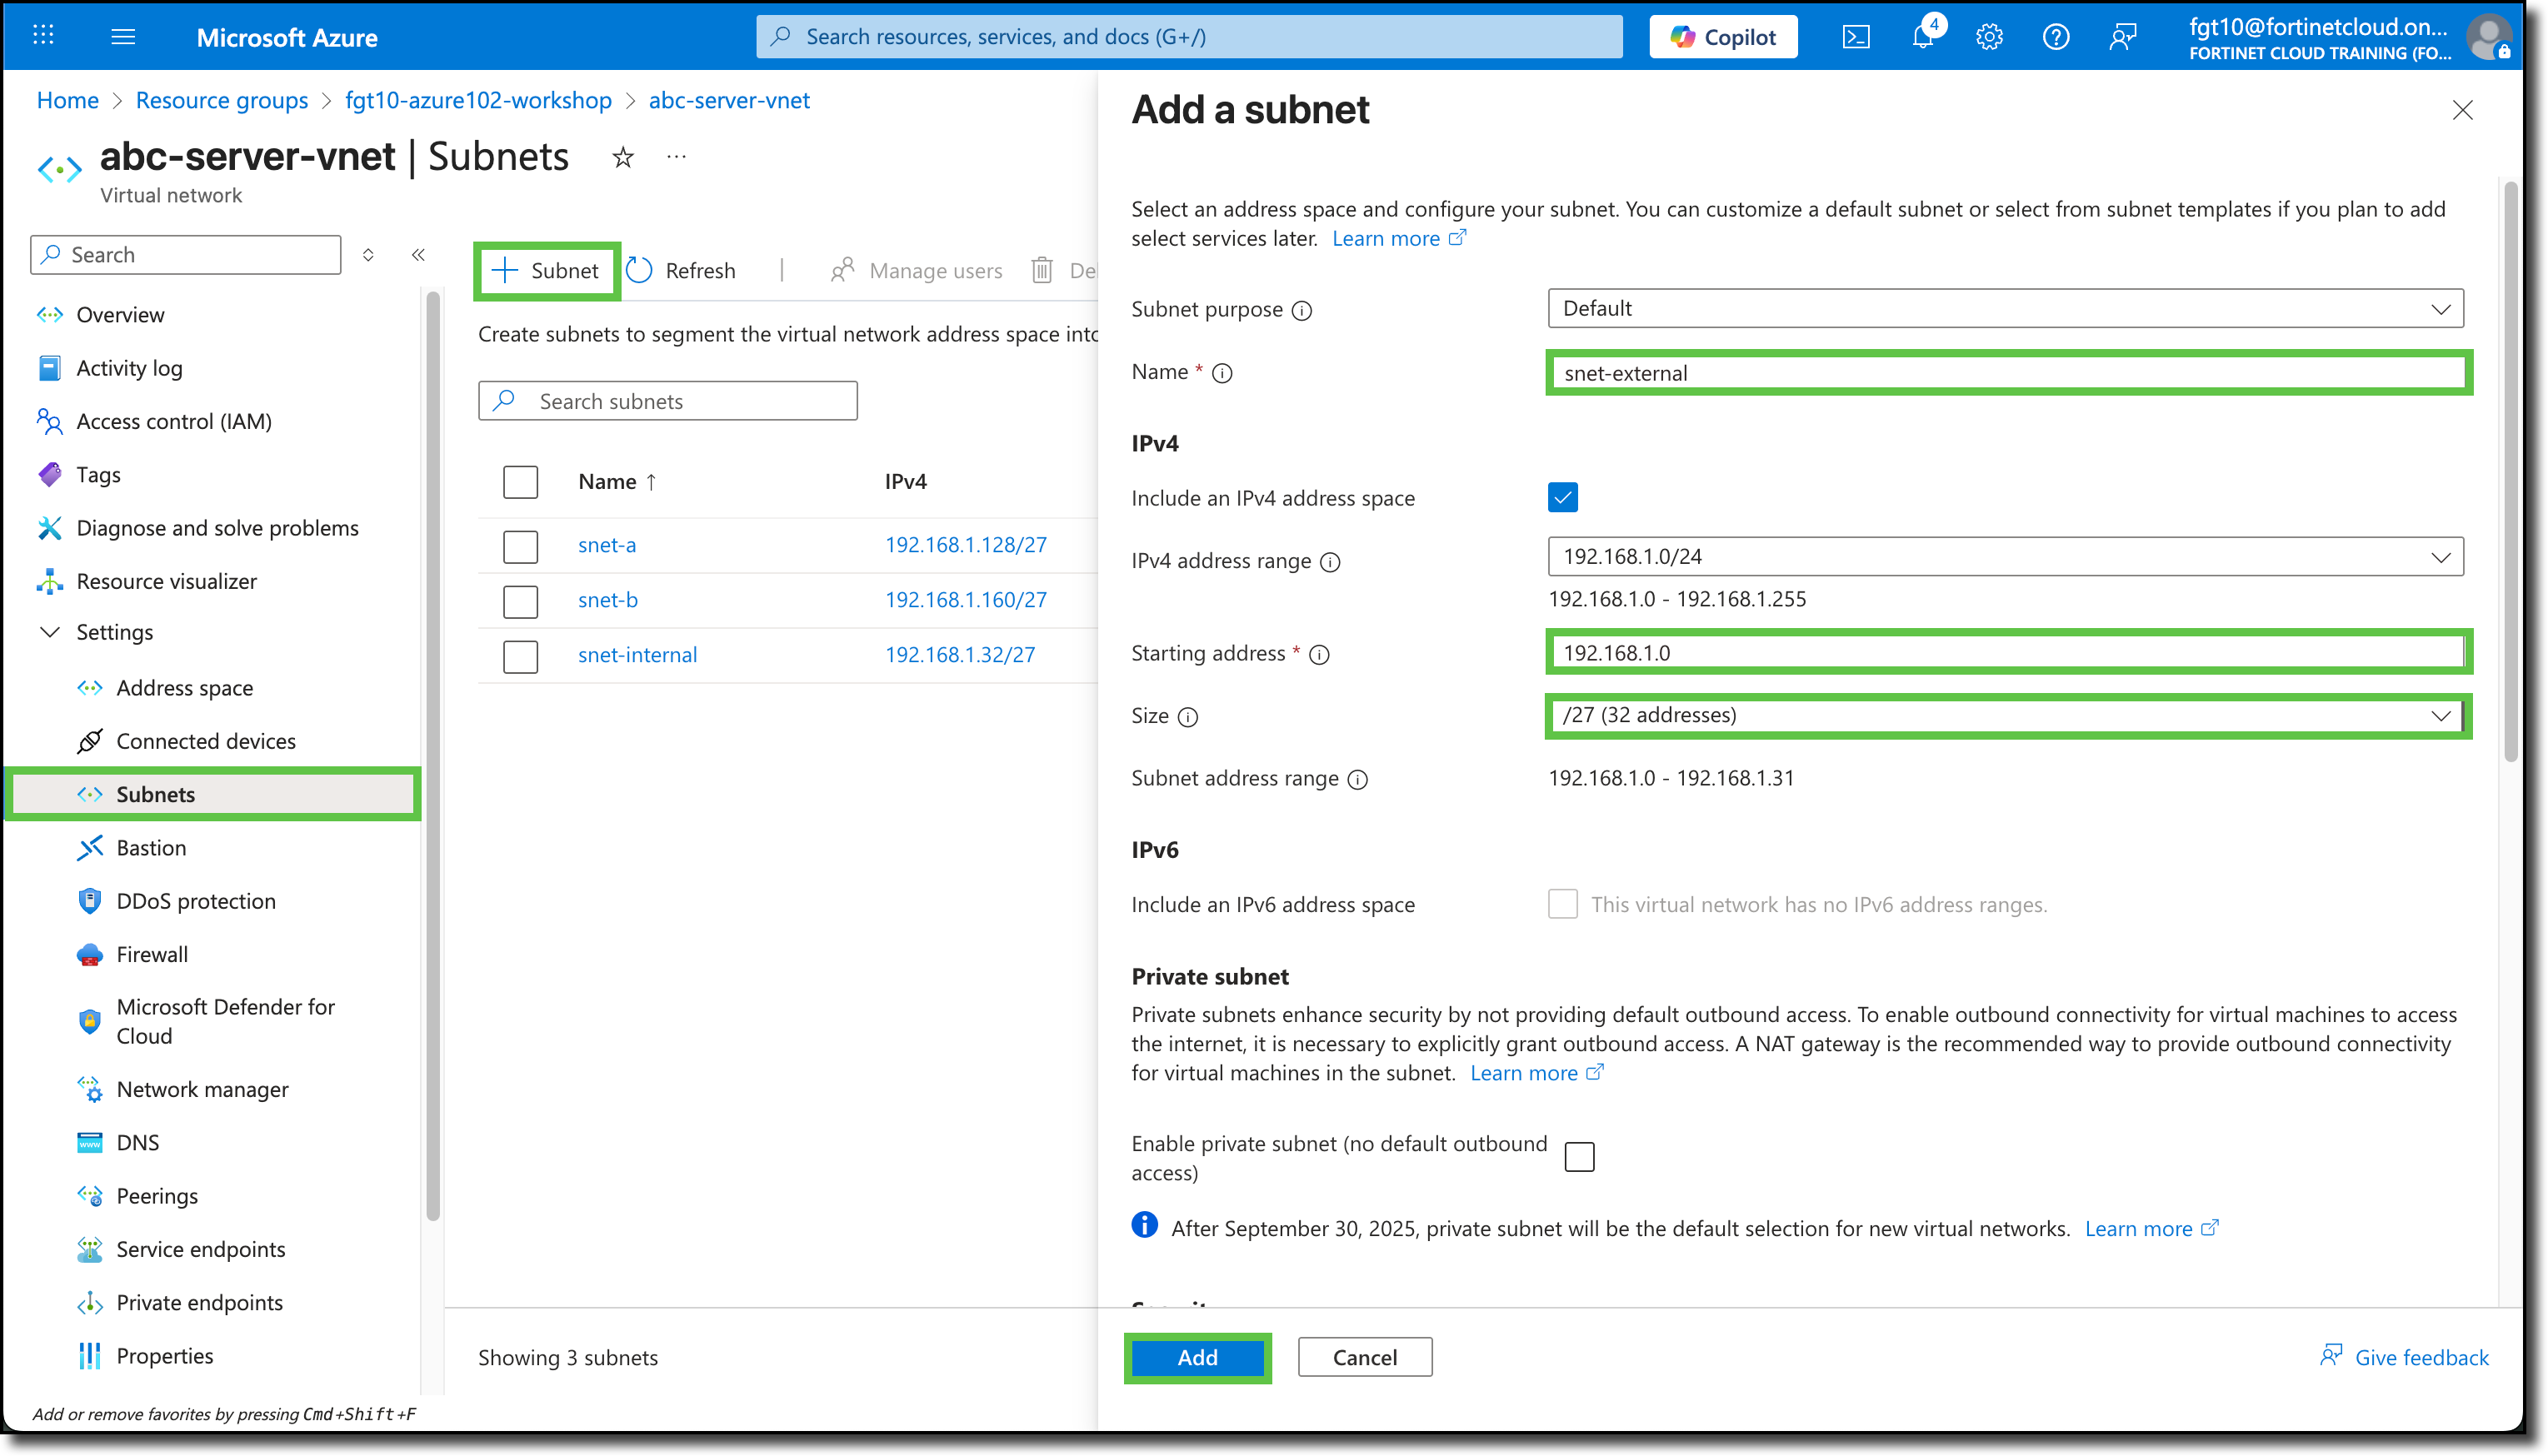
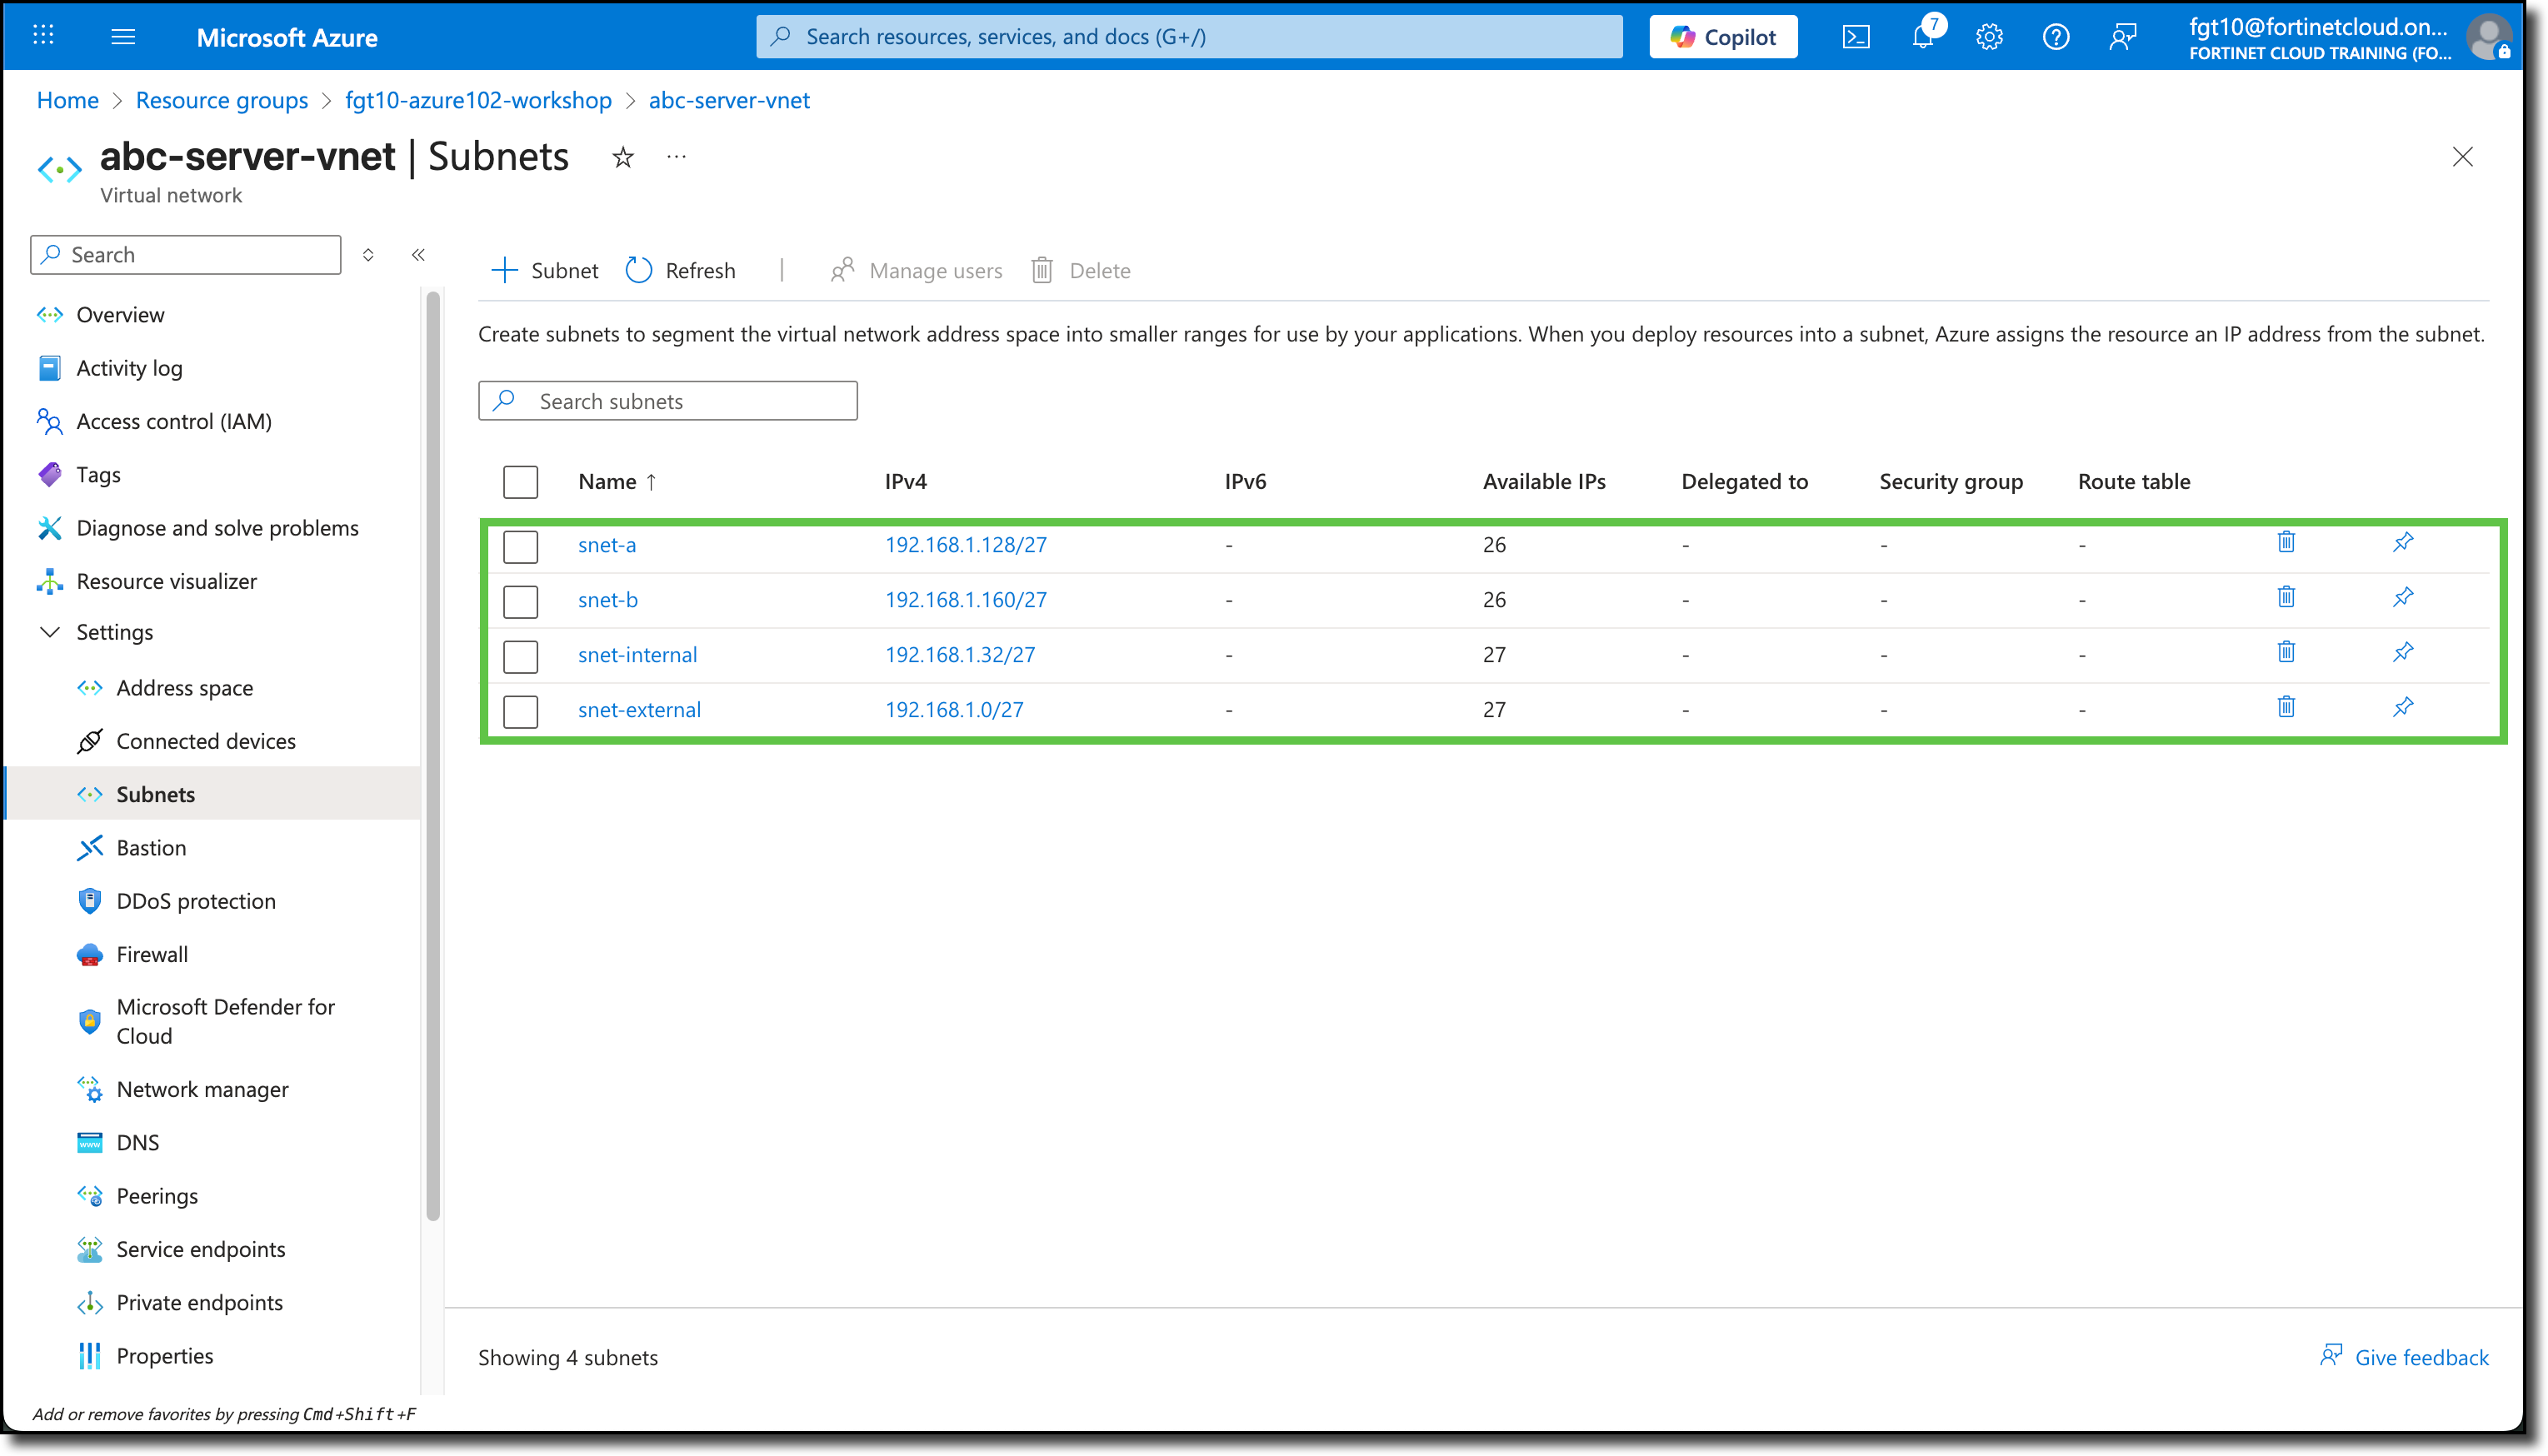
Access acb-server-vnet and add these two subnets
- snet-external with address space 192.168.1.0/27
- snet-internal with address space 192.168.1.32/27
Use these screen shots for reference
FortiGate Deployment
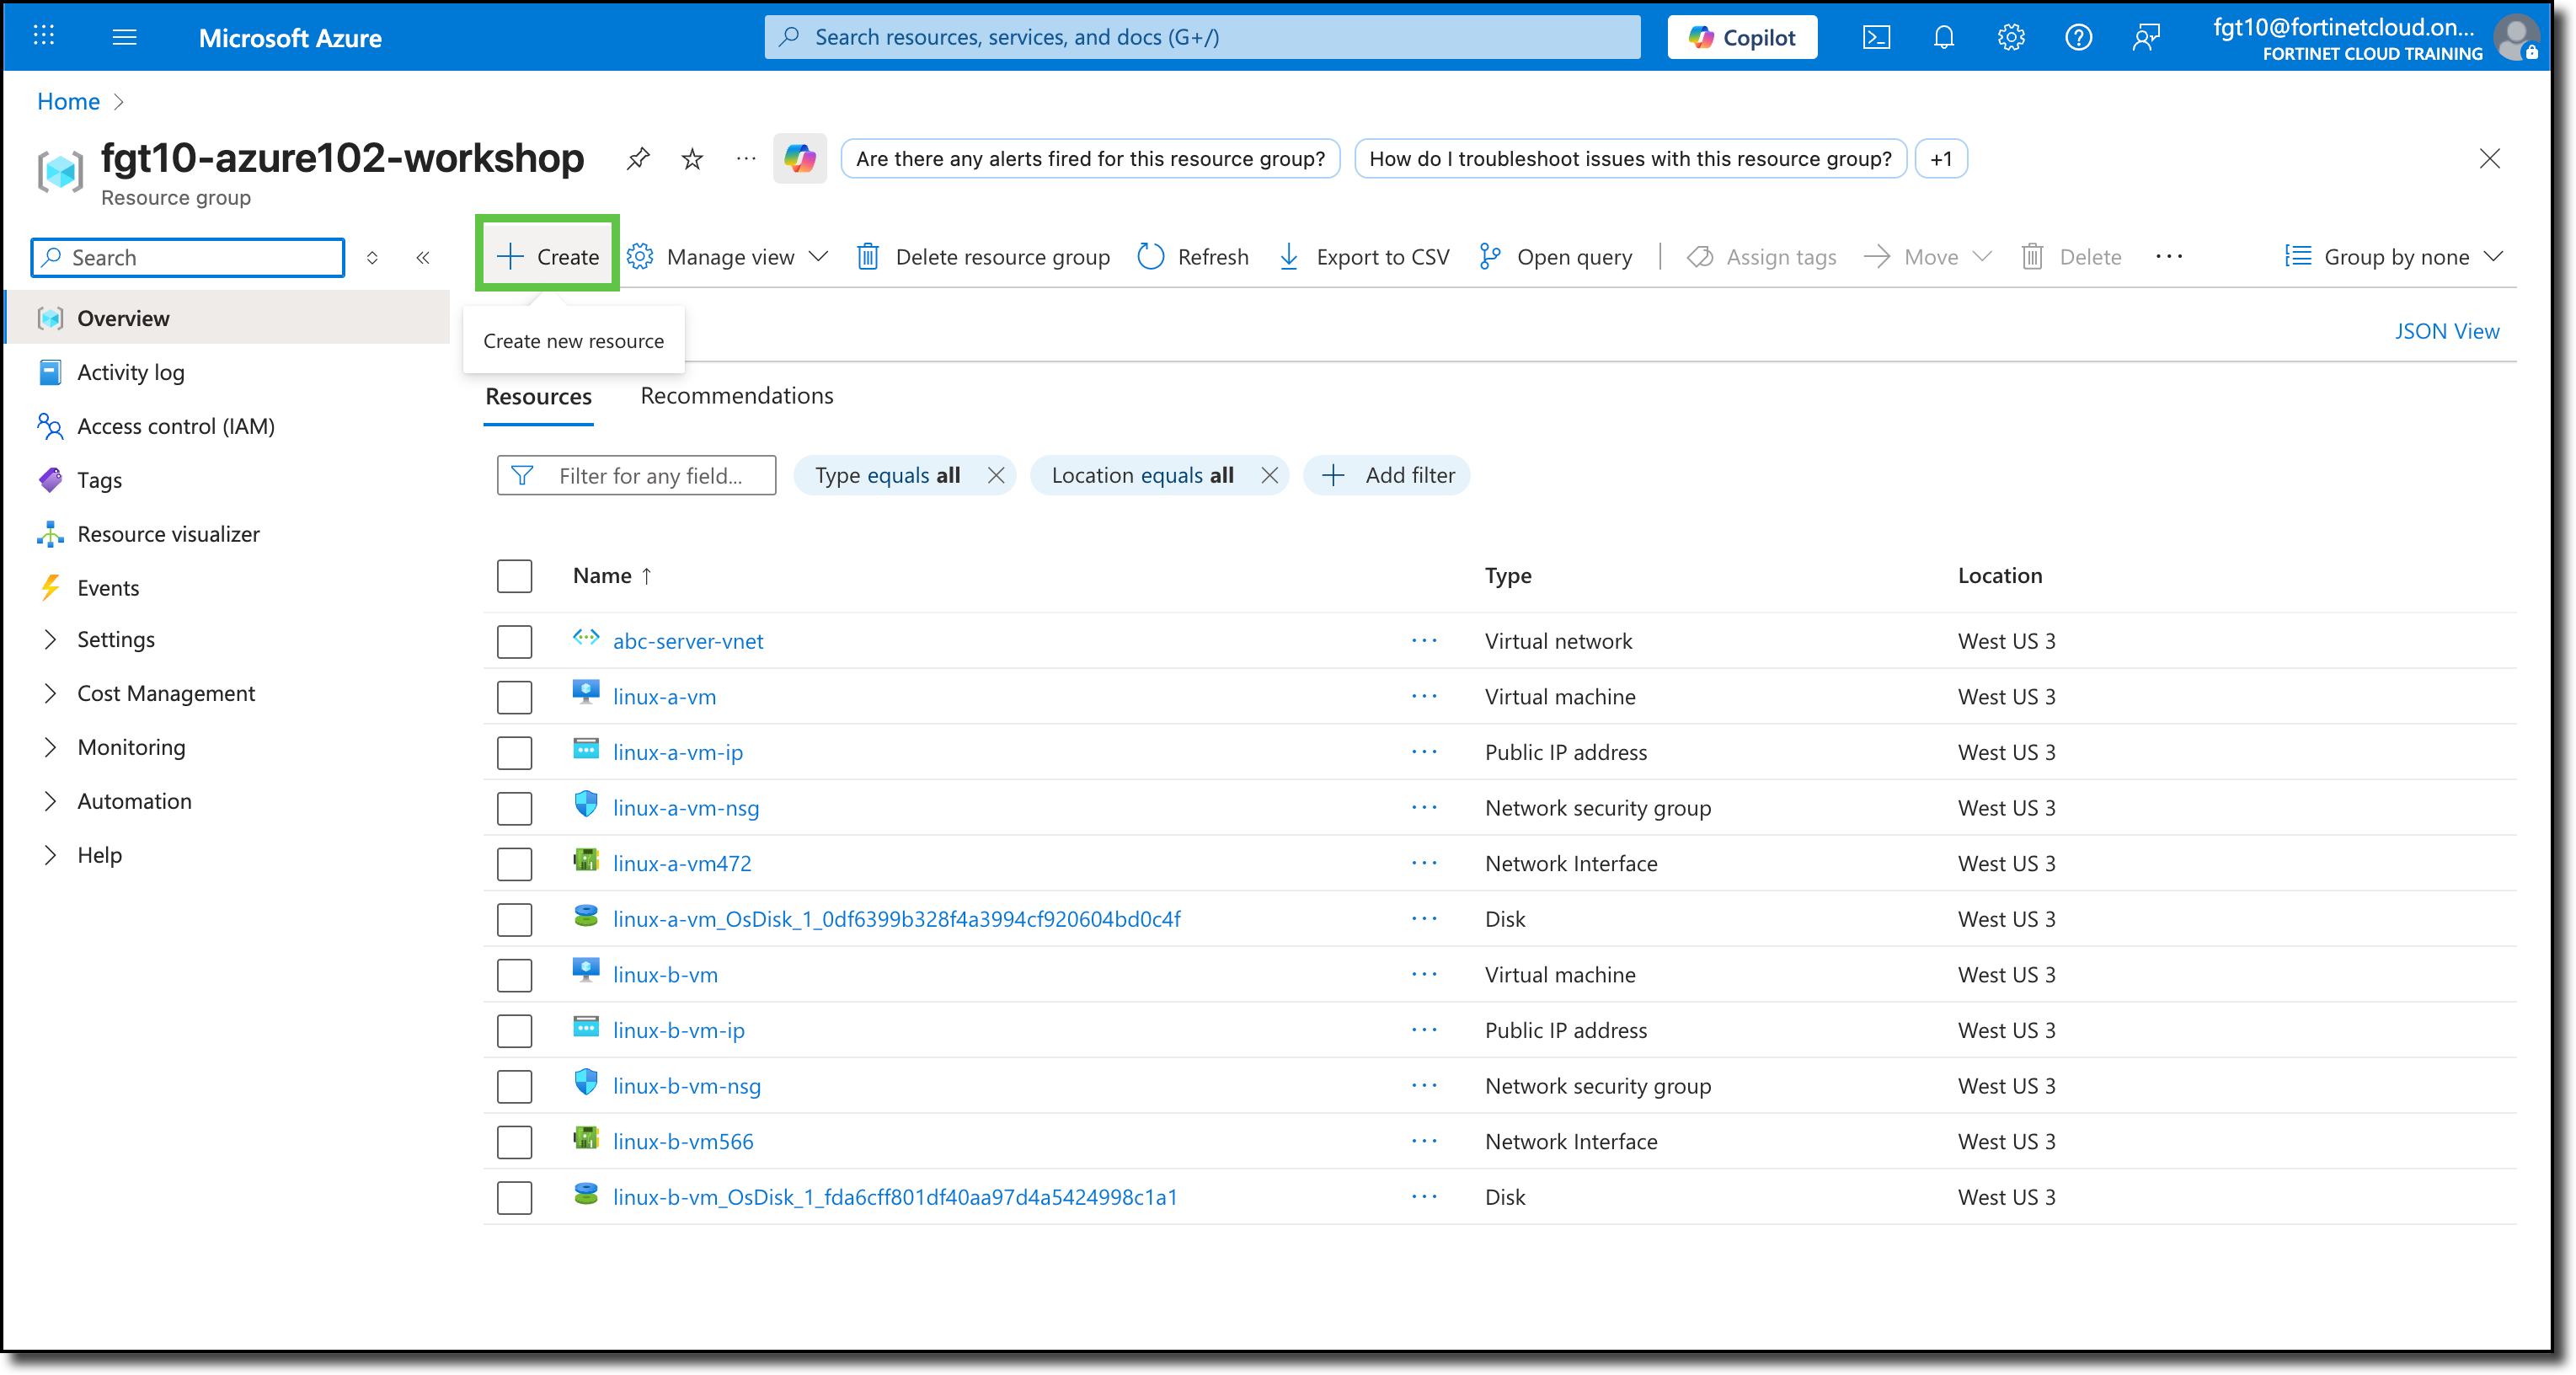
Navigate to your Resource Group
Click “+ Create”
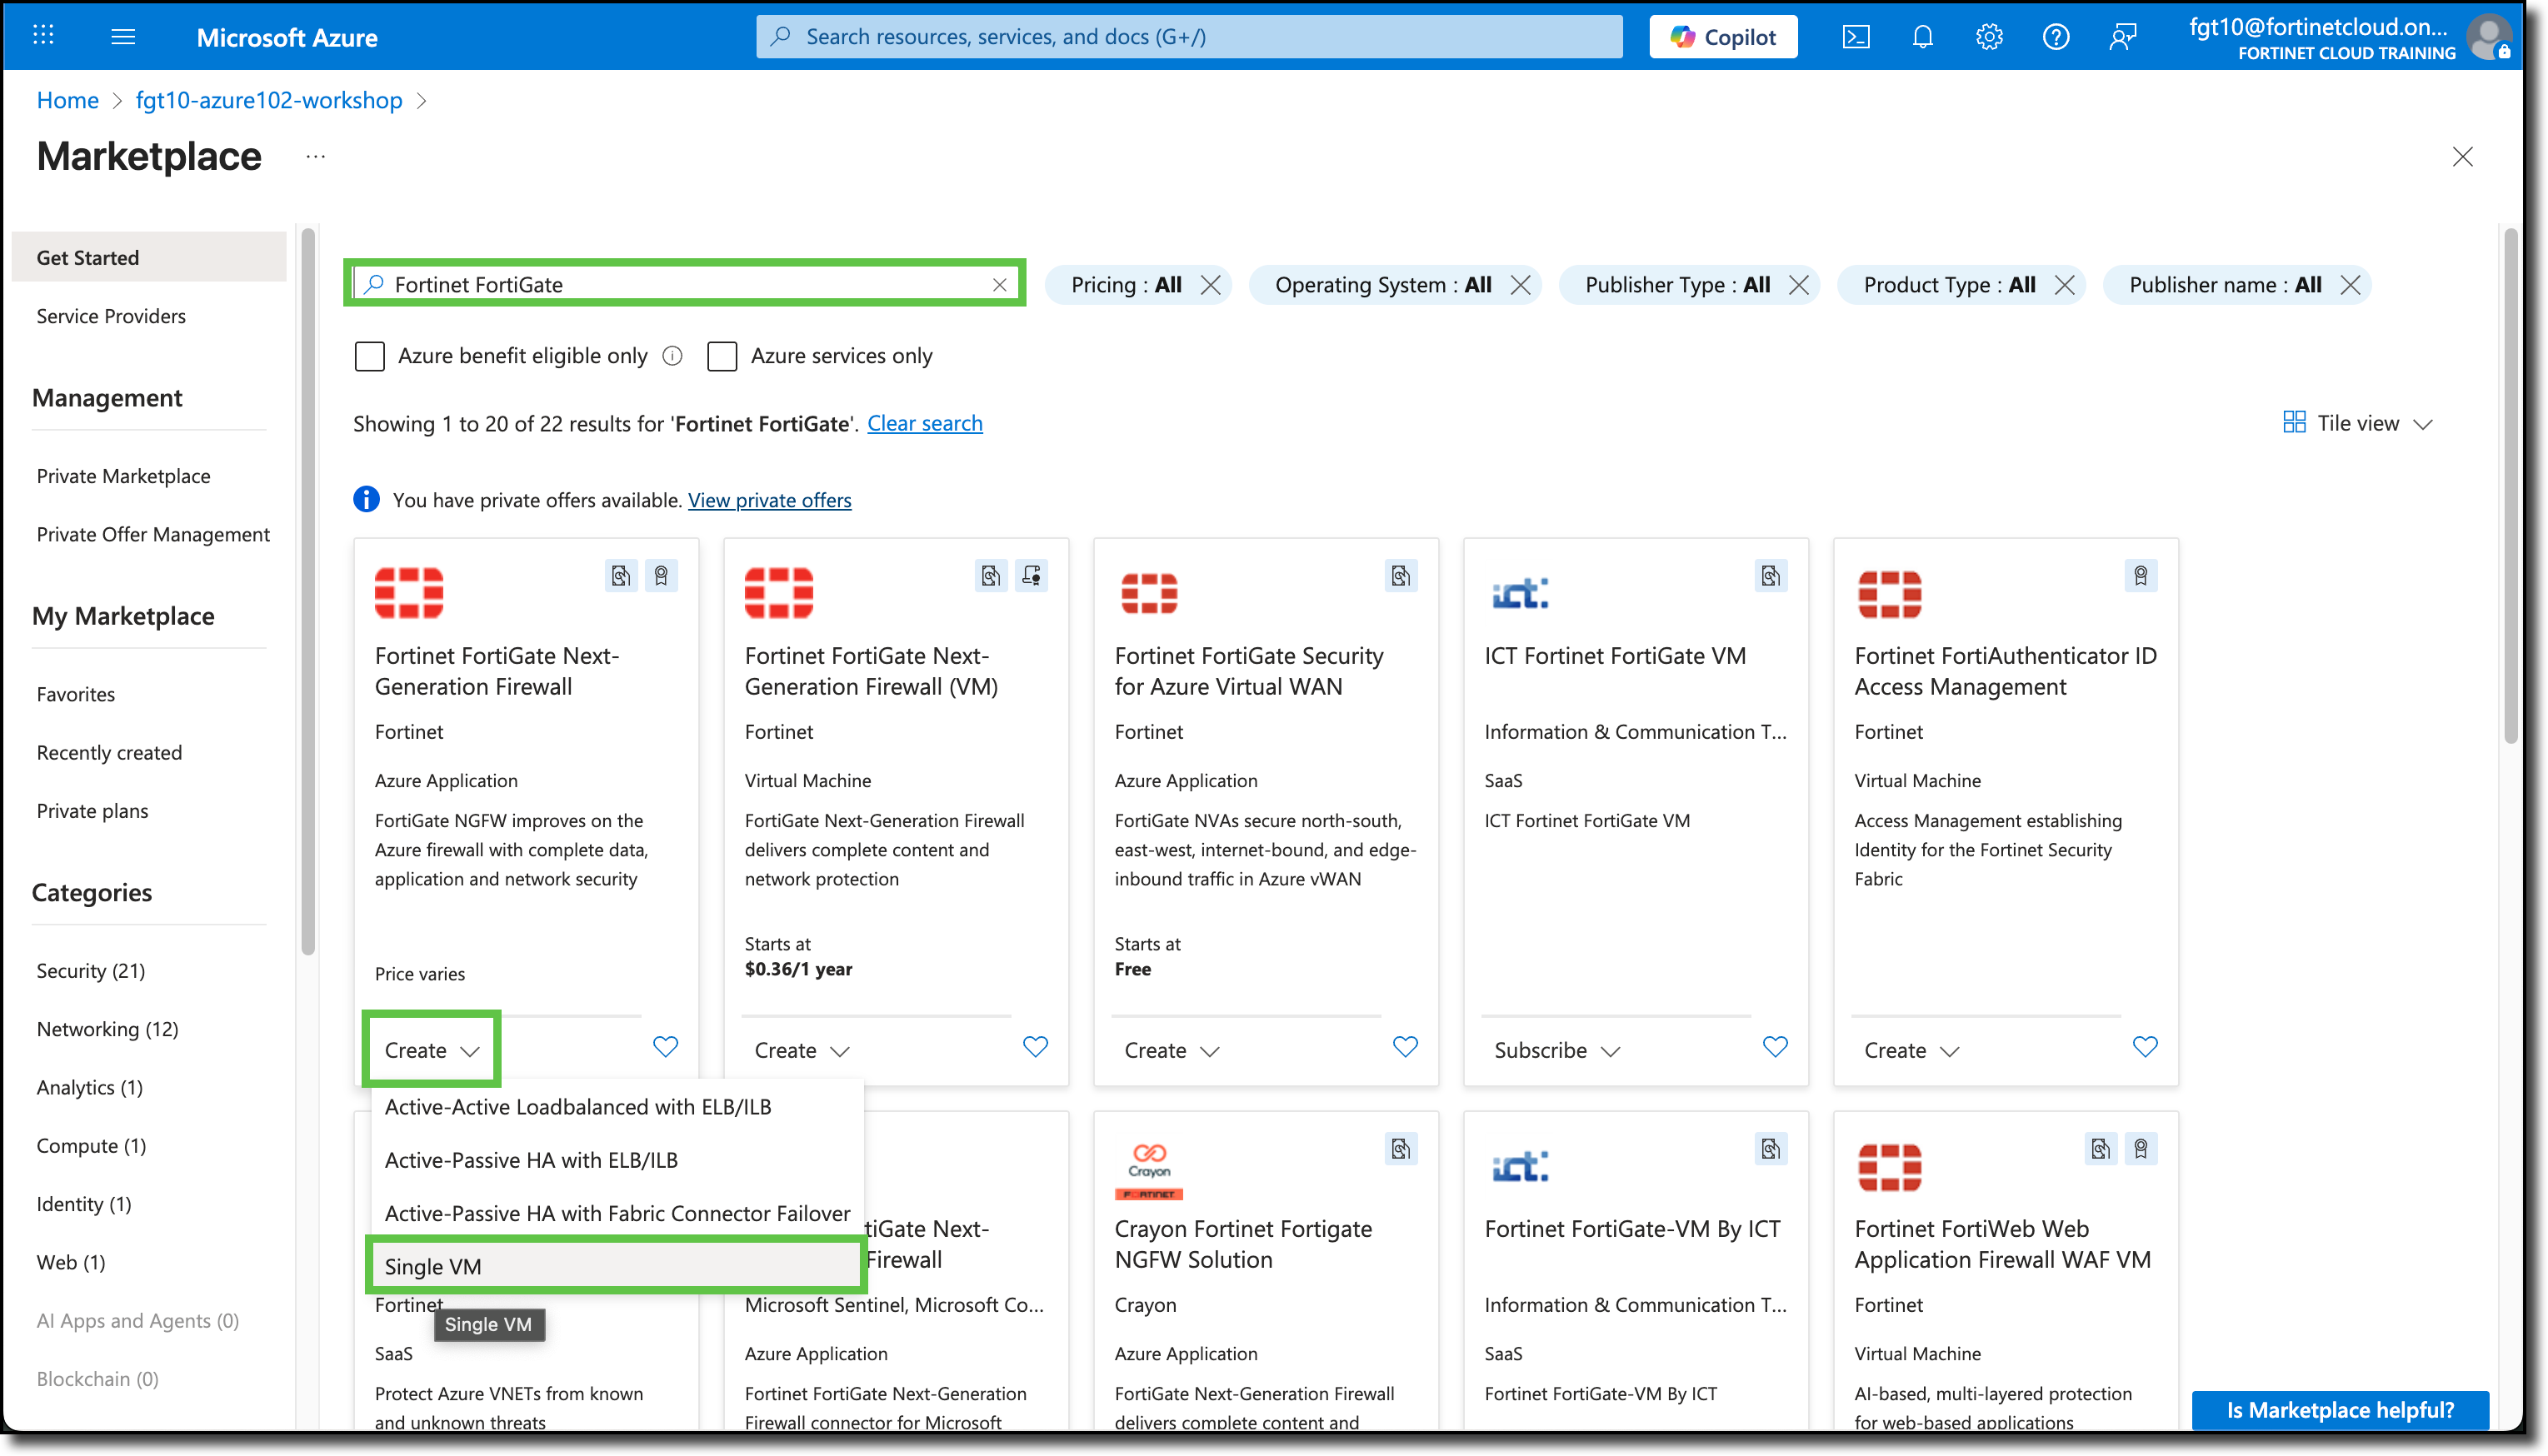
You will be redirected to the Azure Marketplace.
Search for
Fortinet FortiGateSelect “Fortinet FortiGate Next-Generation Firewall”
Click “Create”
Click “Single VM”
You will be redirected to the Create Single VM template.
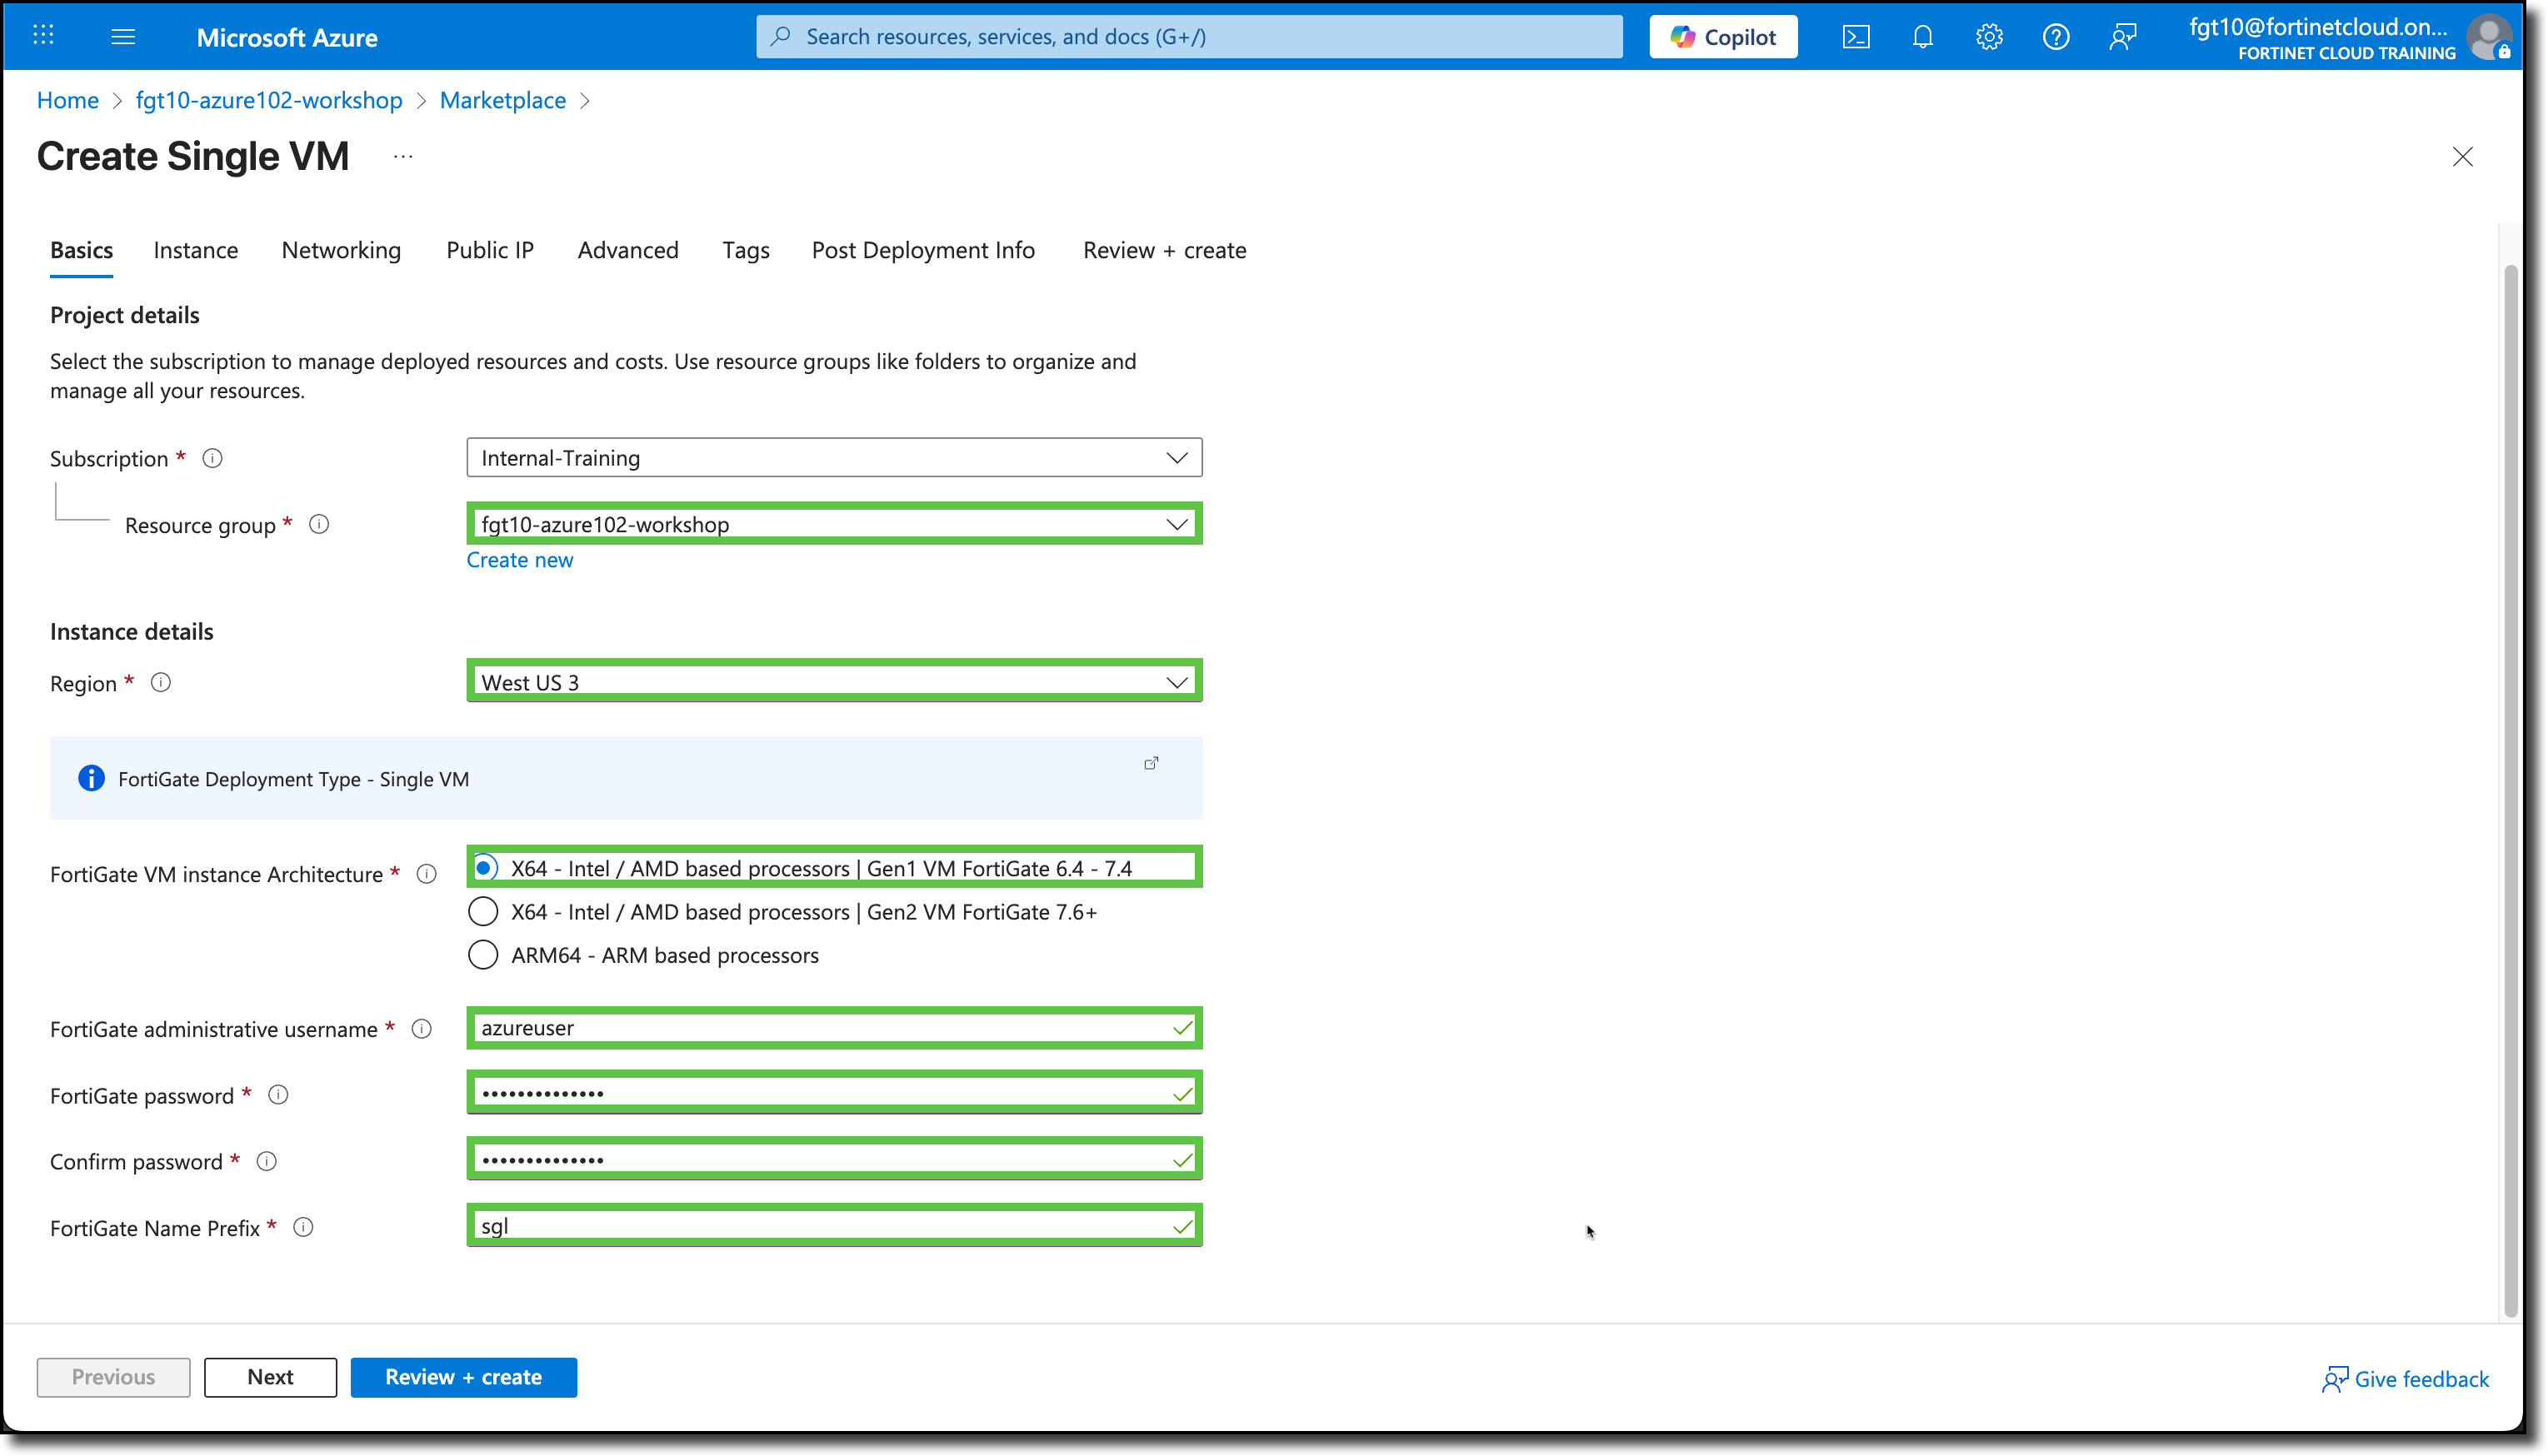
Under the Basics tab, the Subscription and Resource Groups may already be filled in with your assigned info. If not, see the screenshot below for details.
Under Instance details, select/enter the following:
- Region: West US 3
- FortiGate VM instance Architecture: “X64 - Intel / AMD based processors | Gen1 VM FortiGate 6.4 - 7.4”
- FortiGate administrative username:
azureuser - FortiGate password:
123Password#@! - Confirm password:
123Password#@! - FortiGate Name Prefix:
sgl
Click “Next”
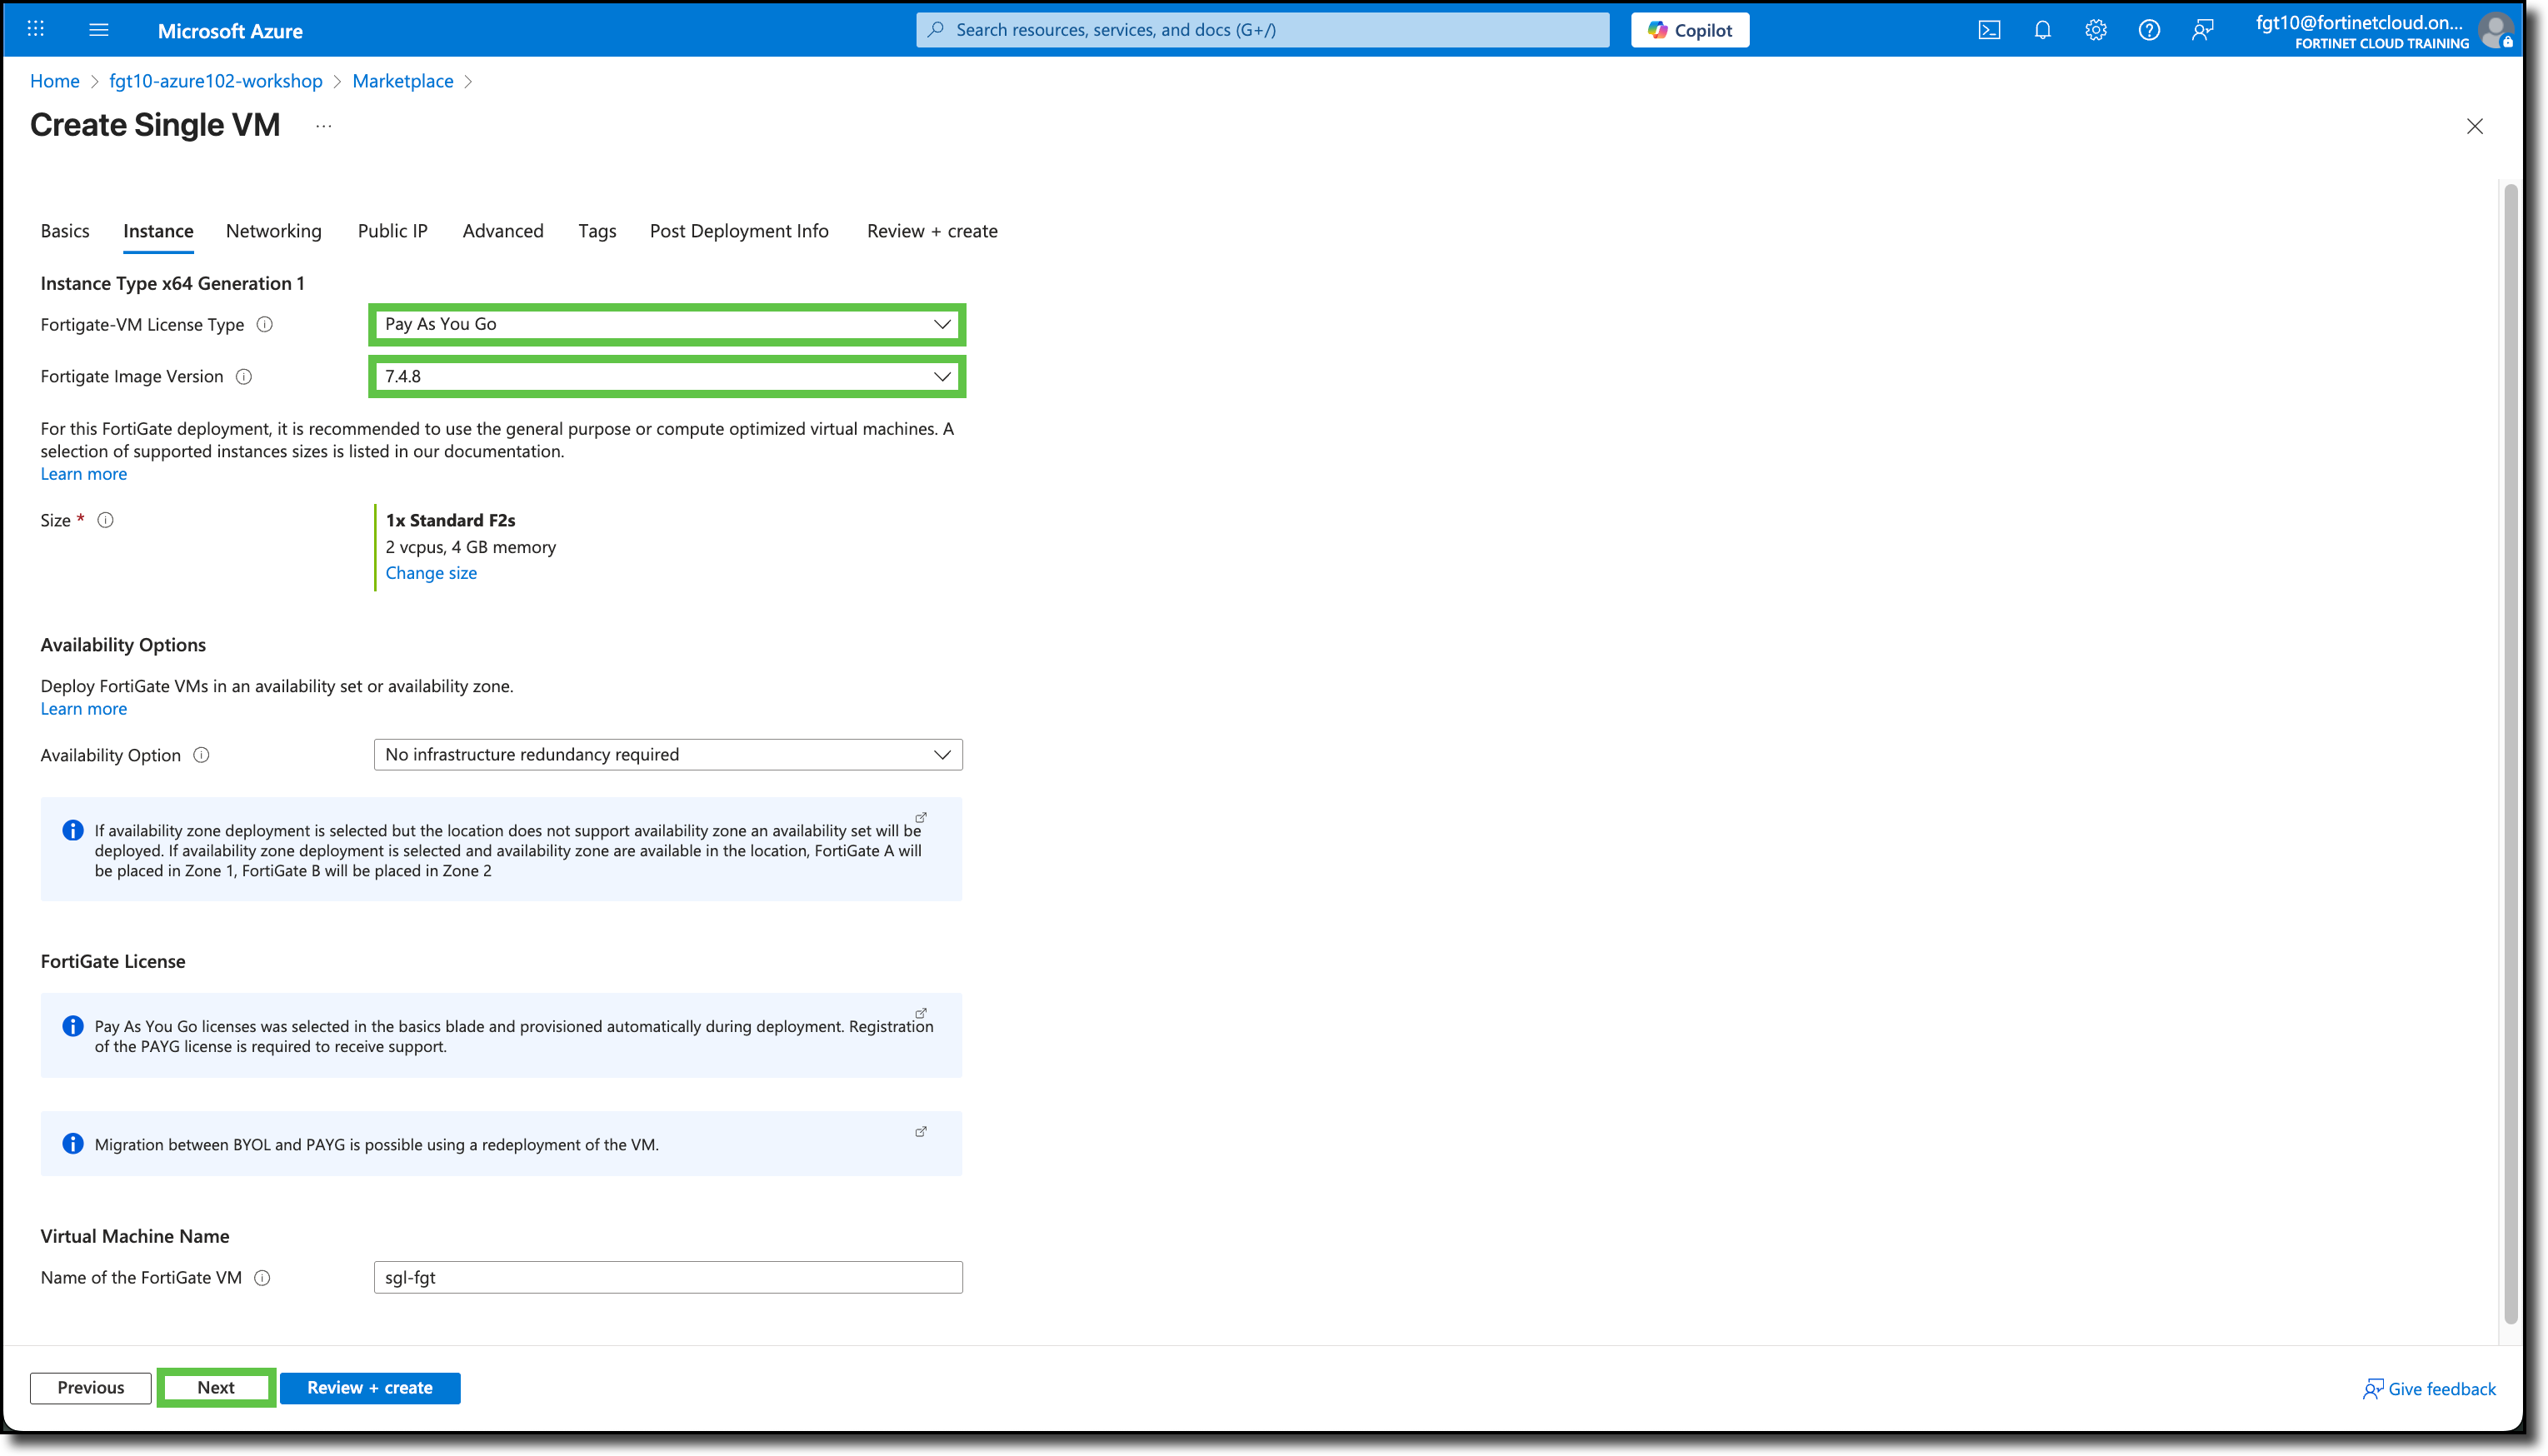
On the Instance tab, select the following
- Fortigate-VM License Type: “Pay As You Go”
- Fortigate Image Version: “7.4.x” - Select the latest version
- Size: “F2s_v2” - If the size is not “F2s_v2” use the “Change size” link and select “F2s_v2”
Tip
Note the blue shaded areas, they are links to additional information
Click “Next”
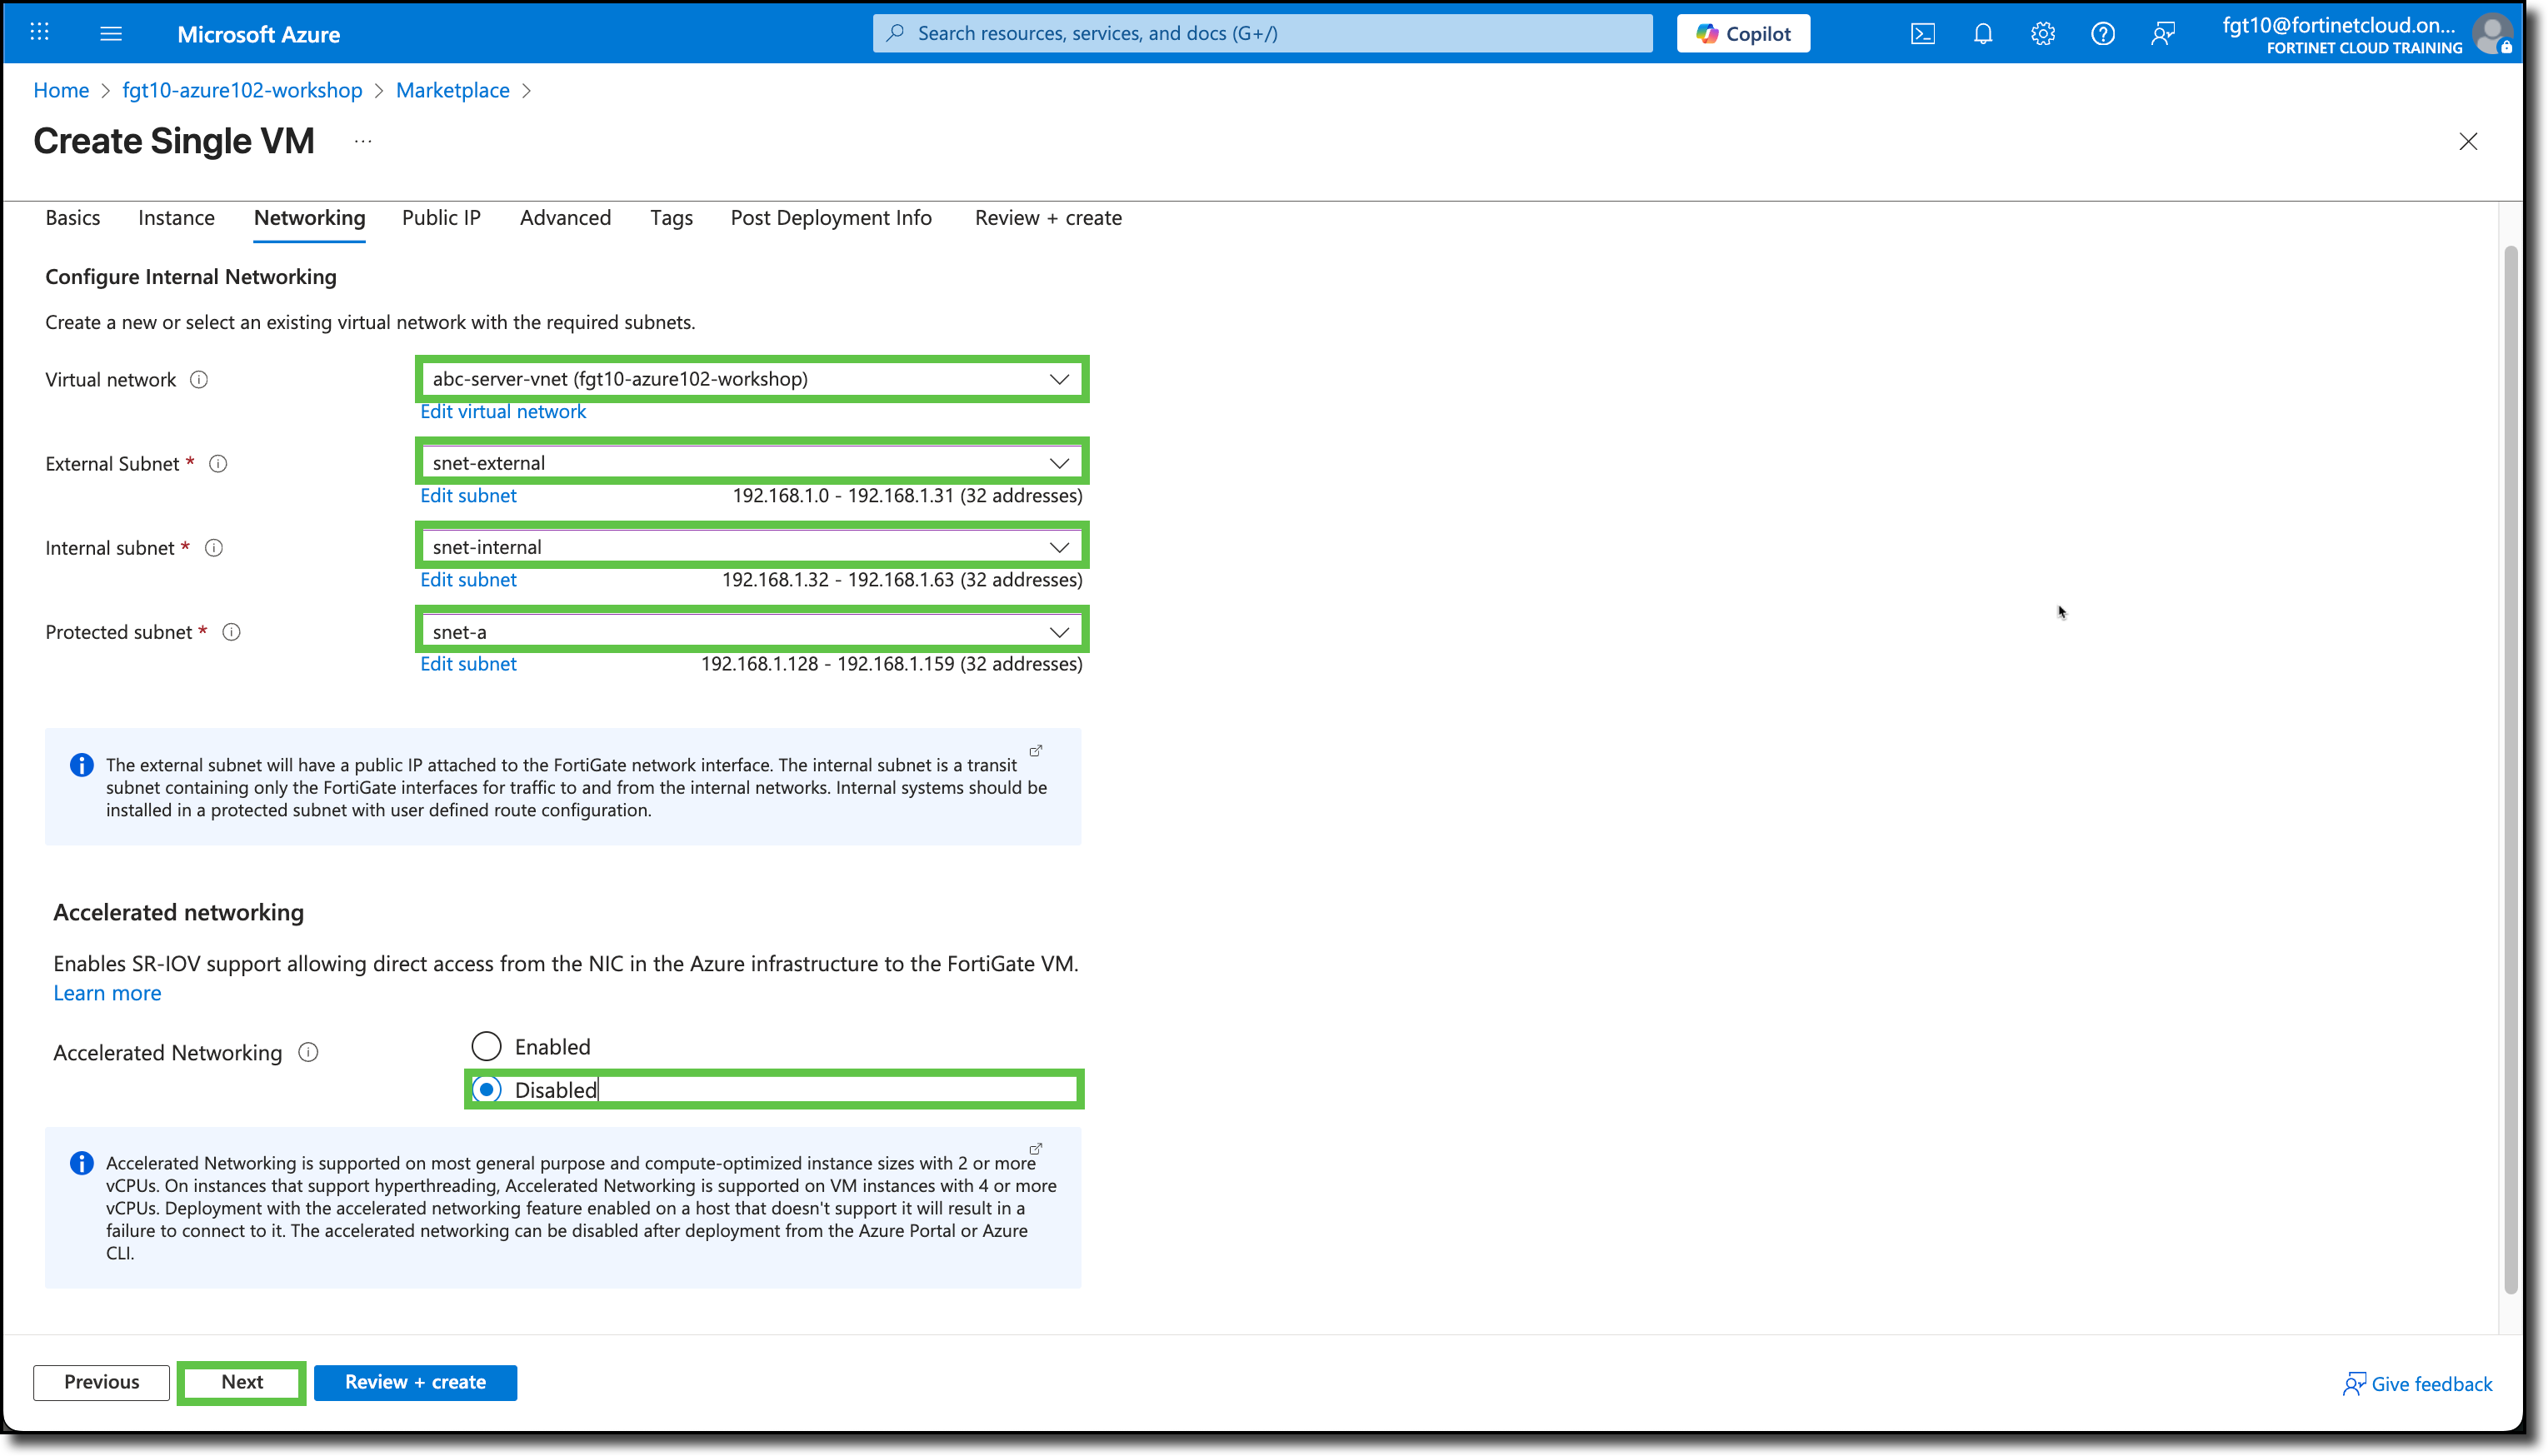
On the Networking tab, select the following:
- Virtual network: abc-server-vnet
- External Subnet: snet-external
- Internal subnet: snet-internal
- Protected subnet: snet-a
- Accelerated Networking: Disabled
Note
snet-b will be protected as well, the template just does not have a selection for it.
Click “Next”
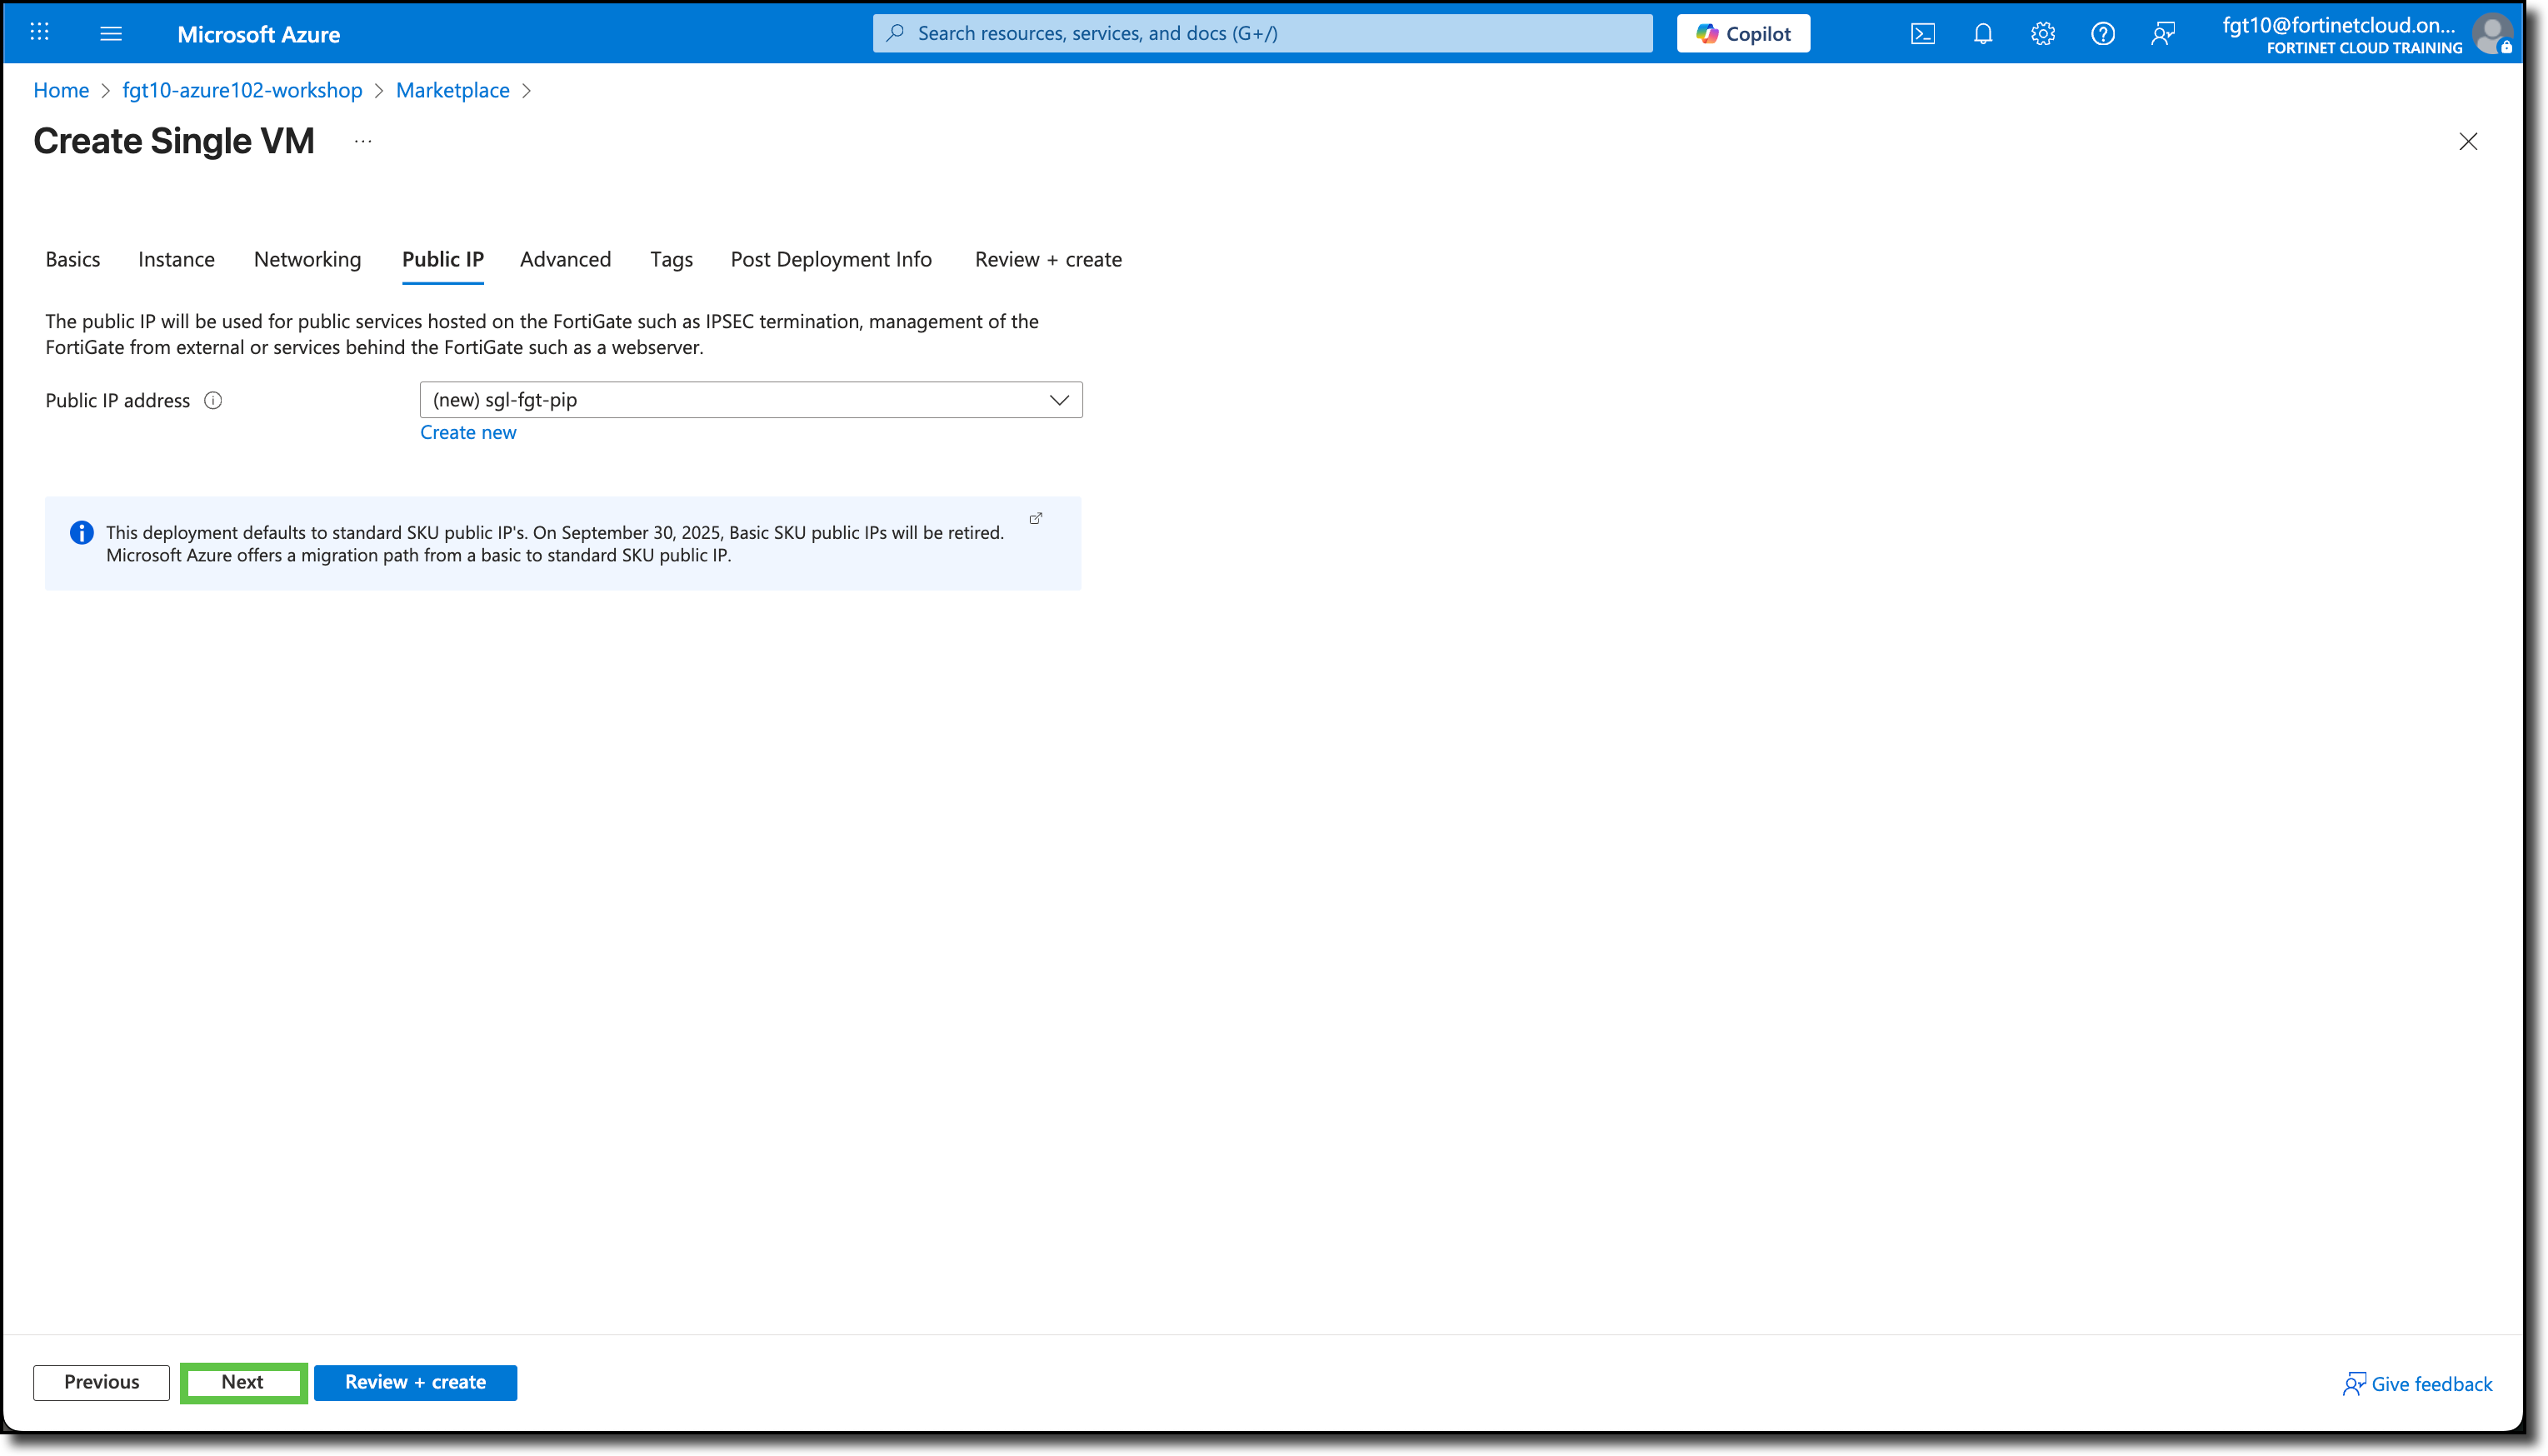
On the Public IP tab, keep the default Public IP address already entered. It should have a “(new)” listed in the beginning of the field.
Click “Next”
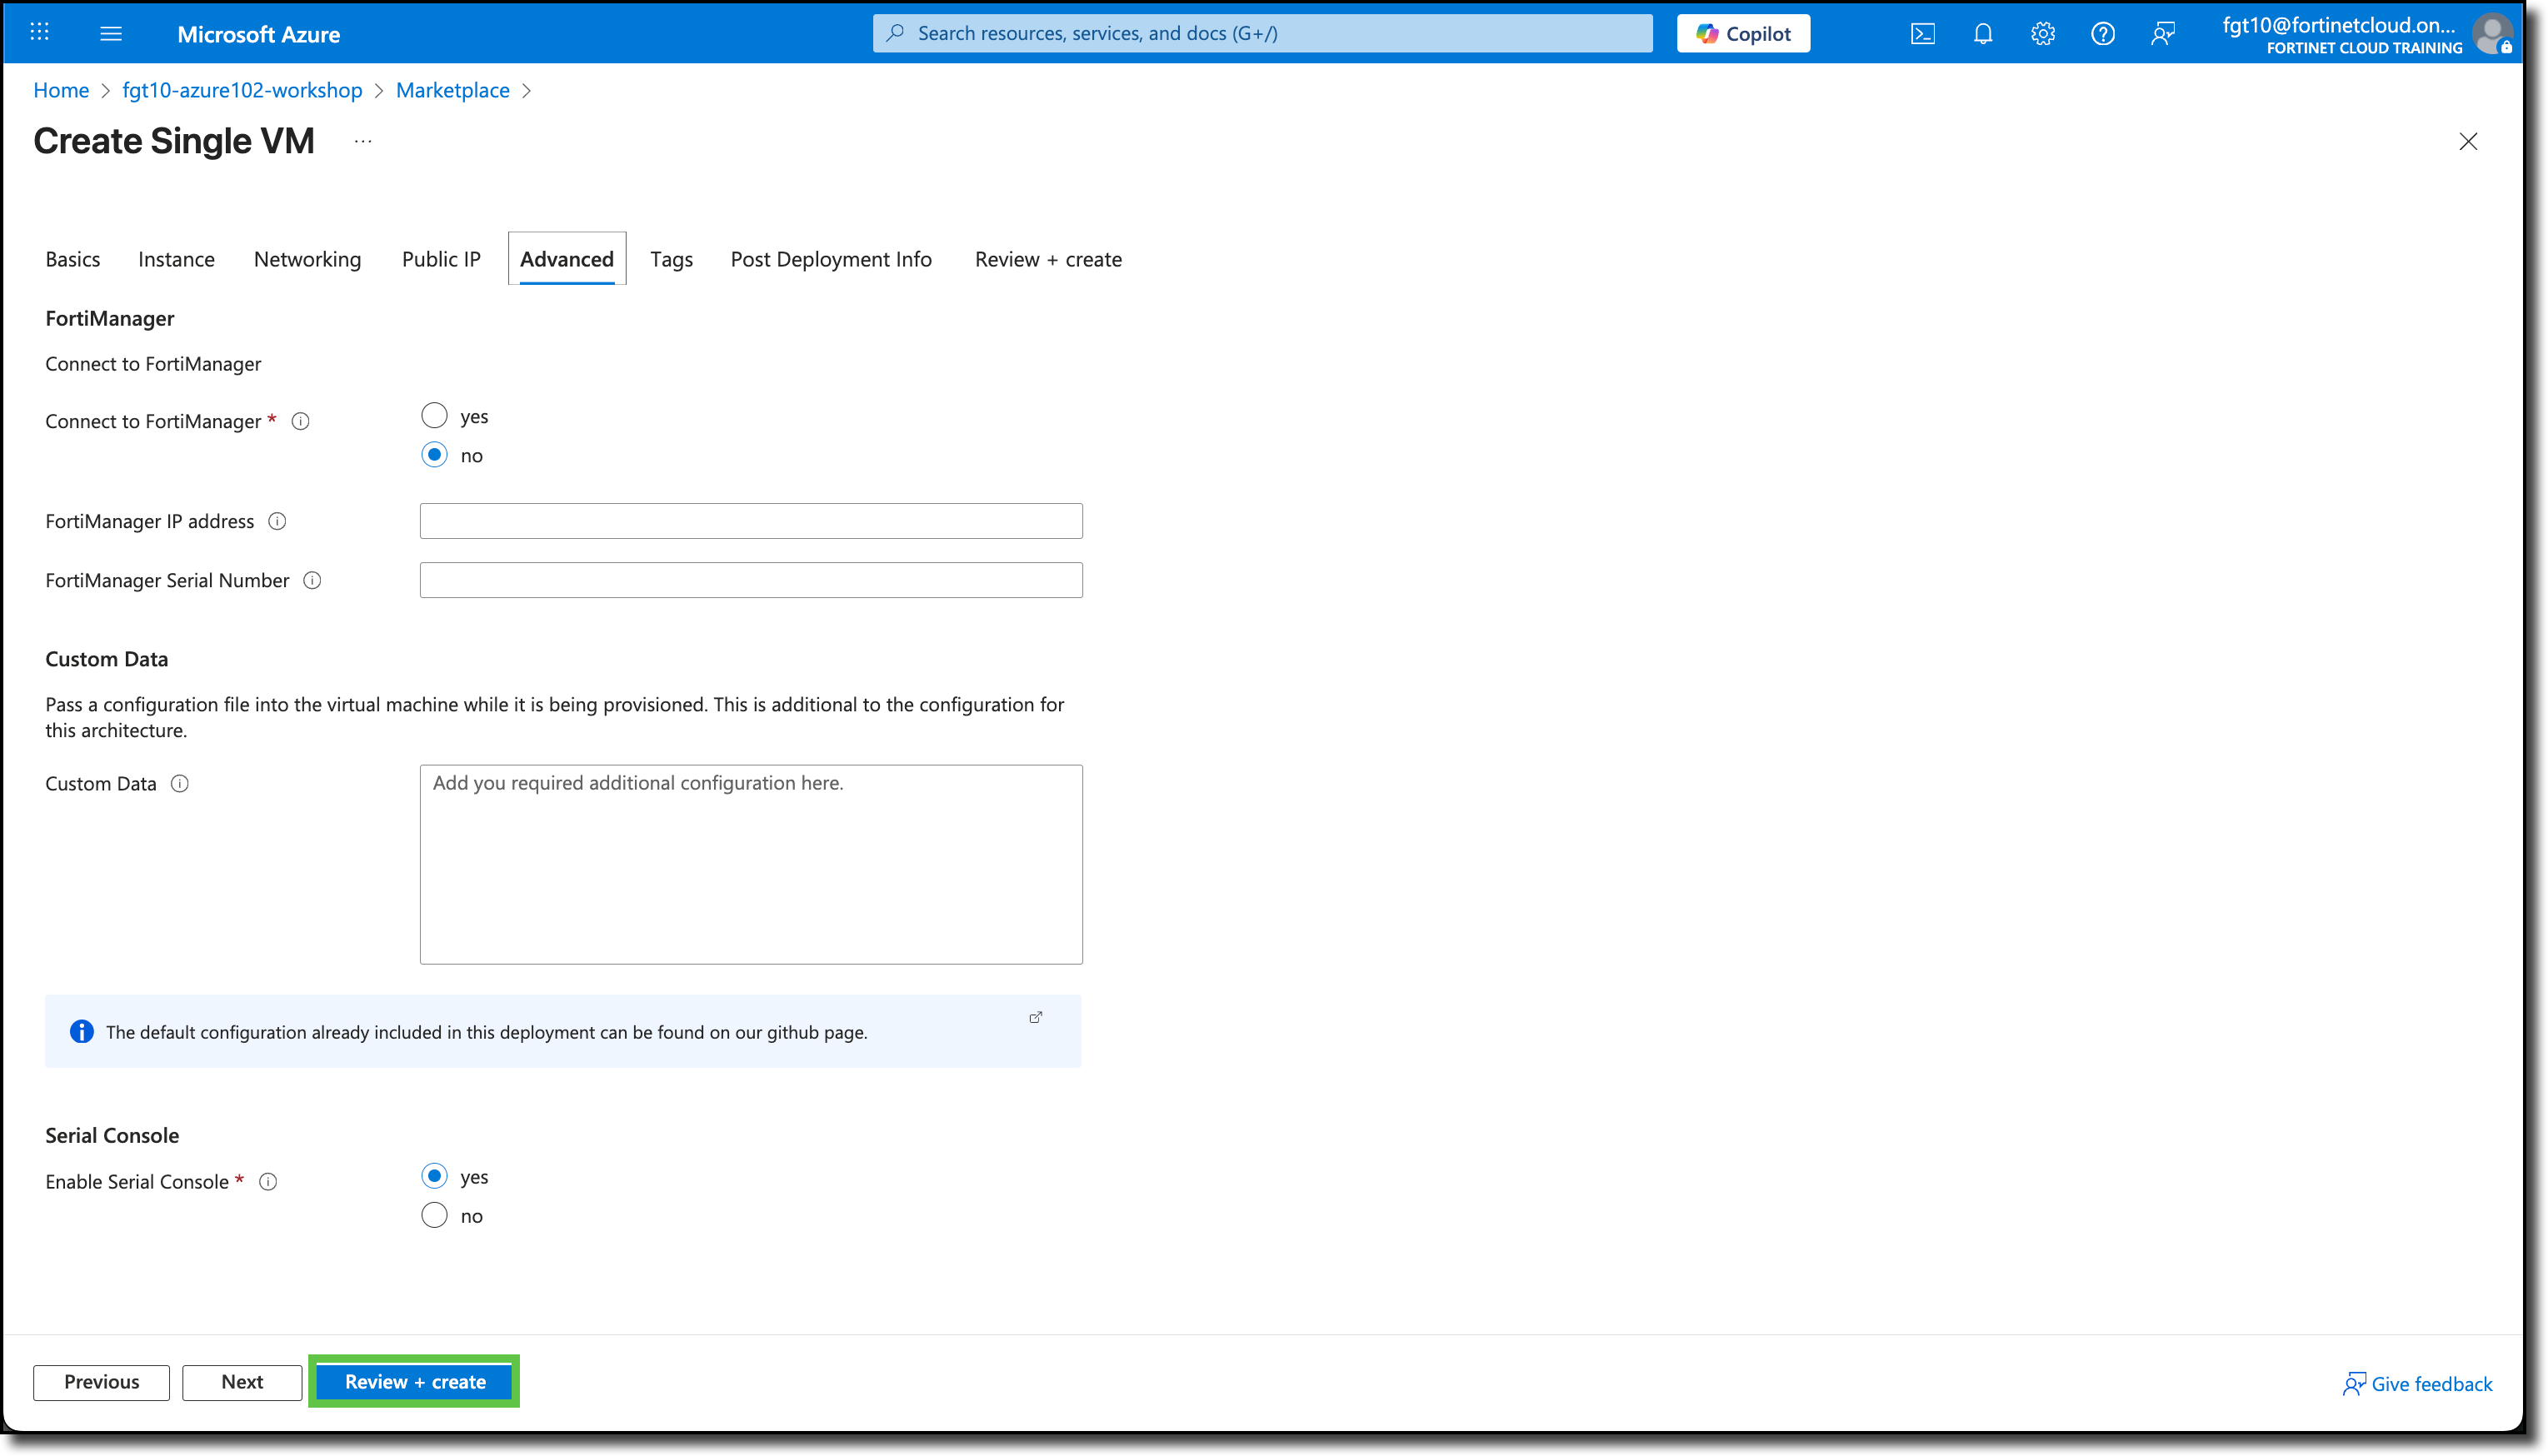
On the Advanced tab, keep the default settings.
Click “Review + create”
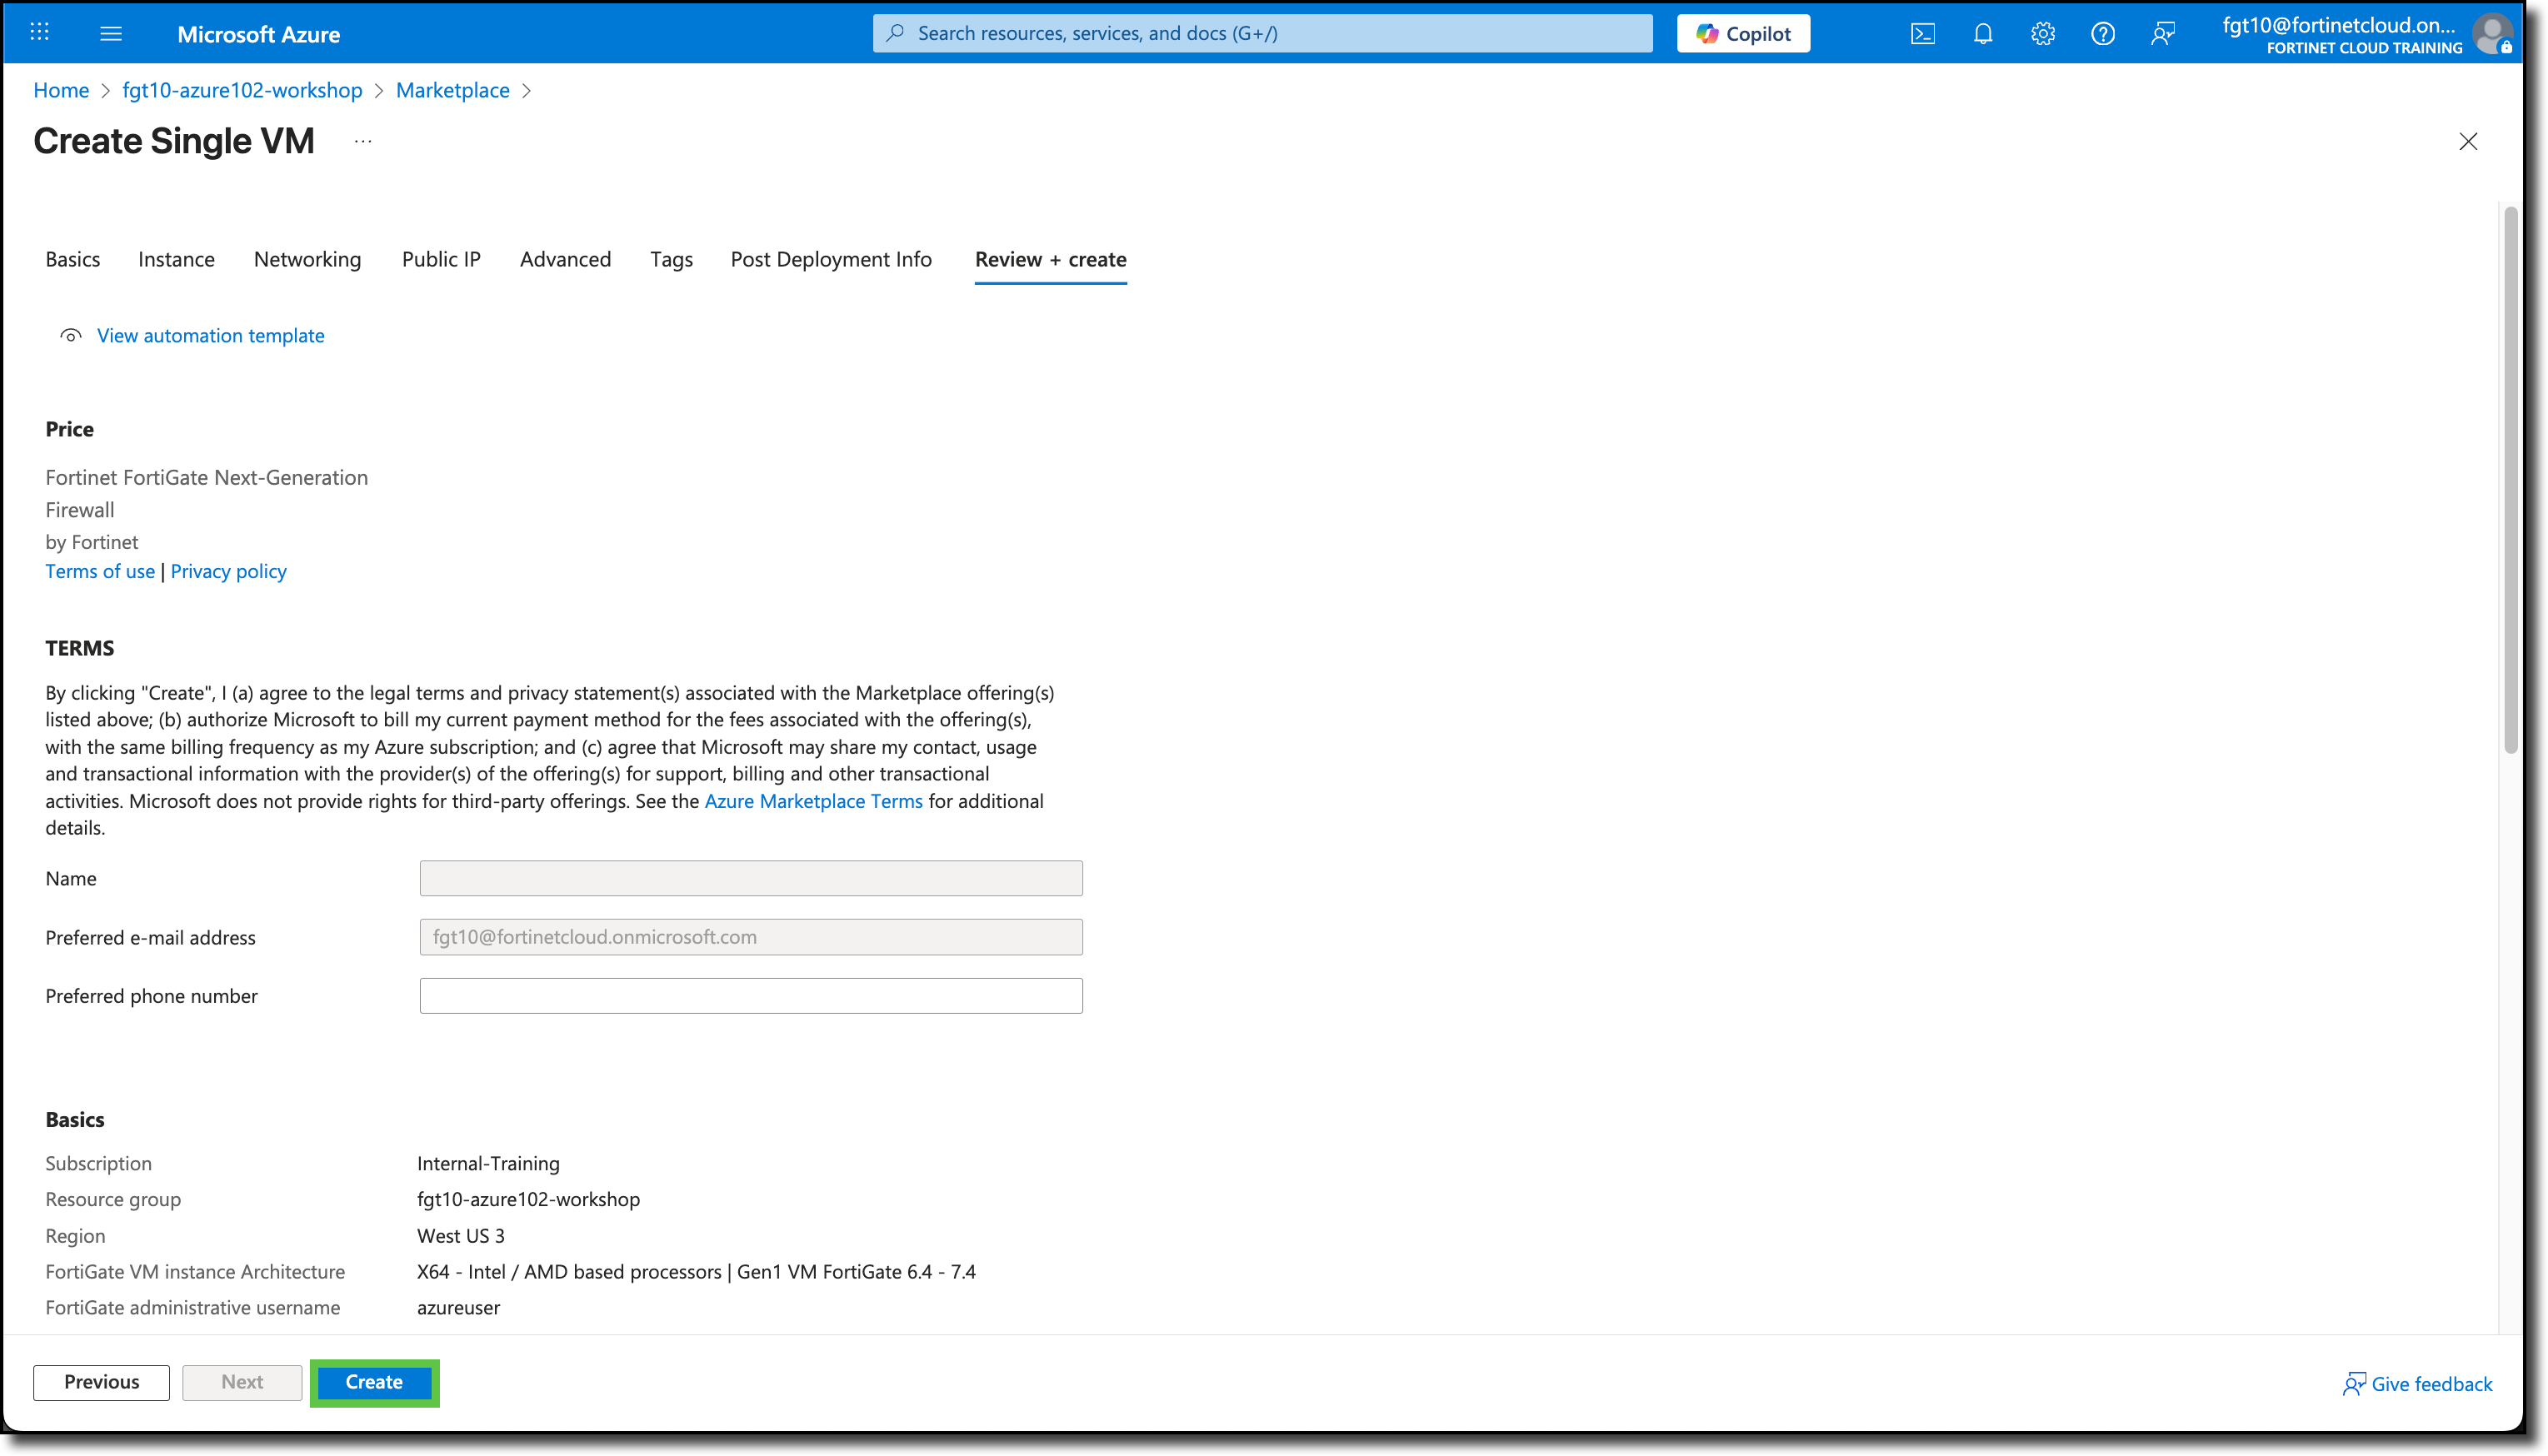
On the Review + create tab, scroll down and review the template entries.
Click “Create”
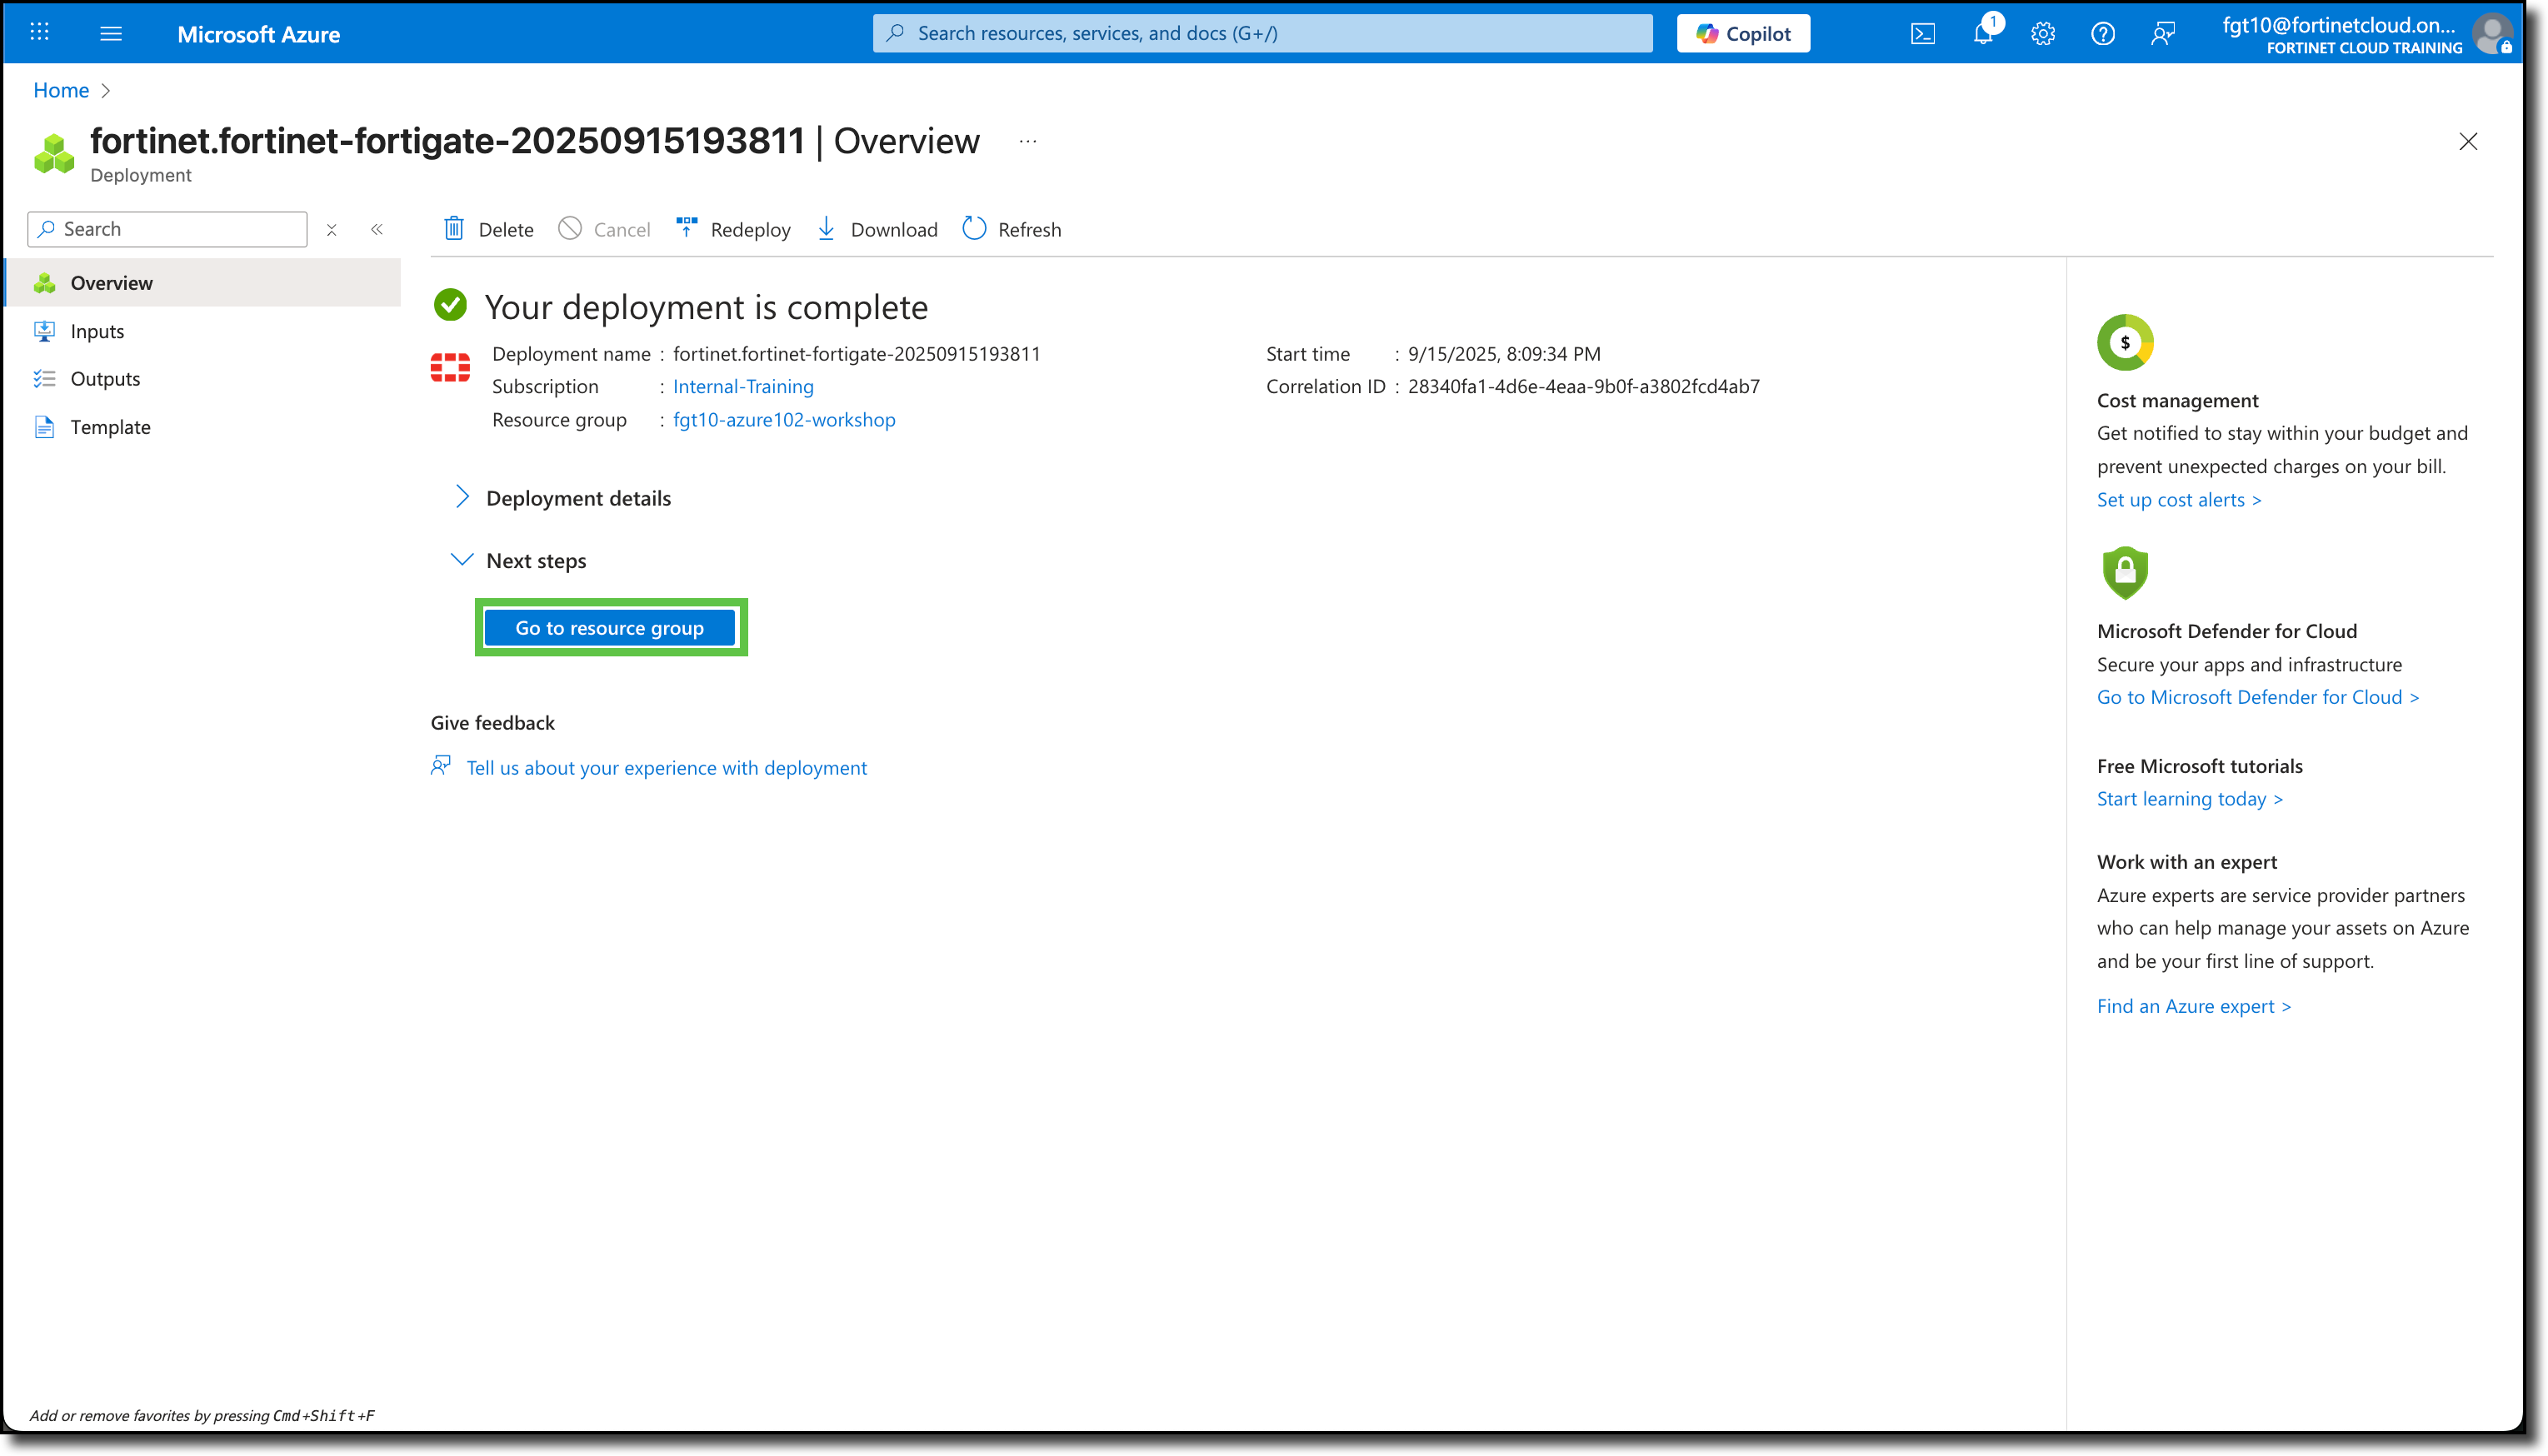
The screen will refresh and you will see Deployment is in progress.

After a few minutes, you will see Your deployment is complete
Click Go to resource group
Confirm the FortiGate NVA and its related services have been deployed.
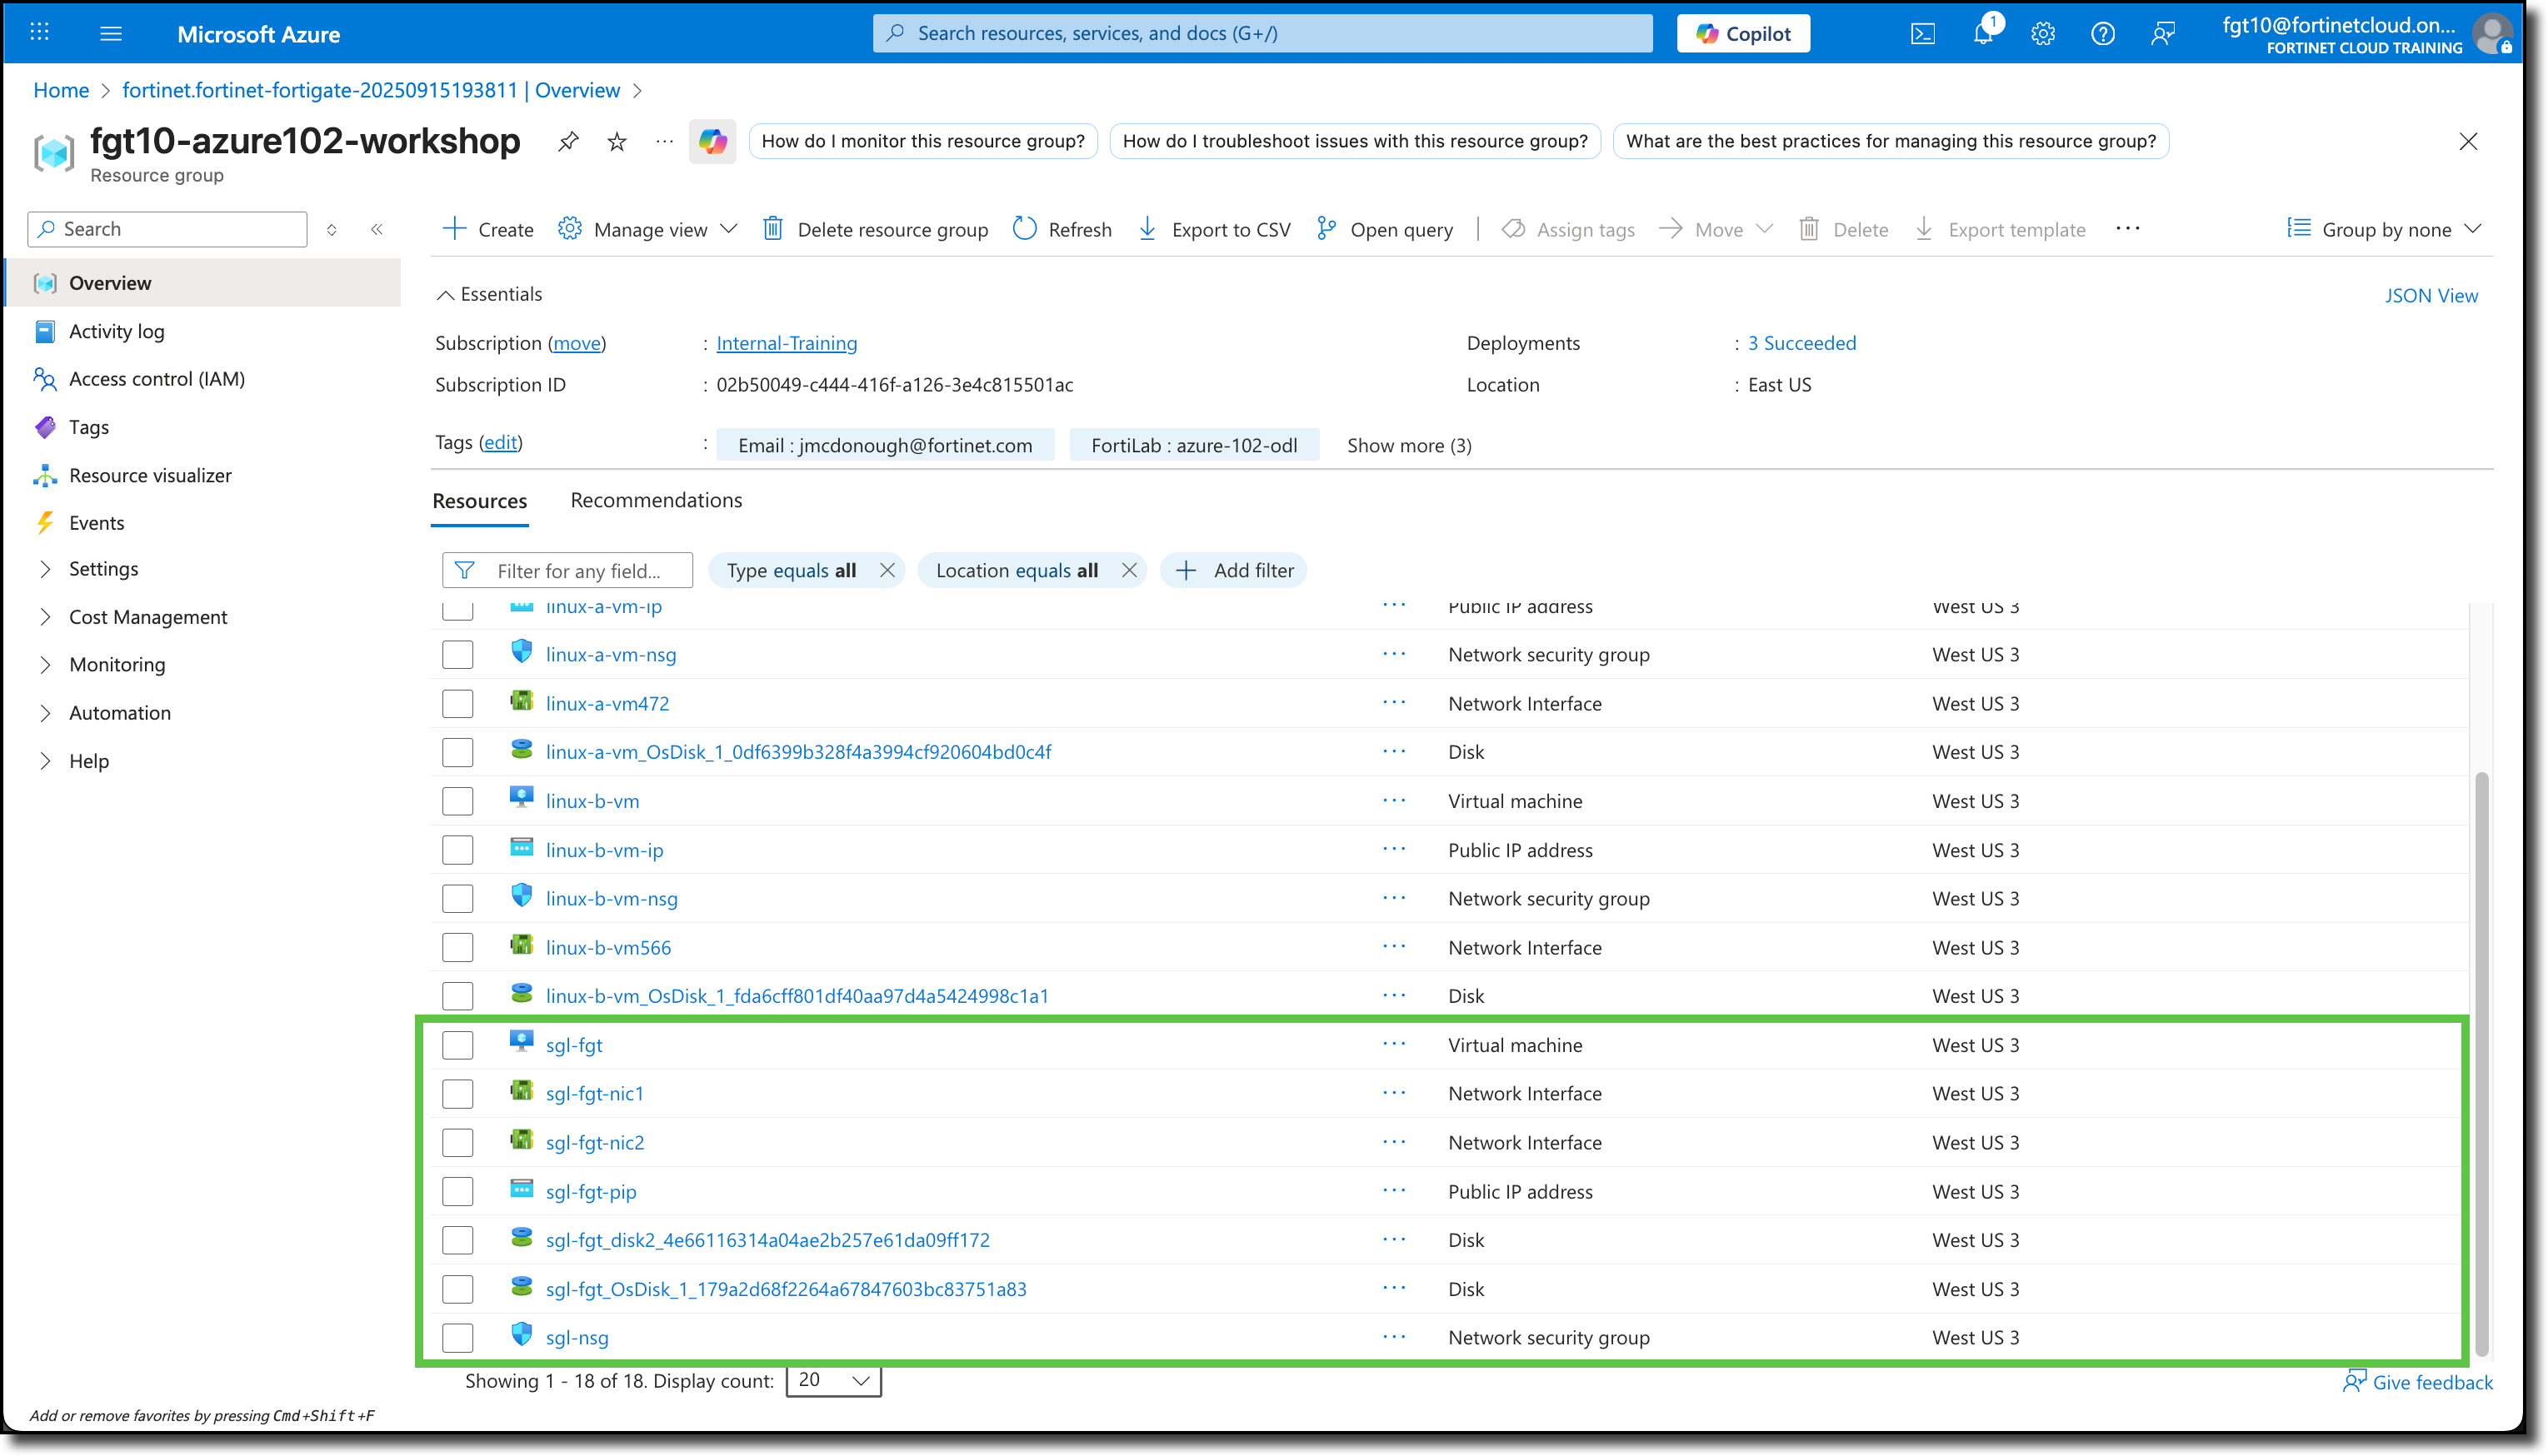
Click “sgl-fgt”
View Public IP address on overview page
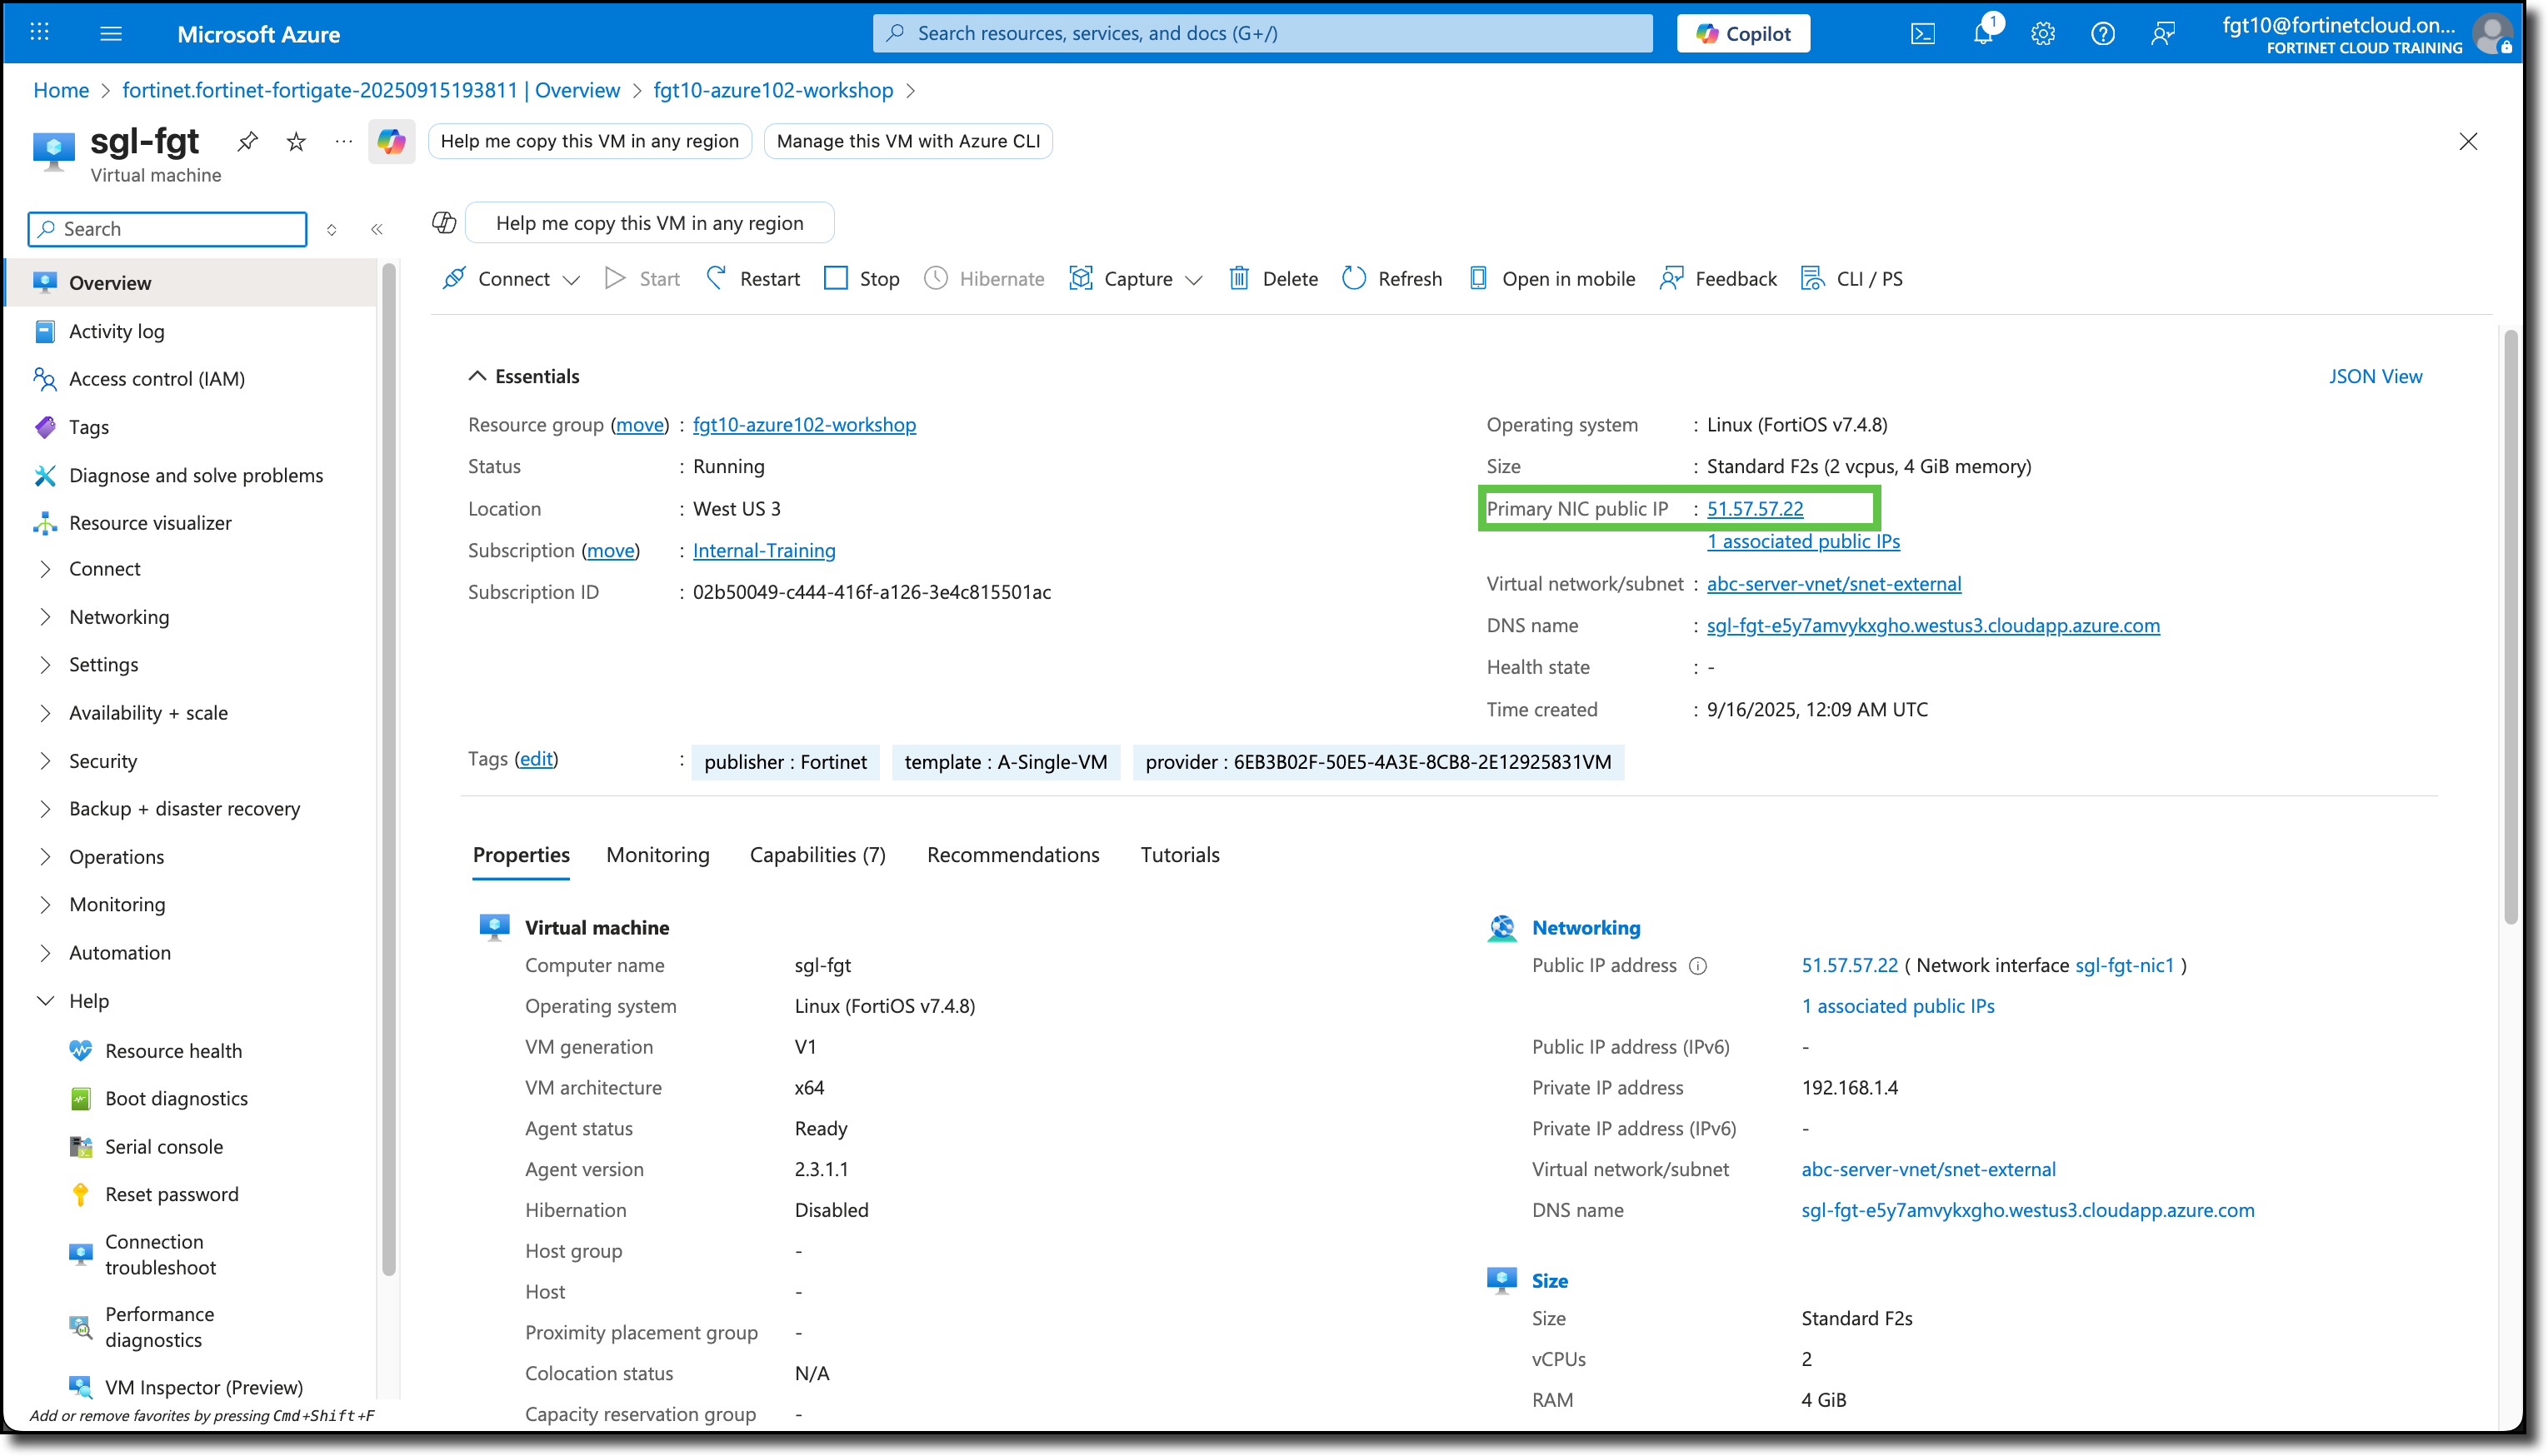
FortiGate Access
Use the “Public IP address” in a browser to access the FortiGate interface
Enter the login info from above

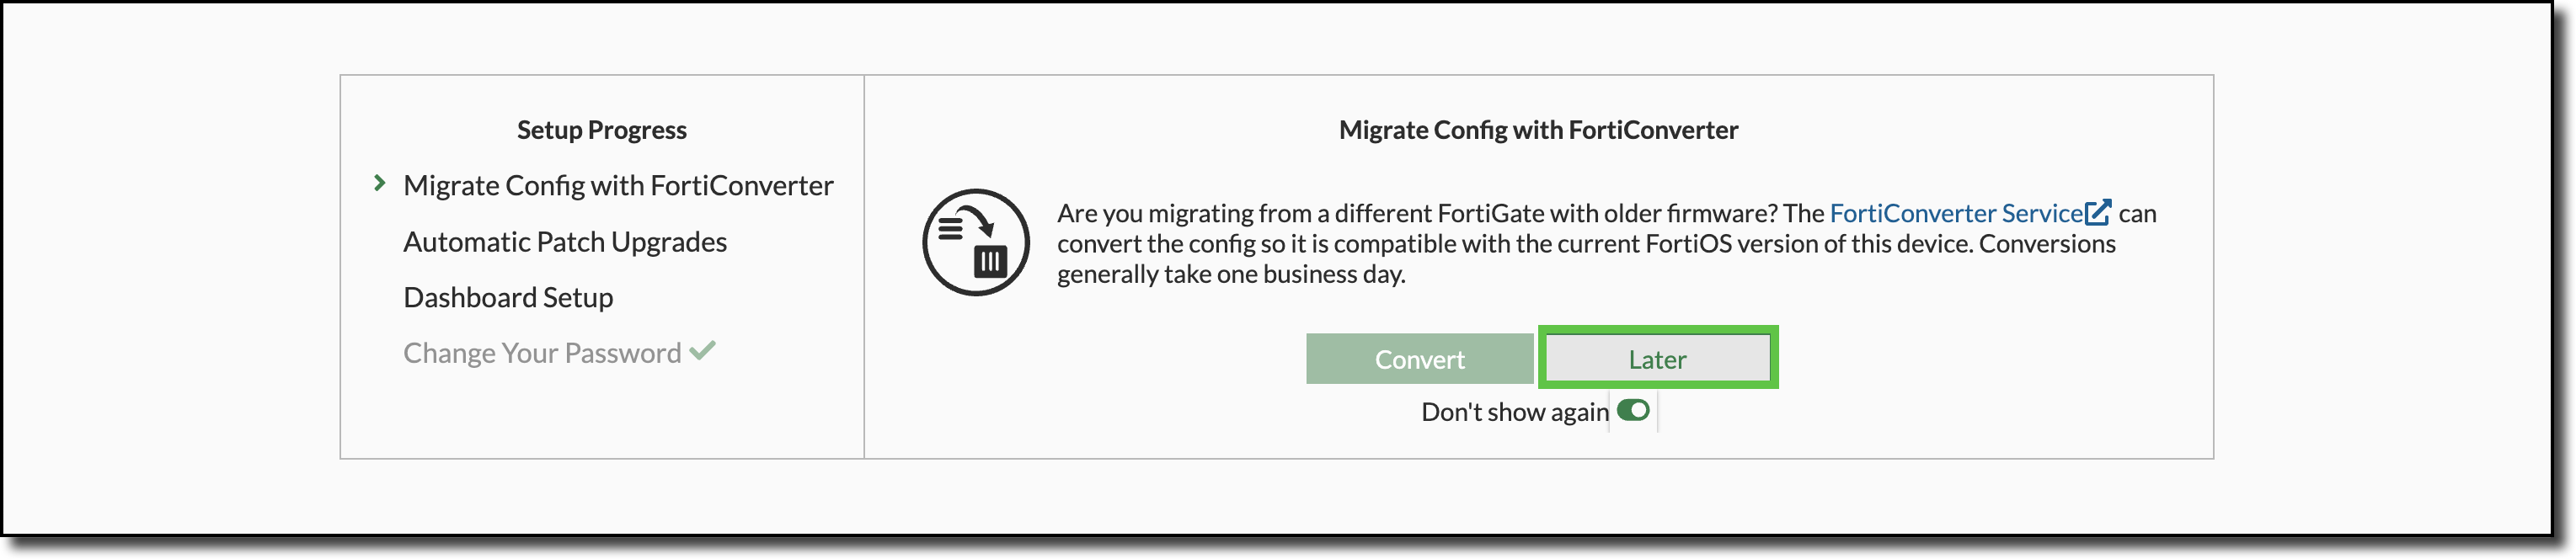
Click “Begin” on the FortiGate Setup page

Click “Later” on the Migrate Config with FortiConverter page
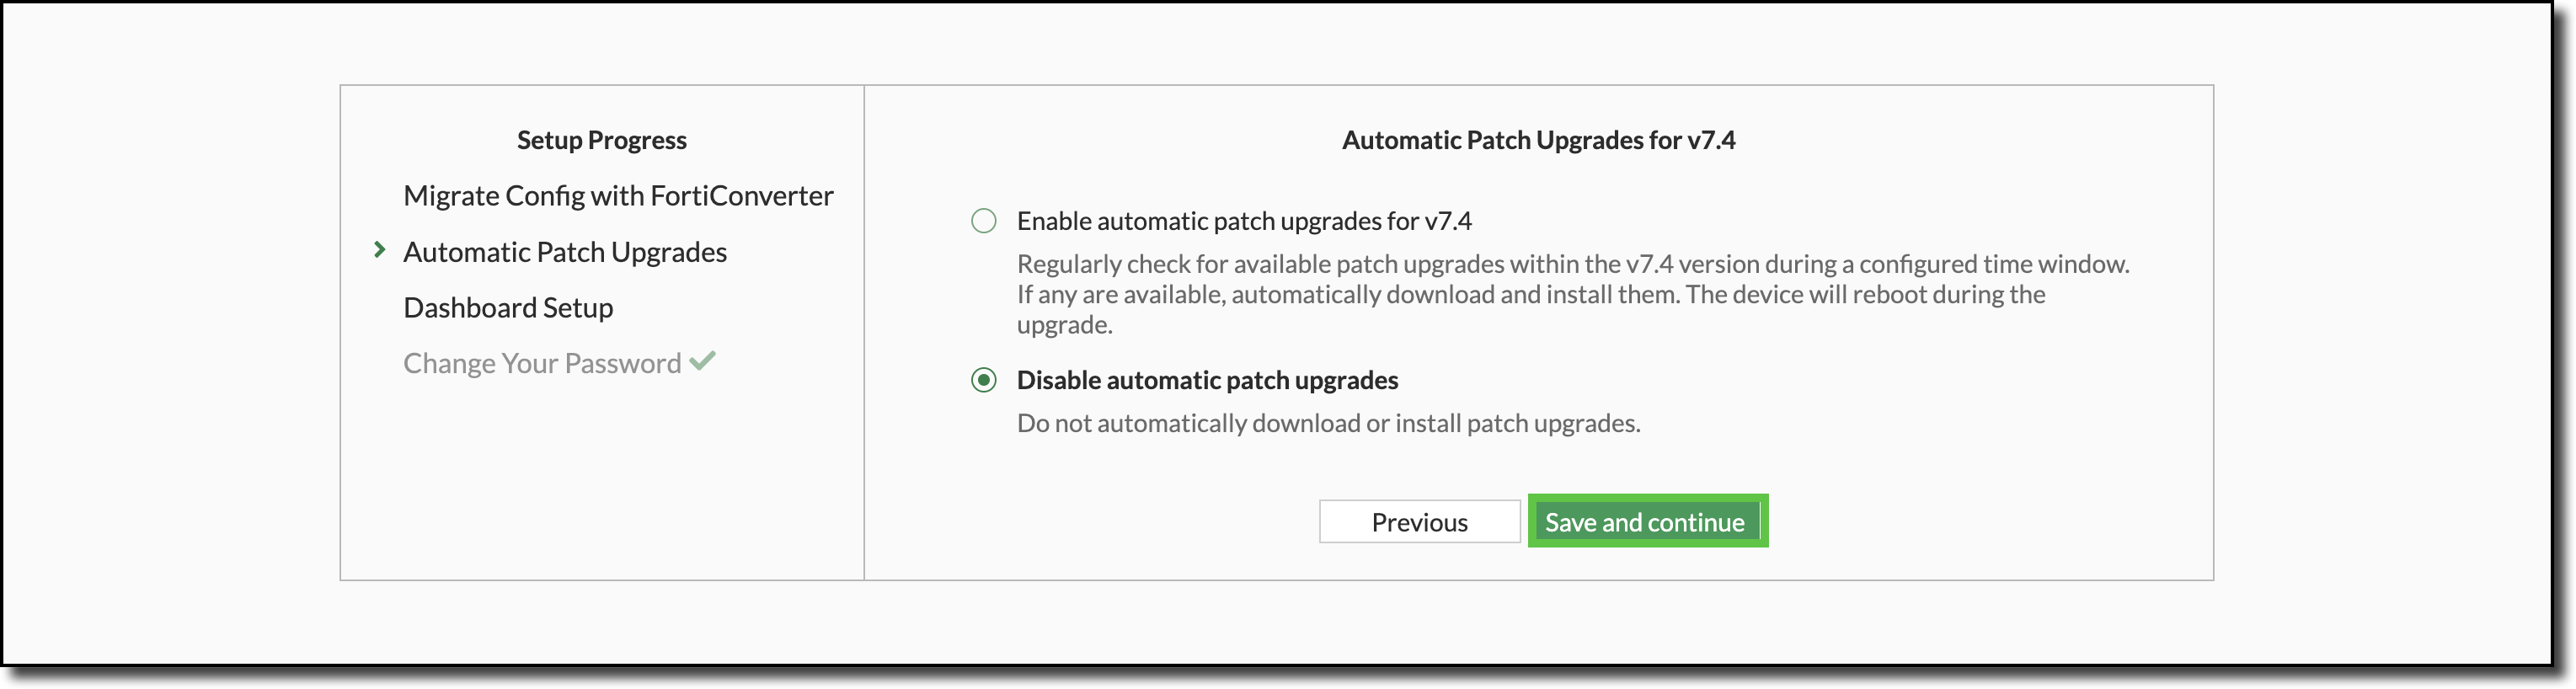
Select “Disable automatic patch upgrades” then Click “Save and continue” on the Automatic Patch Upgrades for v7.4 page
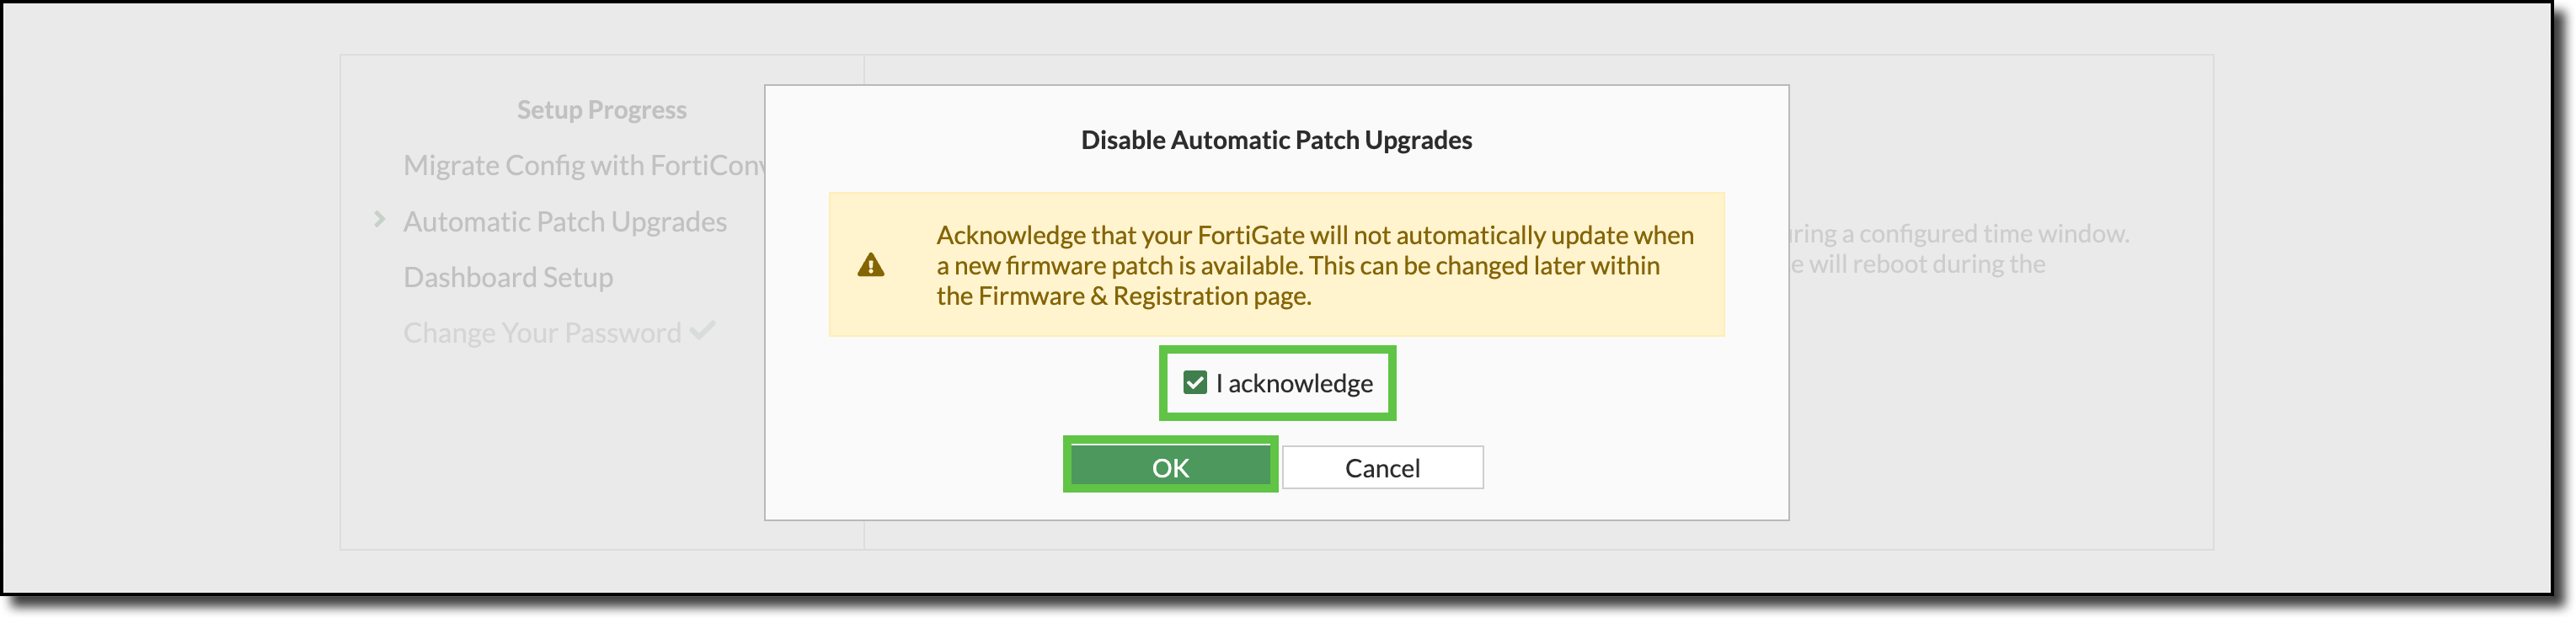
Select “I acknowledge” and Click “OK” on the Disable Automatic Patch Upgrades page
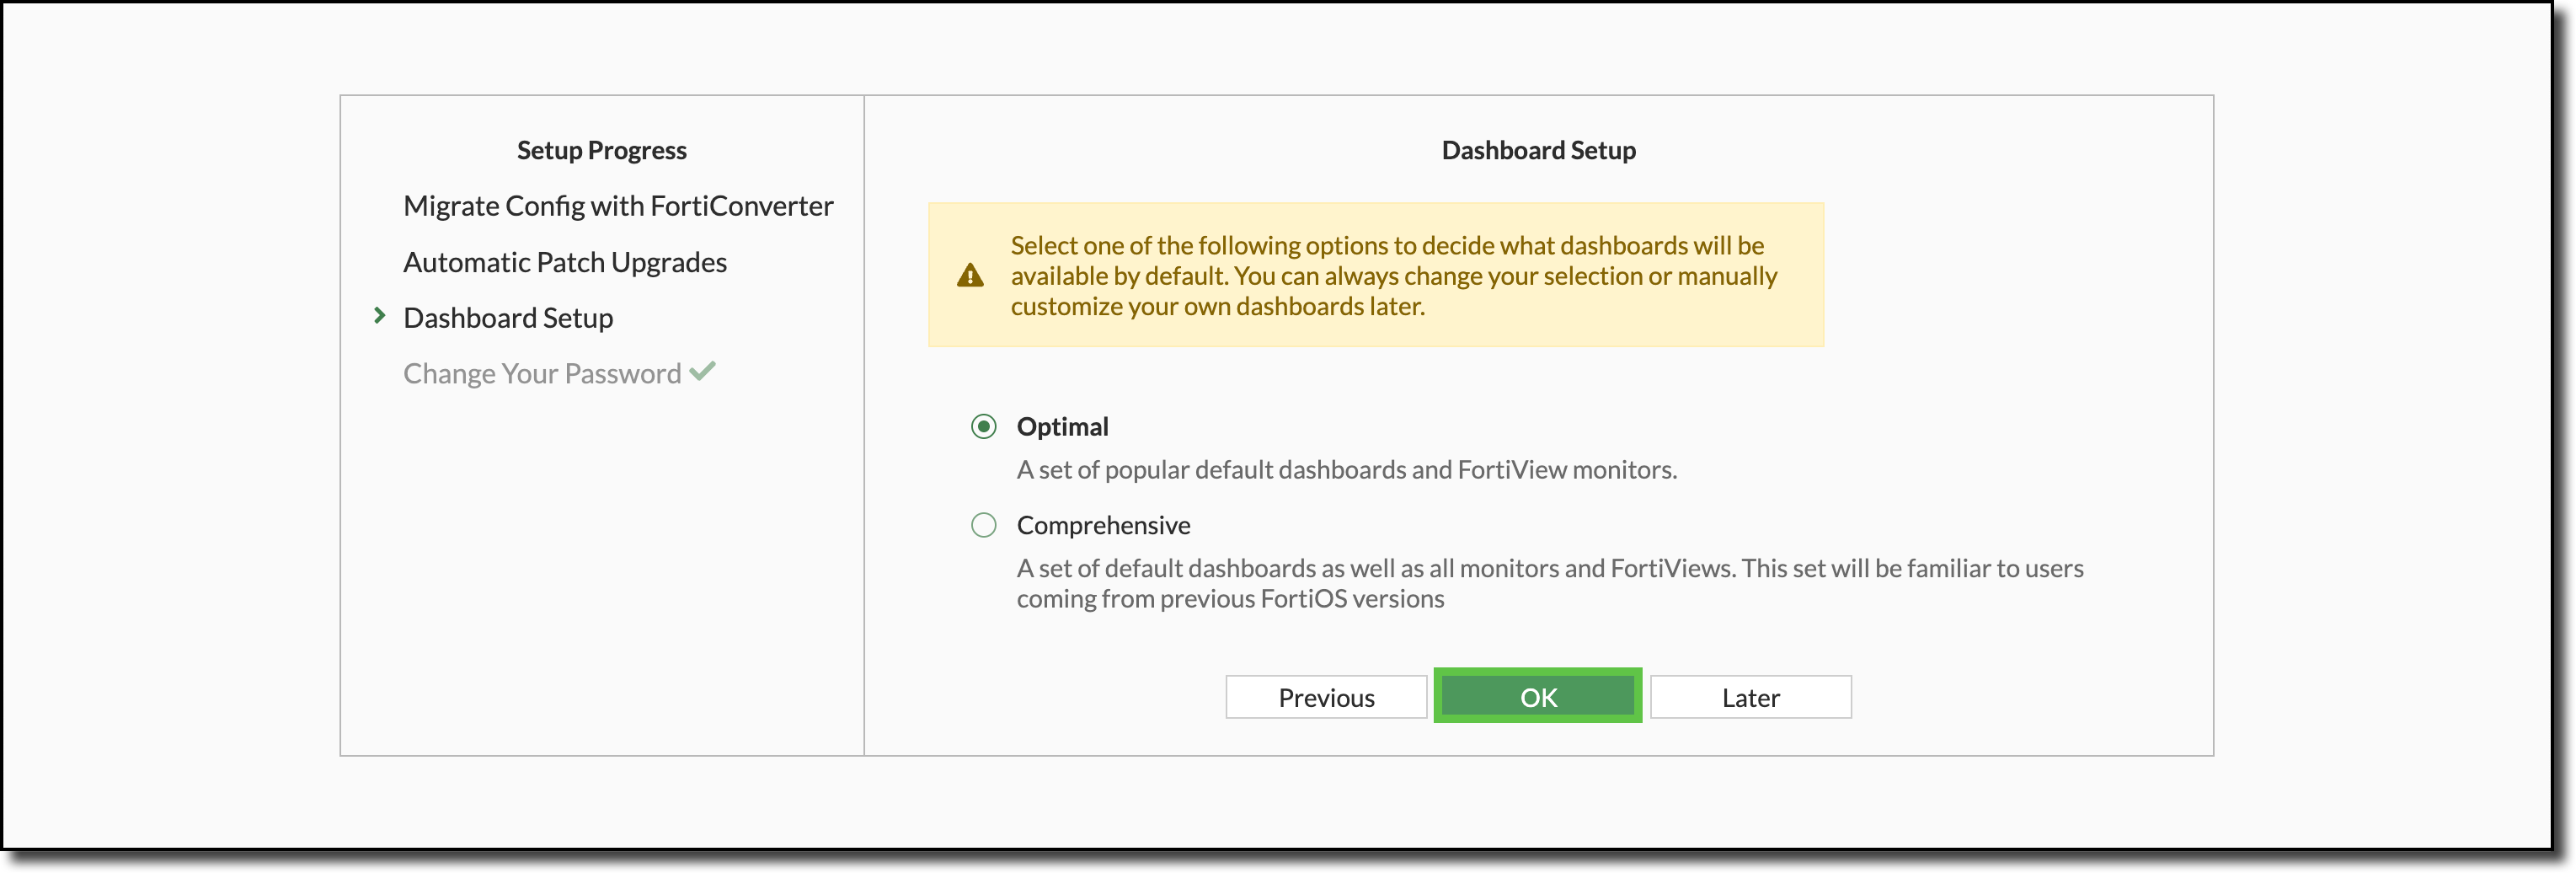
Click “OK” on the Dashboard Setup page
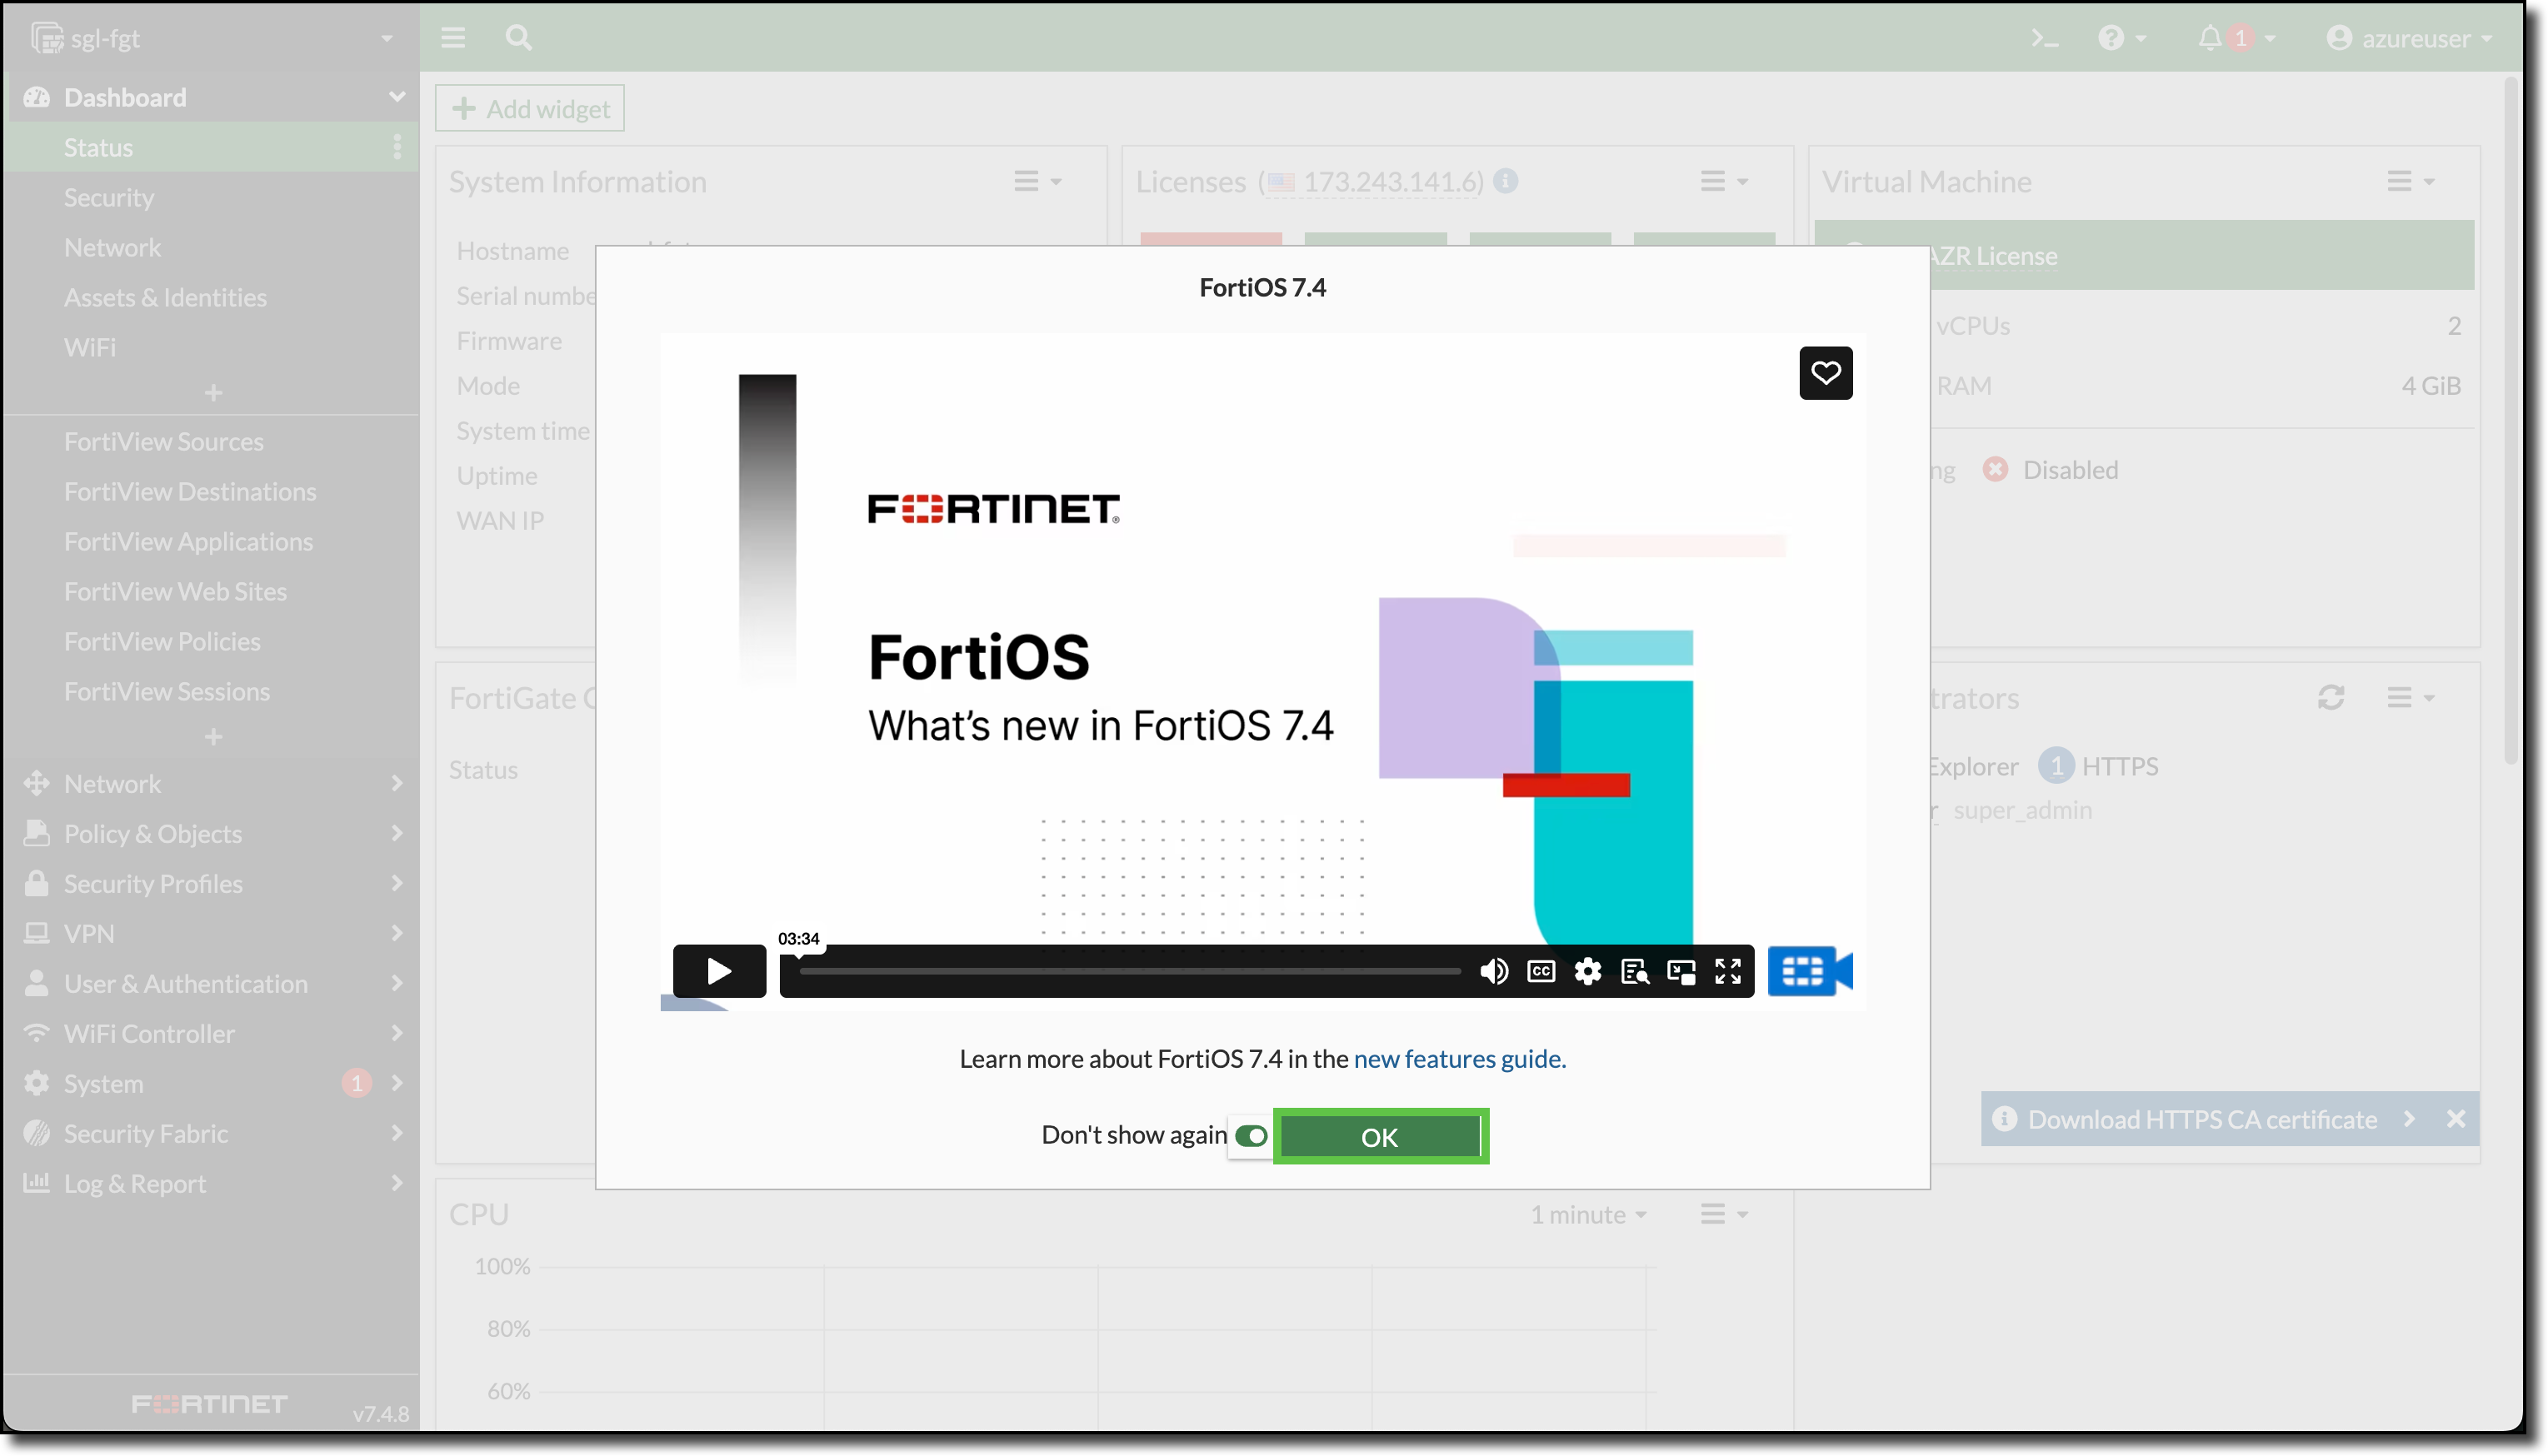
Select “Don’t show again” and Click “OK” on the What’s new in FortiOS 7.4 video
The following diagram is a representation of your current VNET with Linux VM deployment and FortiGate NVA