Task 4: Configure FortiGate Policies
In Task 4, now that you have confirmed traffic from both Linux VMs is being routed to the FortiGate, you will create policies that will accomplish the security requirements requested by company ABC.
To meet these requirements, the following access needs to be setup for each Linux VM.
linux-a-vm is the management server and should have the following access:
- SSH and PING access to linux-b-vm
- HTTP and HTTPS access to the Internet
- SSH access to linux-a-vm from the Internet
linux-b-vm is the www server and should have the following access:
- HTTP service from the Internet
- HTTP and HTTPS access to the Internet
- PING access to linux-a-vm
Configure FortiGate Policies and Objects
In the following steps, you will create
- An Address object
- A Virtual IP Address (VIP)
- A Firewall Policy for linux-a-vm
Then repeat each step to create similar configurations for linux-b-vm
Tip
In FortiGate System–>Settings change the “Idle timeout” to 60 to stay logged into the FortiGate
From the FortiGate GUI
Navigate to Policy & Objects–>Addresses
Click “+ Create new”
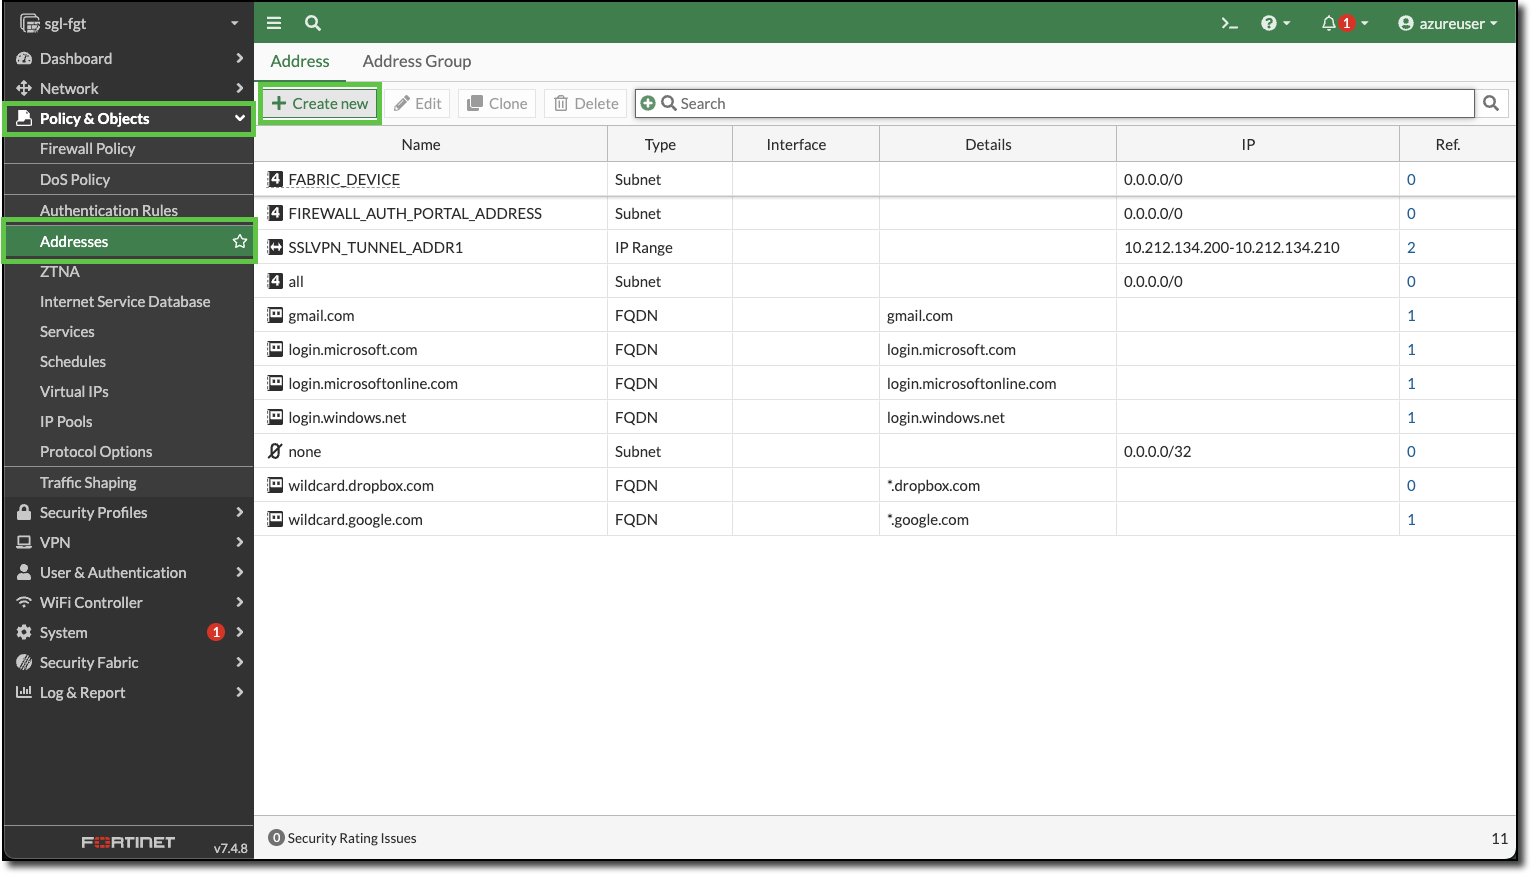
Enter the following:
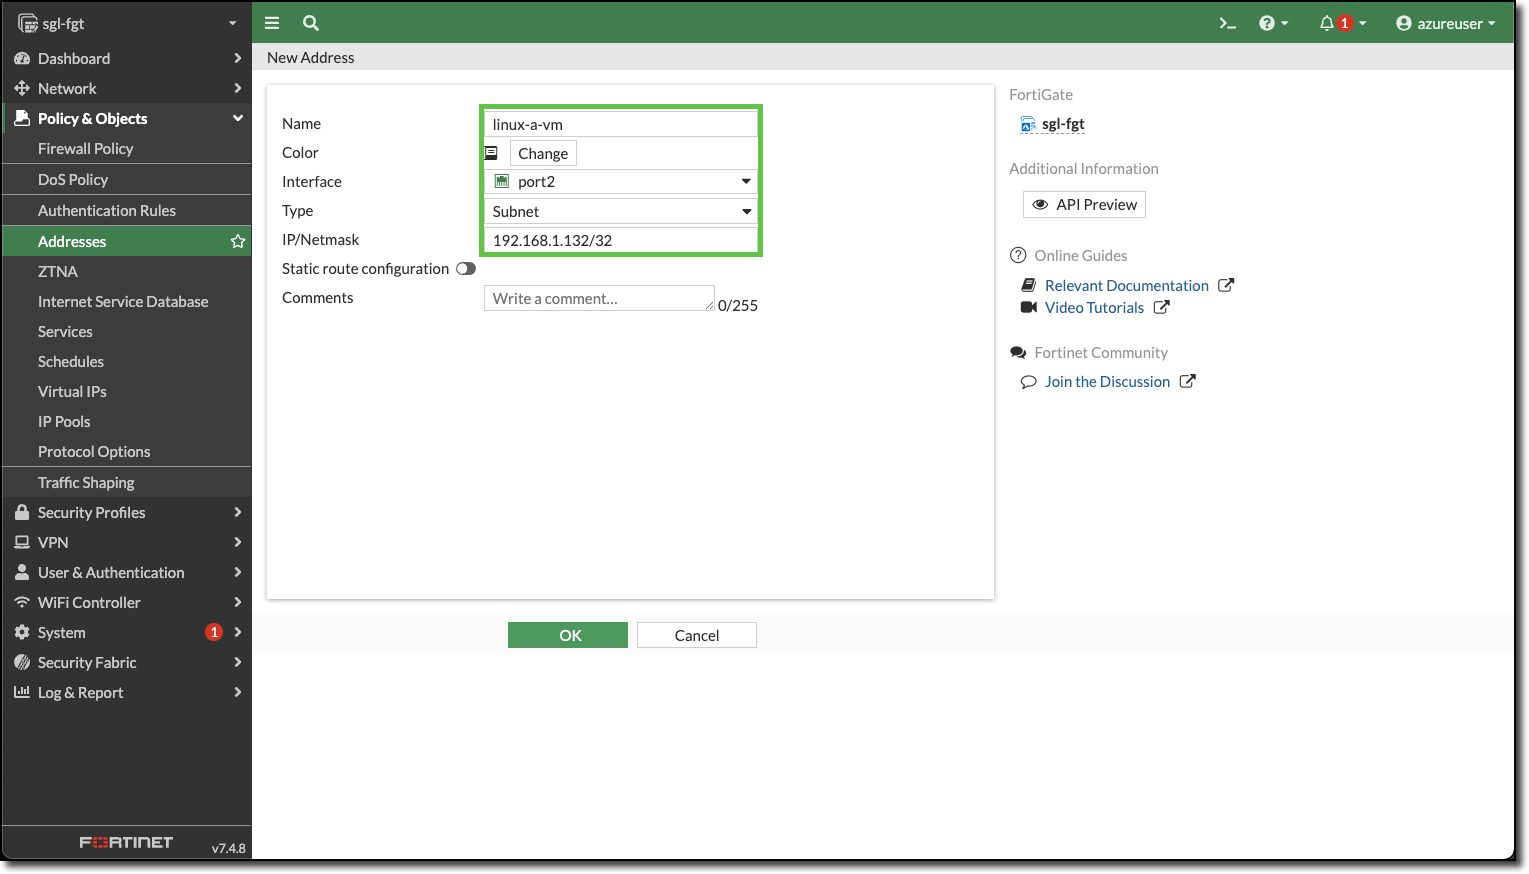
- Name:
linux-a-vm - Interface: port2
- Type: Subnet
- IP/Netmask:
192.168.1.132/32
- Name:
Click “OK”
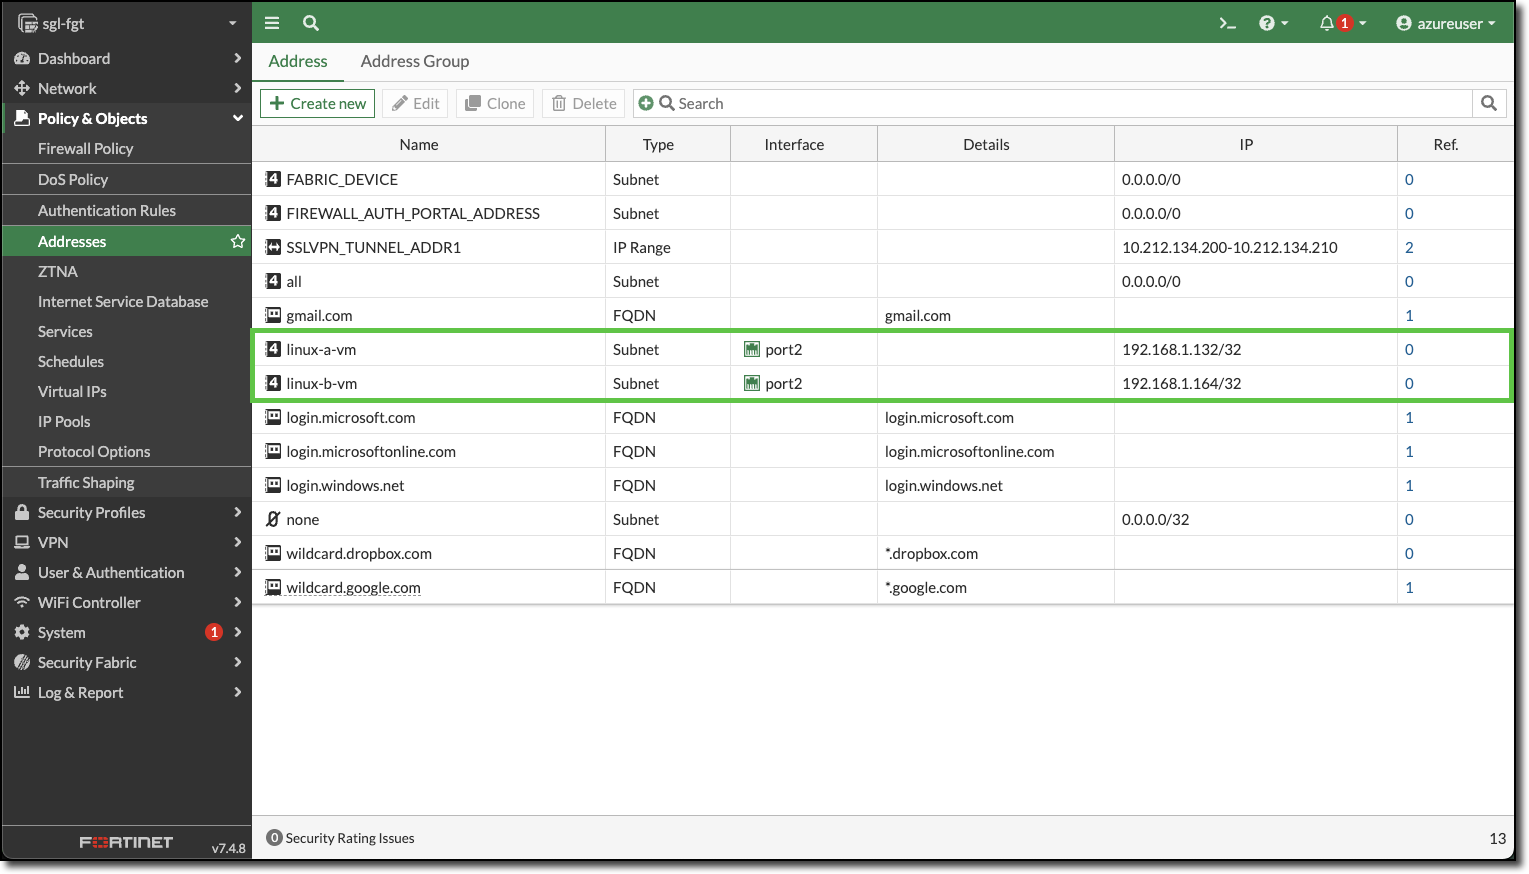
Repeat for linux-b-vm. Your Address screen should have both Linux VMs listed.
Click “+ Create new”
Enter the following:
- Name:
linux-b-vm - Interface: port2
- Type: Subnet
- IP/Netmask:
192.168.1.164/32
- Name:
Click “OK”
View the created Address Objects
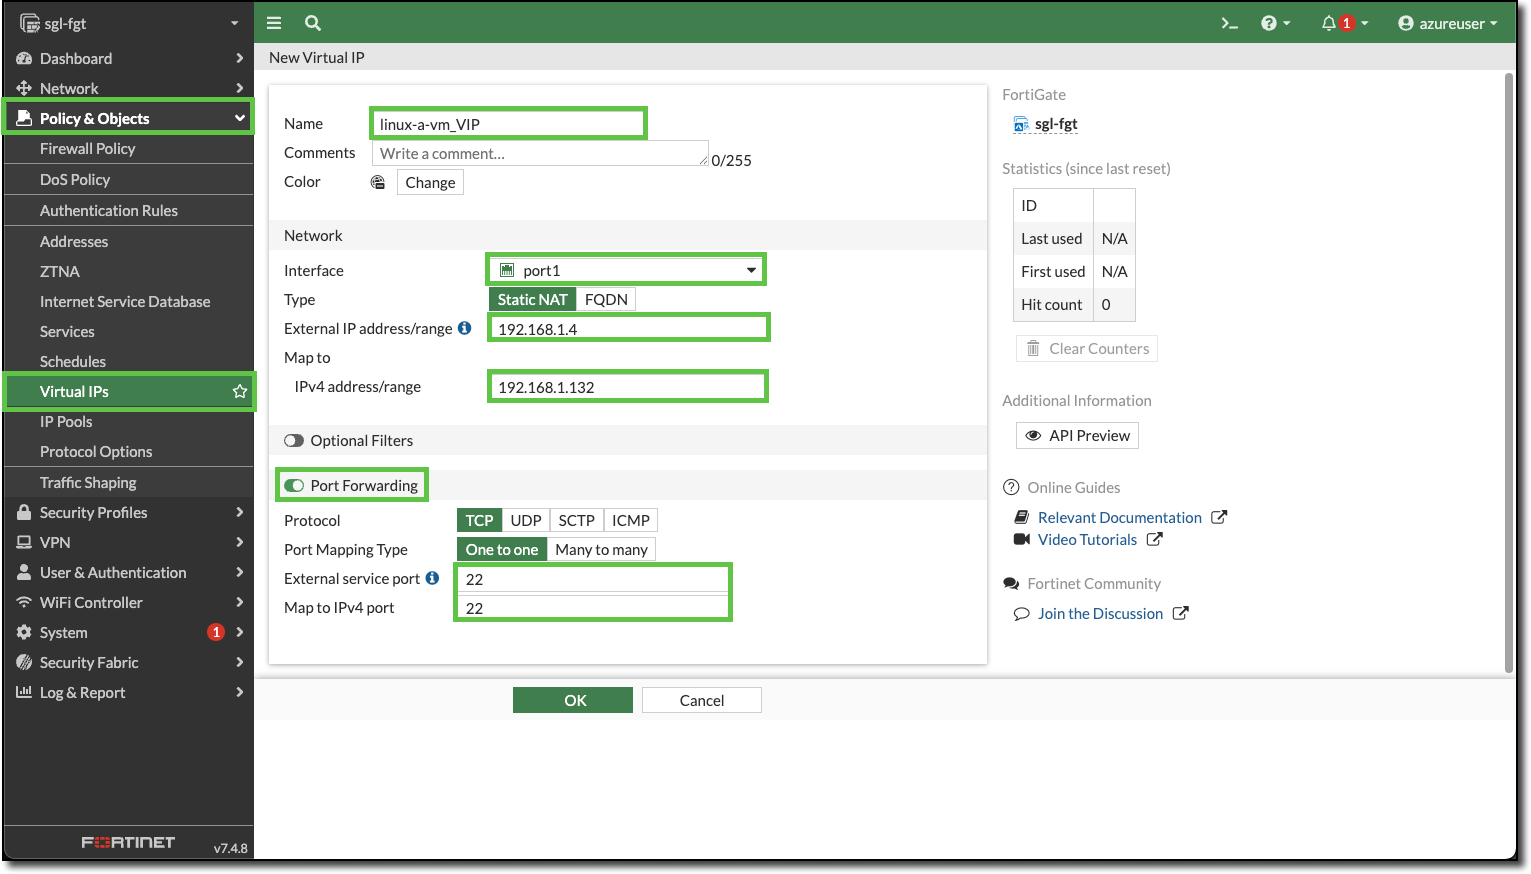
Navigate to Policy & Objects–>Virtual IPs
Click “+ Create new”
Enter the following:
- Name:
linux-a-vm_VIP - Interface: port1
- External IP address/range:
192.168.1.4 - Map to IPv4 address/range:
192.168.1.132 - Port Forwarding: Enable
- External service port: 22
- Map to IPv4 port: 22
- Name:
Click “OK”
Repeat and create a VIP for linux-b-vm, HTTP is the service port.
- Name:
linux-b-vm_VIP - Interface: port1
- External IP address/range:
192.168.1.4 - Map to IPv4 address/range:
192.168.1.164 - Port Forwarding: Enable
- External service port: 8080
- Map to IPv4 port: 80
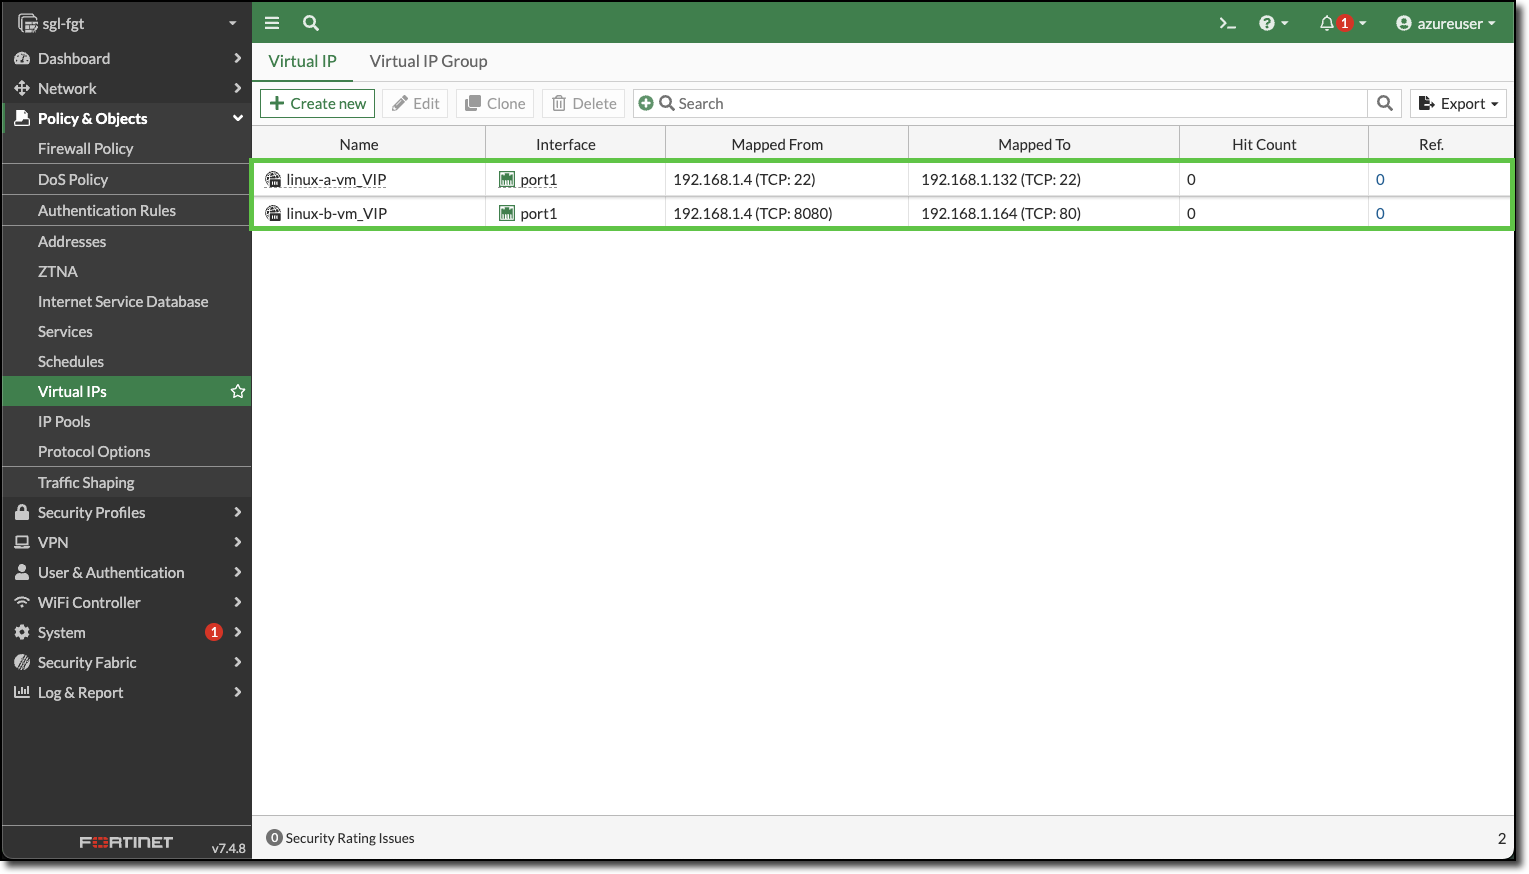
- Name:
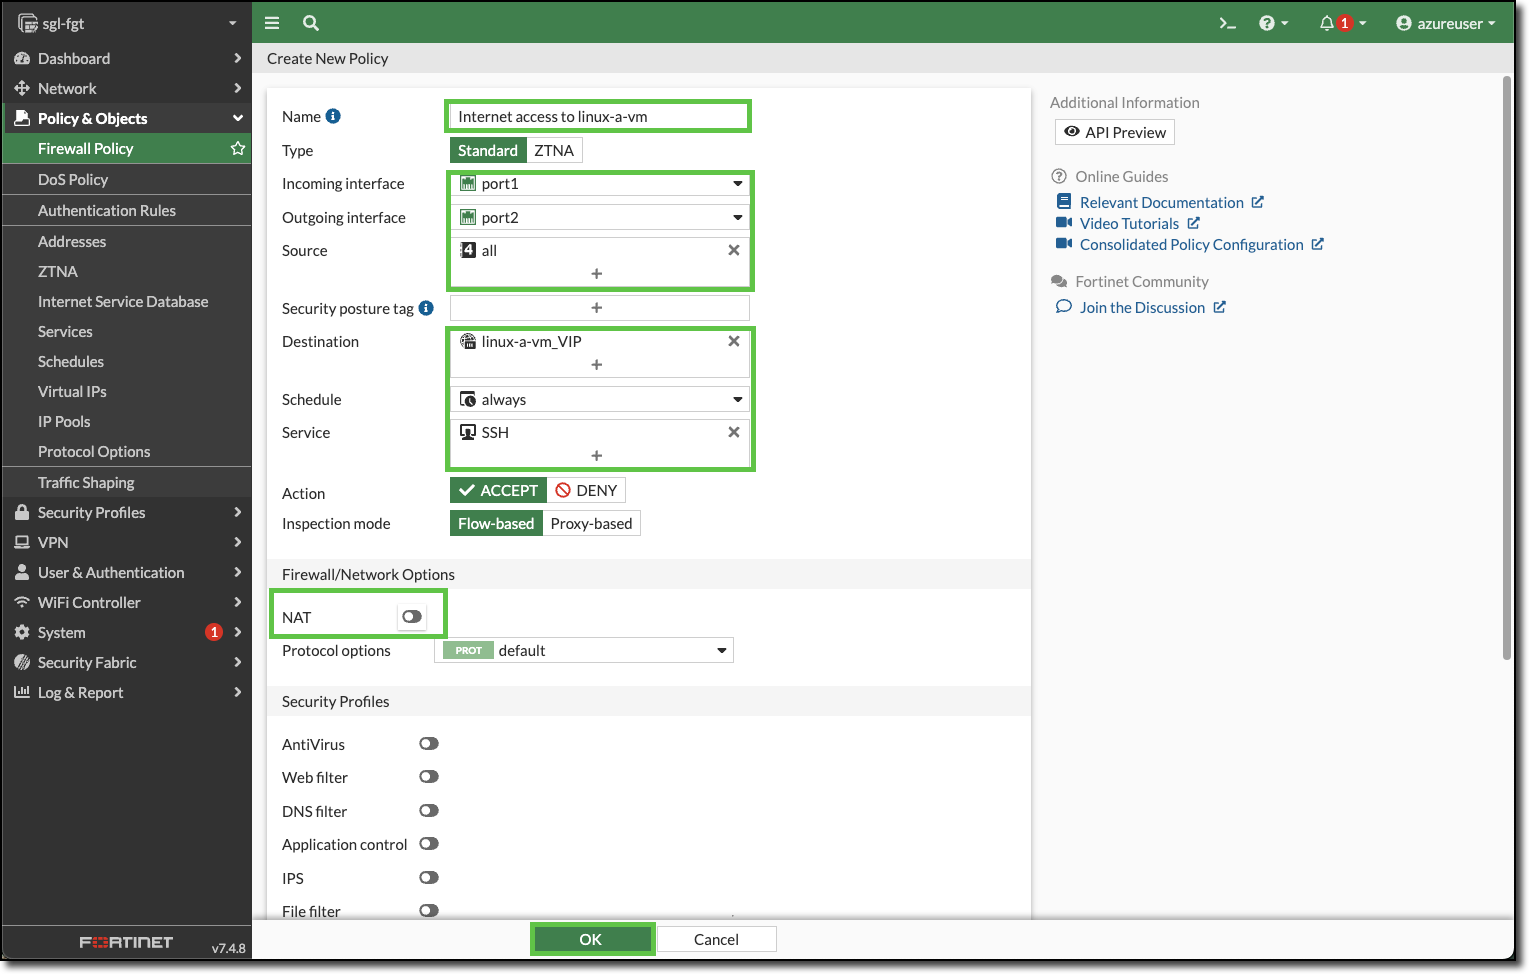
Navigate to Policy & Objects–>Firewall Policy
Click “+ Create new”
Enter the following:
- Name:
Internet access to linux-a-vm - Incoming interface: port1
- Outgoing interface: port2
- Source: all
- Destination: linux-a-vm_VIP
- Service: SSH
- NAT: Toggle to disabled
- Name:
Click “OK”
Confirm the new policy for linux-a-vm is displayed
Enter the following to create a policy to allow SSH and PING access to linux-b-vm.
- Name:
SSH & PING access to linux-b-vm - Incoming interface: port2
- Outgoing interface: port2
- Source: linux-a-vm
- Destination: linux-b-vm
- Service: SSH PING
- NAT: Toggle to disabled
Click OK and confirm the new policy is displayed.
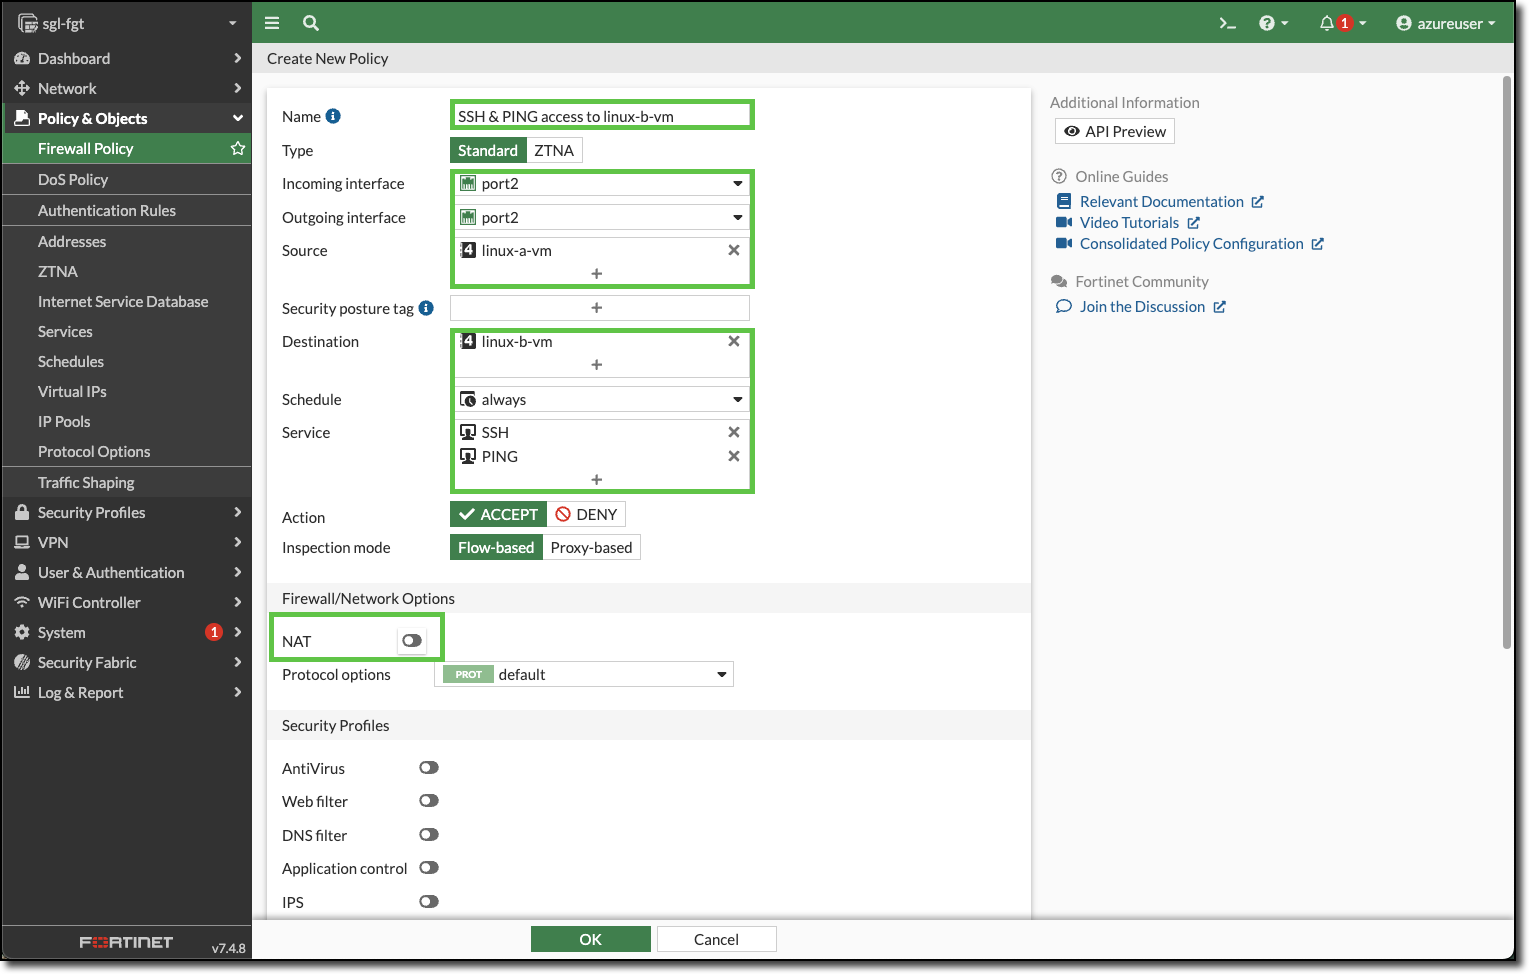
- Name:
Repeat and modify to finishing adding the required policies
linux-a-vm needs these additional policies
- HTTP and HTTPS access to the Internet
- Name:
linux-a-vm access to the internet - NAT: enabled
- Name:
linux-b-vm needs these additional policies
HTTP service from the Internet
- Name:
Internet access to linux-b-vm
- Name:
HTTP and HTTPS access to the Internet
- Name:
linux-b-vm access to the internet - NAT: enabled
- Name:
PING access to linux-a-vm
- Name:
Ping Access to linux-a-vm
- Name:
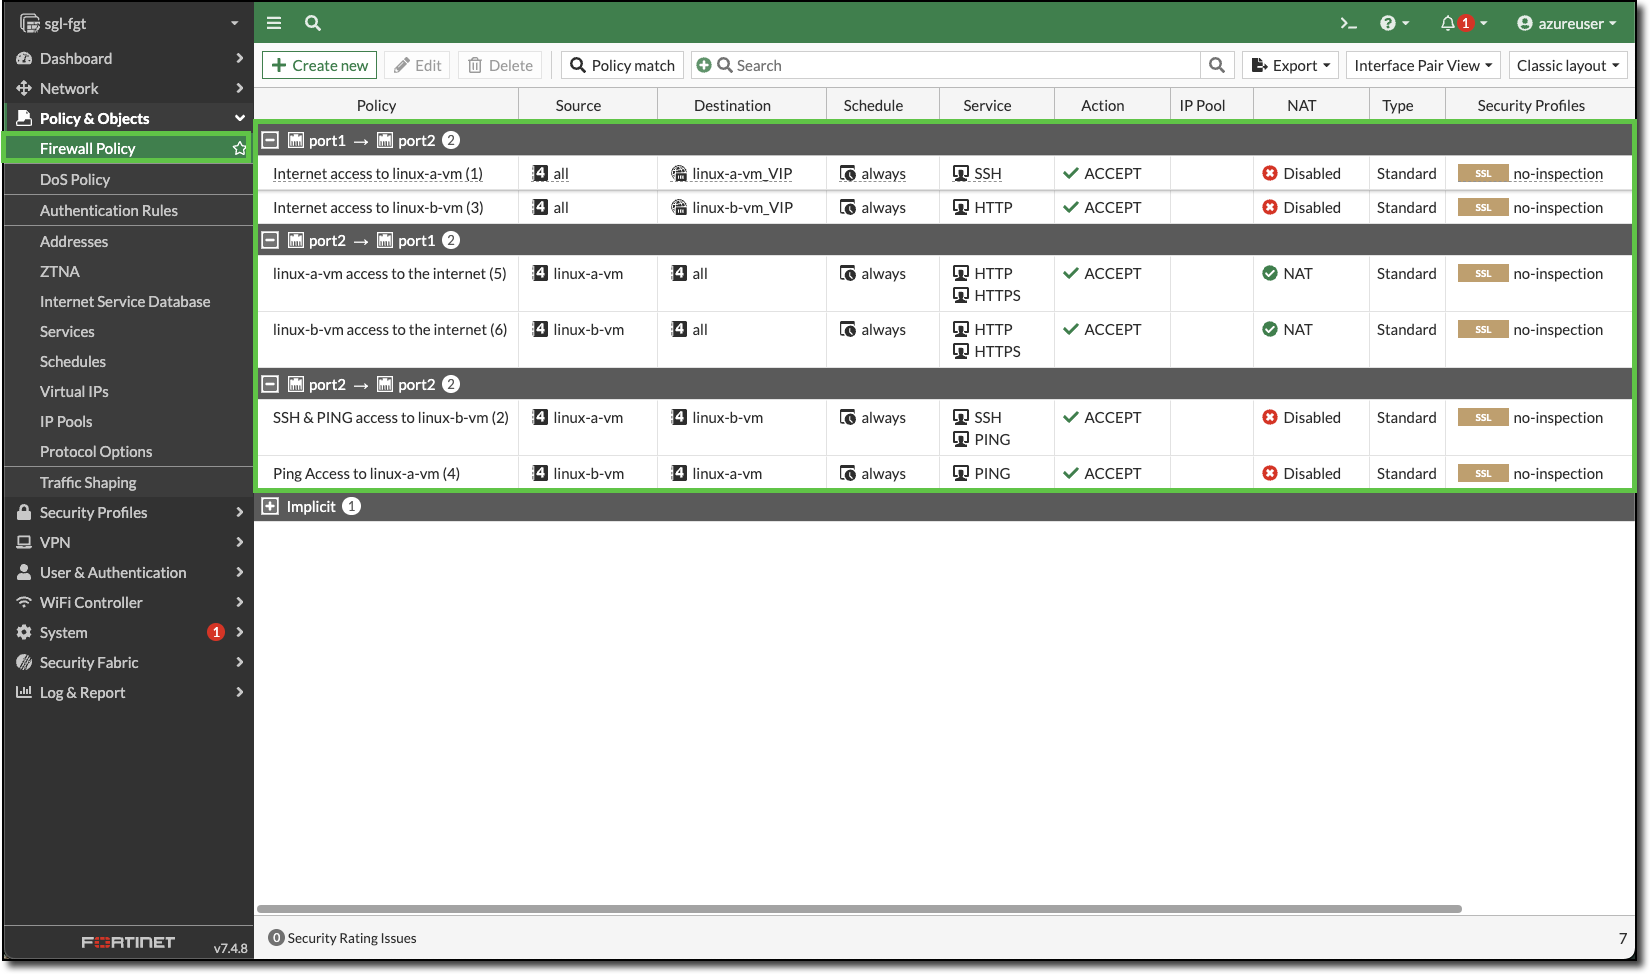
When you are finished adding all the policies for both Linux VMs, your Firewall Policy page should look similar to the following:
- HTTP and HTTPS access to the Internet