Task 1: FortiGate NVA Deployment
In task one, you will deploy a FortiGate NVA into the vWAN hub that you have been assigned.
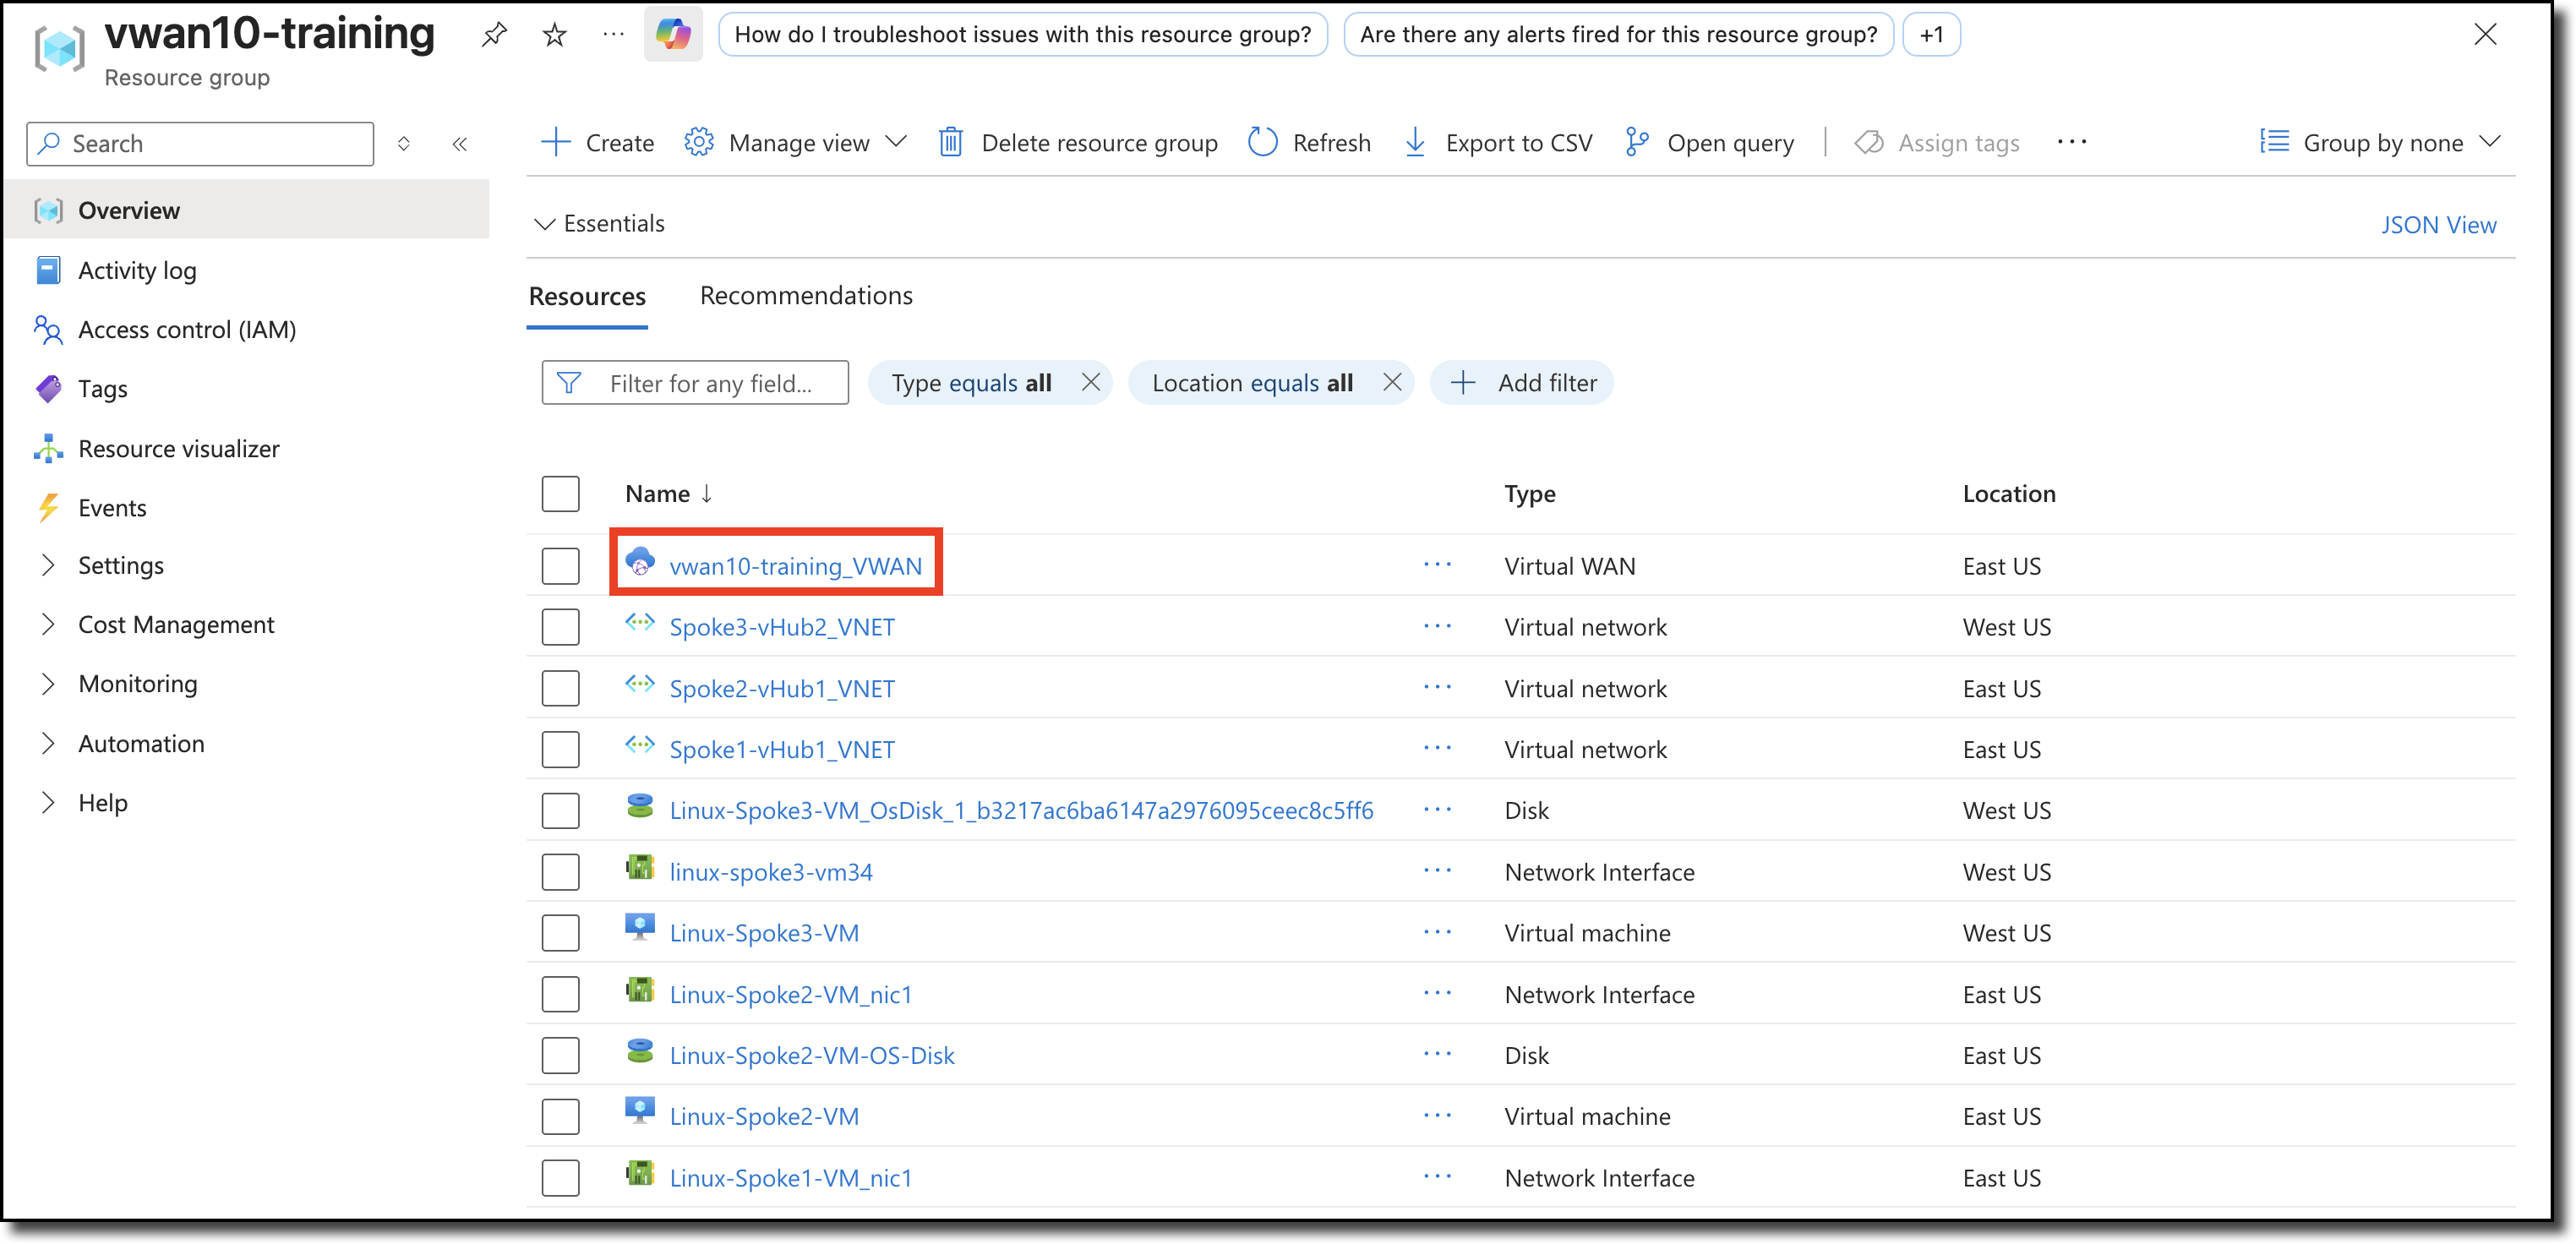
Click on VWAN vwanXX-training_VWAN in your Resource Group. XX is your assigned number.
Click on “Hubs” in the “Connectivity” section of the left-hand navigation. A hub in EastUS has already been deployed.

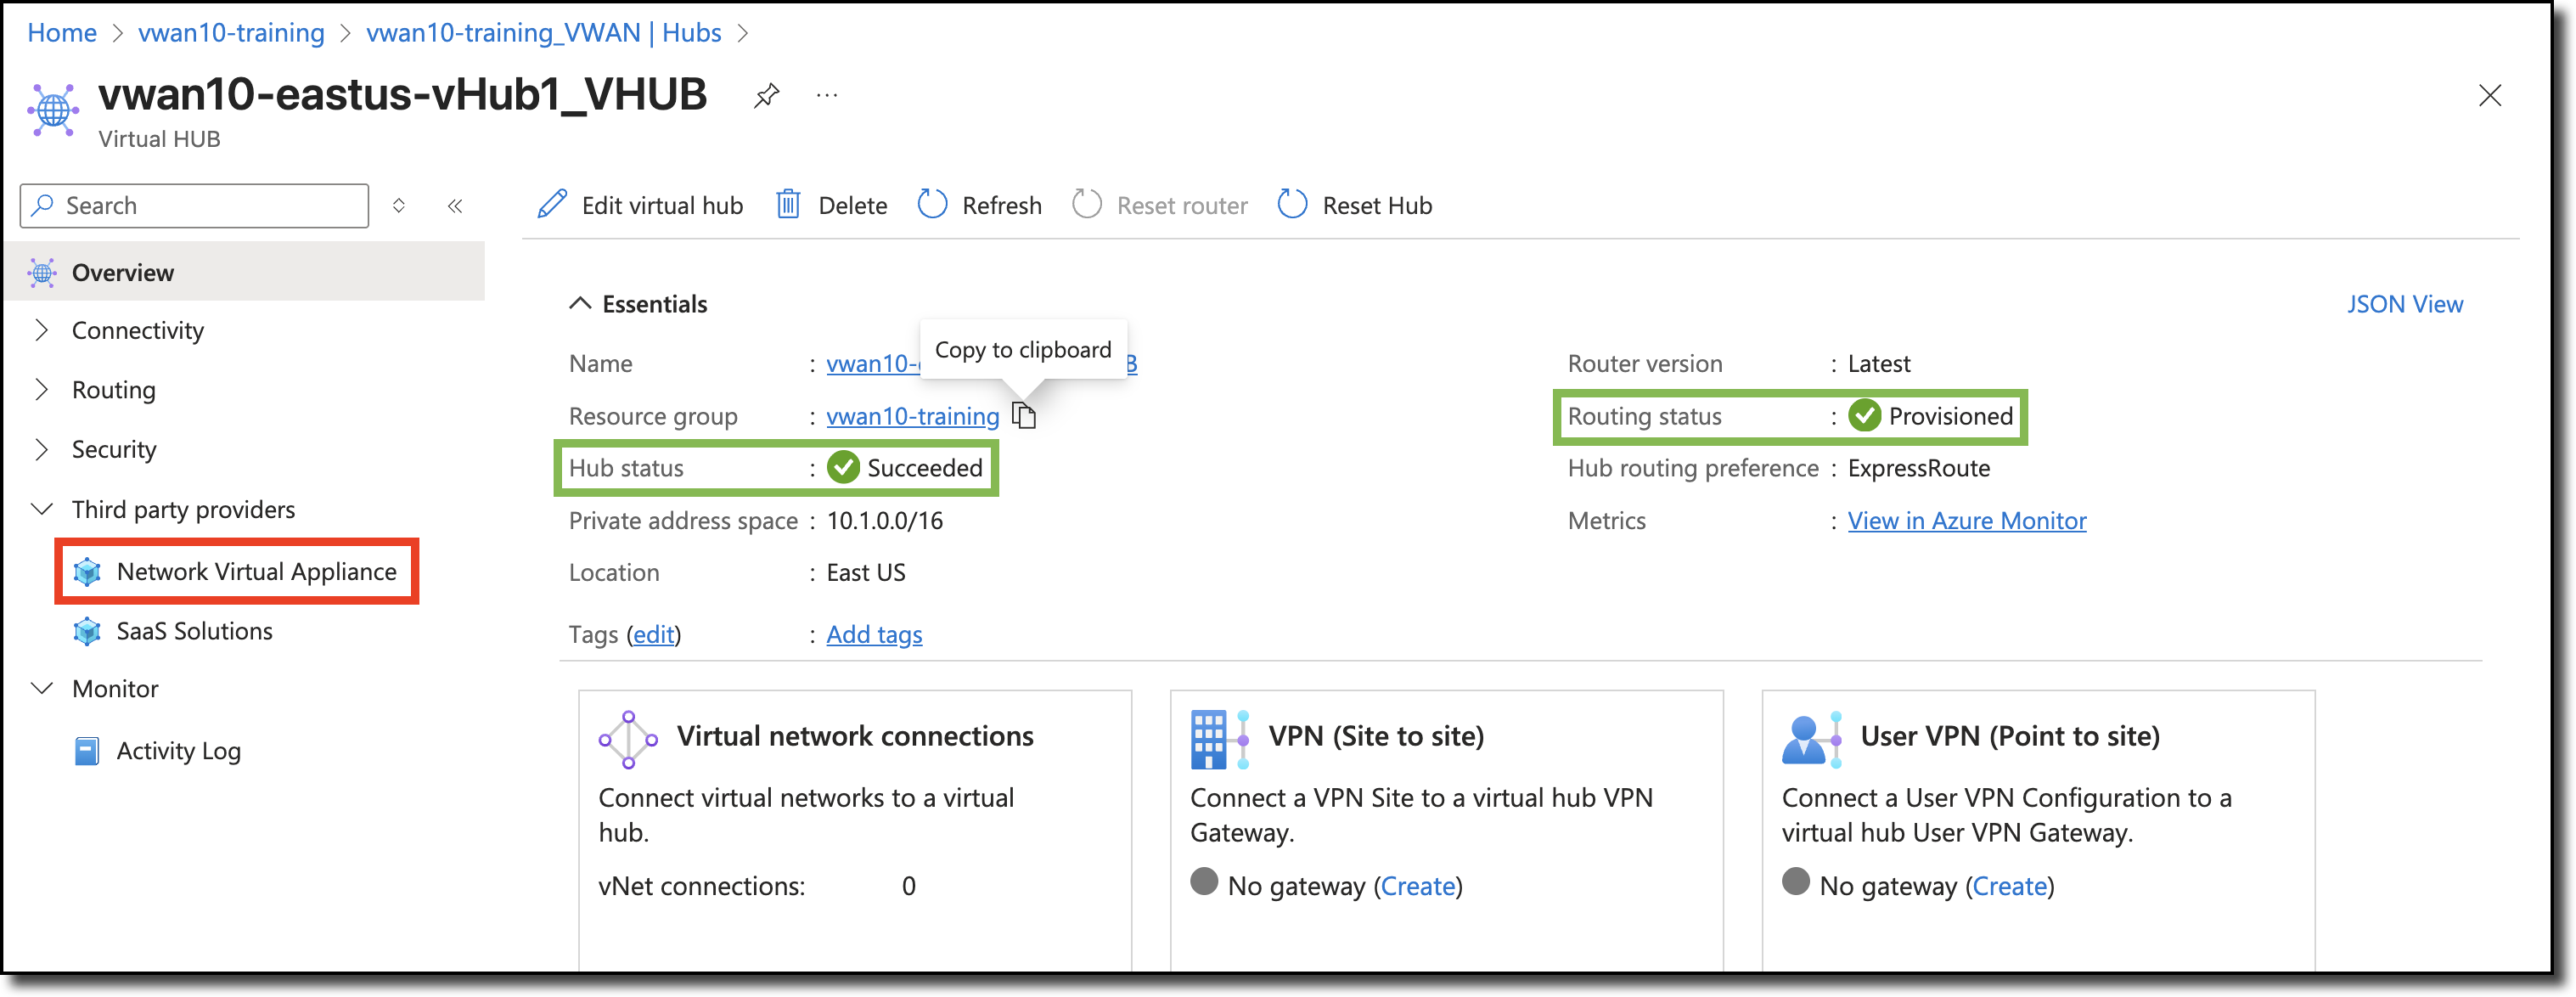
Click on your assigned hub
View information about Hub
- Name
- Location (Region)
- Private Address Space
Confirm the status of the following:
- Hub status: Succeeded
- Routing status: Provisioned
Warning
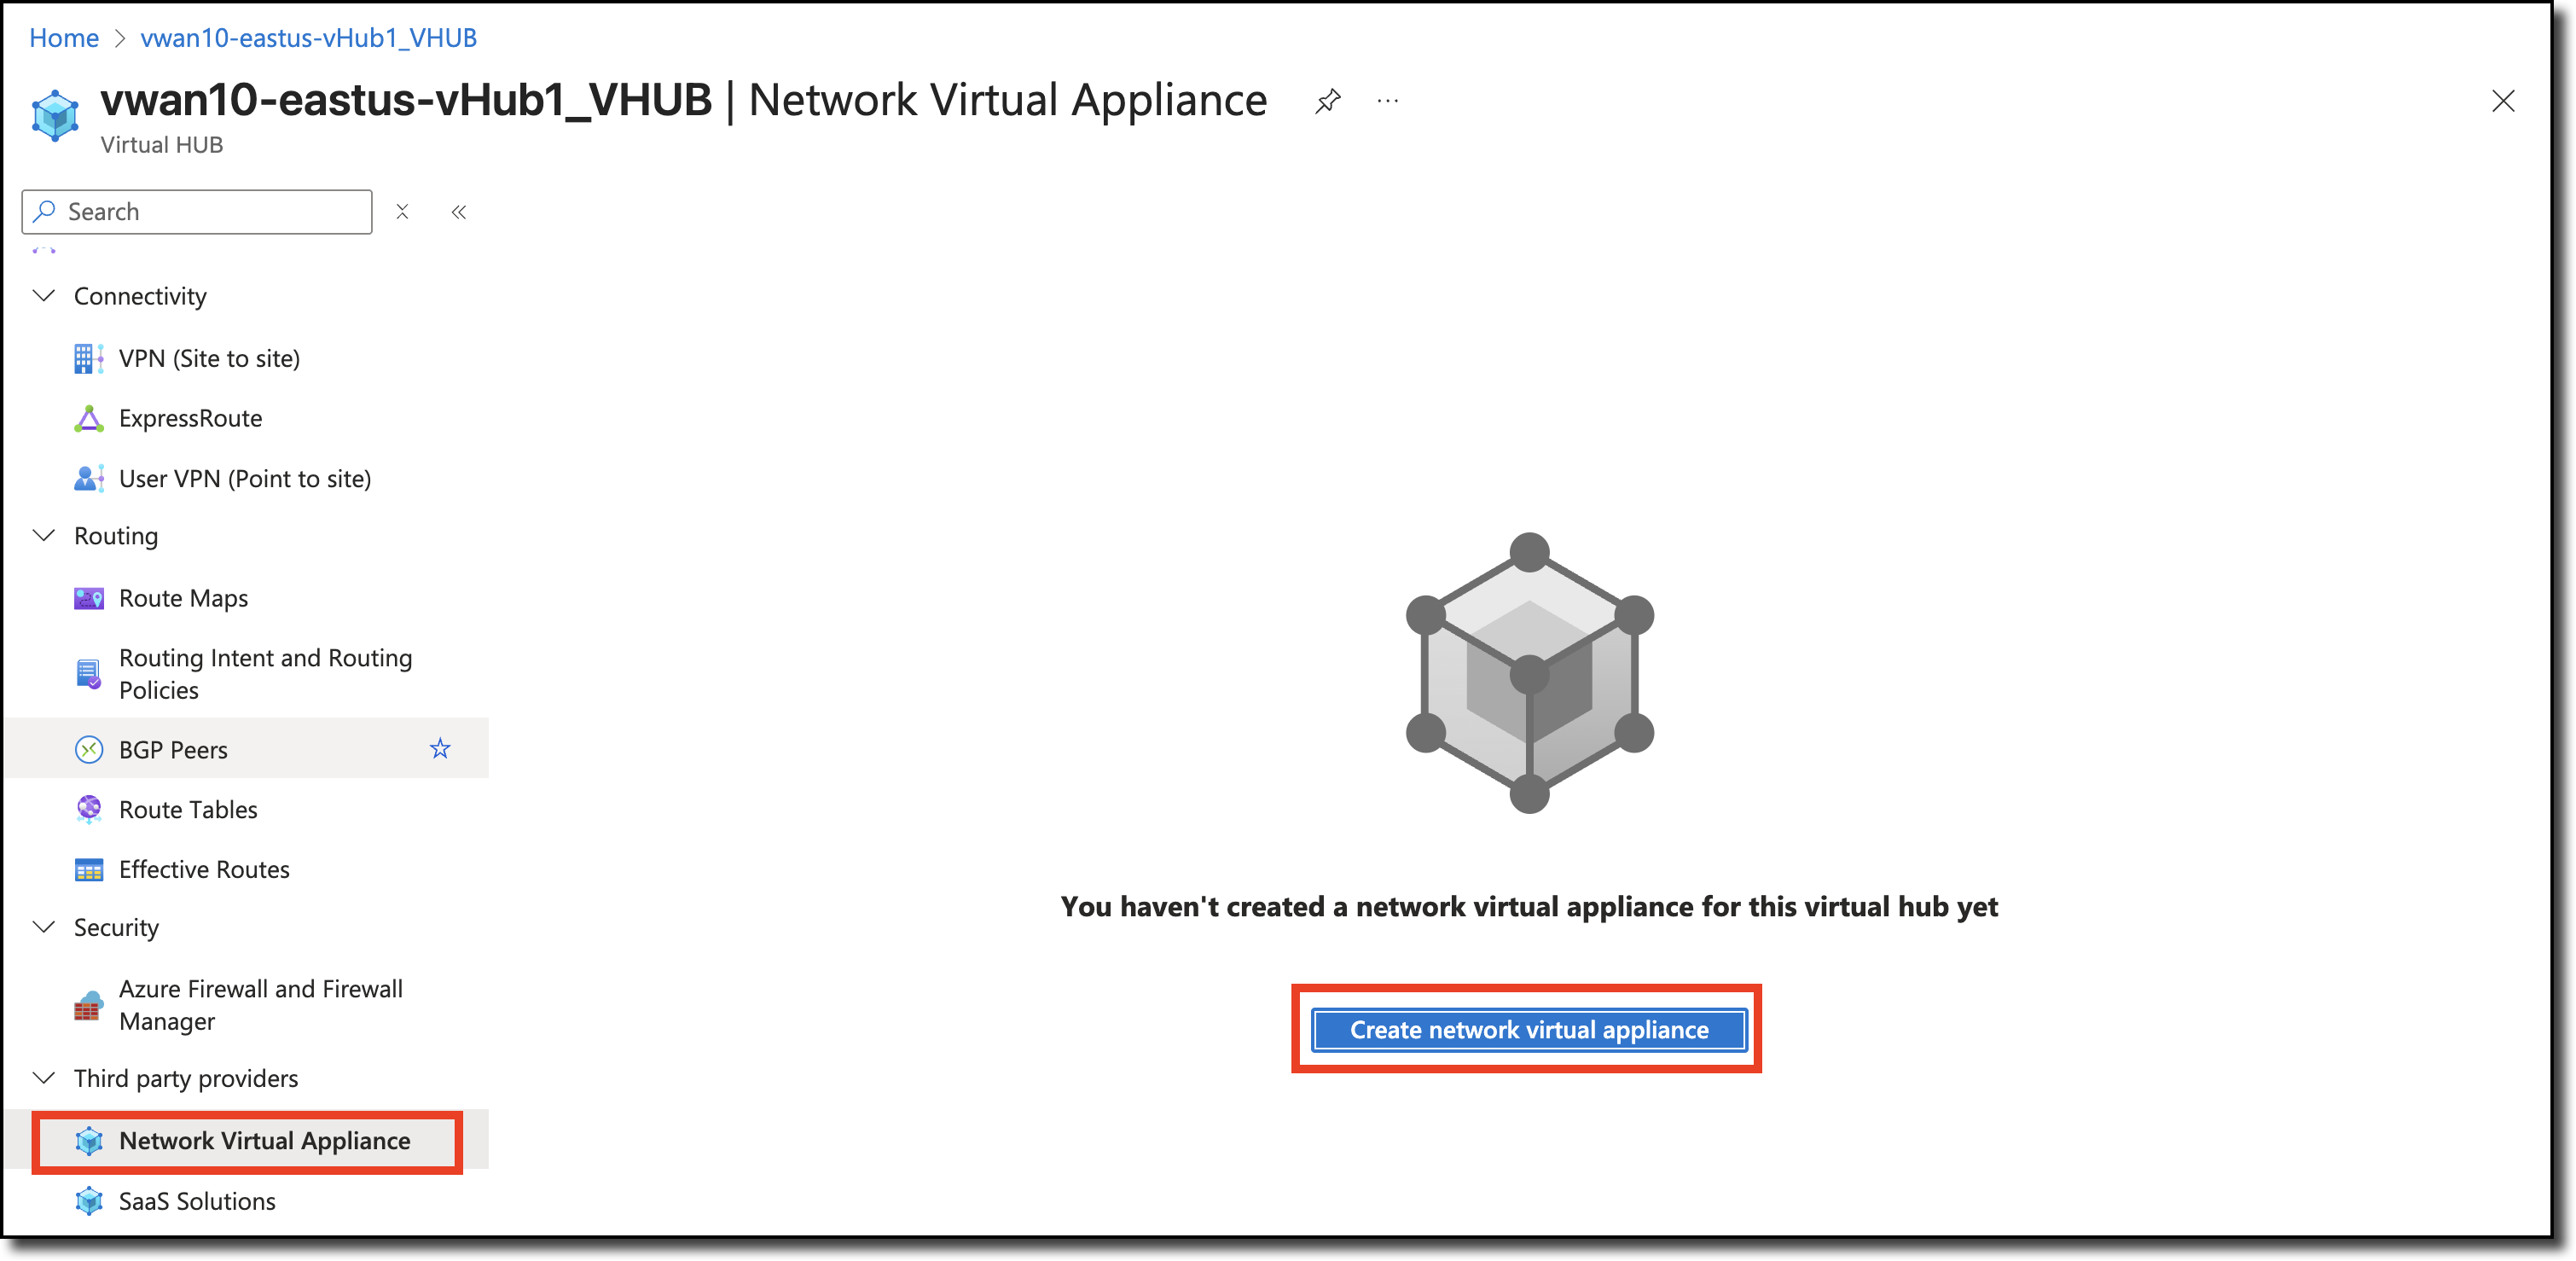
Only move on to the next step if Hub and Routing status have green checks.Click on “Network Virtual Appliance in the “Third party providers” section of the left-hand navigation.
Click the button “Create network virtual appliance”
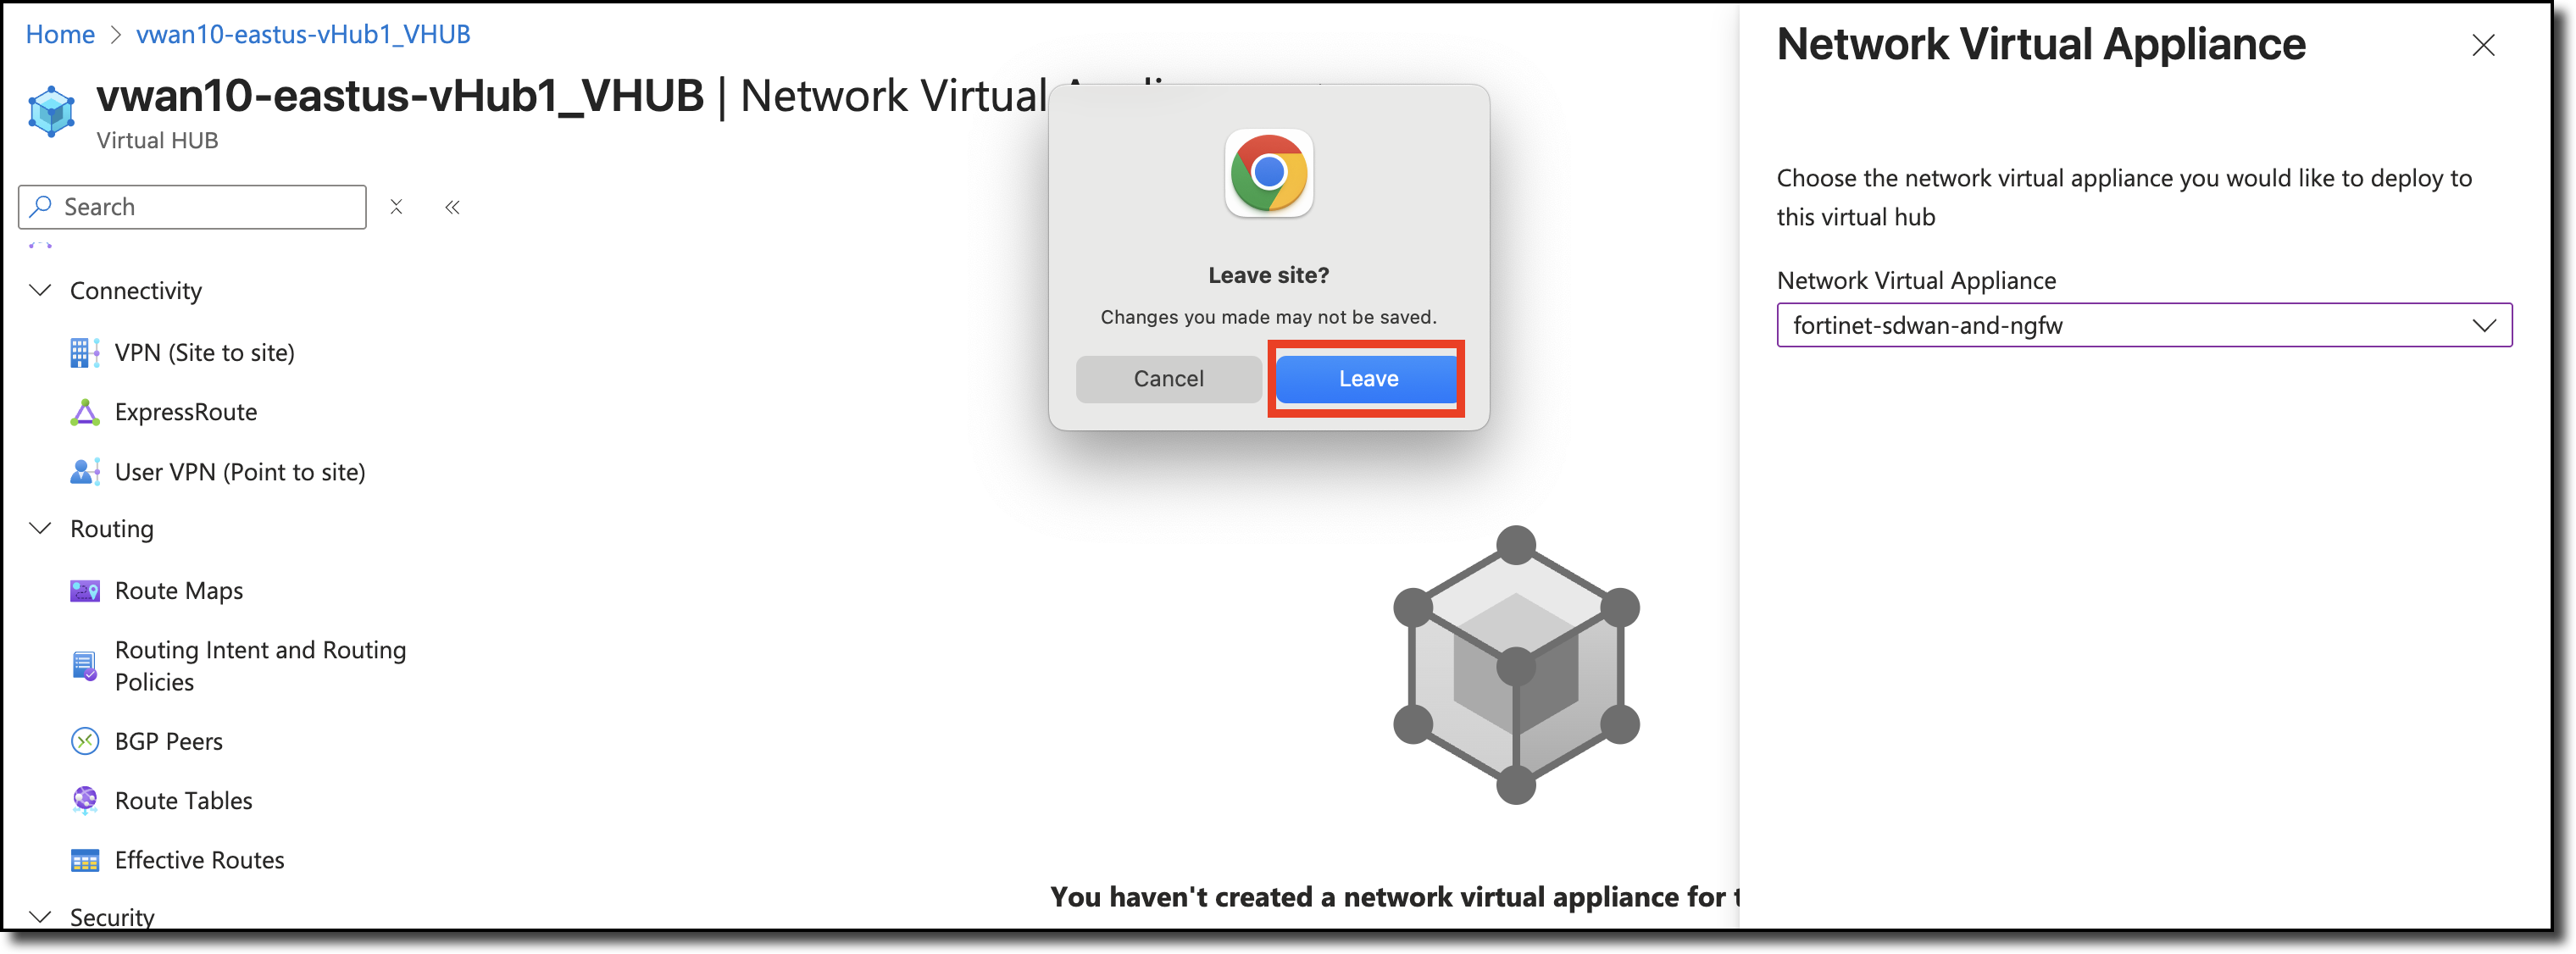
Select fortinet-sdwan-and-ngfw
Click “Create” - proceed to leave site to redirect to Marketplace.
Info
If a warning is displayed about “Leaving” the site, select the Leave page button.
Click “Create” on the Marketplace listing for “Azure Virtual WAN Secured by FortiGate”
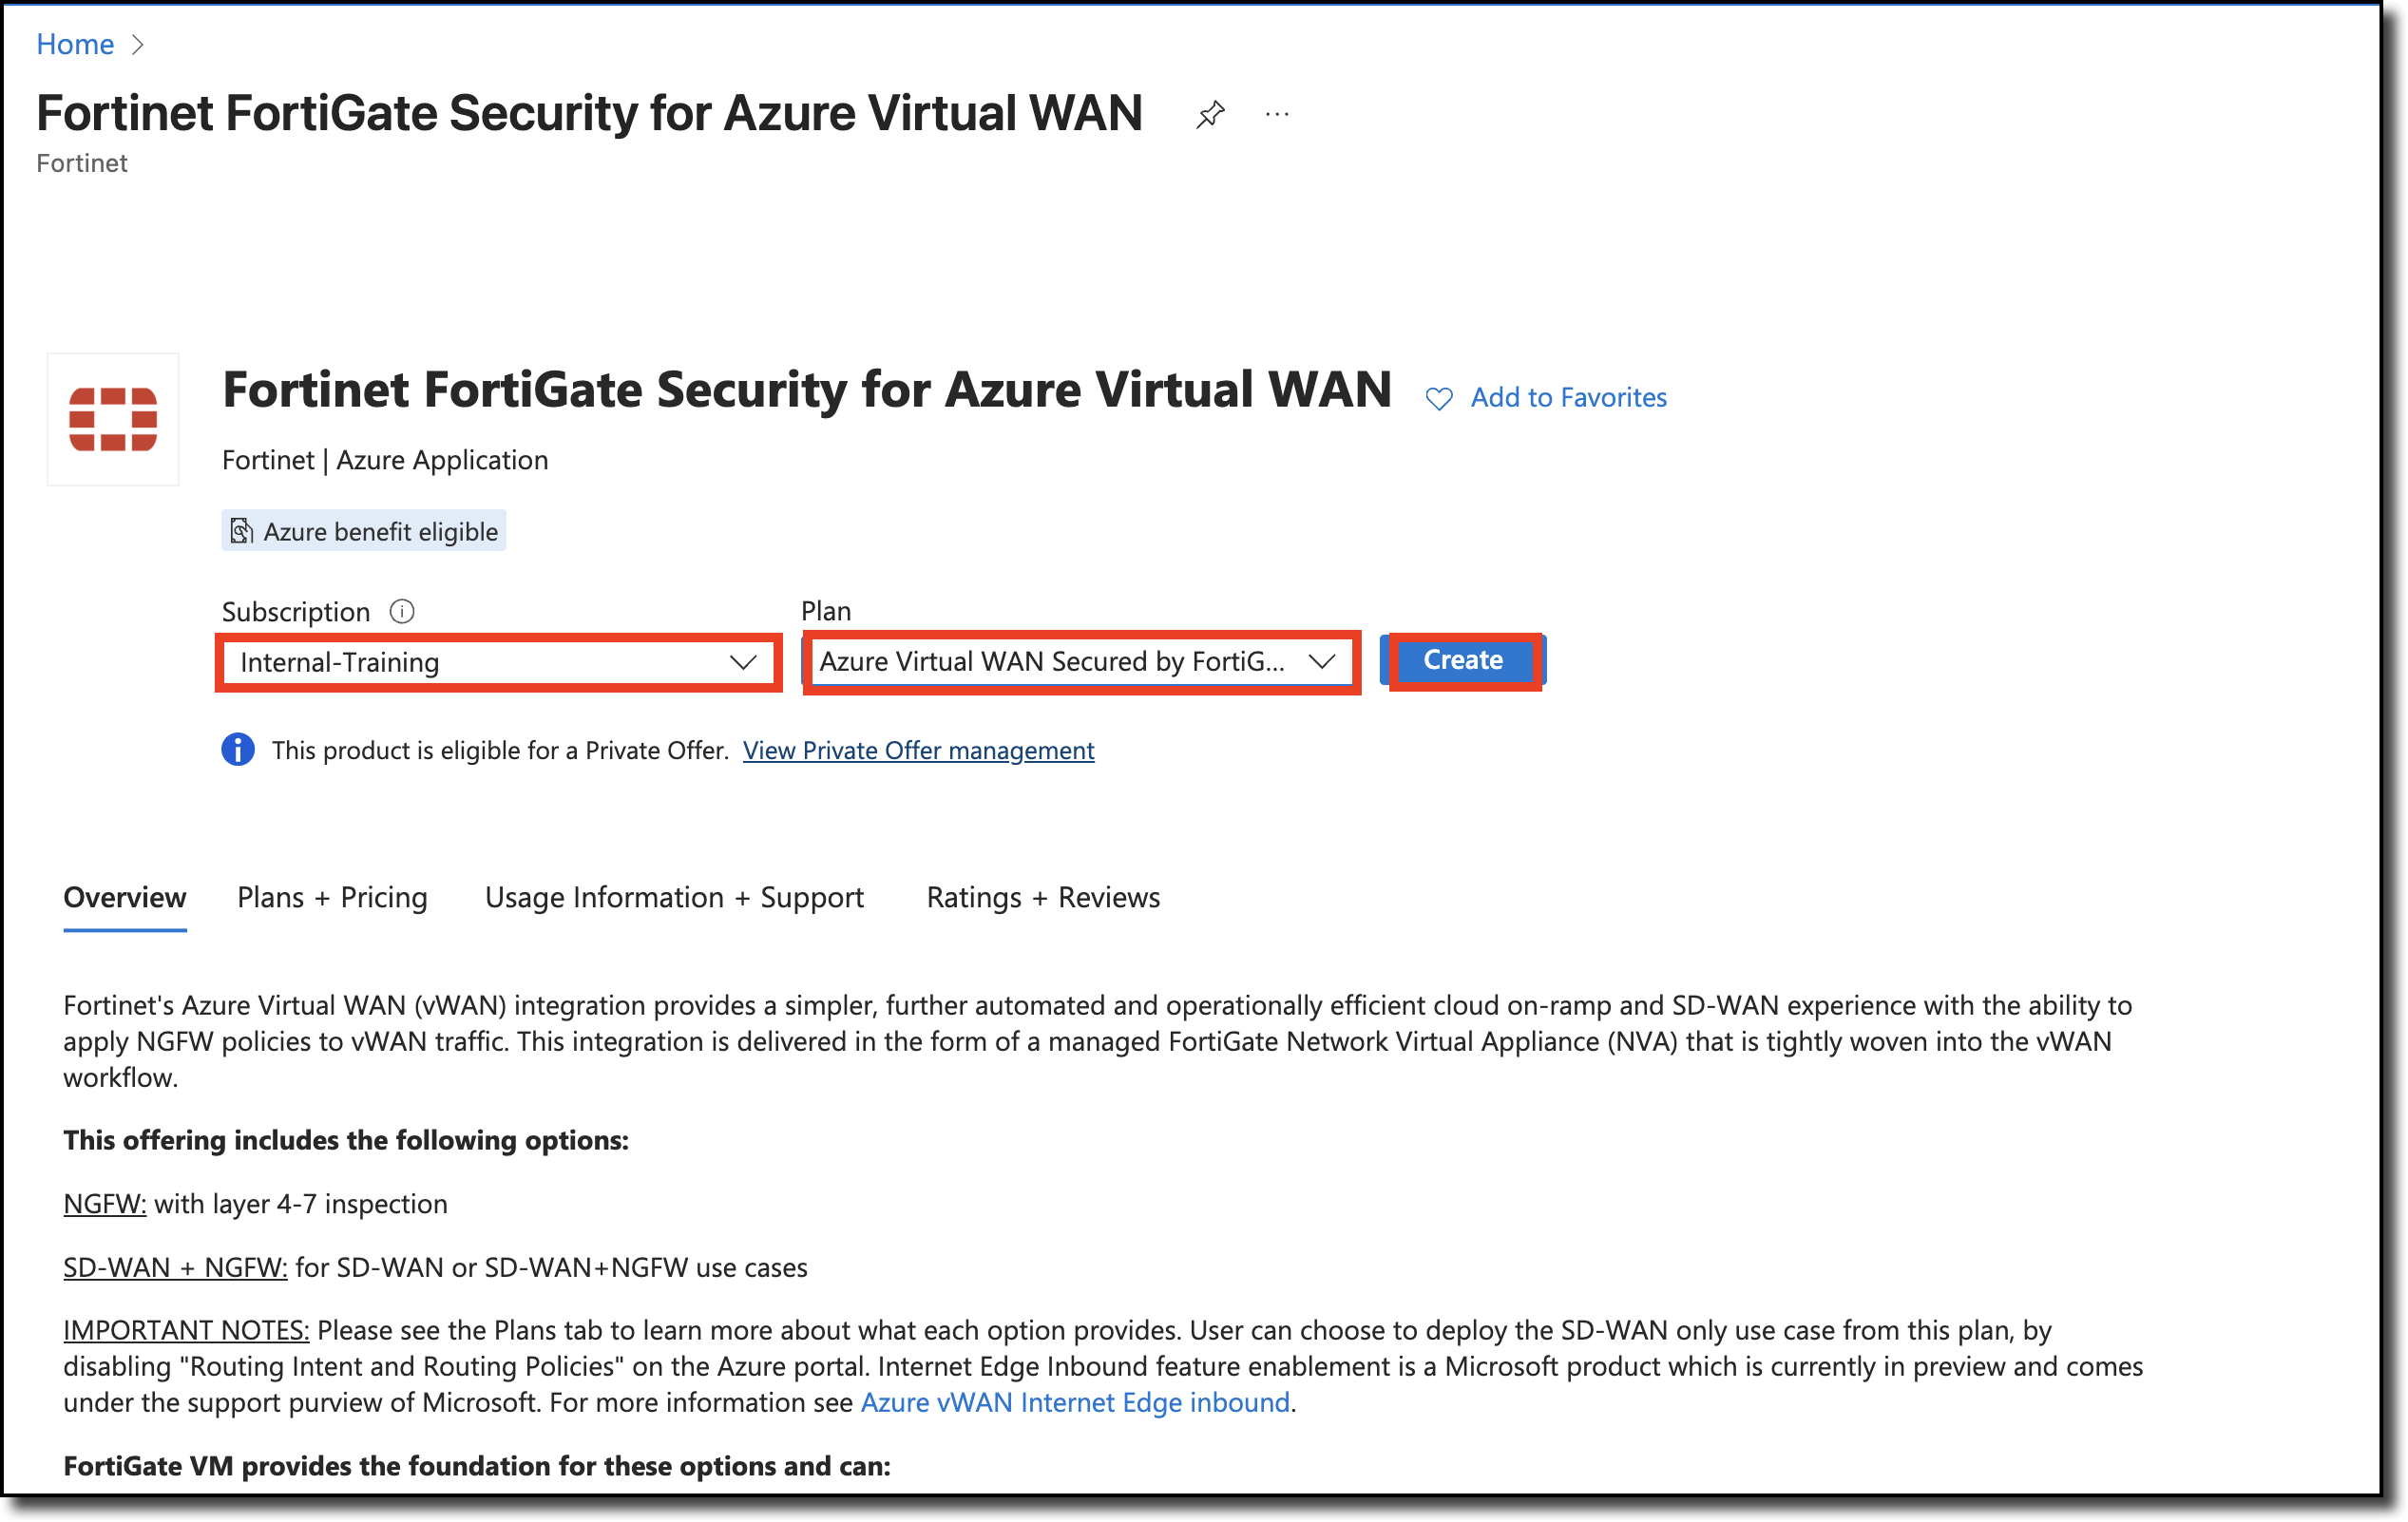
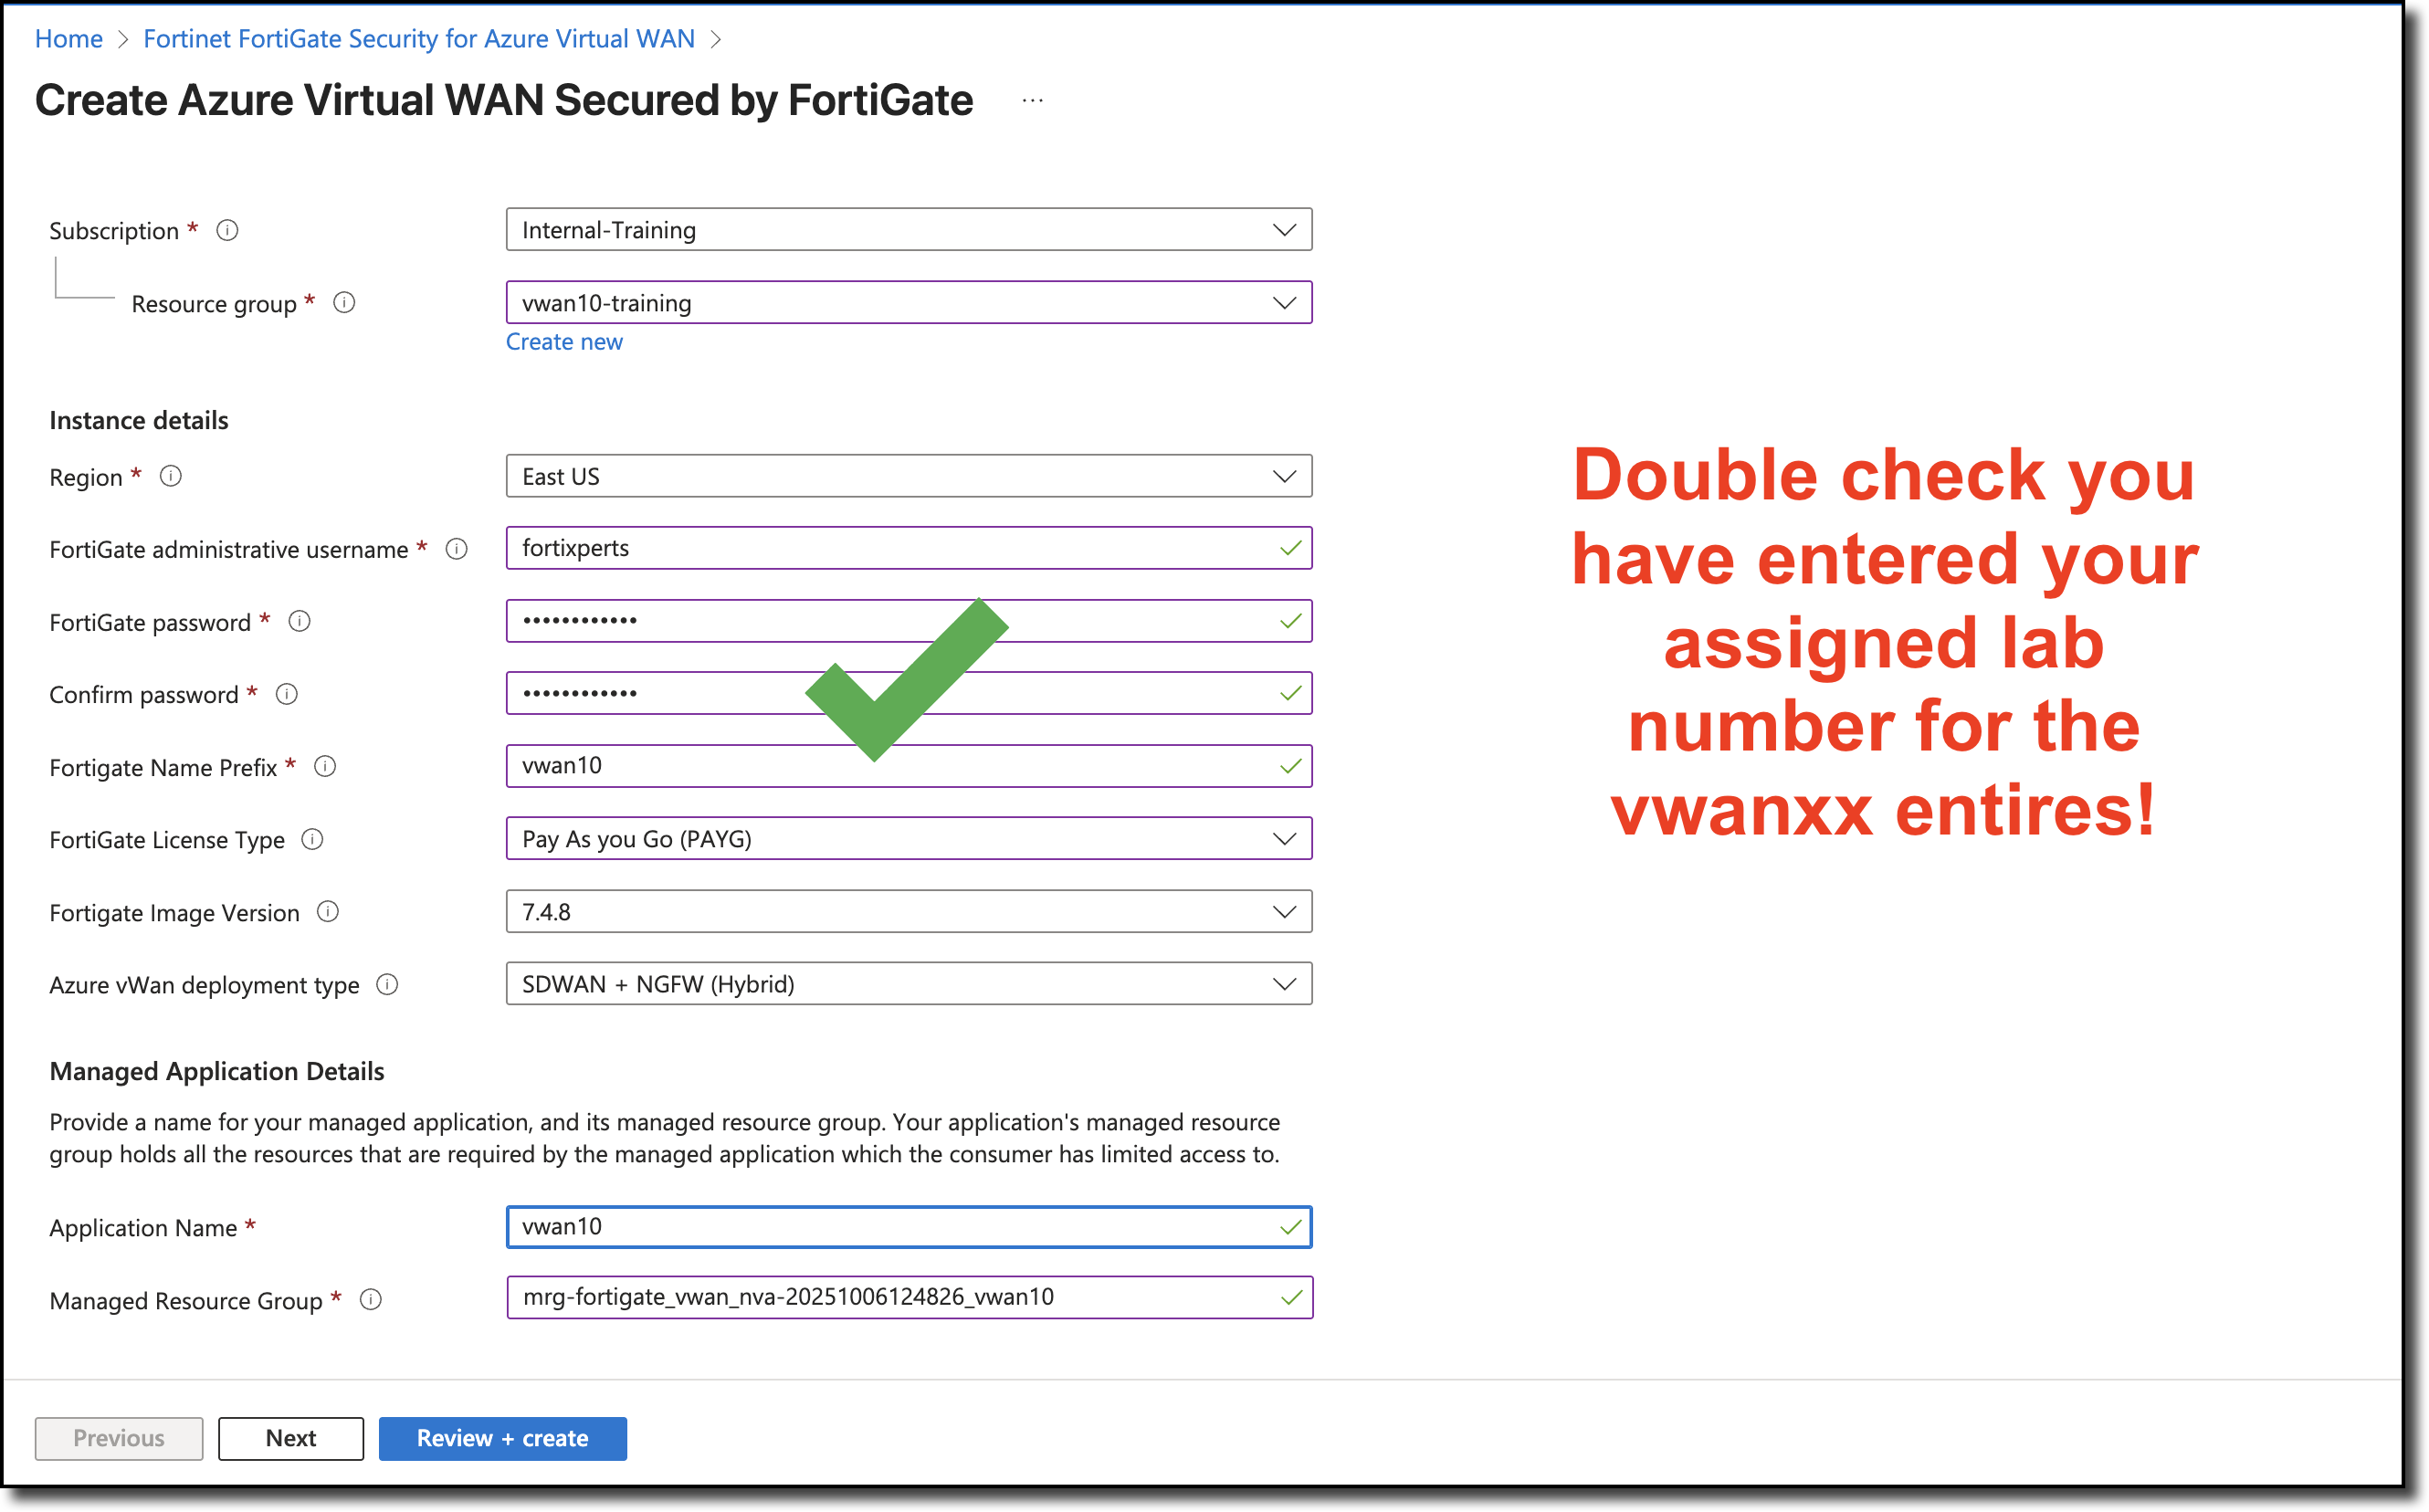
On the “Create Azure Virtual WAN Secured by FortiGate” window, enter the following values in the Basics tab:
- Select - Resource Group - vwanXX-training – Be sure to select your assigned Resource Group
- Select - Region - East US – May already be defaulted to the correct region
- Enter - FortiGate administrative username -
fortixperts - Enter - password -
fortiXperts! - Confirm - password -
fortiXperts! - Enter - FortiGate Name Prefix - vwanXX – Enter your assigned lab number for XX.
- Select - FortiGate License Type - “Pay As you Go (PAYG)”
- Select - FortiGate Image Version - “7.4.X” – Be sure to select the highest 7.4 version.
- Select - Azure vWan deployment type - “SDWAN + NGFW (Hybrid)”
- Enter - Application Name - vwanXX – Enter your assigned lab number for XX.
- Update - Managed Resource Group - Append “_vwanXX” to the provided name – Enter your assigned lab number for XX.
- Click - “Next”
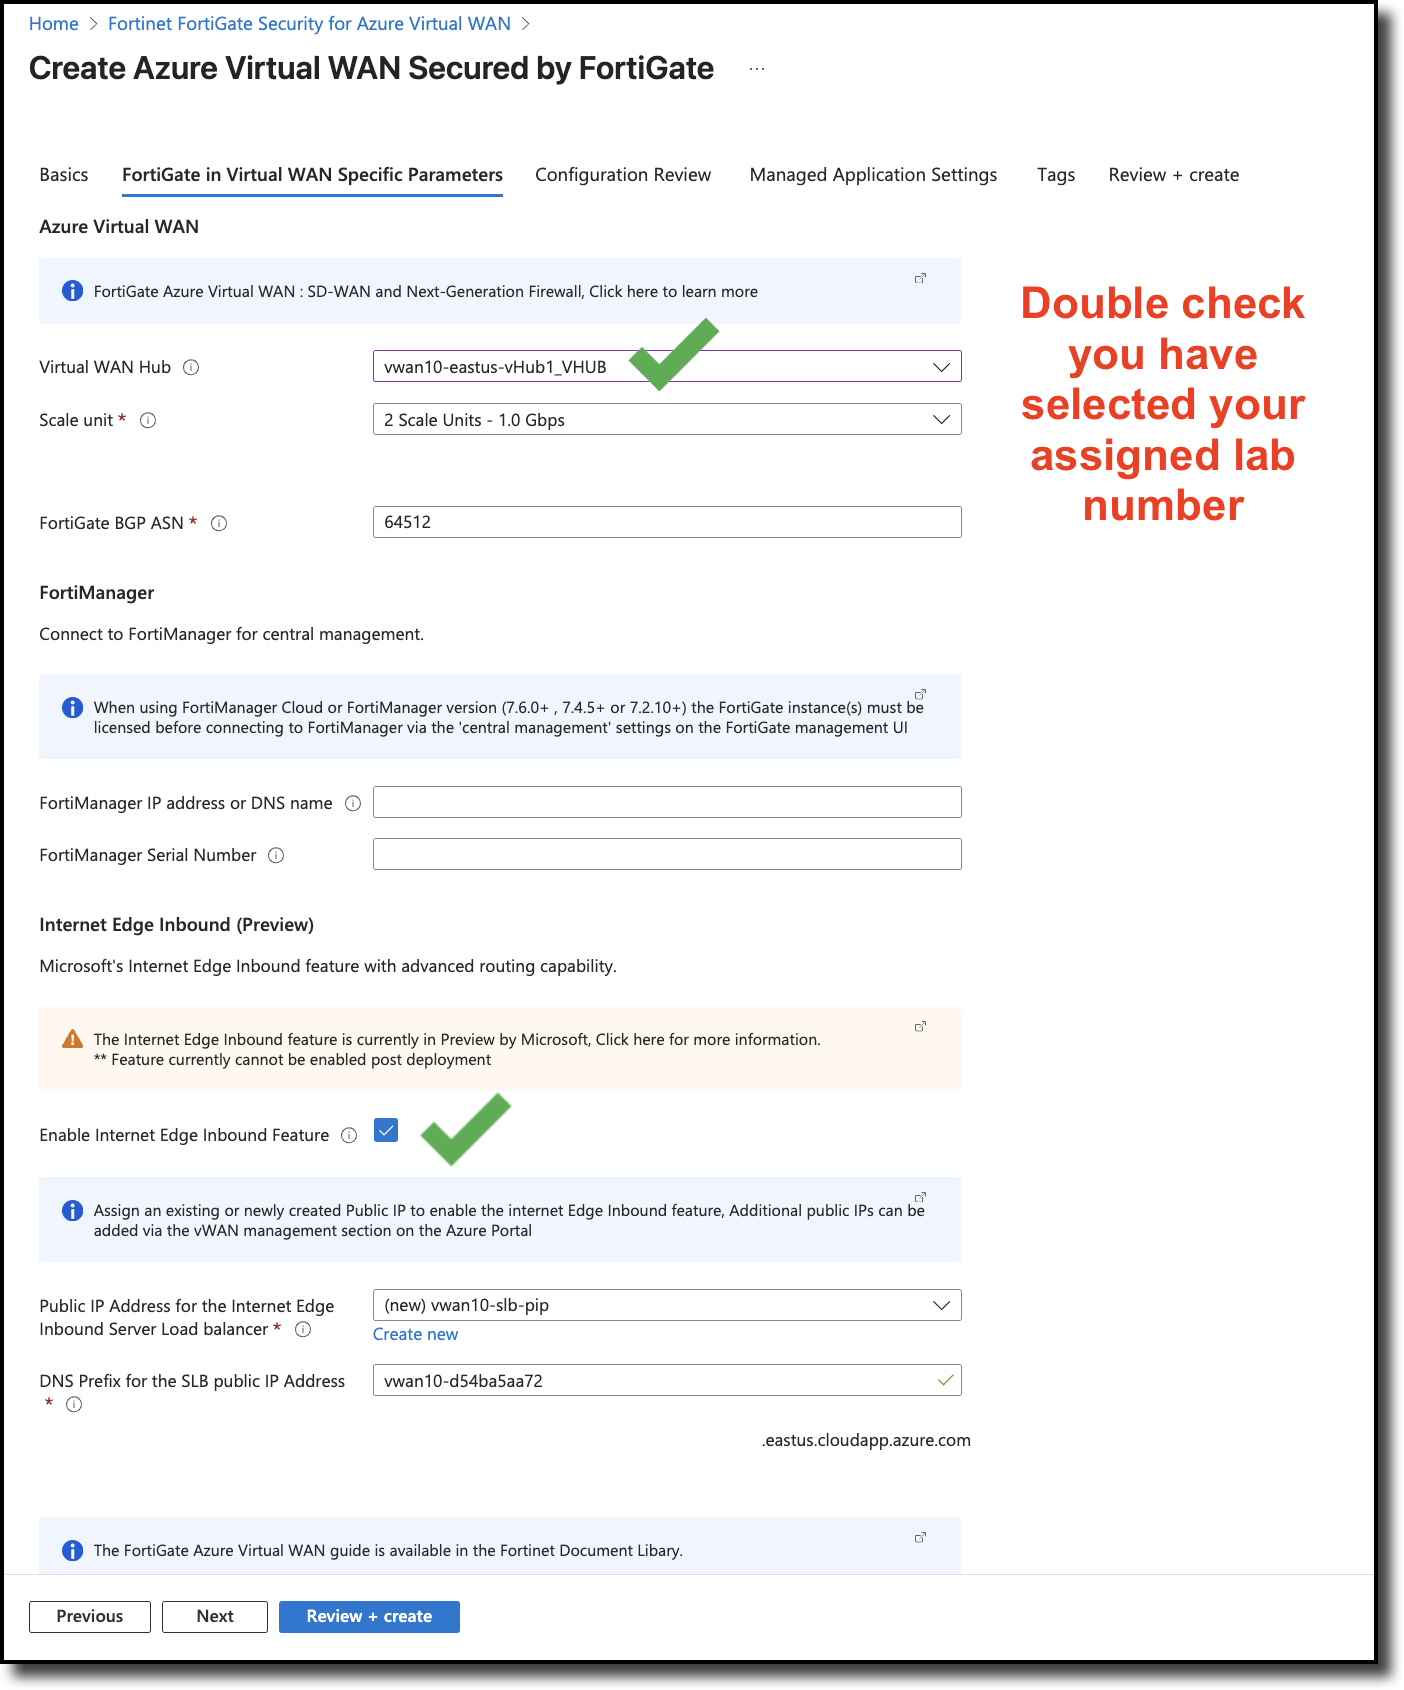
On the FortiGate in Virtual WAN Specific Parameters tab, enter the following values:
- Select Virtual WAN Hub - select vwanXX-eastus-vHub1_VHUB – Be sure to enter your assigned lab number for XX.
- Checkbox Enable Internet Edge Inbound Feature
- Leave all other items as is
- Click “Next”
On the Configuration Review tab, select “Next”.

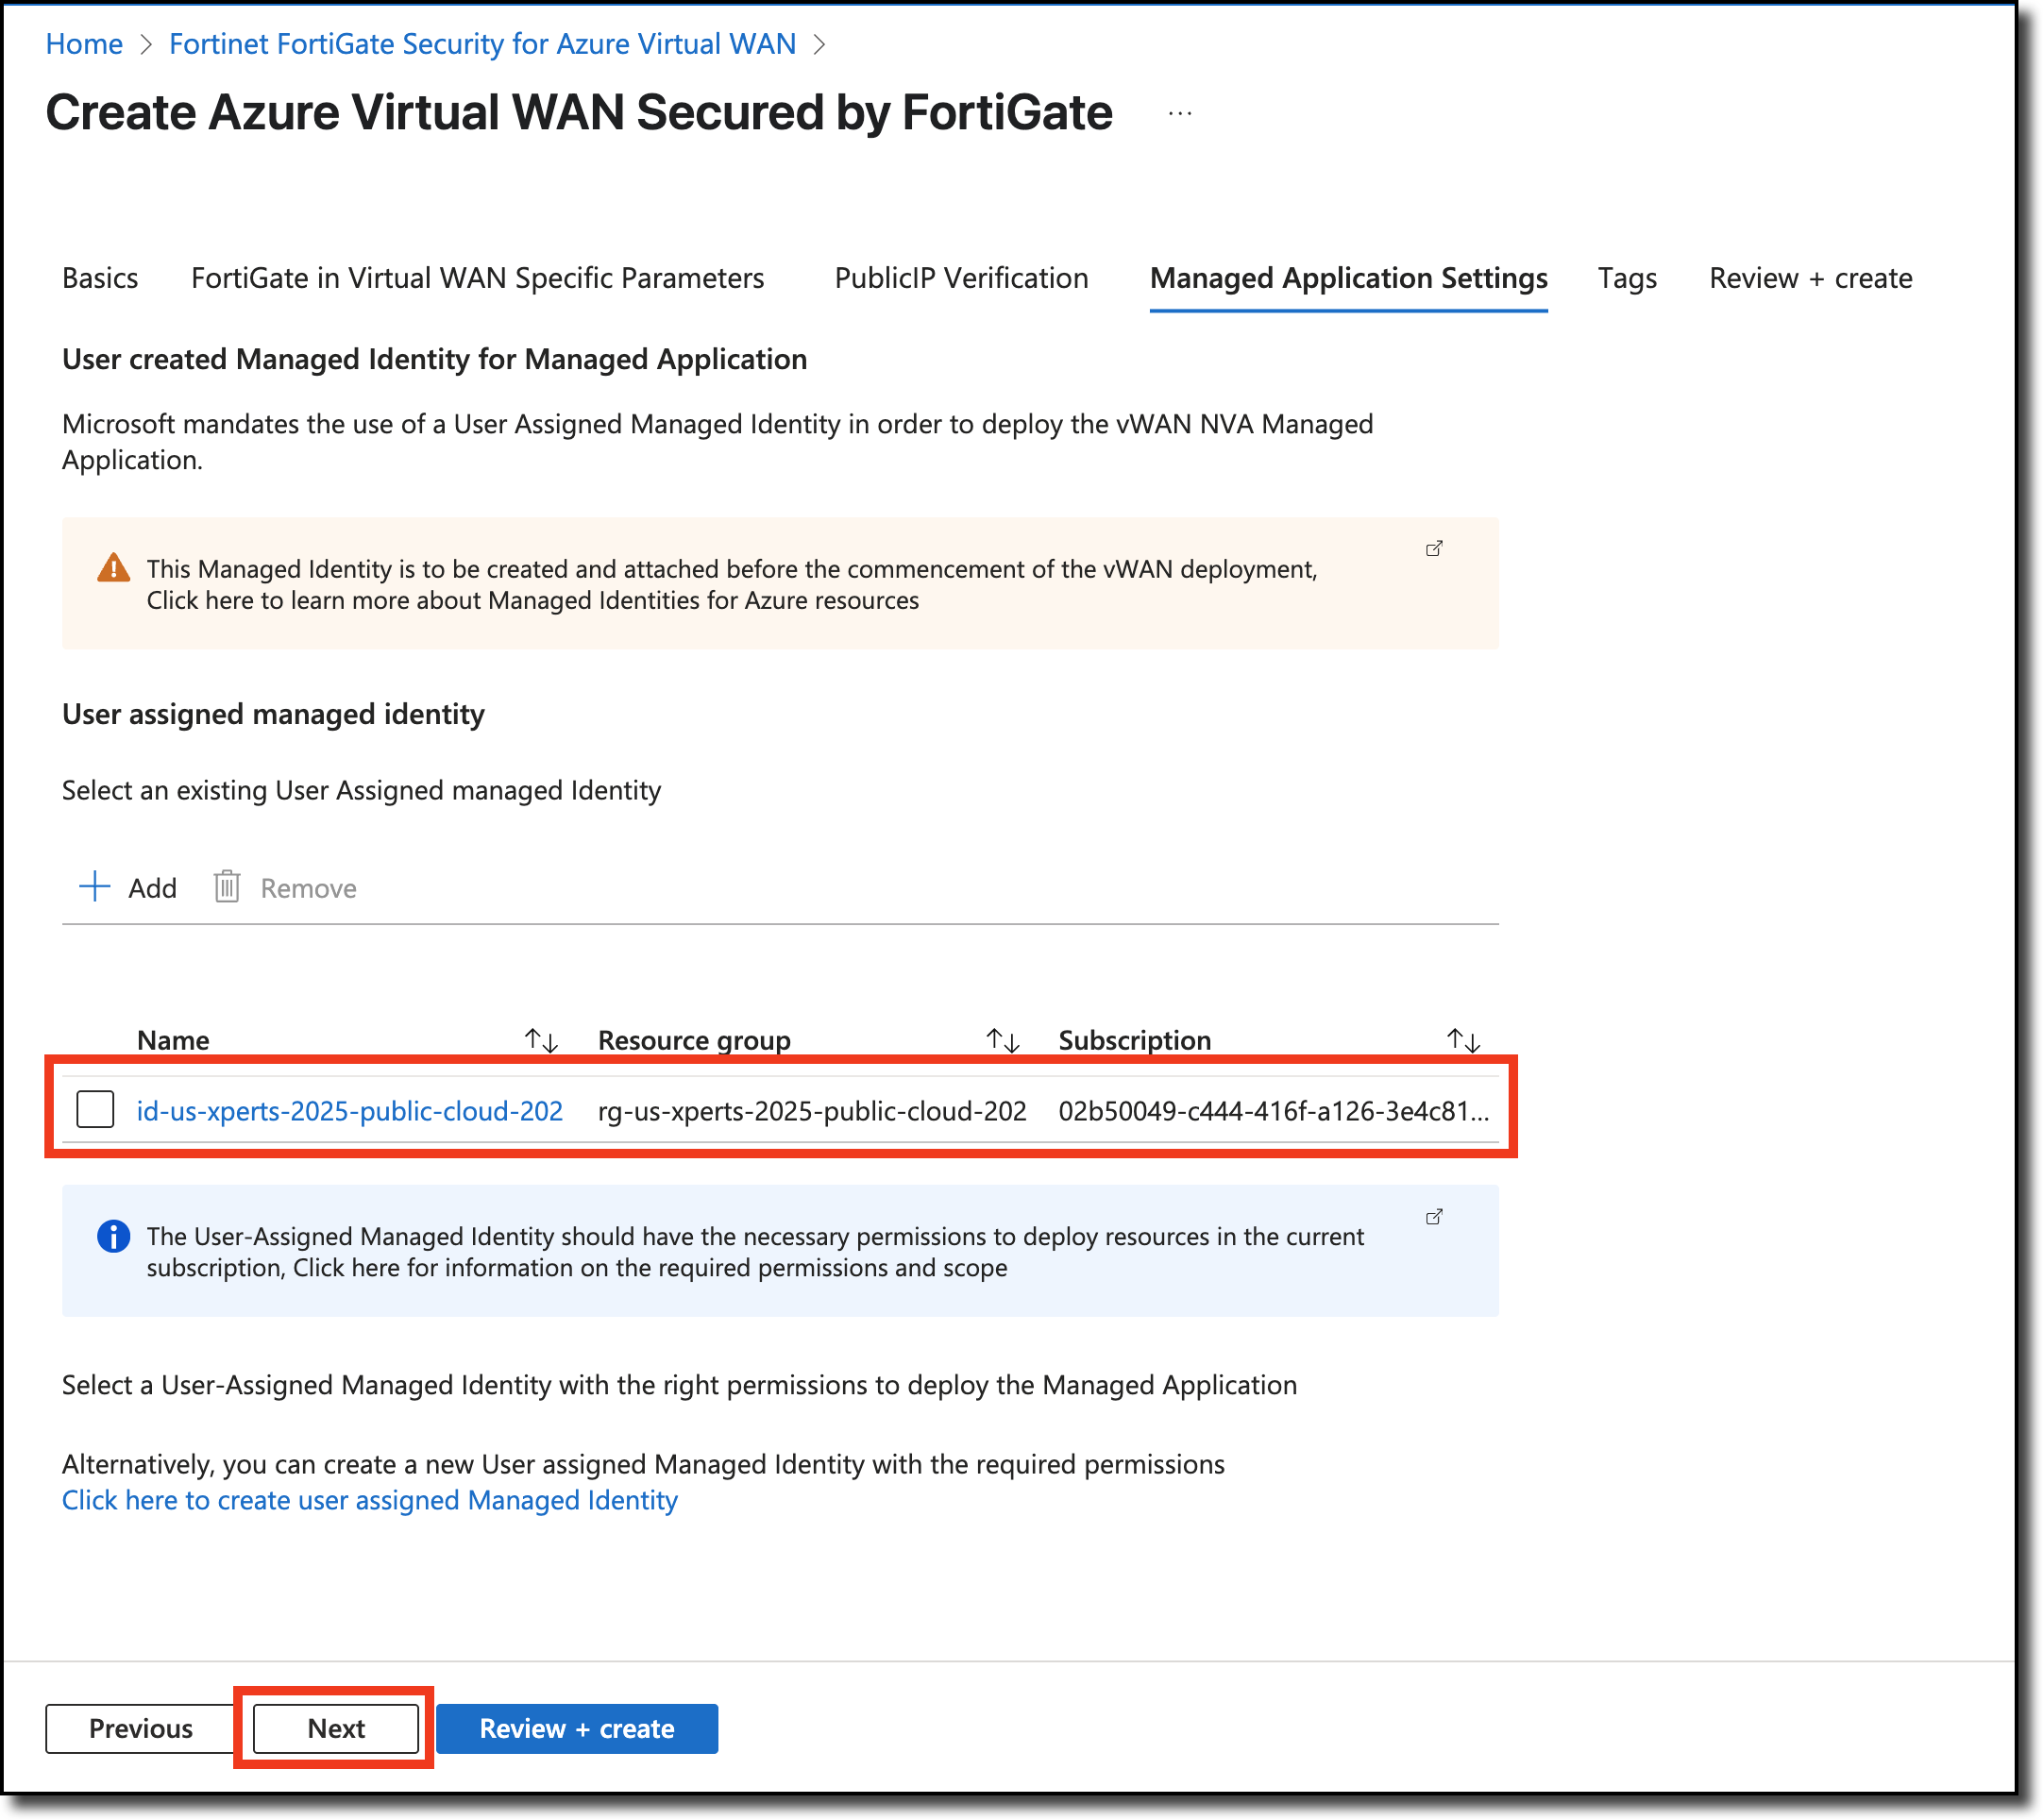
on the Managed Application Settings tab, click “Add”

on the add User assigned managed identity,
- Select Internal Training
- Select id-us-xperts-2025-public-cloud-202
- Click “Add”
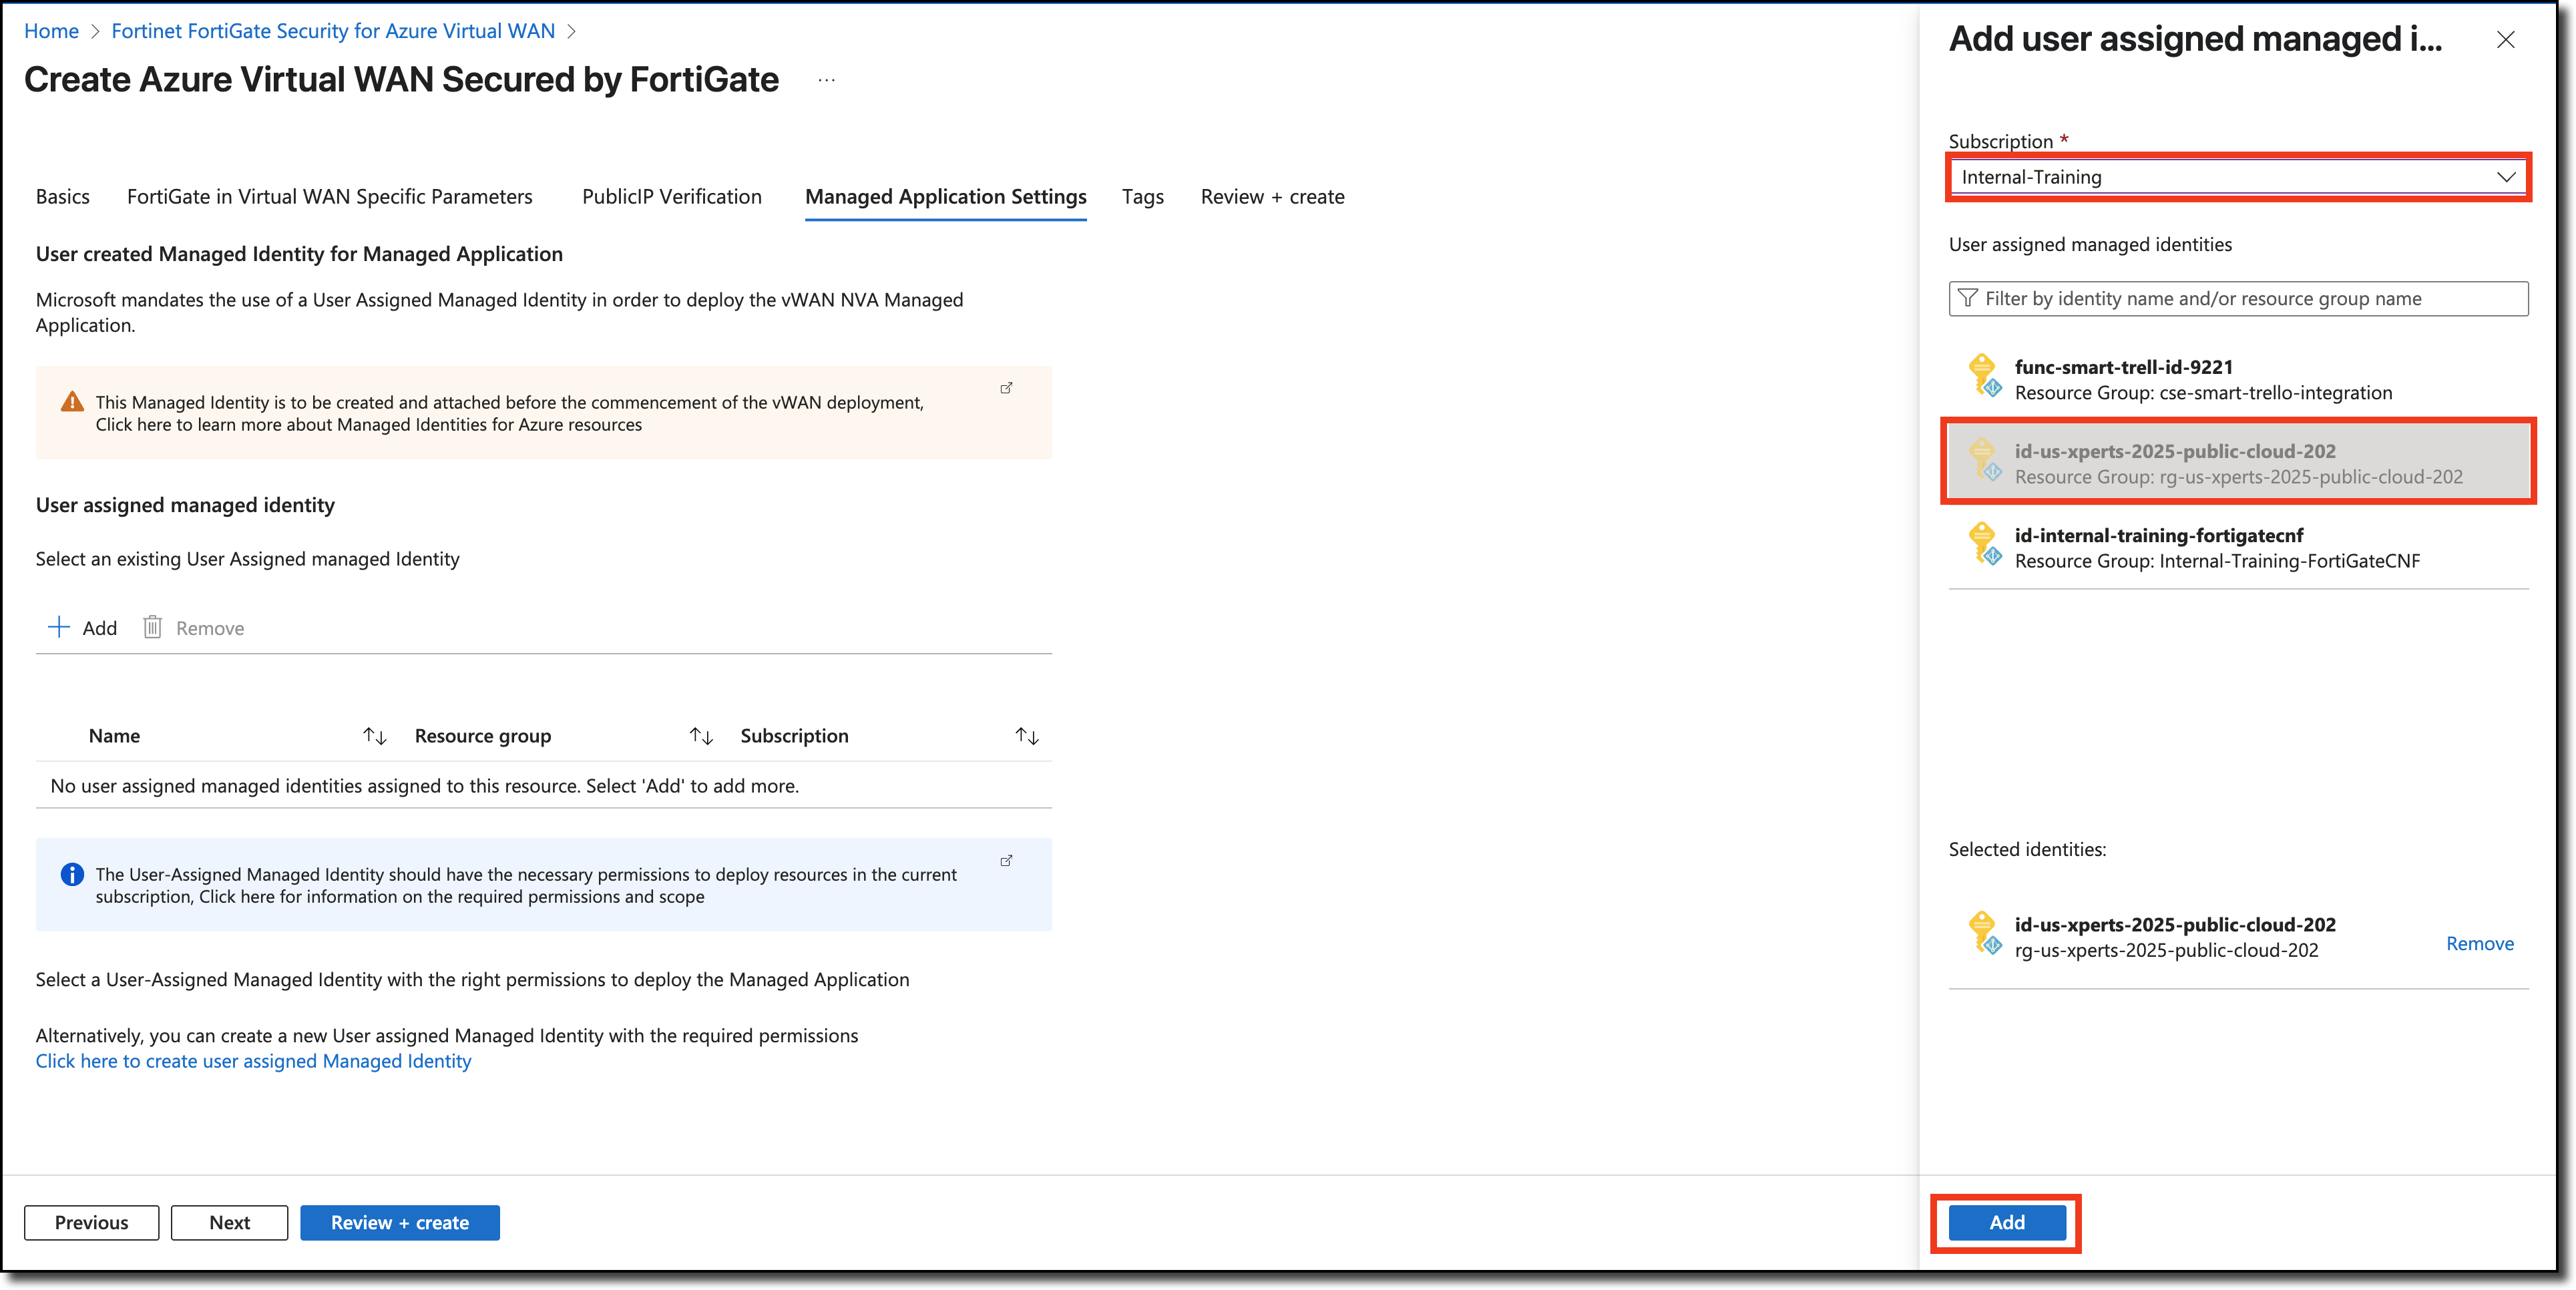
on the Managed Application Settings tab, make sure to verify it looks like below, click “Next”
On the Tags tab, select “Next”.
- No screenshot included in this step
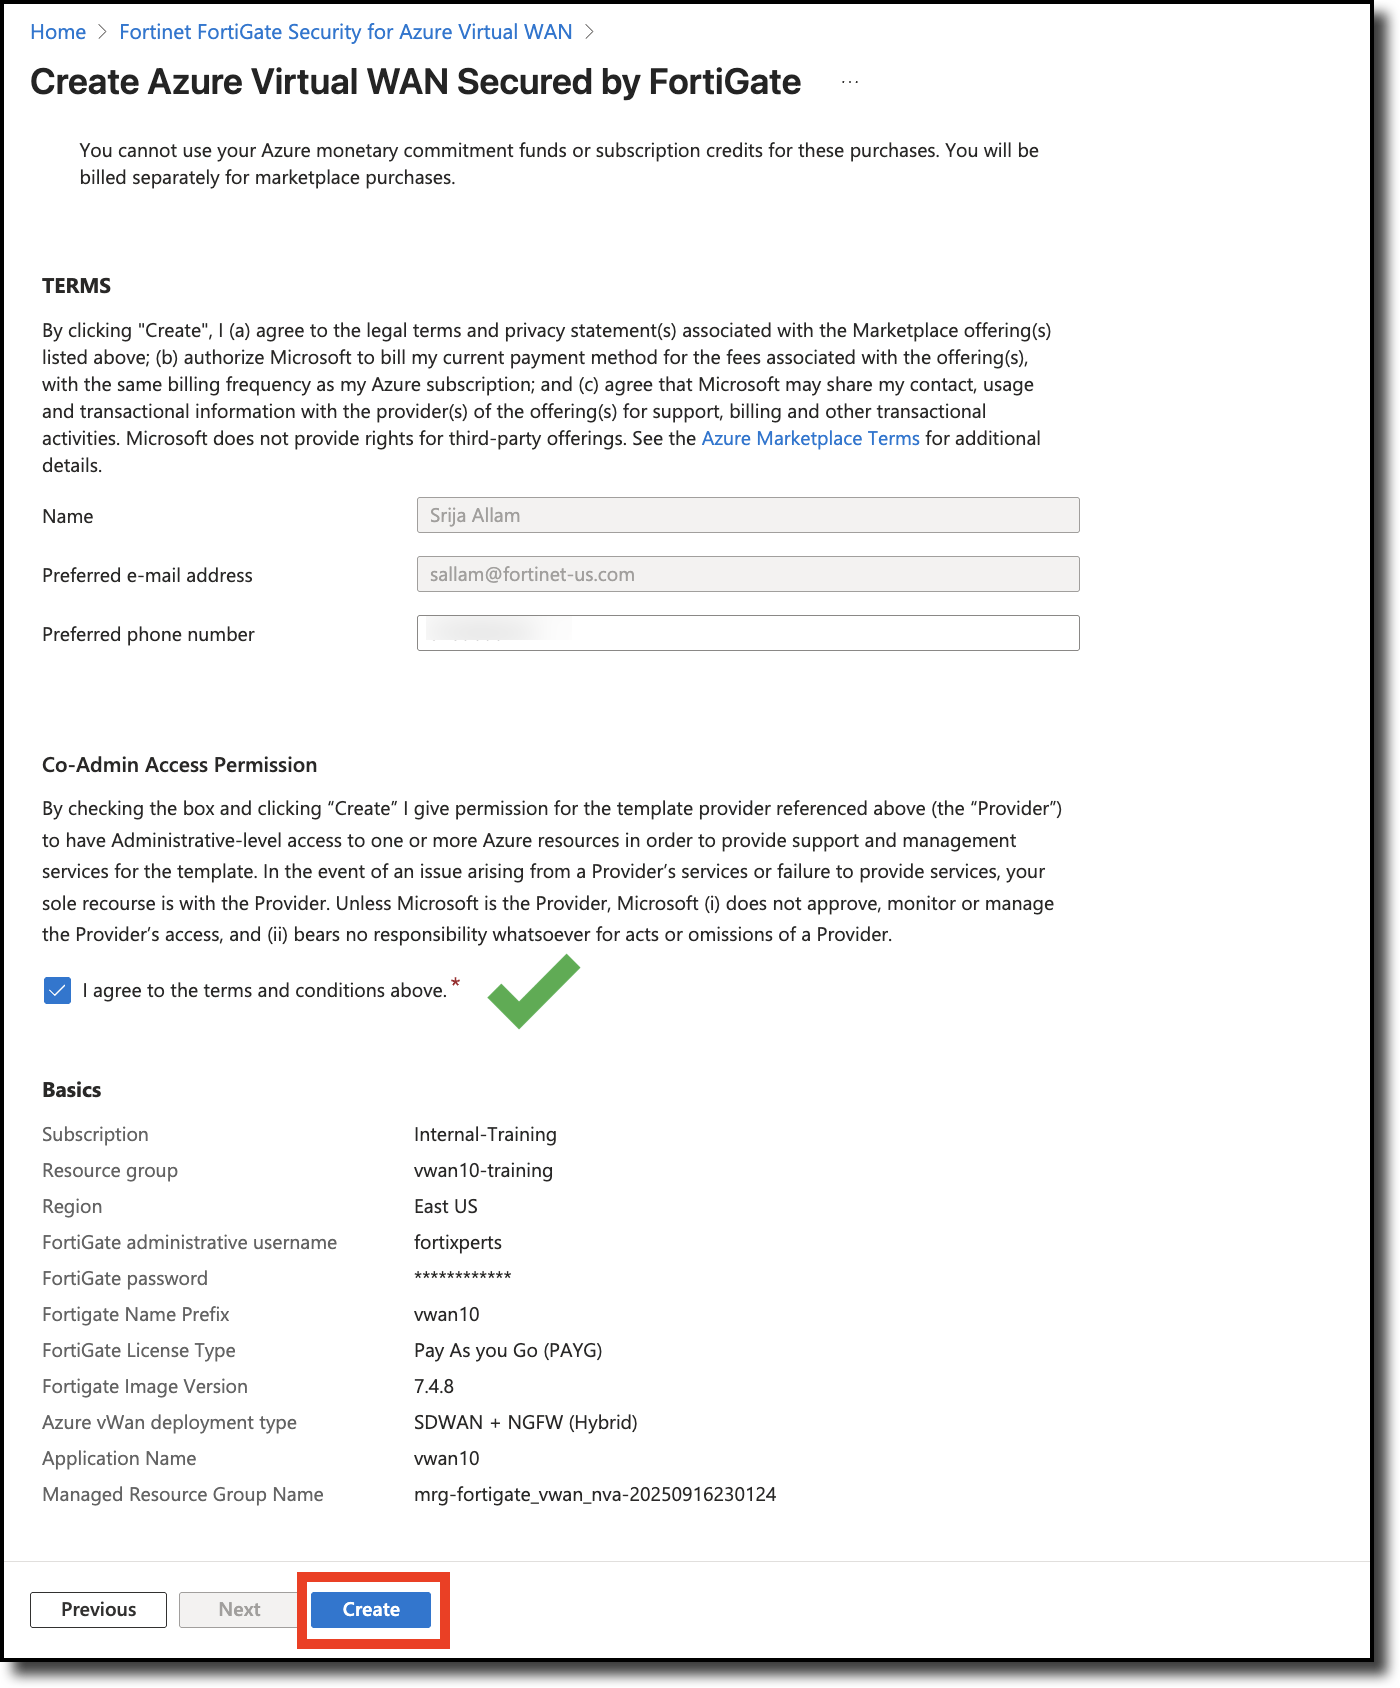
On the Review + create tab, select the following:
- Scroll down to agree to the terms and conditions
- Click “Create”
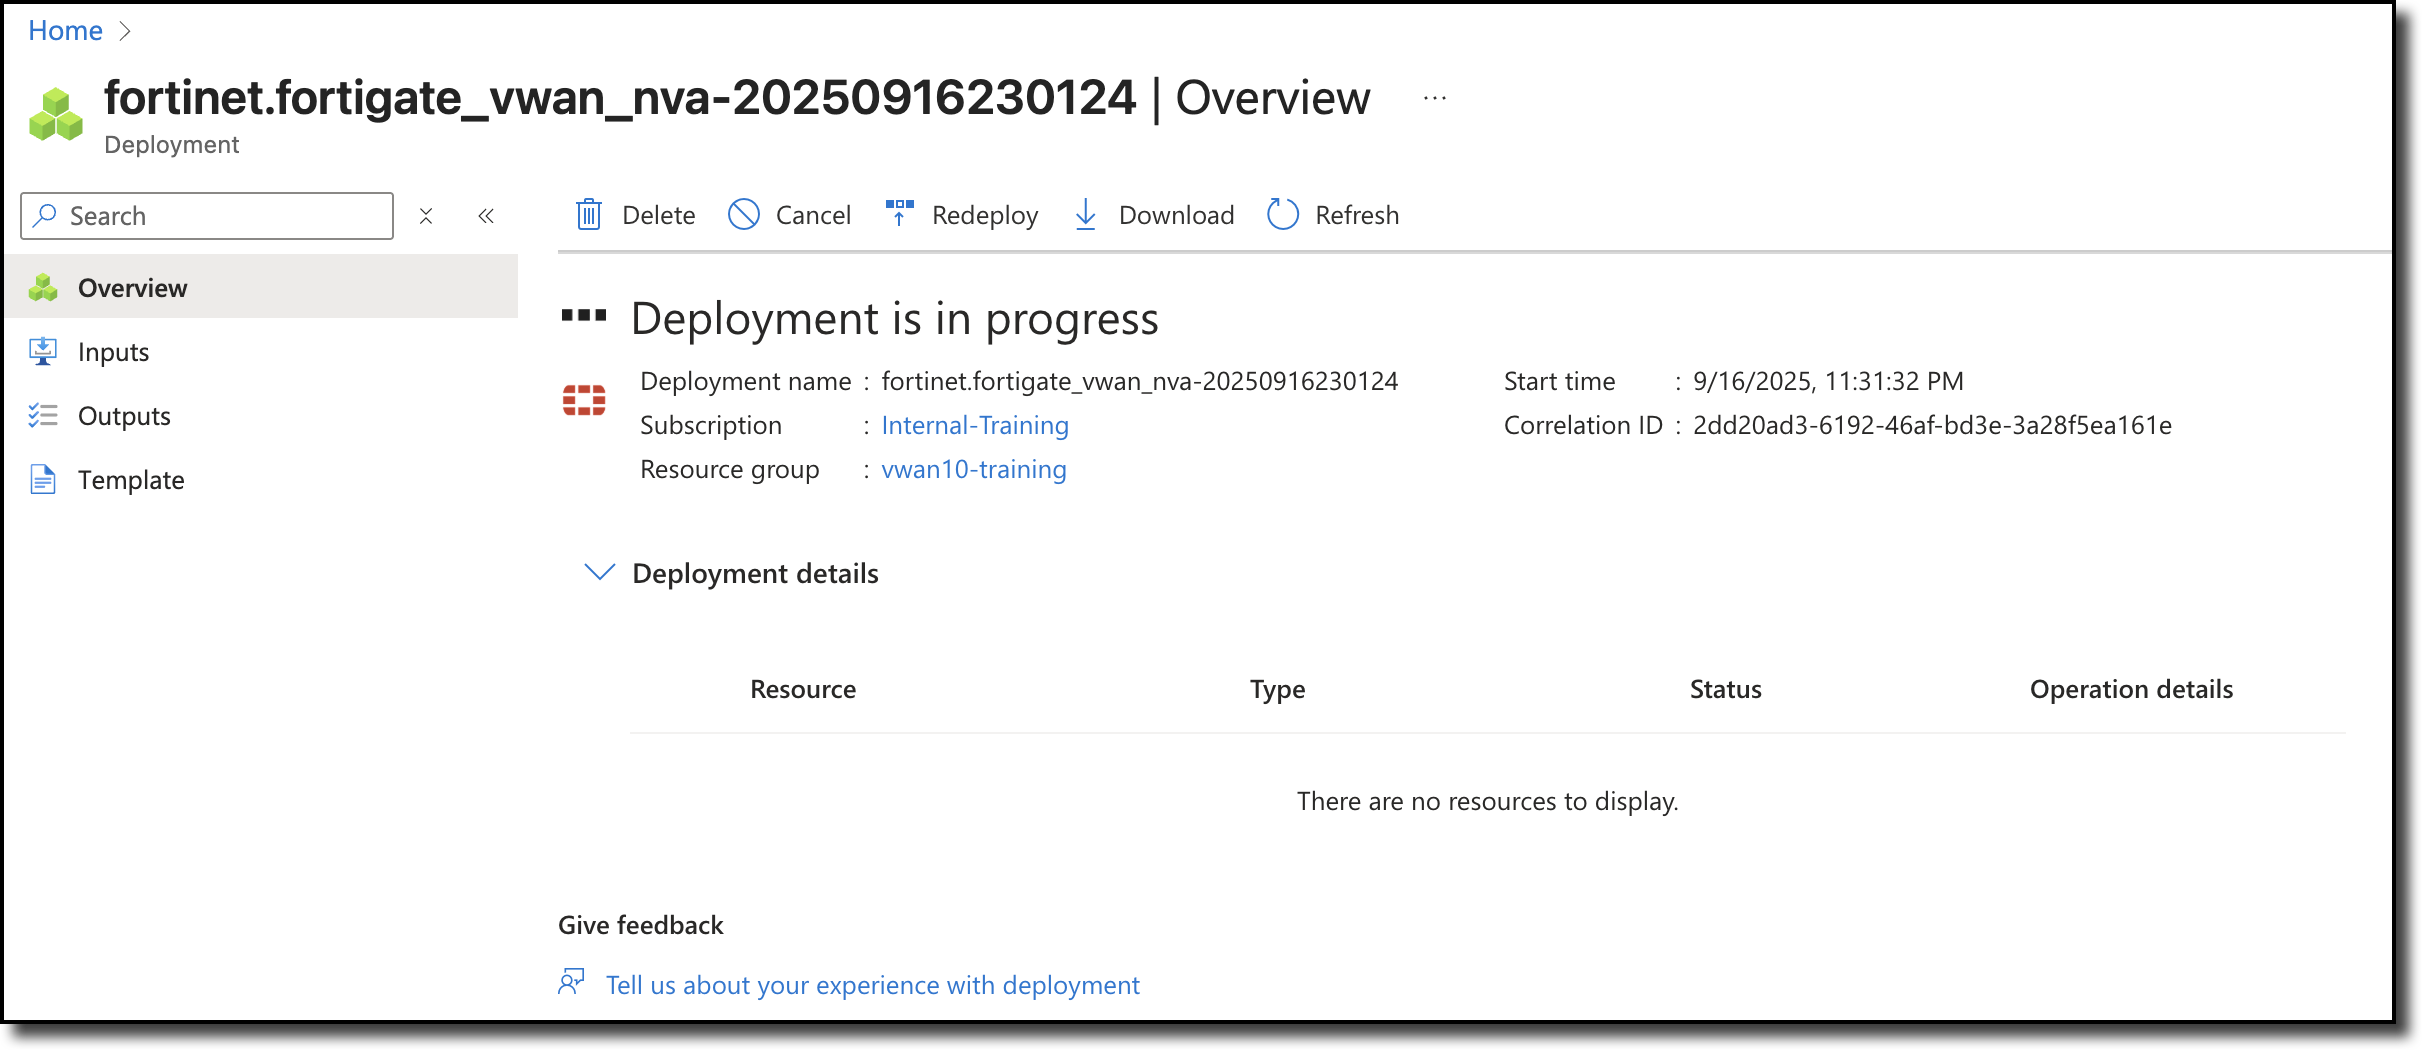
Info
The FortiGate NVAs take about 15 minutes to deploy. Grab a refreshment and relax! You will see the screen belows when the deployment is in progress and when complete.
Click on your assigned Resource Group to return to your Resource Group and prepare for the next task.

Continue to Chapter 4 - Task 2: Configure FGSP