In this task configure BGP on the FortiGates and enable Routing Intent from the Azure portal.
Configure BGP
Confirm the private address space of the vWAN hub
The private address space of the vWAN hub is needed to create a summary route from the private address range to the secondary interfaces of the FortiGate NVAs to establish BGP peering.
The FortiGates are deployed with BGP peers already configured and ready to go online after the static route is enabled.
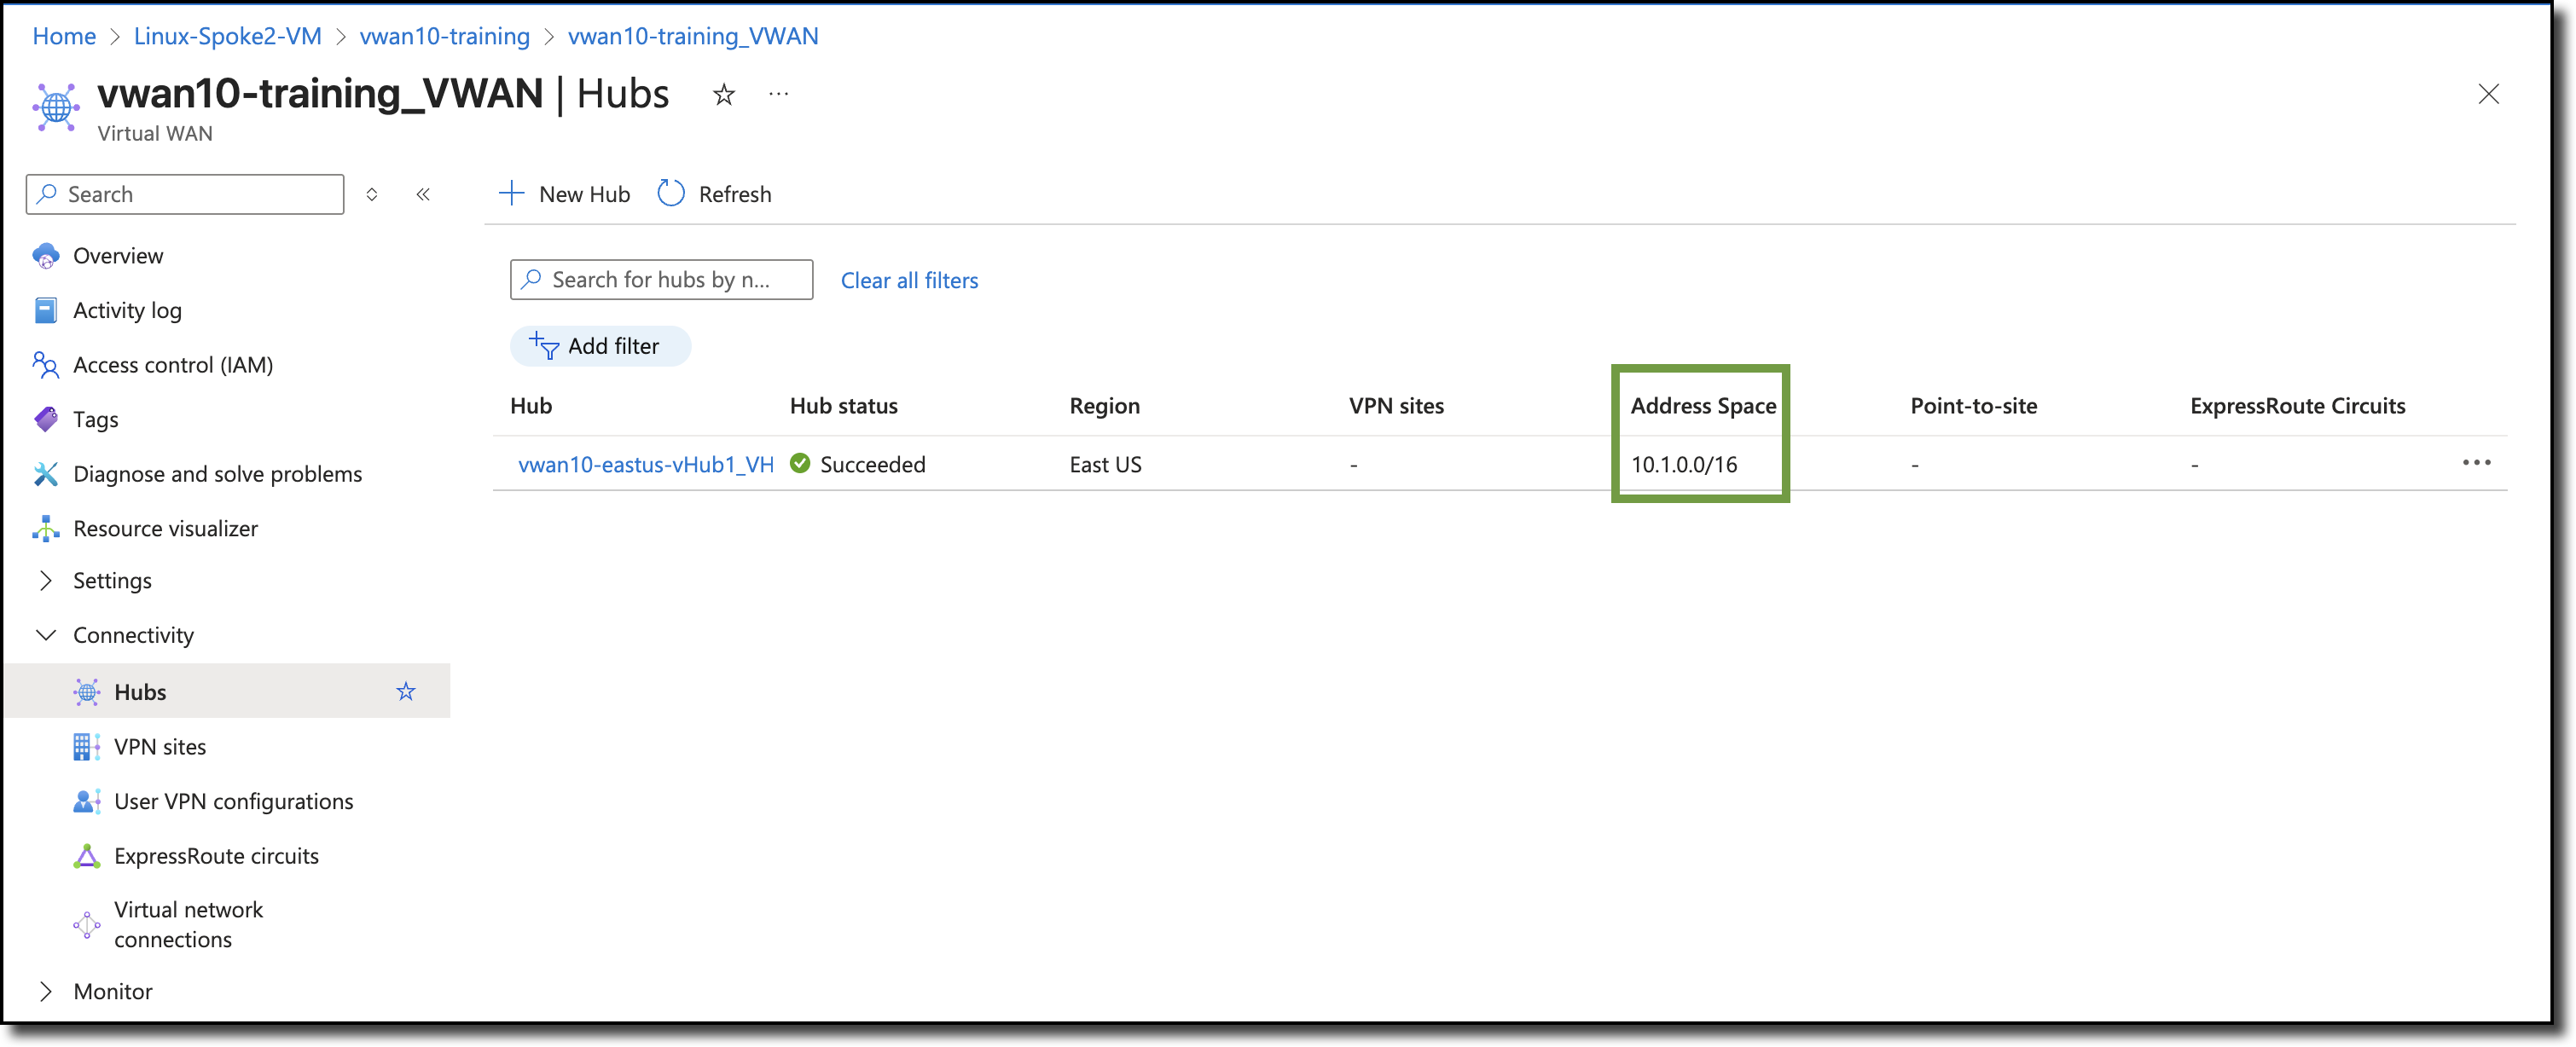
Navigate to your assigned hub vwanXX-eastus-vHub1_VHUB
View hub address space
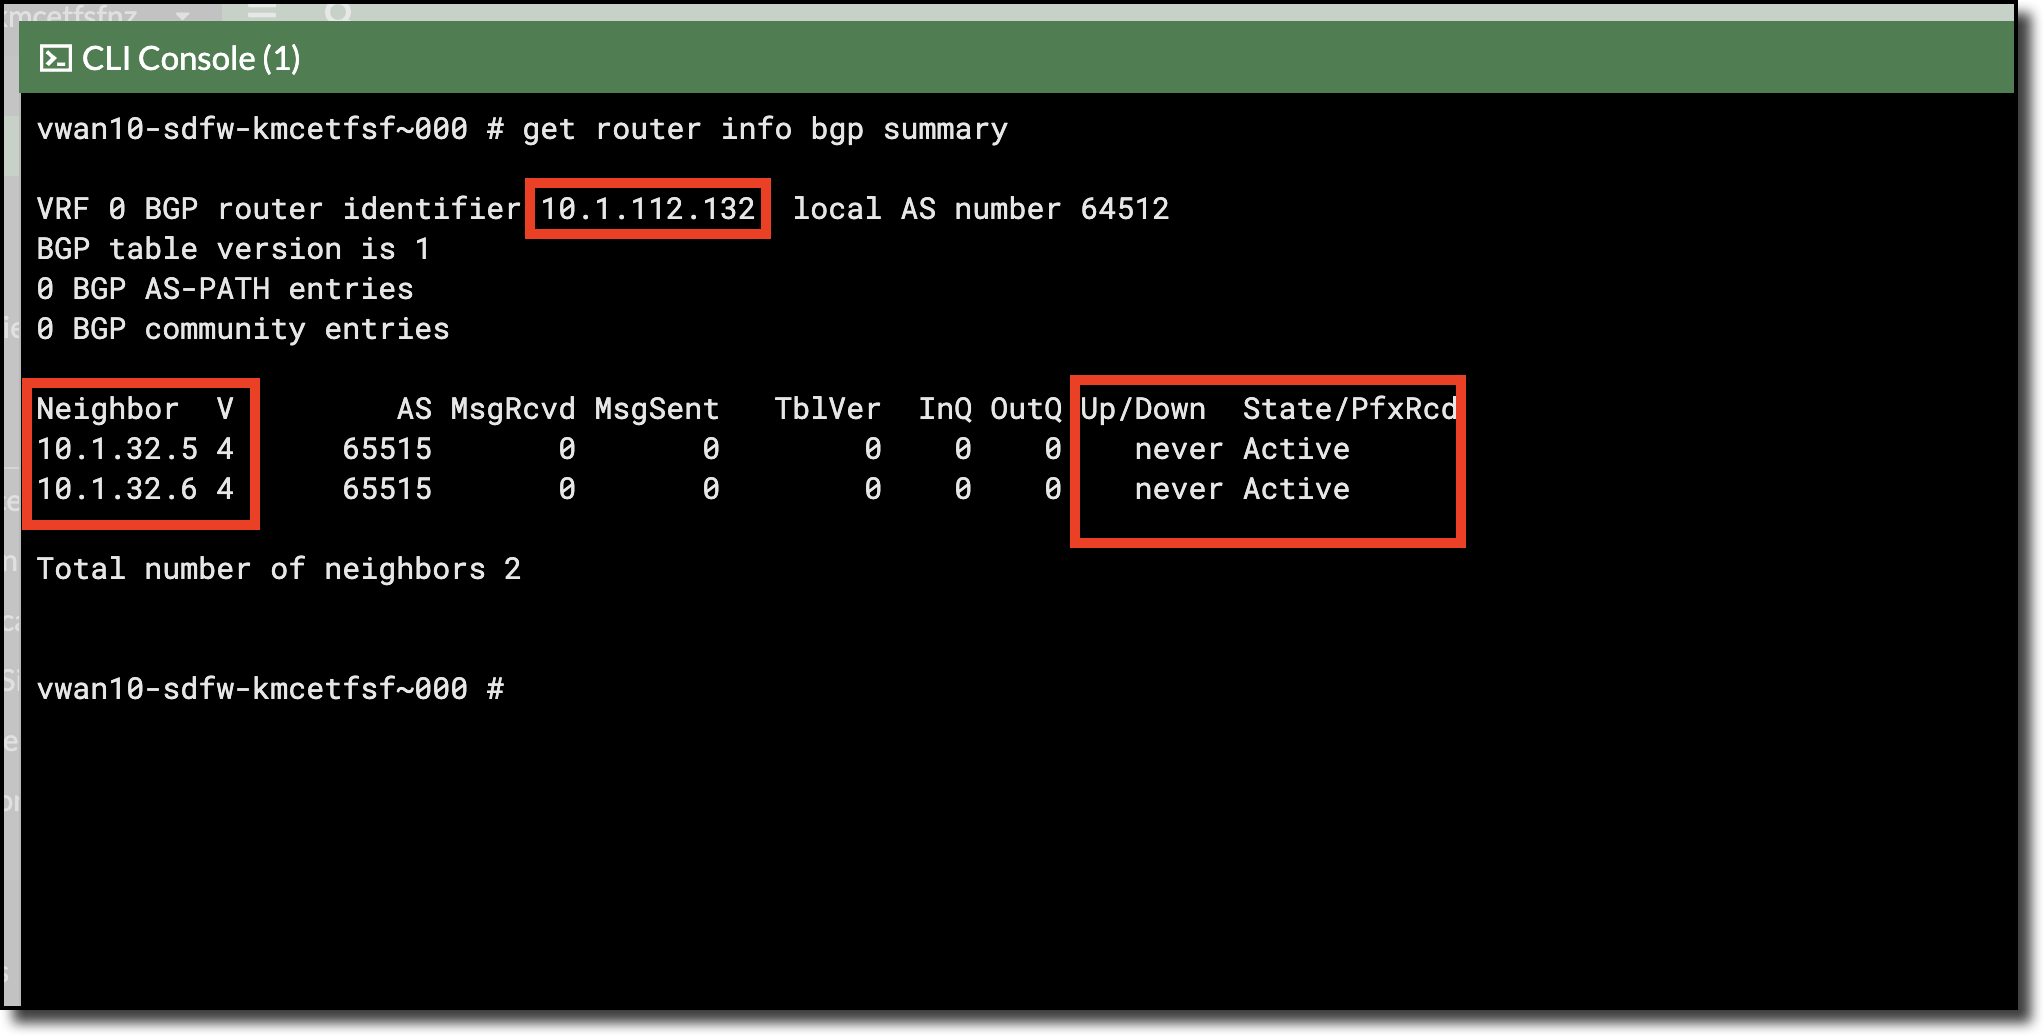
View FortiGate BGP peer status
Open each FortiGate in a browser tab/window
Open FortiGate CLI
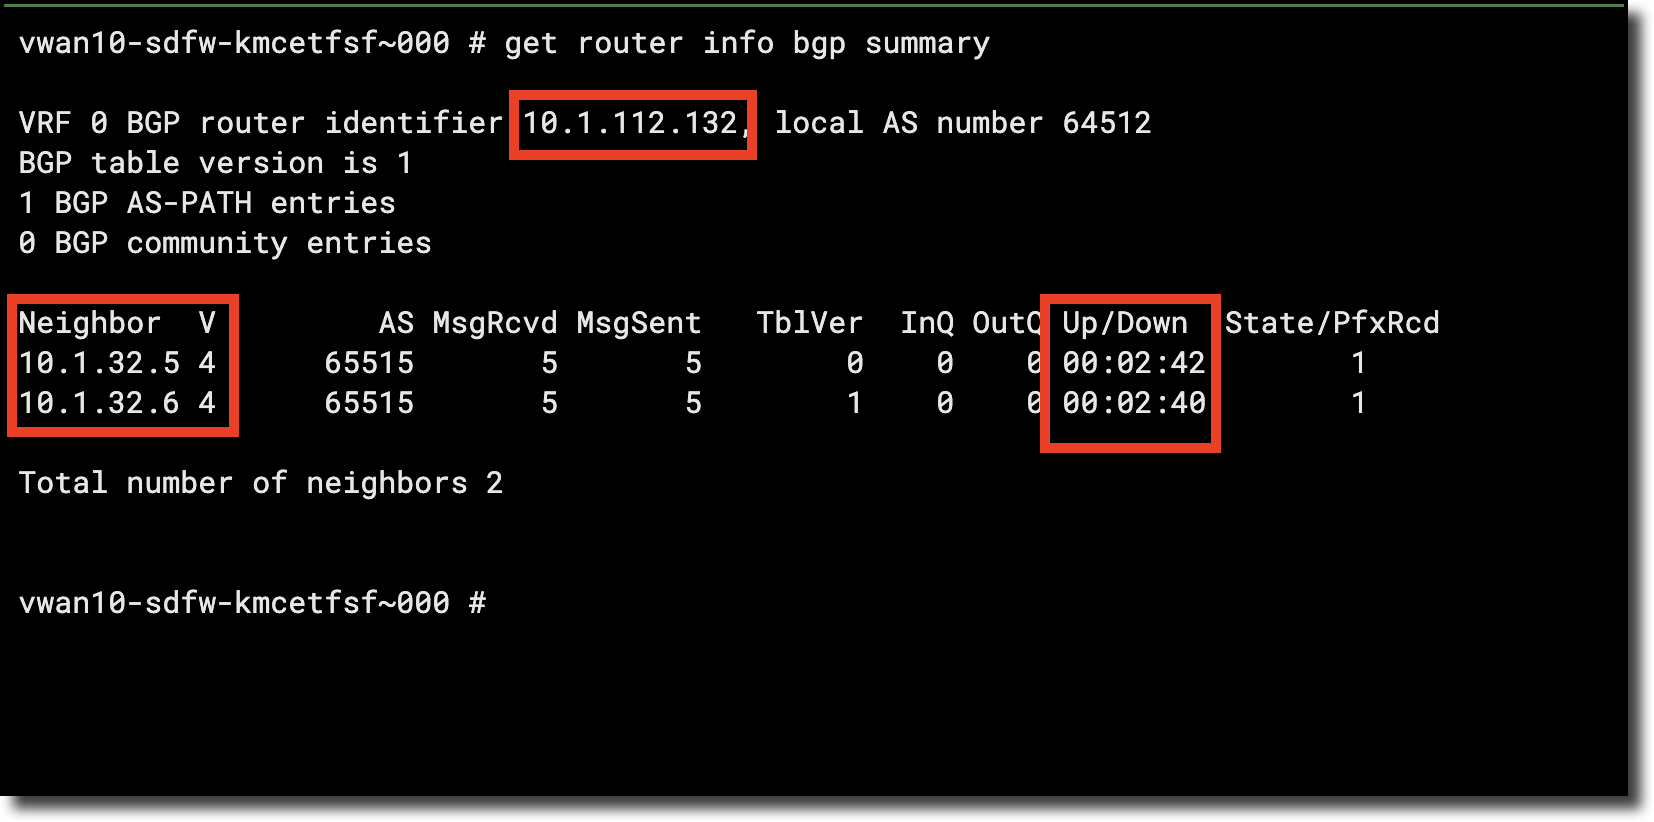
Run CLI command get router info bgp summary to view BGP Peer status
Determine FortiGate NVA port2 Gateway
Static routes are needed on the FortiGates to enable BGP, a component required to setup the static route is the gateway address of the FortiGate’s port2 interface.
Every subnet in Azure uses the first address in the subnet as the gateway. For example, in the subnet 10.1.1.0/24 Azure uses 10.1.1.1 as the subnet gateway.
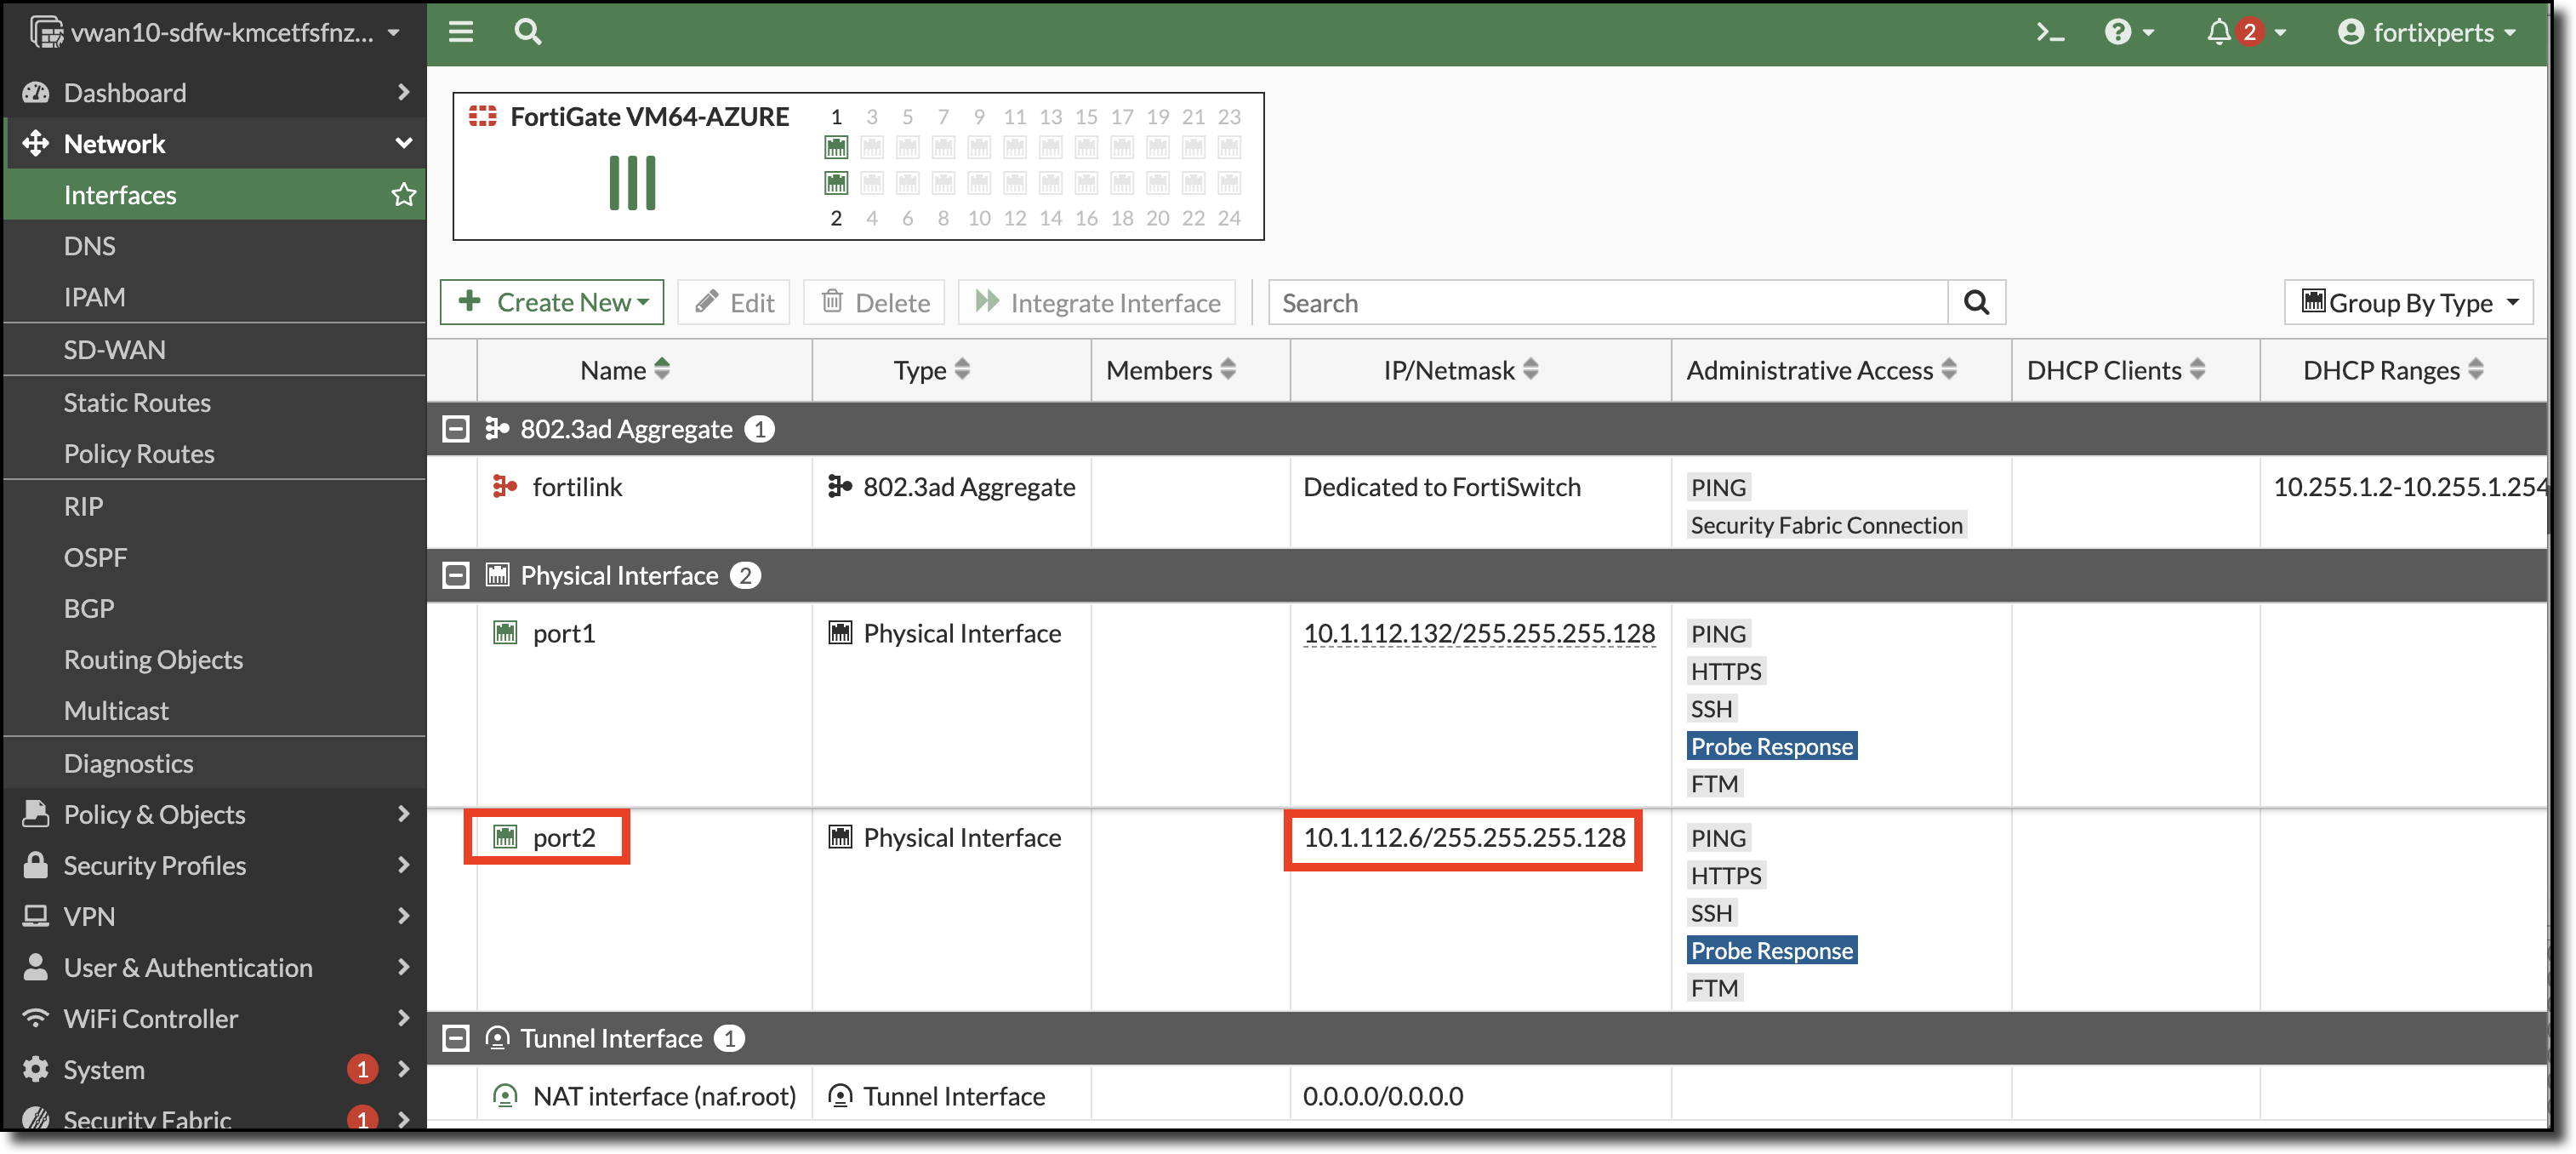
Click on Network
Click on Interfaces
View the assigned address of port2 and determine the gateway
In the screenshot below, the port2 IP address is 10.1.112.5/255.255.255.128 (/25)
Network address is 10.1.112.0
Gateway address is 10.1.112.1
Configure Static Routes on each FortiGate
Two static routes are required on each FortiGate
A static route to the virtual hub routers through the gateway of port2
A Static route for the internal Azure load balancer probes
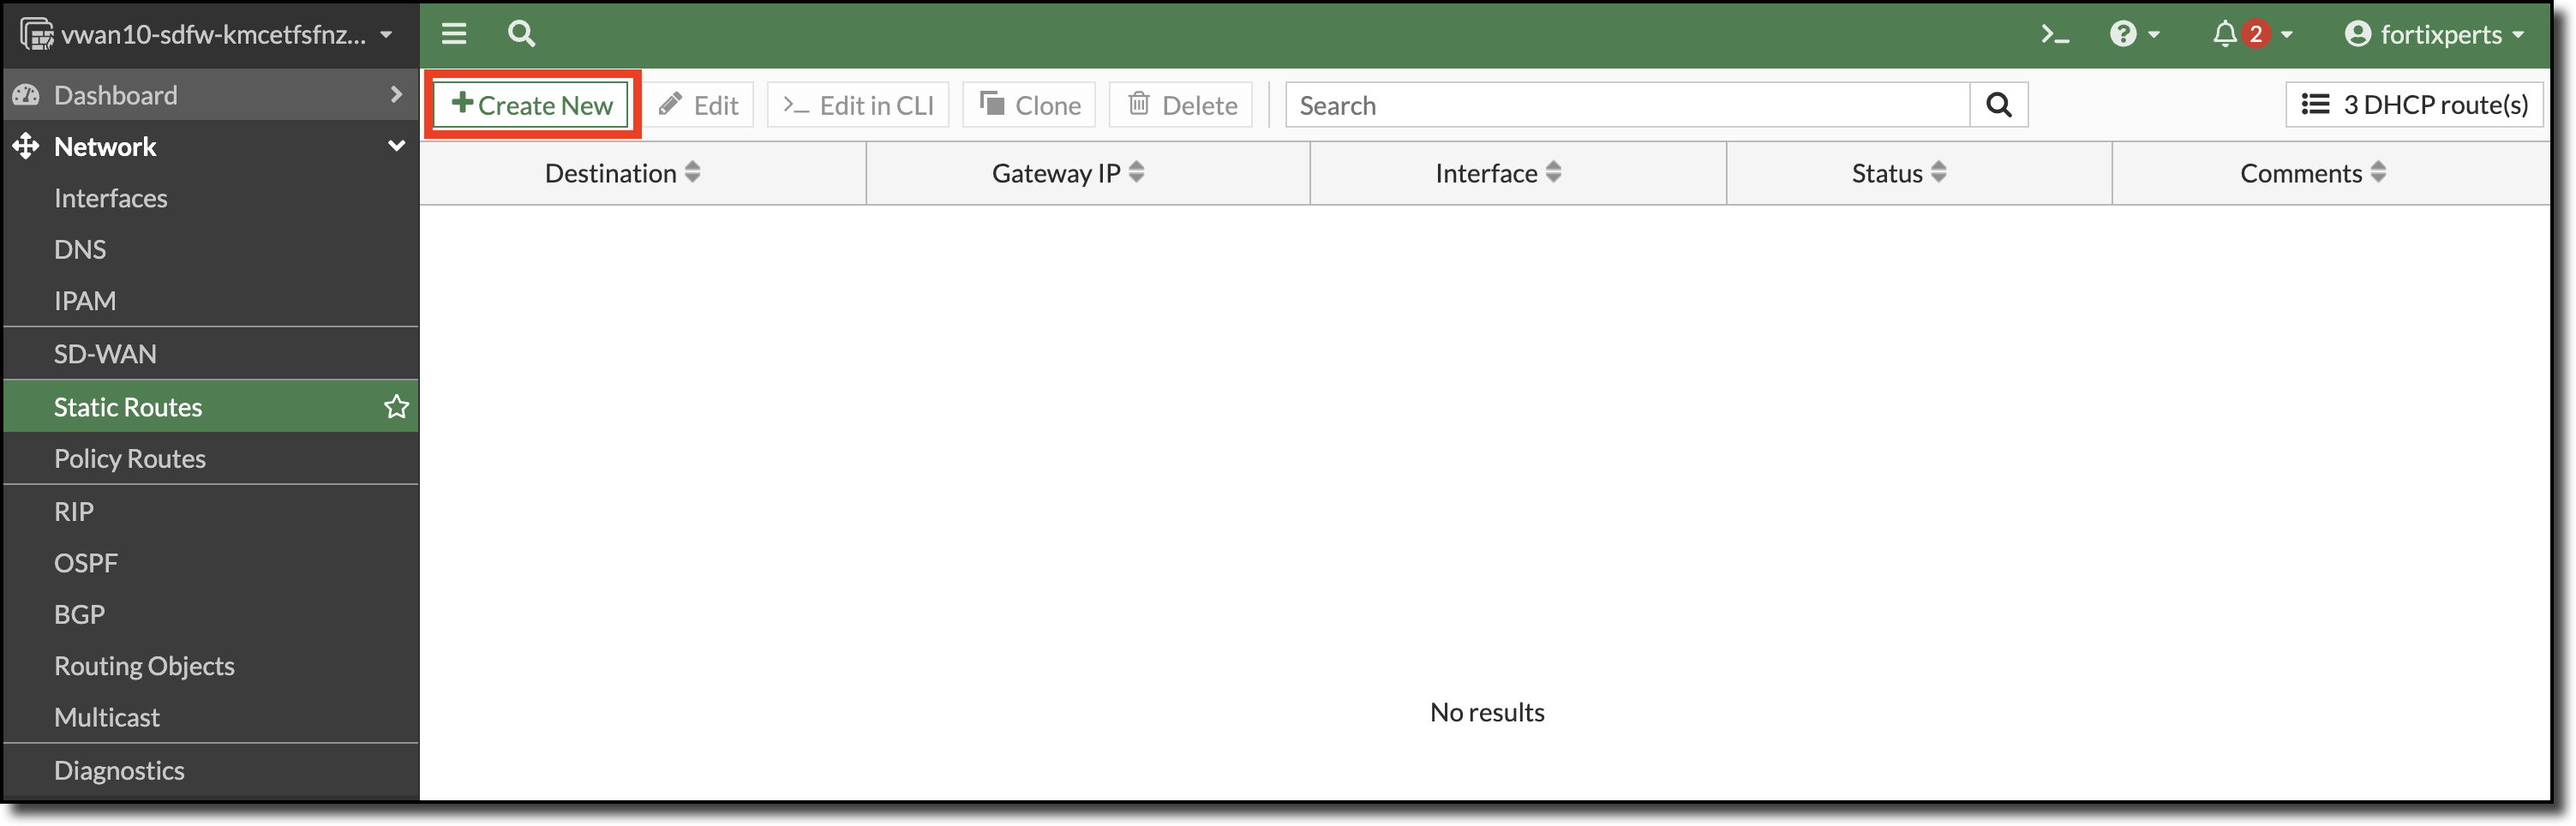
Click Network
Click Static Routes
Click Create New
Create a static route
Enter Destination - 10.1.0.0/16
Enter Gateway Address - 10.1.112.1
Select Interface - port2
Click “OK”
Repeat the process to add a static route for the Azure internal load balancer health probe
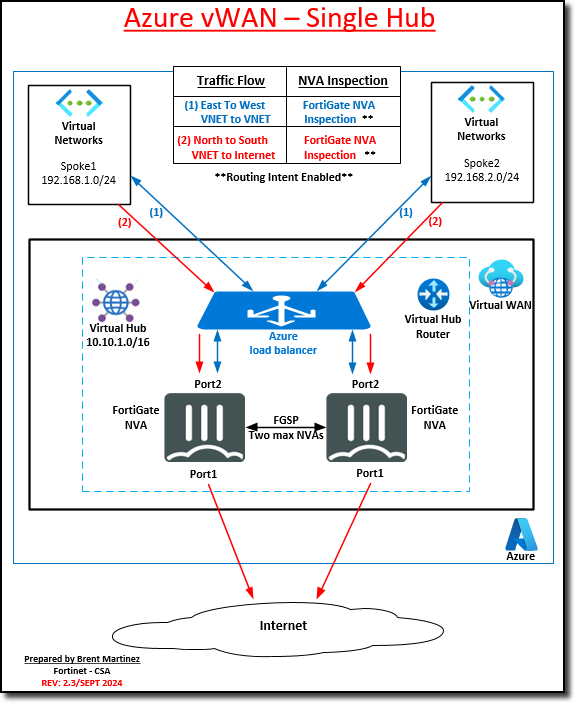
Refer to the overall architecturefor the internal load balancer placement.
Health probes enable the Azure load balancer to determine if a FortiGate is in a state to forward traffic.
The static route destination below is the default Azure load balancer health probe destination.
Enter Destination: 168.63.129.16/32
Enter Gateway Address: 10.1.112.1
Select Interface: port2
Enter Administrative Distance: 5
Click “OK”
Repeat the commands on the other FortiGate
CLI commands below can be used.
config router static
edit 1
    set dst 10.1.0.0 255.255.0.0
    set gateway 10.1.112.1
    set device "port2"
next
edit 2
    set dst 168.63.129.16 255.255.255.255
    set gateway 10.1.112.1
    set distance 5
    set device "port2"
next
end
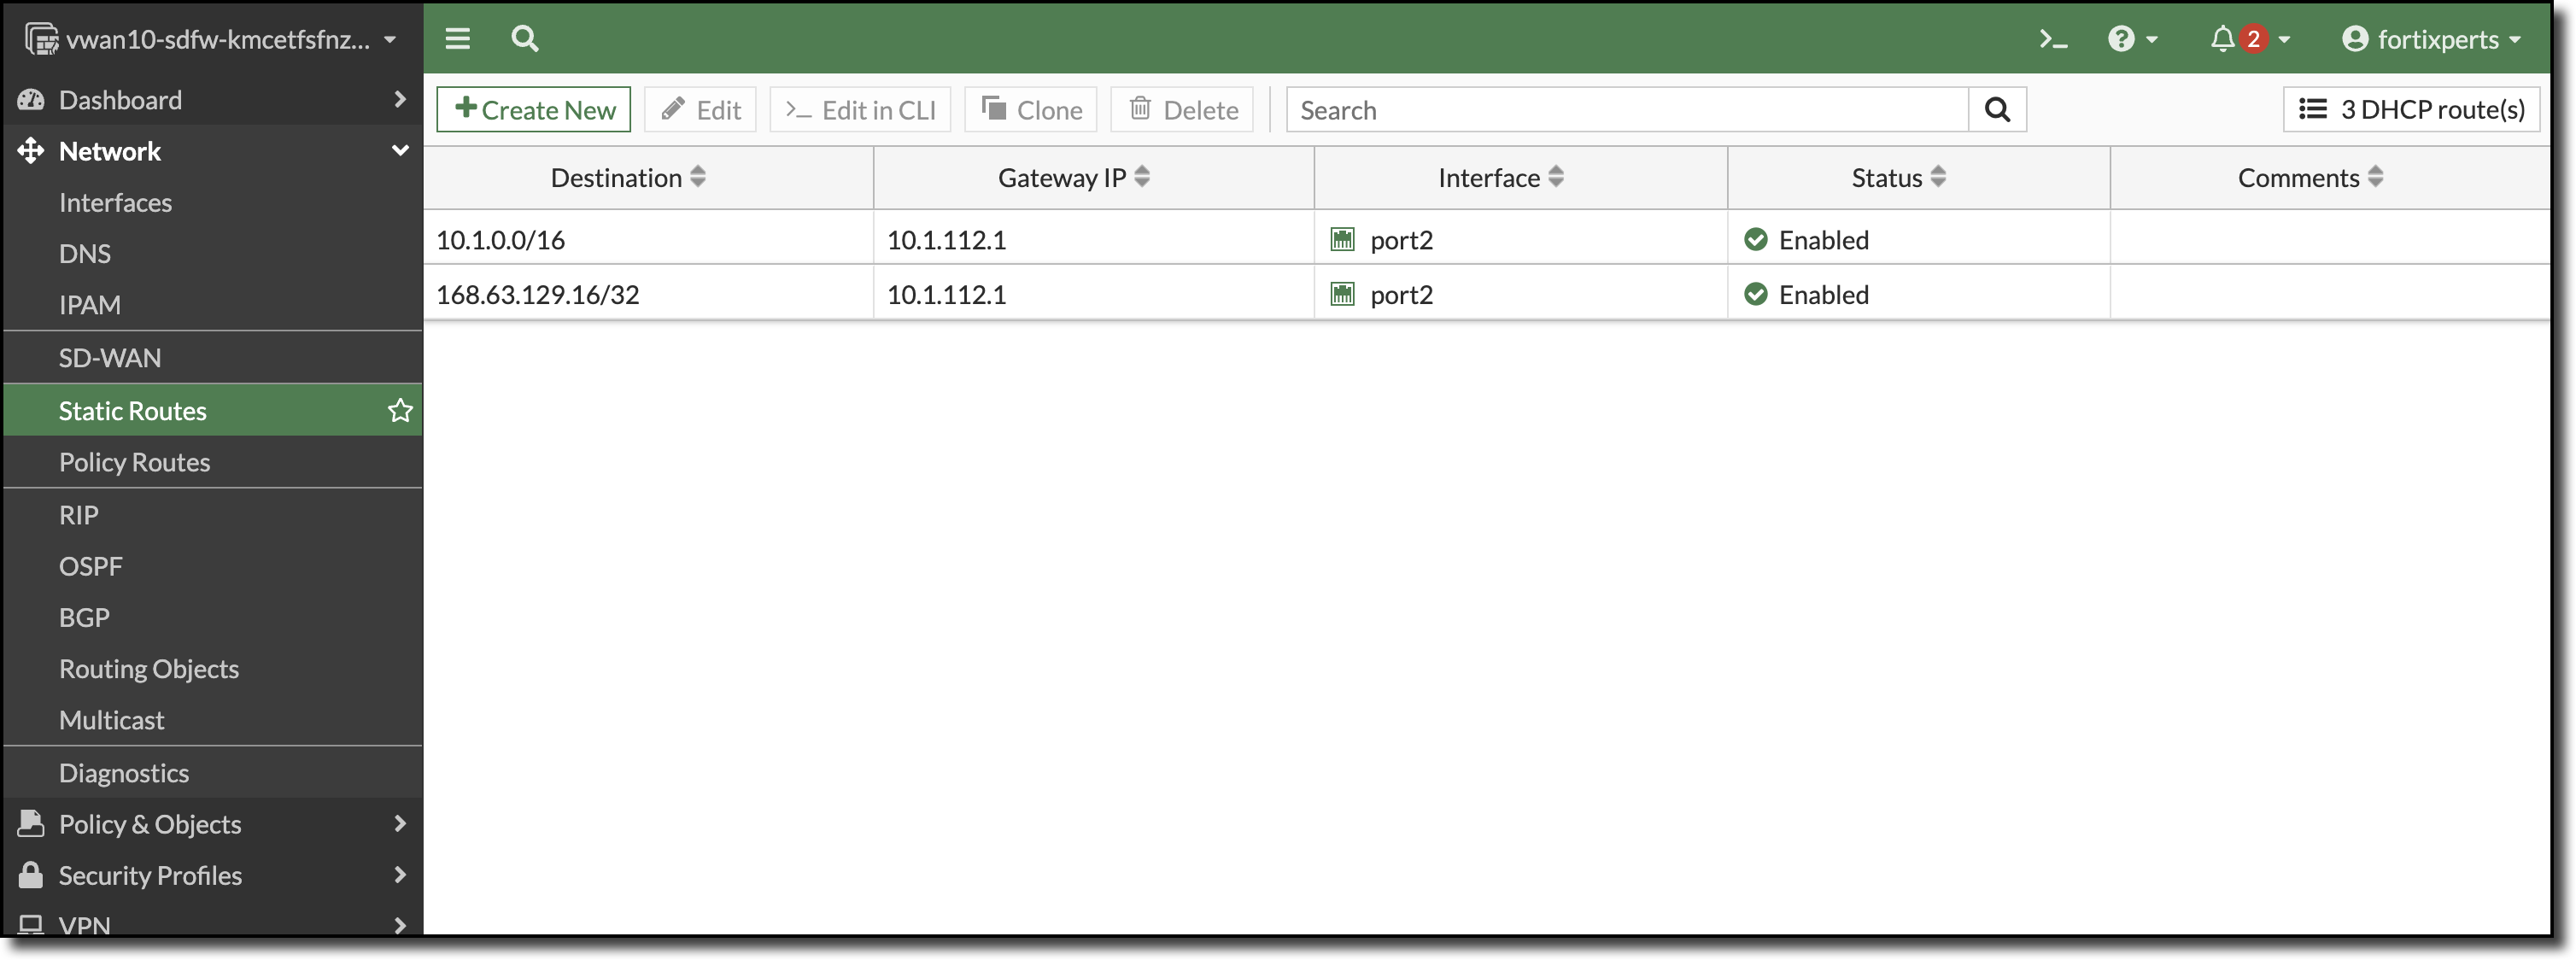
When completed the static routes of each FortiGate should look similar to the screenshot below.
Verify BGP communication between FortiGate NVAs
After configuring the static routes on both FortiGates BGP peers are reachable.
Verify BGP communication between FortiGate NVAs in the CLI.
Open FortiGate CLI
Run CLI command get router info bgp summary
More information about FortiGate static routes and BGP can be found in Fortinet documents.
Enable Routing Intent
Routing Intent and Routing Policies allow you to configure the Virtual WAN hub to forward Internet-bound and Private (Point-to-site VPN, Site-to-site VPN, ExpressRoute, Virtual Network and Network Virtual Appliance) traffic to an Azure Firewall, Next-Generation Firewall Network Virtual Appliance (NGFW-NVA) or security software-as-a-service (SaaS) solution deployed in the virtual hub.
Enable Routing Intent
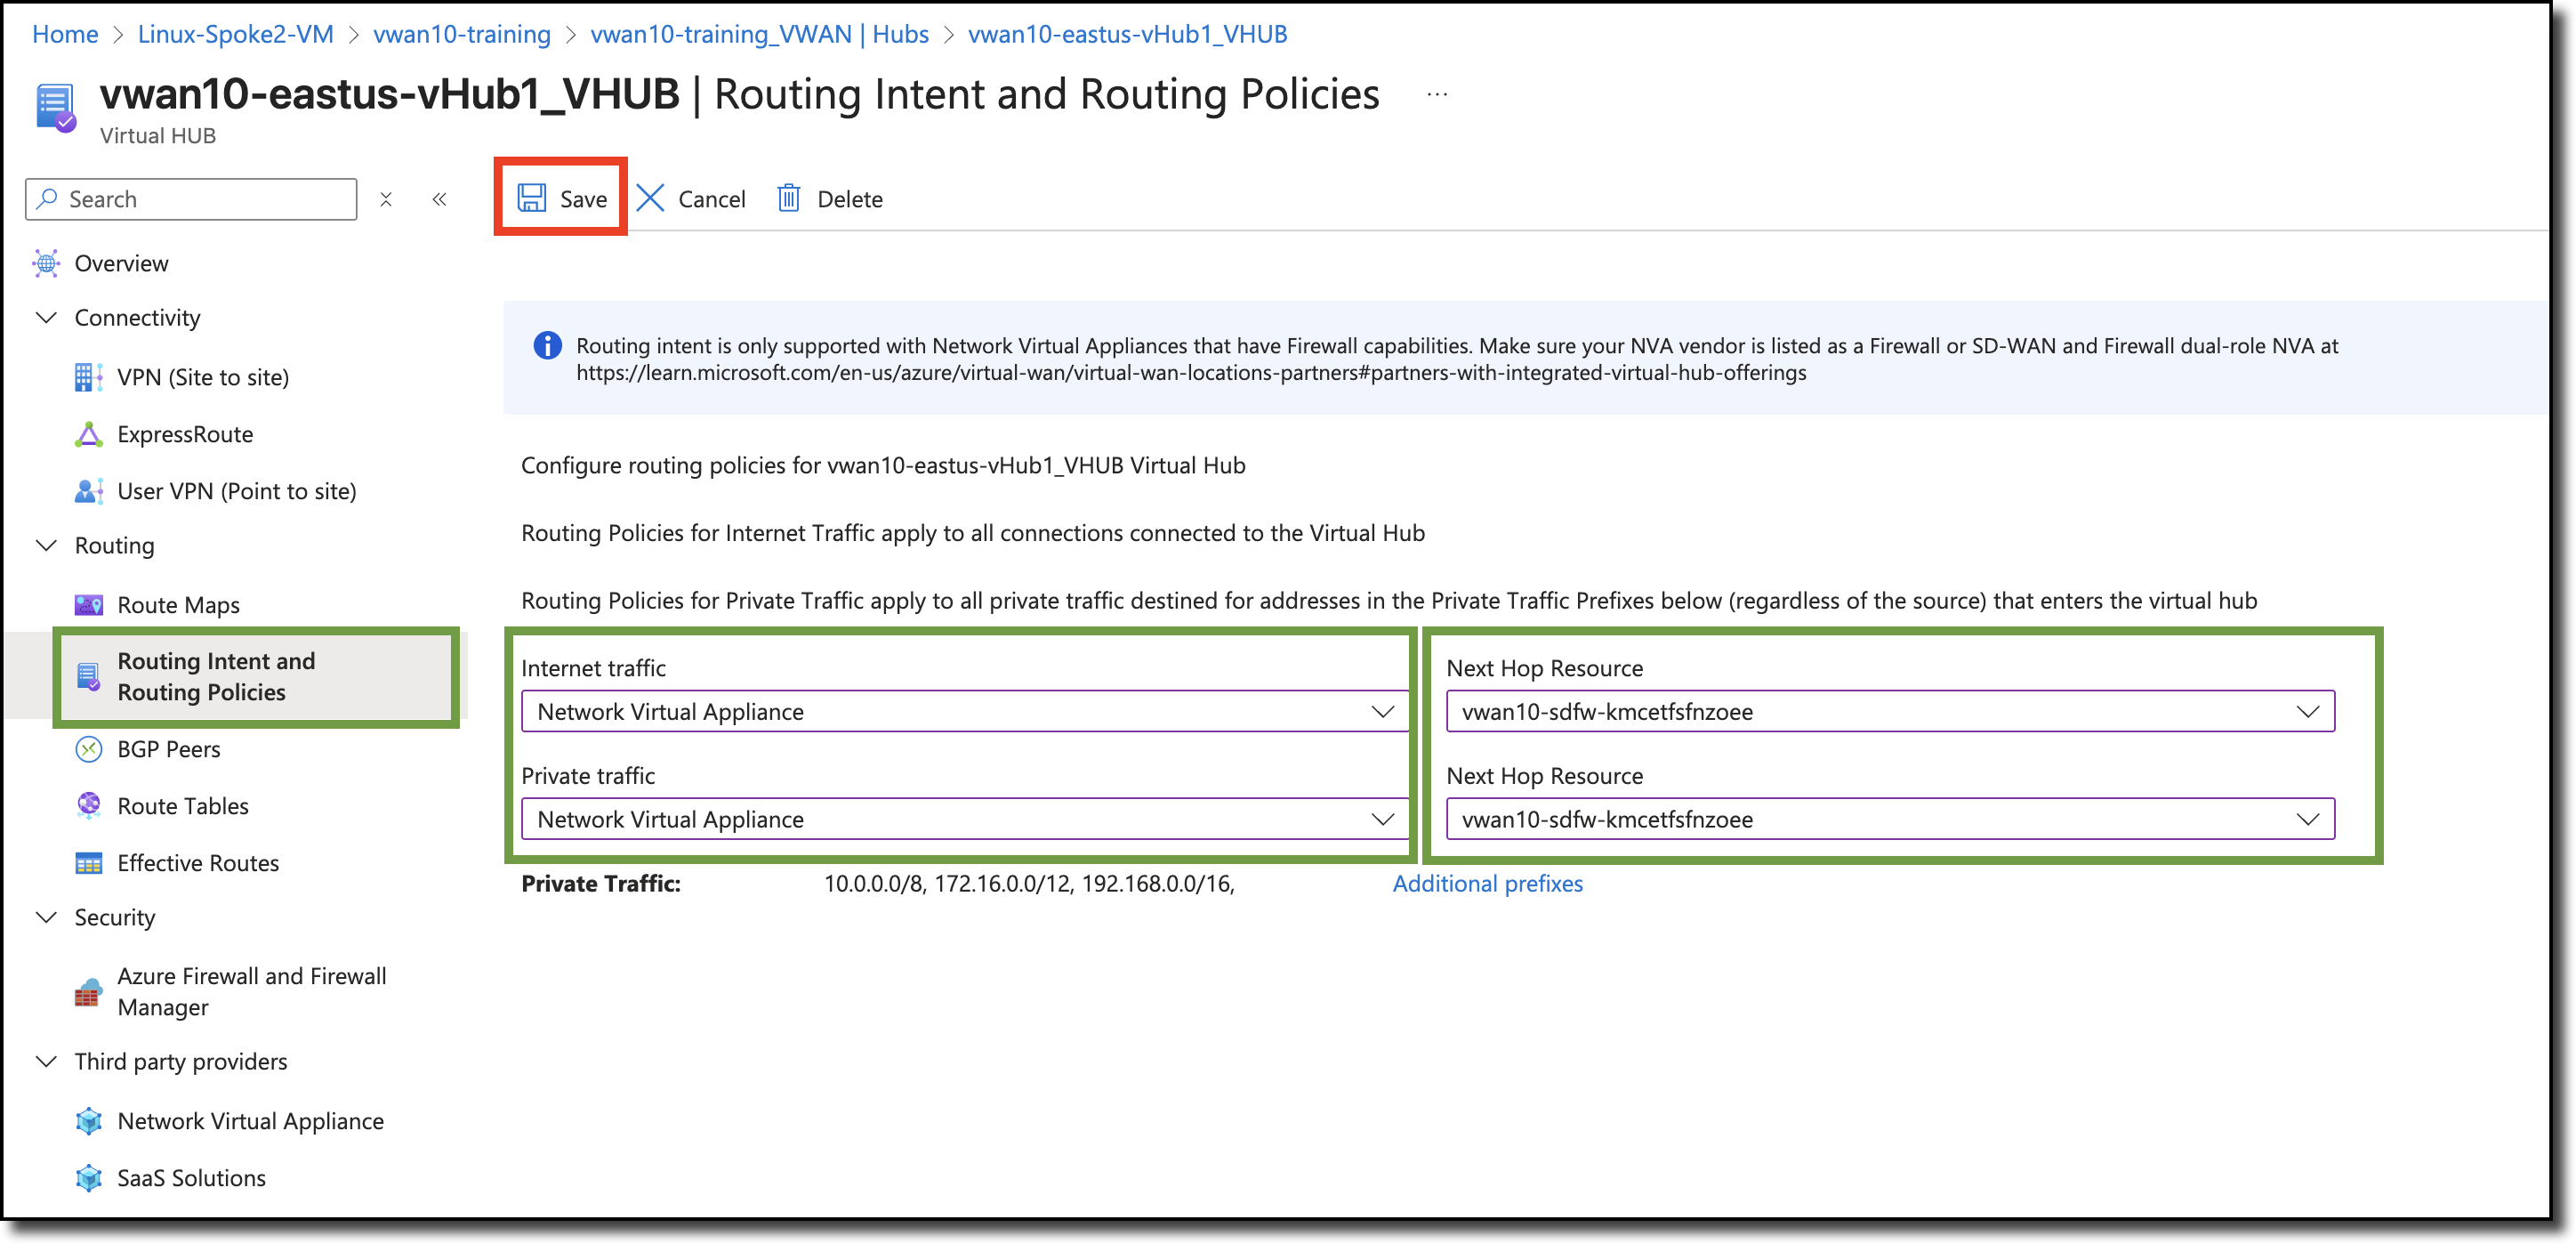
Navigate - to your Hub - vwanXX-eastus-vHub1_VHUB
Click - “Routing Intent and Routing Policies” on the left under “Routing”
Select - for “Internet traffic” - Network Virtual Appliance
Select - for “Private traffic” - Network Virtual Appliance
Select - for both “Next Hop Resources” - your cluster name (the only selection in the dropdown)
Click - “Save” to update Routing Intent
Continue to Chapter 4 - Task 5: VNET Peering and Verifying Routing