Task 3: Internet inbound Traffic
In this task create FortiGate firewall policies and DNAT (Destination Network Address Translation) policies on the Load balancer to allow Internet inbound network traffic.
Find Internet Inbound IP Address
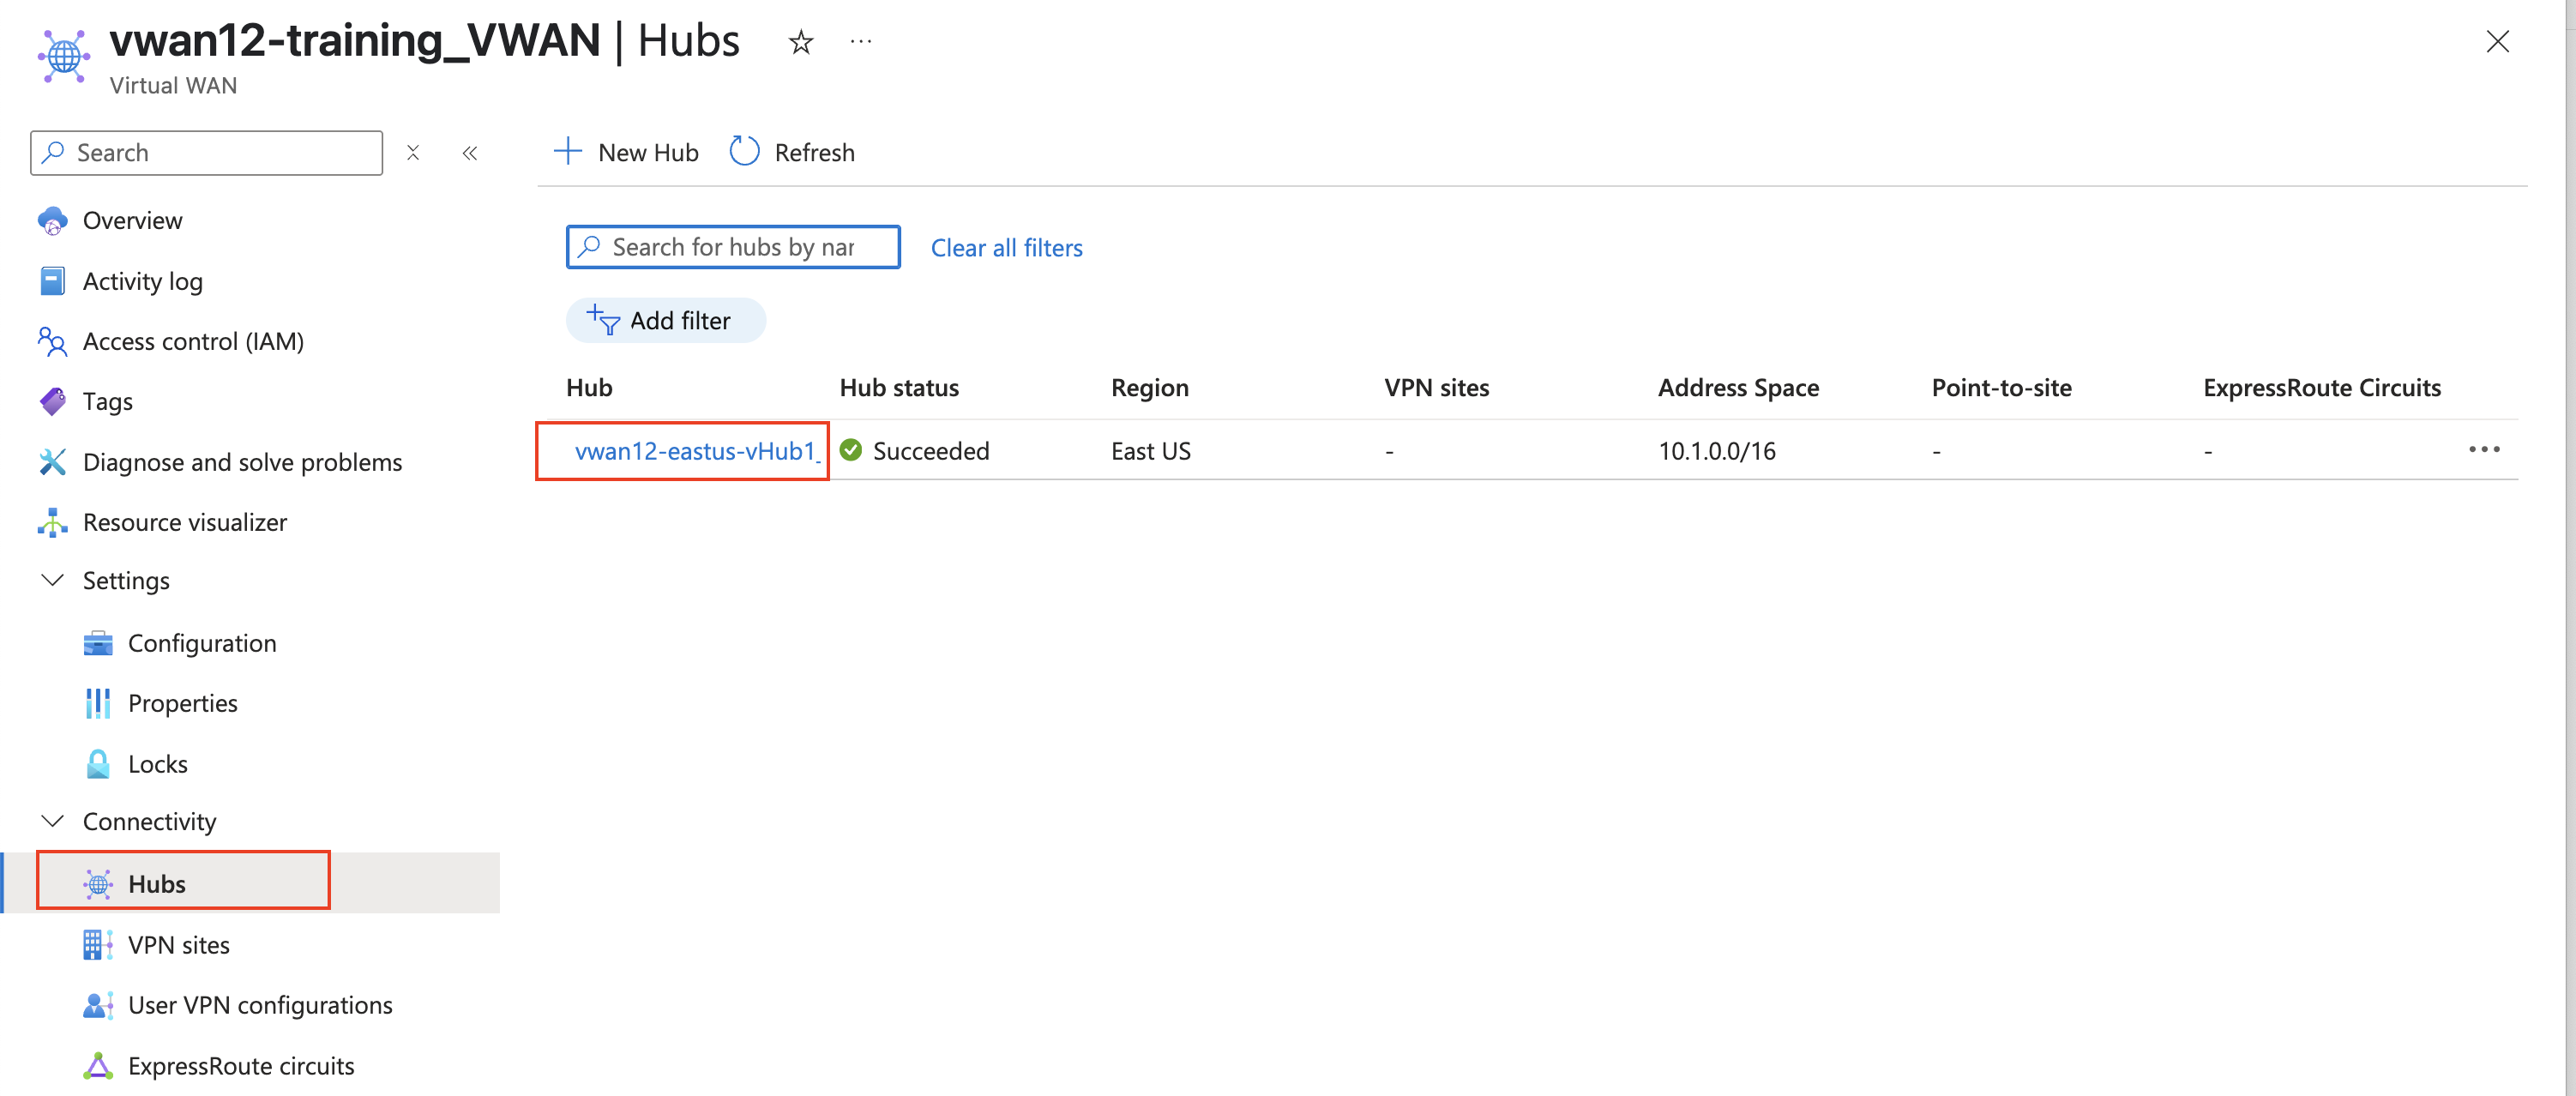
From your assigned Resource Group “vwanxx-training”, navigate to your vWAN “vwanxx-training_VWAN” and then your hub “vwanXX-eastus-vHub1_VHUB”
Click Network Virtual Appliance in the left-hand navigation
Click on “Manage Configurations” in the right-hand “Network Virtual Appliances” pane
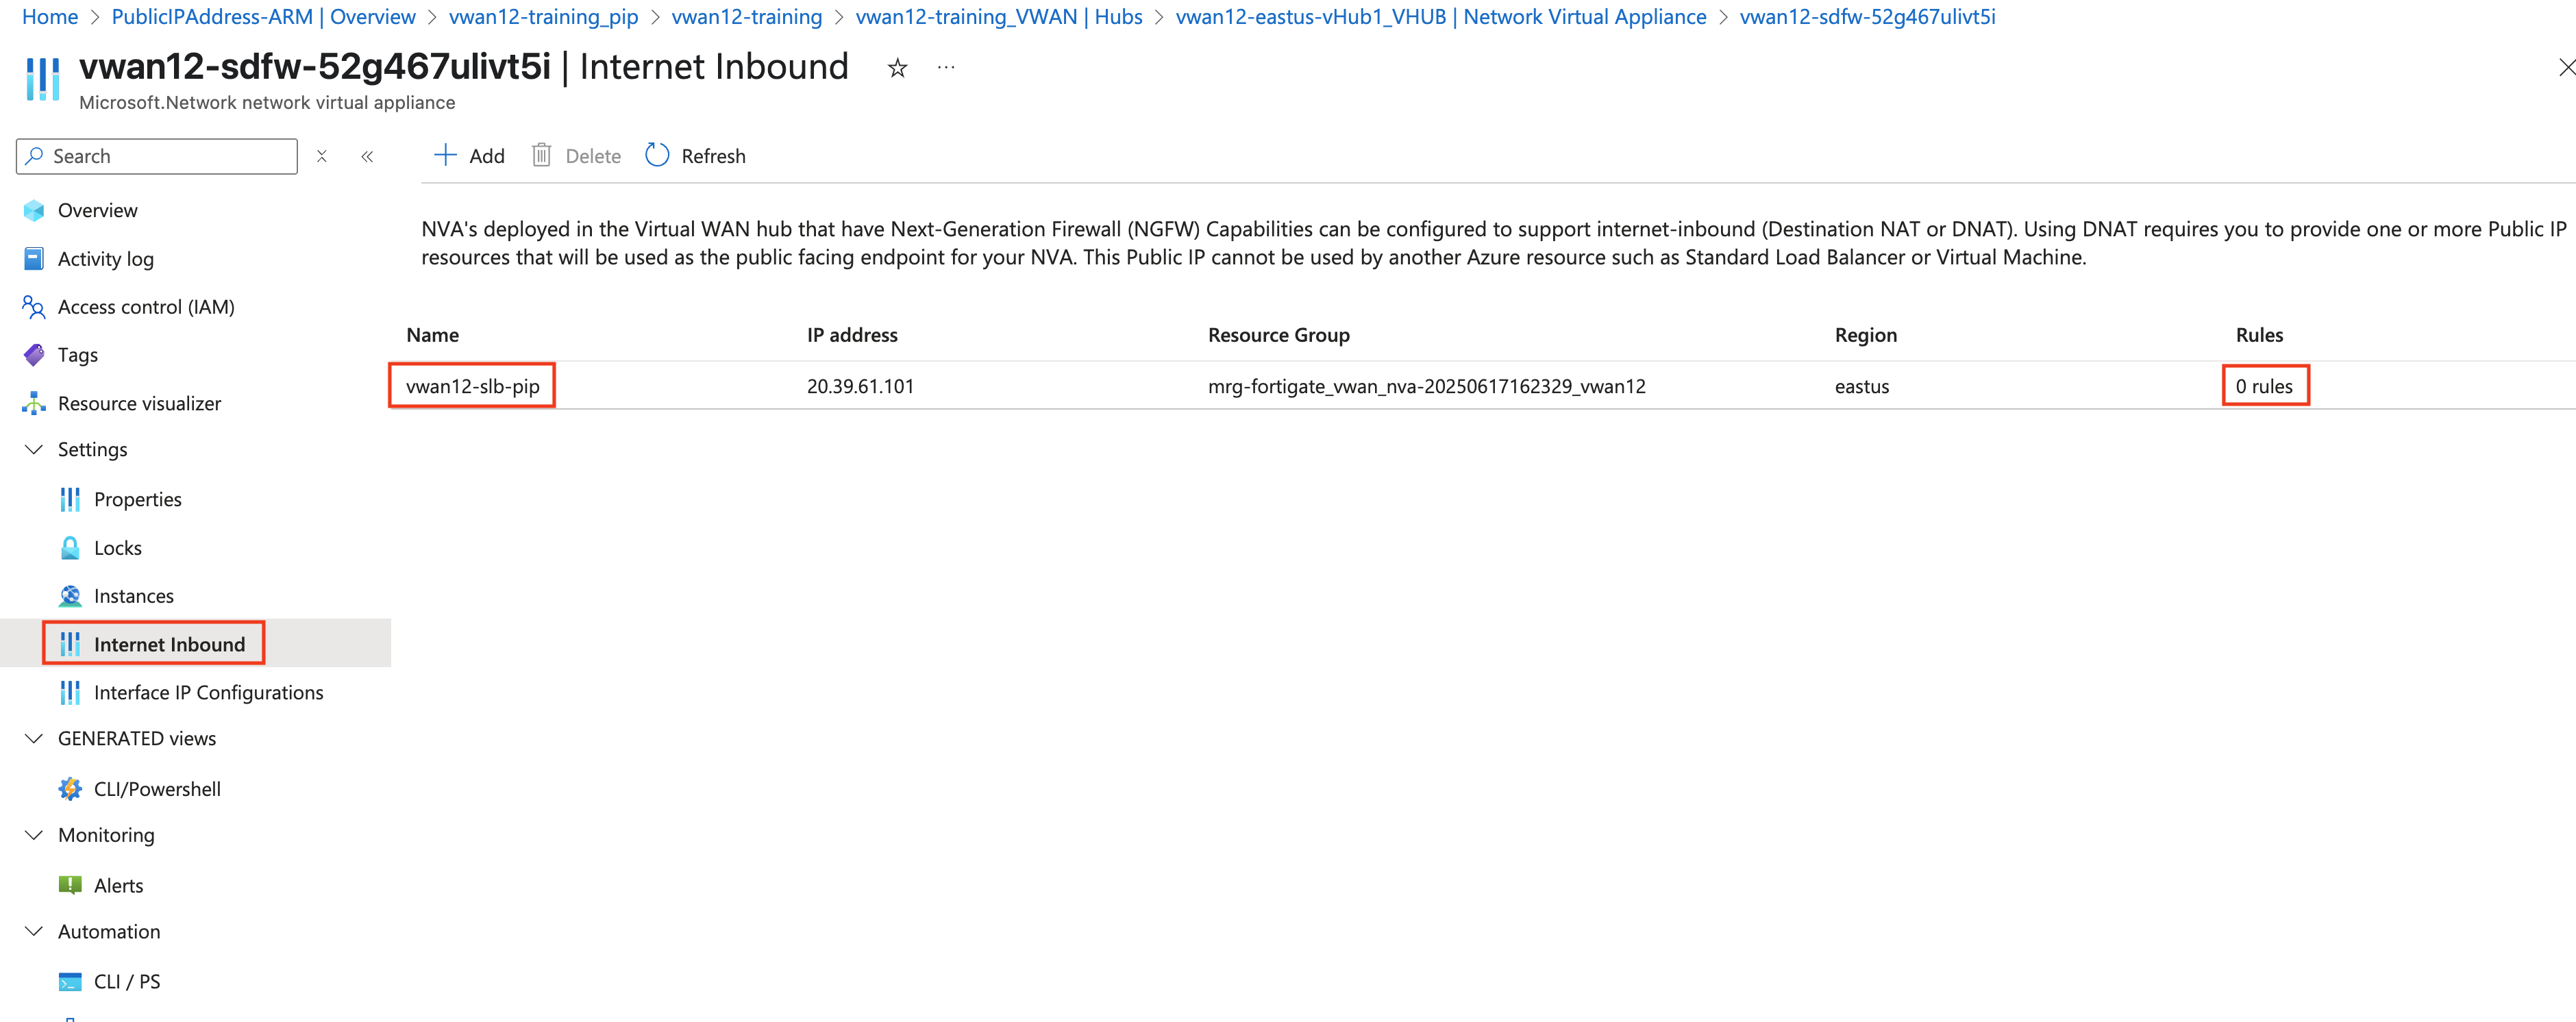
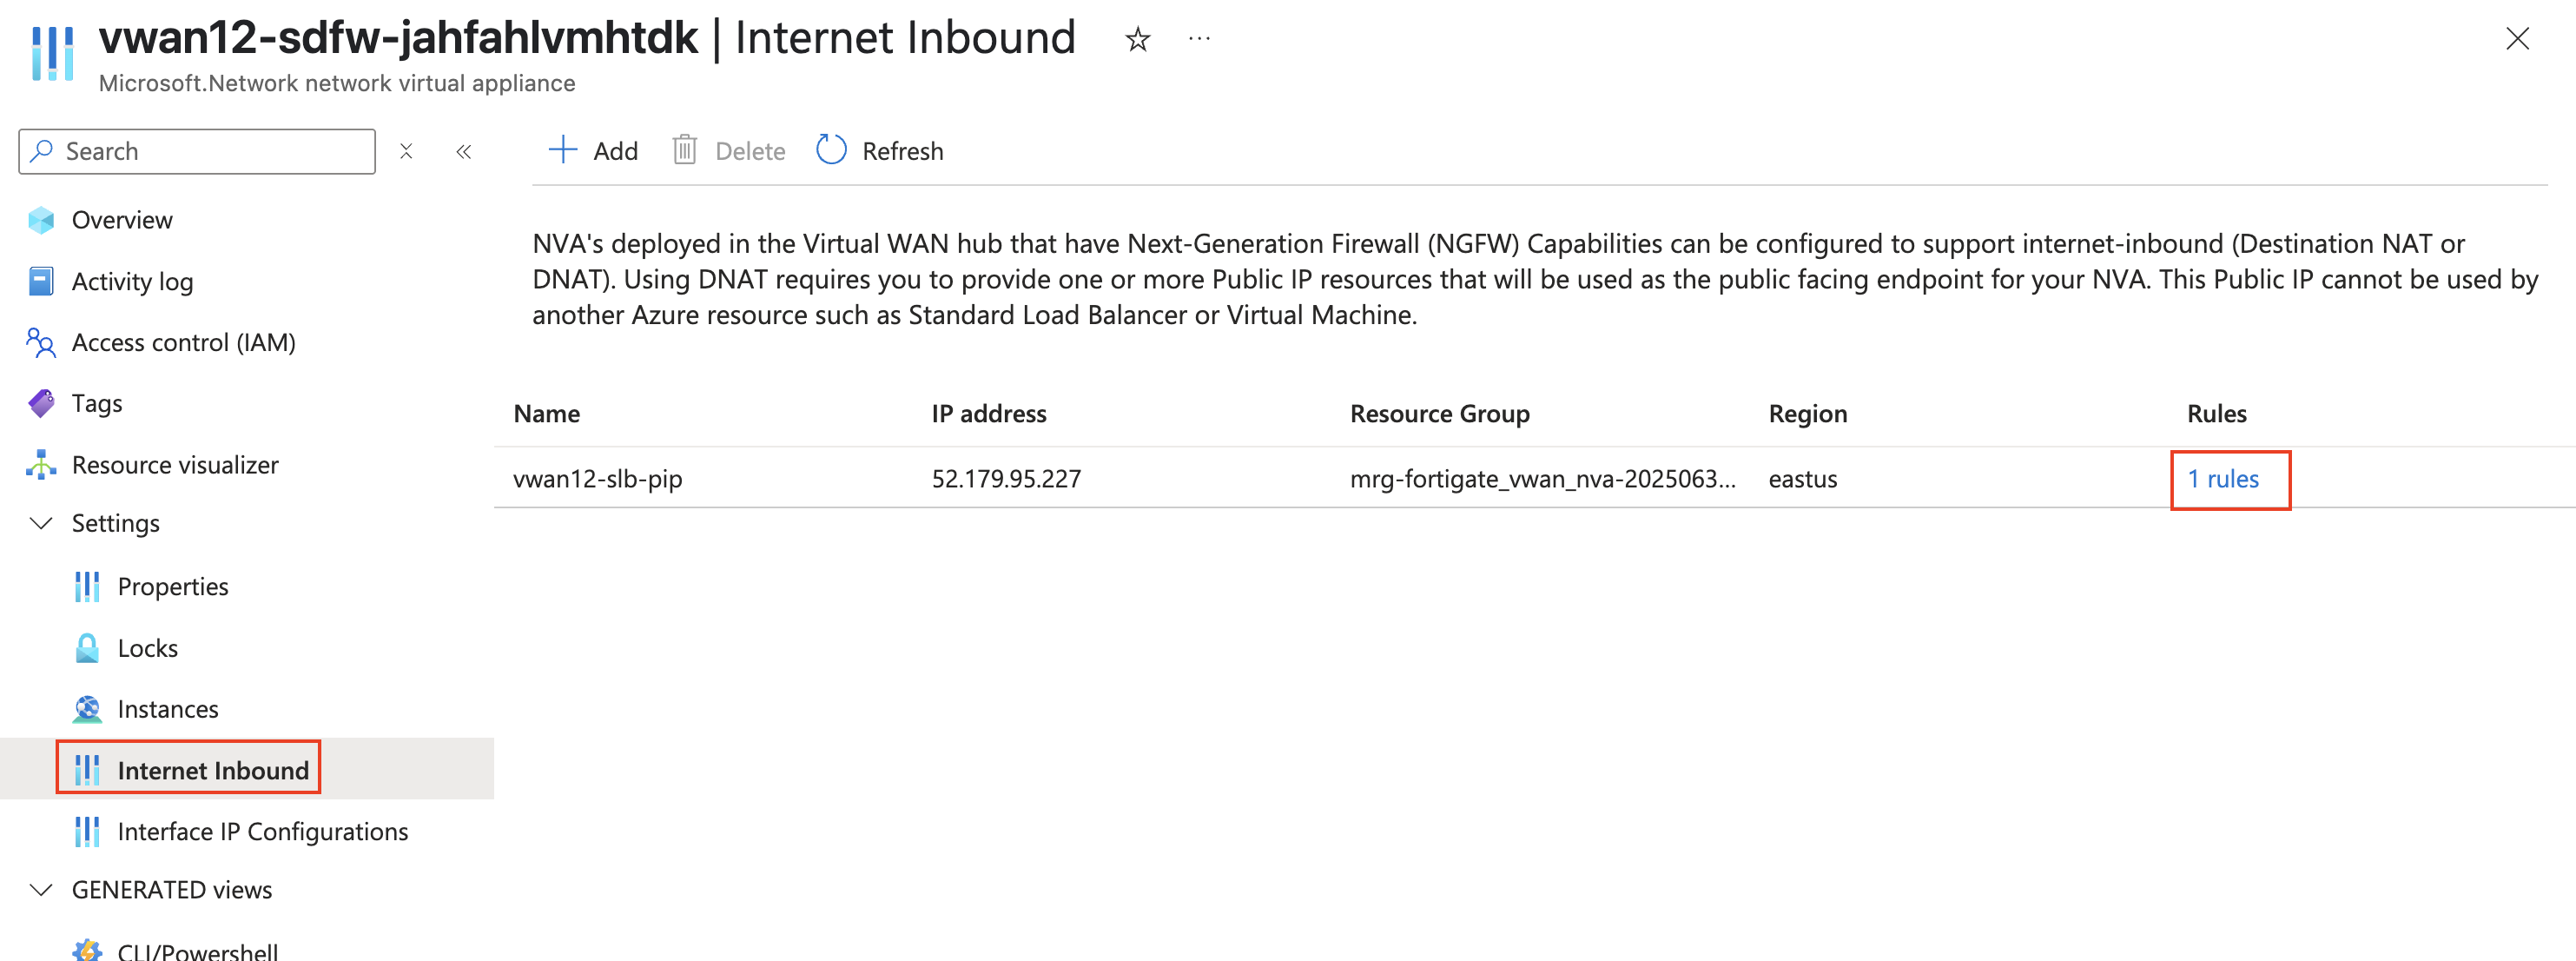
Click on Internet Inbound in the left-hand navigation
Note You should see a Public IP with “vwanxx-slb-pip” assigned to the load balancer. Notice there are 0 rules assigned to the Loadbalancer Load Balancer Rules are required to allow traffic inbound. Each rule specifies IP, Port, and Protocol
Copy the Name (vwanxx-slb-pip) and IP address to a notepad
To access the CLI on your FortiGate NVAs, following these steps:
From your assigned Resource Group “vwanxx-training”, navigate to your vWAN “vwanxx-training_VWAN” and then your hub “vwanXX-eastus-vHub1_VHUB”
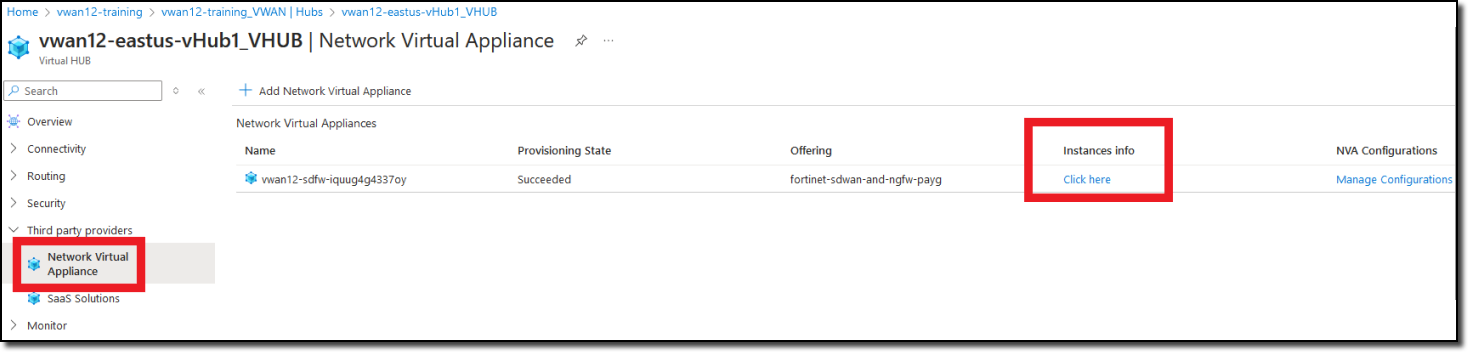
Click Network Virtual Appliance in the left-hand navigation
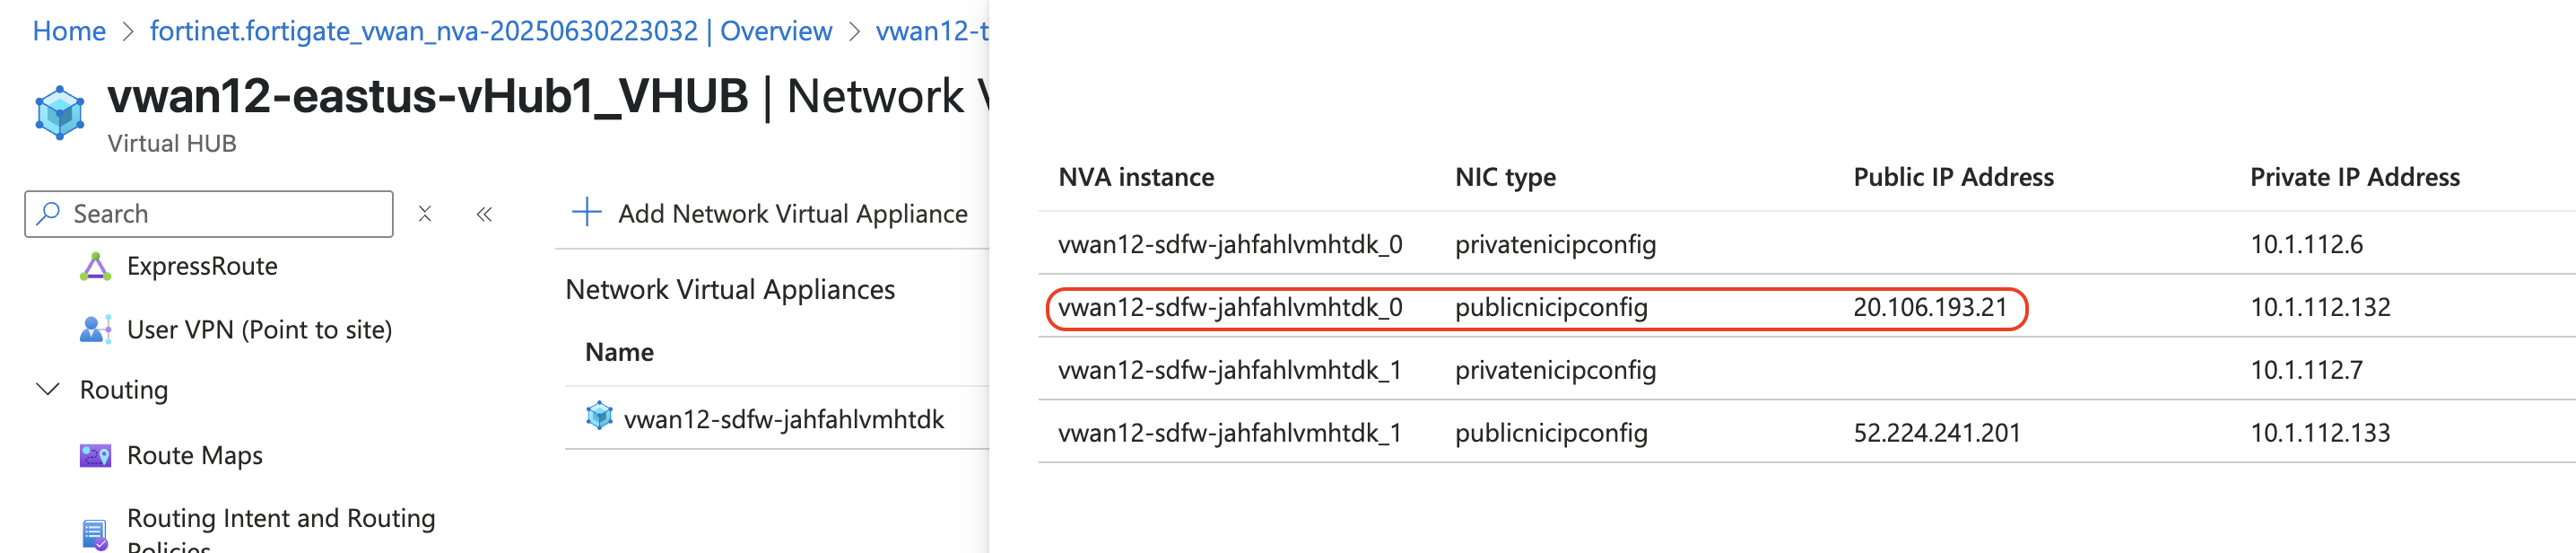
Click “Click here” link under “Instances info” in the right-hand “Network Virtual Appliances” pane
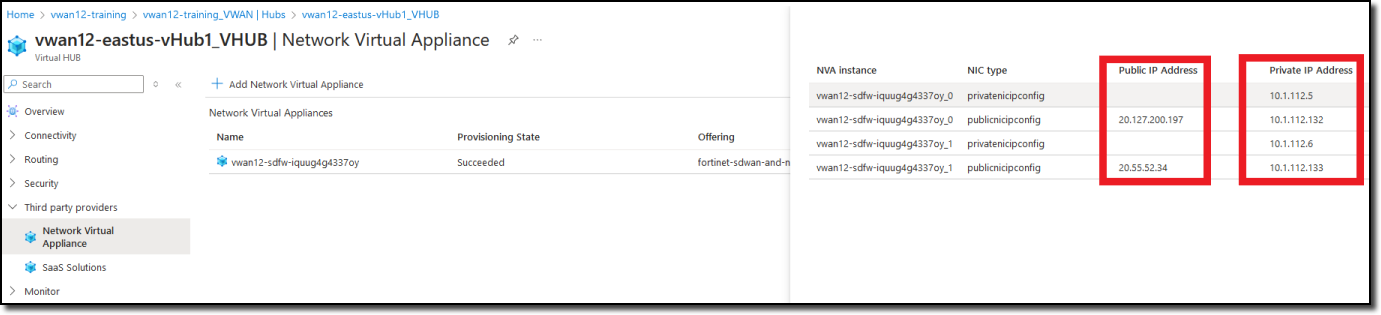
Note FortiGate Public IP and Private IP addresses
Open a browser tab to each FortiGate using the Public IP address of each FortiGate
Login to the Fortigate with _0 suffix by using the Public IP address with the provided credentials. Example: vwanxx-sdfw-52g467ulivt5i_0
Click on the >_ at the top right corner.
- Copy this command
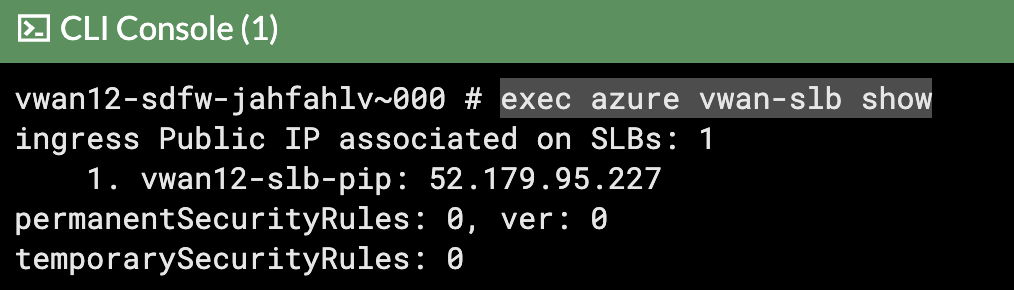
exec azure vwan-slb show - Note Should see output like below
- Copy this command
Click on the >_ at the top right corner.
- Copy this command
exec azure vwan-slb pull - Note Should see output like below

- Copy this command
Copy the below configuration to create rules on the loadbalancer.
Warning
Load Balancer rules only need to be configured on one FortiGate NVA.
Warning
Make sure to change the applies-on to reflect the name of your Public IPCopy these CLI commands to notepad or similar tool to update the vwanxx-slb-pip, if required.
config azure vwan-slb
    set mode active
    config permanent-security-rules
        config rules
            edit "1"
                set source-address-prefix "0.0.0.0/0"
                set destination-port-ranges "8080"
                set applies-on "vwanxx-slb-pip"
            next
        end
    end
end
Info
You should see Azure SLB security rules changed message once the above configuration is complete.
Check to see if the rules are now pushed to the Azure portal, following these steps:
- From your assigned Resource Group “vwanxx-training”, navigate to your vWAN “vwanxx-training_VWAN” and then your hub “vwanXX-eastus-vHub1_VHUB”
- Click Network Virtual Appliance in the left-hand navigation
- Click “Manage Configurations” right-hand “Network Virtual Appliances” pane
- Click Internet Inbound.
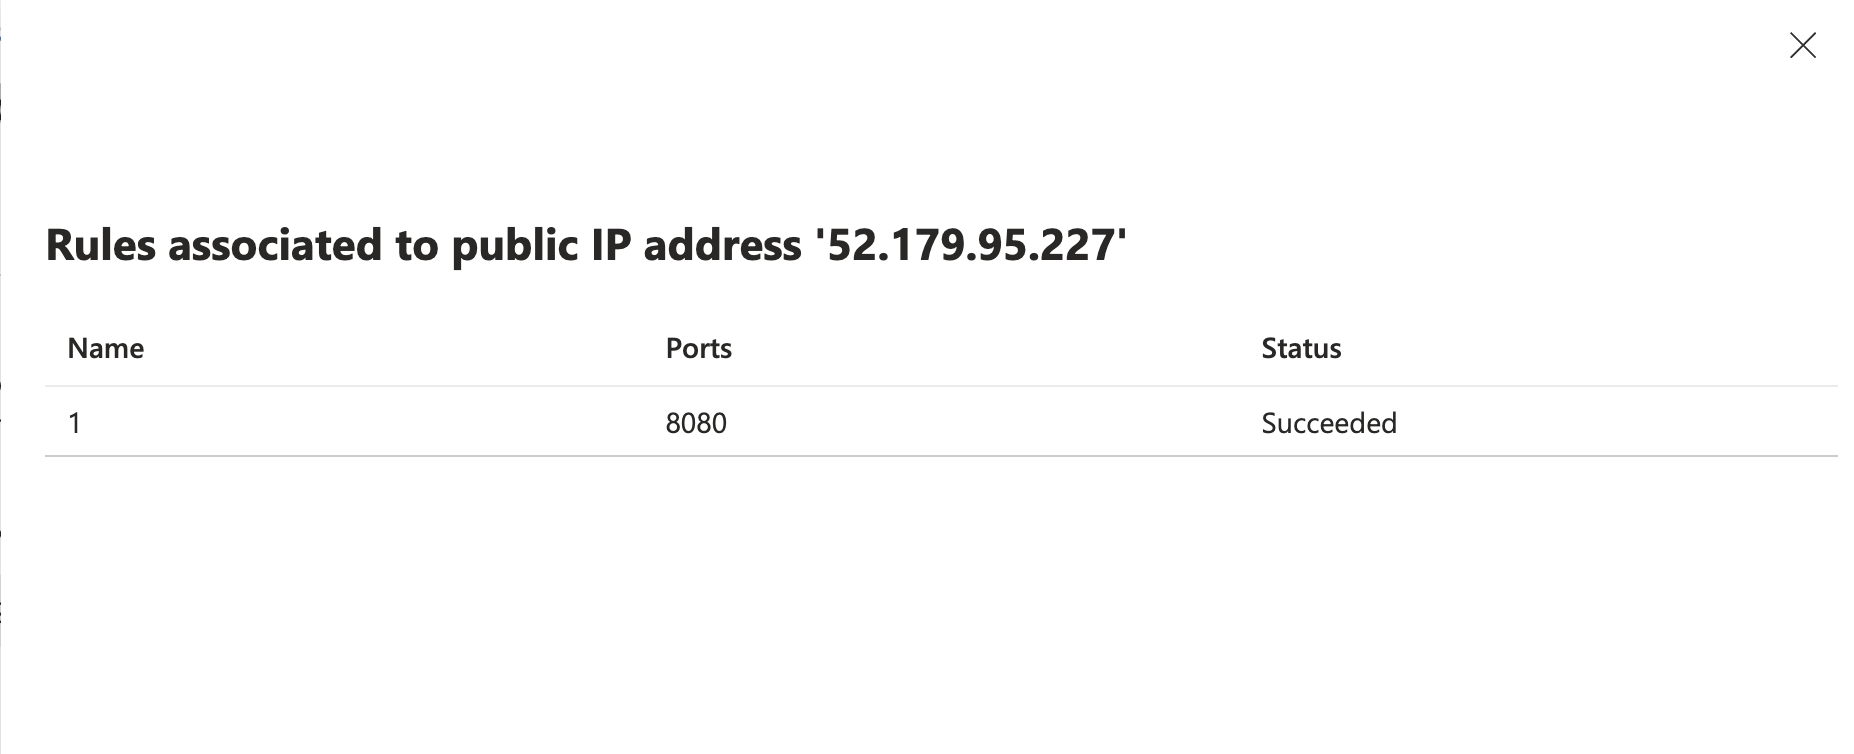
- Click Rules to show the rules associated with Public IP address.
Login to both the NVA FortiGate’s again to create a VIP to the web Server on both FortiGates.
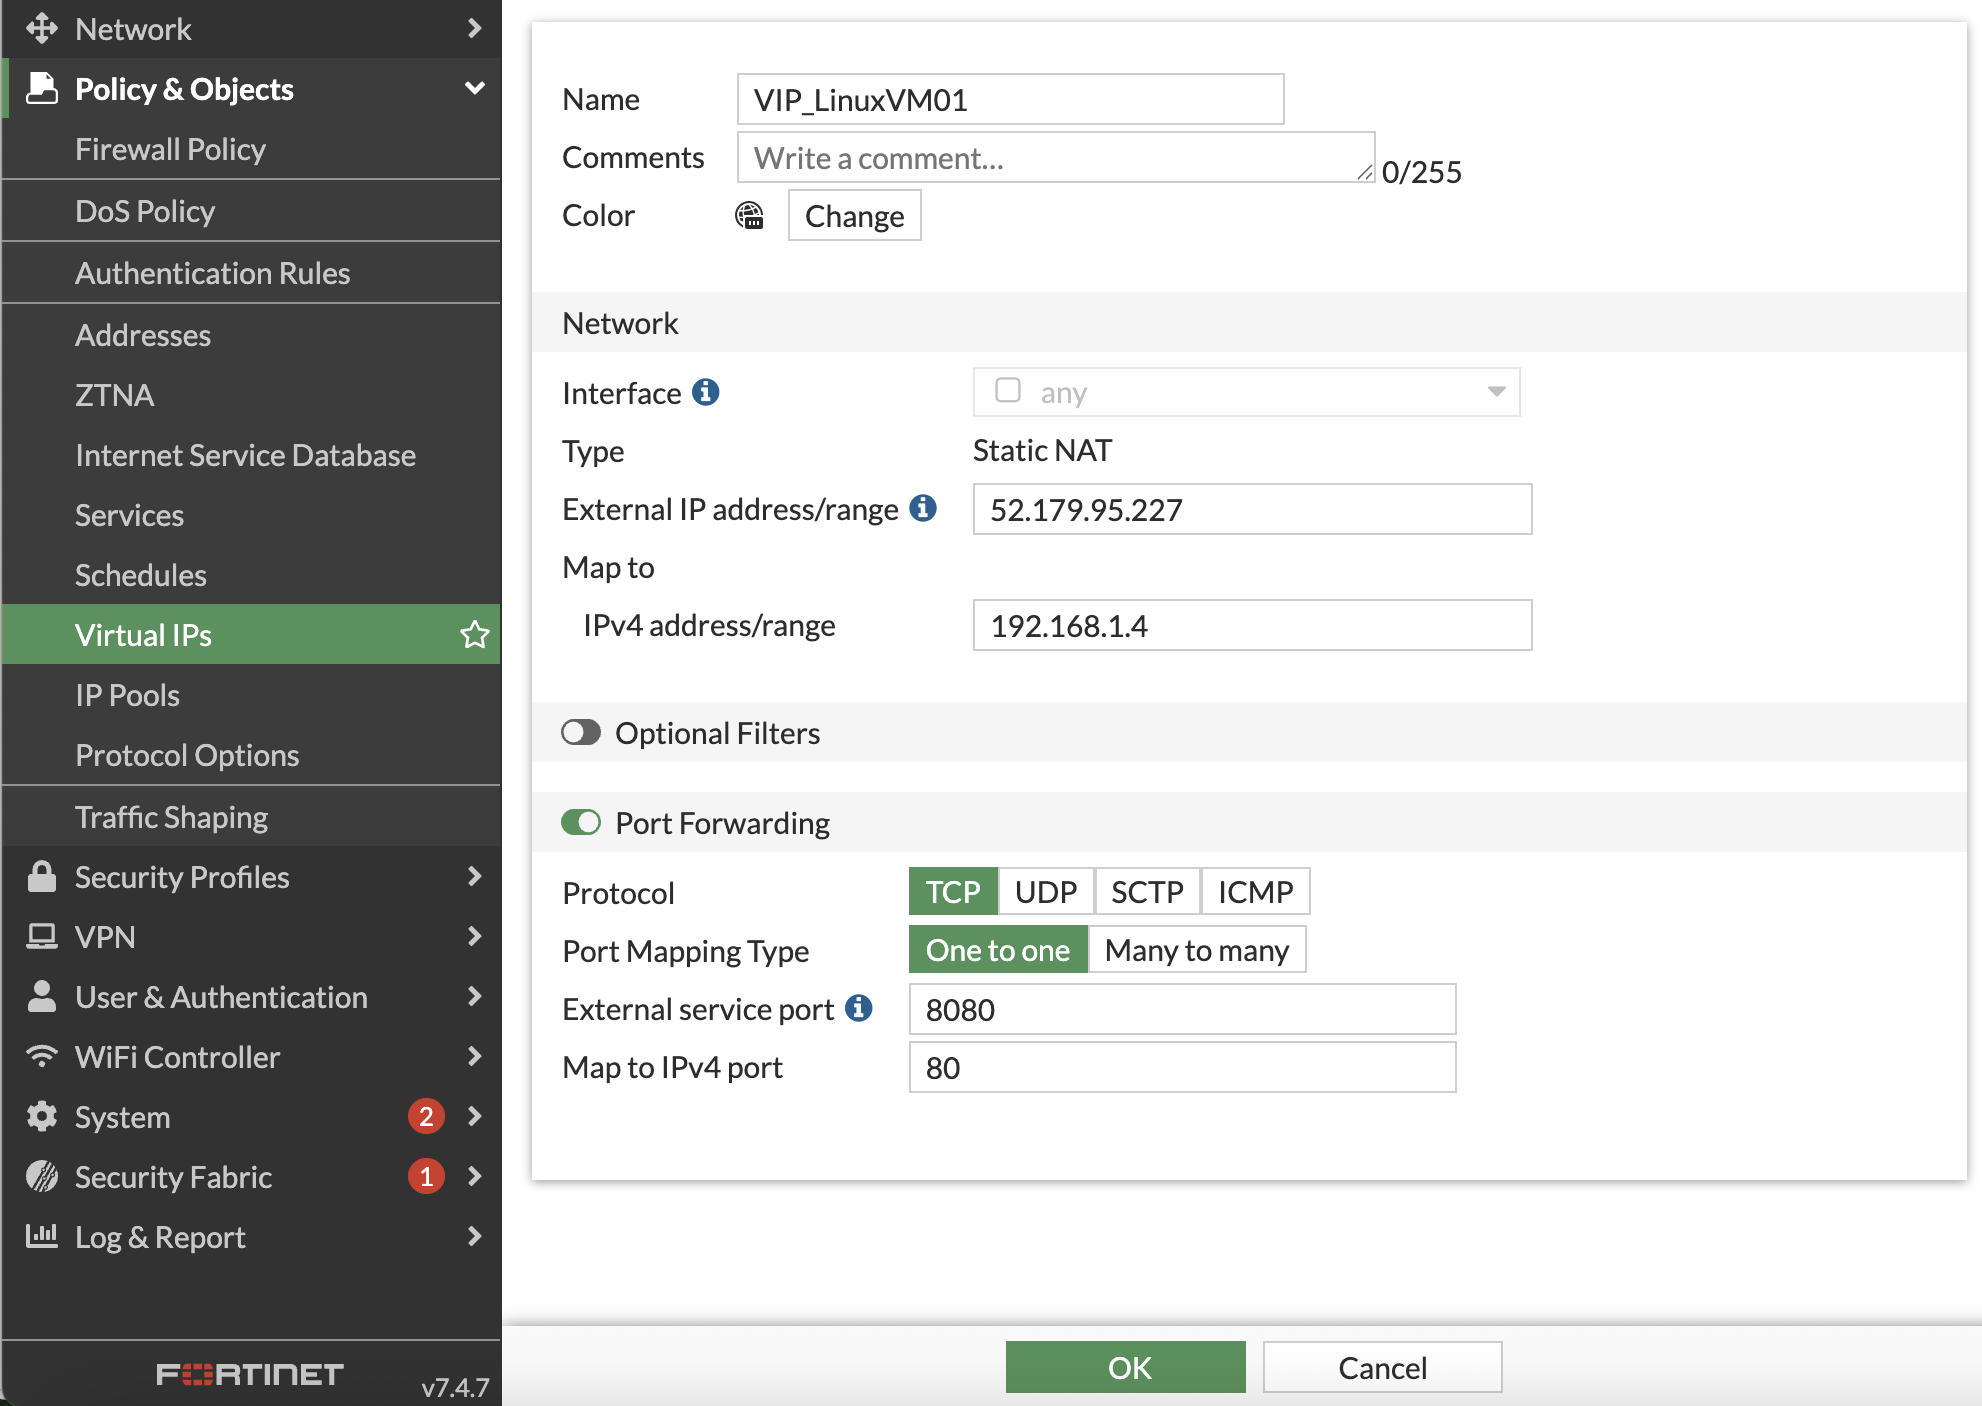
Navigate to Policy & objects > Virtual IP’s
Create a new VIP with the following.
Attribute Value Name VIP_LinuxVM01Interface any External IP address/range Use IP address of Loadbalancer named vwanxx-slb-pip Map to IPv4 address/range 192.168.1.4 Port forwarding enabled Protocol TCP Port Mapping Type one to one External service port 8080 Map to IPv4 port 80 Click “OK”
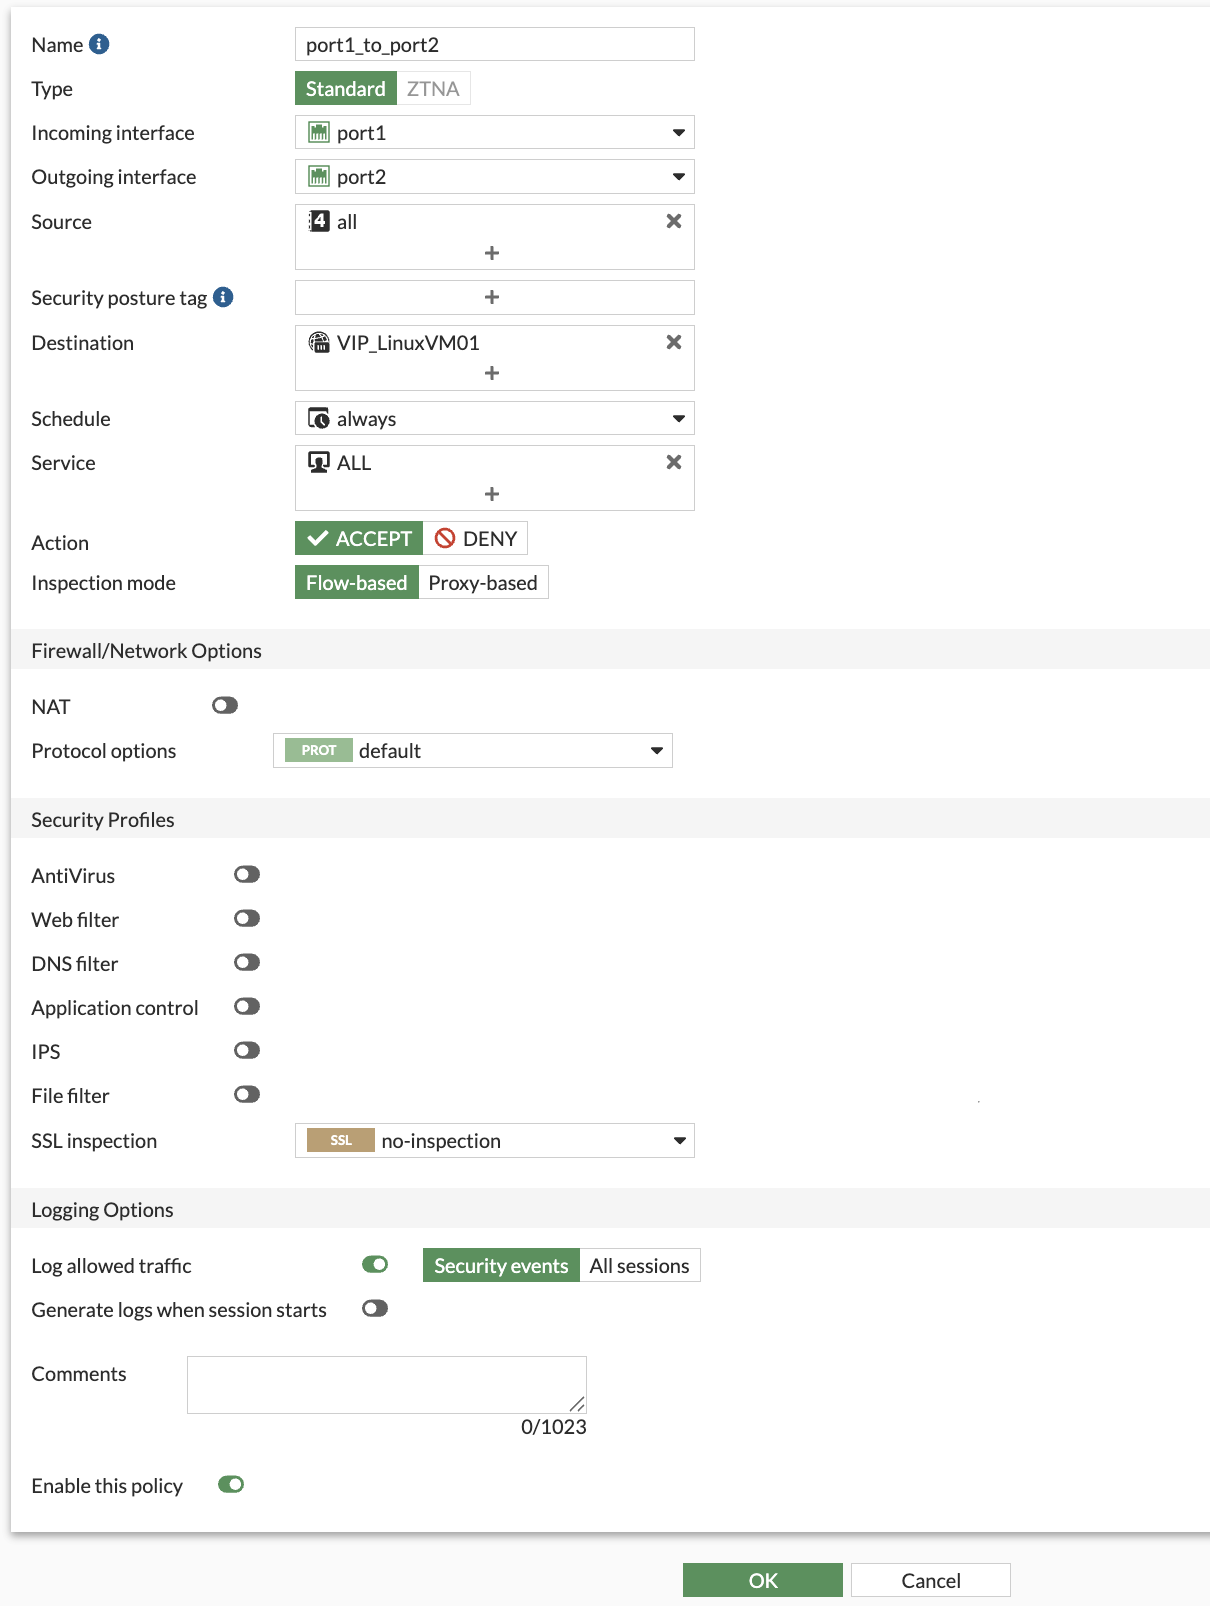
Create Firewall policies on both FortiGates to allow traffic to pass from port1 to port2 (Internet to Spoke)
The FortiGates can be setup to sync configuration information. If one of the FortiGates was designated as the primary configuration supplier and the other as a secondary, any changes made to the primary would be replicated to the secondary.
Configuration Synchronization was not enabled on the FortiGates as part of this course.
Navigate to “Policy & Objects”
Click Firewall Policy
Click Create new
Attribute Value Name port1_to_port2Incoming interface port1 Outgoing interface port2 Source all Destination VIP_LinuxVM01 Schedule always Service ALL NAT disabled Enable this policy enabled Click “OK”
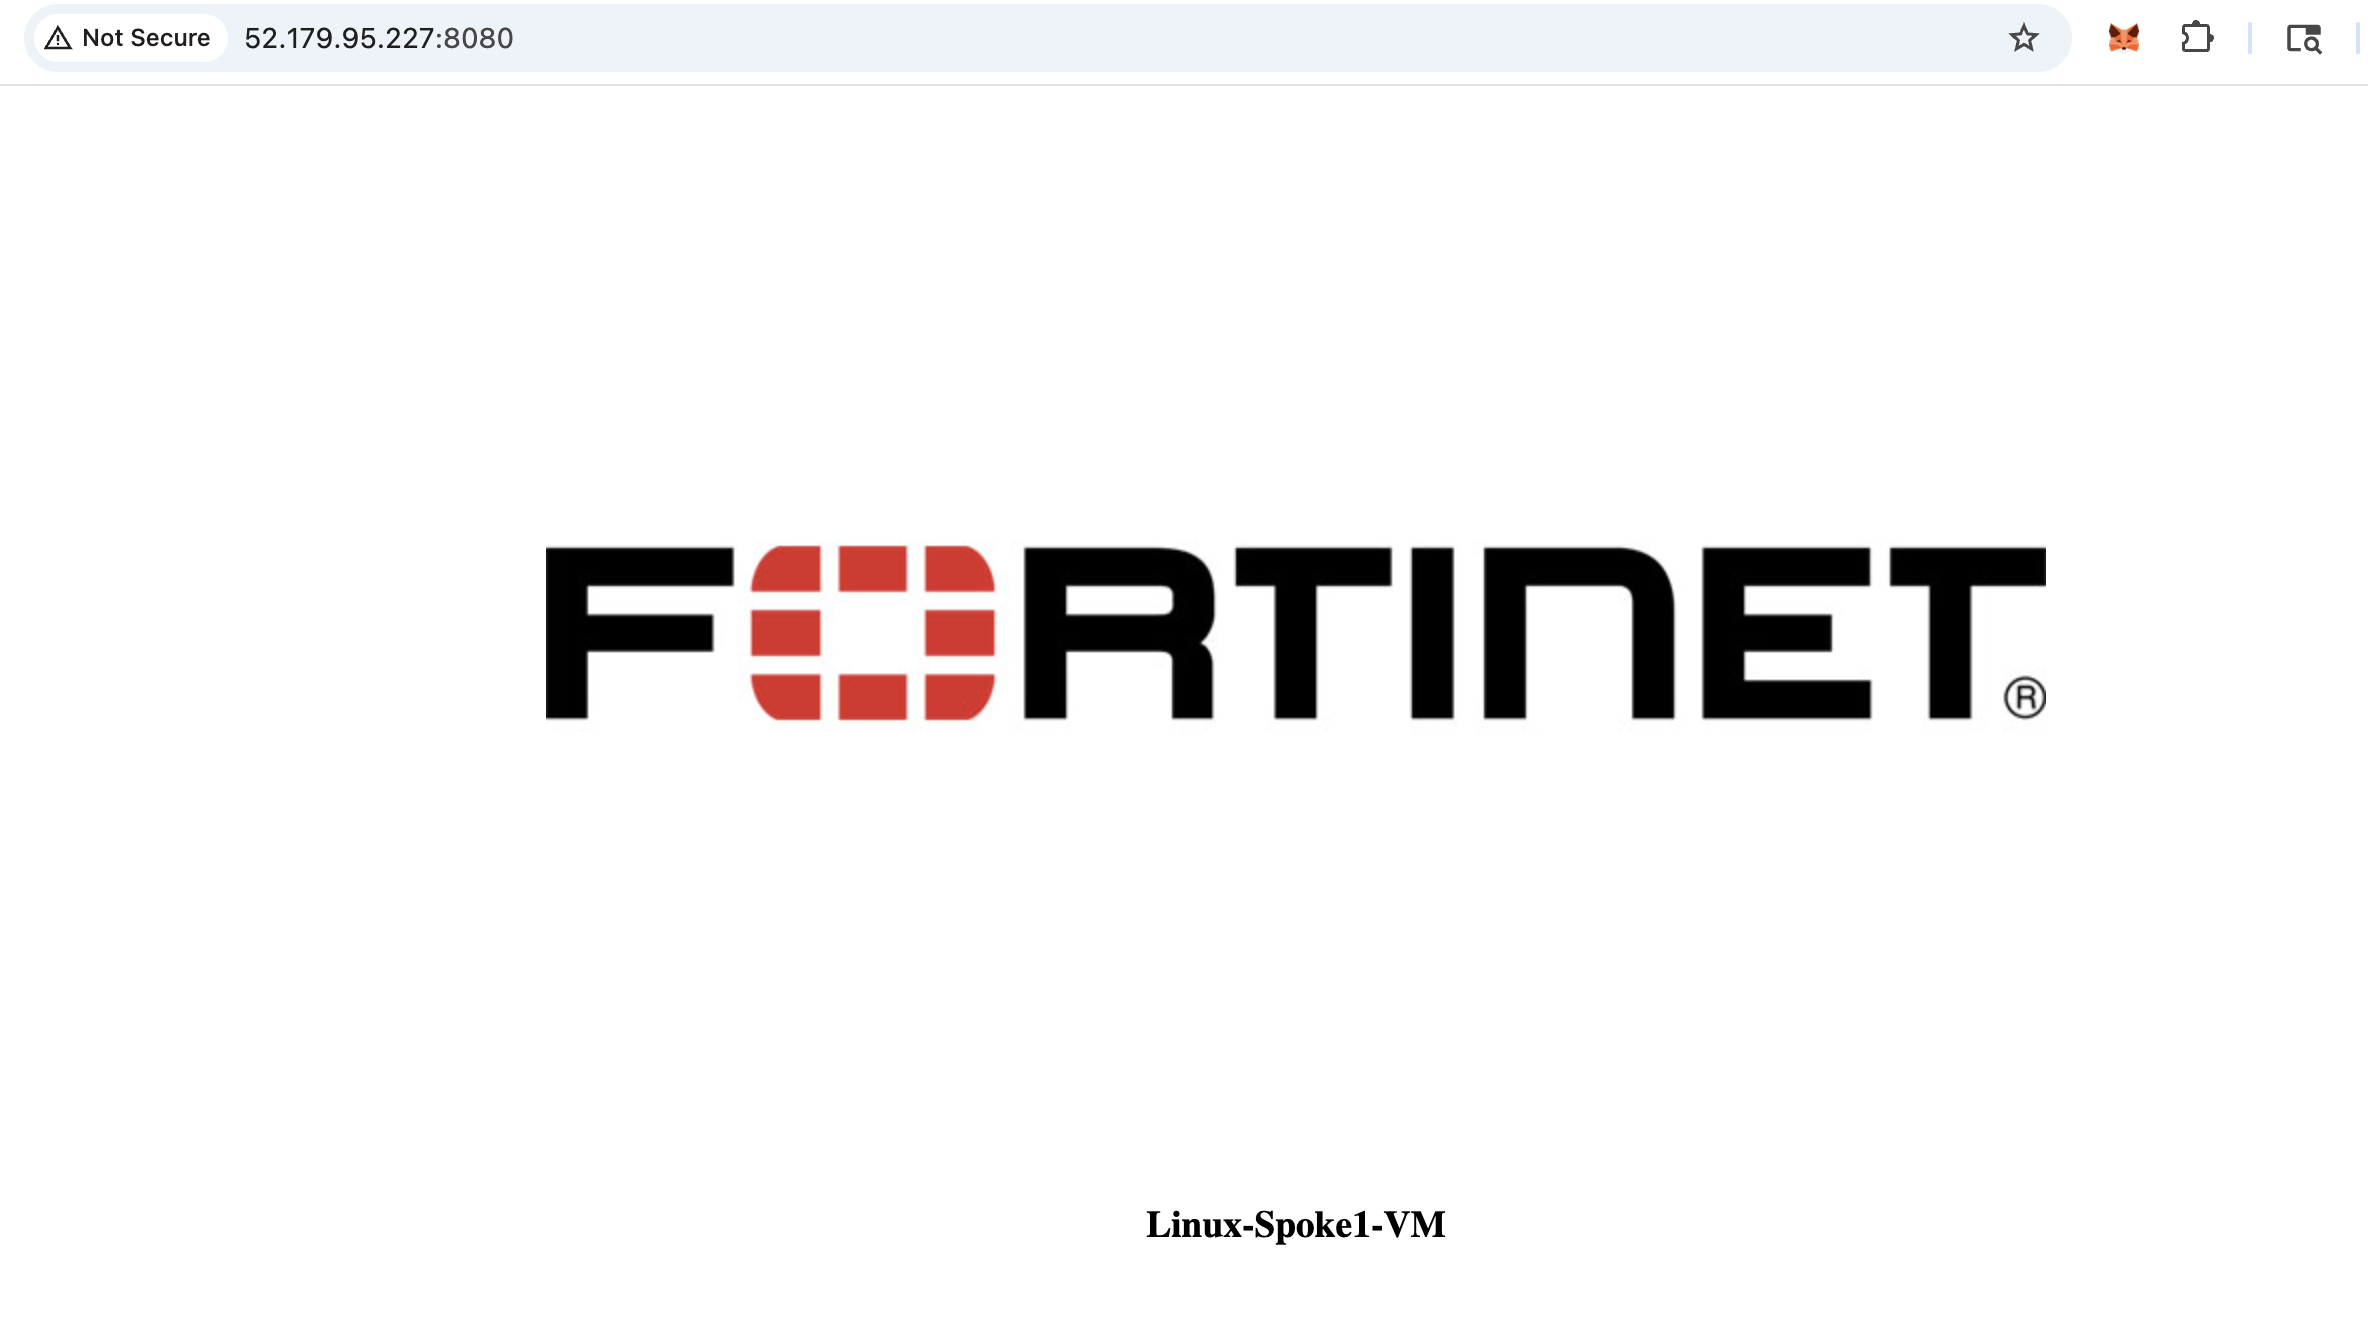
Navigate to a web browser and check if able to reach the web server with vwanxx-slb-pip IP that was used in creating the VIP and port 8080
http://vwanxx-slb-pip:8080
Continue to Chapter 6 - Two vWAN Hubs