Task 3: Deploy a Linux VM
Deploy a Linux VM
Now that the “Spoke3-vHub2_VNET” VNET is deployed, deploy a Linux VM in Spoke3-vHub2_VNET. This VM will be used to test hub to hub connectivity between spokes peered to different hubs.
Steps to create a Linux VM
Navigate into your assigned Resource Group and click on the + Create located at the top left of the tool bar.
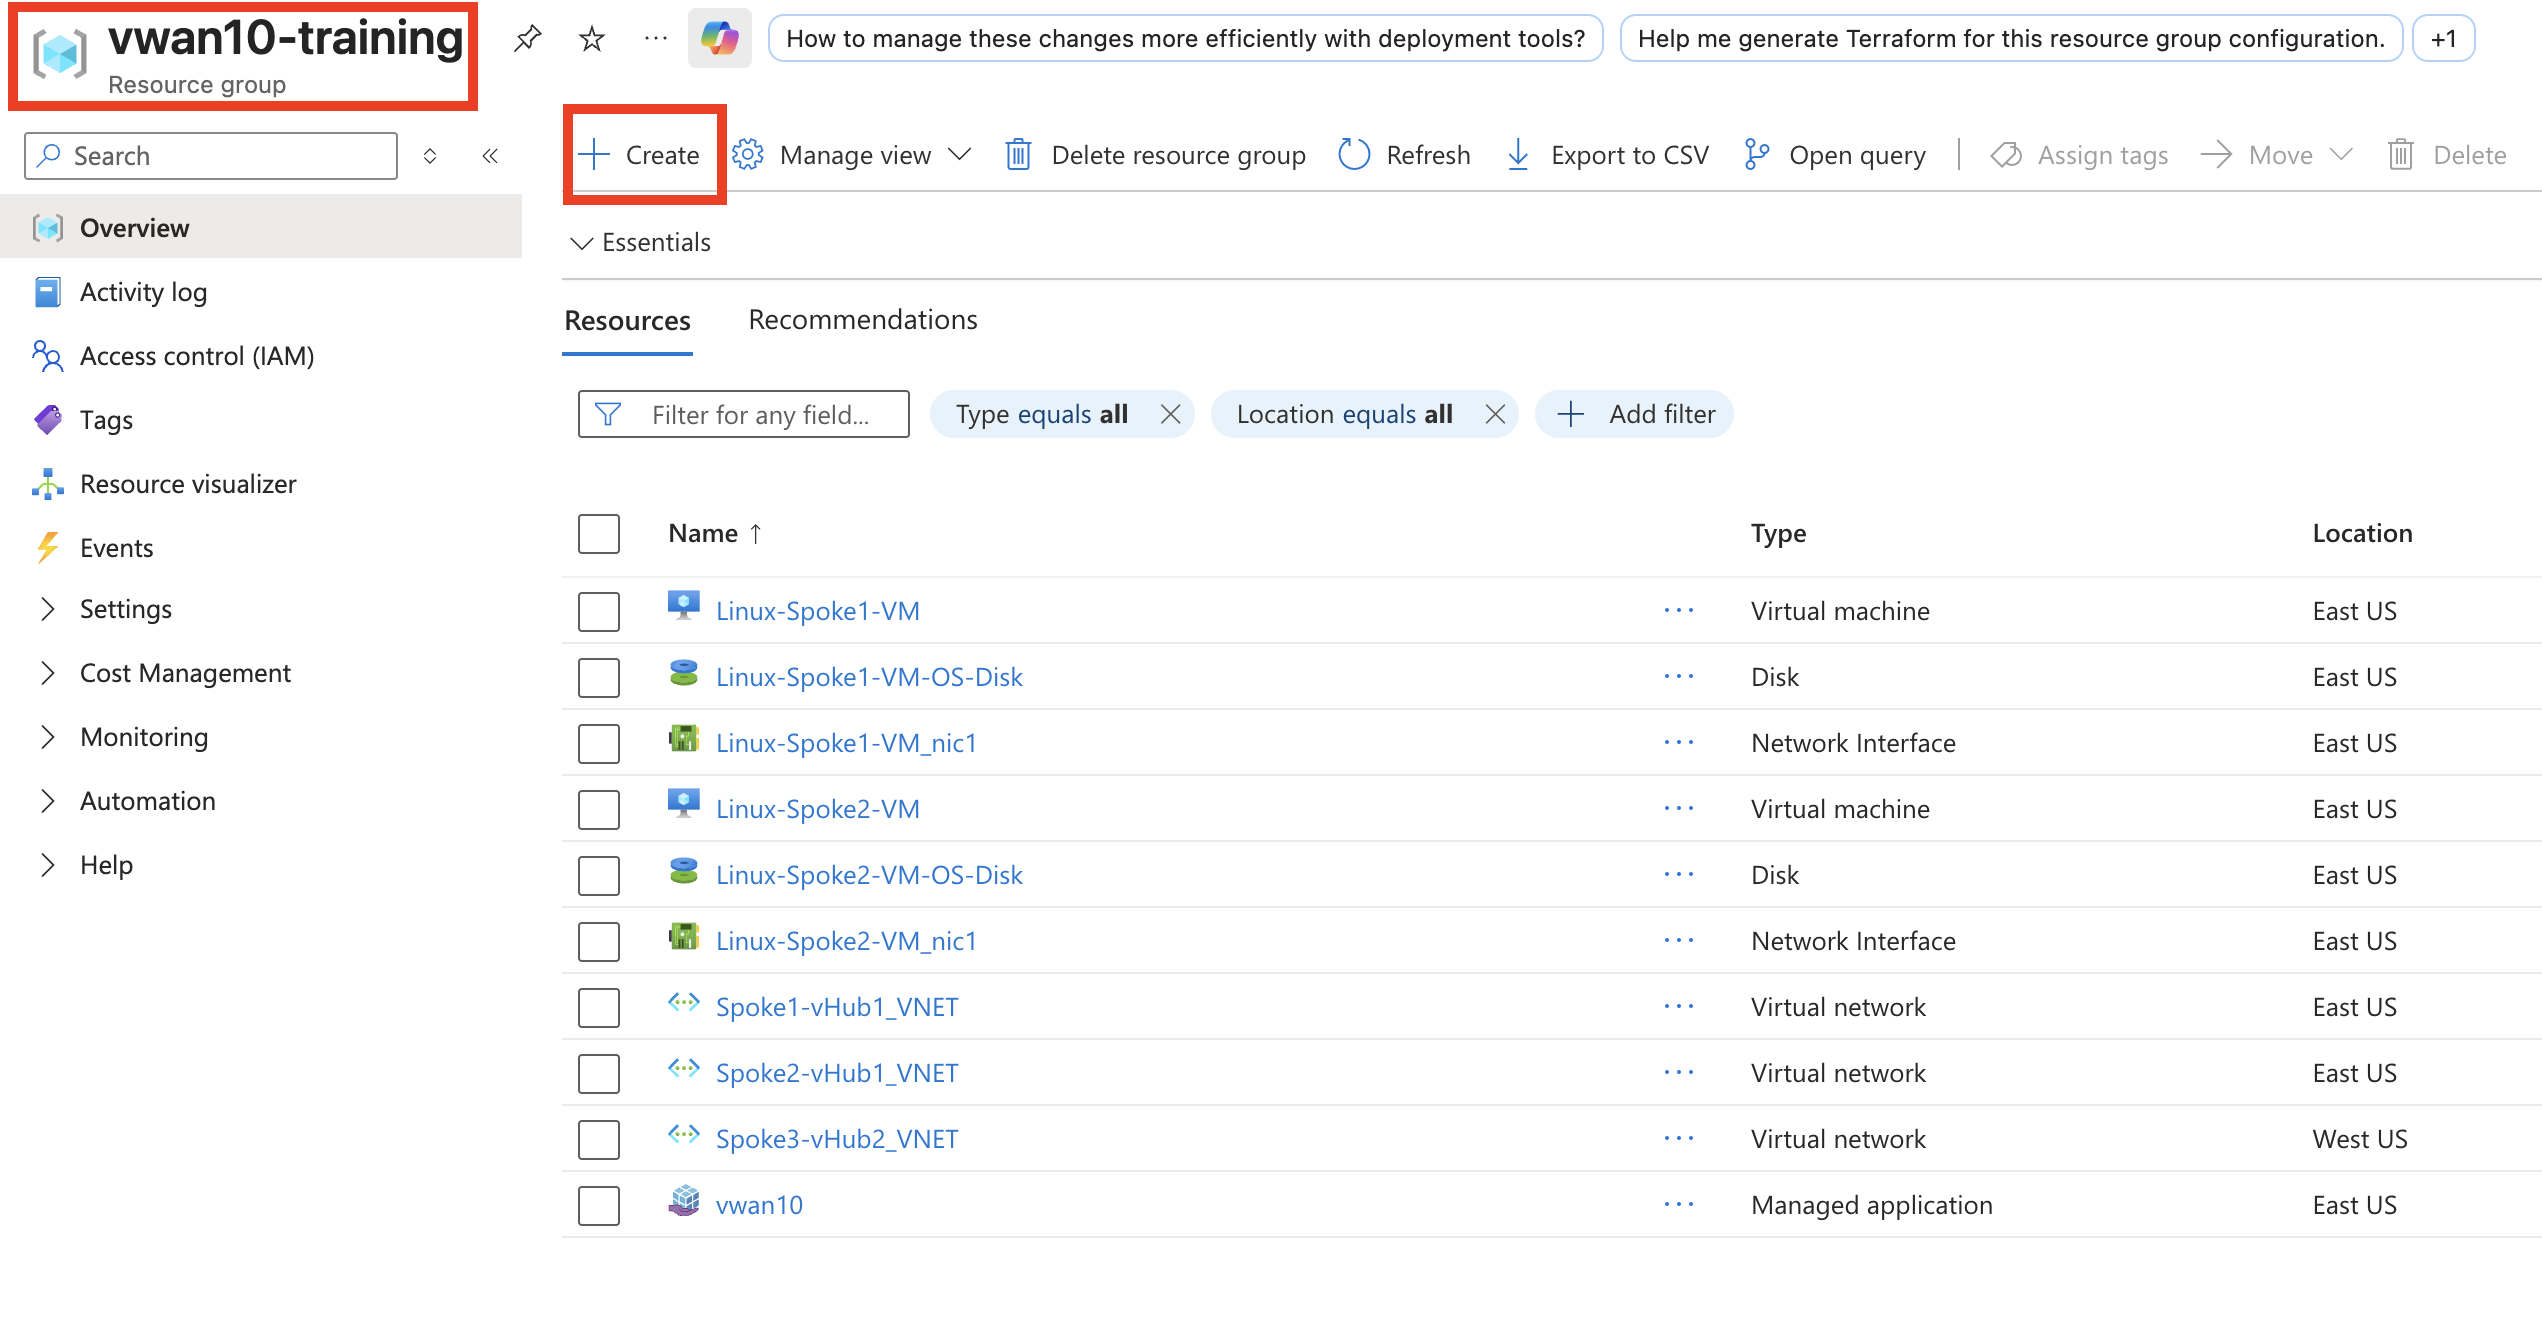
You will be redirected to the Azure Marketplace.
Enter - **ubuntu 24.04 - in the Marketplace search bar, then press enter. Navigate to the Ubuntu 22.04 LTS offering from Canonical and select Create and Ubuntu Server 24.04.

You will be redirected to the Create a virtual machine template.
Under the Basics tab, update the following fields:
(Leave the default entry for the other fields not listed here)
- Resource group: Confirm vwanXX-training
- Virtual machine name:
Linux-Spoke3-VM - Region: (US) West US
- Availability options: No infrastructure redundancy required
- Security type: Standard
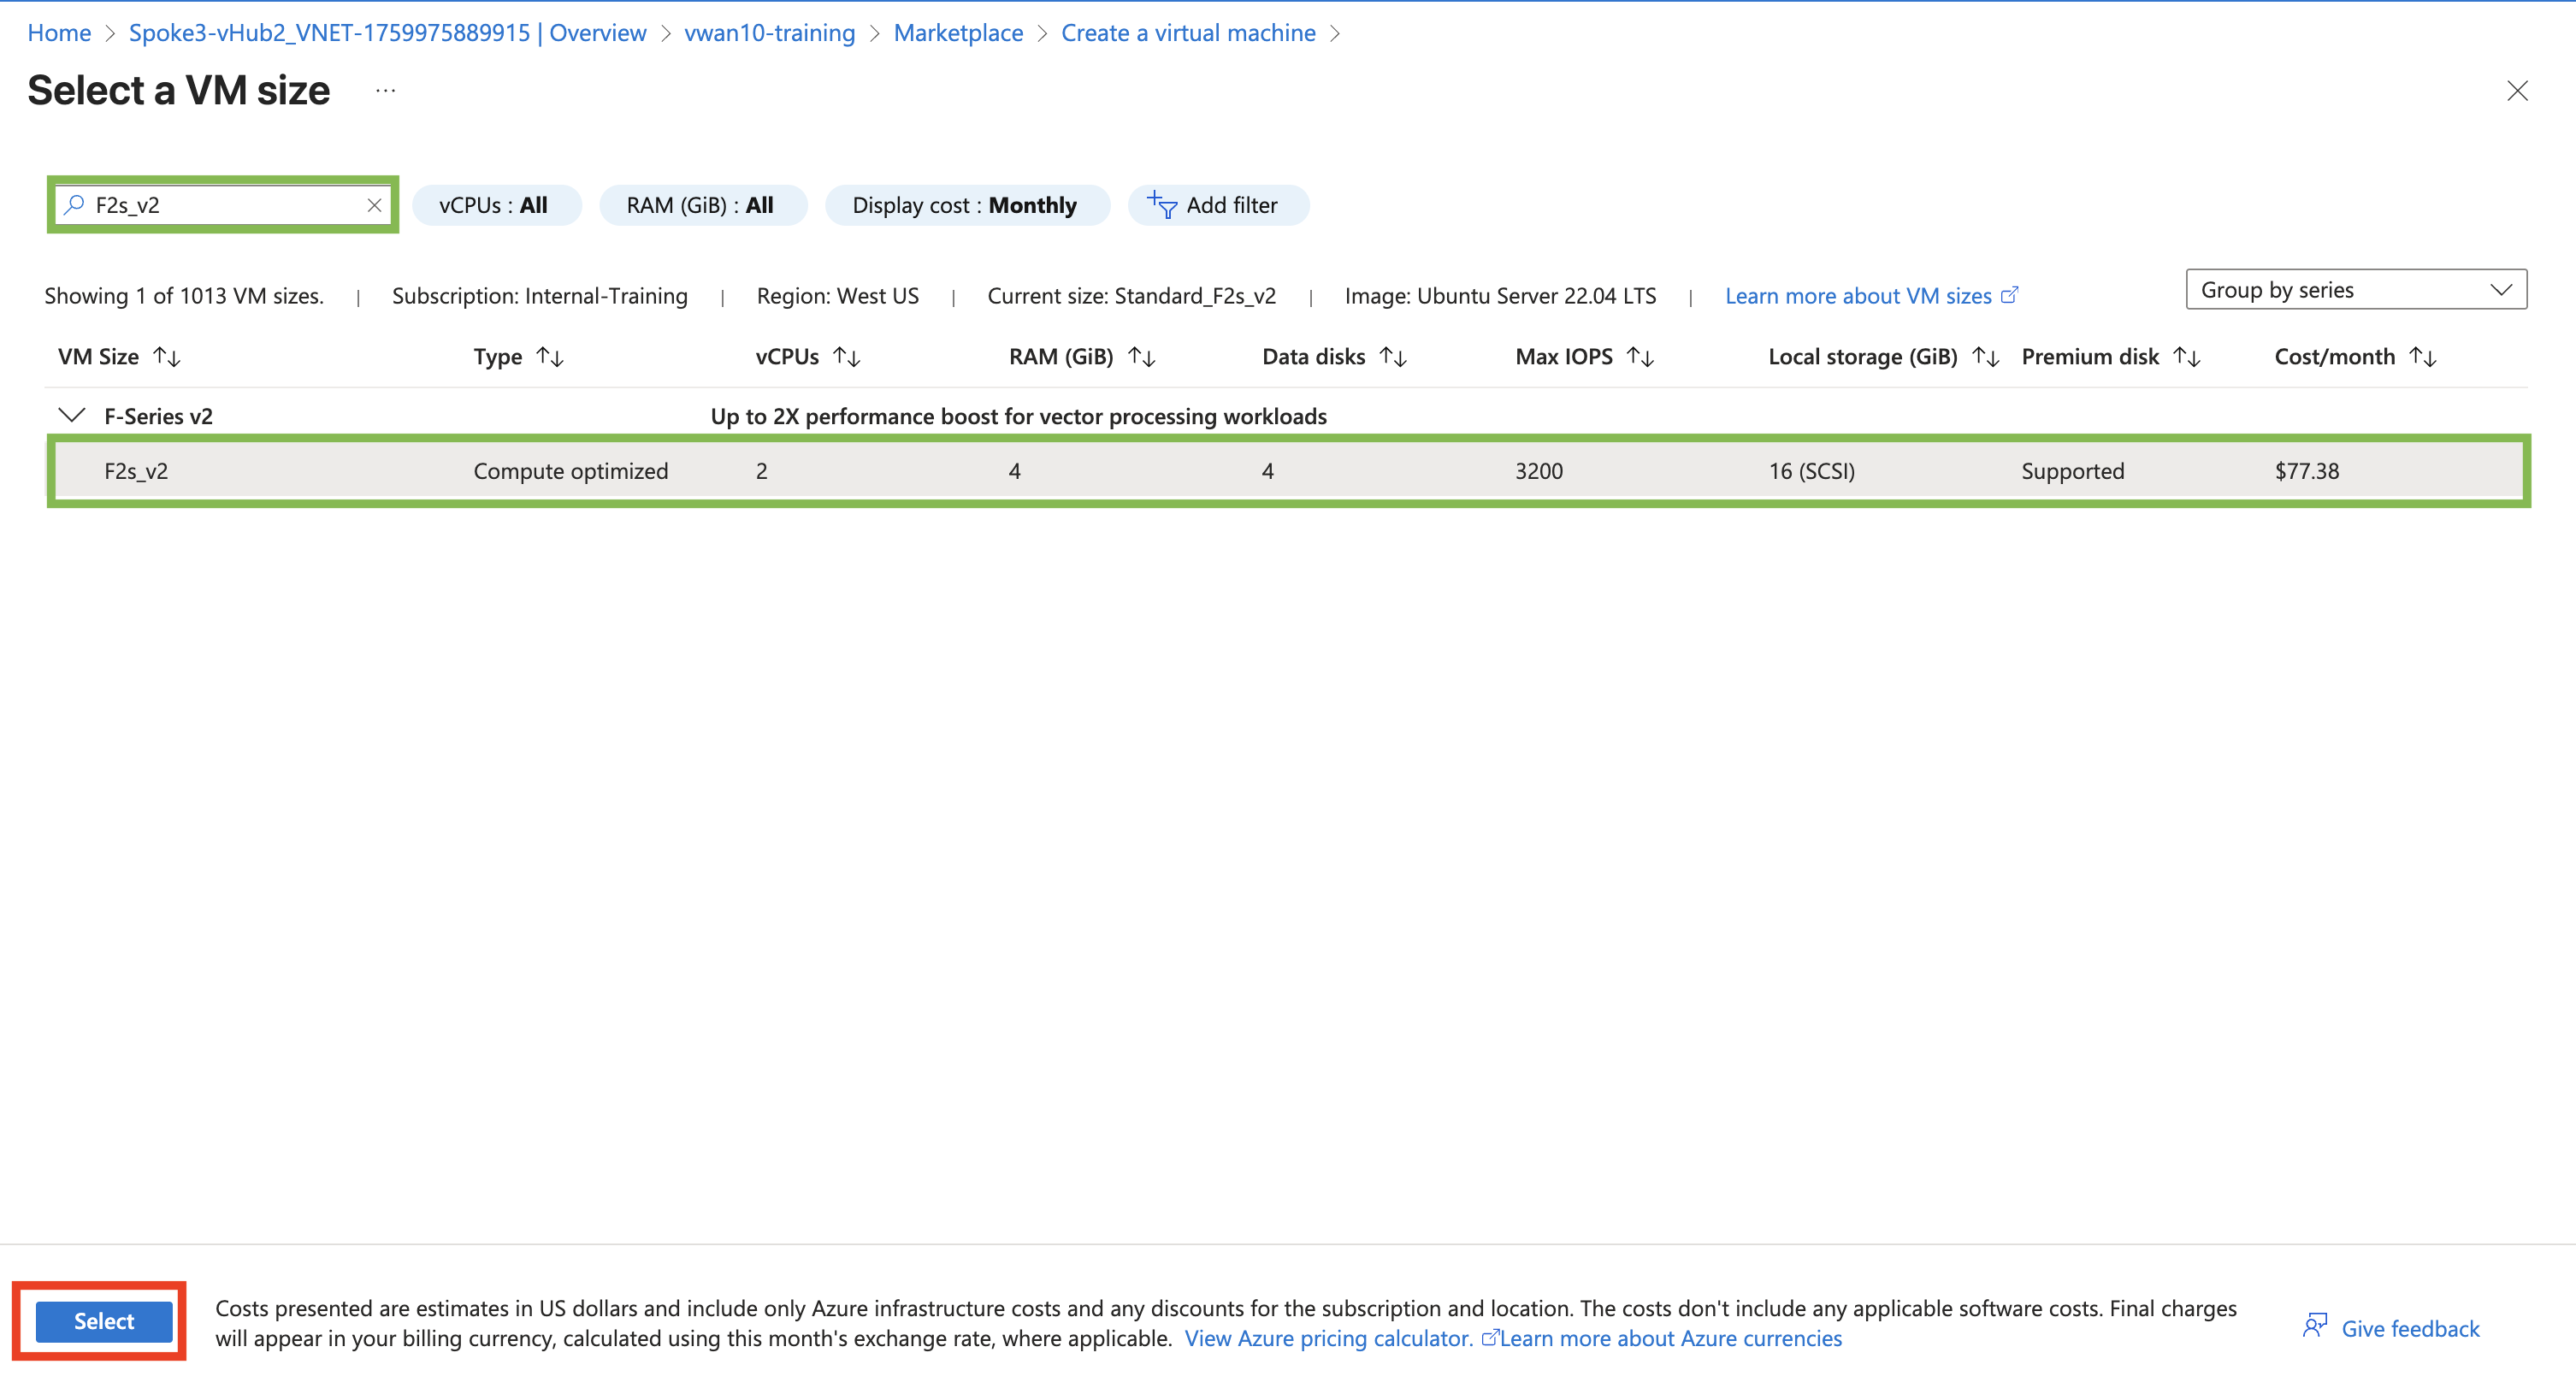
- Size: Click “See all sizes”
- Search for “F2s_v2”
- Click on the VM to highlight
- Click the “Select” button
- Authentication type: Password
- Username:
fortixperts - Password:
fortiXperts! - Confirm password:
fortiXperts!
Confirm the changes and the other fields default entries match the following diagram.
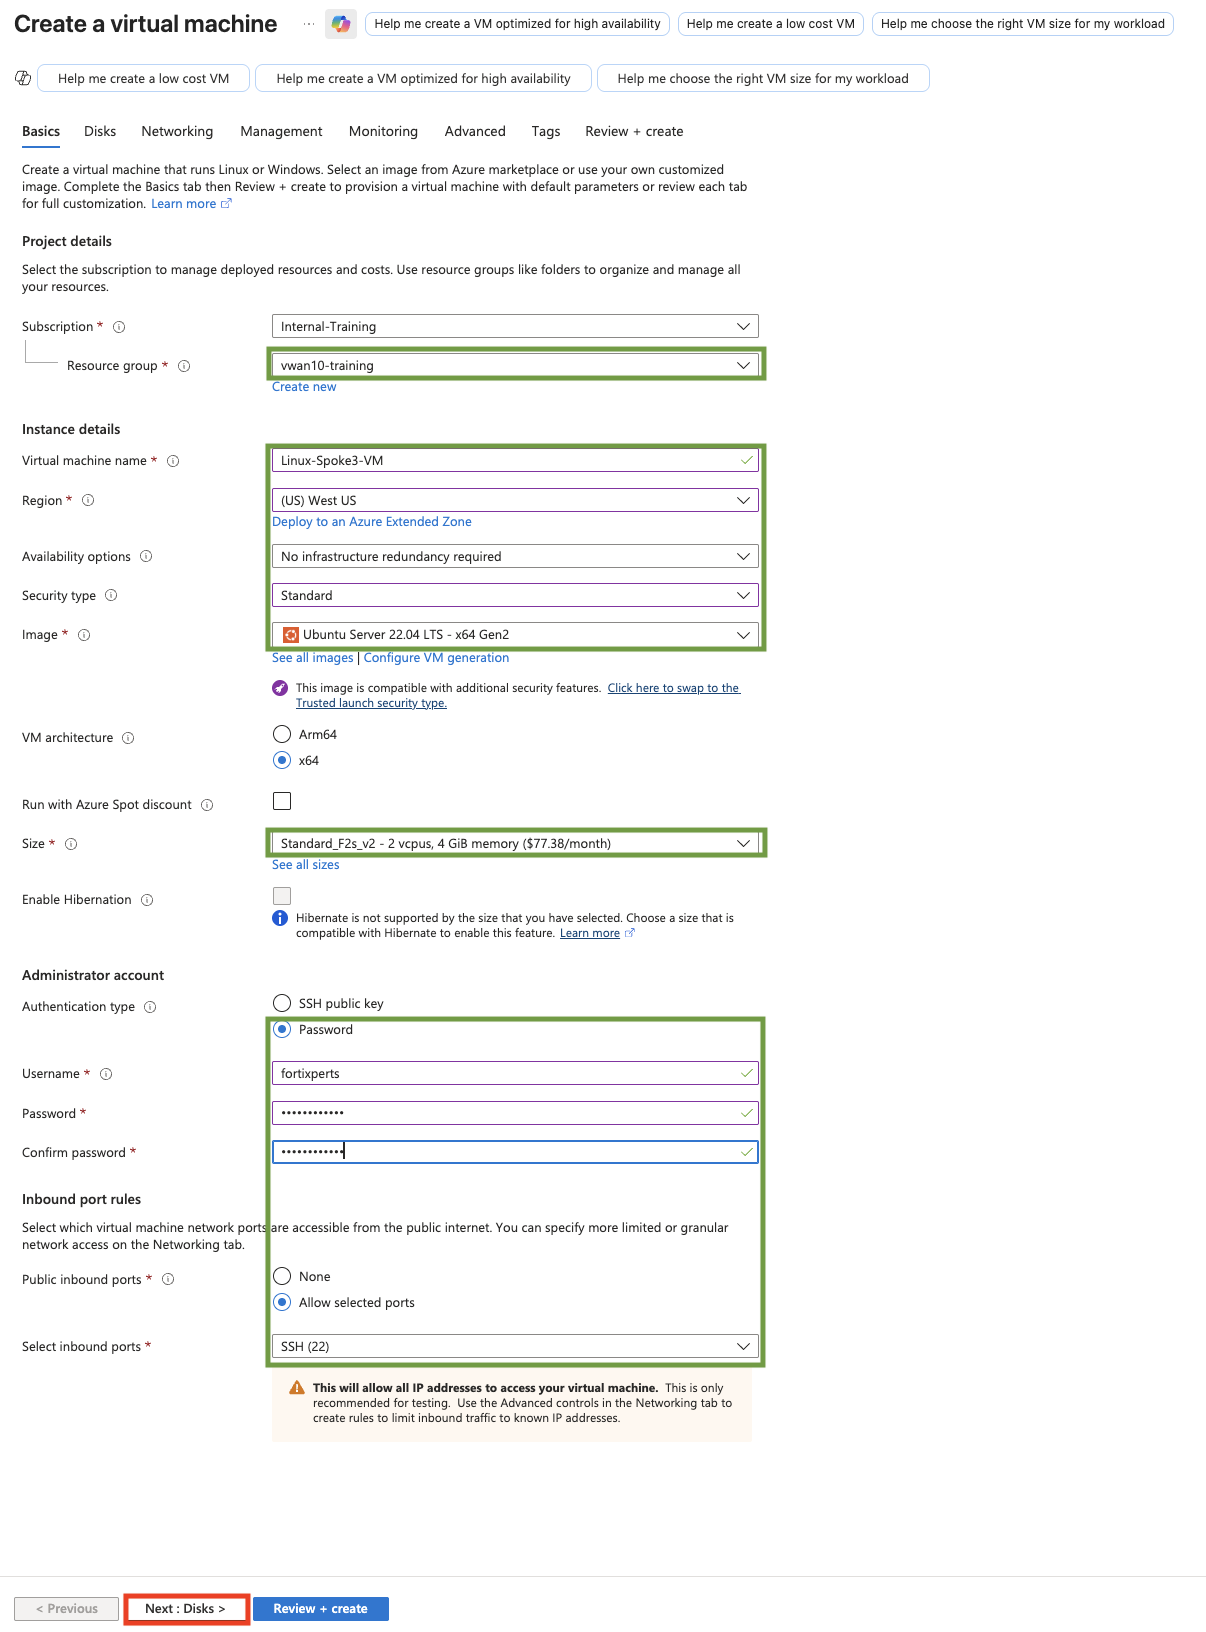
Click Next: Disks > Feel free to read through the available disk services that can be changed/enabled.
Click Next: Networking >
Update the following fields on the Networking tab: (Leave the default entry of the other fields not listed here)
- Virtual network: “Spoke3-vHub2_VNET”
- Subnet: “Subnet1-Spoke3_SUBNET (192.168.3.0/24)”
- Public IP: Select None
- NIC network security group: Select None
Confirm the changes and the other fields default entries match the following diagram

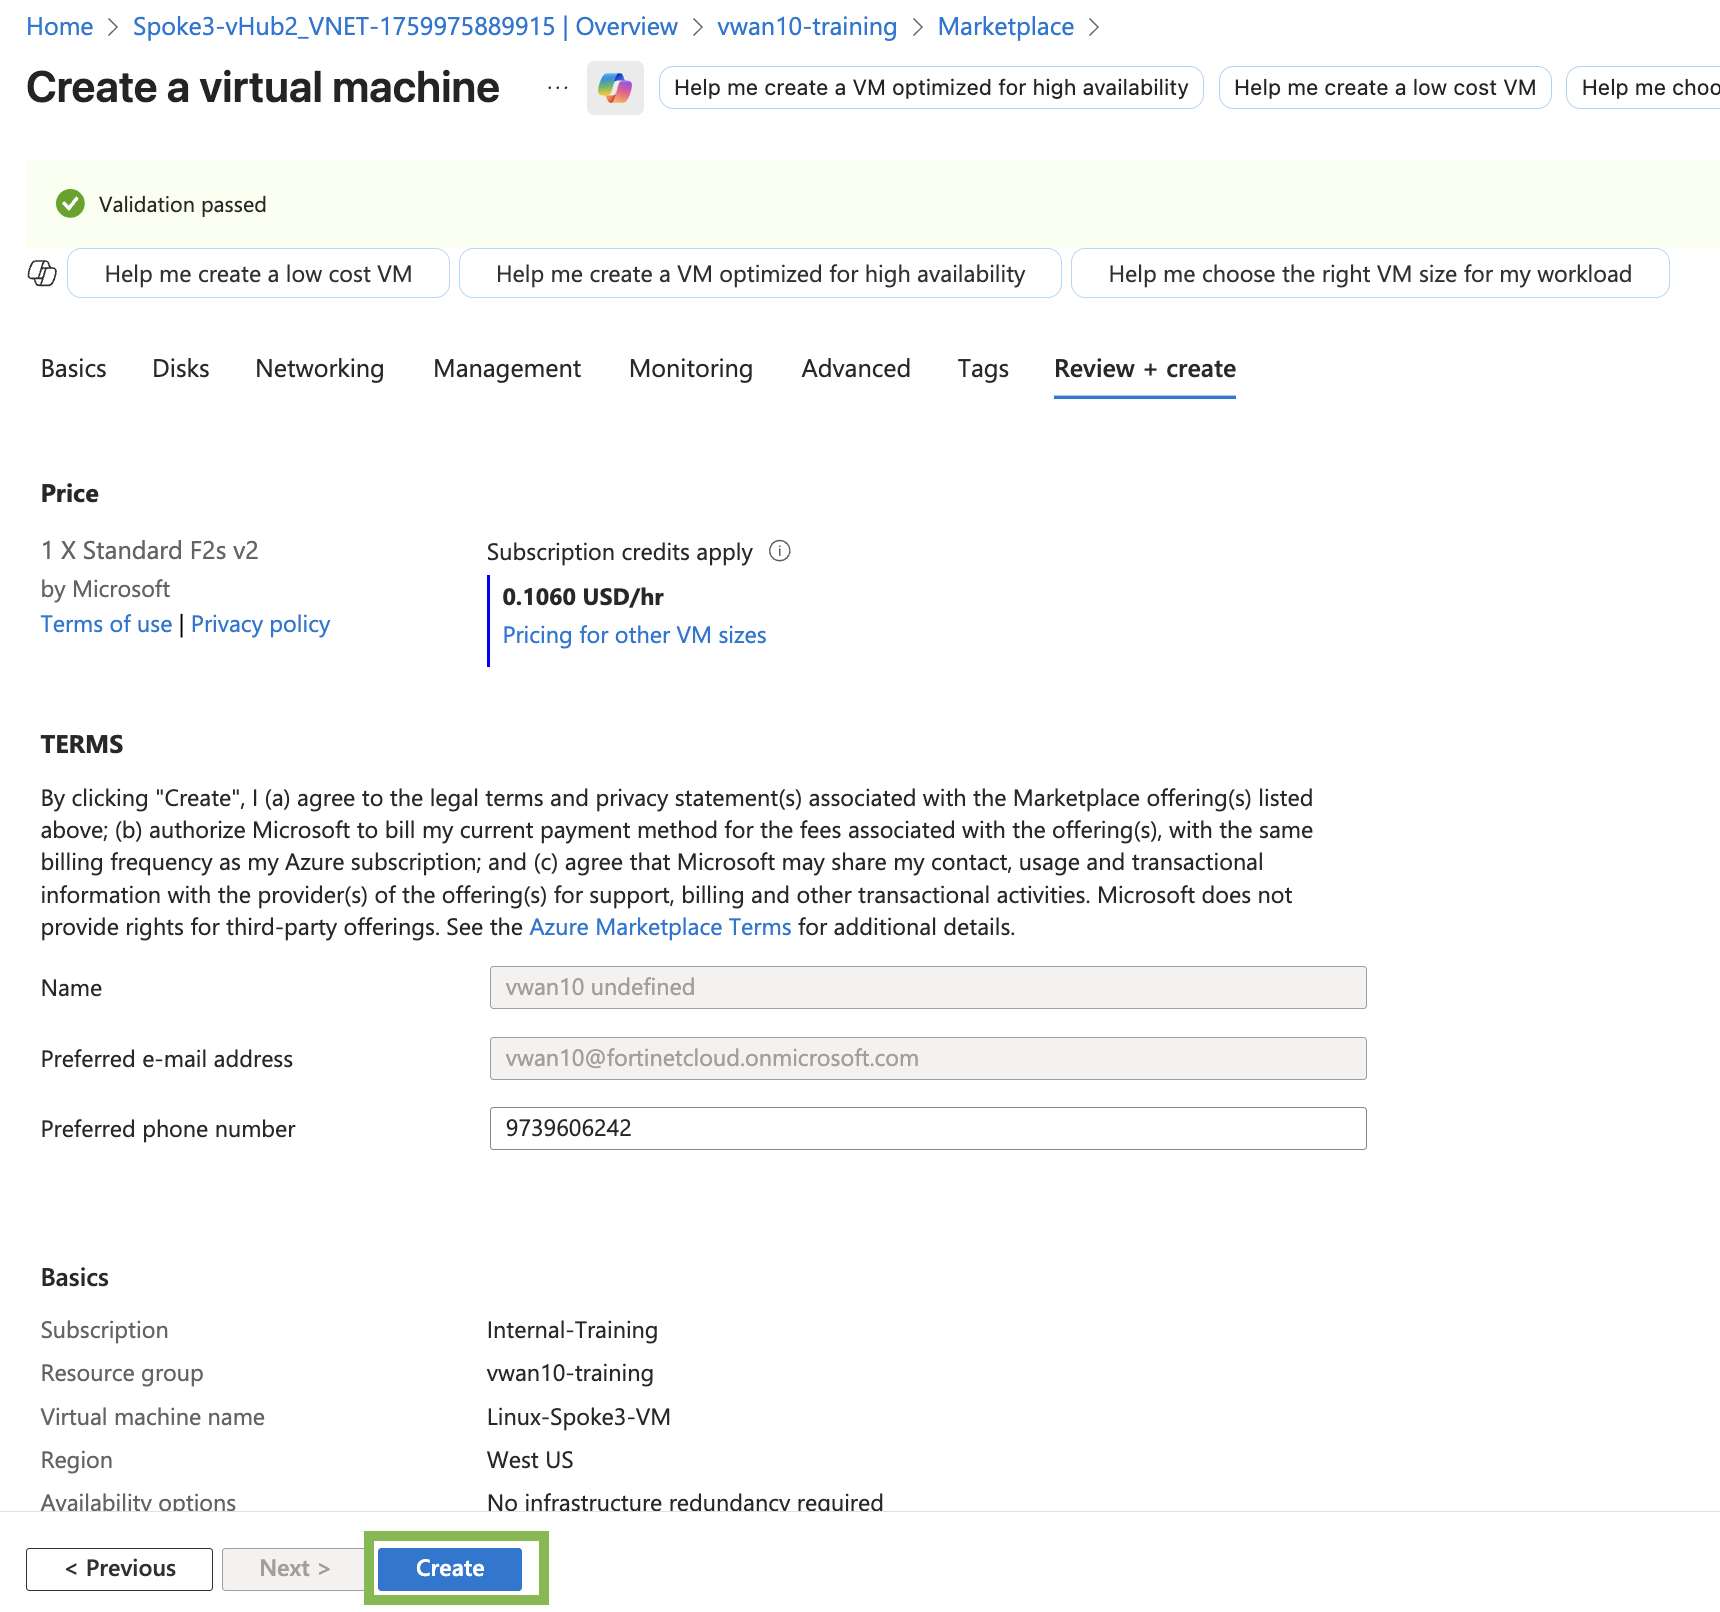
Click Review + create >
Feel free to read through the Management, Monitoring, Advanced, and Tags tabs for additional services that can be changed/enabled.
Confirm the template validation has passed
Click Create
Info
The Deployment is in progress notice is displayed and then the Your deployment is complete notice is displayed.
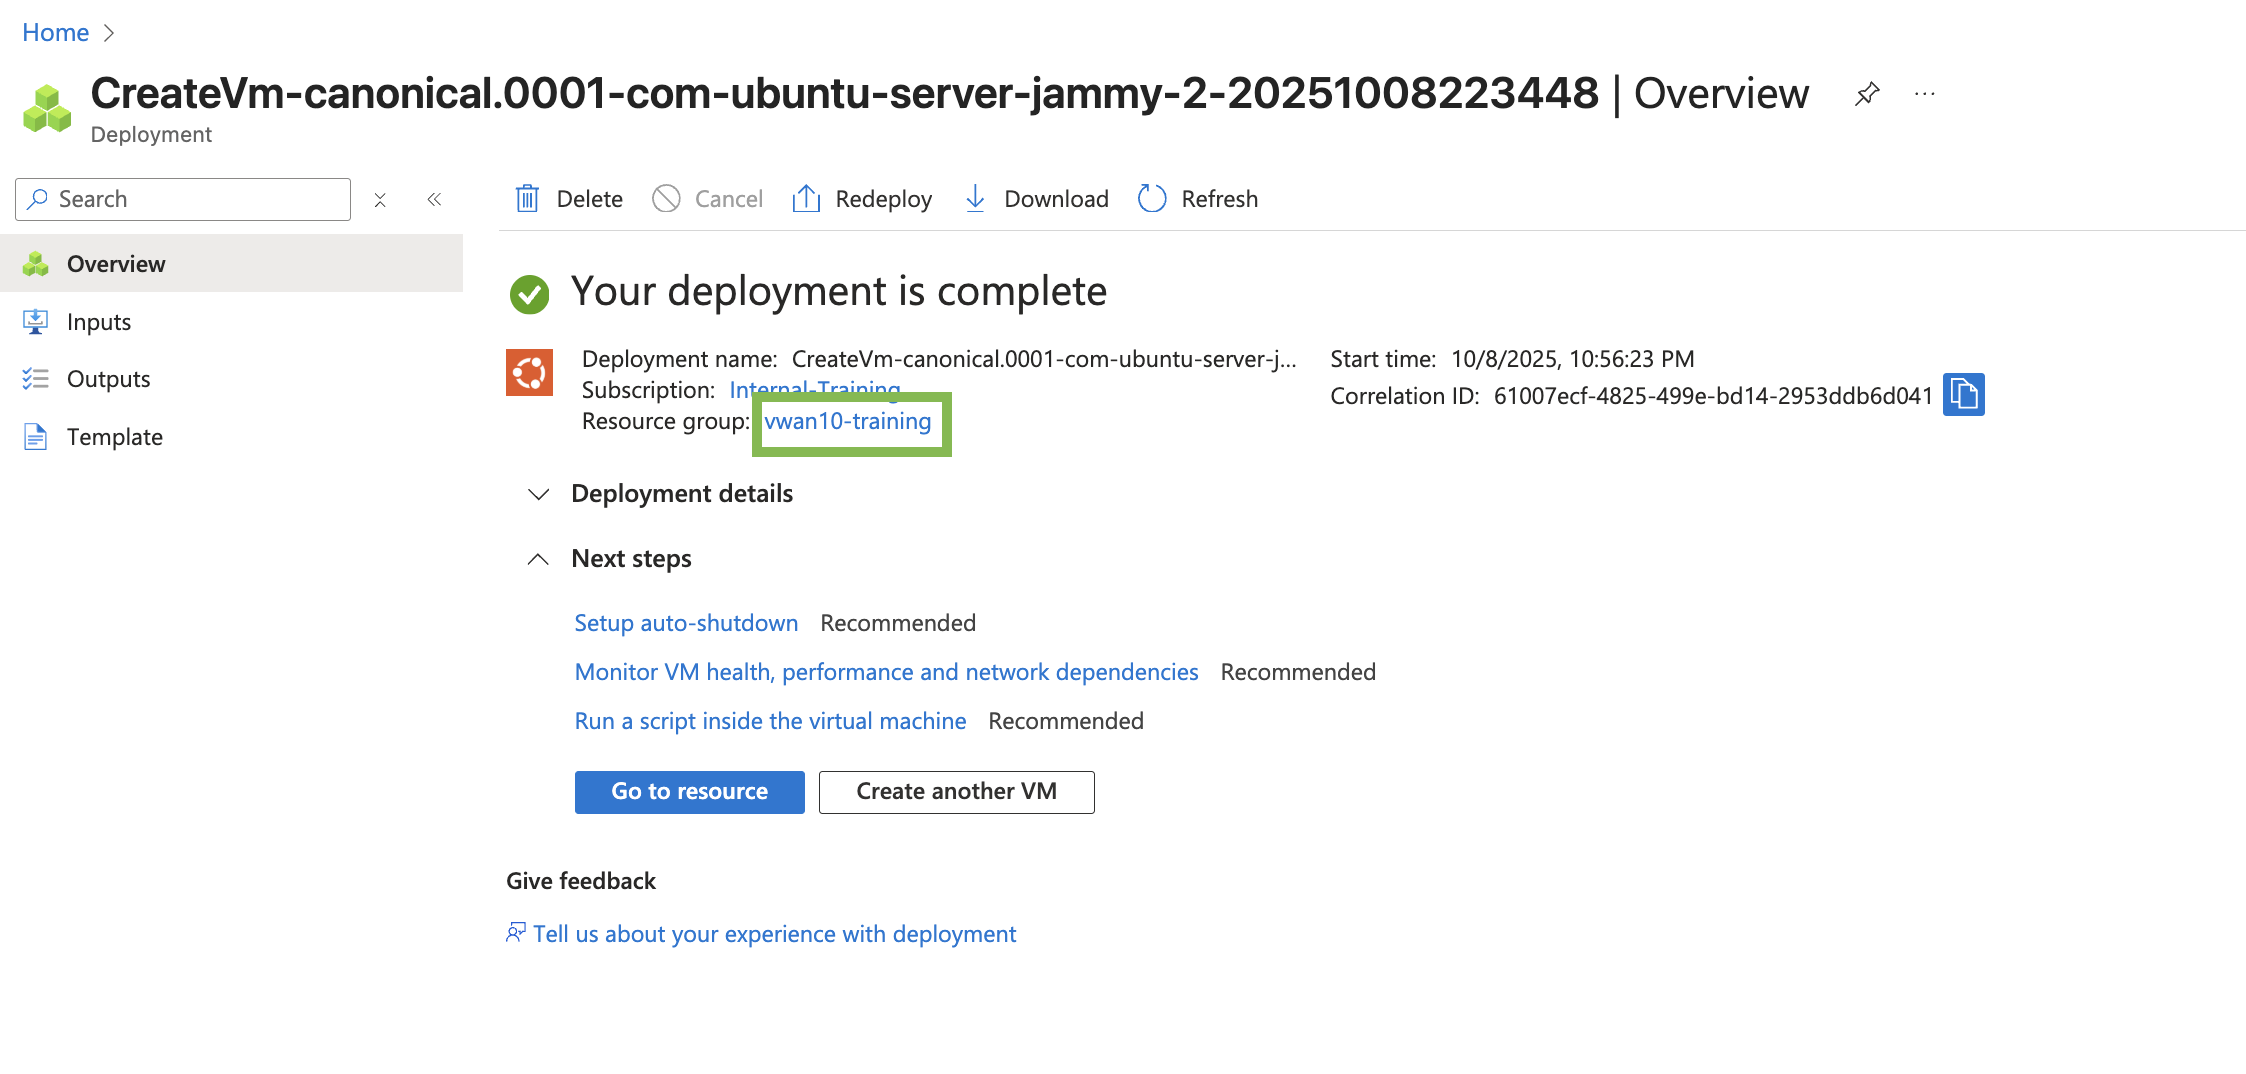
Click on the vwanXX-training link to be re-directed to your resource group.
Verify the new Linux-Spoke3-VM and the associated components are listed in your Resource Group.
Continue to Chapter 6 - Task 4: VNET Peering to the Second Hub