Task 3 - Automation Action
Create Complex Automation Stitch
A FortiGate Automation Stitch brings together a Trigger and one of more Actions.
The action is to build and send a Webhook. A Webhook is a way to send an HTTP request to a listening endpoint. The endpoint can then do something with the Webhook based on the HTTP method. FortiGate Webhook actions support several HTTP methods; DELETE, GET, PATCH, POST, and PUT.
The Webhook configured in this task uses the POST method. The HTTP POST method will utilize HTTP headers and the request body to send data to the listening endpoint. The listening endpoint was described earlier in the chapter describing Azure Automation. The Azure Automation Webhook (this is the listening endpoint) was created as part of the Terraform deployment. The Azure Automation Webhook is associated to the Azure Automation Runbook Update-RouteTable.
To summarize there are two Webhooks;
- Azure Automation Webhook listens for incoming requests and sends the request to the Azure Automation Runbook Update-RouteTable
- FortiGate Automation Stitch Action Webhook sends data in the form of an HTTP POST request to the Azure Automation Webhook
The data sent by the FortiGate Webhook action is sent (POSTed) to the Azure Automation Runbook Update-RouteTable where it is parsed and acted upon based on the sent data. Possible runbook actions are
- Update the Azure Route table rt-protected in the Resource Group USERXX-fgt-as-workshop by adding a host route
- Update the Azure Route table rt-protected in the Resource Group USERXX-fgt-as-workshop by removing a host route
- Return an error message indication that the passed data was incorrect or that the runbook was not executed via the Webhook
The FortiGate Automation Stitch action is triggered by a log entry related to Dynamic addresses, when a Dynamic address is updated by adding or removing an IP address. The Dynamic addresses setup previously are updated when a VM with a specific tag and value is discovered or if a previously discovered VM with a specific tag and value is no longer seen in the Azure environment.
The triggers setup in the last task can all utilize the same action.
Task 3 - Create Automation Action
- Login to the FortiGate using the IP address and credentials from the Terraform output.
- Click through any opening screens for FortiGate setup actions, no changes are required.
- Click the CLI Console
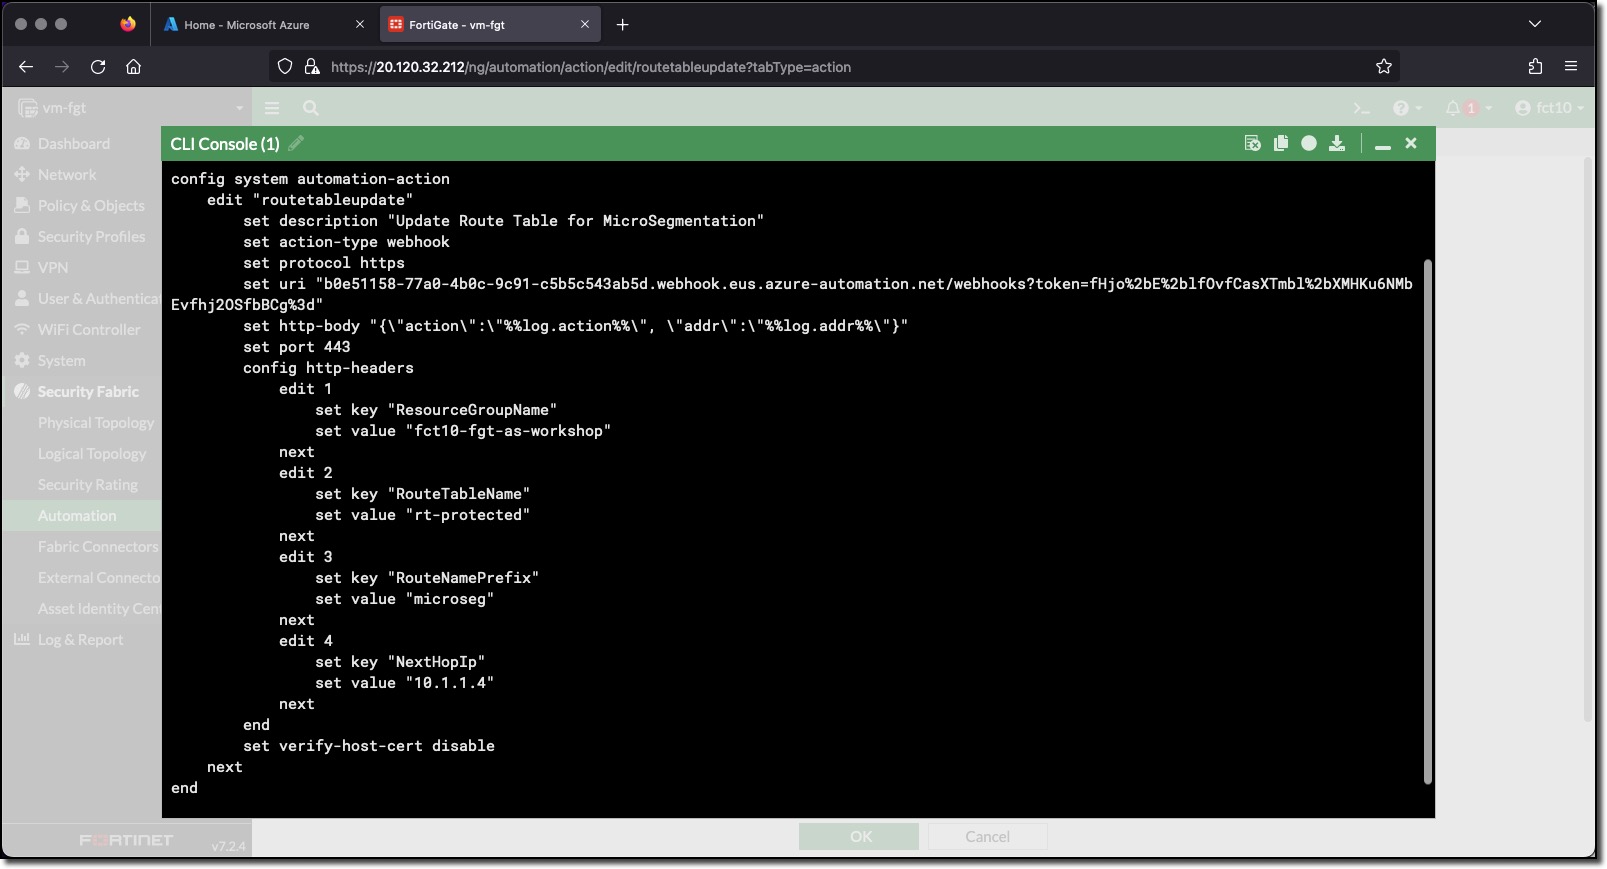
- Enter the following CLI commands to create an Automation Stitch Action that will send a Webhook to Azure
- There are two options to create the action
Replace the values indicated below with the information specific to your deployment. The values can be obtained by running the following terraform commands in the
terraform/azuredirectory - Refer to Chapter 1 Task 2 - Run Terraform- YOUR_RESOURCE_GROUP -
terraform output - YOUR_WEBHOOK -
terraform output webhook
- YOUR_RESOURCE_GROUP -
Use the contents of the generated FortiOS configuration file
terraform/fortios/fortigate_automation_action_cli.cfg- This file was created for this specific deployment when the initial terraform apply was executed.
The webhook URI contains a question mark (?) between the words webhooks and token. When pasting text into the FortiGate CLI question marks are removed, due to the question mark having special meaning in the FortiGate CLI.
config system automation-action
    edit "routetableupdate"
        set description "Update Route Table for MicroSegmentation"
        set action-type webhook
        set protocol https
        set uri "YOUR_WEBHOOK"
        set http-body "{\"action\":\"%%log.action%%\", \"addr\":\"%%log.addr%%\"}"
        set port 443
        config http-headers
            edit 1
                set key "ResourceGroupName"
                set value "YOUR_RESOURCE_GROUP"
            next
            edit 2
                set key "RouteTableName"
                set value "rt-protected"
            next
            edit 3
                set key "RouteNamePrefix"
                set value "microseg"
            next
            edit 4
                set key "NextHopIp"
                set value "10.1.1.4"
            next
        end
        set verify-host-cert disable
    next
end
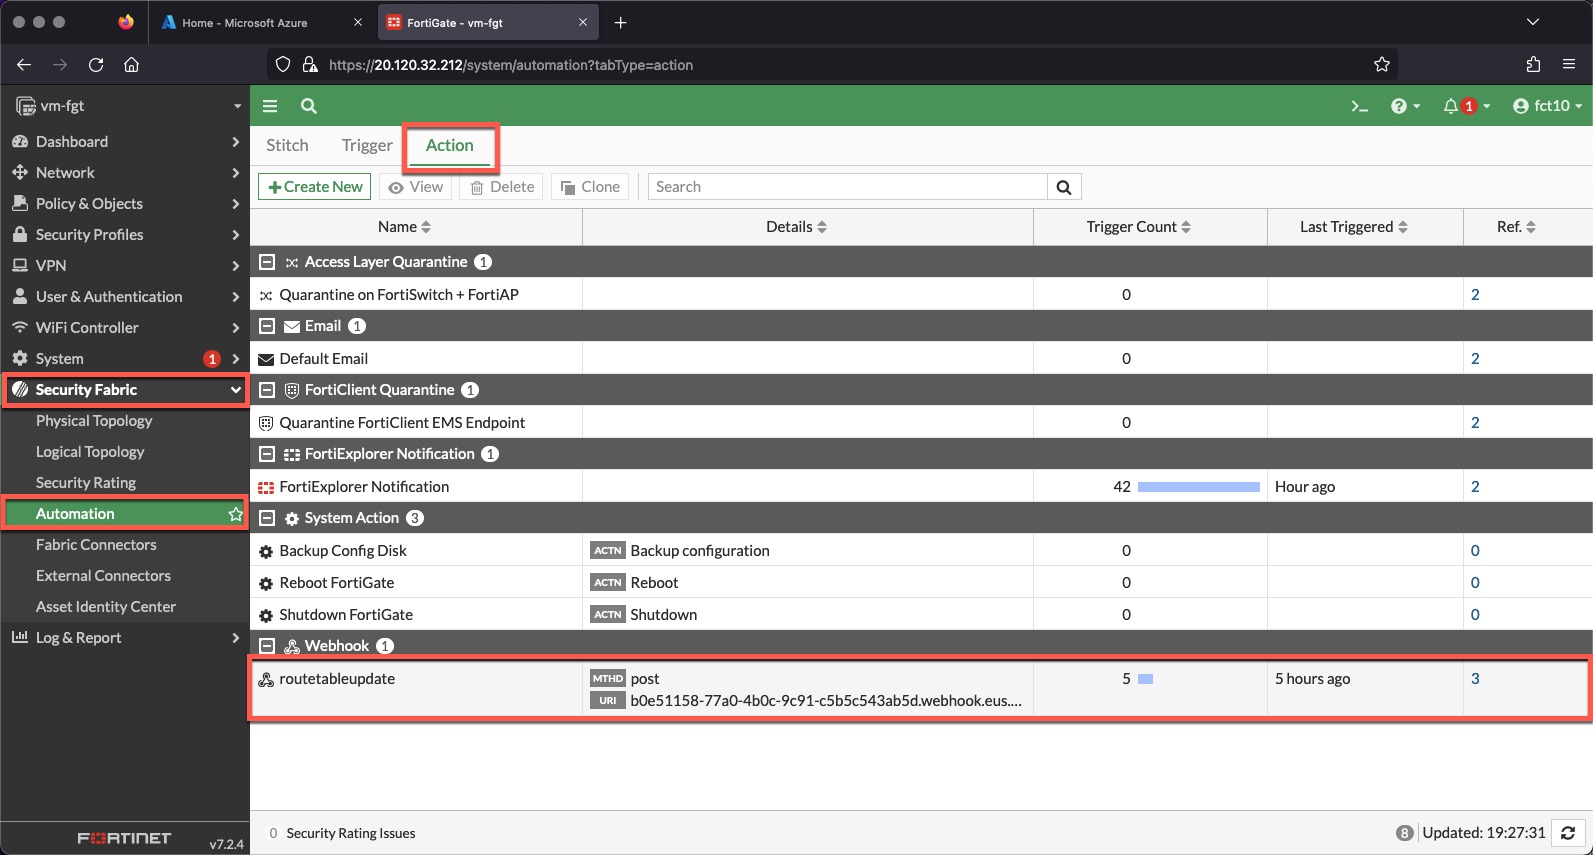
View the configured Action in the FortiGate UI
- Minimize “CLI Console”
- Click “Security Fabric”
- Click “Automation”
- Click the “Action” tab
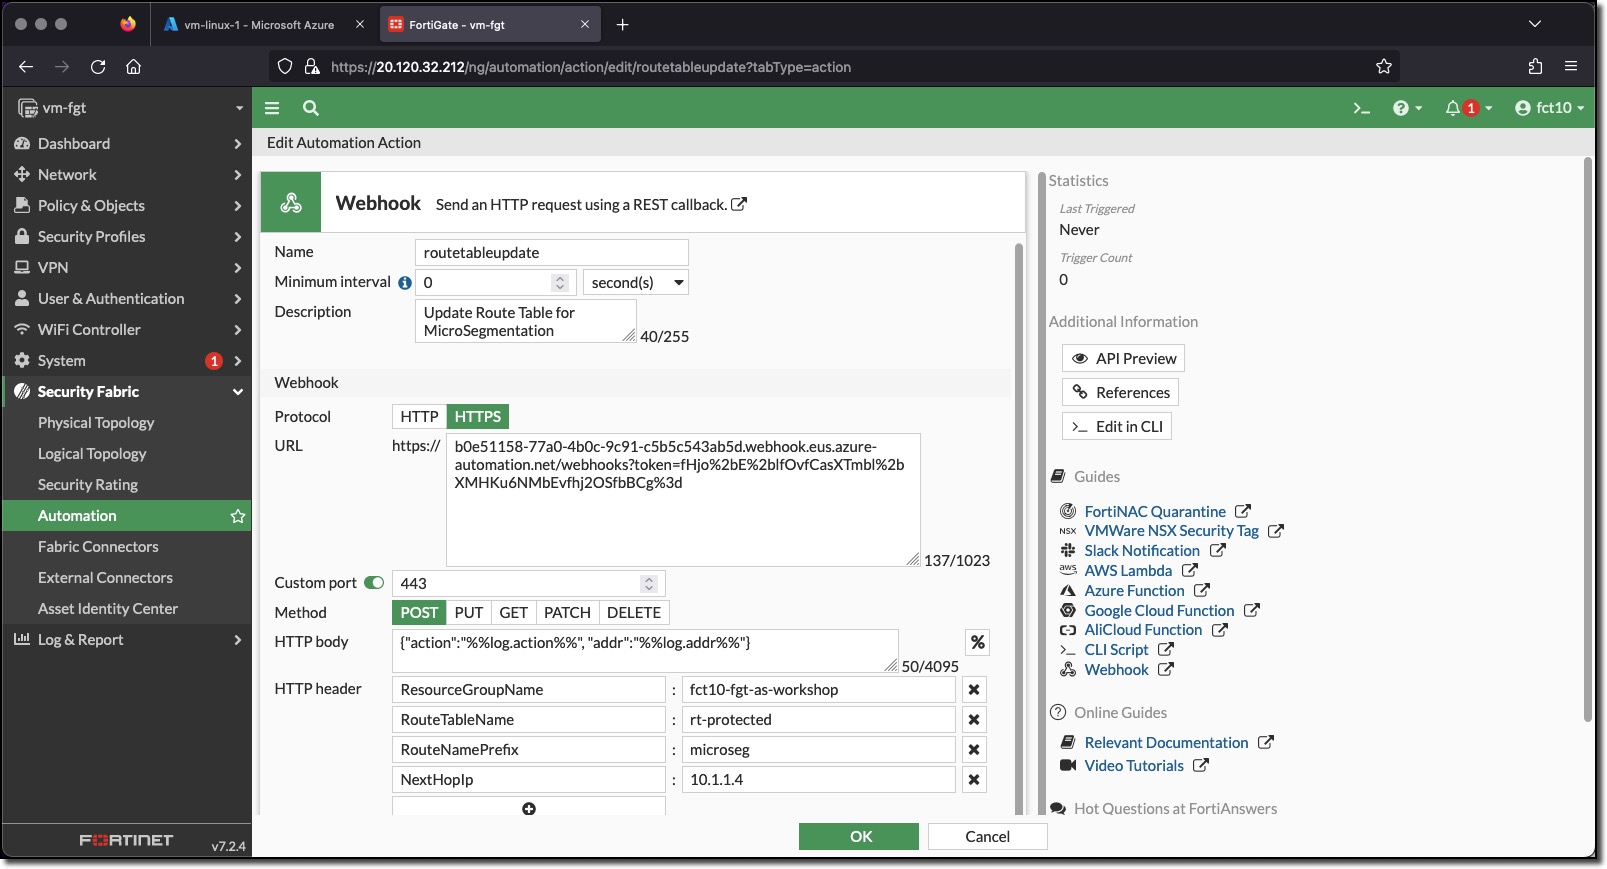
View routetableupdate configuration in the FortiGate UI
- Double-Click the routetableupdate trigger
The Action fields
- Protocol - HTTP or HTTPS
- URL - the Azure Automation Webhook is entered into this field without the https:// prefix
- Custom Port - the port the Azure Automation Webhook is listening on
- Method - the HTTPS method
- HTTP body - the body of the POST request - in this request the body is formatted as JSON. The items %%log.action%% and %%log.addr%% represent the FortiGate event log fields from the log that triggered the action. These values are:
- log.action - object-add or object-remove
- log.addr - the IP address of the VM with the ComputeType tag
- HTTP header - additional header fields - these fields could also have been passed in the HTTP body
ResourceGroupName - the name of the Azure Resource Group containing the Azure Route table to update
RouteTableName - the name of the Azure Route table to update
RouteNamePrefix - a prefix for the routes managed by the Azure Automation Runbook
NextHopIp - the Next Hop IP Address for the routes managed by the Azure Automation Runbook


