Task 5 - Enable Azure SDN Connector
Task 5 - Enable Azure SDN Connector
The completed Automation Stitch trigger will be when a log is recorded for the following events:
- Dynamic address added
- Dynamic address removed
These log events are recorded when a FortiGate Dynamic Address is updated by adding or removing an address. FortiGate Dynamic Addresses are updated when the conditions of the Dynamic Address filter are met.
The Dynamic address filters can utilize the data returned from the FortiGate Azure SDN Connector. The filters can match on several aspects of the Azure environment. The Dynamic address filters in this task will match on Azure Tags and Values.
The configurations are presented as a combination of FortiGate CLI commands and screenshots of the configured object. All of the command blocks can be copied and pasted into the FortiGate CLI console.
Enable and View the Azure SDN Connector
Login to the FortiGate using the IP address and credentials from the Terraform output.
Click through any opening screens for FortiGate setup actions, no changes are required.
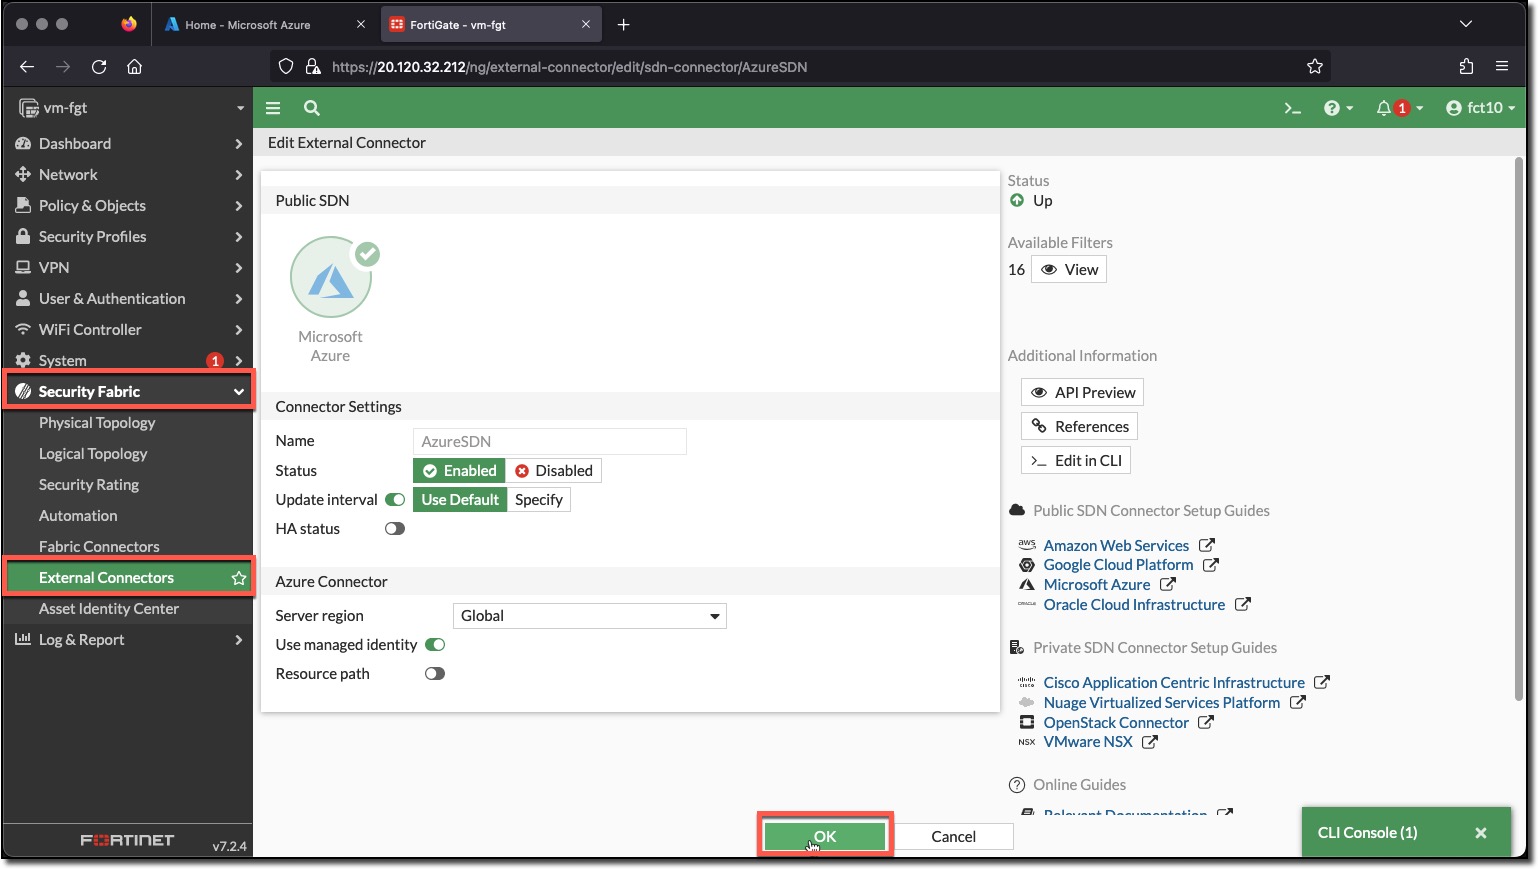
Click “Security Fabric”
Click “External Connectors”
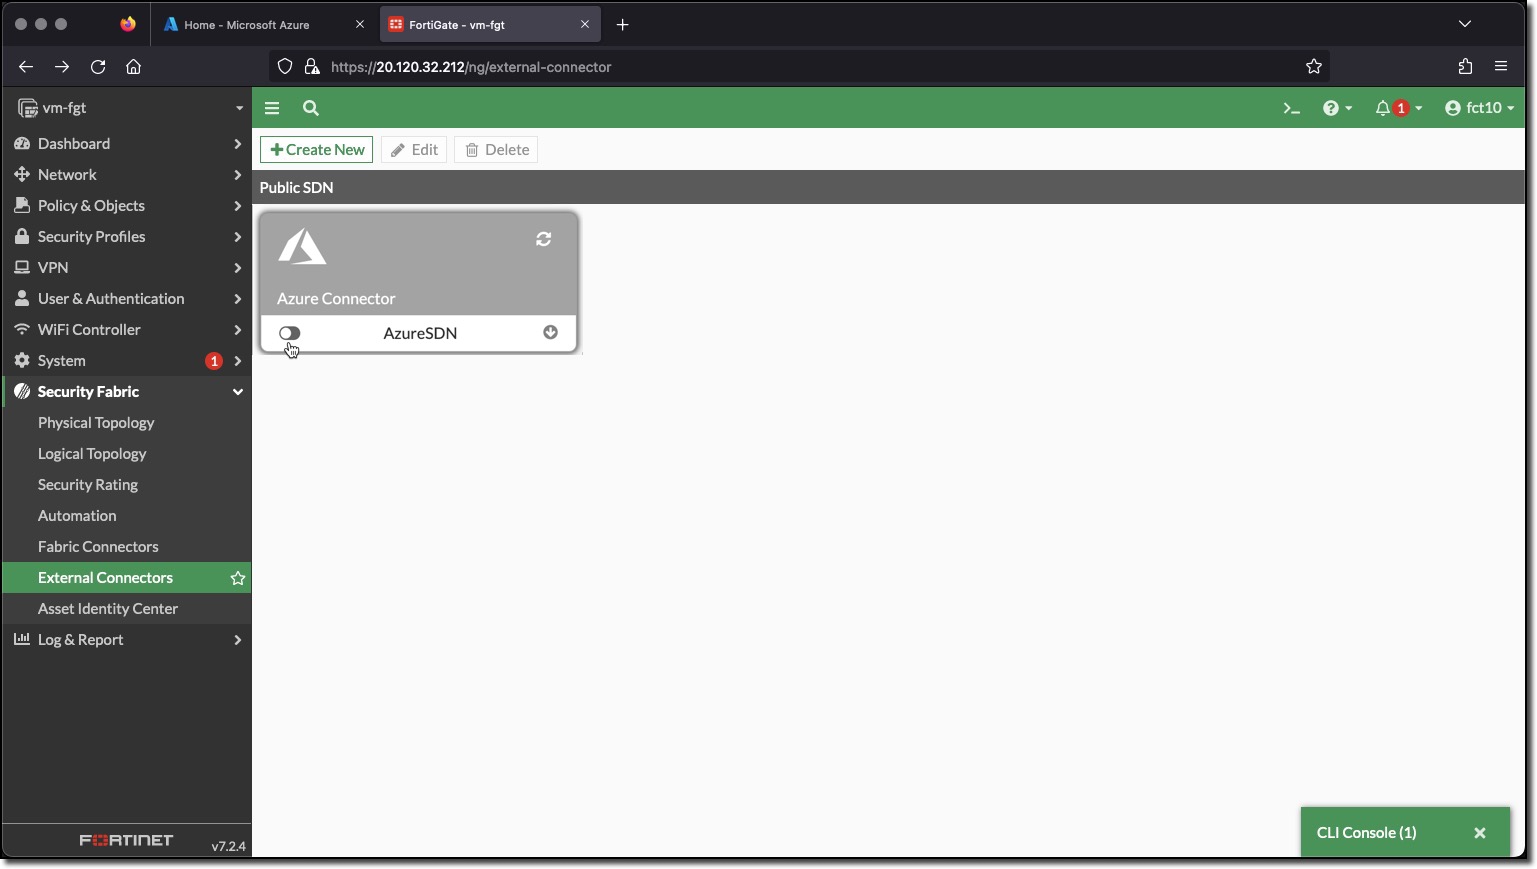
Toggle the enable button on the Azure SDN Connector, it will take at least 60 seconds for the SDN Connector to retrieve information from Azure.
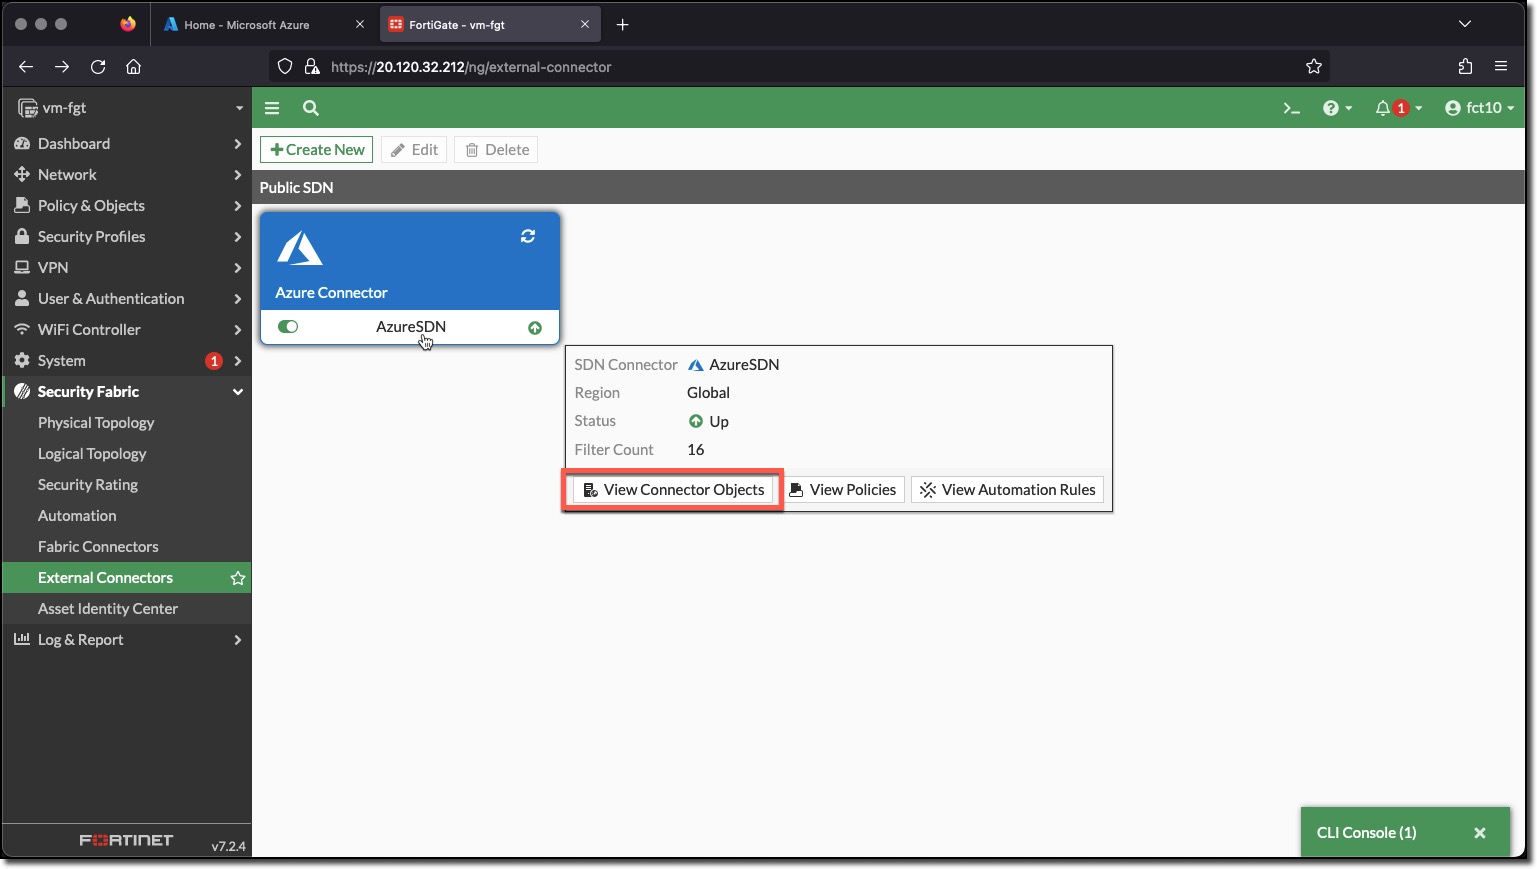
Hover over “AzureSDN” <– The SDN Connector may have already discovered Azure Environment objects, if so follow the next steps to view them.
- Click “View Connector Objects”
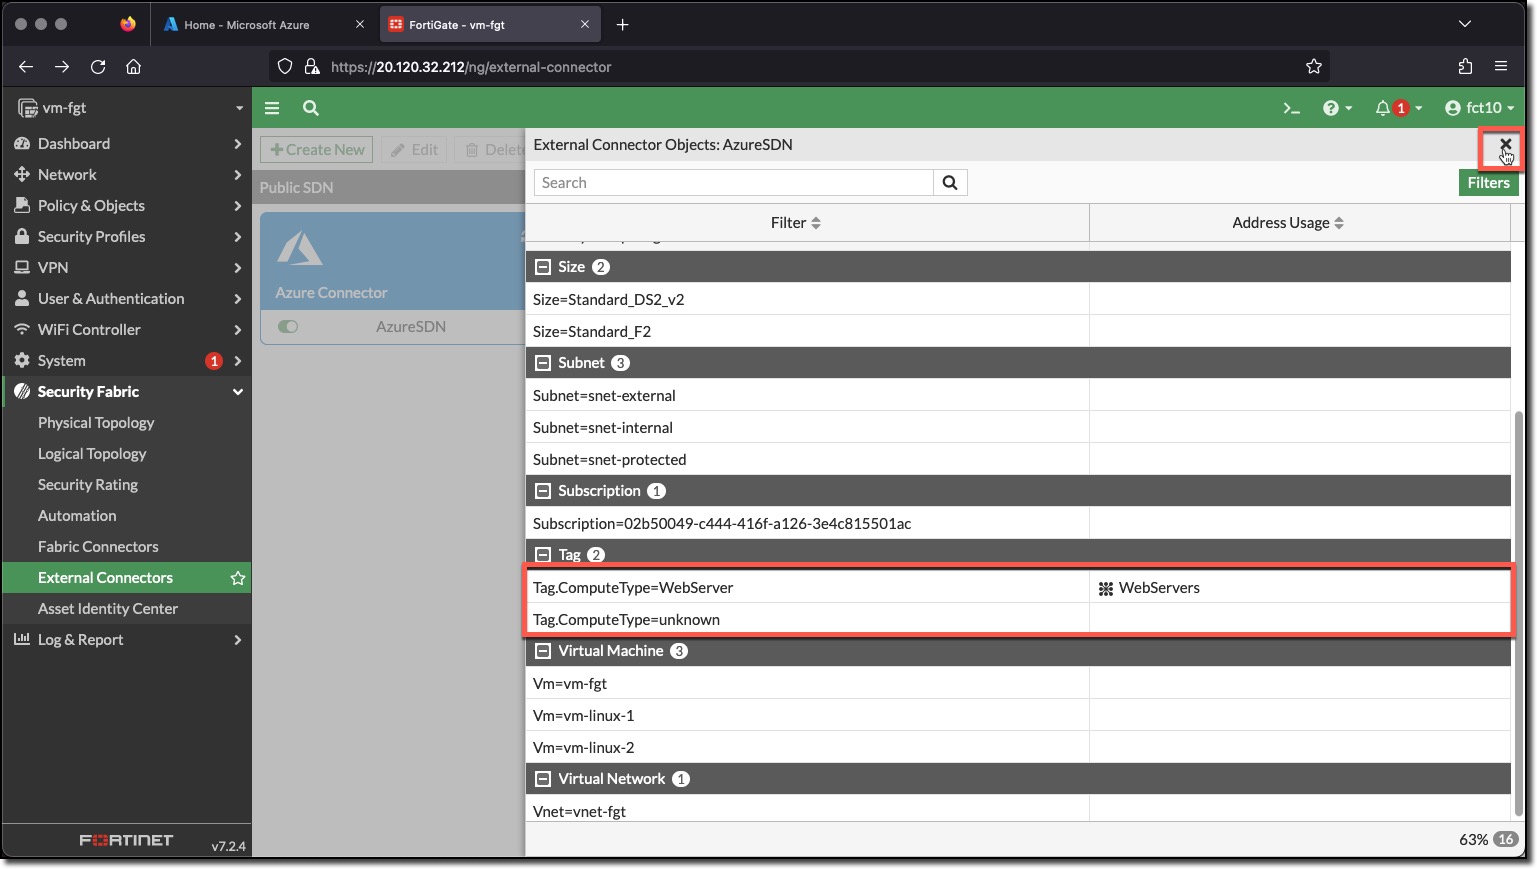
- Scroll through discovered objects, the ones that the Dynamic addresses will use in the “Tag” group
- Click “X” to exit the view
Double-Click “AzureSDN” to view the configuration in the UI
Notice that the switch “Use managed identity” is enabled. This allows the FortiGate to issue Azure Resource Manager API calls to read the Azure environment. The “Resource path” can also be enabled to scope the read requests to a particular “Subscription ID” and “Resource group”.
The Azure identity of the FortiGate has already been scoped to the Resource Group when the Contributor Role was assigned to the FortiGate during deployment.
View the FortiGate’s Azure Assigned Identity Contributor Role and Scope
- Login to Azure Cloud Portal https://portal.azure.com/ with the provided login/password
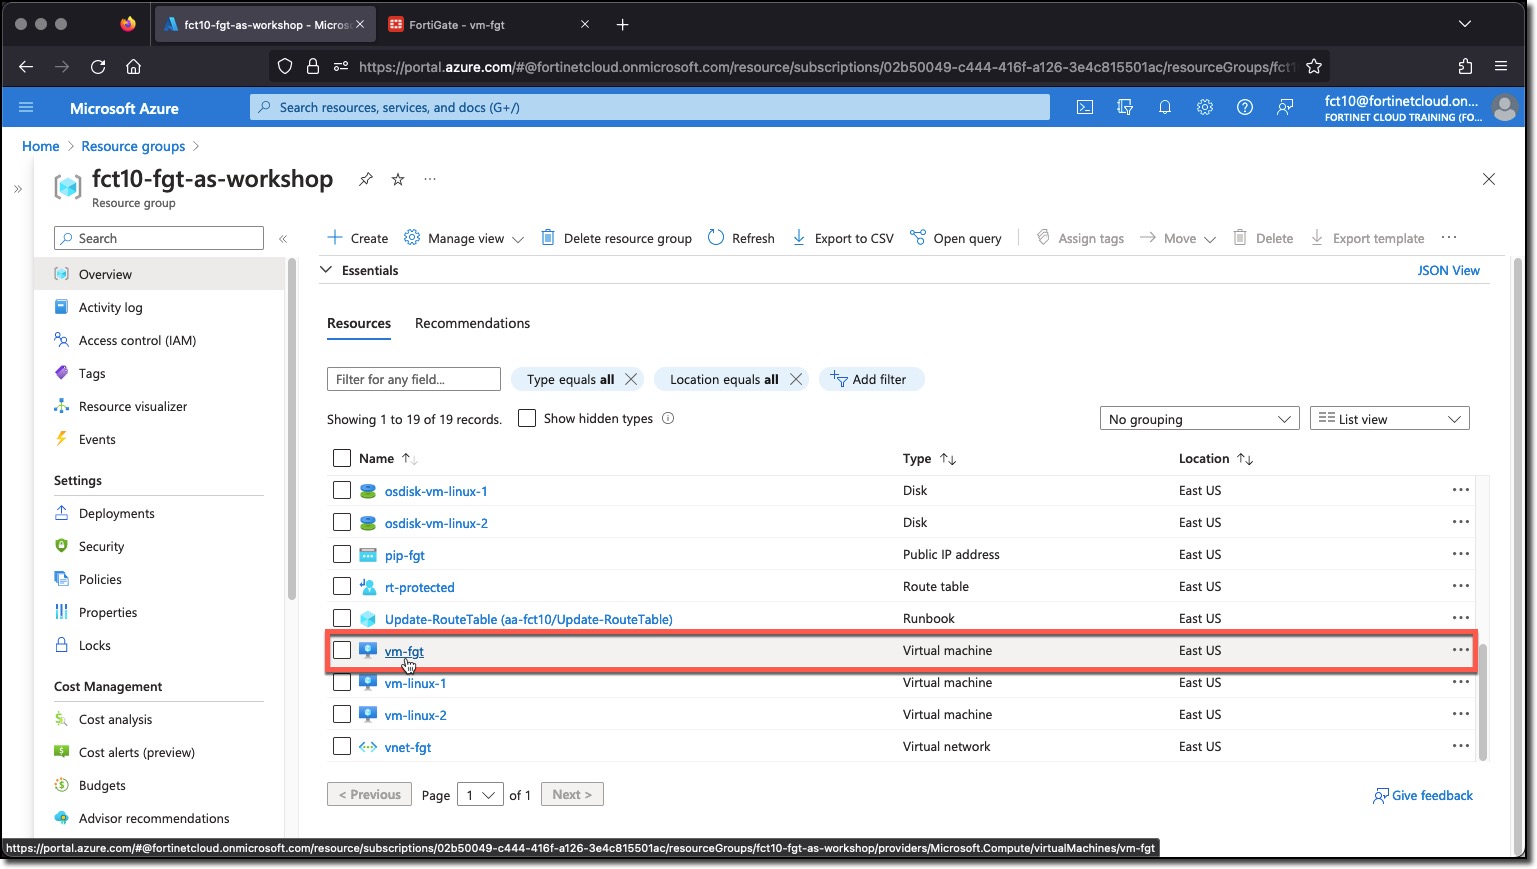
- Navigate to your Resource Group “USERXX-fgt-as-workshop”
- Click “vm-fgt”
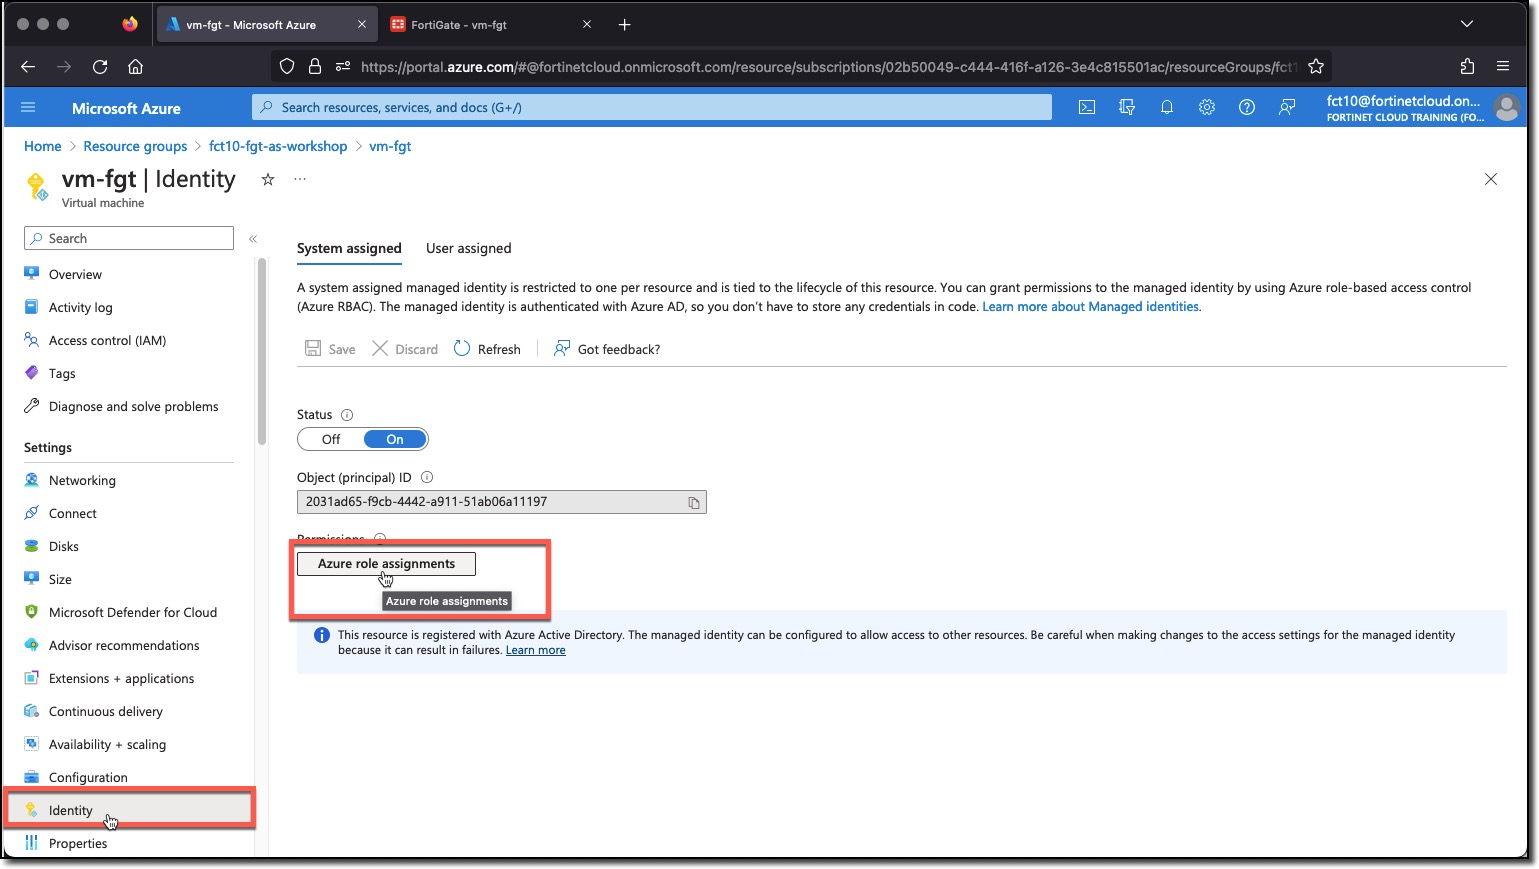
- Click “Identity”
- Click “Azure role assignments”
The Azure “Contributor” role has been assigned to the FortiGate’s associated Azure Identity, with a scope of the Resource Group “USERXX-fgt-as-workshop”. This means that any API request issued by the FortiGate Azure SDN Connector has all the privileges of the Contributor role but only on objects that are in the specified Resource Group.
View the FortiGate Dynamic Address Resolution
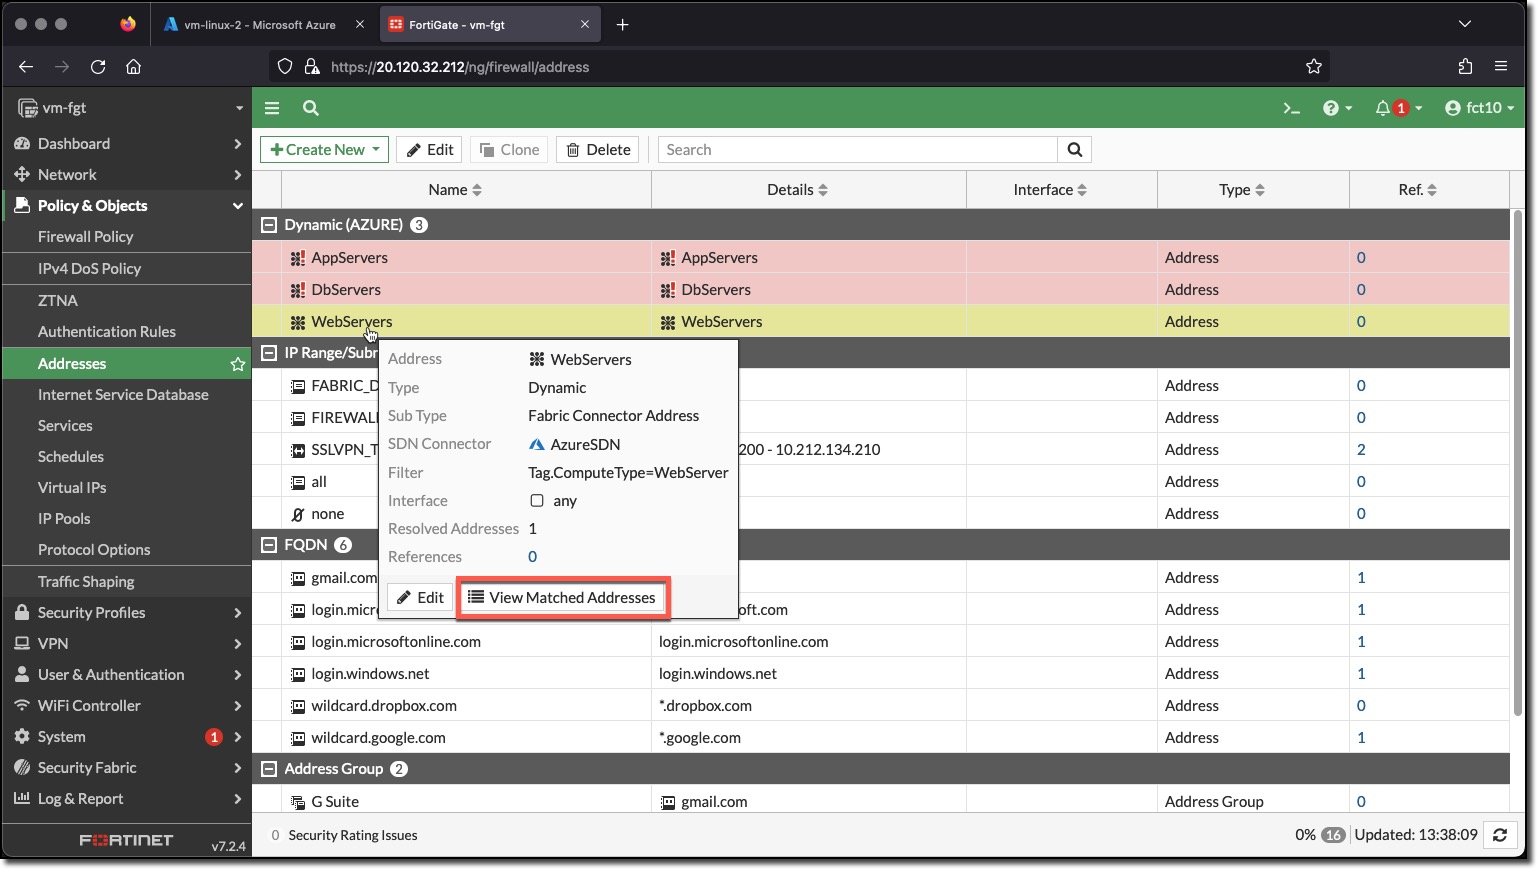
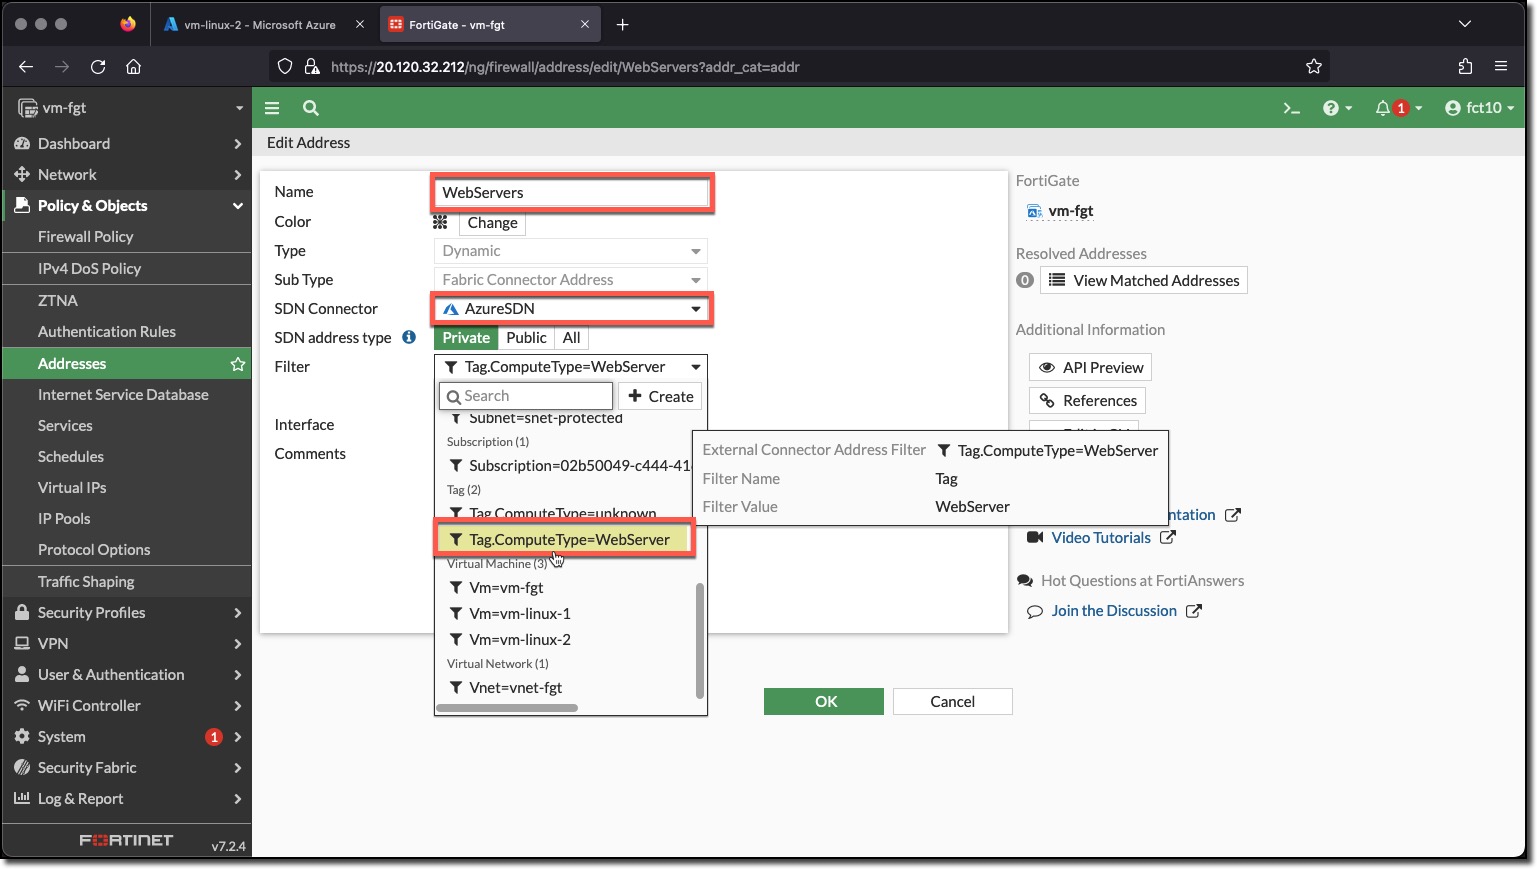
Now that the Azure SDN Connector has been enabled the WebServers Address should populate with a resolved IP address for a VM with the Tag ComputeType and the value Webserver.
As part of the environment deployment by Terraform:
- A linux VM with the name vm-linux-2 was deployed
- A tag ComputeType with the value WebServer was added to the VM
- The VM data retrieved by the Azure SDN connecter matched the WebServers address filter
- The address object was populated with the IP address of the VM vm-linux-2
The red exclamation point near an address name indicates that the filter(s) for the address did not match anything.
