Start protecting Juice Shop Application with FortiAppSec Cloud
Task
Onboard Application in FortiAppSec GUI
Verify task completion
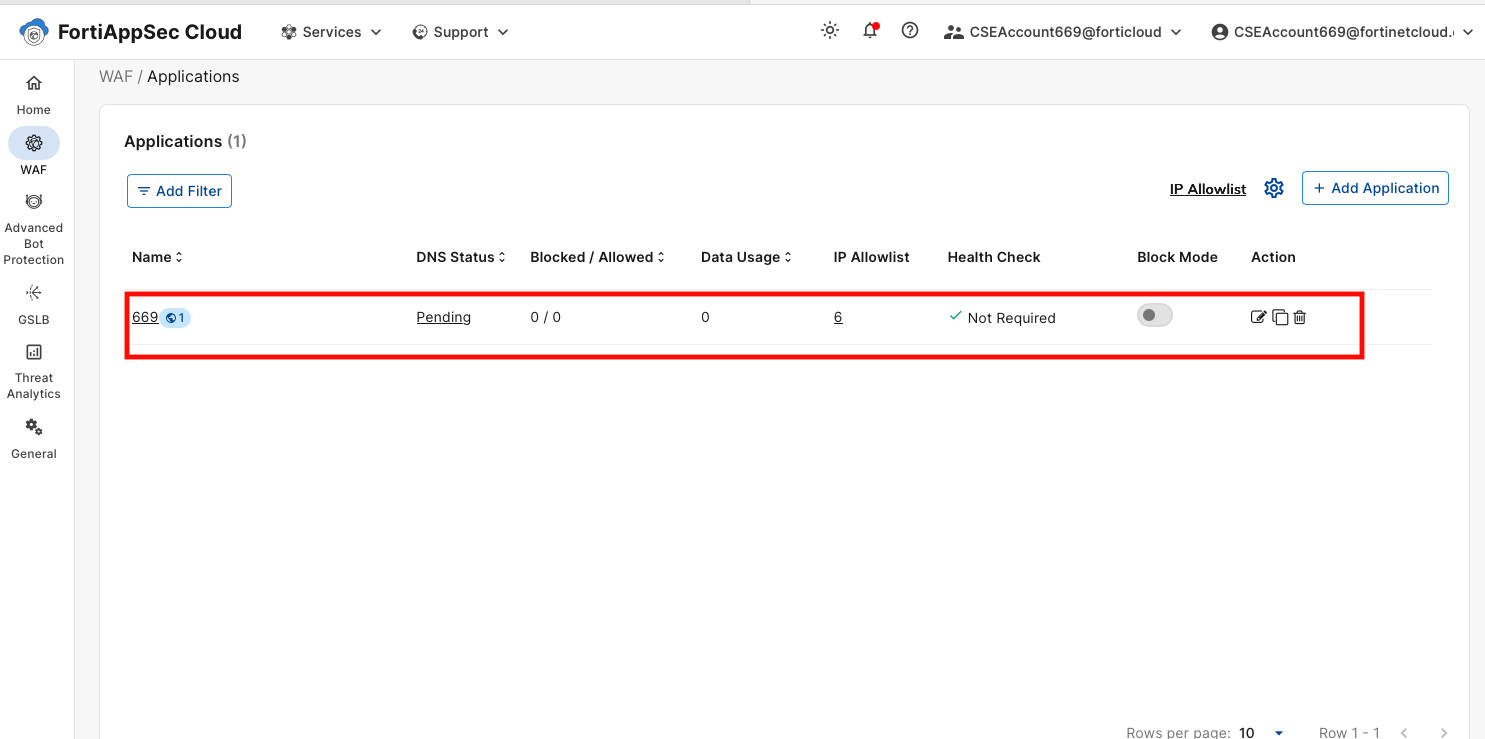
Your Application will show up in the Application list.
Add Application
Click on the WAF icon in the left menu bar, open the Applications view, and then click + ADD APPLICATION.
.
and then click, + ADD APPLICATION
.
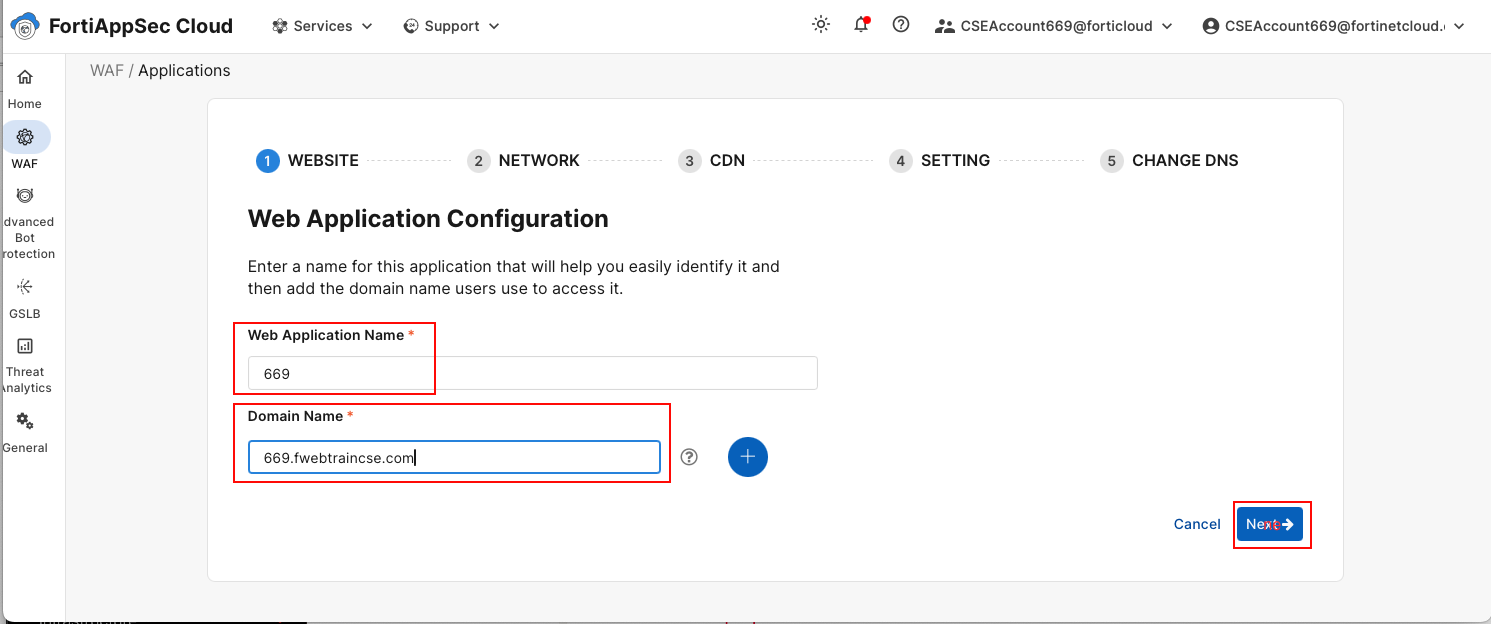
Tab 1: “WEBSITE”
In Web Application Name enter your FortiAppSec Cloud StudentID number which you used to login to FortiAppSec Cloud (found at the top right corner of the FortiAppSec Cloud Screen).
For Domain Name use <studentId>.fwebtraincse.com and then select next
Info
The warning “Failed to look up for .fwebtraincse.com” can be safely ignored
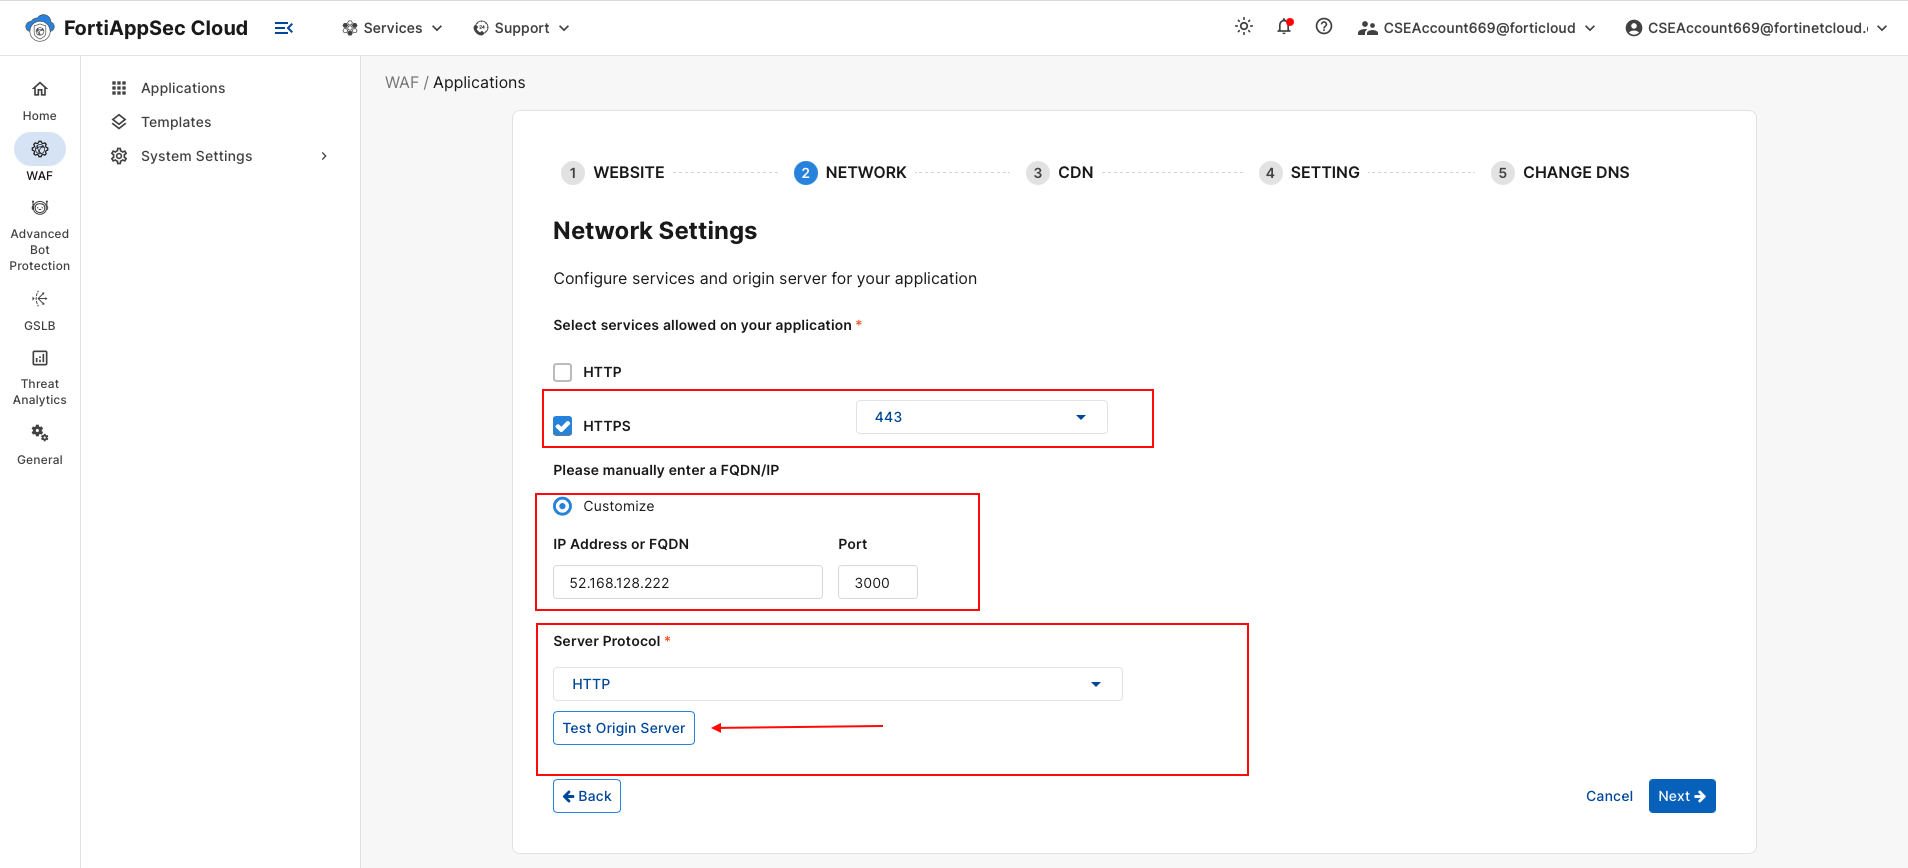
Tab 2: Network,
Clear the “HTTP” as we want to force users to interact with FortiAppSec using only HTTPS.
For IP Address or FQDN enter the JuiceShop Public IP (which is the Ubuntu VM Public IP from your Terraform Output)
For Port enter “3000”
Select HTTP for Server Protocol. This is Juice Shop and it is NOT secure
Click on Test Origin Server You should see a green box pop up that says “Test successful”
Choose Next
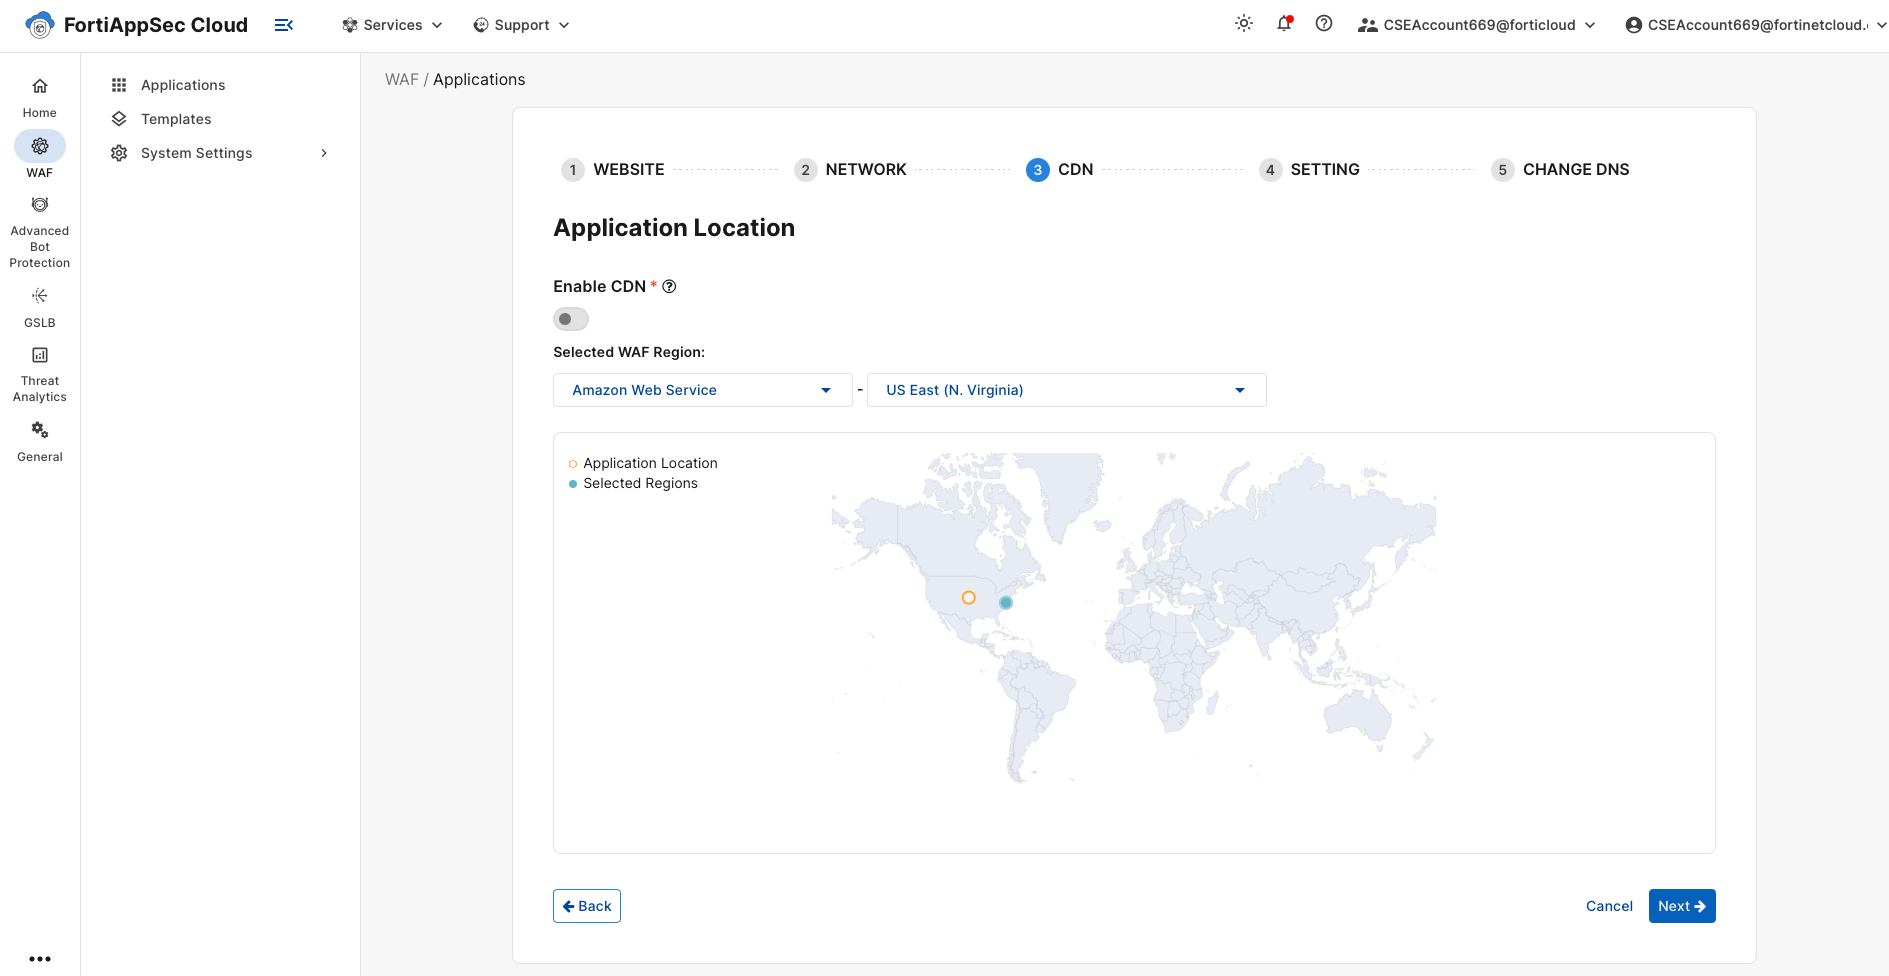
Tab 3: CDN
No Changes. You will notice the Selected WAF Region shows the Platform “AWS” and the Region. In your lab it may show a different platform and region
Info
FortiAppSec Cloud automatically chooses the platform and region based on the IP Address of the application. There is no user intervention required.
Select Next
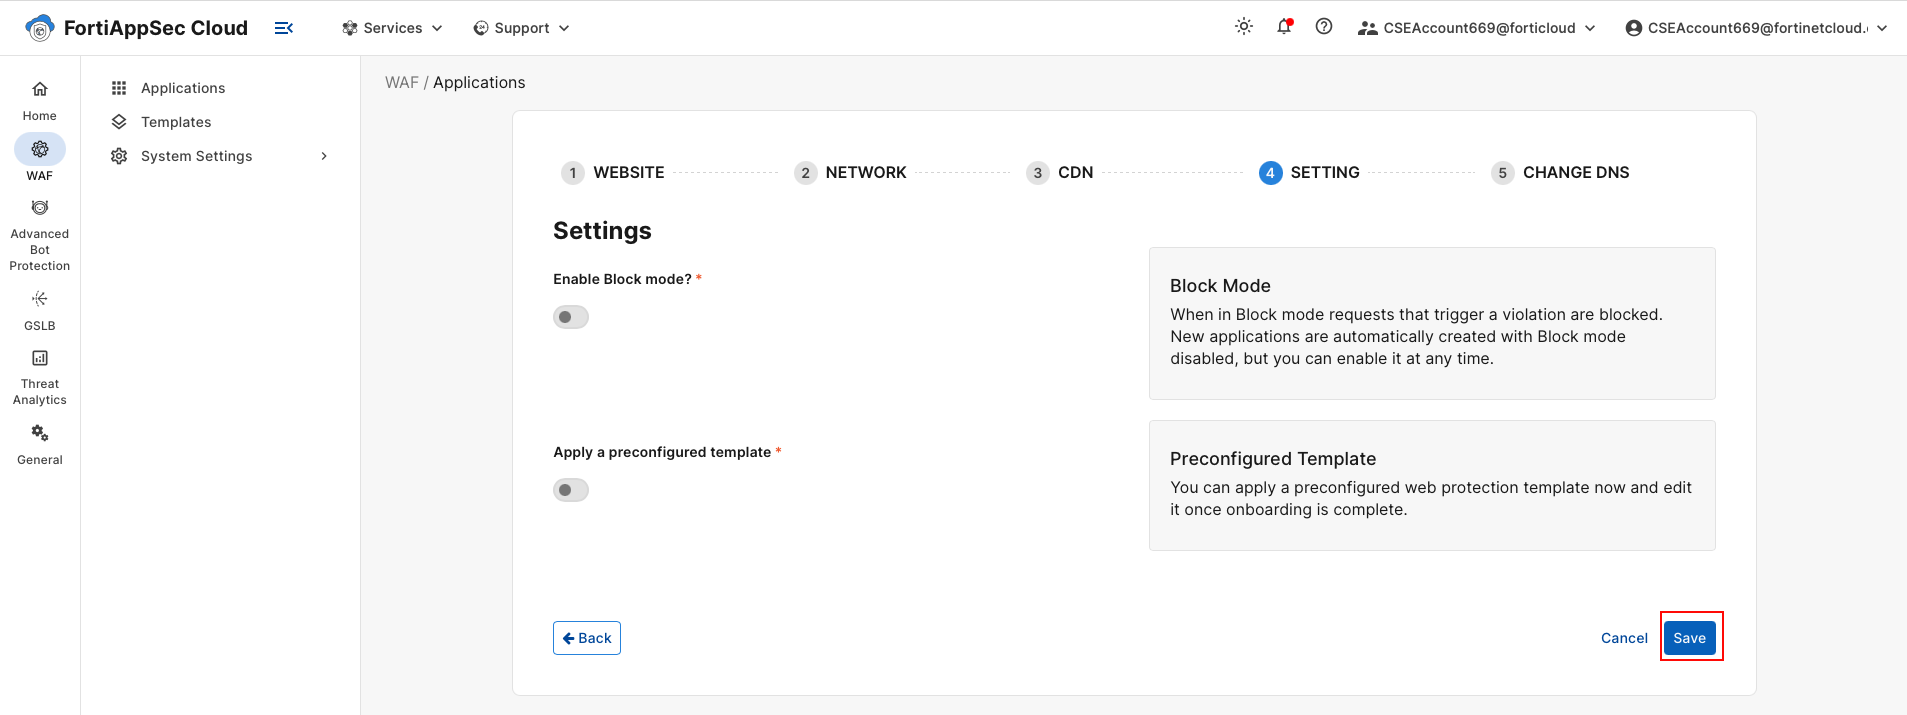
Tab 4: “SETTING”
DO NOT enable Block Mode
Select Save
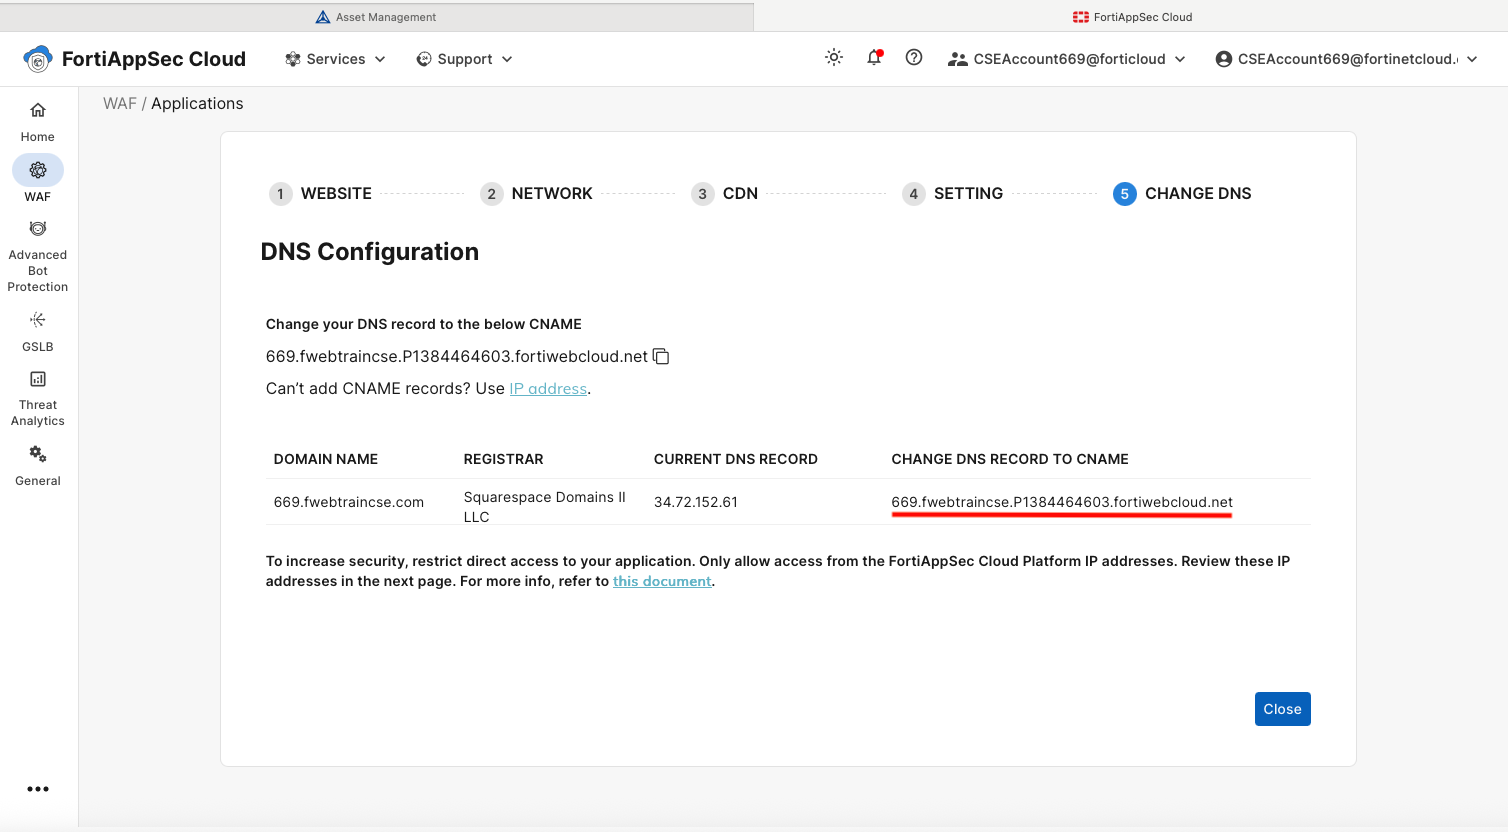
Tab 5: “CHANGE DNS”
We are presented with very important information regarding DNS settings which need to be changed in order to direct traffic to FortiAppSec Cloud. In this lab, we will not be doing this, as sometimes it can take a while for the DNS settings to propagate.
Warning
Take Note of the IPv4 addresses and CNAME for use in a later step. Before you close!
Select Close
You should now see your Application listed in FortiAppSec Cloud. Note that the DNS Status is set to Update Pending This is expected, and we will ignore it.
Note
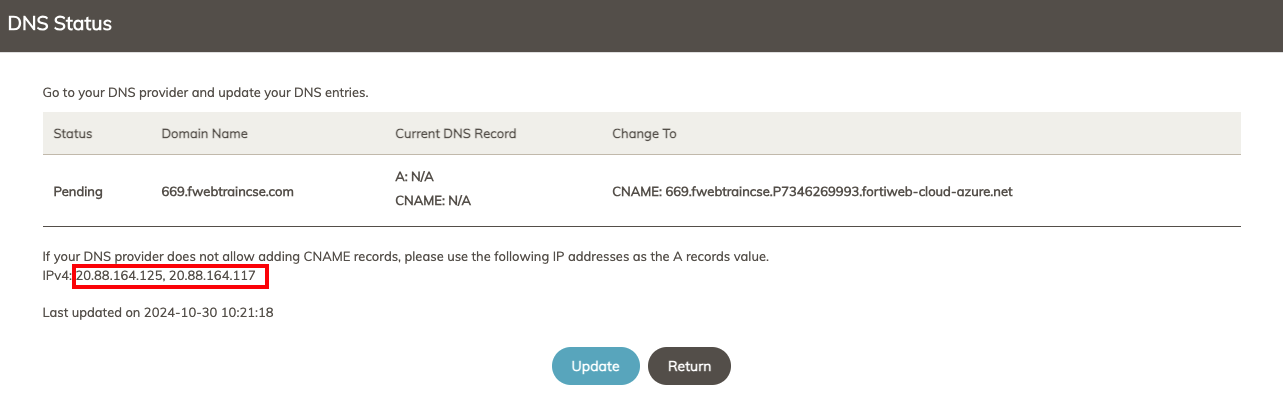
If you need to recover the application IPs or CNAME later, you can click on the app’s DNS status Update Pending to show DNS status & retrieve the IPs
Update Application DNS
Use the Form Provided below to update DNS records
Example