Task 2: Setup API Gateway
| Goal | Setup API Gateway on FortiAppSec Cloud |
| Task | Enable and Configure API Gateway and then test function using Postman |
| Verify task completion | If successful, API requests will require submission of an API Key in order to access data |
Setup API Gateway
Details
If you lose access to the FortiAppSec Console, open an Incognito browser and use the link below to log back in:
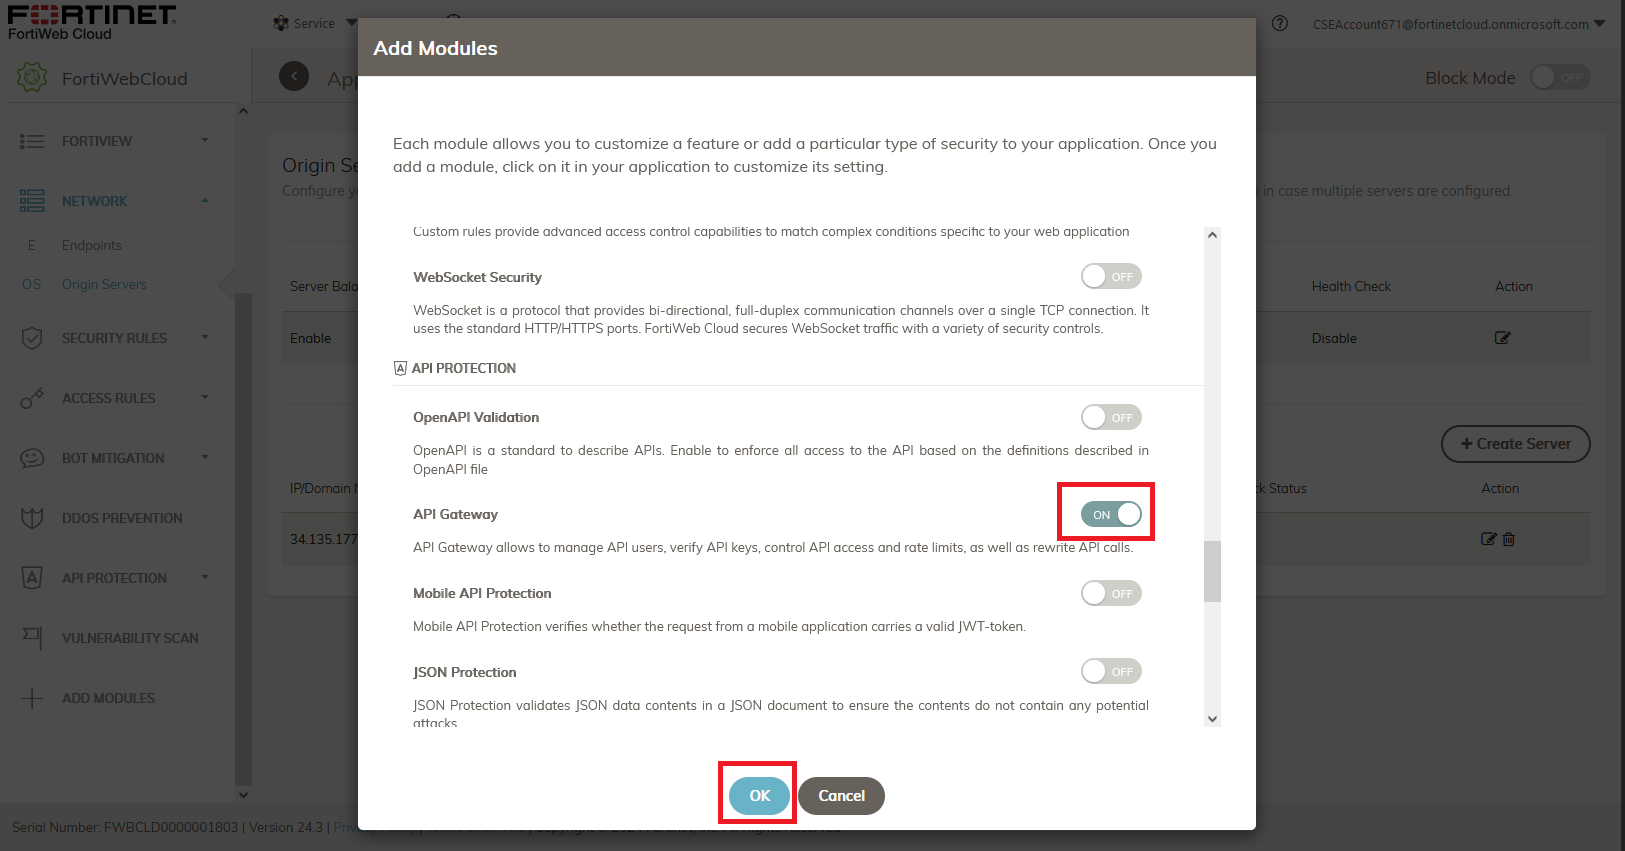
https://customersso1.fortinet.com/saml-idp/proxy/demo_sallam_okta/login/From the FortiAppSec Cloud Console select your application and in the left pane, select Waf > ADD MODULES. Scroll down and turn on API Gateway under API Protection then Click OK.
Now API PROTECTION should show up on the left side of the screen. Under API PROTECTION, select API Gateway
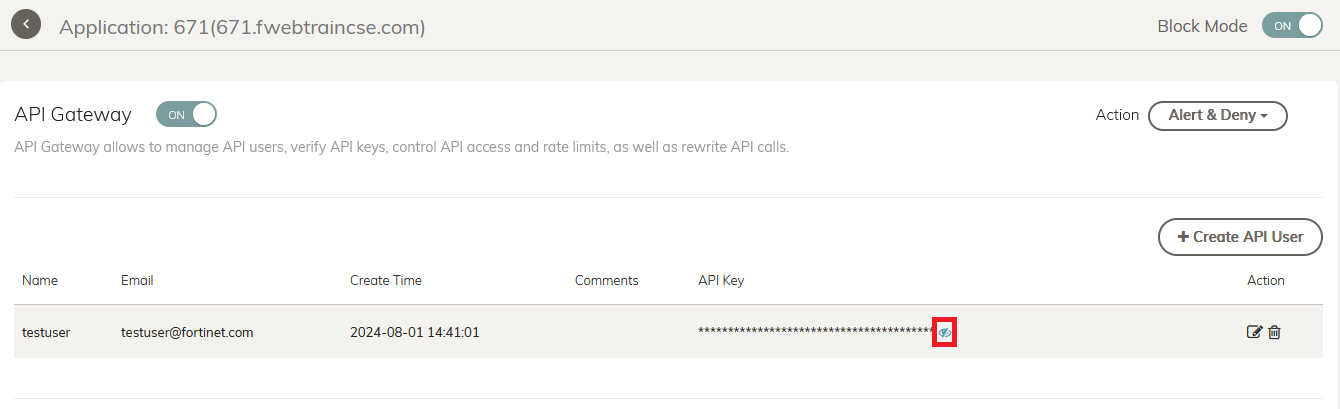
Click to Create an API User. Add
testuseras Name andtestuser@fortinet.comas Email address Then Click OK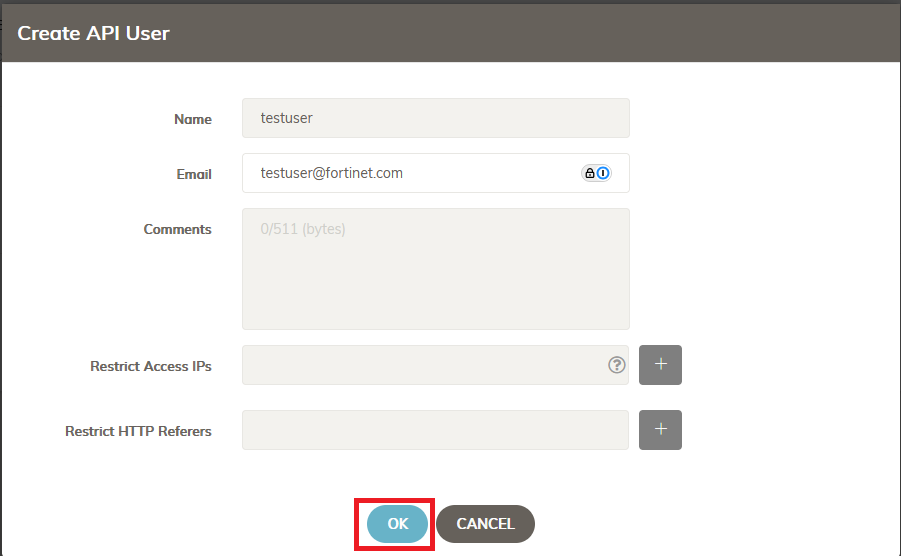
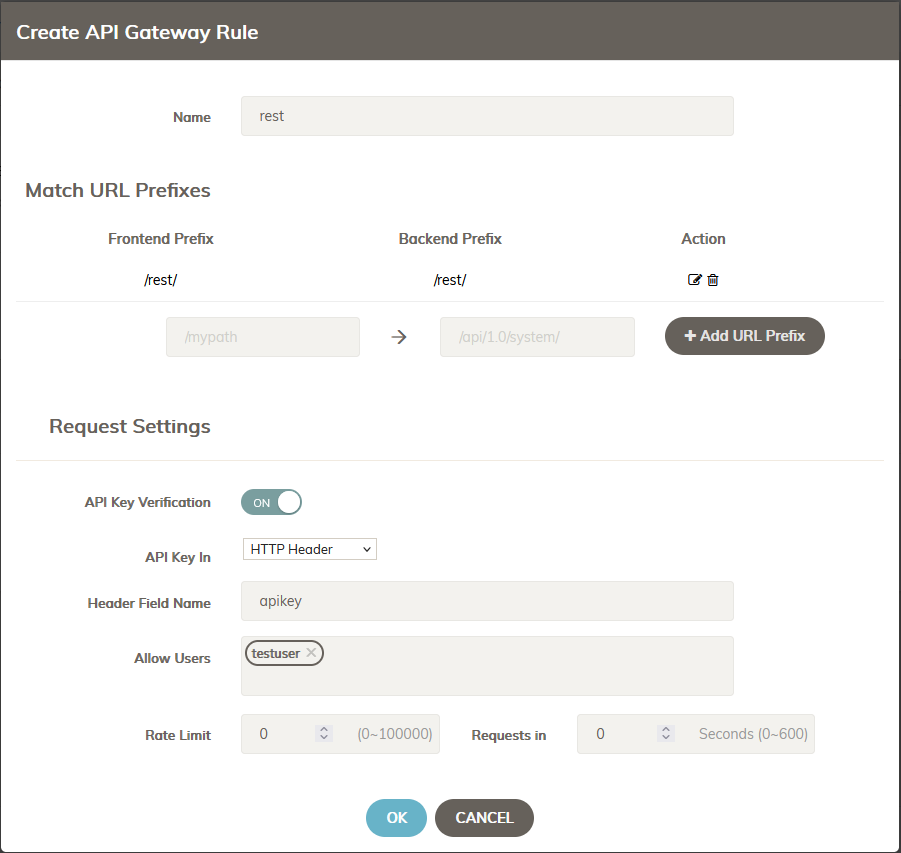
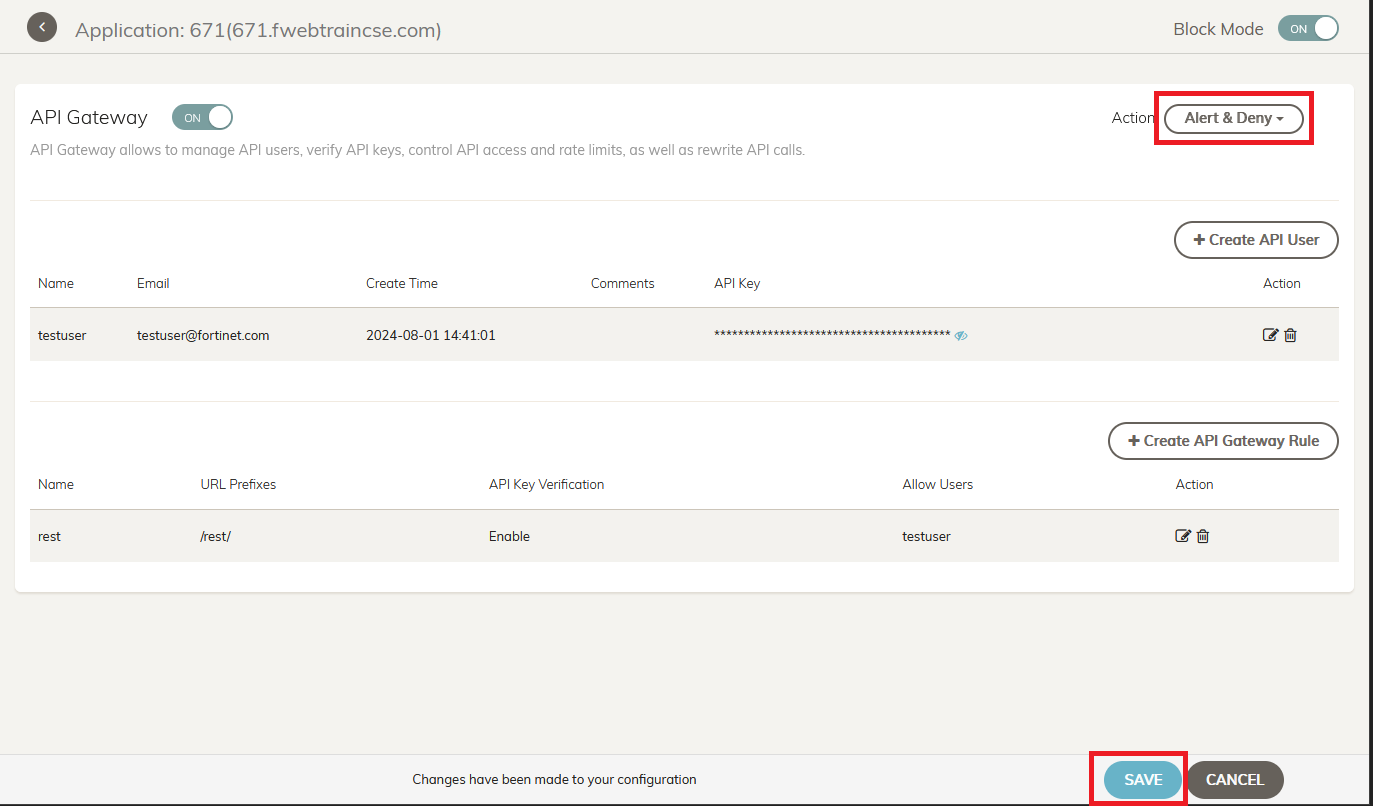
Next click Create API Gateway Rule.
- Name: choose a name such as
rest - For both “Frontend” and “Backend”, enter
/rest/then click Add URL Prefix - turn on API Key Verification
- choose HTTP Header for API Key In
- for Header Field Name enter
apikey - for Allow Users, select the user you created in step 3
- leave the Rate limits at default
- select OK
- Name: choose a name such as
You will need to click Save at the bottom right. Now you should have an API key. Click on the eye icon to display the key. Copy it and put it into a note pad.
Ensure that the action is set to Alert & Deny and then click Save
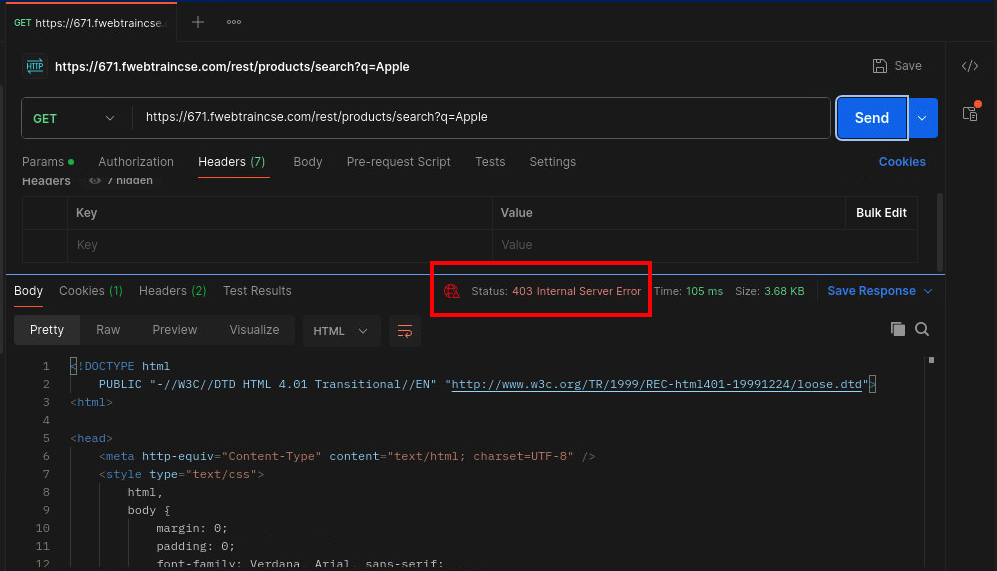
Test API gateway
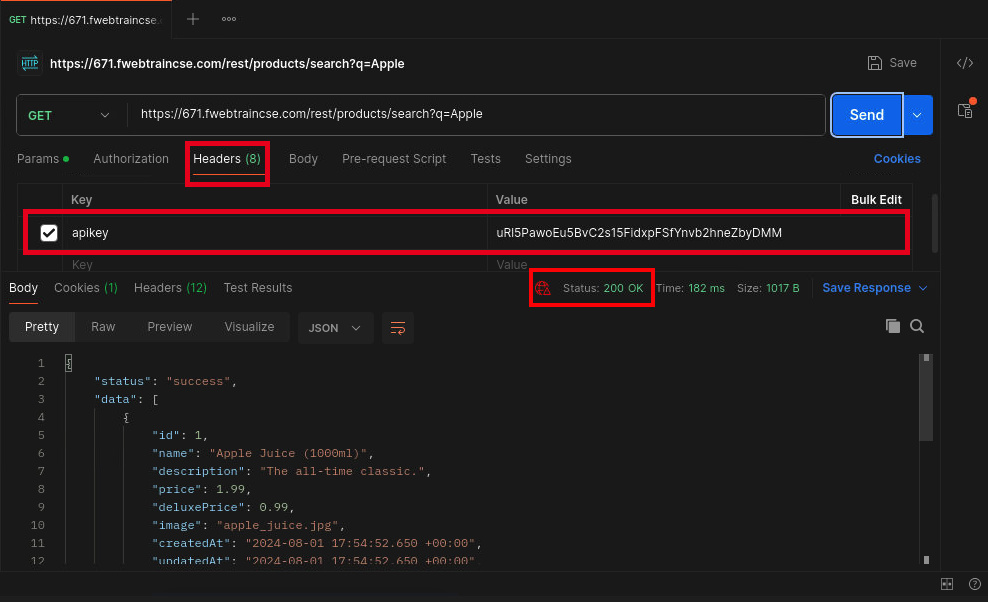
Back on Kali Desktop, In Postman, click Send again to re-test your api call. It should return status 403 and return a long error page ending with “Please contact the administrator…”
Now, let’s add a key
- select Headers under the URL bar.
- enter
apikeyfor Key - enter the previously copied key for Value
- click the empty box next to apikey to send this header
- click Send
You should see code 200 and returned data.