Configure and Test the Anomaly Detection Module
Enabling Anomaly Detection in FortiAppSec
In this section, we will enable the Anomaly Detection module, which uses machine learning to block zero-day threats and other sophisticated attacks.
This module builds a behavioral model by analyzing legitimate traffic patterns, allowing it to detect anomalies and unknown attack types.
To train the model, we will use a tool that generates a sufficient number of legitimate requests.
Note: The tool may take approximately 30 minutes to complete its run.
Step 1: Enable the Anomaly Detection Module
- From the FortiAppSec Cloud Console, select your application.
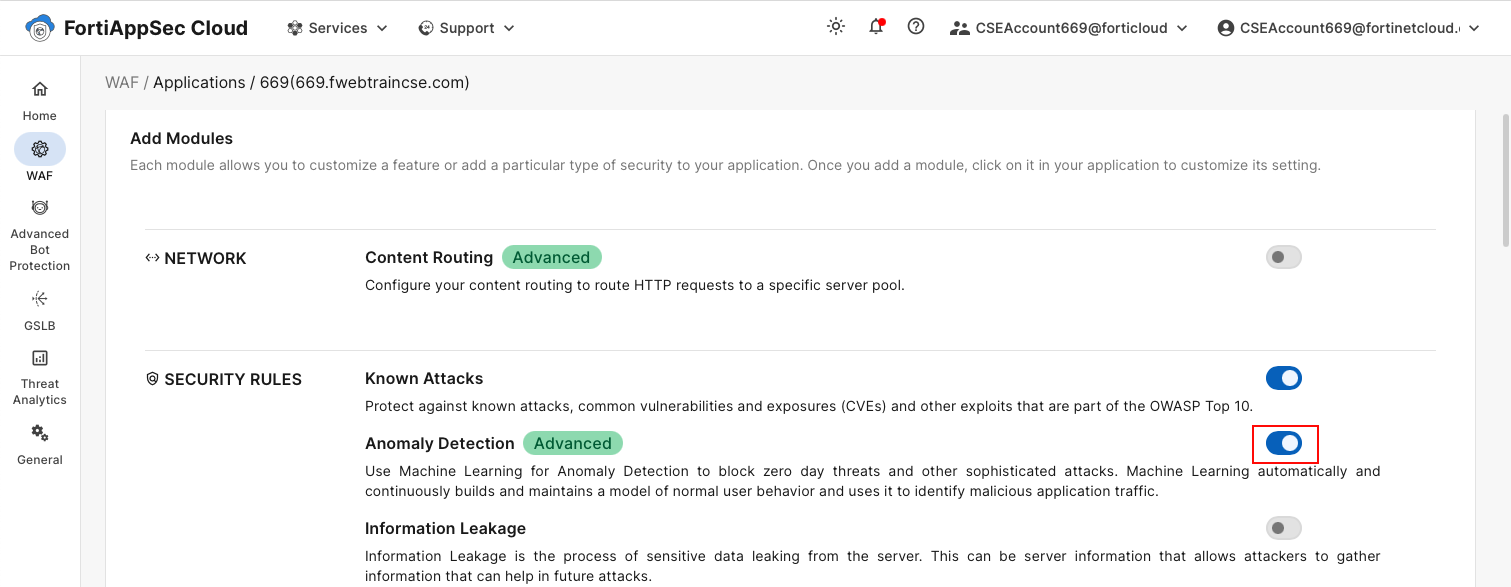
- In the left navigation pane, go to WAF > Add Modules.
- Scroll down to the Security Rules section.
- Toggle Anomaly Detection to On. Click OK.
In a production environment, both known attack detection (signature-based) and anomaly detection are used together.
For this demonstration, we will disable signature-based detection.
- From the FortiAppSec Cloud Console, select your application.
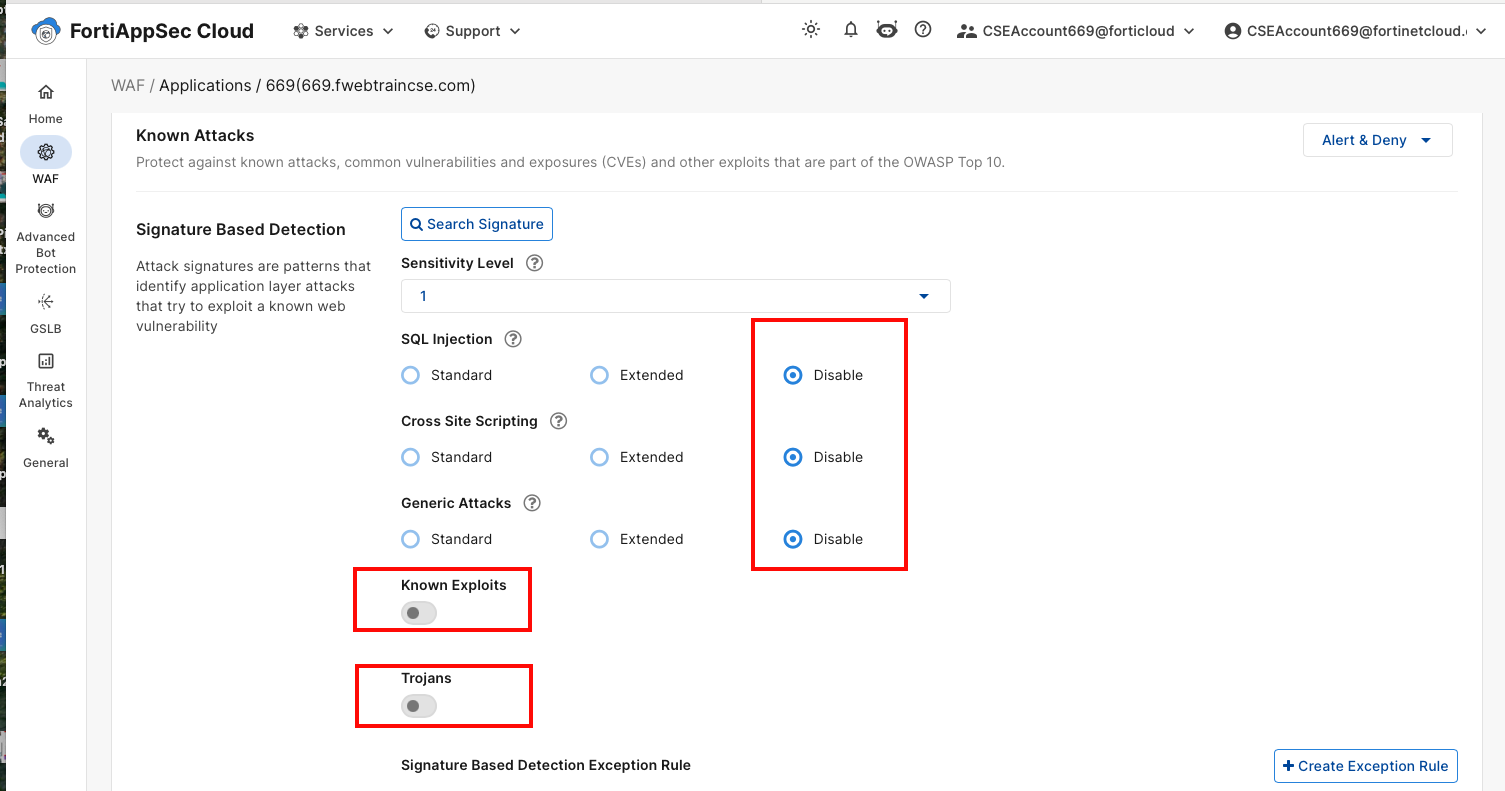
- In the left navigation pane, go to WAF > Security Rules > Known Attacks.
- In the Signature-Based Detection pane, disable the following by toggling each option:
- SQL Injection
- Cross-Site Scripting
- Generic Attacks
- Known Exploits
- Trojans
- Click Save.
Step 2: Run the Tool to Generate Legitimate Traffic
To build the anomaly detection model, you need to generate enough legitimate requests.
Open a terminal window from your Kali desktop.
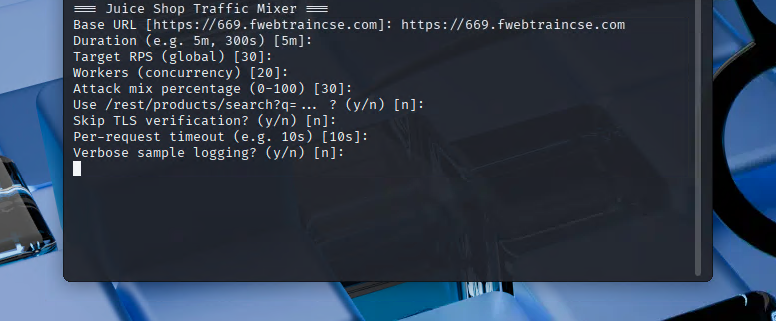
Run:ml-mixWhen prompted, enter the URL:
https://<FortiAppSecStudentID>.fwebtraincse.com
Use the following values for the remaining options:
- Duration: 30M
- Target RPS: 30
- Workers: 20
- Attack mix percentage: 0 (We are building the model only with legitimate traffic.)
- Use /rest/products/search? q= … : n
- Skip TLS verification: n
- Per- request timeout : 10s
- Verbose sample logging: y
Details
⚠️ Note: The process may take up to 30 minutes. Keep the terminal open. You will see periodic progress updates.
- While the tool is running, log into the FortiAppSec Cloud Console to monitor the model-building process.
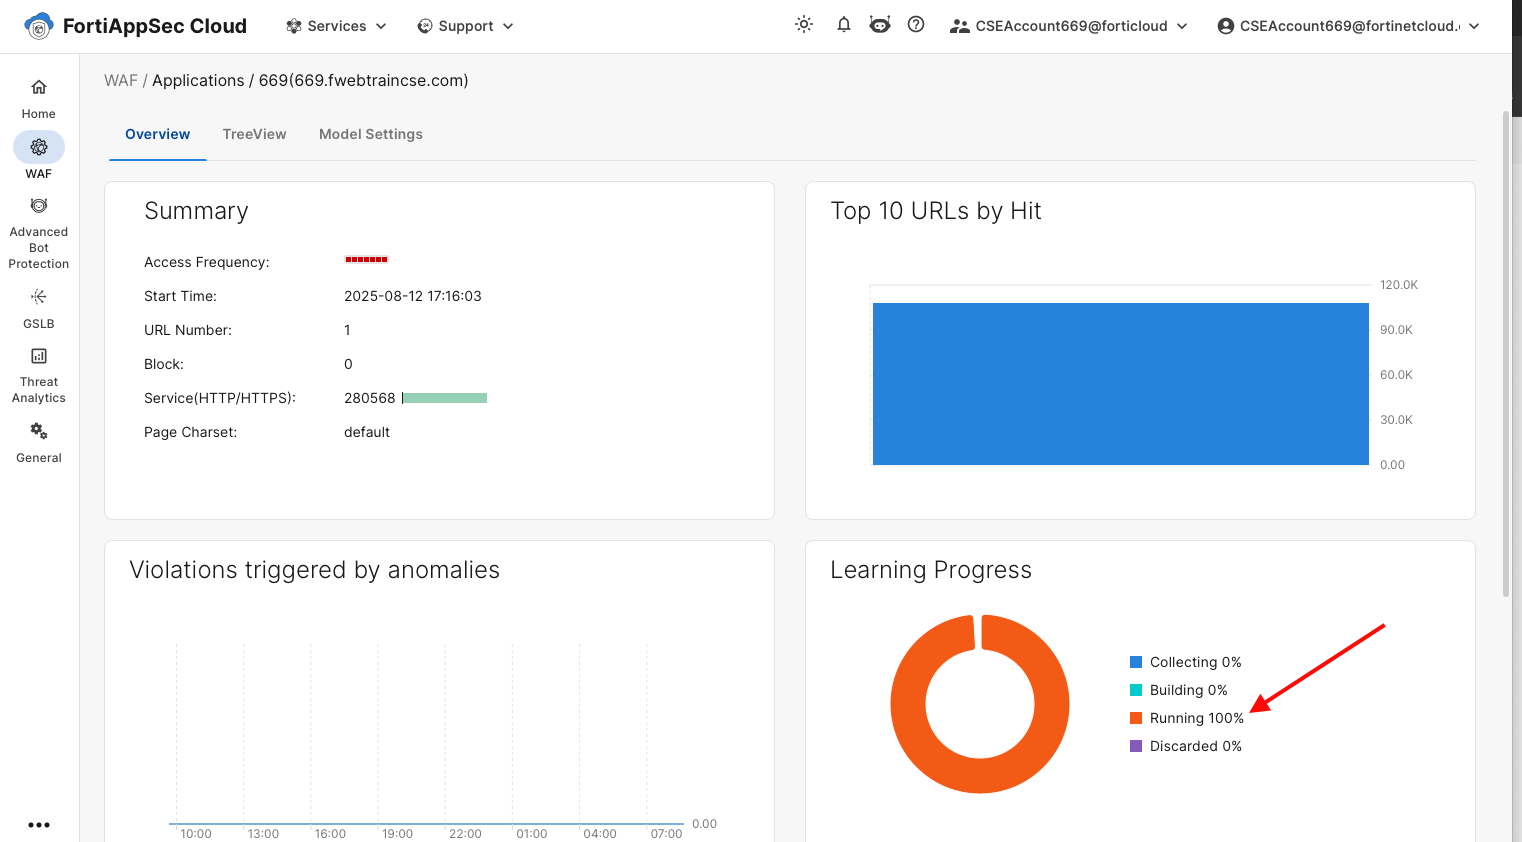
Step 3: Review the Anomaly detection module on FortiAppSec Cloud
Details
If you lose access to the FortiAppSec Console, open an Incognito browser and use the link below to log back in:
https://customersso1.fortinet.com/saml-idp/proxy/demo_sallam_okta/login/From the FortiAppSec Cloud Console, select your application.
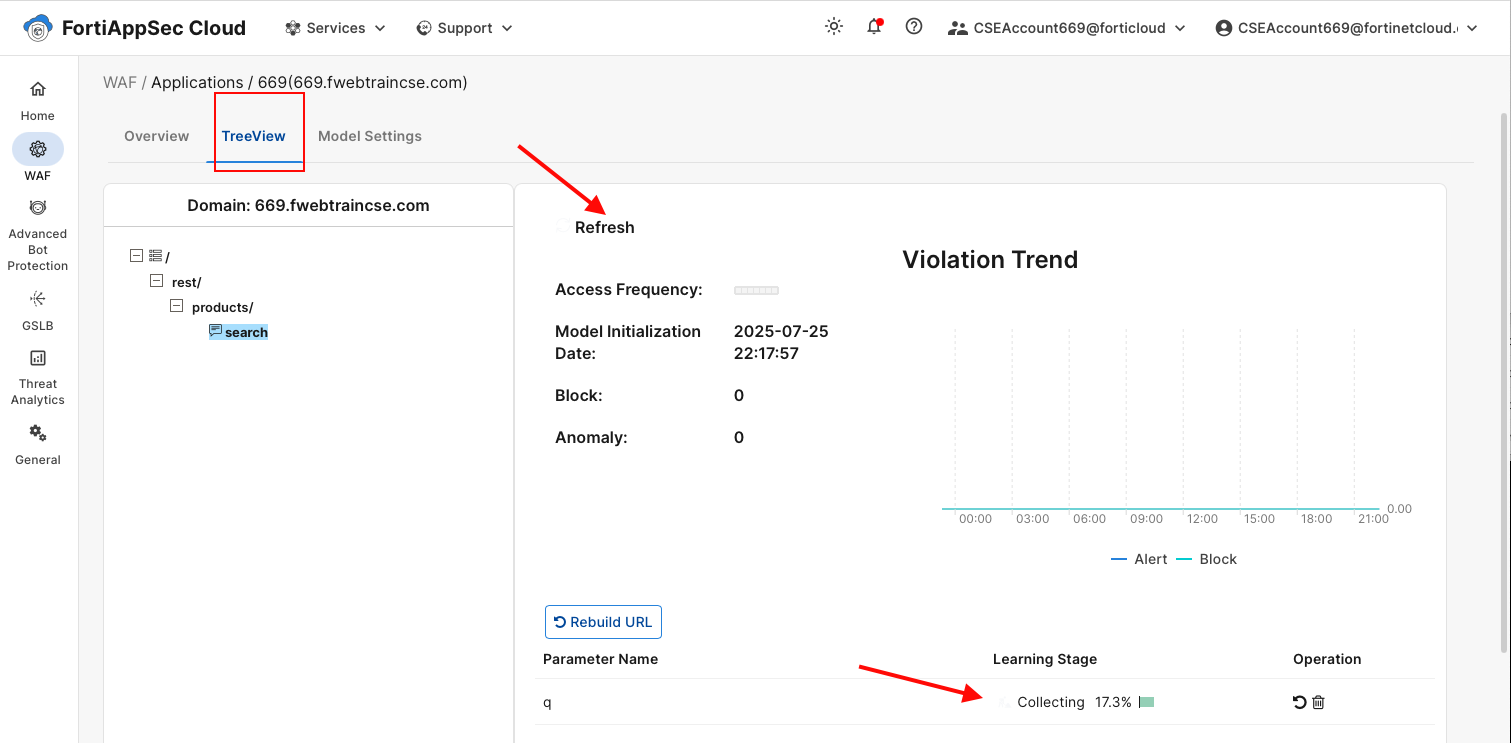
In the left navigation pane, select Waf > Security Rules > Anomaly Detection Click on the TreeView tab and drill down to the search parameter field. You will see the stages: Collecting, Building, and Running.
Warning
Building the model can take up to 30 minutes. In some cases we have found we needed to run the tool for a second time. When the tool finishes running you will get a completion message. Please do not delete once it is built. we will need it for the next exercise
When the model reaches the Running stage, you are ready to proceed with launching attacks.
Step 4: Launch Attacks
To test the model, we will run the same tool again but this time include attack traffic (SQL Injection, Command Injection, and XSS) along with legitimate requests. 1. Open a terminal window from your Kali desktop. Run:
ml-mix
When prompted, enter the URL:
https://<FortiAppSecStudentID>.fwebtraincse.com
Accept the default values for the remaining options:
- Duration: 5m ( we do not need to run the tool as long this time , just enough to trigger some log entries)
- Target 30
- Workers: 20
- Attack mix percentage: 30 ( this time we will add about 30% attack traffic to our mix)
- Use /rest/products/search? q= … : n
- Skip TLS verification: n
- Per- request timeout : 10s
- Verbose sample logging: n
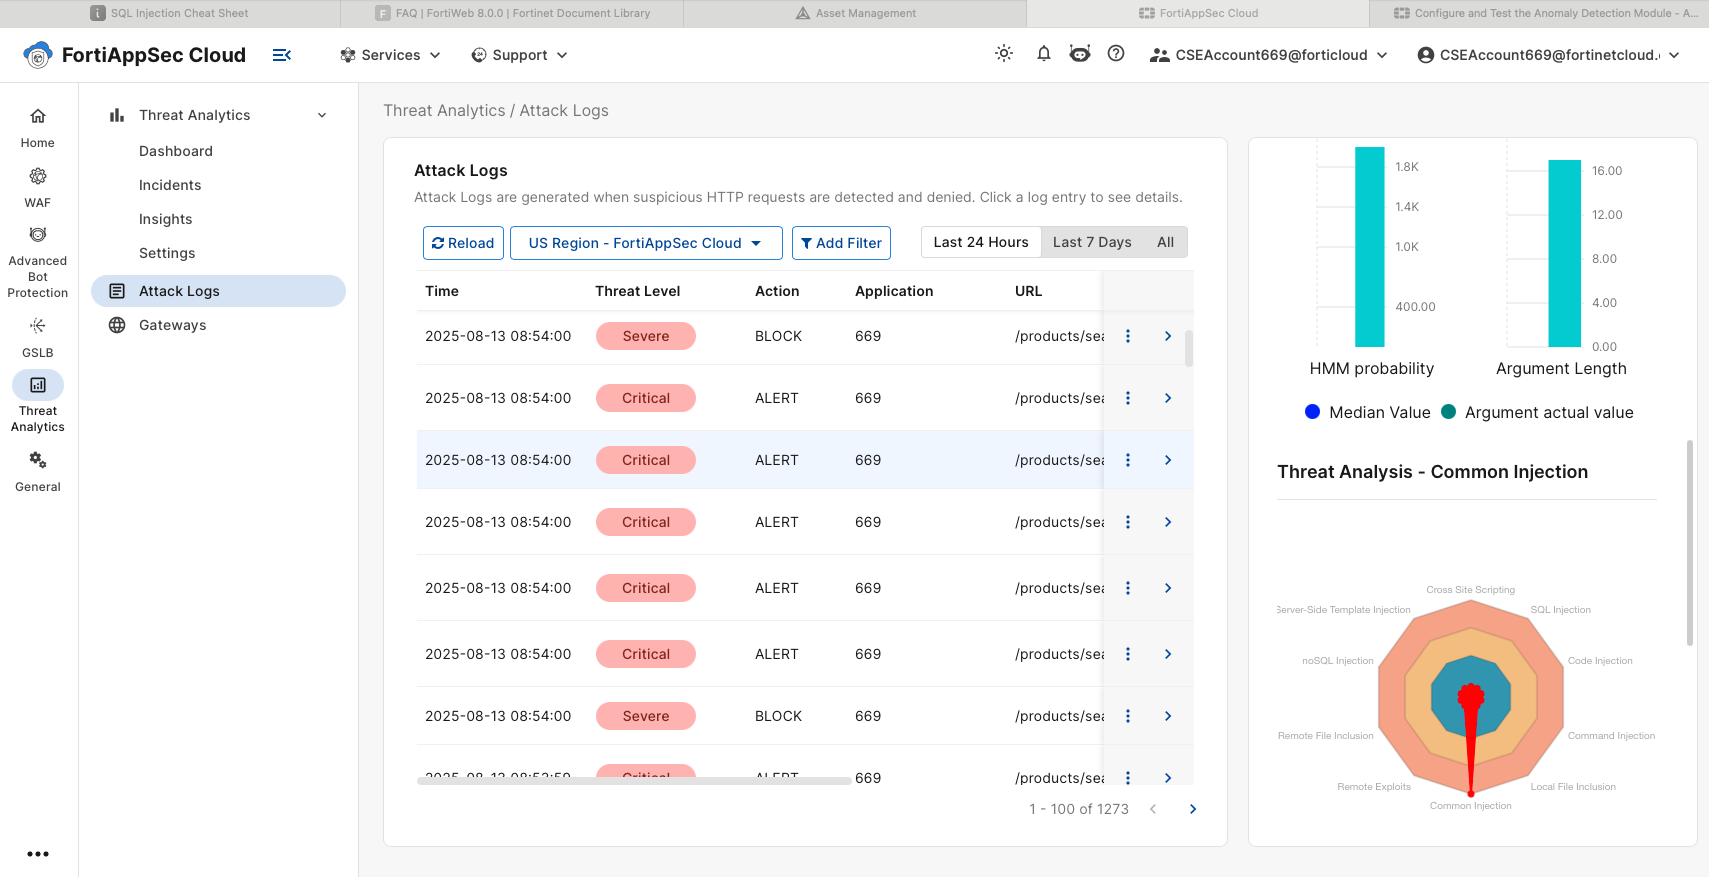
While the tool is running, log into the FortiAppSec Cloud Console and check the logs to confirm attacks are being detected and mitigated.
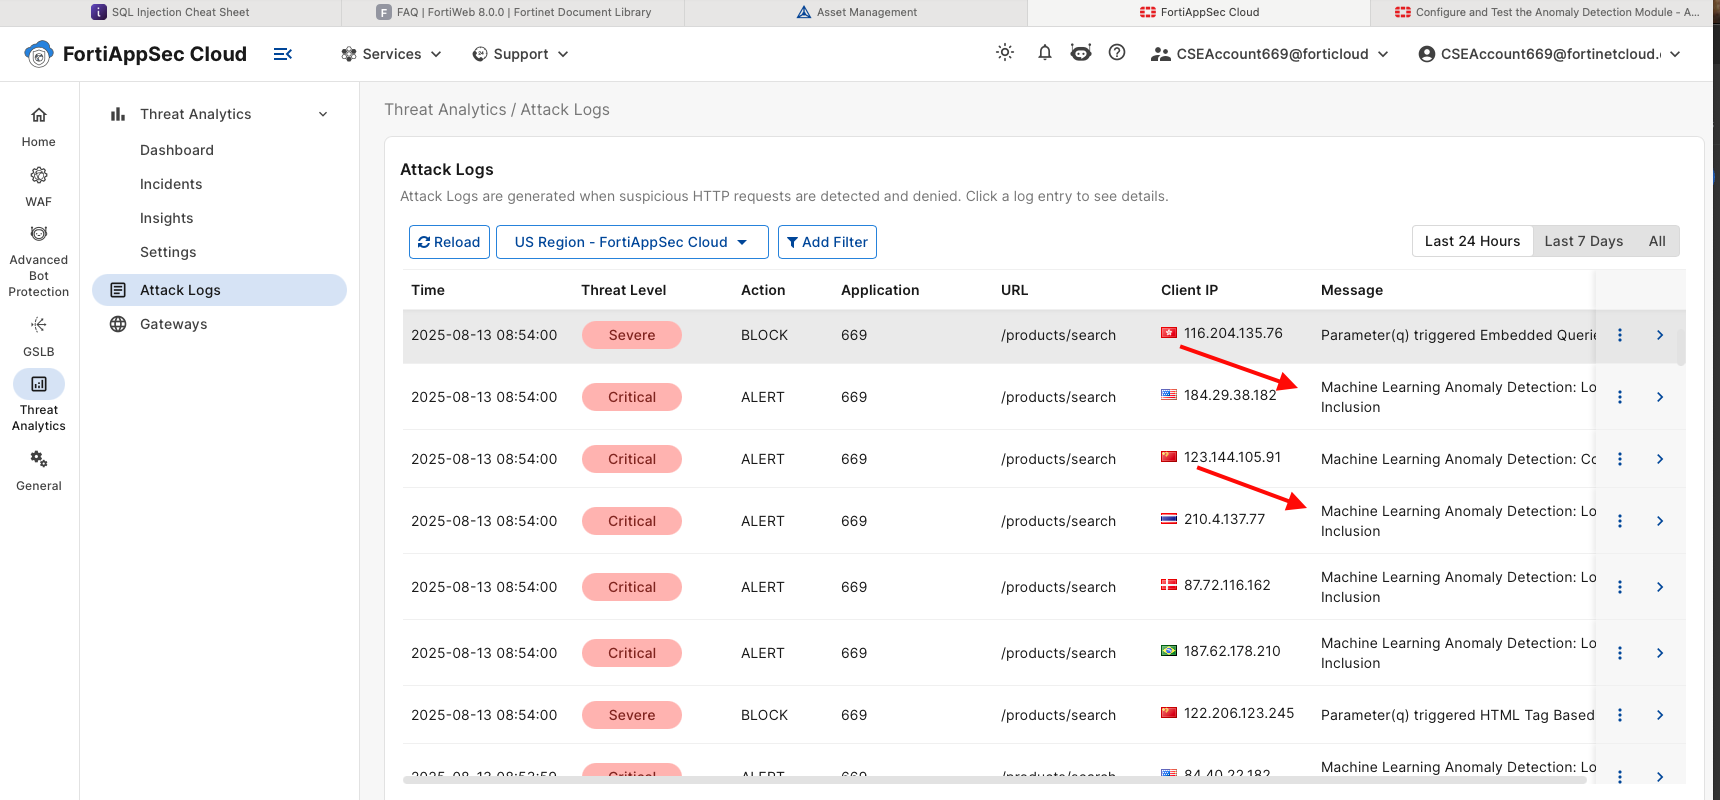
Drill down on the log entries and review the details.