Fortinet XPerts 2024

Welcome to the Kubernets(K8s) 101 Workshop

ACME is embarking on deploying a hyperscale web application.

Concerns:

  • Decoupling Applications from Infrastructure
  • Automatic Scaling
  • Seamless Upgrades
  • High Availability (HA)
  • Security
  • Cost Management
  • Performance Monitoring and Logging
  • Disaster Recovery and Data Persistence
  • Compliance and Data Sovereignty
  • Service Mesh Integration
  • Developer Productivity
  • Interoperability and Integration

Considered Alternatives:

  • Docker Compose
  • Docker Swarm
  • Apache Mesos
  • Nomad

Kubernetes Achievements:

  • Decoupling: Application from Infrastructure
  • Scaling: Automatic and Efficient
  • Upgrades: Seamless with Zero Downtime
  • HA: Robust Support for High Availability
  • Security: Enhanced with RBAC, Network Policies, PSP
  • Resource Utilization: Optimized and Efficient
  • Monitoring: Integration with Tools like Prometheus
  • Data Persistence: Support for StatefulSets and Persistent Volumes
  • Flexibility: Across Various Environments
  • Service Mesh: Easy Integration with Istio/Envoy
  • Developer Productivity: Automation of Deployment and Management
  • Integration: With CI/CD, Databases, Monitoring Tools, etc.

Non-Kubernetes solutions face challenges with scalability, automation, complexity in management, cost-effectiveness at scale, and lack of ecosystem support.

This workshop focuses on deploying, scaling, and upgrading applications with Kubernetes, addressing these challenges by leveraging Kubernetes’ comprehensive and extensible platform, designed for efficient container orchestration.

Version:
Last updated: Thu, May 22, 2025 22:18:30 UTC
Copyright© 2025 Fortinet, Inc. All rights reserved. Fortinet®, FortiGate®, FortiCare® and FortiGuard®, and certain other marks are registered trademarks of Fortinet, Inc., and other Fortinet names herein may also be registered and/or common law trademarks of Fortinet. All other product or company names may be trademarks of their respective owners. Performance and other metrics contained herein were attained in internal lab tests under ideal conditions, and actual performance and other results may vary. Network variables, different network environments and other conditions may affect performance results. Nothing herein represents any binding commitment by Fortinet, and Fortinet disclaims all warranties, whether express or implied, except to the extent Fortinet enters a binding written contract, signed by Fortinet’s General Counsel, with a purchaser that expressly warrants that the identified product will perform according to certain expressly-identified performance metrics and, in such event, only the specific performance metrics expressly identified in such binding written contract shall be binding on Fortinet. For absolute clarity, any such warranty will be limited to performance in the same ideal conditions as in Fortinet’s internal lab tests. Fortinet disclaims in full any covenants, representations, and guarantees pursuant hereto, whether express or implied. Fortinet reserves the right to change, modify, transfer, or otherwise revise this publication without notice, and the most current version of the publication shall be applicable.

Subsections of Fortinet XPerts 2024

Kubernetes TECWorkshop

Welcome to K8s 101 workshop

About Kubernetes

Kubernetes is an open-source container orchestration platform that automates the deployment, scaling, and management of containerized applications. Originally developed by Google and now maintained by the Cloud Native Computing Foundation (CNCF), Kubernetes has become the de facto standard for managing containerized workloads in production environments. K8s is short name of Kubernetes.

Workshop Objectives

In this workshop, you will:

  • Understand why containers are important, and how they fit into a microservices architecture orchestrated by K8s
  • Build a Kubernetes cluster on a Virtual Machine (VM)in Azure.
  • Gain a fundamental understanding of Kubernetes concepts.
  • Learn how to deploy, manage, and scale applications using Kubernetes.
  • Explore key Kubernetes resources such as Pods, Deployments, Services, and more.
  • Gain hands-on experience with practical examples.

Building a K8s cluster from scratch vs using Managed Services like AKS,EKS,GKE?

  • Building a self-managed cluster instead of relying on managed services for learning Kubernetes offers beginners hands-on experience, deeper understanding of core concepts, and greater control over configurations.

  • Building a cluster offers deeper understanding of core Kubernetes components such as pods, nodes, and controllers.

  • In production environments, many organizations use managed Kubernetes services provided by major cloud providers.

  • These services—Amazon Elastic Kubernetes Service (EKS), Azure Kubernetes Service (AKS), and Google Kubernetes Engine (GKE)—are managed Kubernetes offerings from AWS, Azure, and Google Cloud. They provide features such as automated updates, scaling, monitoring, and seamless integration with other cloud services.

  • However, the choice often depends on factors such as existing cloud provider relationships, specific feature requirements, pricing, and the level of control and customization desired by the organization.

In this workshop, we begin with Azure Managed Kubernetes (AKS) for an easy start, followed by a deep dive into self-managed Kubernetes with kubeadm, covering the installation of every component.

Formatting Conventions

  • Yellow Highlighted Text: Indicates that is a command lines you can execute on shell.
  • Black Box: Contains bash commands intended for you to copy and paste directly into your terminal for your task.
  • Grey Box: Displays the output from executed commands. The text above each box explains the command’s purpose and intent.

Unless explicitly stated otherwise, all CLI commands should be executed directly in the Azure Cloud Shell.

Workshop Logistics

1 Workshop Quickstart and Setup

  • 1.1 Setup Azure Cloud Shell
  • 1.2 Use Terraform to initialize two VMs for a self-managed Kubernetes installation

2 K8s Learning

  • 2.1 Introduction to Kubernetes and its fundamental workings
  • 2.2 Quickstart with Azure AKS to cover basic Kubernetes concepts

3 Self-Managed K8s Workshop Hands-on

  • 3.1 Task 1 : Install a self-managed Kubernetes cluster using kubeadm
  • 3.2 Task 2 : Deploy and Scale application
  • 3.3 K8s in Depth: Deep dive into Kubernetes, including application deployment, upgrades, and exposure

Guidance for Participants:

  • Beginners:

If you’re new to Kubernetes, you are encouraged to follow the workshop through sections 1, 2, 3.1, and 3.2. then take 3.3 with extend hours.

  • Experienced Users:

If you have prior Kubernetes experience, you may skip section 2 and progress directly from section 1 to section 3.

Subsections of Workshop Logistics

Quickstart

Provisioning the Azure environment (40min)

Provision your Azure Environment, enter your Email address and click Provision

Warning

After submitting, this page will return with a blank email address box and no other indications. Provisioning can take several minutes. \*\*\* __PLEASE DO NOT SUBMIT MULTIPLE TIMES__ \*\*\*

When provisioning is complete, one of the following will happen.

  • You will receive an email with Azure environment credentials. Use those credentials for this environment, even if you have your own.
  • You will receive and email indicating that there are no environments available to utilize. In this case please try again at a later date.
  • You will receive an email indicating that the supplied email address is from an unsupported domain.
  • No email received due to an unexpected error. You can try again or notify the Azure CSE team.

Tasks

  • Setup Azure Cloud Shell
  • Run Terraform
  • Verify Terraform

Subsections of Quickstart

Task 1 - Setup Azure CloudShell

1. Setup your AzureCloud Shell

  • Login to Azure Cloud Portal https://portal.azure.com/ with the provided login/password

    cloudshell1 cloudshell1 cloudshell2 cloudshell2

  • Click the link “Skip for now (14 days until this is required)” do not click the “Next” button

    cloudshell3 cloudshell3

  • Click the “Next” button

    cloudshell4 cloudshell4

  • Click on Cloud Shell icon on the Top Right side of the portal

    cloudshell5 cloudshell5

  • Select Bash

    cloudshell6 cloudshell6

  • Click on Mount Storage Account

    cloudshell7 cloudshell7

  • Select

    • Storage Account Subscription - Internal-Training
    • Apply
  • Click Select existing Storage account, Click Next

    cloudshell8 cloudshell8

  • in Select Storage account Step,

    • Subscription: Internal-Training
    • Resource Group: Select the Resource group from the drop down: K8sXX-K8s101-workshop
    • Storage Account: Use existing storage account from dropdown.
    • File share: Use cloudshellshare
    • Click Select

    cloudshell9 cloudshell9

Warning

Please make sure to use the existing ones. you wont be able to create any Resource Group or Storage account

  • After 1-2 minutes, You should now have access to Azure Cloud Shell console

    cloudshell10 cloudshell10

Task 2 - Run Terraform

Task 2 - Launch resources using Terraform

All the components required for Lab are deployed through terraform.

Lab Architecture:

lab001 lab001

Perform the following steps in your Cloudshell console to create your environment.

  1. Clone the Github repo git clone https://github.com/FortinetCloudCSE/k8s-101-workshop.git
  2. Change directory to the cd k8s-101-workshop/terraform folder
  3. Run terraform init
git clone https://github.com/FortinetCloudCSE/k8s-101-workshop.git
cd k8s-101-workshop/terraform
terraform init

lab11 lab11

  1. Run the following command to apply it

    terraform apply -var="username=$(whoami)" --auto-approve
    IF THE COMMAND ABOVE RESULTS IN AN ERROR

    You can manually specify your username (found in your Azure Account email) in the command
    If your Workshop Azure account login is se31@ftntxxxxx.onmicrosoft.com, your username is se31, and the command to enter is:

    terraform apply  -var='username=se31' --auto-approve

lab12 lab12

  1. Terraform deployment takes atleast 10-15 min to complete.

lab13 lab13

  1. Once Terraform is complete you should see the output. Please copy the output to notepad.

output output

  1. To print the node VM’s login password, you can run this command

    terraform output -raw linuxvm_password

Kubernetes Overview

What is Kubernetes, and Why Kubernetes

Kubernetes is a powerful platform designed to automate deploying, scaling, and operating application containers, making it an excellent choice for managing microservices-based applications that need to scale from a few users to millions of internet users while ensuring high availability. Here’s how Kubernetes addresses these specific requirements:

Info

A microservice is like a small, specialized team in a company. Each team focuses on a specific task, such as marketing or customer support, and works independently. Similarly, in software, a microservice is a small, self-contained component that handles a specific function of an application, like user authentication or order processing.

Scaling from Few Users to Millions

  • Horizontal Pod Autoscaling (HPA): Kubernetes can automatically adjust the number of running pods (where you container is running) of your microservices based on the actual demand observed. As the number of users grows, HPA increases the number of pods to maintain performance and reduce latency. Conversely, it reduces the number of pods during low demand periods to save resources.

  • Kubernetes Cluster Autoscaler (KCA): The Kubernetes Cluster Autoscaler is an automated component that adjusts the number of nodes (virtual machines) in a Kubernetes cluster to meet the current demand for application resources. It works closely with cloud providers to dynamically scale the cluster’s infrastructure by adding nodes when there’s insufficient capacity for application workloads (scaling out/up) and removing nodes when they’re underutilized (scaling in/down). This ensures efficient resource use and maintains application performance as user demand changes, enabling seamless scalability from a few users to millions without manual intervention.

  • HPA (Horizontal Pod Autoscaler) scales your pods across existing nodes, while KCA (Kubernetes Cluster Autoscaler) scales the nodes themselves. Together, HPA and KCA enable Kubernetes to efficiently scale to meet the demands of millions of users, optimizing cost management.

  • Resource Management: Kubernetes efficiently manages the computing, networking, and storage resources that your microservices need to run. It ensures that each microservice has the resources it requires and is isolated from other services to prevent one service from over-consuming resources at the expense of others

Kubernetes vs. Docker

While both Kubernetes and Docker are centered around containerization, they serve different aspects of application development and deployment:

Docker is primarily a container runtime and toolset that makes it easy to build, package, and run applications in containers. Docker containers encapsulate an application with its dependencies, making it easy to run across different computing environments consistently.

Kubernetes, on the other hand, is a container orchestration platform that manages containers running across multiple hosts. It provides the infrastructure for deploying, scaling, and managing containerized applications. Kubernetes works with Docker and other container runtimes (like containerd and CRI-O) to manage the lifecycle of containers in a more extensive, distributed environment.

In essence, while Docker focuses on the individual container and its lifecycle, Kubernetes focuses on managing clusters of containers, including scaling, healing, and updating them with minimal downtime. This makes Kubernetes particularly well-suited for microservices-based applications that need to scale dynamically and require high availability, as it automates many of the manual processes involved in deploying and scaling containerized applications.

For applications expected to grow from a few users to millions and require constant availability, Kubernetes provides a robust, scalable platform that can adapt to changing demands, manage deployments and updates seamlessly, and ensure that services are always available to end-users.

Kubernetes architecture

Kubernetes is a powerful platform designed to manage containerized applications across a cluster of machines, providing tools for deploying applications, scaling them as necessary, and managing changes to existing containerized applications. Its architecture is designed to be highly modular, distributing responsibilities across various components that work together to form a robust system. Here’s an overview of the key components within the Kubernetes architecture, using the example of autoscaling a microservice to illustrate their roles:

In the diagram above, a Node can be any platform capable of running your Pod, such as a bare metal machine, an IoT edge device, a cloud-based virtual machine, and more."

Kubernetes Master (Control-Plane) Components

  • Kubernetes API Server (kube-apiserver):

This is the front end of the Kubernetes control plane, handling REST requests and updating objects in the etcd database with the desired state. For example, when scaling a microservice, a request to update the number of replicas in a Deployment would be sent to the API Server.

  • Etcd:

A consistent and highly-available key-value store used as Kubernetes’ backing store for all cluster data. It holds the actual state of the cluster, including the number of replicas for a scaled service.

  • Kube-Scheduler (kube-scheduler):

This component watches for newly created Pods with no assigned node and selects a node for them to run on based on various scheduling criteria. In the autoscaling scenario, once the desired number of replicas increases, the Scheduler decides on which nodes the additional Pods should be created, taking into account the resources available on each node.

  • Controller Manager (kube-controller-manager):

Runs controller processes, which are background tasks that handle routine tasks in the cluster. The Replication Controller ensures the number of Pods matches the desired state specified in the etcd for a scaled service. If a Pod crashes, the Controller Manager works to bring the system back to the desired state.

Kubernetes Worker Node Components

  • Kubelet: An agent that runs on each node in the cluster, ensuring that containers are running in a Pod. The Kubelet takes a set of PodSpecs and ensures that the containers described in those PodSpecs are running and healthy. When autoscaling a microservice, the Kubelet on each node starts the containers for the new Pods assigned to its node.

  • Kube-Proxy (kube-proxy): Maintains network rules on nodes, allowing network communication to your Pods from network sessions inside or outside of your cluster. It ensures that each Pod gets its IP address and provides load balancing to distribute traffic to the Pods of a scaled service.

  • Container Runtime Interface (CRI): Enables Kubernetes to use different container runtimes, like Docker, containerd, or any other implementation that matches the CRI. The runtime is responsible for running the containers as part of the Pods. common CRI are cri-o, containerd and docker. Kubernetes is deprecating Docker as a container runtime after v1.20.

  • Container Network Interface (CNI) Plugins: Provide the networking layer for Pods, enabling connectivity between Pod networks within the cluster. This is crucial for service discovery and allowing microservices to communicate with each other across multiple nodes. common CNI like Calico , Cilium , Flannel etc., Managed Kubernetes like EKS, AKS, and GKE often has it’s own CNI which often optimized for cloud networking.

  • Container Storage Interface (CSI) Plugins: Allow Kubernetes to interface with a wide range of storage systems, making it possible to use persistent storage for stateful applications in the cluster.

Manufacturing Analogy to Kubernetes

Below let’s summarize with a comparsion between Kubernetes components and a manufacturing environment analogy.

Kubernetes ComponentManufacturing AnalogyDescription
Master NodeCentral Command CenterCoordinates the activities within the Kubernetes cluster, overseeing operations and making critical decisions, similar to how a command center manages a manufacturing facility’s operations.
Worker NodeFactoryRuns the containers and manages workloads, akin to a factory where products are manufactured.
API ServerDesign HouseActs as the central management entity for the cluster, similar to how a design house plans and stores blueprints. It processes all REST requests and updates the state of the cluster.
ContainerRobot MachineRepresents a single, focused task or application, similar to a robot machine designed for a specific manufacturing process.
KubeletSupervisorManages the containers on a node, ensuring they are running as expected, much like a supervisor overseeing factory operations.
PodManufacturing CellThe smallest deployable unit in Kubernetes, comparable to a manufacturing cell where a group of machines work together on a task.
Controller ManagerProduction ManagerOversees and regulates the state of the cluster, like a production manager ensuring manufacturing goals are met.
SchedulerPlannerDecides on which node a pod should run, optimizing resource use, similar to a planner scheduling manufacturing processes for efficiency.
etcdBlueprint StorageA key-value store for cluster data, acting as the single source of truth, analogous to the secure storage and management of blueprints.
Container RuntimeUtility InfrastructureProvides the necessary environment and tools to run containers, akin to the utility infrastructure (electricity, water, gas) that powers machinery in a factory.
Container Network Interface (CNI)Factory’s Internal Transportation SystemEnsures that network traffic can be routed appropriately between containers, nodes, and external services, just like a factory’s transportation system moves materials and products efficiently between different sections.

Different Kubernetes distribution

  • Self-Managed Kubernetes: Self-Managed Kubernetes distributions like Minikube, MicroK8s, K3s/K3d, and OpenShift give users full control over their Kubernetes environments, suitable for a range of scenarios from development to enterprise production.

  • Cloud-Managed Kubernetes: Cloud-managed Kubernetes services, such as Azure Kubernetes Service (AKS), Google Kubernetes Engine (GKE), and Amazon Elastic Kubernetes Service (EKS), simplify the deployment, management, and scaling of Kubernetes clusters. These services abstract away the complexity of the Kubernetes control plane (master node), handling its provisioning, setup, scaling, and maintenance automatically.

By managing the control plane, these services take away the operational overhead of running a Kubernetes cluster. Users don’t need to worry about the intricacies of setting up and maintaining Kubernetes masters, updating them, or managing their availability and scalability. This abstraction allows developers and operations teams to focus on deploying and managing their applications within Kubernetes, leveraging the powerful orchestration capabilities of Kubernetes without the need to manage its underlying infrastructure.

Choosing between self-managed and cloud-managed Kubernetes depends on an organization’s specific needs, expertise, and whether they prefer the control and flexibility of managing their own environment or the convenience and integration of a cloud-managed service.

Subsections of Kubernetes Overview

Walk Through K8s Basic Concept with AKS

In this chapter, we delve into Kubernetes fundamentals using a managed AKS cluster. You’re set to begin right from the Azure Shell, leveraging the az aks command to streamline cluster setup without navigating through complex installation steps. Our focus areas include Pods, Labels, Deployments, Replicas, and Namespaces.

Quick AKS Cluster Setup

We’ll kick off by deploying a managed AKS cluster featuring a single worker node. This hands-on approach introduces you to Kubernetes essentials efficiently, with the setup process completing in about 5 minutes."

In your Azure Cloud Shell, click the ‘copy to clipboard’ icon at the top right corner to copy the command. Then, paste it into the terminal and press enter to execute.

Below script will create a managed azure K8s (AKS) with one worker node, also update kubeconfig for access AKS.

Create AKS
  1. Create AKS cluster
# Save and execute script immediately
cat << 'EOF' | tee aks.sh
#!/bin/bash -xe
# Generate public key if it doesn't exist
[ ! -f ~/.ssh/id_rsa ] && ssh-keygen -q -N "" -f ~/.ssh/id_rsa
clustername=$(whoami)

# Get the resource group name
userPrincipalName=$(az account show --query user.name -o tsv)

queryString="[?tags.UserPrincipalName=='$userPrincipalName'].name"

resourcegroupname=$(az group list --query "$queryString" -o tsv)

if [ -z "$resourcegroupname" ]; then
    resourcegroupname=$(az group list --query "[0].name" -o tsv)
fi

# Export resourcegroupname and clustername to make them available in the current shell
export resourcegroupname
export clustername

# Check if the cluster already exists
clusterExists=$(az aks list --resource-group $resourcegroupname --query "[?name=='$clustername'].name" -o tsv)

if [ -n "$clusterExists" ]; then
    # If the cluster already exists, do nothing
    echo "Cluster $clustername already exists. No changes made."
else
    # Create a new AKS cluster
    echo "Cluster $clustername does not exist. Creating a new cluster..."
    az aks create \
        --name ${clustername} \
        --node-count 1 \
        --vm-set-type VirtualMachineScaleSets \
        --network-plugin azure \
        --service-cidr 10.96.0.0/16 \
        --dns-service-ip 10.96.0.10 \
        --nodepool-name worker \
        --resource-group $resourcegroupname
fi

# Update kubeconfig file for kubectl to use
az aks get-credentials -g $resourcegroupname -n ${clustername} --overwrite-existing
EOF

# Make the script executable
chmod +x aks.sh

# Source the script to run it in the current shell and expose environment variables
source aks.sh
  1. Verify provisioned AKS cluster
az aks list --resource-group $resourcegroupname --output table

expected output:

[Warning] This output may compromise security by showing the following secrets: ssh, linuxProfile, keyData, publicKeys. Learn more at: https://go.microsoft.com/fwlink/?linkid=2258669
Name    Location    ResourceGroup          KubernetesVersion    CurrentKubernetesVersion    ProvisioningState    Fqdn
------  ----------  ---------------------  -------------------  --------------------------  -------------------  -----------------------------------------------------------
k8s50   eastus      k8s50-k8s101-workshop  1.27                 1.27.9                      Succeeded            k8s50-k8s50-k8s101-wor-02b500-eg9yx3nt.hcp.eastus.azmk8s.io

Operate Kubernetes objects

There are two primary methods for managing Kubernetes objects:

  • Imperative Management: This approach uses direct kubectl commands to create, update, and delete Kubernetes resources. It’s beneficial for ad-hoc development and experimentation due to its straightforward syntax. However, it might not fully leverage all Kubernetes API features and is less suited for tracking changes in version control.

  • Declarative Management: This method involves defining resources in YAML or JSON manifests and managing them with commands like kubectl apply. It’s ideal for production environments and version-controlled configuration, offering reproducibility and easier management of complex deployments.

While imperative commands offer a quick way to perform tasks and are excellent for learning Kubernetes, declarative management provides a more robust framework for consistent and reproducible infrastructure management.

In this task, we will explore the imperative approach using kubectl to familiarize ourselves with basic Kubernetes operations.

Use Kubectl

Once you have a running Kubernetes cluster, you can deploy your containerized applications on top of it. To do this, we use the kubectl command to create Pod , deployments or other objects in Kubernetes.

kubectl relies on a configuration file found at ~/.kube/config for authentication and communication with the kube-api-server. Running kubectl config view displays details about the kube-API server, including its address, name, and the client’s key and certificate.

To use kubectl from your personal client machine, you need to copy the ~/.kube/config file from the server to your client machine. Additionally, ensure your client machine can connect to the kube-API server’s address.

Download Kubectl

Download the Kubectl version that is compatible with your Kubernetes server version.

Kubectl

Download Kubectl

curl -Lo $HOME/kubectl https://dl.k8s.io/release/v1.28.2/bin/linux/amd64/kubectl && chmod +x $HOME/kubectl && export PATH=$HOME:$PATH

Verify the Version

kubectl version

It will show you both client kubectl version and server version.

  • basic usage of kubectl

The common format of a kubectl command is: kubectl ACTION RESOURCE

This performs the specified action (like create, describe or delete) on the specified resource (like node or deployment). You can use –help after the subcommand to get additional info about possible parameters (for example: kubectl get nodes –help).

Check that kubectl is configured to talk to your cluster, by running the kubectl version command.

Check that kubectl is installed and you can see both the client and the server versions.

  • Most used kubectl commands:
Basic Commands (Beginner):
  create          Create a resource from a file or from stdin
  expose          Take a replication controller, service, deployment or pod and expose it as a new Kubernetes service
  run             Run a particular image on the cluster
  set             Set specific features on objects

Basic Commands (Intermediate):
  explain         Get documentation for a resource
  get             Display one or many resources
  edit            Edit a resource on the server
  delete          Delete resources by file names, stdin, resources and names, or by resources and label selector

Deploy Commands:
  rollout         Manage the rollout of a resource
  scale           Set a new size for a deployment, replica set, or replication controller
  autoscale       Auto-scale a deployment, replica set, stateful set, or replication controller

for example, you can use kubectl get node or kubectl get node -o wide to check cluster node detail

  • Check Cluster node
kubectl get node

If you’re using self-managed Kubernetes, you’ll see both master and worker nodes in your cluster. However, with managed Kubernetes services like AKS, only worker nodes are visible. Kubernetes will deploy our application based on the available worker nodes.

expected outcome on AKS cluster

NAME                             STATUS   ROLES   AGE     VERSION
aks-worker-20494901-vmss000000   Ready    agent   2m56s   v1.27.9

Summary

Above, we set up an AKS cluster with a single worker node and downloaded kubectl to interact with the AKS API server. Now let’s learn basic Kubernetes concept.

Pod

What is a Pod?

A Pod in Kubernetes is like a single instance of an application. It can hold closely related containers that work together. All containers in a Pod share the same IP address and ports, and they are always placed together on the same server (Node) in the cluster. This setup means they can easily communicate with each other. Pods provide the environment in which containers run and offer a way to logically group containers together.

To create a Pod:

  • kubectl run: Quick way to create a single Pod for ad-hoc tasks or debugging.
  • kubectl create: Creates specific Kubernetes resources with more control. Use kubectl create -f to create from file.
  • kubectl apply: Creates or updates resources based on their configuration files. Use kubectl apply -f to create from file.

Create and Delete Pod

Pod can be created with kubectl run

  1. Create a Pod with kubectl run
kubectl run juiceshop --image=bkimminich/juice-shop

above will create a Pod with container juiceshop runing inside it.

  1. Verify the Pod creation

use kubectl get pod to check the Pod

kubectl get pod

expected output

kubectl get pod
NAME        READY   STATUS    RESTARTS   AGE
juiceshop   1/1     Running   0          7s

You might see the STATUS of Pod is ContainerCreating , but eventually, it will become “Running”.

use kubectl logs po/juiceshop to check the terminal log from Pod. you are expected see logs like info: Server listening on port 3000

  1. Check container log
Check Container log
kubectl logs po/juiceshop

expected result

info: All dependencies in ./package.json are satisfied (OK)
info: Detected Node.js version v20.10.0 (OK)
info: Detected OS linux (OK)
info: Detected CPU x64 (OK)
info: Configuration default validated (OK)
info: Entity models 19 of 19 are initialized (OK)
info: Required file server.js is present (OK)
info: Required file index.html is present (OK)
info: Required file styles.css is present (OK)
info: Required file polyfills.js is present (OK)
info: Required file main.js is present (OK)
info: Required file runtime.js is present (OK)
info: Required file vendor.js is present (OK)
info: Port 3000 is available (OK)
info: Domain https://www.alchemy.com/ is reachable (OK)
info: Chatbot training data botDefaultTrainingData.json validated (OK)
info: Server listening on port 3000
  1. Create Pod from yamlfile

Create Pod with kubectl create -f <yamlfile> or `kubectl apply -f

cat << EOF | tee juice-shop2.yaml
apiVersion: v1
kind: Pod
metadata:
  name: juiceshop2
  labels:
    run: juiceshop2
spec:
  containers:
  - image: bkimminich/juice-shop
    name: juiceshop
EOF
kubectl create -f juice-shop2.yaml

cat << EOF is a shell syntax for a “here document” (heredoc). It allows you to provide a block of input text directly in the shell. The input continues until the token EOF (End Of File) is encountered again in the input stream. | is the pipe operator, which takes the output of the command on its left (the heredoc in this case) and uses it as the input for the command on its right. In the next following chapters, we are going to use this a lot.

Verify the Pod creation

kubectl get pod

expected result

you shall see two Pod is running

NAME         READY   STATUS    RESTARTS   AGE
juiceshop    1/1     Running   0          35s
juiceshop2   1/1     Running   0          4s

delete Pod

use kubectl delete to delete the Pod juiceshop2

kubectl delete pod juiceshop2

you should see juiceshop2 now deleted

Check Pod again

kubectl get pod

expected output

NAME        READY   STATUS    RESTARTS   AGE
juiceshop   1/1     Running   0          63s

Labels

Labels in Kubernetes are key/value pairs attached to objects, such as Pods, Services, and Deployments. They serve to organize, select, and group objects in ways meaningful to users, allowing the mapping of organizational structures onto system objects in a loosely coupled fashion without necessitating clients to store these mappings.

  1. Labels can be utilized to filter resources when using kubectl commands. For example, executing the command below will retrieves all Pods labeled with run=juiceshop.
kubectl get pods -l run=juiceshop
  1. Labels can be added to an object using the kubectl label command. For instance, executing below will add the key:value pair “purpose=debug” to the Pod named juiceshop.
kubectl label pod juiceshop purpose=debug

To display all the labels:

kubectl get pod --show-labels

Expected Output

NAME                  READY   UP-TO-DATE   AVAILABLE   AGE   LABELS
juiceshop   1/1     Running   0          4m7s   purpose=debug,run=juiceshop

What is a kubernetes Deployment

While directly creating Pods might be suitable for learning purposes or specific use cases (like one-off debugging tasks), deployments offer a robust and scalable way to manage containerized applications in production environments. Deployments abstract away much of the complexity associated with Pod management, providing essential features such as automatic scaling, self-healing, rolling updates, and rollbacks, which are critical for running reliable and available applications in Kubernetes.

deployment_replicasset_pod deployment_replicasset_pod

  • Deployment in Kubernetes manages app Pods, ensuring they run and update smoothly.
  • Simplifies app management and scaling by handling Pods replication and updates.
  • Using kubectl, you can scale Pods easily (e.g., from 1 to 10) to meet demand.
  • Monitors app Pods continuously for any failures.
  • Implements self-healing by replacing failed Pod on other nodes in the cluster.

Deploying an Application with Deployment**

Deploy your first application on Kubernetes using the kubectl create deployment command. This is an imperative command.It requires specifying the deployment name and the location of the application image (including the full repository URL for images not hosted on Docker Hub).

Deploy an app
  1. Deployment kubernetes-bootcamp application
kubectl create deployment kubernetes-bootcamp --image=gcr.io/google-samples/kubernetes-bootcamp:v1

the –image choose the container image to use for Pod. Above we use image from image repository gcr.io , if you prefer to use juice-shop from docker’ , you can use kubectl create deployment juiceshop --image=docker.io/bkimminich/juice-shop. as Docker Hub is the default registry. you could also use kubectl create deployment juiceshop --image=bkimminich/juice-shop instead.

Congratulations! You’ve just deployed your first application by creating a deployment.

The kubectl create deployment command is used to create a new deployment in Kubernetes. Deployments manage a set of replicas of your application, ensuring that a specified number of instances (Pods) are running at any given time. This command specifically:

Name: Specifies the name of the deployment, in this case, kubernetes-bootcamp. Image: Determines the container image to use for the Pods managed by this deployment, here gcr.io/google-samples/kubernetes-bootcamp:v1, which is a sample application provided by Google. By executing this command, you instruct Kubernetes to pull the specified container image, create a Pod for it, and manage its lifecycle based on the deployment’s configuration. This process encapsulates the application in a scalable and manageable unit, facilitating easy updates, rollbacks, and scaling."

  1. Verify the deployment
kubectl get deployment -l app=kubernetes-bootcamp

expected outcome

We see that there is 1 deployment running a single Pod of your app. Container(s) is running inside a Pod with shared storage and IP.

NAME                  READY   UP-TO-DATE   AVAILABLE   AGE
kubernetes-bootcamp   1/1     1            1           20m

In this output:

kubernetes-bootcamp is the name of the deployment managing your application. READY 1/1 indicates that there is one Pod targeted by the deployment, and it is ready. 1/1 mean’s the deployment expect 1 Pod and Pod in ready status is also 1 which mean the actual deployed Pod meet the expected number (replica). UP-TO-DATE: Indicates the number of replicas that have been updated to achieve the desired state. 1 suggests that one replica is up-to-date with the desired configuration.AVAILABLE: Shows the number of replicas that are available to serve requests. 1 means there is one replica available.

Let’s keep this deployment to explore what is ReplicaSet

What is ReplicaSet

A ReplicaSet is a Kubernetes resource that ensures a specified number of replicas of a Pod are running at any given time. It is one of the key controllers used for Pod replication and management, offering both scalability and fault tolerance for applications. The primary purpose of a ReplicaSet is to maintain a stable set of replica Pods running at any given time. As such, it is often used to guarantee the availability of a specified number of identical Pods. Deployment is a higher-level resource in Kubernetes that actually manages ReplicaSets and provides declarative updates to applications.

ReplicaSet
  1. Check the ReplicaSet from Deployment

Use below command to check the ReplicaSet (rs) that created when using Deployment to scale the application.

kubectl get rs -l app=kubernetes-bootcamp
  1. Check detail of ReplicaSet from Deployment
kubectl describe rs kubernetes-bootcamp

expected output

NAME                             DESIRED   CURRENT   READY   AGE
kubernetes-bootcamp-5485cc6795   1         1         1       18m
Name:           kubernetes-bootcamp-5485cc6795
Namespace:      default
Selector:       app=kubernetes-bootcamp,pod-template-hash=5485cc6795
Labels:         app=kubernetes-bootcamp
                pod-template-hash=5485cc6795
Annotations:    deployment.kubernetes.io/desired-replicas: 1
                deployment.kubernetes.io/max-replicas: 2
                deployment.kubernetes.io/revision: 1
Controlled By:  Deployment/kubernetes-bootcamp
Replicas:       1 current / 1 desired
Pods Status:    1 Running / 0 Waiting / 0 Succeeded / 0 Failed
Pod Template:
  Labels:  app=kubernetes-bootcamp
           pod-template-hash=5485cc6795
  Containers:
   kubernetes-bootcamp:
    Image:        gcr.io/google-samples/kubernetes-bootcamp:v1
    Port:         <none>
    Host Port:    <none>
    Environment:  <none>
    Mounts:       <none>
  Volumes:        <none>
Events:
  Type    Reason            Age   From                   Message
  ----    ------            ----  ----                   -------
  Normal  SuccessfulCreate  18m   replicaset-controller  Created pod: kubernetes-bootcamp-5485cc6795-cdwz7

From above output , we can find a line saying Controlled By: Deployment/kubernetes-bootcamp which indicate that ReplicaSet is controlled by Deployment.

Manage your Deployment

Scale you Application**

Scaling
  1. scale out deployment

To manually scale your deployment with more replicas

kubectl scale deployment kubernetes-bootcamp --replicas=10
  1. Verify new deployment
kubectl get deployment kubernetes-bootcamp

expected output

NAME                  READY   UP-TO-DATE   AVAILABLE   AGE
kubernetes-bootcamp   10/10   10           10          26m

The READY status will eventually show 10/10, indicating that 10 replicas were expected and all 10 are now available."

We can use kubectl get pod to list the pod, use -l to select which pod to list. app=kubernetes-bootcamp is the label assigned to pod during creating. the expected pod will become 10.

  1. Check the Pod created by deployment
kubectl get pod -l app=kubernetes-bootcamp

10 Pod will be created.

  1. scale in deployment

To reduce resource usage by scaling in the deployment, modify the –replicas parameter to 1, decreasing the expected number of Pods:

kubectl scale deployment kubernetes-bootcamp --replicas=1
  1. Verify the result
kubectl get pod -l app=kubernetes-bootcamp -o wide

expected output

You will observe some Pods in the Terminating state, and eventually, only 1 Pod will remain active.

NAME                                  READY   STATUS    RESTARTS   AGE   IP              NODE         
kubernetes-bootcamp-bcbb7fc75-5r649   1/1     Running   0          73s   10.244.222.16   worker001    

Above output is from the kubectl get Pod -o wide -l app=kubernetes-bootcamp command, which requests Kubernetes to list Pods with additional information (wide output) that match the label app=kubernetes-bootcamp. Here’s a breakdown of the output:

NAME: kubernetes-bootcamp-bcbb7fc75-5r649 - This is the name of the Pod. Kubernetes generates Pod names automatically based on the deployment name and a unique identifier to ensure each Pod within a namespace has a unique name. you might noticed the name has some appended some hash value bcbb7fc75-5r649, this is created by deployment automatically for each replica. the Pod created with kubectl run pod or kubectl create -f <pod.yaml> does not have this hash appended in Pod name.

READY: 1/1 - This indicates the readiness state of the Pod. It means that 1 out of 1 container within the Pod is ready. Readiness is determined by readiness probes, which are used to know when a container is ready to start accepting traffic.

STATUS: Running - This status indicates that the Pod is currently running without issues.

RESTARTS: 0 - This shows the number of times the containers within the Pod have been restarted. A restart usually occurs if the container exits with an error or is killed for some other reason. In this case, 0 restarts indicate that the Pod has been stable since its creation. if Pod crashed for some reason, kube-manager will resatrt it. then the Rstart will change.

AGE: 73s - This shows how long the Pod has been running. In this case, the Pod has been up for 73 seconds.

IP: 10.244.222.16 - This is the internal IP address assigned to the Pod within the Kubernetes cluster network. This IP is used for communication between Pods within the cluster.

NODE: worker001 - This indicates the name of the node (physical or virtual machine) within the Kubernetes cluster on which this Pod is running. The scheduler decides the placement of Pods based on various factors like resources, affinity/anti-affinity rules, etc. In this case, the Pod is running on a node named worker001. Below diagram show a Pod can have 1 container or multiple container, with or without shared storage.

all the containers within a single Pod in Kubernetes follow “shared fate” principle. This means that containers in a Pod are scheduled on the same node (physical or virtual machine) and share the same lifecycle, network namespace, IP address, and storage volumes.

Namespace

A namespace in Kubernetes is like a folder that helps you organize and separate your cluster’s resources (like applications, services, and Pods) into distinct groups. It’s useful for managing different projects, environments (such as development, staging, and production), or teams within the same Kubernetes cluster. Namespaces help avoid conflicts between names and make it easier to apply policies, limits, and permissions on a per-group basis

  • Understand the default namespace

By default, a Kubernetes cluster will instantiate a default namespace when provisioning the cluster to hold the default set of Pods, Services, and Deployments used by the cluster.

  • we can use kubectl create namespace to create different namespace name. use kubectl get namespace to list all namespaces in cluster.

  • by default, all operation is under default namespace, for example kubectl get deployment kubernetes-bootcamp -n default is same as kubectl get deployment kubernetes-bootcamp.

Let’s imagine a scenario where an organization is using a shared Kubernetes cluster for development and production use cases.

The development team would like to maintain a space in the cluster where they can get a view on the list of Pods, Services, and Deployments they use to build and run their application. In this space, Kubernetes resources come and go, and the restrictions on who can or cannot modify resources are relaxed to enable agile development.

The operations team would like to maintain a space in the cluster where they can enforce strict procedures on who can or cannot manipulate the set of Pods, Services, and Deployments that run the production site.

One pattern this organization could follow is to partition the Kubernetes cluster into two namespaces: development and production.

Create deployment in namespace

Follow the steps below to explore how namespaces organize your deployments in Kubernetes. Execute each command sequentially:

Namespaces
  1. Create namespace:
kubectl create namespace production
kubectl create namespace development
  1. Verify the namespace creation:
kubectl get namespace production
kubectl get namespace development
  1. Deploy an application into namespace:
kubectl create deployment kubernetes-bootcamp --image=gcr.io/google-samples/kubernetes-bootcamp:v1 --namespace=production

kubectl create deployment kubernetes-bootcamp --image=gcr.io/google-samples/kubernetes-bootcamp:v1 --namespace=development
  1. Monitor the deployment’s progress:
kubectl rollout status deployment kubernetes-bootcamp -n development
kubectl rollout status deployment kubernetes-bootcamp -n production
  1. Check the deployment details:
kubectl get deployment kubernetes-bootcamp -n development
kubectl get deployment kubernetes-bootcamp -n production
kubectl get pod --namespace=production 
kubectl get pod -n=development

or use kubectl get all -n=production and kubectl get all -n=development to list everything in that namespace.

  1. Delete namespace and everything inside it

it will take a while to delete namespace. Do not interupt it.

kubectl delete namespace production
kubectl delete namespace development

Review Questions

  1. Explain the role of a Deployment in Kubernetes. How does it simplify the process of scaling and managing application within the cluster?

    Click for Answer…
    Deployments in Kubernetes simplify application management by providing a high-level abstraction for deploying, scaling, and updating applications. They handle the complexities of maintaining desired state, scaling, and rolling updates, allowing developers and operators to focus on the application rather than the infrastructure details.
    

  2. How do namespaces contribute to resource management and isolation in a Kubernetes cluster? Provide an example scenario where separating resources into different namespaces would be beneficial.

    Click for Answer…
        namespaces provide a clean separation between different clients, enhancing security, resource management, and operational efficiency. It allows the SaaS provider to manage a multi-tenant environment effectively within a single Kubernetes cluster. 
        for example, Deploying a firewall container in a separate namespace within Kubernetes cluster offers several benefits:  Ensure that only authorized team members can modify firewall rules.
        Apply strict resource quotas to guarantee the firewall always has necessary resources.
        Implement network policies that allow the firewall to interact with all namespaces while restricting other cross-namespace communication.
        Perform updates to the firewall components without risking downtime for tenant applications.

  3. Describe how containers are organized within a Pod in Kubernetes and explain the advantages of this arrangement for container communication and resource sharing.

Click for Answer…
Network Sharing:
All containers in a Pod share a single IP address
They can communicate with each other using localhost
Containers use different ports on the shared network interface
Example: Container A can reach Container B via localhost:port
Storage Sharing:
Pods can have one or more volumes defined
These volumes can be mounted into some or all containers in the Pod
Containers can read from and write to these shared volumes
Example: A shared volume mounted at /data in two containers allows them to exchange files
This shared network and storage setup enables efficient inter-container communication and data exchange within the Pod, facilitating tight integration of related application components.

K8S Node and Service

Node

Kubernetes orchestrates containerized workloads by scheduling containers into Pods on Nodes, which can be either virtual or physical machines, depending on the cluster setup. Each node is managed by the control plane and contains the services necessary to run Pods.

In self-managed Kubernetes, the cluster includes both master and worker nodes. However, in Azure Kubernetes Service (AKS), “Node” usually refers to what’s traditionally known as a “worker node”—the machines that run your applications and services. AKS abstracts and manages the control plane for you, enhancing simplicity and reducing management overhead. Users don’t have direct access to control plane machines or their settings in AKS, unlike with self-managed Kubernetes clusters, you do not have direct access to the control plane VMs or their configurations in AKS. This means you cannot directly log into the control plane nodes or run commands on them as you might with worker nodes. This AKS deployment example has just one worker node.

The components on a worker node include the kubelet, a container runtime, and the kube-proxy.

Kubelet: This is the main guy talking to both the Node it’s on and the control plane. It looks after the Pods and containers on the Node, making sure they’re running as they should. Container Runtime: This is what runs your containers. It pulls the container images from where they’re stored, unpacks them, and gets your application up and running. Docker and CRI-O are examples of container runtimes used in Kubernetes environments. kube-proxy: This is essential for the operation of Kubernetes services, allowing Pods to communicate with each other and with the outside world. It enables services to be exposed to the external network, load balances traffic across Pods, and is crucial for the overall networking functionality in Kubernetes.

So, in short, a Worker Node is the workhorse of a Kubernetes cluster, providing the necessary environment for your applications (in containers) to run. The control plane or master node keeps an eye on the resources and health of each Node to ensure the cluster operates efficiently.

Alt text for the image Alt text for the image

in above diagram , the Docker is used as container runtime, but in our AKS cluster, the container runtime is containerd

we can use kubectl get node -o wide to check the node status in cluster.

  1. Check the node detail
kubectl get node -o wide

expected outcome: on self-managed Kubernetes

NAME        STATUS   ROLES           AGE   VERSION   INTERNAL-IP   EXTERNAL-IP   OS-IMAGE             KERNEL-VERSION     CONTAINER-RUNTIME
nodemaster    Ready    control-plane   55m   v1.26.1   10.0.0.4      <none>        Ubuntu 22.04.3 LTS   6.2.0-1019-azure   cri-o://1.25.4
node-worker   Ready    <none>          54m   v1.26.1   10.0.0.5      <none>        Ubuntu 22.04.3 LTS   6.2.0-1019-azure   cri-o://1.25.4

on managed Kubernetes like AKS

NAME                             STATUS   ROLES   AGE     VERSION   INTERNAL-IP   EXTERNAL-IP   OS-IMAGE             KERNEL-VERSION      CONTAINER-RUNTIME
aks-worker-24706581-vmss000000   Ready    agent   7m32s   v1.27.9   10.224.0.4    <none>        Ubuntu 22.04.3 LTS   5.15.0-1054-azure   containerd://1.7.7-1

Cordon worker node

Nodes in Kubernetes can be made un-schedulable using the kubectl cordon <nodename> command, which is particularly useful when preparing a node for maintenance. When a node is cordoned, the kube-scheduler will no longer schedule new pods onto it, although existing pods on the node are not affected.

use kubectl uncordon <nodename> to put worker node back to work.

Cordon first node since this cluster only have one node, Cordon first node mean all nodes.

firstNodeName=$(kubectl get node -o json | jq -r .items[0].metadata.name)
kubectl cordon $firstNodeName
  • Check node status
kubectl get node 

expected result

aks-worker-29142279-vmss000000   Ready,SchedulingDisabled   agent   29m   v1.27.9

the Node now marked with “SchedulingDisabled”.

Create Pod

kubectl run juiceshop3 --image=bkimminich/juice-shop

Check the Pod status

kubectl get pod juiceshop3

expected result

NAME         READY   STATUS    RESTARTS   AGE
juiceshop3   0/1     Pending   0          42s

The Pod Juiceshop3 will remain in Pending status, as the only worker node now is disabled for scheduling. if you have multiple worker node. then the Pod will be scheduled to other worker node.

Put node back to work

firstNodeName=$(kubectl get node -o json | jq -r .items[0].metadata.name)
kubectl uncordon $firstNodeName

Check node status

kubectl get node 

expected result

aks-worker-29142279-vmss000000   Ready    agent   29m   v1.27.9

Check the Pod Juiceshop3 status

kubectl get pod juiceshop3

The Pod juiceshop3 shall move to “Runing” status.

What is Service

A Kubernetes Service is a way to expose an application running on a set of Pods as a network service. It abstracts the details of the pod’s IP addresses from consumers, providing a single point of access for a set of pods, typically to ensure that network traffic can be directed to them even as they are created or destroyed. This is crucial for maintaining consistent access to the functionalities these pods provide.

Services primarily operate at the transport layer (Layer 4 of the OSI model), dealing with IP addresses and ports. They provide a way to access pods within the cluster and, in the case of NodePort and LoadBalancer, expose them externally.

Major Types of Kubernetes Services:

  • ClusterIP to expose service to cluster internal

This is the default service type that exposes the service on an internal IP within the cluster, making the service reachable only from within the cluster.

clusterIP svc clusterIP svc

To check the services in your Kubernetes cluster, you can use the following command:

  1. Check Kubernetes build-in service

use kubectl get svc to check service

kubectl get svc --show-labels

expected output

NAME         TYPE        CLUSTER-IP   EXTERNAL-IP   PORT(S)   AGE   LABELS
kubernetes   ClusterIP   10.96.0.1    <none>        443/TCP   49m   component=apiserver,provider=kubernetes

This output shows the built-in Kubernetes service, which serves as the internal endpoint for the Kubernetes API service. The ClusterIP 10.96.0.1 assigned to services like the Kubernetes API server (Kubernetes service) is a virtual IP (VIP) and does not correspond to a physical network interface. It is part of Kubernetes’ service discovery and networking mechanism, which relies on kube-proxy (running on each node) and the cluster’s network configuration to route traffic to the appropriate endpoints.

The ClusterIP is only accessible from within the cluster, which means it cannot be directly accessed from the master node using kubectl. To interact with it, one must use another pod within the same cluster.

  • Kubernetes API clusterIP service

Below, we launch a pod using the curl command to access the HTTPS port on 10.96.0.1 which is Kubernetes API. Receiving either 401 or 403 response indicates that connectivity is working fine, but the request is not authorized. This lack of authorization occurs because curl did not supply a certificate to authenticate itself:

Verify whether kubernetes svc API is reachable

kubectl run curlpod --image=appropriate/curl --restart=Never --rm -it --  curl -I -k https://10.96.0.1/

Expected output:

HTTP/1.1 401 Unauthorized

or

HTTP/1.1 403 Forbidden

“401” or “403” is because curl need to supply a certificate to authenticate itself which we did not supply, however, above is enough to show you the 10.96.0.1 is reachable via clusterIP Service.

Verify the Kube-dns service

  • Exploring the Kubernetes Default ClusterIP type Service: kube-dns

Kubernetes includes several built-in services essential for its operation , with kube-dns being a key component. The kube-dns service is responsible for DNS resolution within the Kubernetes cluster, allowing pods to resolve the IP addresses of other services and external domains.

clusterIP svc clusterIP svc

In this workshop, the kube-dns svc has configured with ip 10.96.0.10 instead of 10.0.0.10

To check the kube-dns services in your Kubernetes cluster namespace kube-system , use

Check kube-dns API in namespace kube-system

kubectl get svc --namespace=kube-system -l k8s-app=kube-dns

expected output

NAME       TYPE        CLUSTER-IP   EXTERNAL-IP   PORT(S)         AGE
kube-dns   ClusterIP   10.96.0.10   <none>        53/UDP,53/TCP   33m

You should see kube-dns listed among the services, typically with a ClusterIP type, indicating it’s internally accessible within the cluster.

  • Verifying DNS Resolution with kube-dns

To verify that kube-dns is correctly resolving domain names within the cluster, you can perform a DNS lookup from a pod. Here’s how to launch a temporary pod for testing DNS resolution using the busybox image, the FQDN name for Kubernetes service is in format “svcname.namespace.svc.cluster.local”. kube-dns service help how to solve cluster internal and external FQDN to IP address.

  1. Verify whether kube-dns can resolve cluster internal svc
kubectl run dns-test --image=busybox --restart=Never --rm -it -- nslookup  kubernetes.default.svc.cluster.local

expected output

Server:         10.96.0.10
Address:        10.96.0.10:53

Name:   kubernetes.default.svc.cluster.local
Address: 10.96.0.1


pod "dns-test" deleted
  1. Verify whether kube-dns can resolve public fqdn dns name
kubectl run dns-test --image=busybox --restart=Never --rm -it -- nslookup  www.google.com

expected output

Server:         10.96.0.10
Address:        10.96.0.10:53

Non-authoritative answer:
Name:   www.google.com
Address: 142.251.16.147
Name:   www.google.com
Address: 142.251.16.104
Name:   www.google.com
Address: 142.251.16.105
Name:   www.google.com
Address: 142.251.16.99
Name:   www.google.com
Address: 142.251.16.103
Name:   www.google.com
Address: 142.251.16.106

Non-authoritative answer:
Name:   www.google.com
Address: 2607:f8b0:4004:c07::67
Name:   www.google.com
Address: 2607:f8b0:4004:c07::6a
Name:   www.google.com
Address: 2607:f8b0:4004:c07::63
Name:   www.google.com
Address: 2607:f8b0:4004:c07::68

pod "dns-test" deleted

Above two commands does the following:

Launches a temporary pod named dns-test using the busybox image. Executes the nslookup command to resolve the domain name Kubernetes.default.svc.cluster.local, which should be the internal DNS name for the Kubernetes API server. Automatically removes the pod after the command execution (–rm flag).

The kube-dns service is vital for internal name resolution in Kubernetes, enabling pods to communicate with each other and access various cluster services using DNS names. Verifying DNS resolution functionality with kube-dns is straightforward with a temporary pod and can help diagnose connectivity issues within the cluster.

  • NodePort: expose service to cluster external

Exposes the service externally on the same port of each selected node in the cluster via NAT. Accessible by NodeIP:NodePort within the range 30000-32767.

nodePort svc nodePort svc

  • LoadBalancer: expose service to cluster external

Exposes the service externally using a cloud provider’s load balancer or an on-premises solution like MetalLB, assigning a fixed, external IP to the service."

LoadBalancer svc LoadBalancer svc

Expose deployment with LoadBalancer Service

Let’s use kubectl expose deployment command to expose our Kubernetes Bootcamp deployment to the internet by creating a LoadBalancer service. The kubectl expose command is used to expose a Kubernetes deployment, pod, or service to the internet or other parts of the cluster. When used within Azure Kubernetes Service (AKS), a managed Kubernetes platform, this command creates a service resource that defines how to access the Kubernetes workloads. –type=LoadBalancer: Specifies the type of service to create. LoadBalancer services are public, cloud-provider-specific services that automatically provision an external load balancer (in this case, an Azure Load Balancer) to direct traffic to the service. This option makes the service accessible from outside the AKS cluster.

  1. expose kubernetes-bootcamp with LoadBalancer service
kubectl expose deployment kubernetes-bootcamp --port=80 --type=LoadBalancer --target-port=8080 --name=kubernetes-bootcamp-lb-svc 
  1. Verify the exposed service
kubectl get svc -l app=kubernetes-bootcamp

expected outcome

NAME                         TYPE           CLUSTER-IP      EXTERNAL-IP    PORT(S)        AGE
kubernetes-bootcamp-lb-svc   LoadBalancer   10.96.250.234   4.157.216.24   80:32428/TCP   12m

You should observe the EXTERNAL-IP status transition from ‘Pending’ to an actual public IP address, serving as the entry point for the Kubernetes Bootcamp deployment. Coupled with PORT 80, this defines how to access the Kubernetes Bootcamp application.

Access Bootcamp from external

Access the Kubernetes Bootcamp application using the curl command or through your web browser."

ip=$(kubectl get svc -l app=kubernetes-bootcamp -o json | jq -r .items[0].status.loadBalancer.ingress[0].ip)
curl http://$ip:80

Expected result

Hello Kubernetes bootcamp! | Running on: kubernetes-bootcamp-855d5cc575-b97z8 | v=1

Summary

Worker nodes host your pods. A ClusterIP service enables internal cluster access to these pods, while NodePort and LoadBalancer services provide external access.

You have sucessfully brought up a managed Kubernetes (AKS) and walked through the concept of POD, Deployment, Replicas, Namespace, Label, Node, different type of services etc, in Kubernetes. We will continue to install a self-managed Kubernetes to continue our jourey.

clean up

Warning

Do not forget to remove your AKS cluster. We will use self-managed k8s for hands-on activities.

delete your aks cluster with below command, this will took around 5 minutes.

clustername=$(whoami)
resourcegroupname=$(az group list --query "[?tags.UserPrincipalName=='$(az account show --query user.name -o tsv)'].name" -o tsv)
echo you are going to delete aks cluster $clustername in resourcegroup $resourcegroupname
az aks delete --name ${clustername} -g $resourcegroupname  

Review Questions

  1. What is the role of a worker node in Kubernetes, and what are three key components that run on every Kubernetes Worker Node?
    Click for Answer…
    A Kubernetes worker node is responsible for running containerized applications. It hosts the pods and provides the runtime environment.
    Three key components that run on every Kubernetes worker node are:
    Kubelet: Manages pods and their containers on the node.
    Container Runtime: (e.g., Docker, containerd) Runs the containers.
    Kube-proxy: Manages network rules for pod communication.
    These components work together to ensure proper execution and networking of pods on the worker node.
  2. What is a Kubernetes Service, and why is it important?
    Click for Answer…
    A Kubernetes Service exposes applications running on a set of Pods to network traffic. It abstracts away the details of which Pods are running, allowing clients to reliably access the application without knowing its internal structure.
    
  3. Describe the difference between ClusterIP, NodePort, and LoadBalancer Service types in Kubernetes.
    Click for Answer…
    ClusterIP: Internal access within the cluster.
    NodePort: Exposes the service on each node's IP at a static port.
    LoadBalancer: Exposes the service externally typically using a cloud provider's load balancer.

Self Managed K8s Workshop Hands-on Agenda

Workshop tasks

  1. Install Self-Managed K8S on azure VM

  2. Create, Scale, Upgrade, Expose your deployment

Subsections of Self Managed K8s Workshop Hands-on

Kubernetes installation

Objective:

Use kubeadm to install a self-managed Kubernetes cluster with 1 master node and 1 worker node on Azure ubuntu VM.

Choose your Kubernetes

Although Cloud-Managed Kubernetes becoming the popular choice for enteprise to use in production network, But Self Managed Kubernetes give users full control over their Kubernetes environments. Choosing the right method to install Self Managed Kubernetes can vary significantly based on the intended use case, from development and testing environments to production deployments. Here’s a short description of different ways to install Kubernetes, tailored to specific needs:

For Development and Testing

  • Minikube: Best For: Individual developers and small teams experimenting with Kubernetes applications or learning the Kubernetes ecosystem.

  • Kind (Kubernetes in Docker): Best For: Kubernetes contributors, developers working on CI/CD pipelines, and testing Kubernetes configurations.

  • OrbStack Kubernetes: Best for: development and testing on MacOS desktop with Apple Silicon or intel chipset, it eliminates the complexity of setting up and managing full-fledged Kubernetes clusters.

For Production Deployment

  • Kubeadm: Best For: Organizations looking for a customizable production-grade Kubernetes setup that adheres to best practices. Suitable for those with specific infrastructure requirements and those who wish to integrate Kubernetes into existing systems with specific configurations.

  • Kubespray: Best For: Users seeking to deploy Kubernetes on a variety of infrastructure types (cloud, on-premises, bare-metal) and require a tool that supports extensive customization and scalability.

  • Rancher: Best For: Organizations looking for an enterprise Kubernetes management platform that simplifies the operation of Kubernetes across any infrastructure, offering UI and API-based management.

Subsections of K8s install

Task 1 - Install Kubernetes

Use kubeadm to install kubernetes

labafter labafter

use azure shell as kubenetes client

To use Azure Cloud Shell as a Kubernetes client, ensure you have completed your Terraform deployment in Azure Cloud Shell. Azure Cloud Shell comes with kubectl pre-installed, facilitating Kubernetes operations.

  1. Navigate to your project directory where your Kubernetes workshop materials are located:

    cd $HOME/k8s-101-workshop
  2. Create a script for later use

    echo 'ssh_worker_function() {
        cd $HOME/k8s-101-workshop/terraform/
        nodename=$(terraform output -json | jq -r .linuxvm_worker_FQDN.value)
        username=$(terraform output -json | jq -r .linuxvm_username.value)
        ssh -o "StrictHostKeyChecking=no" $username@$nodename
    }
    alias ssh_worker="ssh_worker_function"' >> $HOME/.bashrc
    
    echo 'ssh_master_function() {
        cd $HOME/k8s-101-workshop/terraform/
        nodename=$(terraform output -json | jq -r .linuxvm_master_FQDN.value)
        username=$(terraform output -json | jq -r .linuxvm_username.value)
        export fqdn=${nodename}
        ssh -o "StrictHostKeyChecking=no"  -t $username@$nodename "export fqdn=${fqdn}; exec bash"
    }
    alias ssh_master="ssh_master_function"' >> $HOME/.bashrc
    
    alias k='kubectl' >> $HOME/.bashrc
    source $HOME/.bashrc
  3. Generate ssh-key for master and worker node

  • delete existing kubeconfig
rm -f ~/.kube/config
  • delete ssh knowhost
rm -f /home/$(whoami)/.ssh/known_hosts
  • get the password for VM which will be needed when use ssh-copy-id to copy ssh key into the master node. Make sure to copy the password to a notepad. You will need this to login to Master node in next steps.
cd $HOME/k8s-101-workshop/terraform/
vmpassword=$(terraform output -json | jq -r .linuxvm_password.value)
echo $vmpassword
  • generate ssh-key
[ ! -f ~/.ssh/id_rsa ] && ssh-keygen -q -N "" -f ~/.ssh/id_rsa
  • copy ssh-key to master node, enter password when prompted.
cd $HOME/k8s-101-workshop/terraform/
nodename=$(terraform output -json | jq -r .linuxvm_master_FQDN.value)
username=$(terraform output -json | jq -r .linuxvm_username.value)
ssh-copy-id -f  -o 'StrictHostKeyChecking=no' $username@$nodename
  • copy ssh-key to worker node, enter password when prompted.
cd $HOME/k8s-101-workshop/terraform/
nodename=$(terraform output -json | jq -r .linuxvm_worker_FQDN.value)
username=$(terraform output -json | jq -r .linuxvm_username.value)
ssh-copy-id -f  -o 'StrictHostKeyChecking=no' $username@$nodename
  1. Install kubernetes master node:

    • ssh into master node to run kubernetes master installation script this step take around 4 minutes
    cd $HOME/k8s-101-workshop/terraform/
    nodename=$(terraform output -json | jq -r .linuxvm_master_FQDN.value)
    username=$(terraform output -json | jq -r .linuxvm_username.value)
    sed -i "s/localhost/$nodename/g" $HOME/k8s-101-workshop/scripts/install_kubeadm_masternode.sh
    ssh -o 'StrictHostKeyChecking=no' $username@$nodename sudo kubeadm reset -f
    ssh -o 'StrictHostKeyChecking=no' $username@$nodename < $HOME/k8s-101-workshop/scripts/install_kubeadm_masternode.sh
  2. Install kubernetes worker node :

    • ssh into worker node to run kubernetes worker installation script this step take around 3 minutes
    cd $HOME/k8s-101-workshop/terraform/
    nodename=$(terraform output -json | jq -r .linuxvm_worker_FQDN.value)
    username=$(terraform output -json | jq -r .linuxvm_username.value)
    ssh -o 'StrictHostKeyChecking=no' $username@$nodename sudo kubeadm reset -f
    ssh -o 'StrictHostKeyChecking=no' $username@$nodename < $HOME/k8s-101-workshop/scripts/install_kubeadm_workernode.sh
  3. Join worker node to cluster

    cd $HOME/k8s-101-workshop/terraform/
    nodename=$(terraform output -json | jq -r .linuxvm_master_FQDN.value)
    username=$(terraform output -json | jq -r .linuxvm_username.value)
    scp -o 'StrictHostKeyChecking=no' $username@$nodename:workloadtojoin.sh .
    nodename=$(terraform output -json | jq -r .linuxvm_worker_FQDN.value)
    username=$(terraform output -json | jq -r .linuxvm_username.value)
    ssh -o 'StrictHostKeyChecking=no' $username@$nodename < ./workloadtojoin.sh
  4. Prepare access kubernetes from azure shell

    • To use Kubernetes from Azure Shell, copy your kubectl configuration. Because Azure Shell is external to your Azure VM VPC, you must use the Kubernetes master node’s public IP for access. Follow these steps:
    cd $HOME/k8s-101-workshop/terraform/
    nodename=$(terraform output -json | jq -r .linuxvm_master_FQDN.value)
    username=$(terraform output -json | jq -r .linuxvm_username.value)
    rm -rf $HOME/.kube/
    mkdir -p ~/.kube/
    scp -o 'StrictHostKeyChecking=no' $username@$nodename:~/.kube/config $HOME/.kube
    sed -i "s|server: https://[0-9]\{1,3\}\.[0-9]\{1,3\}\.[0-9]\{1,3\}\.[0-9]\{1,3\}:6443|server: https://$nodename:6443|" $HOME/.kube/config
  5. Verify the installation

    • From your Azure shell, watch the node getting “Ready”. it will take a while to get worker node become “Ready”.
    watch kubectl get node 

    expected outcome

    NAME          STATUS   ROLES           AGE   VERSION
    node-worker   Ready    <none>          14m   v1.27.1
    nodemaster    Ready    control-plane   18m   v1.27.1

Summary

This chapter focuses on installing a Kubernetes cluster using a kubeadm based installation script. we created a Kubernetes cluster with one master node and one worker node. We can continue to deploy and scalling application.

We do not delve into the details of the script used for installing the Kubernetes master and worker nodes. If you wish to understand more about what the installation script entails, please refer to step by step installation guide.

Review Questions

  1. What is the kube-API FQDN name in kubeconfig ?
    Click for Answer…
    https://k8sxx-master.eastus.cloudapp.azure.com:6443
    
  2. What is the version of this Kubernetes server ?
    Click for Answer…
    Client Version: v1.28.1
    Kustomize Version: v5.0.4-0.20230601165947-6ce0bf390ce3
    Server Version: v1.27.16
  3. What is the container runtime name and version ?
    Click for Answer…
    cri-o:/1.27.4, can found from "kubectl get node -o wide"
    nodemaster    Ready    control-plane   6m58s   v1.27.1   10.0.0.4      <none>        Ubuntu 22.04.5 LTS   6.5.0-1025-azure   cri-o://1.27.4
  4. Describe general step to add a new VM as worker node in this cluster
    Click for Answer…
    Create a new VM (e.g., using a Terraform script or cloud provider's interface).
    Install required components: kubelet, container runtime (e.g., containerd), and CNI plugins.
    Obtain the join command from the master node (includes the necessary token and CA cert hash).
    Run the join command on the new VM to add it to the cluster as a worker node.
    Verify the new node's status in the cluster using kubectl get nodes.
    This process ensures the new VM is properly configured and securely joined to the existing Kubernetes cluster.

IN CASE YOU RUNNING INTO PROBLEM

you can re-install kubernetes or remove VM node then create again to starting over.

Re-Install Kubernetes

Warning

If you wish to start over and completely remove Kubernetes from all master and worker nodes, execute the following command on each node.This step is ideal if you're seeking a clean slate for experimenting further or if any part of the setup did not go as planned:

ssh into master worker and worker node with alias ssh_master and ssh_worker

then on master or worker node , run sudo kubeadm reset -f.

Note: This action will reset your Kubernetes cluster, removing all configurations, deployments, and associated data. It’s a critical step, so proceed with caution.

if you are satisfied with your current Kubernetes setup and ready to move on to the next task, you can skip this step. This flexibility allows you to either delve deeper into Kubernetes functionalities or reset your environment for additional testing and learning opportunities.

Starting Over

Warning

if you want delete VM completely and try again, use terraform script below.

  • delete VM

cd $HOME/k8s-101-workshop/terraform/ && terraform destroy -var="username=$(whoami)" --auto-approve

  • create VM again

cd $HOME/k8s-101-workshop/terraform/ && terraform apply -var="username=$(whoami)" --auto-approve

Task 2 - Deploy and Scalling Application

Objective

A quick demo using a few commands to demonstrate how Kubernetes can scale to handle increased web traffic. These include

  • Creating a client deployment to simulate HTTP traffic.
  • Setting up a web application with auto-scaling using Horizontal Pod Autoscaler (HPA).
  1. Deploy Demo Application and enable auto scalling (HPA)

    The Deployed demo application include two Pods but able to auto scale if coming traffic reach certain limit.

    cd $HOME/k8s-101-workshop/terraform/
    nodename=$(terraform output -json | jq -r .linuxvm_master_FQDN.value)
    username=$(terraform output -json | jq -r .linuxvm_username.value)
    sed -i "s/localhost/$nodename/g" $HOME/k8s-101-workshop/scripts/deploy_application_with_hpa_masternode.sh
    ssh -o 'StrictHostKeyChecking=no' $username@$nodename < $HOME/k8s-101-workshop/scripts/deploy_application_with_hpa_masternode.sh
     

    use kubectl get pod to check deployment.

    kubectl get pod

    expected outcome

    NAME                                READY   STATUS    RESTARTS   AGE
    nginx-deployment-55c7f467f8-q26f2   1/1     Running   0          9m53s
    nginx-deployment-55c7f467f8-rfdck   1/1     Running   0          7m2s

  2. Verify the deployment is successful

    • To confirm that the deployment of your Nginx service has been successfully completed, you can test the response from the Nginx server using the curl command:
    cd $HOME/k8s-101-workshop/terraform/
    nodename=$(terraform output -json | jq -r .linuxvm_master_FQDN.value)
    curl -k https://$nodename/default
    • This command should return a response from the Nginx server, indicating that the service is active and capable of handling requests.
    • With the Nginx service deployed and verified, we are now prepared to initiate benchmark traffic towards the Nginx service. This step will demonstrate Kubernetes’ ability to dynamically scale out additional Nginx pods to accommodate the incoming request load.
  3. Stress the nginx deployment

  • Paste below command to create a client deployment to send http request towards nginx deployment to stress it. this client deployment will create two Pod to keep issue http request towards nginx server.
cat <<EOF | tee  infinite-calls_client.yaml
apiVersion: apps/v1
kind: Deployment
metadata:
  name: infinite-calls
  labels:
    app: infinite-calls
spec:
  replicas: 2
  selector:
    matchLabels:
      app: infinite-calls
  template:
    metadata:
      name: infinite-calls
      labels:
        app: infinite-calls
    spec:
      containers:
      - name: infinite-calls
        image: busybox
        command:
        - /bin/sh
        - -c
        - "while true; do wget -q -O- http://nginx-deployment.default.svc.cluster.local; done"
EOF
kubectl create -f infinite-calls_client.yaml
  • verify the deployment
kubectl get pod
  • expected outcome
NAME                                READY   STATUS    RESTARTS   AGE
infinite-calls-6865bf6c8b-8g4pg     1/1     Running   0          4s
infinite-calls-6865bf6c8b-md9k7     1/1     Running   0          4s
nginx-deployment-55c7f467f8-mn2kc   1/1     Running   0          3m21s
nginx-deployment-55c7f467f8-skbtv   1/1     Running   0          3m21s

The client pod continuously sends HTTP requests (using wget) towards the ClusterIP service of the nginx deployment.

  1. Monitor Application Scaling up on master node
  • After initiating the stress test with client deployment, you can monitor the deployment as Kubernetes automatically scales out by adding new Pods to handle the increased load. Use the watch command alongside kubectl get pods to observe the scaling process in real time:
    watch kubectl get pods -l app=nginx 
    • expect to see pod increasing as a response to the increased load.
    NAME                                READY   STATUS    RESTARTS   AGE
    nginx-deployment-55c7f467f8-d7bx9   1/1     Running   0          20s
    nginx-deployment-55c7f467f8-dx7ql   1/1     Running   0          20s
    nginx-deployment-55c7f467f8-b5h7z   1/1     Running   0          5m39s
    nginx-deployment-55c7f467f8-g4754   1/1     Running   0          20s
    nginx-deployment-55c7f467f8-hdbcc   1/1     Running   0          20s
    nginx-deployment-55c7f467f8-kbkw6   1/1     Running   0          35s
    nginx-deployment-55c7f467f8-bmzvg   1/1     Running   0          5m39s
    nginx-deployment-55c7f467f8-r6ndt   1/1     Running   0          35s
    nginx-deployment-55c7f467f8-xr2l7   1/1     Running   0          5s
  • As client deployment continues to send traffic to the Nginx service, you will see the number of Pods gradually increase until reach configured limit - 10 Pods, demonstrating Kubernetes’ Horizontal Pod Autoscaler (HPA) in action. This auto-scaling feature ensures that your application can adapt to varying levels of traffic by automatically adjusting the number of Pods based on predefined metrics such as CPU usage or request rate.
  1. Delete client deployment to stop sending client traffic

    kubectl delete deployment infinite-calls
  2. Monitor Application Scaling down on master node

    • Once the traffic generated by client deployment starts to decrease and eventually ceases, watch as Kubernetes smartly scales down the application by terminating the extra Pods that were previously spawned. This behavior illustrates the system’s efficient management of resources, scaling down to match the reduced demand. you need wait 5 minutes (default but configurable ) to see nginx start to decrease.
watch kubectl get pods
  • expected outcome
NAME                                READY   STATUS    RESTARTS   AGE
nginx-deployment-55c7f467f8-dxmqt   1/1     Running   0          10m
nginx-deployment-55c7f467f8-hdbcc   1/1     Running   0          5m40s
nginx-deployment-55c7f467f8-kkr8r   1/1     Running   0          10m
  • By executing this stress test and monitoring the application scaling, you gain insight into the powerful capabilities of Kubernetes in managing application workloads dynamically, ensuring optimal resource utilization and responsive application performance.
  1. Wrap up
  • By now, you should have observed how Kubernetes can dynamically scale your services without any manual intervention, showcasing the platform’s powerful capabilities for managing application demand and resources.
    • Let’s proceed by cleaning up and deleting the resources we’ve created, preparing our environment for further exploration into the intricacies of how Kubernetes operates.
    kubectl delete ingress nginx
    kubectl delete svc nginx-deployment
    kubectl delete deployment nginx-deployment
    kubectl delete hpa nginx-hpa
     
    • Also delete loadbalancer and ingress controller
    kubectl delete -f https://raw.githubusercontent.com/metallb/metallb/v0.14.3/config/manifests/metallb-native.yaml
    kubectl delete -f https://raw.githubusercontent.com/Kong/kubernetes-ingress-controller/v2.10.0/deploy/single/all-in-one-dbless.yaml
    kubectl delete -f https://github.com/jetstack/cert-manager/releases/download/v1.3.1/cert-manager.yaml
    kubectl delete -f https://github.com/kubernetes-sigs/metrics-server/releases/latest/download/components.yaml

Summary

This chapter provides a quick demonstration of deploying an application with Horizontal Pod Autoscaler (HPA). For a detailed understanding of how it works, please continue to the next section Kubernetes in depth

Review Questions

  1. Describe how to make client application - infinite-calls to generate more traffic ?
    Click for Answer…
    increase replicas for infinite-calls deployment. 
    
  2. How many minutes need to wait before you can see nginx pod start increasing.
    Click for Answer…
    it depends on when HPA decides to scale after it sucessfully check the resource usage 
    
  3. How to stop sending traffic to nginx deployment
    Click for Answer…
    kubectl delete deployment infinite-calls  or scale down infinite-calls replicas to 0. 
    

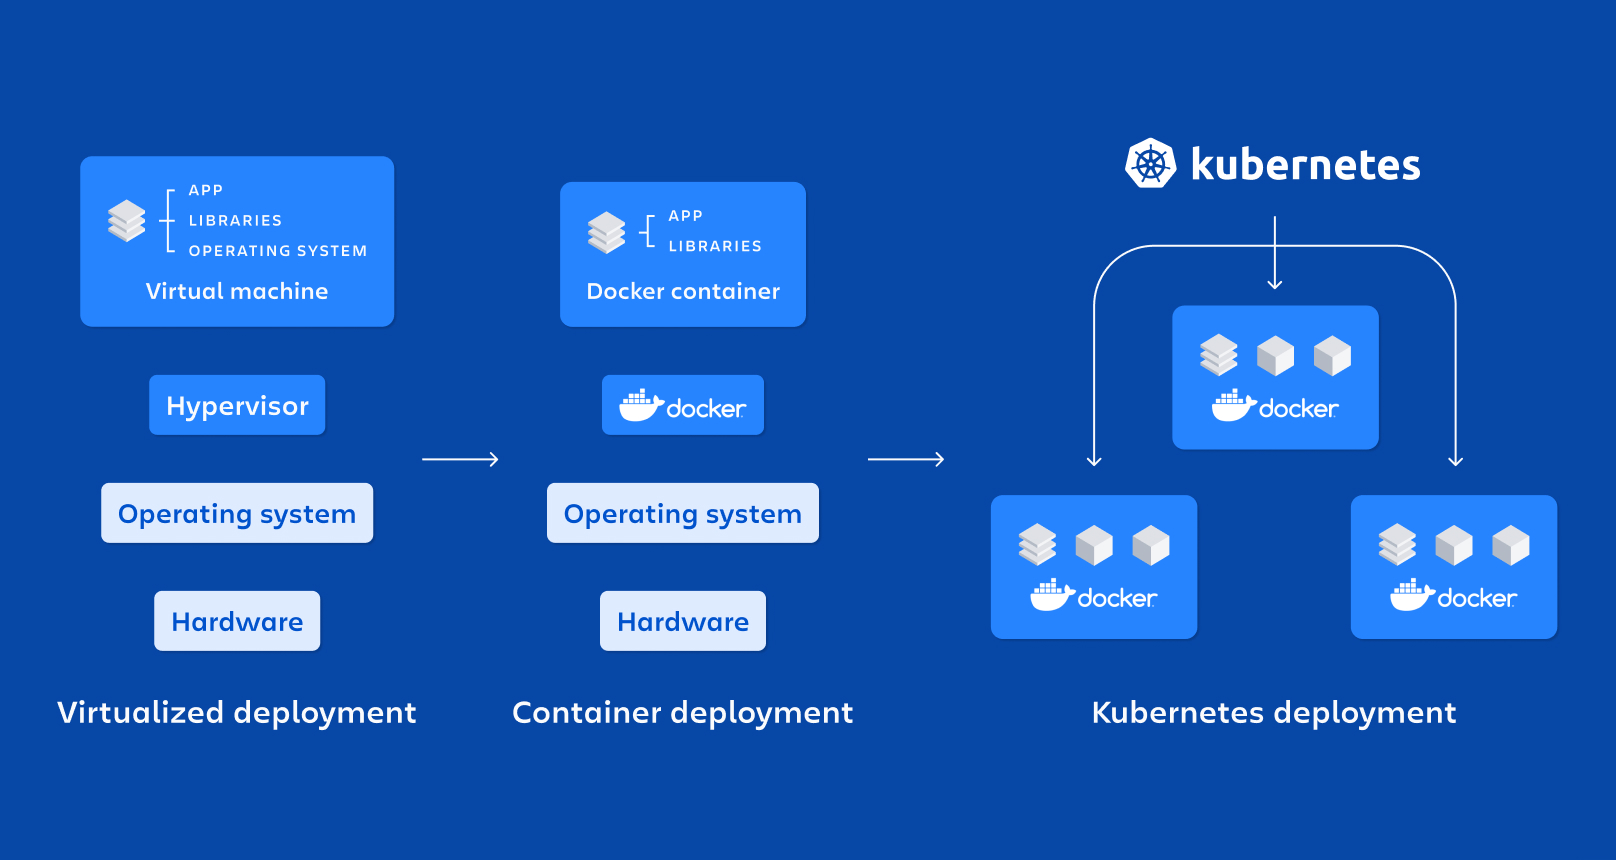
Kubernetes Step by Step Install

Step by Step approach for install master node

Warning

This is only for experienced user who interested to explore the detail of use kubeadm to install master node.

from azure shell , create alias for ssh into master and worker node.

create some script

echo 'ssh_worker_function() {
    cd $HOME/k8s-101-workshop/terraform/
    nodename=$(terraform output -json | jq -r .linuxvm_worker_FQDN.value)
    username=$(terraform output -json | jq -r .linuxvm_username.value)
    ssh -o "StrictHostKeyChecking=no" $username@$nodename
}
alias ssh_worker="ssh_worker_function"' >> $HOME/.bashrc

echo 'ssh_master_function() {
    cd $HOME/k8s-101-workshop/terraform/
    nodename=$(terraform output -json | jq -r .linuxvm_master_FQDN.value)
    username=$(terraform output -json | jq -r .linuxvm_username.value)
    export fqdn=${nodename}
    ssh -o "StrictHostKeyChecking=no"  -t $username@$nodename "export fqdn=${fqdn}; exec bash"
}
alias ssh_master="ssh_master_function"' >> $HOME/.bashrc

alias k='kubectl' >> $HOME/.bashrc
source $HOME/.bashrc

generate ssh-key for master and worker node

  • clean existing kubeconfig
rm -f ~/.kube/config
  • clean knowhost
rm -f /home/$(whoami)/.ssh/known_hosts
  • get the password for VM the password will be needed when use ssh-copy-id to copy ssh key into the master node.
cd $HOME/k8s-101-workshop/terraform/
terraform output -json | jq -r .linuxvm_password.value
echo $vmpassword
  • generate ssh-key if key exist, choose either Overwrite or not.
[ ! -f ~/.ssh/id_rsa ] && ssh-keygen -q -N "" -f ~/.ssh/id_rsa
  • copy ssh-key to master node, enter password when prompted.
cd $HOME/k8s-101-workshop/terraform/
nodename=$(terraform output -json | jq -r .linuxvm_master_FQDN.value)
username=$(terraform output -json | jq -r .linuxvm_username.value)
ssh-copy-id -f  -o 'StrictHostKeyChecking=no' $username@$nodename
  • copy ssh-key to worker node, enter password when prompted.
cd $HOME/k8s-101-workshop/terraform/
nodename=$(terraform output -json | jq -r .linuxvm_worker_FQDN.value)
username=$(terraform output -json | jq -r .linuxvm_username.value)
ssh-copy-id -f  -o 'StrictHostKeyChecking=no' $username@$nodename

after done above, you shall able to use alias ssh_master and ssh_worker to ssh into worker node and master node.

Install required tool on master node.

use alias ssh_master to ssh into master node. below all config are done on master node.

sudo apt-get update -y
sudo apt-get install socat conntrack -y
sudo apt-get install jq -y
sudo apt-get install apt-transport-https ca-certificates -y
sudo apt-get install hey -y

Setting Kernel Parameters for k8s

  • install kernel dep module for cri-o runtime

overlay: Docker and CRI-O can use it to efficiently manage container images and layers br_netfilter: This module is required for network packet filtering, bridging, and IP masquerading, which are essential for Kubernetes networking. It allows the Linux kernel’s netfilter to process bridged (Layer 2) traffic.

cat <<EOF | sudo tee /etc/modules-load.d/k8s.conf
overlay
br_netfilter
EOF
sudo modprobe overlay
sudo modprobe br_netfilter
  • enable iptables support for bridge and enable ip_forwarding
cat <<EOF | sudo tee /etc/sysctl.d/k8s.conf
net.bridge.bridge-nf-call-iptables  = 1
net.bridge.bridge-nf-call-ip6tables = 1
net.ipv4.ip_forward                 = 1
EOF
sudo sysctl --system

Install CRI-O

  1. Configure the CRI-O repository:

    First, add the CRI-O repository. Ensure you replace <VERSION> with the version of Kubernetes you intend to use, for example, 1.25:

OS="xUbuntu_22.04"
VERSION="1.27"
echo "deb [signed-by=/usr/share/keyrings/libcontainers-archive-keyring.gpg] https://download.opensuse.org/repositories/devel:/kubic:/libcontainers:/stable/$OS/ /" | sudo tee  /etc/apt/sources.list.d/devel:kubic:libcontainers:stable.list
echo "deb [signed-by=/usr/share/keyrings/libcontainers-crio-archive-keyring.gpg] https://download.opensuse.org/repositories/devel:/kubic:/libcontainers:/stable:/cri-o:/$VERSION/$OS/ /" | sudo tee /etc/apt/sources.list.d/devel:kubic:libcontainers:stable:cri-o:$VERSION.list
  1. Add the GPG key
mkdir -p /usr/share/keyrings
sudo curl -L --retry 3 --retry-delay 5 https://download.opensuse.org/repositories/devel:/kubic:/libcontainers:/stable/$OS/Release.key | sudo gpg --dearmor -o /usr/share/keyrings/libcontainers-archive-keyring.gpg.tmp
sudo mv -f /usr/share/keyrings/libcontainers-archive-keyring.gpg.tmp /usr/share/keyrings/libcontainers-archive-keyring.gpg

sudo curl -L --retry 3 --retry-delay 5 https://download.opensuse.org/repositories/devel:/kubic:/libcontainers:/stable:/cri-o:/$VERSION/$OS/Release.key | sudo gpg --dearmor -o /usr/share/keyrings/libcontainers-crio-archive-keyring.gpg.tmp
sudo mv -f /usr/share/keyrings/libcontainers-crio-archive-keyring.gpg.tmp /usr/share/keyrings/libcontainers-crio-archive-keyring.gpg
  1. Install CRI-O

CRI-O is an open-source container runtime specifically designed for Kubernetes. It implements the Kubernetes Container Runtime Interface (CRI), allowing Kubernetes to use any OCI (Open Container Initiative)-compliant runtime as the container runtime for running pods. all Docker image are OCI-compliant. CRI-O-Runc is a CLI tool for spawning and running containers according to the OCI specification.

sudo apt-get update
sudo apt-get install cri-o cri-o-runc -y
  1. Start and enable CRI-O
sudo systemctl daemon-reload
sudo systemctl enable crio
sudo systemctl start crio

After this step, you can optionaly use journalctl -f -u crio to check the running status of crio, you shall see error message related with CNI which is normal, because we have not installed any CNI yet

Install crictl

install crictl which is the client tool for interactive with crio.

DOWNLOAD_DIR="/usr/local/bin"
sudo mkdir -p "$DOWNLOAD_DIR"
CRICTL_VERSION="v1.27.1"
ARCH="amd64"
curl  --insecure --retry 3 --retry-connrefused -fL "https://github.com/kubernetes-sigs/cri-tools/releases/download/$CRICTL_VERSION/crictl-$CRICTL_VERSION-linux-$ARCH.tar.gz" | sudo tar -C $DOWNLOAD_DIR -xz

After this step, you can optionaly use sudo crictl info to check the status of crio. it shall tell you the container runtime is ready, but the network status is not ready.

Install kubeadm, kubelet and kubectl

kubeadm is the binary that responsible for k8s installation, kubelet is the agent(binary) on each worker node to take the instruction from kube-apiserver and then talk to CRI-O with CRI standard to manage life-cycle of container. kubectl is the client that talk to k8s API server for daily k8s operation. Below script downloading specific versions of kubeadm, kubelet, and kubectl, placing them in the system path, configuring kubelet to run as a systemd service, and ensuring it starts automatically.

Download 1.27.1 version kubeadm and kubelet

#RELEASE="$(curl -sSL https://dl.k8s.io/release/stable.txt)"
RELEASE="v1.27.1"
ARCH="amd64"
DOWNLOAD_DIR="/usr/local/bin"
sudo mkdir -p "$DOWNLOAD_DIR"
cd $DOWNLOAD_DIR
sudo curl --insecure --retry 3 --retry-connrefused -fL --remote-name-all https://dl.k8s.io/release/$RELEASE/bin/linux/$ARCH/{kubeadm,kubelet}
sudo chmod +x {kubeadm,kubelet}

Download service file for start kubelet and kubeadm, kubeadm use system service to manage kubelet.

RELEASE_VERSION="v0.4.0"
curl --insecure --retry 3 --retry-connrefused -fL "https://raw.githubusercontent.com/kubernetes/release/$RELEASE_VERSION/cmd/kubepkg/templates/latest/deb/kubelet/lib/systemd/system/kubelet.service" | sed "s:/usr/bin:$DOWNLOAD_DIR:g" | sudo tee /etc/systemd/system/kubelet.service

sudo mkdir -p /etc/systemd/system/kubelet.service.d

sudo curl --insecure --retry 3 --retry-connrefused -fL "https://raw.githubusercontent.com/kubernetes/release/$RELEASE_VERSION/cmd/kubepkg/templates/latest/deb/kubeadm/10-kubeadm.conf" | sed "s:/usr/bin:$DOWNLOAD_DIR:g" | sudo tee /etc/systemd/system/kubelet.service.d/10-kubeadm.conf

Download kubectl.

KUBECTL_VERSION="v1.28.1"
sudo curl --insecure --retry 3 --retry-connrefused -fLO https://dl.k8s.io/release/$KUBECTL_VERSION/bin/linux/$ARCH/kubectl
sudo cp kubectl /usr/local/bin
sudo chmod +x /usr/local/bin/kubectl

Enabling and Starting kubelet

sudo systemctl enable --now kubelet

Use kubeadm to initial Installation

Pulling Kubernetes Container Images

kubeadm will pull the core component of k8s, which are -kube-apiserver -kube-controller-manager -kube-scehduler -kube-proxy -pause -etcd -coredns

sudo kubeadm config images pull --cri-socket unix:///var/run/crio/crio.sock --kubernetes-version=$RELEASE --v=5

Config kubeadm init parameters

Kubeadm require some parameter to initionize the installation which include NODEIP, cluster-dns, POD_CIDR, SERVICE_CIDR, also certificate parameter like sans etc., kubeadm will also create a token for worker node to join. CLUSTERDNSIP must in range of SERVICE_CIDR. the ${fqdn} will be required if kubectl use fqdn of API_SERVER to use Kubernetes API.

when use alias ssh_master to ssh into the master node, the fqdn already set to actual domain name of the master node VM, if not, you must set fqdn byself, for example , fqnd=k8sXX-master.eastus.cloudapp.azure.com

local_ip=$(ip route get 8.8.8.8 | awk -F"src " 'NR==1{split($2,a," ");print a[1]}')
CLUSTERDNSIP="10.96.0.10"
cat <<EOF | sudo tee /etc/default/kubelet
KUBELET_EXTRA_ARGS=--node-ip=$local_ip,--cluster-dns=$CLUSTERDNSIP
EOF

IPADDR=$local_ip
NODENAME=`hostname | tr -d '-'`
POD_CIDR="10.244.0.0/16"
SERVICE_CIDR="10.96.0.0/12"
echo $IPADDR $NODENAME  | sudo tee -a  /etc/hosts

Initializing the Kubernetes Cluster

sudo kubeadm reset -f 
sudo kubeadm init --cri-socket=unix:///var/run/crio/crio.sock --apiserver-advertise-address=$IPADDR  --apiserver-cert-extra-sans=$IPADDR,${fqdn}  --service-cidr=$SERVICE_CIDR --pod-network-cidr=$POD_CIDR --node-name $NODENAME  --token-ttl=0 -v=5

Configuring kubectl for the Current User and Root

after done the kubeadm installation, a kubeconfig file will be created which include the certificate for kubectl client to use to talk to kube-api server.

mkdir -p /home/ubuntu/.kube
sudo cp -f /etc/kubernetes/admin.conf /home/ubuntu/.kube/config
sudo chown ubuntu:ubuntu /home/ubuntu/.kube/config
sudo mkdir -p /root/.kube
sudo cp -f /home/ubuntu/.kube/config /root/.kube/config
kubectl --kubeconfig /home/ubuntu/.kube/config config set-cluster kubernetes --server "https://$fqdn:6443"

Install Calico CNI

The default bridge CNI in Kubernetes does not support cross-node networking. To enable this capability, We diretly install Calico CNI, Calico uses VXLAN technology to facilitate network expansion across multiple nodes, providing enhanced networking features.

Calico CNI extends standard Kubernetes API with its own API definitions, allowing for advanced network configurations. The installation and management of Calico are streamlined through the use of tigera-operator.yaml and custom-resources.yaml. The Tigera Operator automates Calico’s lifecycle management, while custom-resources.yaml enables administrators to tailor Calico’s configuration to the specific needs of their Kubernetes cluster.

The configuration below includes enabling IP forwarding for containers. Typically, this setting is not necessary unless the container acts as a Layer 3 router, involving multiple IP interfaces. In this setup, BGP is disabled because we utilize VXLAN for networking, which does not require direct exchange of Pod IPs across nodes.

This approach ensures that Calico provides robust and flexible networking capabilities for Kubernetes clusters, supporting a wide range of deployment scenarios, including those requiring cross-node networking and advanced network routing features.

cd $HOME
#sudo curl --insecure --retry 3 --retry-connrefused -fL https://github.com/projectcalico/calico/releases/latest/download/calicoctl-linux-amd64 -o /usr/local/bin/calicoctl
sudo curl --insecure --retry 3 --retry-connrefused -fL https://github.com/projectcalico/calico/releases/download/v3.25.0/calicoctl-linux-amd64 -o /usr/local/bin/calicoctl
sudo chmod +x /usr/local/bin/calicoctl
curl --insecure --retry 3 --retry-connrefused -fLO https://raw.githubusercontent.com/projectcalico/calico/v3.25.0/manifests/tigera-operator.yaml
kubectl --kubeconfig /home/ubuntu/.kube/config create -f tigera-operator.yaml
kubectl rollout status deployment tigera-operator -n tigera-operator
curl --insecure --retry 3 --retry-connrefused -fLO https://raw.githubusercontent.com/projectcalico/calico/v3.25.0/manifests/custom-resources.yaml
sed -i -e "s?blockSize: 26?blockSize: 24?g" custom-resources.yaml
sed -i -e "s?VXLANCrossSubnet?VXLAN?g" custom-resources.yaml
sed -i -e "s?192.168.0.0/16?$POD_CIDR?g" custom-resources.yaml
#sed -i -e "s?192.168.0.0/16?10.244.0.0/16?g" custom-resources.yaml
sed -i '/calicoNetwork:/a\    containerIPForwarding: Enabled ' custom-resources.yaml
sed -i '/calicoNetwork:/a\    bgp: Disabled ' custom-resources.yaml
kubectl --kubeconfig /home/ubuntu/.kube/config create namespace calico-system
sleep 1
kubectl  get namespace calico-system
kubectl --kubeconfig /home/ubuntu/.kube/config apply  -f custom-resources.yaml
sleep 5
kubectl rollout status deployment calico-kube-controllers -n calico-system
kubectl rollout status ds calico-node -n calico-system

use sudo calicoctl node status to check calico node status, until it show calico process is running use kubectl get tigerastatus to check calico status via calico extended api

expected output from watch kubectl get tigerastatus

until both AVAILABLE to “True”

expected outcome

apiserver   True        False         False      68s
calico      True        False         False      83s

create token for other worker node to join

create a new token for worker node to join

on master node do

kubeadm token create --print-join-command > /home/ubuntu/workloadtojoin.sh
kubeadm config print join-defaults  > /home/ubuntu/kubeadm-join.default.yaml
echo '#sudo kubeadm join --config kubeadm-join.default.yaml' | sudo tee -a  /home/ubuntu/workloadtojoin.sh
chmod +x /home/ubuntu/workloadtojoin.sh
cat /home/ubuntu/workloadtojoin.sh 

then exit the master node, back to az shell.

install worker node

To configure the worker nodes in your Kubernetes cluster, you need to install specific components that manage the container lifecycle and networking. Each worker node requires the installation of kubelet and cri-o for container management, as well as kube-proxy to set up iptables rules for service-to-container communication.

Since the commands for installing these components on the worker nodes overlap with those covered in the “Install Master Node” section, this guide will focus on providing a streamlined, “simple way” to set up each worker node. This method allows for a quick and efficient installation by copying and pasting the script below directly into the terminal of each worker node.

ssh into your workder node use alias ssh_worker

and Execute the Installation Script by copy and paste the following script into the terminal of the worker node to start the installation process: We are not going to explain each step for install worker node as those are just part of install master node.

#!/bin/bash -xe

error_handler() {
    echo -e "\e[31mAn error occurred. Exiting...\e[0m" >&2
    tput bel
    
}

trap error_handler ERR
sudo kubeadm reset -f 
cd $HOME
sudo apt-get update -y
sudo apt-get install socat conntrack -y
sudo apt-get install jq -y
sudo apt-get install apt-transport-https ca-certificates -y

cat <<EOF | sudo tee /etc/modules-load.d/k8s.conf
overlay
br_netfilter
EOF
sudo modprobe overlay
sudo modprobe br_netfilter

cat <<EOF | sudo tee /etc/sysctl.d/k8s.conf
net.bridge.bridge-nf-call-iptables  = 1
net.bridge.bridge-nf-call-ip6tables = 1
net.ipv4.ip_forward                 = 1
EOF
sudo sysctl --system

OS="xUbuntu_22.04"
VERSION="1.27"

echo "deb [signed-by=/usr/share/keyrings/libcontainers-archive-keyring.gpg] https://download.opensuse.org/repositories/devel:/kubic:/libcontainers:/stable/$OS/ /" | sudo tee  /etc/apt/sources.list.d/devel:kubic:libcontainers:stable.list
echo "deb [signed-by=/usr/share/keyrings/libcontainers-crio-archive-keyring.gpg] https://download.opensuse.org/repositories/devel:/kubic:/libcontainers:/stable:/cri-o:/$VERSION/$OS/ /" | sudo tee /etc/apt/sources.list.d/devel:kubic:libcontainers:stable:cri-o:$VERSION.list

mkdir -p /usr/share/keyrings
sudo curl -L --retry 3 --retry-delay 5 https://download.opensuse.org/repositories/devel:/kubic:/libcontainers:/stable/$OS/Release.key | sudo gpg --dearmor -o /usr/share/keyrings/libcontainers-archive-keyring.gpg.tmp
sudo mv -f /usr/share/keyrings/libcontainers-archive-keyring.gpg.tmp /usr/share/keyrings/libcontainers-archive-keyring.gpg
sudo curl -L --retry 3 --retry-delay 5 https://download.opensuse.org/repositories/devel:/kubic:/libcontainers:/stable:/cri-o:/$VERSION/$OS/Release.key | sudo gpg --dearmor -o /usr/share/keyrings/libcontainers-crio-archive-keyring.gpg.tmp
sudo mv -f /usr/share/keyrings/libcontainers-crio-archive-keyring.gpg.tmp /usr/share/keyrings/libcontainers-crio-archive-keyring.gpg

sudo apt-get update
sudo apt-get install cri-o cri-o-runc -y

sudo systemctl daemon-reload
sudo systemctl enable crio
sudo systemctl start crio

DOWNLOAD_DIR="/usr/local/bin"
sudo mkdir -p "$DOWNLOAD_DIR"
CRICTL_VERSION="v1.27.1"
ARCH="amd64"
curl  --insecure --retry 3 --retry-connrefused -fL "https://github.com/kubernetes-sigs/cri-tools/releases/download/$CRICTL_VERSION/crictl-$CRICTL_VERSION-linux-$ARCH.tar.gz" | sudo tar -C $DOWNLOAD_DIR -xz


#RELEASE="$(curl -sSL https://dl.k8s.io/release/stable.txt)"
RELEASE="v1.27.1"
ARCH="amd64"
DOWNLOAD_DIR="/usr/local/bin"
sudo mkdir -p "$DOWNLOAD_DIR"
cd $DOWNLOAD_DIR
sudo curl --insecure --retry 3 --retry-connrefused -fL --remote-name-all https://dl.k8s.io/release/$RELEASE/bin/linux/$ARCH/{kubeadm,kubelet}
sudo chmod +x {kubeadm,kubelet}

RELEASE_VERSION="v0.4.0"
curl --insecure --retry 3 --retry-connrefused -fL "https://raw.githubusercontent.com/kubernetes/release/$RELEASE_VERSION/cmd/kubepkg/templates/latest/deb/kubelet/lib/systemd/system/kubelet.service" | sed "s:/usr/bin:$DOWNLOAD_DIR:g" | sudo tee /etc/systemd/system/kubelet.service

sudo mkdir -p /etc/systemd/system/kubelet.service.d

sudo curl --insecure --retry 3 --retry-connrefused -fL "https://raw.githubusercontent.com/kubernetes/release/$RELEASE_VERSION/cmd/kubepkg/templates/latest/deb/kubeadm/10-kubeadm.conf" | sed "s:/usr/bin:$DOWNLOAD_DIR:g" | sudo tee /etc/systemd/system/kubelet.service.d/10-kubeadm.conf
sudo mkdir -p /etc/kubernetes/manifests

KUBECTL_VERSION="v1.28.1"
sudo curl --insecure --retry 3 --retry-connrefused -fLO https://dl.k8s.io/release/$KUBECTL_VERSION/bin/linux/$ARCH/kubectl

sudo chmod +x /usr/local/bin/kubectl

sudo systemctl enable --now kubelet
cd $HOME
[ $? -eq 0 ] && echo "installation done"  
trap - ERR

then exit the worker node back to az shell

Joining a Worker Node to the Cluster

Now that we have everything set up, it’s time to join the worker node to the cluster. This process involves using a token for joining, as well as the hash of the master node’s CA certificate for authentication purposes. This ensures the worker node is joining the intended Kubernetes cluster.

Retrieve the Join Command from master node Once logged into the master node via ssh_master from azure shell, use the following command to display the join token and CA certificate hash. This information is stored in the workloadtojoin.sh file:

cat /home/ubuntu/workloadtojoin.sh

Copy the content displayed by the cat command. After copying the necessary join command, exit the master node session.

SSH into the Worker Node with alias ssh_worker to join the worker node to Cluster On the worker node, paste the previously copied join command to connect the worker node to the Kubernetes cluster. Replace , Replace and with the actual token and hash values you copied earlier. This command requires sudo to ensure it has the necessary permissions:

sudo kubeadm join <master node ip>:6443 --token <paste your token here> --discovery-token-ca-cert-hash <paste your hash here>

If there’s a need to reset the Kubernetes setup on the worker node before joining, you can use sudo kubeadm reset -f. This step is generally only necessary if you’re reconfiguring or troubleshooting the node

Following these steps will successfully join your worker node to the Kubernetes cluster. You can repeat the process for multiple worker nodes to expand the cluster’s capacity for running workloads. then exit the worker node and ssh_master into the master node to check cluster node status

you are expected to see both master node and worker node shall in Ready status.

kubectl get node -o wide

expected outcome

NAME          STATUS   ROLES           AGE   VERSION   INTERNAL-IP   EXTERNAL-IP   OS-IMAGE             KERNEL-VERSION     CONTAINER-RUNTIME
node-worker   Ready    <none>          54s   v1.27.1   10.0.0.4      <none>        Ubuntu 22.04.5 LTS   6.5.0-1025-azure   cri-o://1.27.4
nodemaster    Ready    control-plane   10m   v1.27.1   10.0.0.5      <none>        Ubuntu 22.04.5 LTS   6.5.0-1025-azure   cri-o://1.27.4

After Successfully Joining Worker Nodes to the Cluster Once you have successfully joined the worker nodes to the cluster, return to the master node to continue the setup or deployment process. Use the SSH command provided earlier to access the master node and proceed with your Kubernetes configuration or application deployment.

prepare access Kubernetes on azure shell

copy kubectl configuration to azure shell to use kubenetnes. as azure shell is outside for azure VM VPC, so it’s required to use Kubernetes master node public ip to access it.

cd $HOME/k8s-101-workshop/terraform/
nodename=$(terraform output -json | jq -r .linuxvm_master_FQDN.value)
username=$(terraform output -json | jq -r .linuxvm_username.value)
rm -rf $HOME/.kube/
mkdir -p ~/.kube/
scp -o 'StrictHostKeyChecking=no' $username@$nodename:~/.kube/config $HOME/.kube
sed -i "s|server: https://[0-9]\{1,3\}\.[0-9]\{1,3\}\.[0-9]\{1,3\}\.[0-9]\{1,3\}:6443|server: https://$nodename:6443|" $HOME/.kube/config

Verify the installation is sucessful

from azure cloud shell. run

kubectl get node 

expected result.

NAME          STATUS   ROLES           AGE     VERSION
node-worker   Ready    <none>          5h36m   v1.27.1
nodemaster    Ready    control-plane   5h49m   v1.27.1

Review Questions

  • Try to use flannel instead calico as CNI
  • Try to replace CRI-O with Docker as container runtime
  • List all the k8s component that installed on master node and worker node.

Kubernetes in depth

This chapter is your guide to mastering essential Kubernetes concepts.

  • You’ll start with Pods, the building blocks of applications in Kubernetes, understanding how they work and how to manage them effectively.
  • Then, you’ll explore ConfigMaps and Secrets, learning how to handle configuration data and sensitive information securely.
  • Next, you’ll dive into upgrade strategies, discovering how to update your applications smoothly without causing downtime.
  • Deployment techniques will be covered extensively, showing you how to deploy, update, and roll back application versions with ease.
  • Lastly, you’ll learn about scaling, exploring methods to adjust your application’s capacity to meet changing demands effortlessly.
  • By the end, you’ll have the skills to confidently deploy, manage, and scale applications in Kubernetes environments.

Subsections of Kubernetes in depth

Task 1 - Creating and Managing Pods

Objective: Learn Pod, container and init container

What is Pod

In Kubernetes, a Pod is the smallest and most basic deployable unit. It represents a single instance of a running process in your cluster. Pods are the building blocks of Kubernetes applications and encapsulate one or more containers, storage resources, a unique network IP, and options that govern how the containers should run. More info about Pods:

  • The smallest, most basic unit in Kubernetes.
  • Represents a single instance of a running process in your cluster.
  • Can contain one or more containers that are tightly coupled and share resources, such as storage and networking.
  • Often represents a single microservice, but can also encapsulate multiple closely related containers.
  • Pods are ephemeral by nature, meaning they can be created, destroyed, and replaced dynamically based on the cluster’s needs.
  • Managed by Kubernetes controllers like Deployments, ReplicaSets, or StatefulSets to ensure desired state and high availability.(We will learn about these in next chapters)
  • Provides a unique IP address within the cluster, allowing communication between Pods.
  • Can have one or more volumes attached to it for persistent storage.
  • Logs and metrics of individual containers within a Pod can be accessed using kubectl.

Pods in a Kubernetes cluster are used in two main ways:

Pods that run a single container: The “one-container-per-Pod” model is the most common Kubernetes use case; in this case, you can think of a Pod as a wrapper around a single container; Kubernetes manages Pods rather than managing the containers directly.

Pods that run multiple containers: that need to work together. A Pod can encapsulate an application composed of multiple co-located containers that are tightly coupled and need to share resources. These co-located containers form a single cohesive unit.

Copy the below manifest file to create a Pod.

cat << EOF | kubectl apply -f -
apiVersion: v1
kind: Pod
metadata:
  name: nginx
spec:
  containers:
  - name: nginx
    image: nginx:latest
    ports:
    - containerPort: 80
EOF

Init container

Init containers in Kubernetes are specialized containers that run before the main containers in a Pod, serving to prepare the environment or perform initialization tasks. They execute sequentially, ensuring that each init container completes successfully before the next one starts and before the main containers begin execution. Init containers share the same volume mounts as the main containers, facilitating the sharing of resources such as configuration files or secrets. They are transient in nature, running to completion once and then terminating, and are not restarted if they fail.

  • To create Pod with init containers:
cat << EOF |  kubectl apply -f -
apiVersion: v1
kind: Pod
metadata:
  name: nginx-pod-manual
spec:
  volumes:
  - name: shared-data
    emptyDir: {}
  containers:
  - name: nginx
    image: nginx:latest
    ports:
    - containerPort: 80
    volumeMounts:
    - name: shared-data
      mountPath: /usr/share/nginx/html
  initContainers:
  - name: init-nginx
    image: busybox
    command: ['sh', '-c', 'echo "Hello, NGINX at $(date)!" >> /usr/share/nginx/html/index.html']
    volumeMounts:
    - name: shared-data
      mountPath: /usr/share/nginx/html
EOF
  • To check Pods, run kubectl get pods

  • To check more detail of Pod, use kubectl describe pod

check the output difference between kubectl describe pod nginx and kubectl describe pod nginx-pod-manual.

  • To access nginx Pod from contaier itself, use
kubectl exec -it po/nginx-pod-manual -- curl http://127.0.0.1

expected outcome

Hello, NGINX at Tue Feb 27 01:18:50 AM UTC 2024!

Review Questions

  1. What is the purpose of spec.containers.volumeMounts in a Pod definition?
    Click for Answer…
    Specify where volumes should be mounted within containers.
    
  2. Which lines in the Pod nginx-pod-manual define a volume?
    Click for Answer…
    volumeMounts:
    - name: shared-data
      mountPath: /usr/share/nginx/html
    
  3. Why can the init container access the shared-data folder?
    Click for Answer…
    Both the init container and the main nginx container mount this same volume
    
  4. Can you restart a Pod created with kubectl create pod or a YAML file specifying kind: Pod?
    Click for Answer…
    You cannot directly restart a Pod created with kind: Pod
    
  5. If you delete the Pod nginx-pod-manual and recreate it using the same YAML, will the previous data in the shared-data folder persist?"
    Click for Answer…
    No, The volume is defined as an emptyDir, emptyDir volumes are ephemeral and tied to the Pod's lifecycle.
    

Clean up

kubectl delete pod nginx-pod-manual

Task 2 - Configuration

Objective: Master injecting configuration into Pods.

Description: Learn to externalize application configuration using ConfigMaps and the Downward API. Understand how to pass environment variables, configure application settings, and expose Pod and container metadata to applications. Labs include creating ConfigMaps and using the Downward API to expose Pod information.

ConfigMaps:

In Kubernetes, ConfigMaps are a resource object used to store non-sensitive configuration data in key-value pairs that can be consumed by pods or other system components. They provide a way to decouple configuration artifacts from container images, allowing for more flexible and manageable application configurations.

Here are some reasons why ConfigMaps are used in Kubernetes:

  • Separation of Concerns: ConfigMaps allow you to separate configuration data from application code. This separation makes it easier to manage configurations independently of the application’s lifecycle, which can be particularly useful in scenarios where multiple instances of the same application are deployed with different configurations.

  • Dynamic Configuration Updates: ConfigMaps support dynamic updates, meaning that changes to the configuration can be applied to running pods without requiring a restart. This allows for more flexibility and agility in managing application configurations.

  • Environment Agnostic: ConfigMaps are environment-agnostic, meaning that the same configuration can be used across multiple environments (e.g., development, testing, production) without modification. This helps maintain consistency and simplifies the deployment process.

  • Immutable Infrastructure: By externalizing configurations into ConfigMaps, the underlying infrastructure becomes more immutable. This means that changes to configurations do not require modifications to the underlying infrastructure, making deployments more predictable and reliable.

  • Centralized Management: ConfigMaps provide a centralized location for managing configuration data. This can be particularly beneficial in large-scale deployments where multiple applications and components require different configurations.

  • Integration with Other Resources: ConfigMaps can be easily integrated with other Kubernetes resources such as pods, deployments, and services. This allows you to inject configuration data into your application containers at runtime, making them highly configurable and adaptable to different environments.

Overall, ConfigMaps play a crucial role in Kubernetes by providing a flexible and efficient mechanism for managing configuration data in a containerized environment, contributing to improved application deployment, scalability, and maintainability.

Secrets:

In Kubernetes, Secrets are another type of resource object used to store sensitive information, such as passwords, OAuth tokens, and SSH keys, in a secure manner. They are similar to ConfigMaps but are specifically designed to handle sensitive data. Here are some key aspects of Secrets in Kubernetes:

  • Secure Storage: Secrets are stored securely within the Kubernetes cluster, encrypted at rest by default. This ensures that sensitive information is not exposed or accessible to unauthorized users.

  • Base64 Encoding: Secret data is typically stored in Base64 encoded format. While Base64 encoding does not provide encryption, it helps prevent accidental exposure of sensitive data in logs or other places where plaintext might be displayed.

  • Multiple Types of Secrets: Kubernetes supports various types of Secrets, including generic secrets, Docker registry credentials, TLS certificates, and service account tokens. Each type of Secret has its specific use case and configuration options.

  • Usage in Pods: Secrets can be mounted as volumes or exposed as environment variables within pods. This allows containers running within the pod to access the sensitive information stored in the Secret without exposing it directly in the container specification or source code.

  • Access Control: Kubernetes provides role-based access control (RBAC) mechanisms to manage access to Secrets. This ensures that only authorized users or applications can create, read, update, or delete Secrets within the cluster.

  • Automatic Injection: In some cases, Kubernetes can automatically inject certain types of Secrets into pods. For example, service account tokens are automatically mounted as a volume in pods running within the Kubernetes cluster, allowing them to authenticate with the Kubernetes API server.

  • Immutable Once Created: Unlike ConfigMaps, Secrets are immutable once created. This means that you cannot update the data stored in a Secret directly. Instead, you must delete the existing Secret and create a new one with the updated data.

Overall, Secrets in Kubernetes provide a secure and convenient way to manage sensitive information within a cluster, ensuring that sensitive data is protected from unauthorized access while still being accessible to the applications that need it.

Creating ConfigMaps:

cat << EOF | kubectl apply -f -
apiVersion: v1
kind: ConfigMap
metadata:
  name: nginx-index-html
data:
  index.html: |
    <!DOCTYPE html>
    <html>
    <head>
      <title>Welcome to NGINX!</title>
    </head>
    <body>
      <h1>Welcome to NGINX!</h1>
      <p>This is a custom index.html page served by NGINX at $(date).</p>
    </body>
    </html>
EOF

To get configmap, try kubectl get configmap

Creating Secret:

  • Firstly, we need encode a secret value to base64. On linux you can use the following commands to encode.

  • Encode a string to base64:

echo -n 'your_secret_value' | base64

for example:

base64_encoded_username=$(echo -n 'ftntadmin' | base64)
base64_encoded_password=$(echo -n 'password123' | base64)

cat << EOF | kubectl apply -f -
apiVersion: v1
kind: Secret
metadata:
  name: nginx-secret
type: Opaque
data:
  username: $base64_encoded_username
  password: $base64_encoded_password
EOF

There are several types of built in Secrets [!https://kubernetes.io/docs/concepts/configuration/secret/#secret-types] in Kubernetes. Opaque is a secret which is an arbitrary user defined data.

Creating a pod using confimap and secret

cat << EOF | tee nginx-pod-with-configmap-secret.yaml
apiVersion: v1
kind: Pod
metadata:
  name: nginx-pod-with-configmap-secret
spec:
  containers:
  - name: nginx-container
    image: nginx:latest
    ports:
    - containerPort: 80
    volumeMounts:
    - name: nginx-config-volume
      mountPath: /usr/share/nginx/html
    - name: nginx-secret-volume
      mountPath: /etc/nginx/secret
      readOnly: true
  volumes:
  - name: nginx-config-volume
    configMap:
      name: nginx-index-html
  - name: nginx-secret-volume
    secret:
      secretName: nginx-secret
EOF
kubectl apply -f nginx-pod-with-configmap-secret.yaml

Review Questions

  1. How to access nginx Pod web page from container inside ?
    Click for Answer…
    kubectl exec -it nginx-pod-with-configmap-secret --  curl localhost:80 
  2. Delete Pod nginx-pod-with-configmap-secret and create again, check the web page of nginx again ? did you see any difference ? why ?
    Click for Answer…

    you should not see any difference, as The ConfigMap and Secret remain unchanged in the cluster.

  3. Modify below nginx-deployment with VolumeMounts to use ConfigMap
    Click for Answer…

    nginx-deployment

    apiVersion: apps/v1
    kind: Deployment
    metadata:
      name: nginx-deployment
      labels:
        app: nginx
    spec:
      replicas: 2
      selector:
        matchLabels:
          app: nginx
      template:
        metadata:
          labels:
            app: nginx
        spec:
          containers:
          - name: nginx
            image: nginx:latest
            ports:
            - containerPort: 80

    ConfigMap

    cat << EOF | tee nginx_deployment_cm.yaml
    apiVersion: v1
    kind: ConfigMap
    metadata:
      name: nginx-webpage
    data:
      index.html: |
        <html>
        <head>
        <title>Welcome to NGINX!</title>
        </head>
        <body>
        <h1>Hello, Kubernetes!</h1>
        </body>
        </html>
    
    kubectl create -f nginx_deployment_cm.yaml

Task 3 - Deploy and Scale Deployments

Objective: Master the Creation and Management of Deployments

Description: This module zeroes in on Deployments as the primary mechanism for deploying applications on Kubernetes. You will delve into the creation of Deployments, learn how to scale them effectively, and update applications with zero downtime. Through hands-on lab exercises, you will experience deploying a multi-replica application and conducting rolling updates to ensure seamless application transitions.

Deploying an Application with a Deployment

We’ve previously seen how to use kubectl create deployment Kubernetes-bootcamp –image=gcr.io/google-samples/kubernetes-bootcamp:v1 to create a deployment directly from the command line. However, Kubernetes also supports deploying applications using YAML or JSON manifests. This approach provides greater flexibility than using the kubectl CLI alone and facilitates version control of your deployment configurations.

By defining deployments in YAML or JSON files, you can specify detailed configurations, manage them through source control systems, and apply changes systematically. This method enhances the maintainability and reproducibility of your deployments within a Kubernetes environment.

  1. Deployment kubernetes-bootcamp application
cat << EOF | tee kubernetes-bootcamp.yaml
apiVersion: apps/v1
kind: Deployment
metadata:
  name: kubernetes-bootcamp
spec:
  replicas: 1 # Default value for replicas when not specified
  selector:
    matchLabels:
      app: kubernetes-bootcamp
  template:
    metadata:
      labels:
        app: kubernetes-bootcamp
    spec:
      containers:
      - name: kubernetes-bootcamp
        image: gcr.io/google-samples/kubernetes-bootcamp:v1
EOF
kubectl create -f kubernetes-bootcamp.yaml
  • replicas: 1: Specifies that only one replica of the Pod should be running.
  • selector: Defines how the Deployment finds which Pods to manage using matchLabels.
  • template: Describes the Pod template used by the Deployment to create new Pods.
  • metadata.labels: Sets the label app: kubernetes-bootcamp on the Pod, matching the selector in the Deployment spec.
  • spec.containers: Lists the containers to run in the Pod.
  • image: gcr.io/google-samples/kubernetes-bootcamp:v1: Specifies the container image to use.

Scale your deployment

After deploying the Kubernetes Bootcamp application, you might find the need to scale your deployment to accommodate an increased load or enhance availability. Kubernetes allows you to scale a deployment, increasing the number of replicas from 1 to 10, for instance. This ensures your application can handle a higher load. There are several methods to scale a deployment, each offering unique benefits.

1. Using kubectl scale

Benefits

  • Immediate: This command directly changes the number of replicas in the deployment, making it a quick way to scale.
  • Simple: Easy to remember and use for ad-hoc scaling operations.
  1. Check the existing Deployment
    kubectl get deployment

    expected output

    NAME                  READY   UP-TO-DATE   AVAILABLE   AGE
    kubernetes-bootcamp   1/1     1            1           63m
  2. Scaling the deployment:

kubectl scale deployment kubernetes-bootcamp --replicas=10

expected output

deployment.apps/kubernetes-bootcamp scaled
3. Check the Deployment status
kubectl rollout status deployment kubernetes-bootcamp

Expected output

Waiting for deployment "kubernetes-bootcamp" rollout to finish: 1 of 10 updated replicas are available...
Waiting for deployment "kubernetes-bootcamp" rollout to finish: 2 of 10 updated replicas are available...
Waiting for deployment "kubernetes-bootcamp" rollout to finish: 3 of 10 updated replicas are available...
Waiting for deployment "kubernetes-bootcamp" rollout to finish: 4 of 10 updated replicas are available...
Waiting for deployment "kubernetes-bootcamp" rollout to finish: 5 of 10 updated replicas are available...
Waiting for deployment "kubernetes-bootcamp" rollout to finish: 6 of 10 updated replicas are available...
Waiting for deployment "kubernetes-bootcamp" rollout to finish: 7 of 10 updated replicas are available...
Waiting for deployment "kubernetes-bootcamp" rollout to finish: 8 of 10 updated replicas are available...
Waiting for deployment "kubernetes-bootcamp" rollout to finish: 9 of 10 updated replicas are available...
deployment "kubernetes-bootcamp" successfully rolled out
4. Verify the Deployment
kubectl get deployment kubernetes-bootcamp

After scaling, you should observe that the number of Pods has increased to meet the deployment’s requirements.

expected output

NAME                  READY   UP-TO-DATE   AVAILABLE   AGE
kubernetes-bootcamp   10/10   10           10          64m
5. Listing the Pods from Deployment
kubectl get pod -l app=kubernetes-bootcamp

expected output

NAME                                  READY   STATUS    RESTARTS   AGE
kubernetes-bootcamp-bcbb7fc75-5fjhc   1/1     Running   0          44s
kubernetes-bootcamp-bcbb7fc75-5kjd7   1/1     Running   0          44s
kubernetes-bootcamp-bcbb7fc75-5r649   1/1     Running   0          30m
kubernetes-bootcamp-bcbb7fc75-bmzbv   1/1     Running   0          44s
kubernetes-bootcamp-bcbb7fc75-fn29h   1/1     Running   0          44s
kubernetes-bootcamp-bcbb7fc75-fp2d9   1/1     Running   0          44s
kubernetes-bootcamp-bcbb7fc75-jfdvf   1/1     Running   0          44s
kubernetes-bootcamp-bcbb7fc75-nh9sn   1/1     Running   0          44s
kubernetes-bootcamp-bcbb7fc75-q7sqc   1/1     Running   0          44s
kubernetes-bootcamp-bcbb7fc75-t4tkm   1/1     Running   0          44s

This output confirms the deployment now runs 10 replicas of the Kubernetes Bootcamp application, demonstrating successful scaling.

6. delete the deployment

kubectl delete deployment kubernetes-bootcamp 

2. use kubectl apply

Benefits

If the intended resource to update is in yaml file, we can directly edit the yaml file with any editor, then use kubectl apply to update.

  • Version Controlled: Can be version-controlled if using a local YAML file, allowing for tracking of changes and rollbacks.
  • Reviewable: Changes can be reviewed by team members before applying if part of a GitOps workflow.

The kubectl apply -f command is more flexible and is recommended for managing applications in production. It updates resources with the changes defined in the YAML file but retains any modifications that are not specified in the file.It’s particularly suited for scenarios where you might want to maintain manual adjustments or unspecified settings.

  1. create Kubernetes-bootcamp deployment with yaml file
cat << EOF | tee kubernetes-bootcamp.yaml
apiVersion: apps/v1
kind: Deployment
metadata:
  name: kubernetes-bootcamp
spec:
  replicas: 1 # Default value for replicas when not specified
  selector:
    matchLabels:
      app: kubernetes-bootcamp
  template:
    metadata:
      labels:
        app: kubernetes-bootcamp
    spec:
      containers:
      - name: kubernetes-bootcamp
        image: gcr.io/google-samples/kubernetes-bootcamp:v1
EOF
kubectl apply -f kubernetes-bootcamp.yaml 
  1. Verify the deployment
    kubectl get deployment

    expected output

    NAME                  READY   UP-TO-DATE   AVAILABLE   AGE
    kubernetes-bootcamp   1/1     1            1           3s
  2. modify replicas in yaml file

Now, use editor like vim to change the replicas=1 in the yaml file to replicas=10. Alternatively you can also use sed to change it

sed -i 's/replicas: 1/replicas: 10/' kubernetes-bootcamp.yaml

Apply the change with kubectl apply

kubectl apply -f kubernetes-bootcamp.yaml

Verify the result

kubectl get deployment kubernetes-bootcamp

expected outcome

NAME                  READY   UP-TO-DATE   AVAILABLE   AGE
kubernetes-bootcamp   10/10   10           10          99s

clean up

kubectl delete -f kubernetes-bootcamp.yaml

3. use kubectl edit

This approach involves manually editing the resource definition in a text editor (invoked by kubectl edit), where you can change any part of the resource. After saving and closing the editor, Kubernetes applies the changes. This method requires no separate kubectl apply, as kubectl edit directly applies the changes once the file is saved and closed.

Benefit: Ablility to review and modify other configuration which is not in YAML file

  1. create the deployment
kubectl create deployment kubernetes-bootcamp --image=gcr.io/google-samples/kubernetes-bootcamp:v1 --replicas=1
  1. Modify replicas with kubectl edit
kubectl edit deployment kubernetes-bootcamp

above command show you into VI EDITOR with opened yaml file, locate the text

spec:
  progressDeadlineSeconds: 600
  replicas: 1

then change replicas from 1 to 10, save the change and exit the EDITOR with press Ctrl-C follow :wq!.

  1. Verify the deployment
kubectl get deployment kubernetes-bootcamp
  1. delete deployment
kubectl delete deployment kubernetes-bootcamp

4. Kubectl patch

kubectl patch directly updates specific parts of a resource without requiring you to manually edit a file or see the entire resource definition. It’s particularly useful for making quick changes, like updating an environment variable in a Pod or changing the number of replicas in a deployment.

Benefit: Ideal for scripts and automation because you can specify the exact change in a single command line.

  1. Create Deployment
kubectl create deployment kubernetes-bootcamp --image=gcr.io/google-samples/kubernetes-bootcamp:v1 --replicas=1
  1. Verify the Deployment
kubectl get deployment kubernetes-bootcamp

expected result

NAME                  READY   UP-TO-DATE   AVAILABLE   AGE
kubernetes-bootcamp   1/1     1            1           33s
  1. use kubectl patch to change replicas
kubectl patch deployment kubernetes-bootcamp --type='json' -p='[{"op": "replace", "path": "/spec/replicas", "value":10}]'
  1. Verify the Deployment
kubectl get deployment kubernetes-bootcamp

expected result

NAME                  READY   UP-TO-DATE   AVAILABLE   AGE
kubernetes-bootcamp   10/10   10           10          97s
  1. Delete the Deployment
kubectl delete deployment kubernetes-bootcamp

5. use kubectl replace

The kubectl replace -f command replaces a resource with the new state defined in the YAML file. If the resource doesn’t exist, the command fails. This command requires that the resource be defined completely in the file being applied because it replaces the existing configuration with the new one provided.

Deletion and Recreation: Under the hood, replace effectively deletes and then recreates the resource, which can lead to downtime for stateful applications or services. This method does not preserve unspecified fields or previous modifications made outside the YAML file.

Usage: Use kubectl replace -f when you want to overwrite the resource entirely, and you are certain that the YAML file represents the complete and desired state of the resource.

  1. create deployment with image=gcr.io/google-samples/kubernetes-bootcamp:v1
cat << EOF | tee kubernetes-bootcamp.yaml
apiVersion: apps/v1
kind: Deployment
metadata:
  name: kubernetes-bootcamp
spec:
  replicas: 5 # Default value for replicas when not specified
  selector:
    matchLabels:
      app: kubernetes-bootcamp
  template:
    metadata:
      labels:
        app: kubernetes-bootcamp
    spec:
      containers:
      - name: kubernetes-bootcamp
        image: gcr.io/google-samples/kubernetes-bootcamp:v1
        
EOF
kubectl create -f kubernetes-bootcamp.yaml
  1. verify the deployment
kubectl get pod -l app=kubernetes-bootcamp

expected output

NAME                                   READY   STATUS        RESTARTS   AGE
kubernetes-bootcamp-5485cc6795-5wdrb   1/1     Running       0          4s
kubernetes-bootcamp-5485cc6795-79qkm   1/1     Running       0          4s
kubernetes-bootcamp-5485cc6795-ltqst   1/1     Running       0          4s
kubernetes-bootcamp-5485cc6795-szgqt   1/1     Running       0          4s
kubernetes-bootcamp-5485cc6795-xw7l6   1/1     Running       0          4s

the Pod has name from deployment template hash kubernetes-bootcamp-5485cc6795

  1. Modify image in yaml file

Modify container image in kubernetes-bootcamp.yaml. Modify this will affect the Pod template hash

sed -i 's|image: gcr.io/google-samples/kubernetes-bootcamp:v1|image: jocatalin/kubernetes-bootcamp:v2|' kubernetes-bootcamp.yaml
  1. apply the change
kubectl replace -f kubernetes-bootcamp.yaml
  1. Verify deployment v
kubectl get pod -l app=kubernetes-bootcamp

Expected output

NAME                                   READY   STATUS        RESTARTS   AGE
kubernetes-bootcamp-5485cc6795-5wdrb   1/1     Terminating   0          78s
kubernetes-bootcamp-5485cc6795-79qkm   1/1     Terminating   0          78s
kubernetes-bootcamp-5485cc6795-ltqst   1/1     Terminating   0          78s
kubernetes-bootcamp-5485cc6795-szgqt   1/1     Terminating   0          78s
kubernetes-bootcamp-5485cc6795-xw7l6   1/1     Terminating   0          78s
kubernetes-bootcamp-7c6644499c-559fq   1/1     Running       0          7s
kubernetes-bootcamp-7c6644499c-9zdg2   1/1     Running       0          7s
kubernetes-bootcamp-7c6644499c-fb9dn   1/1     Running       0          6s
kubernetes-bootcamp-7c6644499c-l9xhn   1/1     Running       0          6s
kubernetes-bootcamp-7c6644499c-nzhj9   1/1     Running       0          7s

You should observe the creation of new Pods with a new hash in their names, indicating an update. Concurrently, all previous Pods with the old hash in their names will be deleted, suggesting that the entire resource has been recreated.

  1. Delete the deployment
kubectl delete deployment kubernetes-bootcamp

Risk of Downtime: For some resources, using kubectl replace can cause downtime since it may delete and recreate the resource, depending on the type and changes made. It’s important to use this command with caution, especially for critical resources in production environments.

Summary

  • kubectl scale: Quickly scales the number of replicas for a deployment, ideal for immediate, ad-hoc adjustments.

  • kubectl edit: Offers an interactive way to scale by manually editing the deployment’s YAML definition in a text editor, providing a chance to review and adjust other configurations simultaneously.

  • kubectl patch: Efficiently updates the replicas count with a single command, suitable for scripts and automation without altering the rest of the deployment’s configuration.

  • kubectl replace -f: Replaces the entire deployment with a new configuration from a YAML file, used when you have a prepared configuration that includes the desired replicas count.

  • kubectl apply -f: Applies changes from a YAML file to the deployment, allowing for version-controlled and incremental updates, including scaling operations.

Task 4 - Auto Scaling Deployment

Objective: Automate Deployment Scaling with HPA

Learn to configure the Horizontal Pod Autoscaler (HPA) for a deployment and simulate traffic to test scaling.

Using kubectl autoscale

When Kubernetes has Resouce Metrics API installed, We can using the kubectl autoscale command kubectl autoscale deployment to automatically scale a deployment based on CPU utilization (or any other metric) requires that the Kubernetes Metrics Server (or an equivalent metrics API) is installed and operational in your cluster. The Metrics Server collects resource metrics from Kubelets and exposes them in the Kubernetes API server through the Metrics API for use by Horizontal Pod Autoscaler (HPA) and other components.

using the kubectl autoscale command to automatically scale a deployment based on CPU utilization (or any other metric) requires that the Kubernetes Metrics Server (or an equivalent metrics API) is installed and operational in your cluster. The Metrics Server collects resource metrics from Kubelets and exposes them in the Kubernetes API server through the Metrics API for use by Horizontal Pod Autoscaler (HPA) and other components.

Enable resource-API

The Resource Metrics API in Kubernetes is crucial for providing core metrics about Pods and nodes within a cluster, such as CPU and memory usage to enable feature like Horizontal Pod Autoscaler (HPA), Vertical Pod Autoscaler (VPA) and enable efficent resource scheduling.

  1. copy/paste below command to enable resource-api
curl  --insecure --retry 3 --retry-connrefused -fL "https://github.com/kubernetes-sigs/metrics-server/releases/latest/download/components.yaml" -o components.yaml
sed -i '/- --metric-resolution/a \ \ \ \ \ \ \ \ - --kubelet-insecure-tls' components.yaml

kubectl apply -f components.yaml
kubectl rollout status deployment metrics-server -n kube-system

use kubectl top node and kubectl top pod to check the Pod and node resource usage

Create a deployment with resource constrain

  • In this deployment , we add some resource restriction like memory and cpu for a POD.

  • when POD reach the CPU or memory limit, if HPA configured, new POD will be created according HPA policy.

  1. create deployment with CPU and Memory constraints
    cat <<EOF | tee nginx-deployment_resource.yaml
    apiVersion: apps/v1
    kind: Deployment
    metadata:
      name: nginx-deployment
      labels:
        app: nginx
    spec:
      replicas: 2
      selector:
        matchLabels:
          app: nginx
      template:
        metadata:
          labels:
            app: nginx
        spec:
          containers:
          - name: nginx
            image: nginx:latest
            ports:
            - containerPort: 80
            resources:
              requests:
                memory: "64Mi"  # Minimum memory requested to start the container
                cpu: "10m"     # 100 millicpu (0.1 CPU) requested to start the container
              limits:
                memory: "128Mi" # Maximum memory limit for the container
                cpu: "40m"     # 200 millicpu (0.2 CPU) maximum limit for the container
    EOF
    kubectl apply -f nginx-deployment_resource.yaml
    kubectl rollout status deployment nginx-deployment
    
    cat << EOF | tee nginx-deployment_clusterIP.yaml
    apiVersion: v1
    kind: Service
    metadata:
      labels:
        app: nginx
      name: nginx-deployment
      namespace: default
    spec:
      ipFamilies:
      - IPv4
      ipFamilyPolicy: SingleStack
      ports:
      - port: 80
        protocol: TCP
        targetPort: 80
      selector:
        app: nginx
      sessionAffinity: None
      type: ClusterIP
    EOF
    kubectl apply -f nginx-deployment_clusterIP.yaml

    check the deployment and service

    kubectl get deployment nginx-deployment
    kubectl get svc nginx-deployment

Use autoscale (HPA) to scale your application

  1. We can use kubectl autoscale command or use create a hpa yaml file then follow a kubectl apply -f to create hpa.

use kubectl command to create hpa

kubectl autoscale deployment nginx-deployment --name=nginx-deployment-hpa --min=2 --max=10 --cpu-percent=50  --save-config

expected Outcome

horizontalpodautoscaler.autoscaling/nginx-deployment-hpa autoscaled

or use yaml file to create hpa

cat << EOF | tee > nginx-deployment-hpa.yaml
apiVersion: autoscaling/v2
kind: HorizontalPodAutoscaler
metadata:
  name: nginx-deployment-hpa
spec:
  scaleTargetRef:
    apiVersion: apps/v1
    kind: Deployment
    name: nginx-deployment
  minReplicas: 2
  maxReplicas: 10
  metrics:
  - type: Resource
    resource:
      name: cpu
      target:
        type: Utilization
        averageUtilization: 50
EOF
kubectl apply -f nginx-deployment-hpa.yaml
  • Target CPU Utilization: This is set to 50%. It means the HPA will aim to adjust the number of Pods so that the average CPU utilization across all Pods is around 50% of the allocated CPU resources for each Pod.
  • Scaling Out: If the average CPU utilization across all Pods in the nginx-deployment exceeds 50%, the HPA will increase the number of Pods, making more resources available to handle the workload, until it reaches the maximum limit of 10 Pods.
  • Scaling In: If the average CPU utilization drops below 50%, indicating that the resources are underutilized, the HPA will decrease the number of Pods to reduce resource usage, but it won’t go below the minimum of 2 Pod.
  1. Check Result

use kubectl get hpa nginx-deployment-hpa to check deployment

kubectl get hpa nginx-deployment-hpa

Expected Outcome

NAME                   REFERENCE                     TARGETS   MINPODS   MAXPODS   REPLICAS   AGE
nginx-deployment-hpa   Deployment/nginx-deployment   0%/50%    2         10        2          23s
For a deeper understanding, consider using the following command to conduct further observations"

use kubectl get deployment nginx-deployment to check the change of deployment. use kubectl get hpa and kubectl describe hpa to check the size of replicas.

Send http traffic to application

since the nginx-deployment service is cluster-ip type service which can only be accessed from cluster internal, so we need to create a POD which can send http traffic to nginx-deployment service.

  1. create deployment for generate http traffic, in this deployment, we will use wget to similuate the real traffic towards ngnix-deployment cluster-ip service which has service name http://nginx-deployment.default.svc.cluster.local.
cat <<EOF | tee infinite-calls-deployment.yaml
apiVersion: apps/v1
kind: Deployment
metadata:
  name: infinite-calls
  labels:
    app: infinite-calls
spec:
  replicas: 2
  selector:
    matchLabels:
      app: infinite-calls
  template:
    metadata:
      name: infinite-calls
      labels:
        app: infinite-calls
    spec:
      containers:
      - name: infinite-calls
        image: busybox
        command:
        - /bin/sh
        - -c
        - "while true; do wget -q -O- http://nginx-deployment.default.svc.cluster.local; done"
EOF
kubectl apply -f infinite-calls-deployment.yaml
  1. check the creation of infinite-calls deployment
kubectl get deployment infinite-calls
  1. check the log from infinite-calls Pods. {.items[0]} means use first Pod
podName=$(kubectl get pod -l app=infinite-calls -o=jsonpath='{.items[0].metadata.name}')
kubectl logs  po/$podName

you will see the response from nginx web server container. use ctr-c to stop.

use kubectl top pod and kubectl top node to check the resource usage status user expected to see the number of Pod increased

  1. You shall see that expected Pod now increased automatically without use attention.

    kubectl get pod -l app=nginx

    expected outcome

    NAME                                READY   STATUS    RESTARTS   AGE
    nginx-deployment-55c7f467f8-f2qbp   1/1     Running   0          19m
    nginx-deployment-55c7f467f8-hxs79   1/1     Running   0          2m2s
    nginx-deployment-55c7f467f8-jx2k9   1/1     Running   0          19m
    nginx-deployment-55c7f467f8-r7vdv   1/1     Running   0          3m2s
    nginx-deployment-55c7f467f8-w6r8l   1/1     Running   0          3m17s

  2. Use kubectl get hpa shall tell you that hpa is action which increased the replicas from 2 to other numbers.

    kubectl get hpa

    expected outcome

    NAME        REFERENCE                     TARGETS   MINPODS   MAXPODS   REPLICAS   AGE
    nginx-deployment-hpa   Deployment/nginx-deployment   50%/50%   2         10        5          11m

  3. check hpa detail

    kubectl describe hpa

    expected outcome

    Name:                     nginx-deployment-hpa
    Namespace:                default
    Labels:                   <none>
    Annotations:              autoscaling.alpha.kubernetes.io/conditions:
                                [{"type":"AbleToScale","status":"True","lastTransitionTime":"2024-02-22T07:57:16Z","reason":"ReadyForNewScale","message":"recommended size...
                              autoscaling.alpha.kubernetes.io/current-metrics:
                                [{"type":"Resource","resource":{"name":"cpu","currentAverageUtilization":48,"currentAverageValue":"4m"}}]
    CreationTimestamp:        Thu, 22 Feb 2024 07:57:01 +0000
    Reference:                Deployment/nginx-deployment
    Target CPU utilization:   50%
    Current CPU utilization:  48%
    Min replicas:             2
    Max replicas:             10
    Deployment pods:          5 current / 5 desired
    Events:
      Type    Reason             Age    From                       Message
      ----    ------             ----   ----                       -------
      Normal  SuccessfulRescale  4m28s  horizontal-pod-autoscaler  New size: 3; reason: cpu resource utilization (percentage of request) above target
      Normal  SuccessfulRescale  4m13s  horizontal-pod-autoscaler  New size: 4; reason: cpu resource utilization (percentage of request) above target
      Normal  SuccessfulRescale  3m13s  horizontal-pod-autoscaler  New size: 5; reason: cpu resource utilization (percentage of request) above target

  4. delete infinite-calls to stop generate the traffic

    kubectl delete deployment infinite-calls

    after few minutes later, due to no more traffic is hitting the nginx server. hpa will scale in the number of Pod to save resource.

    kubectl get hpa

    expected output

    NAME        REFERENCE                     TARGETS   MINPODS   MAXPODS   REPLICAS   AGE
    nginx-deployment-hpa   Deployment/nginx-deployment   0%/50%   2         10        5          12m

  5. use kubectl describe hpa will tell you the reason why hpa scale in the number of Pod.

kubectl describe hpa

expected outcome

Name:                     nginx-deployment-hpa
Namespace:                default
Labels:                   <none>
Annotations:              autoscaling.alpha.kubernetes.io/conditions:
                            [{"type":"AbleToScale","status":"True","lastTransitionTime":"2024-02-22T07:57:16Z","reason":"ReadyForNewScale","message":"recommended size...
                          autoscaling.alpha.kubernetes.io/current-metrics:
                            [{"type":"Resource","resource":{"name":"cpu","currentAverageUtilization":0,"currentAverageValue":"0"}}]
CreationTimestamp:        Thu, 22 Feb 2024 07:57:01 +0000
Reference:                Deployment/nginx-deployment
Target CPU utilization:   50%
Current CPU utilization:  0%
Min replicas:             2
Max replicas:             10
Deployment pods:          2 current / 2 desired
Events:
  Type    Reason             Age    From                       Message
  ----    ------             ----   ----                       -------
  Normal  SuccessfulRescale  13m    horizontal-pod-autoscaler  New size: 3; reason: cpu resource utilization (percentage of request) above target
  Normal  SuccessfulRescale  13m    horizontal-pod-autoscaler  New size: 4; reason: cpu resource utilization (percentage of request) above target
  Normal  SuccessfulRescale  12m    horizontal-pod-autoscaler  New size: 5; reason: cpu resource utilization (percentage of request) above target
  Normal  SuccessfulRescale  7m55s  horizontal-pod-autoscaler  New size: 8; reason: cpu resource utilization (percentage of request) above target
  Normal  SuccessfulRescale  54s    horizontal-pod-autoscaler  New size: 5; reason: All metrics below target
  Normal  SuccessfulRescale  39s    horizontal-pod-autoscaler  New size: 2; reason: All metrics below target

clean up

kubectl delete hpa nginx-deployment-hpa
kubectl delete deployment nginx-deployment
kubectl delete svc nginx-deployment

Summary

Choosing the right scaling method depends on your specific needs, such as whether you need to quickly adjust resources, maintain performance under varying loads, or integrate scaling into a CI/CD pipeline. Manual methods like kubectl scale or editing the deployment are straightforward for immediate needs, while kubectl autoscale and HPA provide more dynamic, automated scaling based on actual usage, making them better suited for production environments with fluctuating workloads.

Task 5 - Upgrade Deployment

Objective: Mastering Deployment Upgrades and Downgrades

Discover upgrade strategies and learn how to effectively upgrade or downgrade deployments

Upgrade the deployment

Upgrading a deployment in Kubernetes, particularly changing the version of the application your Pods are running, can be smoothly managed using Kubernetes’ built-in strategies to ensure minimal downtime and maintain stability. The most popular strategies for upgrading a deployment are:

  • Rolling Update (Default Strategy)

How It Works: This strategy updates the Pods in a rolling fashion, gradually replacing old Pods with new ones. Kubernetes automatically manages this process, ensuring that a specified number of Pods are running at all times during the update. Advantages: Zero downtime, as the service remains available during the update. It allows for easy rollback in case the new version is faulty.

  • Blue/Green Deployment This strategy involves running two versions of the application simultaneously - the current (blue) and the new (green) versions. Once the new version is ready and tested, traffic is switched from the old version to the new version, either gradually or all at once.

  • Canary Deployment A small portion of the traffic is gradually shifted to the new version of the application. Based on feedback and metrics, the traffic is slowly increased to the new version until it handles all the traffic.

  • ReCreate Strategy The “Recreate” strategy is a deployment strategy in Kubernetes that is particularly useful for managing stateful applications during updates. Unlike the default “RollingUpdate” strategy, which updates Pods in a rolling fashion to ensure no downtime, the “Recreate” strategy works by terminating all the existing Pods before creating new ones with the updated configuration or image.

the use case for Recreate Strategy is for stateful application where it’s critical to avoid running multiple versions of the application simultaneously.

Performing a Rolling Update

  • Objectives Perform a rolling update using kubectl. Updating an application Users expect applications to be available all the time, and developers are expected to deploy new versions of them several times a day. In Kubernetes this is done with rolling updates. A rolling update allows a Deployment update to take place with zero downtime. It does this by incrementally replacing the current Pods with new ones. The new Pods are scheduled on Nodes with available resources, and Kubernetes waits for those new Pods to start before removing the old Pods.

  • In the previous module we scaled our application to run multiple instances. This is a requirement for performing updates without affecting application availability. By default, the maximum number of Pods that can be unavailable during the update and the maximum number of new Pods that can be created, is one. Both options can be configured to either numbers or percentages (of Pods). In Kubernetes, updates are versioned and any Deployment update can be reverted to a previous (stable) version.

  • Rolling updates overview

Alt text for the image Alt text for the image

  • Similar to application Scaling, if a Deployment is exposed publicly, the Service will load-balance the traffic only to available Pods during the update. An available Pod is an instance that is available to the users of the application.

  • Rolling updates allow the following actions:

  • Promote an application from one environment to another (via container image updates) Rollback to previous versions Continuous Integration and Continuous Delivery of applications with zero downtime

  • If a Deployment is exposed publicly, the Service will load-balance the traffic only to available Pods during the update.

  • In the following interactive tutorial, we’ll update our application to a new version, and also perform a rollback.

Perform Rolling Update

  1. Create deployment with image set to kubernetes-bootcamp:v1

    kubectl create deployment kubernetes-bootcamp --image=gcr.io/google-samples/kubernetes-bootcamp:v1 --replicas=4
    kubectl expose deployment kubernetes-bootcamp --target-port=8080 --port=80
    1. Verify the deployment
    kubectl get deployment

    Expected outcome

    NAME                  READY   UP-TO-DATE   AVAILABLE   AGE
    kubernetes-bootcamp   4/4   4           4          23s
    1. check the service

    use curlpod from cluster-internal to check the service

    kubectl run curlpod --image=appropriate/curl --restart=Never --rm -it --  curl  http://kubernetes-bootcamp.default.svc.cluster.local

    expected outcome showing v=1

    Hello Kubernetes bootcamp! | Running on: kubernetes-bootcamp-5485cc6795-4m7p9 | v=1
    pod "curlpod" deleted

  2. upgrade deployment

Upgrade the deployment with image set to kubernetes-bootcamp:v2

kubectl set image deployments/kubernetes-bootcamp kubernetes-bootcamp=jocatalin/kubernetes-bootcamp:v2
kubectl rollout status deployment/kubernetes-bootcamp

expected outcome

deployment.apps/kubernetes-bootcamp image updated
Waiting for deployment spec update to be observed...
Waiting for deployment "kubernetes-bootcamp" rollout to finish: 1 out of 4 new replicas have been updated...
Waiting for deployment "kubernetes-bootcamp" rollout to finish: 2 out of 4 new replicas have been updated...
Waiting for deployment "kubernetes-bootcamp" rollout to finish: 3 out of 4 new replicas have been updated...
Waiting for deployment "kubernetes-bootcamp" rollout to finish: 2 old replicas are pending termination...
Waiting for deployment "kubernetes-bootcamp" rollout to finish: 1 old replicas are pending termination...
deployment "kubernetes-bootcamp" successfully rolled out

you can find above that create new replicas first then delete old replicas to avoid service disruption.

  1. check the service

check the service use curlpod

kubectl run curlpod --image=appropriate/curl --restart=Never --rm -it --  curl  http://kubernetes-bootcamp.default.svc.cluster.local

expected outcome showing v=2

Hello Kubernetes bootcamp! | Running on: kubernetes-bootcamp-7c6644499c-lsxm9 | v=2

  1. rollback to old version

To rollback to orignal version, simple change the container image

kubectl set image deployments/kubernetes-bootcamp kubernetes-bootcamp=gcr.io/google-samples/kubernetes-bootcamp:v1 
kubectl rollout status deployment/kubernetes-bootcamp

expected outcome

kubectl rollout status deployment/kubernetes-bootcamp
deployment.apps/kubernetes-bootcamp image updated
Waiting for deployment "kubernetes-bootcamp" rollout to finish: 0 out of 4 new replicas have been updated...
Waiting for deployment "kubernetes-bootcamp" rollout to finish: 1 out of 4 new replicas have been updated...
Waiting for deployment "kubernetes-bootcamp" rollout to finish: 2 out of 4 new replicas have been updated...
Waiting for deployment "kubernetes-bootcamp" rollout to finish: 3 out of 4 new replicas have been updated...
Waiting for deployment "kubernetes-bootcamp" rollout to finish: 1 old replicas are pending termination...
deployment "kubernetes-bootcamp" successfully rolled out
  1. check the service use curlpod
kubectl run curlpod --image=appropriate/curl --restart=Never --rm -it --  curl  http://kubernetes-bootcamp.default.svc.cluster.local

expected outcome showing v=1

Hello Kubernetes bootcamp! | Running on: kubernetes-bootcamp-5485cc6795-gvw6l | v=1
pod "curlpod" deleted

Restart the deployment

  • Restarting a deployment using kubectl rollout restart deployment can be necessary or beneficial for Refreshing the Application, Troubleshooting etc in a Kubernetes environment.
    1. check existing deployment
    kubectl get pod -o wide -l app=kubernetes-bootcamp

    expected output

    NAME                                   READY   STATUS    RESTARTS   AGE     IP               NODE          NOMINATED NODE   READINESS GATES
    kubernetes-bootcamp-5485cc6795-brnv6   1/1     Running   0          4m54s   10.244.152.110   node-worker   <none>           <none>
    kubernetes-bootcamp-5485cc6795-hqkd9   1/1     Running   0          4m54s   10.244.152.109   node-worker   <none>           <none>
    kubernetes-bootcamp-5485cc6795-qb2jh   1/1     Running   0          4m55s   10.244.152.108   node-worker   <none>           <none>
    kubernetes-bootcamp-5485cc6795-zgcrd   1/1     Running   0          4m55s   10.244.152.107   node-worker   <none>           <none>
    1. restart the deployment

    Restart the deployment with default rolling update.

    kubectl rollout restart deployment kubernetes-bootcamp
    1. Verify the deployment
    kubectl rollout status deployment kubernetes-bootcamp

    expected output

    deployment "kubernetes-bootcamp" successfully rolled out
    1. Verify the deployment after restart
    kubectl get pod -o wide -l app=kubernetes-bootcamp

    expected output

    NAME                                  READY   STATUS    RESTARTS   AGE    IP               NODE          NOMINATED NODE   READINESS GATES
    kubernetes-bootcamp-d9f576d69-2q27m   1/1     Running   0          110s   10.244.152.113   node-worker   <none>           <none>
    kubernetes-bootcamp-d9f576d69-dwwc2   1/1     Running   0          110s   10.244.152.112   node-worker   <none>           <none>
    kubernetes-bootcamp-d9f576d69-hhqqm   1/1     Running   0          108s   10.244.152.114   node-worker   <none>           <none>
    kubernetes-bootcamp-d9f576d69-w5tpc   1/1     Running   0          108s   10.244.152.115   node-worker   <none>           <none>

    Notice that the Pod’s IP address has changed, and the deployment’s Pod template hash has also been updated to new prefix (d9f576d69). This indicates that all resources have been recreated following the kubectl rollout restart command.

clean up

kubectl delete svc kubernetes-bootcamp
kubectl delete deployment kubernetes-bootcamp

Review and Questions

  1. Use kubectl run to create a POD with juice-shop image and add a label owner=dev
    Click for Answer…
    kubectl run juice-shop --image=juice-shop --labels=owner=dev
  2. Use kubectl create deployment to create a deployment for juice-shop with replicas=2 and image=bkimminich/juice-shop:v15.0.0
    Click for Answer…
    kubectl create deployment juice-shop --image=bkimminich/juice-shop:v15.0.0 --replicas=2
  3. scale out juice-shop deployment from 2 replicas to 6 replicas
    Click for Answer…
    kubectl scale deployment juice-shop --replicas=6
  4. use rolling upgrade to upgrade your juice-shop deployment to use version v16.0.0.
    Click for Answer…
    kubectl set image deployment/juice-shop juice-shop=bkimminich/juice-shop:v16.0.0
  5. Use kubectl to find the specifcation for imagePullPolicy which is need for create a deployment. and set the juice-shop deployment container imagePullPolicy to use “IfNotPresent”.
    Click for Answer…
    kubectl explain deployment.spec.template.spec.containers.imagePullPolicy
    kubectl patch deployment juice-shop --type=json -p='[{"op": "add", "path": "/spec/template/spec/containers/0/imagePullPolicy", "value": "IfNotPresent"}]'

Task 6 - Exposing Applications with Loadbalancer and Ingress

Objective: Expose Your Deployment Externally

Learn to expose your deployment through NodePort, LoadBalancer, and Ingress methods, and how to secure services with HTTPS certificates

  • In the previous chapter, we discussed Kubernetes ClusterIP services. This chapter will focus on exposing applications externally using NodePort, LoadBalancer, and Ingress services..
    1. Create kubernetes-bootcamp Deployment
    kubectl create deployment kubernetes-bootcamp --image=gcr.io/google-samples/kubernetes-bootcamp:v1 --replicas=2
    1. Verify the Deployment
    kubectl get deployment kubernetes-bootcamp

    expected Outcome

    NAME                  READY   UP-TO-DATE   AVAILABLE   AGE
    kubernetes-bootcamp   2/2     2            2           4s

NodePort

  • To enable external access to an app, such as from the internet, we can expose the service using NodePort or LoadBalancer

  • NodePort: Exposes the app through a NATted port on the worker node running the container. If an external firewall exists, you may need to whitelist this port. NodePort uses a default range of 30000-32767. When creating a NodePort service without specifying a port, Kubernetes automatically allocates one from this range.

  • To expose the service, we can use the kubectl expose command or create a service YAML definition and apply it with kubectl create -f, which offers more flexibility..

To create a NodePort service, you can use the kubectl expose command, for example

kubectl expose deployment kubernetes-bootcamp --port 80 --type=NodePort --target-port=8080 --name kubernetes-bootcamp-nodeportsvc --save-config However, using a YAML file provides more flexibility. Let’s create a NodePort service using a YAML file.

Create NodePort service with YAML file

cat << EOF | tee kubernetes-bootcamp-nodeportsvc.yaml
apiVersion: v1
kind: Service
metadata:
  labels:
    app: kubernetes-bootcamp
  name: kubernetes-bootcamp-nodeportsvc
spec:
  ports:
  - nodePort: 30913
    port: 80
    protocol: TCP
    targetPort: 8080
  selector:
    app: kubernetes-bootcamp
  type: NodePort
EOF
kubectl apply -f kubernetes-bootcamp-nodeportsvc.yaml

Verify the result

kubectl get svc kubernetes-bootcamp-nodeportsvc

expected Outcome

NAME                              TYPE       CLUSTER-IP      EXTERNAL-IP   PORT(S)        AGE
kubernetes-bootcamp-nodeportsvc   NodePort   10.103.189.68   <none>        80:30913/TCP   24s

the NATTED PORT on worker node that running POD is 30913.

NodePort service will exposes the service on a static port which is 30913 in this example on every node in the cluster, including both master and worker nodes. This means you can access the service using the IP address of any node in the cluster followed by the NodePort.

  1. Verify the service

from azure shell , access the application via nodeport service

use

curl http://$(whoami)-master.eastus.cloudapp.azure.com:30913

or

curl http://$(whoami)-worker.eastus.cloudapp.azure.com:30913

expected outcome

Hello Kubernetes bootcamp! | Running on: kubernetes-bootcamp-bcbb7fc75-q7sqc | v=1
  1. Check the endpoints of service

you can find the actual endpoints for nodeport service through command

kubectl get ep  -l app=kubernetes-bootcamp

expected output

NAME                              ENDPOINTS                                 AGE
kubernetes-bootcamp-nodeportsvc   10.244.152.116:8080,10.244.152.117:8080   20m

summary

Using NodePort services in Kubernetes, while useful for certain scenarios, comes with several disadvantages, especially when considering the setup where traffic is directed through the IP of a single worker node has limitation of Inefficient Load Balancing, Exposure to External Traffic,Lack of SSL/TLS Termination etc., so NodePort services are often not suitable for production environments, especially for high-traffic applications that require robust load balancing, automatic scaling, and secure exposure to the internet. For scenarios requiring exposure to external traffic, using an Ingress controller or a cloud provider’s LoadBalancer service is generally recommended. These alternatives offer more flexibility, better load distribution, and additional features like SSL/TLS termination and path-based routing, making them more suitable for production-grade applications.

clean up

kubectl delete svc kubernetes-bootcamp-nodeportsvc
kubectl delete deployment kubernetes-bootcamp

What is LoadBalancer Service

A LoadBalancer service in Kubernetes is a way to expose an application running on a set of Pods to the external internet in a more accessible manner than NodePort.

we can use the kubectl expose command as follow to create a loadbalancer service for deployment kubernetes-bootcamp.

LoadBalancer service require an external IP to use which we use metallb and create an ippool to assign external ip to loadbalancer

metallb loadbalancer

In a self-managed Kubernetes environment, external traffic management and service exposure are not handled automatically by the infrastructure, unlike managed Kubernetes services in cloud environments (e.g., AWS ELB with EKS, Azure Load Balancer with AKS, or Google Cloud Load Balancer with GKE). This is where solutions like MetalLB and the Kong Ingress Controller become essential

MetalLB provides a network load balancer implementation for Kubernetes clusters that do not run on cloud providers, offering a LoadBalancer type service. In cloud environments, when you create a service of type LoadBalancer, the cloud provider provisions a load balancer for your service. In contrast, on-premises or self-managed clusters do not have this luxury. MetalLB fills this gap by allocating IP addresses from a configured pool and managing access to services through these IPs, enabling external traffic to reach the cluster services.

  1. Install metallb LoadBalancer
kubectl apply -f https://raw.githubusercontent.com/metallb/metallb/v0.14.3/config/manifests/metallb-native.yaml
kubectl rollout status deployment controller -n metallb-system
  1. create ippool for metallb

The IP address in the metallb IP pool is designated for assignment to the load balancer. Since Azure VMs have only one IP, which serves as the Node IP, you can retrieve the IP address using the `kubectl get node -o wide`` command.

cd $HOME
#local_ip=$(ip route get 8.8.8.8 | awk -F"src " 'NR==1{split($2,a," ");print a[1]}') 
local_ip=$(kubectl get node -o wide | grep 'control-plane' | awk '{print $6}')
cat <<EOF | tee metallbippool.yaml
apiVersion: metallb.io/v1beta1
kind: IPAddressPool
metadata:
  name: first-pool
  namespace: metallb-system
spec:
  addresses:
  - $local_ip/32
---
apiVersion: metallb.io/v1beta1
kind: L2Advertisement
metadata:
  name: example
  namespace: metallb-system
EOF
kubectl apply -f metallbippool.yaml
  1. Verify created ipaddresspool
kubectl get ipaddresspool -n metallb-system

expected Outcome

NAME         AUTO ASSIGN   AVOID BUGGY IPS   ADDRESSES
first-pool   true          false             ["10.0.0.4/32"]

Create loadBalacncer Service

  1. create kubernetes-bootcamp deployment
kubectl create deployment kubernetes-bootcamp --image=gcr.io/google-samples/kubernetes-bootcamp:v1 --replicas=2
  1. delete exist kong-proxy LoadBalancer if exist

since loadBalancer service require an dedicated external ip, if IP has already occupied by other loadBalancer, we will not able to create new loadBalancer. so if you have kong loadbalaner installed, delete it first

kubectl get svc kong-proxy -n kong && kubectl delete svc kong-proxy -n kong
  1. Create new LoadBalancer
kubectl expose deployment kubernetes-bootcamp --port=80 --type=LoadBalancer --target-port=8080 --name=kubernetes-bootcamp-lb-svc 
  1. Verify service

check external ip assigned to LoadBalancer

kubectl get svc kubernetes-bootcamp-lb-svc

expected outcome

NAME                         TYPE           CLUSTER-IP      EXTERNAL-IP   PORT(S)        AGE
kubernetes-bootcamp-lb-svc   LoadBalancer   10.106.121.27   10.0.0.4      80:32537/TCP   26s
  1. Verify with curl or external browser
curl http://$(whoami)-master.eastus.cloudapp.azure.com

expected outcome

Hello Kubernetes bootcamp! | Running on: kubernetes-bootcamp-bcbb7fc75-nh9sn | v=1

How it works

When we use the kubectl expose command to create a LoadBalancer service in a Kubernetes cluster with MetalLB installed in Layer 2 (L2) advertisement mode, the process simplifies to these key points:

Creating the Service: The command creates a LoadBalancer type service named kubernetes-bootcamp-lb-svc, which targets the kubernetes-bootcamp deployment.

Assigning an External IP: MetalLB automatically assigns an external IP address from its configured IP pool to the service, making it accessible outside the Kubernetes cluster.

L2 Advertisement: MetalLB advertises the assigned IP address across the local network using ARP, directing traffic to the Kubernetes node responsible for the service.

Traffic Routing: Incoming traffic to the external IP is routed to the targeted Pods within the cluster, enabling external access to the application.

This streamlined process allows MetalLB to provide external IPs for services, enabling external access in environments without native cloud provider LoadBalancer support.

If you use cloud managed kubernetes like EKS, GKE, AKE, then cloud provider will responsible for create loadbalancer instance and assign ip address , then Metallb is not reqiured in that case.

clean up

kubectl delete svc kubernetes-bootcamp-lb-svc
kubectl delete deployment kubernetes-bootcamp

What is ingress and ingress controller

Ingress is not classified as a type of Kubernetes Service because it operates at a higher layer in the network stack and serves a different purpose.

Ingress operates at the application layer (Layer 7 of the OSI model), dealing with HTTP and HTTPS traffic. It allows for more complex routing based on the request’s URL path or host, and can manage SSL/TLS termination, name-based virtual hosting, and more.

It’s designed to give developers more control over the access to services from outside the Kubernetes cluster, including URL path-based routing, domain name support, and managing SSL/TLS certificates.

An Ingress typically routes traffic to one or more Kubernetes Services. It acts as an entry point to the cluster that forwards incoming requests to the appropriate Services based on the configured rules. In this sense, Ingress depends on Services to function, but it provides a more flexible and sophisticated way to expose those Services to the outside world.

Ingress requires an Ingress controller to be running in the cluster, which is a separate component that watches the Ingress resources and processes the rules they define. While Kubernetes supports Ingress resources natively, the actual routing logic is handled by this external component. There are many Ingress controller you can use for example, nginx based ingress controller, kong ingress controller, also some vendor like fortinet offer fortiweb as ingress controller.

Install Kong ingress controller

  1. Install Kong as Ingress Controller

The Kong Ingress Controller is an Ingress controller for Kubernetes that manages external access to HTTP services within a cluster using Kong Gateway. It processes Ingress resources to configure HTTP routing, load balancing, authentication, and other functionalities, leveraging Kong’s powerful API gateway features for Kubernetes services. Kong will use the ippool that managed by metallb.

kubectl apply -f  https://raw.githubusercontent.com/Kong/kubernetes-ingress-controller/v2.10.0/deploy/single/all-in-one-dbless.yaml
kubectl rollout status deployment proxy-kong -n kong
kubectl rollout status deployment ingress-kong -n kong
  1. check installed load balancer
kubectl get svc kong-proxy -n kong

expected outcome

kong-proxy   LoadBalancer   10.97.121.60   10.0.0.4      80:32477/TCP,443:31364/TCP   2m10s
  1. Verify the default ingressClasses

When Kong installed, Kong automatically configures itself as the default IngressClass for the cluster. With a default IngressClass set, you have the option to omit specifying ingressClassName: kong in your Ingress specifications.

kubectl get ingressclasses

expected outcome

NAME   CONTROLLER                            PARAMETERS   AGE
kong   ingress-controllers.konghq.com/kong   <none>       9h

Create nginx deployment

4 Create nginx deployment

Create nginx deployment with replicas set to 2. the container also configured resource usage limition for cpu and memory.

cd $HOME
cat <<EOF | tee nginx-deployment.yaml
apiVersion: apps/v1
kind: Deployment
metadata:
  name: nginx-deployment
  labels:
    app: nginx
spec:
  replicas: 2
  selector:
    matchLabels:
      app: nginx
  template:
    metadata:
      labels:
        app: nginx
    spec:
      containers:
      - name: nginx
        image: nginx:latest
        ports:
        - containerPort: 80
        resources:
          requests:
            memory: "64Mi"  # Minimum memory requested to start the container
            cpu: "10m"     # 100 millicpu (0.1 CPU) requested to start the container
          limits:
            memory: "128Mi" # Maximum memory limit for the container
            cpu: "40m"     # 200 millicpu (0.2 CPU) maximum limit for the container
EOF
kubectl apply -f nginx-deployment.yaml
kubectl rollout status deployment nginx-deployment
  1. create nginx clusterIP svc for nginx-deployment
cat << EOF | kubectl apply -f -
apiVersion: v1
kind: Service
metadata:
  labels:
    app: nginx
  name: nginx-deployment
  namespace: default
spec:
  ipFamilies:
  - IPv4
  ipFamilyPolicy: SingleStack
  ports:
  - port: 80
    protocol: TCP
    targetPort: 80
  selector:
    app: nginx
  sessionAffinity: None
  type: ClusterIP
EOF

check created deployment

kubectl get deployment nginx-deployment

expected outcome

NAME               READY   UP-TO-DATE   AVAILABLE   AGE
nginx-deployment   2/2     2            2           5m41s

check created svc

kubectl get svc nginx-deployment

expected outcome

NAME               TYPE        CLUSTER-IP       EXTERNAL-IP   PORT(S)   AGE
nginx-deployment   ClusterIP   10.103.221.158   <none>        80/TCP    4m53s

Install cert-manager

to support https, a certificate for ingress controller is required. user can choose “cert-manager” for manage and deploy certificate.

use below cli to deploy cert-manager which is used to issue certificate needed for service

kubectl get namespace cert-manager || kubectl create namespace cert-manager 
kubectl apply --validate=false -f https://github.com/jetstack/cert-manager/releases/download/v1.3.1/cert-manager.yaml
kubectl rollout status deployment cert-manager -n cert-manager
kubectl rollout status deployment cert-manager-cainjector -n cert-manager
kubectl rollout status deployment cert-manager-webhook -n cert-manager 

once deployed. we need to create a certificate for service.

  1. Create certficate
cd $HOME/k8s-101-workshop/terraform/
nodename=$(terraform output -json | jq -r .linuxvm_master_FQDN.value)
cd $HOME
cat << EOF | tee certIssuer-${nodename}.yaml
---
apiVersion: cert-manager.io/v1
kind: ClusterIssuer
metadata:
  name: selfsigned-issuer-test
spec:
  selfSigned: {}
EOF
sleep 10
kubectl apply -f certIssuer-${nodename}.yaml
cat << EOF | tee cert-${nodename}.yaml
apiVersion: cert-manager.io/v1
kind: Certificate
metadata:
  name: test-tls-test
spec:
  secretName: test-tls-test
  duration: 2160h # 90d
  renewBefore: 360h # 15d
  issuerRef:
    name: selfsigned-issuer-test
    kind: ClusterIssuer
  commonName: kong.example
  dnsNames:
  - ${nodename}
EOF
kubectl apply -f cert-${nodename}.yaml

use kubectl get ClusterIssuer, kubectl get secret test-tls-test and kubectl get cert test-tls-test to check deployment

  1. create ingress rule for nginx svc
cd $HOME/k8s-101-workshop/terraform/
nodename=$(terraform output -json | jq -r .linuxvm_master_FQDN.value)
cd $HOME
cat <<EOF  | tee nginx_ingress_rule_with_cert_${nodename}.yaml
apiVersion: networking.k8s.io/v1
kind: Ingress
metadata:
  name: nginx
  annotations:
    konghq.com/strip-path: 'true'
    cert-manager.io/cluster-issuer: selfsigned-issuer-test
spec:
  tls:
  - hosts:
    - ${nodename} 
  ingressClassName: kong
  rules:
  - host: ${nodename}
    http:
      paths:
      - path: /default
        pathType: ImplementationSpecific
        backend:
          service:
            name: nginx-deployment
            port:
              number: 80
EOF
kubectl apply -f nginx_ingress_rule_with_cert_${nodename}.yaml
  1. Verify ingress rule
kubectl get ingress nginx

expected outcome

NAME    CLASS   HOSTS               ADDRESS    PORTS     AGE
nginx   kong    k8s50-master.eastus.cloudapp.azure.com,k8s50-master.eastus.cloudapp.azure.com    10.0.0.4   80, 443   7m58s
  1. Check ingress detail
kubectl describe ingress nginx

expected outcome

Name:             nginx
Labels:           <none>
Namespace:        default
Address:          10.0.0.4
Ingress Class:    kong
Default backend:  <default>
TLS:
  SNI routes k8s50-master.eastus.cloudapp.azure.com
Rules:
  Host                                    Path  Backends
  ----                                    ----  --------
  k8s50-master.eastus.cloudapp.azure.com  
                                          /default   nginx-deployment:80 (10.244.152.118:80,10.244.152.119:80)
  
Annotations:                              cert-manager.io/cluster-issuer: selfsigned-issuer-test
                                          konghq.com/strip-path: true
Events:                                   <none>
  1. verify service
curl -I -k https://$nodename/default

both shall return 200 OK with response from nginx server

  1. verify with not configured path
curl -k https://$nodename/

expected result

{
  "message":"no Route matched with those values"
}

this is because in ingress rule, we did not config path “/”. therefore, ingress controller will complain there is no Route match.

now let’s create another path but point to a different service.

  1. create Kubernetes-bootcamp deployment and service
cat << EOF | tee kubernetes-bootcamp.yaml
apiVersion: apps/v1
kind: Deployment
metadata:
  name: kubernetes-bootcamp
spec:
  replicas: 1 # Default value for replicas when not specified
  selector:
    matchLabels:
      app: kubernetes-bootcamp
  template:
    metadata:
      labels:
        app: kubernetes-bootcamp
    spec:
      containers:
      - name: kubernetes-bootcamp
        image: gcr.io/google-samples/kubernetes-bootcamp:v1
EOF
kubectl create -f kubernetes-bootcamp.yaml

cat << EOF | tee kubernetes-bootcamp-clusterip.yaml
apiVersion: v1
kind: Service
metadata:
  labels:
    app: kubernetes-bootcamp
  name: kubernetes-bootcamp-deployment
  namespace: default
spec:
  ipFamilies:
  - IPv4
  ipFamilyPolicy: SingleStack
  ports:
  - port: 80
    protocol: TCP
    targetPort: 8080
  selector:
    app: kubernetes-bootcamp
  sessionAffinity: None
  type: ClusterIP
EOF

kubectl create -f kubernetes-bootcamp-clusterip.yaml
  1. update the ingress rule

also add a new rule with path configured to /bootcamp with backendservice set to kubernetes-bootcamp-deployment

cd $HOME/k8s-101-workshop/terraform/
nodename=$(terraform output -json | jq -r .linuxvm_master_FQDN.value)
cd $HOME
cat <<EOF  |  tee nginx_ingress_rule_with_cert_${nodename}_two_svc.yaml
apiVersion: networking.k8s.io/v1
kind: Ingress
metadata:
  name: nginx
  annotations:
    konghq.com/strip-path: 'true'
    cert-manager.io/cluster-issuer: selfsigned-issuer-test
spec:
  tls:
  - hosts:
    - ${nodename}
  ingressClassName: kong
  rules:
  - host: ${nodename}
    http:
      paths:
      - path: /default
        pathType: ImplementationSpecific
        backend:
          service:
            name: nginx-deployment
            port:
              number: 80
  - host: ${nodename}
    http:
      paths:
      - path: /bootcamp
        pathType: ImplementationSpecific
        backend:
          service:
            name: kubernetes-bootcamp-deployment
            port:
              number: 80
EOF
kubectl apply -f nginx_ingress_rule_with_cert_${nodename}_two_svc.yaml
  1. Verify ingress rule with

verify bootcamp ingress rule with https url

curl -k https://${nodename}/bootcamp 

or plain http url

curl http://${nodename}/bootcamp

Expected outcome

Hello Kubernetes bootcamp! | Running on: kubernetes-bootcamp-5485cc6795-rsqs9 | v=1

verify nginx ingress rule with https url

curl -k https://${nodename}/default

or plain http url

curl http://${nodename}/default

Expected outcome

<!DOCTYPE html>
<html>
<head>
<title>Welcome to nginx!</title>
<style>
html { color-scheme: light dark; }
body { width: 35em; margin: 0 auto;
font-family: Tahoma, Verdana, Arial, sans-serif; }
</style>
</head>
<body>
<h1>Welcome to nginx!</h1>
<p>If you see this page, the nginx web server is successfully installed and
working. Further configuration is required.</p>

<p>For online documentation and support please refer to
<a href="http://nginx.org/">nginx.org</a>.<br/>
Commercial support is available at
<a href="http://nginx.com/">nginx.com</a>.</p>

<p><em>Thank you for using nginx.</em></p>
</body>
</html>

Review Questions

  1. Create juice-shop with v15.0.0 deployment and ClusterIP svc
    Click for Answer…
       kubectl create deployment juice-shop --image=bkimminich/juice-shop:v15.0.0
       kubectl expose deployment juice-shop --port=3000 --target-port=3000 --type=ClusterIP
  2. Create juice-shop with v16.0.0 deployment and ClusterIP svc
    Click for Answer…
       kubectl create deployment juice-shop-v16 --image=bkimminich/juice-shop:v16.0.0
       kubectl expose deployment juice-shop-v16 --port=3000 --target-port=3000 --type=ClusterIP
  3. Create https ingress rule with path /v15 point to v15.0.0 deployment
    Click for Answer…
    cat <<EOF  | tee nginx_ingress_rule_with_cert_${nodename}.yaml
    apiVersion: networking.k8s.io/v1
    kind: Ingress
    metadata:
      name: nginx
      annotations:
        konghq.com/strip-path: 'true'
        cert-manager.io/cluster-issuer: selfsigned-issuer-test
    spec:
      tls:
      - hosts:
        - ${nodename}
      ingressClassName: kong
      rules:
      - host: ${nodename}
        http:
          paths:
          - path: /v15
            pathType: Prefix
            backend:
              service:
                name: juice-shop-v15
                port:
                  number: 3000
    EOF
    kubectl apply -f nginx_ingress_rule_with_cert_${nodename}.yaml
  4. Create https ingress rule with path /v16 point to v16.0.0 deployment
    Click for Answer…
    cat <<EOF  | tee nginx_ingress_rule_with_cert_${nodename}.yaml
    apiVersion: networking.k8s.io/v1
    kind: Ingress
    metadata:
      name: nginx
      annotations:
        konghq.com/strip-path: 'true'
        cert-manager.io/cluster-issuer: selfsigned-issuer-test
    spec:
      tls:
      - hosts:
        - ${nodename}
      ingressClassName: kong
      rules:
      - host: ${nodename}
        http:
          paths:
          - path: /v16
            pathType: Prefix
            backend:
              service:
                name: juice-shop-v16
                port:
                  number: 3000
    EOF
    kubectl apply -f nginx_ingress_rule_with_cert_${nodename}.yaml

clean up

kubectl delete ingress nginx
kubectl delete svc nginx-deployment 
kubectl delete svc kubernetes-bootcamp-deployment
kubectl delete deployment nginx-deployment
kubectl delete deployment kubernetes-bootcamp

you can also remove below if you no longer need loadbalancer , ingress controller and cert-manager.

kubectl delete -f https://raw.githubusercontent.com/metallb/metallb/v0.14.3/config/manifests/metallb-native.yaml
kubectl delete -f https://raw.githubusercontent.com/Kong/kubernetes-ingress-controller/v2.10.0/deploy/single/all-in-one-dbless.yaml
kubectl delete -f https://github.com/jetstack/cert-manager/releases/download/v1.3.1/cert-manager.yaml

Appendix - More info

Pod life-cycle

The life cycle of a Kubernetes Pod involves several key stages from creation to termination. Here’s a brief overview of these stages, illustrated with commands related to deploying a Pod using the gcr.io/google-samples/kubernetes-bootcamp:v1 image:

  1. Pod Creation

A Pod is created when you deploy it using a YAML file or directly via the kubectl command.

  1. Pending The Pod enters the Pending state as Kubernetes schedules the Pod on a node and the container image is being pulled from the registry.

  2. Running Once the image is pulled and the Pod is scheduled, it moves to the Running state. The Pod remains in this state until it is terminated or stopped for some reason.

  3. Succeeded/Failed

A Pod reaches Succeeded if all of its containers exit without error and do not restart. A Pod is marked as Failed if any of its containers exit with an error.

  1. CrashLoopBackOff

This status indicates that a container in the Pod is failing to start properly and Kubernetes is repeatedly trying to restart it.

  1. Termination Pods can be terminated gracefully by deleting them. Kubernetes first sends a SIGTERM signal to allow containers to shut down gracefully.

  2. Deletion The Pod’s entry remains in the system for a period after termination, allowing you to inspect its status posthumously. Eventually, Kubernetes cleans it up automatically.

Through these stages, Kubernetes manages the application’s lifecycle, ensuring that the desired state specified by the Deployment configurations is maintained. Monitoring the Pod’s lifecycle helps in managing and troubleshooting applications running on Kubernetes.

we can use kubectl get pod -l app=kubernetes-bootcamp and kuectl describe pod -l app=kubernetes-bootcamp to check the detail state for a Pod.

Useful Command for Pod

You can try a few useful command for operating a Pod

  • get the Pod name only

To retrieve just the name(s) of the Pod(s) with a specific label (app=kubernetes-bootcamp), use the following command:

kubectl get pods -l app=kubernetes-bootcamp -o=jsonpath='{.items[*].metadata.name}'
  • shell into the Pod To access the shell of the default container in a Pod labeled with app=kubernetes-bootcamp, first capture the Pod name in a variable, then use kubectl exec:
PODNAME=$(kubectl get pods -l app=kubernetes-bootcamp -o=jsonpath='{.items[*].metadata.name}')
kubectl exec -it po/$PODNAME -- bash

Note: This command assumes that your selection returns a single Pod name or you are only interested in the first Pod. Use exit to leave the container shell. some of container in Pod does not have bash or sh , then you will not able to shell into the container in that Pod.

you will be drop into Pod’s default container shell, use exit to exit the container.

  • check log for a Pod To view the logs from the container in real-time:
PODNAME=$(kubectl get pods -l app=kubernetes-bootcamp -o=jsonpath='{.items[*].metadata.name}')
kubectl logs -f po/$PODNAME

You will see logs output from the container. Press Ctrl-C to exit the log stream.

Kubernetes Bootcamp App Started At: 2024-02-21T05:41:33.993Z | Running On:  kubernetes-bootcamp-5485cc6795-cdwz7 
  • Delete Pod and Observe IP Address Change First, check the current Pod’s IP address:
kubectl get pod -l app=kubernetes-bootcamp -o wide

then delete Pod

PODNAME=$(kubectl get pods -l app=kubernetes-bootcamp -o=jsonpath='{.items[*].metadata.name}')
kubectl delete po/$PODNAME

You will see an output similar to:

pod "kubernetes-bootcamp-5485cc6795-cdwz7" deleted

After deletion, check the Pods again. You will find a new Pod has been automatically recreated with a new IP address. This behavior is due to the Kubernetes Controller Manager ensuring the actual state matches the desired state specified by the Deployment’s replicas. A new Pod is generated to maintain the desired number of replicas.

kubectl get pod -l app=kubernetes-bootcamp -o wide

The IP address assigned to a Pod is ephemeral and will assign next available ip for recreation.

These commands provide a basic but powerful set of tools for interacting with Pods in a Kubernetes environment, from accessing shells and viewing logs to managing Pod lifecycles.

ServiceAccount

A ServiceAccounts are primarily designed for use by processes running in Pods is like an identity for processes running in a Pod, allowing them to interact with the Kubernetes API securely. When you create a Pod, Kubernetes can automatically give it access to a ServiceAccount, so your applications can ask Kubernetes about other parts of the system without needing a separate login. It’s a way for your apps to ask Kubernetes “Who am I?” and “What am I allowed to do?”

check the default service account for a POD

podName=$(kubectl get pod -l app=kubernetes-bootcamp  -o=jsonpath='{.items[*].metadata.name}')
kubectl describe pod $podName | grep 'Service Account' | uniq

Expected output:

Service Account:  default

Kubernetes adheres to the principle of least privilege, meaning the default ServiceAccount is assigned minimal permissions necessary for a Pod’s basic operations. Should your Pod require additional permissions, you must create a new ServiceAccount with the requisite permissions and associate it with your Pod. use kubectl create rolebinding to bind pre-defined role or custom role to serviceAccount.

Kubernetes API-resources

Kubernetes is fundamentally built around APIs that adhere to the OpenAPI specification, defining resources and their operations. Based on API input, Kubernetes creates objects and stores them in the etcd database. Let’s explore using the Kubernetes API to create a Pod, utilizing the kubectl api-resources and kubectl explain commands for guidance.

  • Finding the API Resource for Pods

First, identify the API resource needed to create a Pod. You can list all API resources with `kubectl api-resources``:

This command filters the list of API resources to show only those related to Pods. The output will look similar like this:

kubectl  api-resources | head  -n 1
kubectl  api-resources | grep pods

expect to see output

 kubectl  api-resources | head  -n 1
NAME 
NAME                              SHORTNAMES                                      APIVERSION                             NAMESPACED   KIND
kubectl  api-resources | grep pods
pods                              po                                              v1                                     true         Pod
pods                                                                              metrics.k8s.io/v1beta1                 true         PodMetrics

From the output, we see that the “KIND” for Pods is “Pod”, and the API version is v1.

  • Understanding Pod Specifications

Next, use kubectl explain to understand how to structure a YAML definition for a Pod specification. Execute the following commands to explore the Pod resource specifications:

kubectl explain Pod

and

kubectl explain Pod.apiVersion

and

kubectl explain Pod.kind

and

kubectl explain Pod.metadata
  • Crafting a Minimal YAML Definition for a Pod

Now, we can construct a minimal YAML file to create a Pod. The essential elements include the Pod’s name and the container image:

cat << EOF | sudo tee minimalyamlforpod.yaml 
apiVersion: v1
kind: Pod
metadata: 
  name: test-pod 
spec:
  containers: 
    - name: nginx
      image: nginx
EOF
  • Creating the Pod

With the YAML file ready, create the Pod using:

kubectl create -f minimalyamlforpod.yaml

Verifying Pod Creation

To see the details of the created Pod, including any default values Kubernetes applied during creation, use:

kubectl get pod test-pod -o yaml

This command outputs the complete configuration of the Pod, test-pod, showing all properties set by Kubernetes, many of which use default values that you can customize in the Pod YAML definition.

use kubectl delete pod test-pod to delete pod or use yaml file below

kubectl  delete -f minimalyamlforpod.yaml 

cleanup

After completing all tasks with the Self-Managed Kubernetes, use the following command to delete the two Azure VMs:

cd $HOME/k8s-101-workshop/terraform && terraform destroy -var="username=$(whoami)" --auto-approve